My niece Luna showed up at my door on a rainy October afternoon, clutching a bag of black licorice and wearing the most determined expression a seven-year-old can muster. “Auntie,” she said, holding up the candy like a sacred offering, “we need to make a Halloween cake that looks like a black cat.” I looked at my pantry—half a bag of dark cocoa powder, some butter that was finally at room temperature, and a bag of candy eyes left over from last year. This was not going to be a normal cake situation.
The thing about baking with kids is that you have to surrender to the chaos. Luna wanted a cookie cake because, in her words, “cookies are better than cake and cake is better than cookies, so together they are the best.” Honestly, she wasn’t wrong. So I started pulling ingredients together, knowing full well that I was about to create something that looked like a science experiment gone right. The kitchen smelled like chocolate and butter within minutes, and Luna was already licking the spatula before I could even get it to the sink.
That afternoon, standing over a slightly lopsided cookie cake that we had shaped into a cat head, I realized this was the kind of recipe that sticks. Not because it’s fancy or complicated—but because it’s forgiving. You can mess up the ears and it still looks cute. You can overbake it by two minutes and it’s still chewy in the middle. And when you stick those candy eyes on a dark chocolate face, something magical happens. The kids lose their minds. The adults pretend to be unimpressed while sneaking a second slice. It’s the kind of dessert that makes Halloween feel less like a performance and more like an actual memory.
This Black Cat Halloween Cookie Cake is for the nights when you want to impress without the pressure. It’s for the last-minute party invite, the classroom treat, or the night you just want to sit on the couch with a fork and a very large cookie. Trust me on this one.
Why You’ll Love This Recipe
I’ve tested this cookie cake about six times now—three times on purpose, and three times because I kept eating the test batches before they could cool. Here’s why I keep coming back to it:
- Quick & Easy: From start to finish, this comes together in about 35 minutes. No chilling the dough, no rolling out individual cookies. Just mix, shape, bake, and decorate.
- Simple Ingredients: You probably have most of this in your kitchen right now. Butter, sugar, eggs, flour, cocoa powder—the usual suspects. No fancy extracts or hard-to-find decorations.
- Perfect for Halloween Parties: It’s the centerpiece of any spooky spread. Kids love it, adults love it, and it looks way more impressive than the effort it actually takes.
- Crowd-Pleaser: I brought this to a Halloween potluck and watched three different people ask for the recipe before the night was over. It’s that kind of dessert.
- Unbelievably Delicious: The texture is the real star here—crispy edges, soft and chewy center, with that deep dark chocolate flavor that doesn’t feel heavy. It’s like the best chocolate chip cookie you’ve ever had, but in giant, shareable form.
What makes this different from other cookie cakes is the approach. Instead of a dry, cake-like texture, this recipe uses melted butter and an extra egg yolk to keep things fudgy and rich. The black cocoa powder (if you can find it) gives it that eerie, almost-black color that makes the cat face pop. But regular cocoa works too—the cookies just turn out a deep, dark brown instead. Either way, you’re getting a dessert that tastes like you spent hours on it, when really you just had a good playlist and a little patience.
This is the kind of recipe that makes you look like a hero without the stress. And honestly? That’s the best kind of Halloween magic.
What Ingredients You Will Need
This recipe uses simple, wholesome ingredients to deliver that perfect cookie cake texture—crispy on the outside, soft and chewy on the inside, with a deep chocolate flavor that feels like a hug. Most of these are pantry staples, so you probably won’t need a special trip to the store.
For the Cookie Cake Base
- Unsalted butter, melted (1 cup / 2 sticks) – Melting the butter instead of creaming it gives the cookie cake that dense, fudgy texture. I use Land O’Lakes or Kerrygold for the best flavor.
- Light brown sugar, packed (1 cup / 200g) – Brown sugar adds moisture and that subtle molasses depth that makes cookies taste homemade. You can use dark brown sugar for an even richer flavor.
- Granulated sugar (½ cup / 100g) – This helps the edges get that perfect crispy snap.
- Large egg (1 whole + 1 yolk) – The extra yolk adds richness and tenderness. Make sure they’re at room temperature so they mix in smoothly.
- Vanilla extract (2 teaspoons) – Pure vanilla is best, but imitation works in a pinch. It rounds out the chocolate flavor beautifully.
- All-purpose flour (2 cups / 240g) – Spoon and level your flour for the most accurate measurement. Scooping directly from the bag can pack in too much and make the cookie cake dry.
- Unsweetened cocoa powder (⅓ cup / 30g) – I recommend using dark or black cocoa powder for that spooky black color. If you only have natural cocoa powder, the cookie will be a deep brown—still delicious, just not as dramatic. Ghirardelli makes a reliable natural cocoa, and King Arthur’s black cocoa is excellent for Halloween baking.
- Baking soda (1 teaspoon) – Helps the cookie cake spread and rise just enough.
- Salt (½ teaspoon) – Don’t skip this. Salt balances the sweetness and makes the chocolate taste more chocolatey. I use fine sea salt.
- Semi-sweet chocolate chips (1 cup / 175g) – These add pockets of melted chocolate throughout. You can use dark chocolate chips for a more intense flavor, or milk chocolate if you prefer a sweeter cookie.
For the Decoration
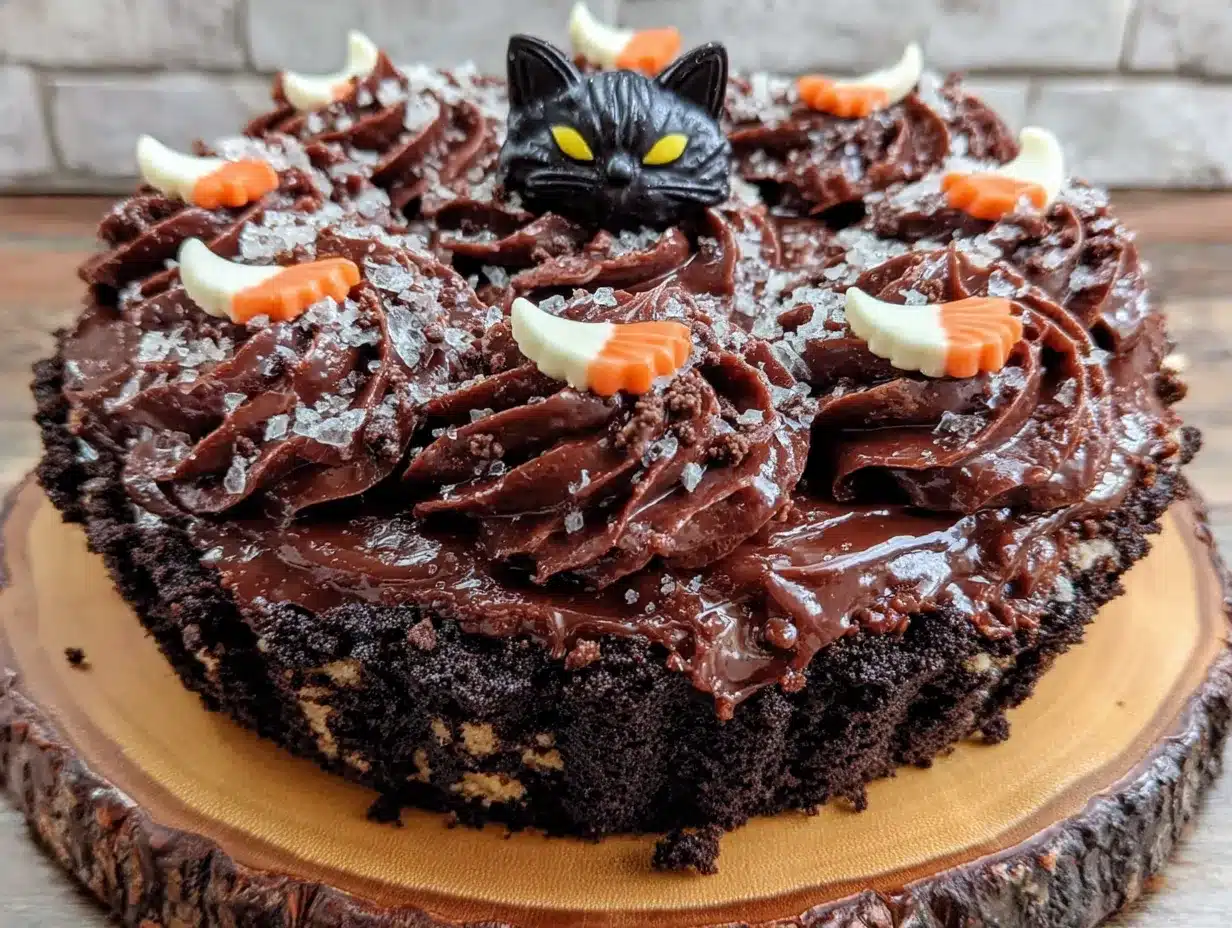
- Black gel food coloring (optional, 1-2 teaspoons) – If you want that truly black color, add this to the wet ingredients. It’s totally optional—the cookie cake is plenty dark without it.
- Candy eyes (2 large) – These are the classic googly eyes you find at craft stores or online. They make the cat face come alive.
- Black licorice strings (for whiskers) – Cut into 2-inch pieces. You can also use black frosting in a piping bag if licorice isn’t your thing.
- Orange or white frosting (for the nose and mouth) – A small piping tip or a zip-top bag with the corner snipped off works perfectly.
- Black sprinkles or sanding sugar (optional, for extra sparkle) – Adds a little Halloween magic to the edges.
Equipment Needed
You don’t need a professional bakery setup for this one. Here’s what you’ll want on hand:
- Large mixing bowl – For combining the wet and dry ingredients. A glass or stainless steel bowl works best.
- Whisk and rubber spatula – The whisk for the wet ingredients, the spatula for folding everything together without overmixing.
- Parchment paper – This is non-negotiable. It prevents sticking and makes clean-up a breeze. I’ve tried baking directly on a greased sheet, and the cookie cake stuck in all the wrong places.
- Baking sheet – A half-sheet pan (18×13 inches) is ideal. If yours is smaller, you might need to bake in two batches.
- Offset spatula or butter knife – For shaping the dough into a cat head shape before baking.
- Cooling rack – Lets the cookie cake cool evenly so the edges don’t get soggy.
- Piping bags or zip-top bags – For the frosting details. I prefer reusable silicone piping bags, but a simple zip-top bag with the corner snipped works just as well.
If you don’t have an offset spatula, don’t worry. I’ve used the back of a spoon more times than I can count. It’s not pretty, but it gets the job done.
Preparation Method
- Preheat your oven to 350°F (175°C). Line a large baking sheet with parchment paper. This is the step where you set yourself up for success—don’t skip the parchment, or you’ll be scraping cookie off the pan later.
- Melt the butter in a microwave-safe bowl or in a small saucepan over low heat. Let it cool for 2-3 minutes—you don’t want it hot enough to cook the eggs when you mix them in. I usually melt mine in the microwave at 30-second intervals, stirring between each, until it’s just melted and warm to the touch.
- In a large mixing bowl, whisk together the melted butter, brown sugar, and granulated sugar until smooth and glossy. This should take about a minute. The mixture will look a little grainy at first, but keep whisking—it’ll come together.
- Add the egg, egg yolk, and vanilla extract. Whisk vigorously until the mixture is pale, thick, and falls off the whisk in ribbons. This is called the “ribbon stage,” and it’s your sign that enough air has been incorporated. If you’re using black gel food coloring, add it now and whisk until the color is evenly distributed. The batter will look almost black, which is exactly what you want.
- In a separate bowl, whisk together the flour, cocoa powder, baking soda, and salt. Make sure there are no lumps—cocoa powder can be stubborn, so I usually sift it if I’m feeling fancy, or just whisk aggressively.
- Gradually add the dry ingredients to the wet ingredients, folding gently with a rubber spatula. Mix until just combined—overmixing will make the cookie cake tough. You should still see a few streaks of flour when you stop.
- Fold in the chocolate chips with a few gentle strokes. Reserve a handful to press into the top of the cookie cake before baking for that bakery-style look.
- Transfer the dough to the prepared baking sheet. Using your hands or an offset spatula, shape it into a rough cat head shape—round at the top, slightly pointed at the chin, with two triangular ears on top. Don’t worry about perfection; the dough will spread and smooth out as it bakes. The ears should be about 2 inches tall and 1.5 inches wide at the base. Press the reserved chocolate chips into the surface of the dough.
- Bake for 18-22 minutes, or until the edges are set and the center looks slightly underdone—it should still jiggle a little when you shake the pan. The cookie cake will continue to cook as it cools on the pan. For a softer, chewier center, pull it out at 18 minutes. For a crisper cookie, go to 22. I personally prefer 20 minutes for the perfect balance.
- Let the cookie cake cool on the baking sheet for 10 minutes, then transfer it to a wire rack to cool completely. This is the hardest part of the recipe—the smell is intoxicating, and you’re going to want to dive in immediately. Trust me, wait. Warm cookie cake is delicious, but room-temperature cookie cake holds its shape better for decorating.
- Once completely cool, it’s time to decorate. Place the two candy eyes in the center of the cookie cake, about an inch apart. Cut the black licorice strings into 2-inch pieces and arrange them on either side of the eyes as whiskers—three on each side, angled outward. Use the orange or white frosting to pipe a small triangle for the nose, just below the eyes, and a tiny “w” shape for the mouth. If you’re using black sprinkles, lightly press them around the edges of the cookie cake for a little sparkle.
- Let the frosting set for 10-15 minutes before slicing. Use a sharp knife to cut wedges, or just let everyone pull off pieces with their hands—it’s Halloween, after all.
Cooking Tips & Techniques
I learned a few things the hard way so you don’t have to. Here are my best tips for cookie cake success:
Don’t overbake. I cannot stress this enough. The first time I made this, I left it in the oven for 25 minutes because I wanted it to be “fully done.” It came out dry and crumbly—still edible, but not the chewy, fudgy dream I was after. Pull it out when the center still looks slightly underdone. It will continue baking on the hot pan. That residual heat is your friend.
Shape the dough while it’s cold-ish. If your kitchen is warm and the dough feels too sticky to shape, pop the bowl in the fridge for 10-15 minutes. It’ll firm up enough to handle without being a mess. I’ve also done this when I got distracted by a phone call and came back to a puddle of butter—it saved the batch.
Use a template for the cat shape. If you’re nervous about freehanding the cat head, cut a piece of parchment paper into a cat head template and place it on the baking sheet. Spread the dough to match the shape, then remove the template. It’s a little extra work, but it guarantees symmetry. I did this for my second test batch and the ears came out perfectly even.
Multitask like a pro. While the cookie cake is baking, prep your decorating station. Set out the candy eyes, cut the licorice strings, and fill your piping bag with frosting. That way, when the cookie comes out and cools, you can decorate immediately without scrambling.
Let it cool completely before decorating. I know, I know—you’re excited. But warm cookie cake will melt the frosting into a puddle, and the candy eyes will slide right off. I learned this when I decorated a slightly warm cookie cake and ended up with a cat that looked like it was melting into the floor. Still cute, but not the look I was going for.
Variations & Adaptations
One of the best things about this recipe is how flexible it is. Here are some ways to make it your own:
Gluten-Free Version: Swap the all-purpose flour for a 1:1 gluten-free baking flour blend. I’ve tested this with Bob’s Red Mill 1:1 Baking Flour and it worked beautifully—just add an extra tablespoon of milk to the dough to compensate for the drier texture. The cookie cake will be slightly more crumbly, but just as delicious.
Vegan Option: Use melted coconut oil or vegan butter instead of regular butter, a flax egg (1 tablespoon ground flaxseed + 3 tablespoons water) plus an extra tablespoon of water for the yolk, and dairy-free chocolate chips. The texture will be a little less fudgy, but still chewy and satisfying. I made this for a vegan friend’s Halloween party and it disappeared in minutes.
Different Decorations: Not a fan of licorice? Use black frosting piped into thin lines for the whiskers. Want a spookier look? Add a piped spiderweb pattern on one side of the cookie cake. You can also use orange and black sprinkles for a festive touch, or swap the candy eyes for white frosting dots if you don’t have them on hand.
Flavor Twists: Add a teaspoon of espresso powder to the dry ingredients for a deeper chocolate flavor—it doesn’t taste like coffee, it just makes the chocolate taste more chocolatey. You can also fold in ½ cup of white chocolate chips along with the semi-sweet for a cookies-and-cream vibe. I tried this for a test batch and it was dangerously good.
Mini Cookie Cakes: Instead of one large cookie cake, divide the dough into 4-6 smaller portions and shape them into mini cat heads. Bake for 12-15 minutes, and you’ve got individual servings that are perfect for parties or lunchbox surprises. Just adjust the decorating accordingly—smaller candy eyes, shorter whiskers.
Serving & Storage Suggestions
This cookie cake is best served at room temperature, but it’s also delicious slightly warm if you’re impatient (no judgment here). Cut it into wedges like a pizza, or let everyone pull off pieces with their hands—it’s Halloween, so messy is part of the fun.
What to Serve With It: A glass of cold milk is the classic pairing, but it also goes beautifully with a scoop of vanilla ice cream or a drizzle of warm caramel sauce. If you’re hosting a Halloween party, set it out alongside some crispy Halloween mummy hot dogs for a sweet-and-savory spread that will impress everyone. For a cozy fall dessert table, pair it with a slice of cozy apple cider donut loaf cake—the apple and chocolate combination is surprisingly perfect.
Storage: Store any leftover cookie cake in an airtight container at room temperature for up to 3 days. If you stack pieces, place a sheet of parchment paper between layers to prevent the decorations from sticking. Do not refrigerate—the fridge will dry out the cookie and make it hard.
Freezing: You can freeze the undecorated cookie cake for up to 2 months. Wrap it tightly in plastic wrap, then a layer of aluminum foil. When you’re ready to serve, thaw it at room temperature for about an hour, then decorate. The texture will be just as good as fresh. I always make an extra batch to freeze for last-minute Halloween emergencies—you never know when a party invite will pop up.
Reheating: If you want that just-baked warmth, pop a slice in the microwave for 10-15 seconds, or in a 300°F oven for 5 minutes. The edges will crisp up again, and the center will get all soft and gooey. Just don’t microwave it with the candy eyes—they’ll melt into weird, gooey blobs. Trust me on this one.
Flavor Development: Honestly, this cookie cake tastes even better the next day. The flavors meld together overnight, and the texture becomes even more fudgy. If you can resist eating it all in one sitting, you’ll be rewarded with an even better experience on day two.
Nutritional Information & Benefits
Let’s be real—this is a treat, not a health food. But that doesn’t mean it’s devoid of any redeeming qualities. Here’s a rough estimate per serving (based on 8 slices):
| Nutrient | Amount Per Serving |
|---|---|
| Calories | |
| Total Fat | 22g |
| Saturated Fat | 13g |
| Carbohydrates | 48g |
| Fiber | 3g |
| Sugar | 32g |
| Protein | 5g |
Dark chocolate and cocoa powder are actually rich in antioxidants called flavonoids, which can support heart health and reduce inflammation. The butter provides vitamin A, and the eggs offer a small amount of protein and B vitamins. Is it a superfood? No. But it’s a dessert that makes people happy, and there’s something to be said for that.
For those with dietary restrictions, this recipe contains gluten, dairy, and eggs. The gluten-free and vegan variations above are great alternatives. If you’re watching your sugar intake, you can reduce the granulated sugar to ¼ cup, but the texture will be slightly less crispy on the edges.
I personally believe that dessert should be enjoyed without guilt. This cookie cake is for celebrations, for memories, for the moments when you want to make something special. It’s not an everyday food—and that’s okay. It’s meant to be shared and savored.
Conclusion
This Black Cat Halloween Cookie Cake is more than just a dessert—it’s a memory in the making. It’s the thing you bring to the party that makes everyone stop and smile. It’s the recipe your kids will ask for year after year, the one that becomes a tradition without anyone planning it.
I love this recipe because it’s forgiving. You can mess up the ears, overbake it by a minute, or forget to add the food coloring, and it still comes out looking adorable and tasting incredible. It’s the kind of recipe that makes you feel like a baking genius, even when you’re just following instructions.
So go ahead—make this for your Halloween gathering, your classroom party, or your cozy night in. Customize it however you want. Add more chocolate chips, switch up the decorations, make it gluten-free or vegan. The cookie cake is your canvas, and Halloween is the perfect excuse to get creative.
I’d love to hear how yours turns out! Drop a comment below and tell me about your decorations, your variations, or just how quickly it disappeared. And if you’re looking for more spooky treats to round out your Halloween menu, check out these perfect pastel Halloween witch hat sugar cookies or these creamy pumpkin spice cake pops for the ultimate dessert spread.
Happy Halloween, and happy baking!
Frequently Asked Questions
Can I make this cookie cake ahead of time?
Absolutely! You can bake the cookie cake up to 2 days in advance. Store it undecorated in an airtight container at room temperature, then add the decorations the day you plan to serve it. The cookie cake actually gets more fudgy and flavorful overnight, so making it ahead is a win-win.
Can I use Dutch-process cocoa powder instead of natural cocoa powder?
Yes, you can. Dutch-process cocoa is less acidic and has a milder, smoother chocolate flavor. The cookie cake will be slightly darker in color and a little less tangy. If you use Dutch-process cocoa, the baking soda will still work, but the spread might be slightly different. I’ve tested it and it works fine—just don’t expect the exact same texture.
Why did my cookie cake spread too much?
This usually happens for one of three reasons: the butter was too warm when you mixed it, the dough wasn’t chilled before shaping, or the baking sheet was too greased. Next time, let the melted butter cool for a few minutes before mixing, and if your kitchen is warm, pop the shaped dough in the fridge for 15 minutes before baking. Also, make sure your parchment paper is clean—excess butter on the pan can cause extra spreading.
Can I use a different shape for the cookie cake?
Of course! This dough is incredibly versatile. You can shape it into a pumpkin, a ghost, a bat, or even a spider. Just adjust the decorations accordingly. For a pumpkin shape, make a round cookie cake and pipe orange frosting in a grid pattern with a green stem on top. The baking time will be the same as long as the thickness is similar.
How do I get the cookie cake perfectly round if I don’t want the cat shape?
Use a springform pan or a cake ring. Press the dough evenly into the pan, then remove the ring before baking. This gives you a perfectly round cookie cake every time. You can also use a 9-inch pie plate—just press the dough into the bottom and up the sides slightly for a cookie cake with a raised edge. Bake for 20-25 minutes, checking for doneness at the 20-minute mark.
Pin This Recipe!
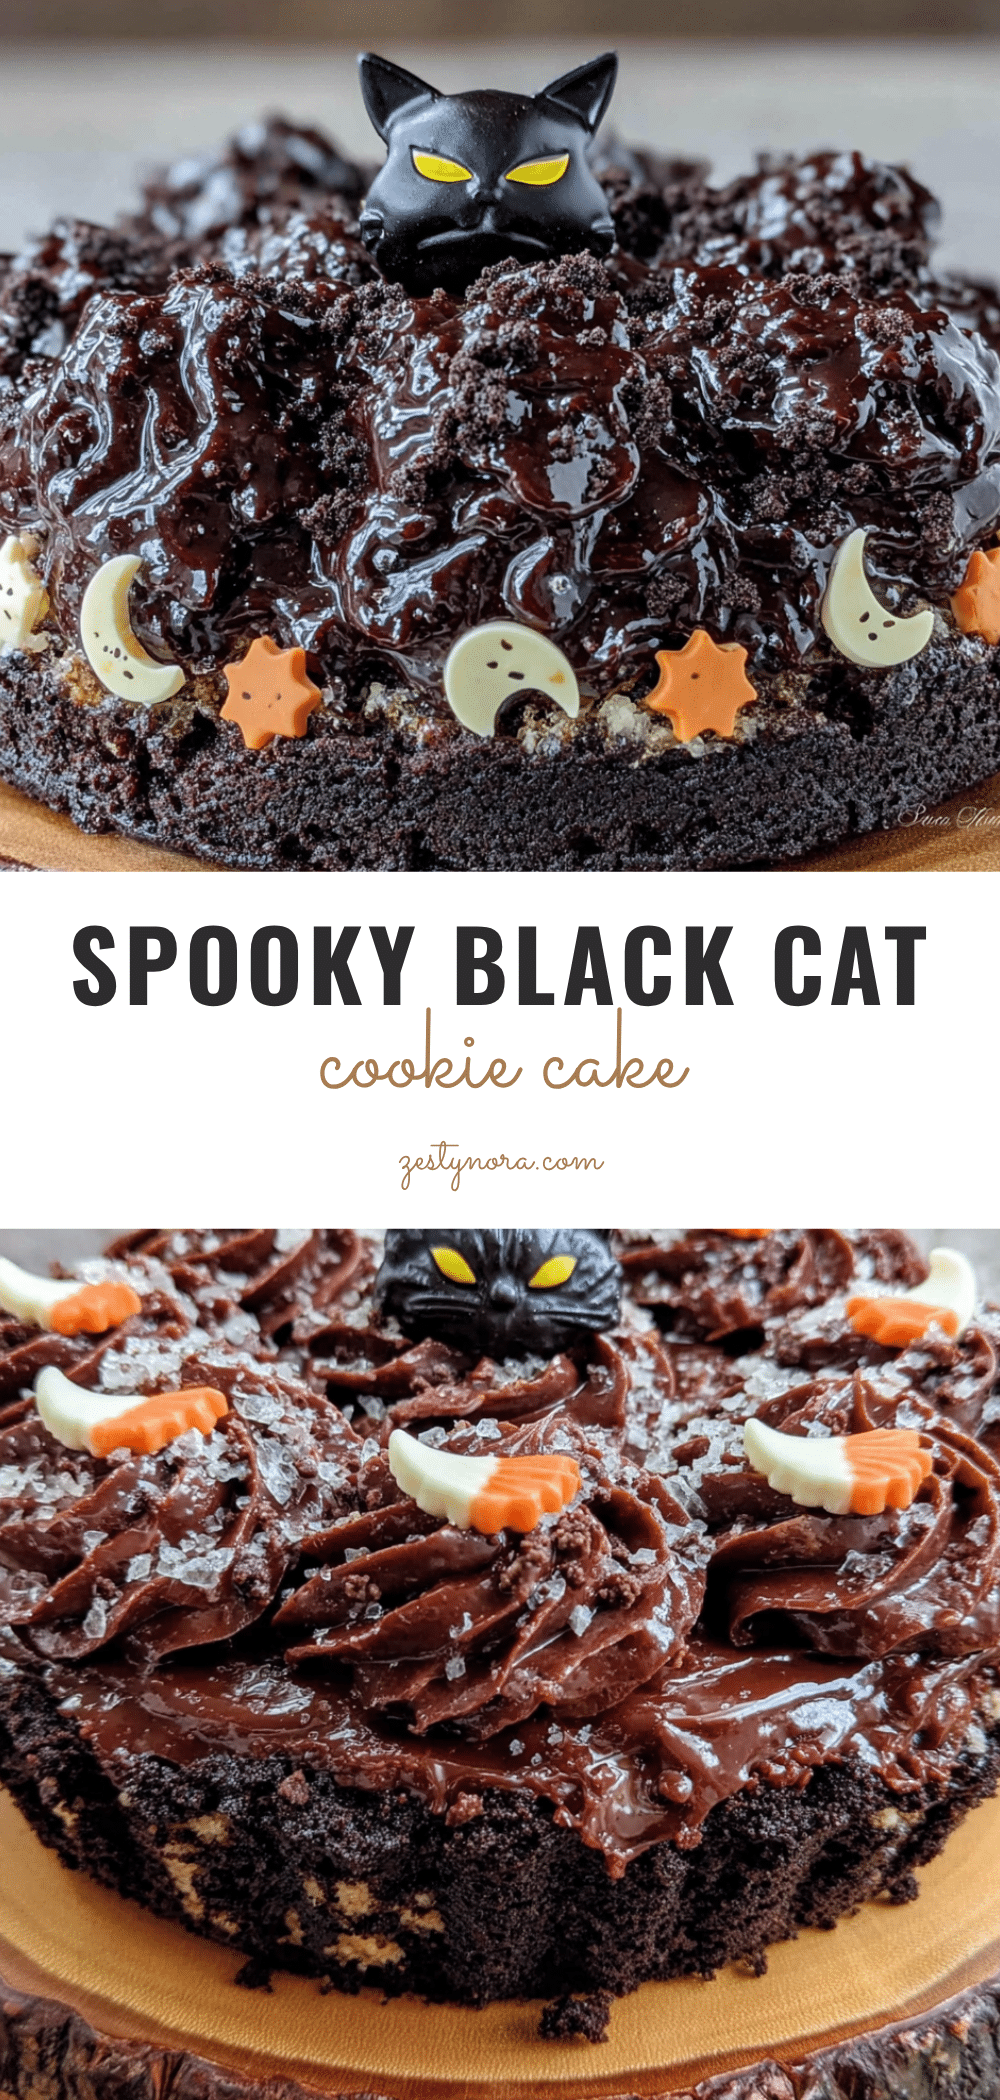
Black Cat Halloween Cookie Cake: Easy Spooky Dessert
A fun and forgiving Halloween dessert that combines the best of cookies and cake into one giant, shareable treat. This dark chocolate cookie cake is shaped like a black cat and decorated with candy eyes and licorice whiskers, making it the perfect spooky centerpiece for any Halloween party.
- Prep Time: 15 minutes
- Cook Time: 20 minutes
- Total Time: 35 minutes
- Yield: 8 servings 1x
- Category: Dessert
- Cuisine: American
Ingredients
- 1 cup (2 sticks) unsalted butter, melted
- 1 cup (200g) light brown sugar, packed
- ½ cup (100g) granulated sugar
- 1 large egg + 1 egg yolk, at room temperature
- 2 teaspoons vanilla extract
- 2 cups (240g) all-purpose flour, spooned and leveled
- ⅓ cup (30g) unsweetened cocoa powder (dark or black cocoa recommended)
- 1 teaspoon baking soda
- ½ teaspoon fine sea salt
- 1 cup (175g) semi-sweet chocolate chips
- 1–2 teaspoons black gel food coloring (optional)
- 2 large candy eyes
- Black licorice strings (for whiskers)
- Orange or white frosting (for nose and mouth)
- Black sprinkles or sanding sugar (optional)
Instructions
- Preheat oven to 350°F (175°C). Line a large baking sheet with parchment paper.
- Melt the butter in a microwave-safe bowl or small saucepan. Let cool for 2-3 minutes.
- In a large mixing bowl, whisk together the melted butter, brown sugar, and granulated sugar until smooth and glossy, about 1 minute.
- Add the egg, egg yolk, and vanilla extract. Whisk vigorously until the mixture is pale, thick, and falls off the whisk in ribbons. If using black gel food coloring, add it now and whisk until evenly distributed.
- In a separate bowl, whisk together the flour, cocoa powder, baking soda, and salt until no lumps remain.
- Gradually add the dry ingredients to the wet ingredients, folding gently with a rubber spatula until just combined. Do not overmix.
- Fold in the chocolate chips with a few gentle strokes. Reserve a handful to press into the top of the cookie cake before baking.
- Transfer the dough to the prepared baking sheet. Using your hands or an offset spatula, shape it into a rough cat head shape—round at the top, slightly pointed at the chin, with two triangular ears on top (about 2 inches tall and 1.5 inches wide at the base). Press the reserved chocolate chips into the surface.
- Bake for 18-22 minutes, or until the edges are set and the center looks slightly underdone (it should jiggle a little when shaken). For a softer center, bake 18 minutes; for a crisper cookie, bake 22 minutes.
- Let the cookie cake cool on the baking sheet for 10 minutes, then transfer to a wire rack to cool completely.
- Once completely cool, decorate: place the two candy eyes in the center, about an inch apart. Cut licorice strings into 2-inch pieces and arrange 3 on each side as whiskers. Pipe a small triangle for the nose and a tiny ‘w’ for the mouth using orange or white frosting. Optionally, press black sprinkles around the edges.
- Let the frosting set for 10-15 minutes before slicing. Cut into wedges or let everyone pull off pieces.
Notes
For a truly black color, use black cocoa powder and black gel food coloring. Do not overbake; the center should look slightly underdone when removed from the oven. Let the cookie cake cool completely before decorating to prevent frosting from melting. Store leftovers in an airtight container at room temperature for up to 3 days. The undecorated cookie cake can be frozen for up to 2 months.
Nutrition
- Serving Size: 1 slice (1/8 of cook
- Calories: 400
- Sugar: 32
- Sodium: 280
- Fat: 22
- Saturated Fat: 13
- Carbohydrates: 48
- Fiber: 3
- Protein: 5
Keywords: Halloween cookie cake, black cat cookie cake, chocolate cookie cake, easy Halloween dessert, spooky dessert, cookie cake recipe


