I burned the bottom of my first three skillet cookies before I figured out what I was doing wrong. Not just a little scorched—like, smoke-alarm-going-off, husband-waving-a-towel, we-are-ordering-pizza burned. The worst part? The middle was still raw batter. It was a disaster, but somewhere between the charred edges and the gooey center, I caught a glimpse of what this dessert was supposed to be. I kept making it anyway, because even the failures tasted better than most cookies I’d had from a bakery.
This small-batch chocolate chip skillet cookie is the payoff from all those burnt pans. It’s the version I finally got right—crispy around the edges, soft and almost fudgy in the middle, and just enough for two people (or one person with very little self-control, which is usually me). I stopped trying to scale down a full-size recipe and started from scratch, adjusting the ratios until the texture was exactly what I wanted. No more burnt bottoms. No more raw centers. Just that perfect, butter-toasted, chocolate-melted magic that makes you eat straight from the skillet with a spoon (you know, for quality control).
Honestly, this is the kind of dessert that feels like a hug. It’s simple enough for a Tuesday night but impressive enough to serve after a nice dinner. And the best part? You don’t need a mixer, you don’t need a full stick of butter, and you definitely don’t need to share if you don’t want to.
Why You’ll Love This Recipe
I’ve tested this recipe more times than I care to admit, and I can tell you with confidence—it works. Every single time. Here’s why this small-batch skillet cookie deserves a spot in your rotation:
- Perfect for Two (or One): No more leftover cookies going stale. This recipe makes just enough for one generous skillet cookie, ideal for date night, a cozy night in, or a solo treat.
- Ready in Under 30 Minutes: From mixing to eating, you’re looking at about 25 minutes. That’s faster than driving to the store and buying a pint of ice cream.
- Simple Pantry Ingredients: Butter, sugar, an egg yolk, flour, chocolate chips—you probably have everything already. No fancy extracts or specialty flours required.
- That Perfect Texture: The edges get golden and slightly crispy while the center stays soft, gooey, and almost underbaked in the best way. It’s the texture you dream about.
- No Mixer Needed: Just a bowl and a whisk. Less cleanup, more cookie.
What makes this recipe different from every other skillet cookie out there? It’s the ratio. Most recipes use a whole egg, which makes the cookie too cakey for a small skillet. Using just the yolk gives you that dense, fudgy, almost brownie-like center that stays soft even after it cools. I learned this the hard way—after making about five versions that were too puffy and dry. This one? It’s the keeper.
This isn’t just another cookie recipe. It’s the kind of dessert that makes you close your eyes after the first bite. The kind where you scrape the last bits of melted chocolate from the skillet with your finger because you just can’t leave it behind.
What Ingredients You Will Need
This recipe uses simple, everyday ingredients to create something that feels special. No weird stuff, no hunting down obscure baking supplies. Just good, honest ingredients that work together perfectly.
For the Skillet Cookie
- Unsalted butter – 3 tablespoons (42g), melted and slightly cooled. I use salted butter in a pinch and just skip the flaky salt at the end, but unsalted lets you control the salt level better.
- Light brown sugar – ¼ cup (50g), packed. This is non-negotiable for that chewy, caramel-like texture. Dark brown sugar works too if you want a deeper molasses flavor.
- Granulated sugar – 2 tablespoons (25g). Just enough to help the edges crisp up without making the whole thing crunchy.
- Egg yolk – 1 large yolk, room temperature. Save the white for scrambled eggs tomorrow. Using only the yolk gives you that dense, fudgy center without making the cookie too cakey.
- Vanilla extract – ½ teaspoon. Pure vanilla makes a difference here. I’ve used imitation in a pinch and it works, but the flavor is noticeably less warm and rich.
- All-purpose flour – ⅓ cup (42g), spooned and leveled. Don’t scoop directly from the bag—you’ll end up with too much flour and a dry cookie.
- Baking soda – ¼ teaspoon. Just enough to give it a little lift without making it puffy.
- Salt – ¼ teaspoon. Balances the sweetness and brings out the chocolate flavor.
- Semi-sweet chocolate chips – ⅓ cup (60g). I prefer Ghirardelli or Guittard for the best melt and flavor. You can also chop up a good quality chocolate bar for those big puddles of melted chocolate.
For Topping (Optional but Highly Recommended)
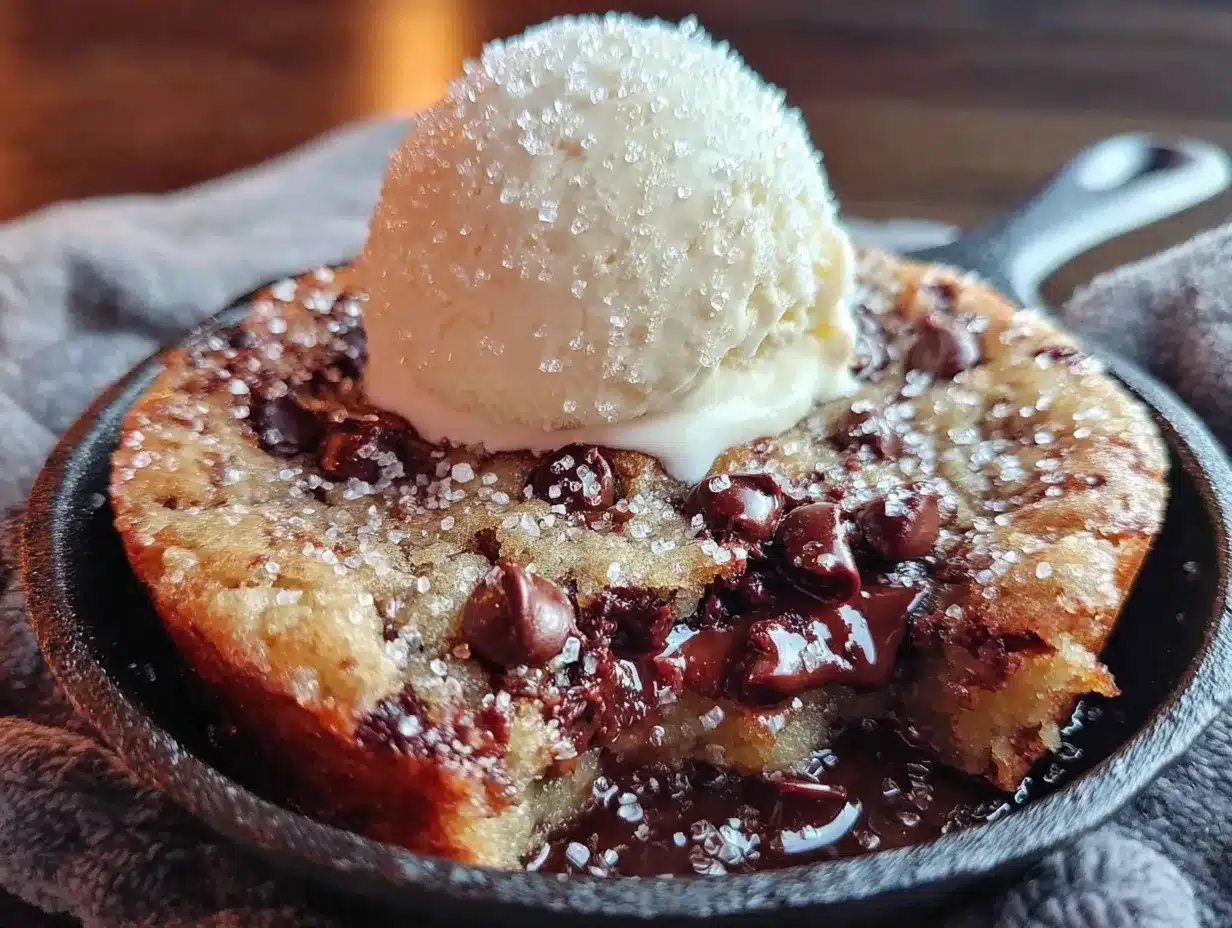
- Flaky sea salt – Just a pinch. Maldon is my go-to. It sounds fancy, but it’s really just salt. The crunch and pop of salt against the sweet, warm cookie is incredible.
- Vanilla ice cream – For serving. Because a warm skillet cookie without ice cream is like a hug without a squeeze.
Ingredient Swaps & Notes: If you’re out of brown sugar, you can use all granulated sugar, but the cookie will be less chewy and more crisp. For a dairy-free version, use a plant-based butter stick (not margarine) and dairy-free chocolate chips. I’ve tried this with oat milk butter and it worked surprisingly well—just make sure it’s the stick form, not the spreadable kind in a tub.
Equipment Needed
You don’t need a lot of fancy tools for this recipe. Here’s what you’ll need:
- Small cast iron skillet – 6-inch or 8-inch. A 6-inch skillet gives you a thicker, more gooey cookie. An 8-inch skillet makes it thinner and slightly more crispy. I use my 6-inch Lodge skillet and it’s perfect for two people. If you don’t have a cast iron skillet, you can use a small oven-safe non-stick pan or even a small baking dish.
- Mixing bowl – Any medium bowl works. I use a glass Pyrex bowl because I can see if everything is combined.
- Whisk – For mixing the wet ingredients. A fork works in a pinch, but a whisk is easier.
- Spatula – A rubber spatula for scraping down the sides and pressing the dough into the skillet.
- Measuring cups and spoons – For accuracy. I cannot stress this enough—baking is chemistry, and guessing measurements leads to sad cookies.
- Kitchen scale (optional but helpful) – If you have one, use it. Weighing the flour and sugar gives you the most consistent results.
If you’re using a non-stick skillet, just make sure it’s oven-safe up to 350°F. I’ve used a small ceramic baking dish before and it worked fine—the cookie just didn’t get those beautiful crispy edges you get from cast iron.
Preparation Method
Alright, let’s make this cookie. I’ll walk you through every step so you don’t make the same mistakes I did.
- Preheat your oven to 350°F (175°C). Place your skillet in the oven while it preheats. This is a trick I learned after burning the bottom of my first few cookies—heating the skillet first helps the edges start cooking immediately, giving you that crispy exterior while the center stays soft. Just be careful when you pull it out later—use an oven mitt.
- Melt the butter. In a microwave-safe bowl or small saucepan, melt 3 tablespoons of butter. I microwave mine in 15-second bursts, stirring between each, until just melted. Don’t let it boil—you want it melted, not hot. Let it cool for about 2 minutes while you get the other ingredients ready.
- Mix the sugars and butter. In your mixing bowl, combine the melted butter, ¼ cup packed brown sugar, and 2 tablespoons granulated sugar. Whisk them together until they’re well combined and look like wet sand. It should be smooth, not grainy. This takes about 30 seconds of whisking.
- Add the egg yolk and vanilla. Drop in the egg yolk and ½ teaspoon vanilla extract. Whisk vigorously until the mixture is smooth, creamy, and slightly lighter in color. This is where the magic happens—the yolk emulsifies with the butter and sugar, creating that fudgy texture. If your mixture looks separated or greasy, you might have added the egg while the butter was too hot. Let it sit for a minute and whisk again—it should come together.
- Add the dry ingredients. Sprinkle ⅓ cup flour, ¼ teaspoon baking soda, and ¼ teaspoon salt over the wet mixture. Use a spatula to fold everything together gently. Stir just until you no longer see streaks of flour—overmixing makes the cookie tough. The dough will be thick and slightly sticky. This is normal.
- Fold in the chocolate chips. Add ⅓ cup chocolate chips and fold them in with your spatula. Make sure they’re evenly distributed. I like to reserve about a tablespoon of chips to press into the top of the dough once it’s in the skillet—it makes for a prettier cookie.
- Press the dough into the skillet. Carefully remove the hot skillet from the oven (use that oven mitt!). The skillet should be warm but not scorching. Drop the dough into the center and use your spatula or fingers to press it into an even layer. Don’t spread it all the way to the edges—leave about ¼ inch of space. The dough will spread as it bakes. Press those reserved chocolate chips into the top.
- Bake for 12-15 minutes. This is the most important part. At 12 minutes, the edges will be golden and set, and the center will look slightly puffed and maybe a little jiggly. That’s exactly what you want. If you bake it until the center looks fully set, it will be overbaked and cakey. I pull mine at exactly 13 minutes for a gooey center. For a slightly more done cookie, go to 14 or 15 minutes. Remember, the cookie continues to cook in the hot skillet after you pull it out.
- Cool for 5 minutes. Place the skillet on a heat-safe surface or trivet. Let it cool for about 5 minutes before adding any toppings. If you add ice cream immediately, it will melt into a puddle. Trust me, I’ve done it.
- Add toppings and serve. Sprinkle a pinch of flaky sea salt over the warm cookie. Add a scoop of vanilla ice cream on top. Serve it straight from the skillet with two spoons. Or one. No judgment here.
Visual Cues: At the 12-minute mark, the edges should be a deep golden brown and the center should look slightly puffed and soft—almost like it’s not quite done. If the center looks completely flat and set, it’s overbaked. The top should be lightly golden, not dark brown. Trust the jiggle.
Cooking Tips & Techniques
I’ve made this cookie more times than I can count, and I’ve learned a few things along the way. Here are my best tips for getting it right every time.
Don’t skip preheating the skillet. This was my biggest mistake early on. When you put the dough into a cold skillet, the bottom cooks too slowly, and by the time the edges are done, the bottom is burnt. Preheating the skillet gives you that immediate heat that creates a crispy, golden bottom while the center stays soft. Just be careful when you handle the hot skillet—use an oven mitt every time.
Measure your flour correctly. This is the number one reason cookies turn out dry. Spoon the flour into your measuring cup, then level it off with a knife. Don’t scoop directly from the bag—you’ll pack in too much flour. If you have a kitchen scale, use it. 42 grams is the magic number.
Let the butter cool before adding the egg. If the butter is too hot, it will cook the egg yolk and you’ll end up with little scrambled egg bits in your cookie. Not the end of the world, but not ideal. Let the melted butter sit for 2-3 minutes before adding the yolk. It should be warm, not hot.
Bake for the shorter time first. Every oven is different. Start checking at 12 minutes. If the edges are golden and the center is still soft, pull it. You can always bake it for another minute if it’s too gooey, but you can’t unbake an overdone cookie.
Let it rest. I know it’s hard, but let the cookie cool for at least 5 minutes before digging in. The texture sets up slightly, and the flavors meld together. Plus, if you add ice cream right away, you’ll end up with sweet soup. Patience pays off here.
One time, I was in a hurry and skipped the preheating step. The bottom of the cookie was burnt, the top was underdone, and I was so frustrated. That’s when I learned that this recipe is simple, but it’s not foolproof. Follow the steps, and you’ll be rewarded with the perfect skillet cookie.
Variations & Adaptations
This recipe is a great base for all kinds of flavor experiments. Here are a few variations I’ve tried and loved.
Peanut Butter Swirl: Before baking, drop 2 tablespoons of creamy peanut butter in small dollops over the dough. Use a knife to gently swirl it into the top. The peanut butter gets all warm and melty, and it pairs beautifully with the chocolate. I’ve also used crunchy peanut butter for a little texture.
Double Chocolate: Replace 1 tablespoon of the flour with 1 tablespoon of unsweetened cocoa powder. Use white chocolate chips or milk chocolate chips instead of semi-sweet. The result is a rich, fudgy, almost brownie-like cookie that’s dangerously good. I made this for a friend who claims she doesn’t like chocolate chip cookies, and she ate half the skillet.
Gluten-Free Option: Use a 1:1 gluten-free baking flour blend. I’ve tested this with King Arthur Measure for Measure flour and it worked perfectly. The texture is slightly more tender, but the gooey center and crispy edges are still there. Just make sure your blend contains xanthan gum for structure.
Add Some Texture: Fold in ¼ cup of chopped pecans or walnuts along with the chocolate chips. The crunch is a nice contrast to the soft cookie. I’ve also used toffee bits or butterscotch chips for a different flavor profile.
Brown Butter Version: For a nuttier, more complex flavor, brown the butter before using it. Melt the butter in a small saucepan over medium heat, swirling occasionally, until it turns amber and smells nutty—about 5-7 minutes. Let it cool completely before using. This adds about 10 minutes to the prep time, but the flavor is incredible. I’ve made this for holiday parties and it always gets rave reviews.
Serving & Storage Suggestions
This cookie is best served warm, straight from the skillet. That’s when the chocolate is at its most melty and the texture is at its peak. Here’s how I like to serve it.
Serving Temperature: Warm, not hot. Let it cool for 5 minutes so the chocolate isn’t lava-hot, but it’s still warm enough to melt the ice cream slightly. The contrast between the warm cookie and cold ice cream is pure magic.
What to Serve With It: A scoop of vanilla bean ice cream is the classic choice, but I’ve also used salted caramel ice cream, coffee ice cream, or even a drizzle of warm caramel sauce. For a less indulgent option, a dollop of whipped cream works beautifully. If you’re feeling fancy, a sprinkle of flaky sea salt and a few fresh raspberries add color and a pop of tartness.
Storage: If you somehow have leftovers (it’s rare in my house), cover the skillet tightly with foil or plastic wrap and store it at room temperature for up to 2 days. The texture will soften over time, but it’s still delicious. You can also transfer any leftover cookie to an airtight container.
Reheating: To bring back that fresh-from-the-oven texture, reheat the skillet in a 300°F oven for 5-7 minutes. You can also microwave individual portions for 15-20 seconds, but the edges won’t be as crispy. If you’re reheating the whole skillet, I recommend the oven method.
Freezing: You can freeze the unbaked dough right in the skillet. Press the dough into the skillet, wrap it tightly in plastic wrap and then foil, and freeze for up to 3 months. When you’re ready to bake, add about 5 minutes to the baking time (bake from frozen, don’t thaw). The texture is just as good as fresh.
The flavors actually develop a bit overnight. If you can resist eating it all, the next-day cookie has a deeper, more caramelized flavor. It’s not as gooey, but it’s still really good.
Nutritional Information & Benefits
Let’s be real—this is a dessert, not a health food. But here’s the estimated nutritional breakdown for the entire skillet cookie (without ice cream), based on 2 servings.
| Nutrient | Per Serving (½ cookie) |
|---|---|
| Calories | ~420 |
| Total Fat | 22g |
| Saturated Fat | 13g |
| Carbohydrates | 54g |
| Sugar | 38g |
| Protein | 5g |
| Fiber | 2g |
| Sodium | 310mg |
Dark chocolate (semi-sweet chips) contains antioxidants and may have some heart health benefits. The butter provides vitamin A, and the egg yolk is a good source of choline, which supports brain health. But honestly? This is a treat. It’s meant to be enjoyed in moderation, not as a daily staple. I make this on Friday nights after a long week, and it’s the perfect way to unwind.
Dietary Considerations: This recipe contains gluten, dairy, and eggs. For a gluten-free version, see the variations section. For a dairy-free version, use plant-based butter and dairy-free chocolate chips. There is no vegan option for this particular recipe because the egg yolk is essential for the texture.
Conclusion
This small-batch chocolate chip skillet cookie is one of those recipes that feels like a secret weapon. It’s simple enough for a random Tuesday, but impressive enough to pull out when you want to make someone feel special. The crispy edges, the gooey center, the melty chocolate—it’s everything you want in a cookie, but scaled down so there’s no waste and no temptation to eat a dozen.
I love this recipe because it reminds me that good things come in small packages. It’s not about the quantity—it’s about the quality of that one perfect bite. And honestly, the fact that it takes less than 30 minutes and uses ingredients I already have means I make it way more often than I probably should.
I’d love to hear how yours turns out. Did you add any fun mix-ins? Did you eat the whole thing yourself? (No judgment, I’ve been there.) Leave a comment below and let me know—your feedback helps other readers too. And if you’re looking for another cozy dessert to try, you might enjoy this apple cider donut loaf cake with brown butter maple glaze or these mini caramel apple tartlets for another small-batch treat. Happy baking!
Frequently Asked Questions
Can I make this in a regular baking dish instead of a cast iron skillet?
Yes, you can use a small oven-safe baking dish or even a ramekin. The cooking time might vary slightly—a wider dish will give you a thinner cookie that bakes faster, while a deeper dish will need a minute or two longer. Just keep an eye on the edges and pull it when they’re golden and the center is still soft.
Why did my cookie turn out cakey instead of gooey?
This usually happens for one of three reasons: you used a whole egg instead of just the yolk, you baked it too long, or you added too much flour. Make sure you’re using only the egg yolk, pull the cookie at 12-13 minutes (even if the center looks slightly underdone), and measure your flour correctly by spooning it into the cup and leveling it off.
Can I double this recipe?
Absolutely. Double all the ingredients and use a 10-inch skillet or a 9-inch pie plate. You’ll need to increase the baking time by about 3-5 minutes. Start checking at 15 minutes and look for the same visual cues—golden edges and a soft, slightly puffed center.
What if I don’t have a kitchen scale?
No problem! Just use the measuring cup and spoon method. For the flour, spoon it lightly into your ⅓ cup measure and level it off with a knife. Don’t pack it down. For the brown sugar, pack it firmly into the measuring cup. For the butter, use the tablespoon markings on the wrapper.
Can I use milk chocolate chips instead of semi-sweet?
Yes, but the cookie will be much sweeter. Milk chocolate chips have more sugar and less cocoa butter, so they melt differently too. If you use milk chocolate, I’d recommend reducing the granulated sugar by 1 tablespoon to balance the sweetness. Dark chocolate chips are also a great option for a less sweet, more intense chocolate flavor.
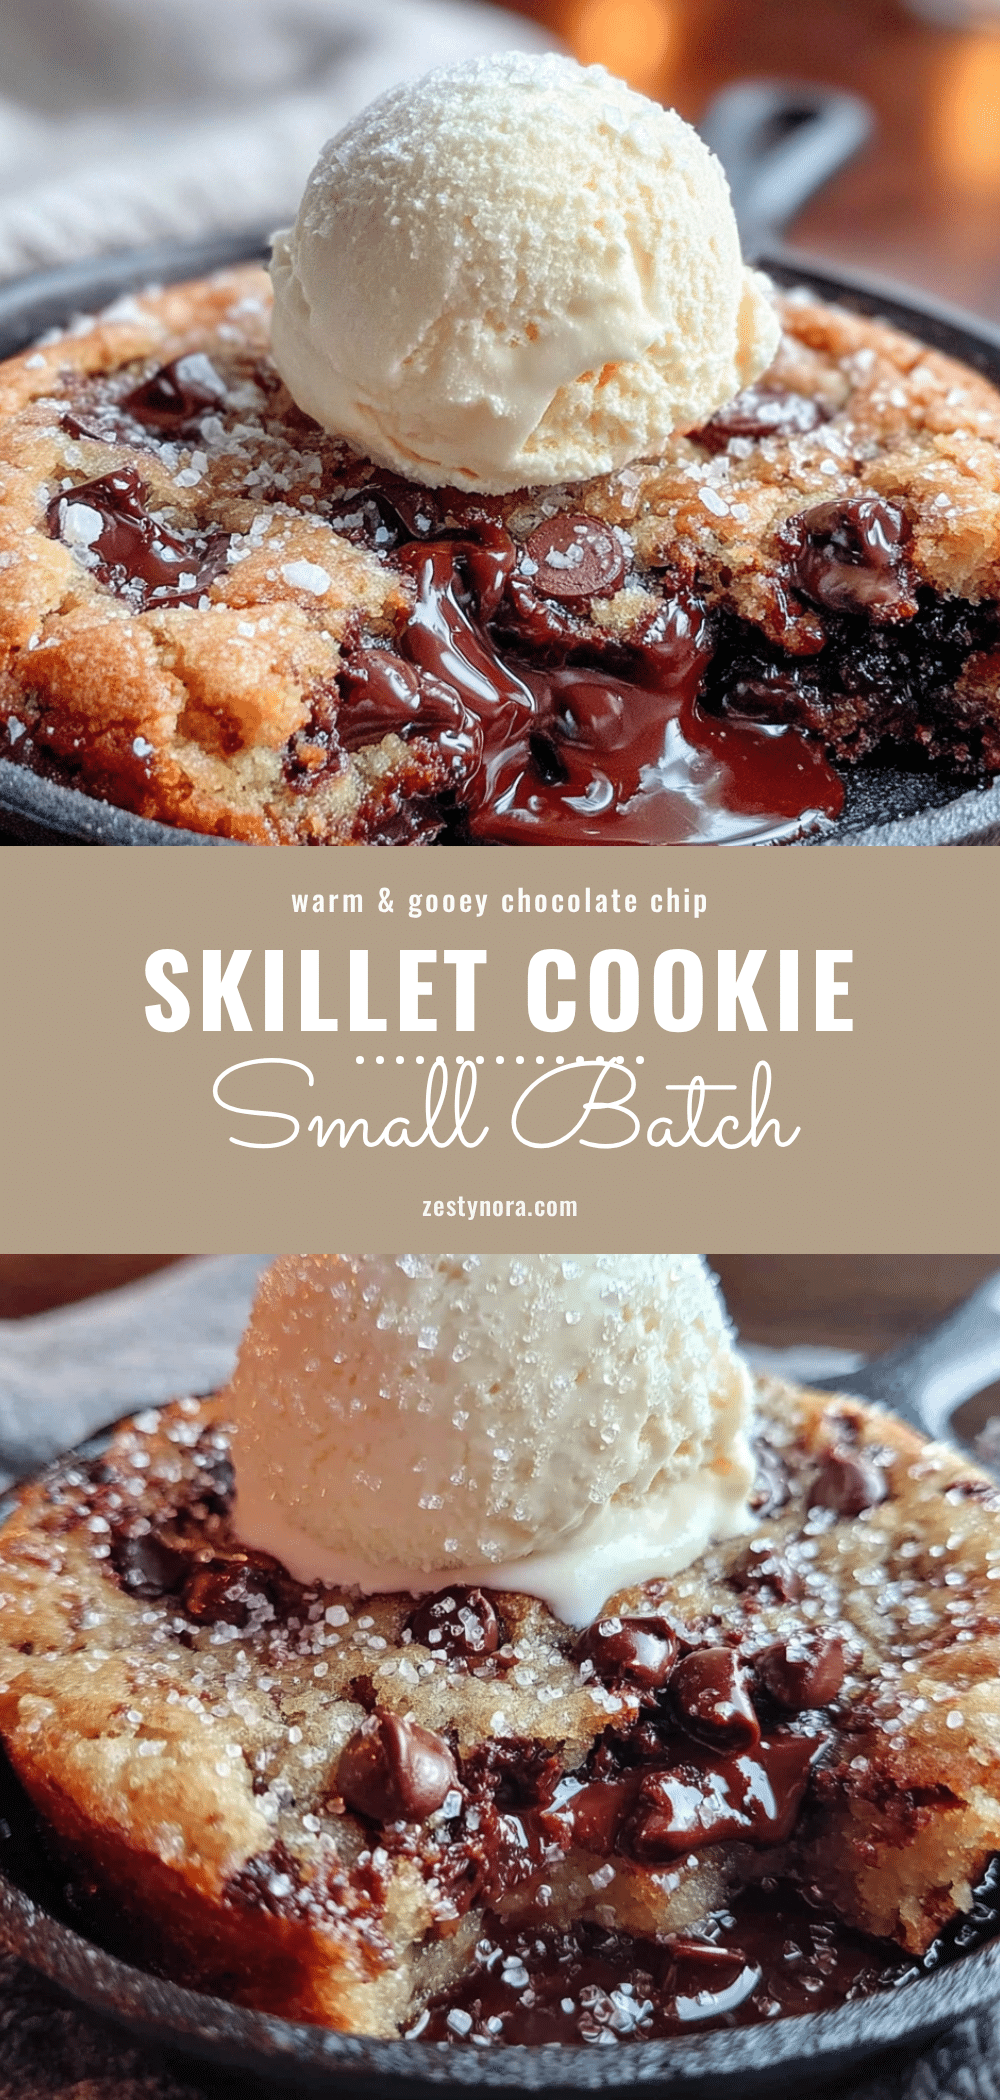
Pin This Recipe!
Best Small-Batch Gooey Chocolate Chip Skillet Cookie
This small-batch chocolate chip skillet cookie is crispy around the edges, soft and almost fudgy in the middle, and just enough for two people (or one person with very little self-control). It’s simple enough for a Tuesday night but impressive enough to serve after a nice dinner.
- Prep Time: 10 minutes
- Cook Time: 13 minutes
- Total Time: 23 minutes
- Yield: 2 servings 1x
- Category: Dessert
- Cuisine: American
Ingredients
- 3 tablespoons (42g) unsalted butter, melted and slightly cooled
- ¼ cup (50g) light brown sugar, packed
- 2 tablespoons (25g) granulated sugar
- 1 large egg yolk, room temperature
- ½ teaspoon vanilla extract
- ⅓ cup (42g) all-purpose flour, spooned and leveled
- ¼ teaspoon baking soda
- ¼ teaspoon salt
- ⅓ cup (60g) semi-sweet chocolate chips
- Pinch of flaky sea salt (for topping, optional)
- Vanilla ice cream (for serving, optional)
Instructions
- Preheat your oven to 350°F (175°C). Place your skillet in the oven while it preheats.
- Melt the butter in a microwave-safe bowl or small saucepan. Let it cool for about 2 minutes.
- In a mixing bowl, combine the melted butter, brown sugar, and granulated sugar. Whisk until well combined and smooth, about 30 seconds.
- Add the egg yolk and vanilla extract. Whisk vigorously until the mixture is smooth, creamy, and slightly lighter in color.
- Sprinkle the flour, baking soda, and salt over the wet mixture. Fold gently with a spatula until just combined—do not overmix.
- Fold in the chocolate chips. Reserve about a tablespoon to press into the top of the dough later.
- Carefully remove the hot skillet from the oven. Drop the dough into the center and press it into an even layer, leaving about ¼ inch of space from the edges. Press reserved chocolate chips into the top.
- Bake for 12-15 minutes. At 12 minutes, the edges should be golden and set, and the center should look slightly puffed and jiggly. For a gooey center, pull at 13 minutes.
- Cool the skillet on a heat-safe surface for 5 minutes before adding toppings.
- Sprinkle with flaky sea salt and add a scoop of vanilla ice cream if desired. Serve straight from the skillet.
Notes
Preheating the skillet helps create a crispy bottom while keeping the center soft. Measure flour correctly by spooning it into the cup and leveling it off. Let the butter cool before adding the egg to avoid scrambling. Bake for the shorter time first and check for doneness. Let the cookie rest for 5 minutes before serving to allow the texture to set.
Nutrition
- Serving Size: ½ cookie
- Calories: 420
- Sugar: 38
- Sodium: 310
- Fat: 22
- Saturated Fat: 13
- Carbohydrates: 54
- Fiber: 2
- Protein: 5
Keywords: small-batch skillet cookie, chocolate chip skillet cookie, gooey cookie, cast iron cookie, easy dessert, quick dessert, date night dessert


