Rummaging through a cluttered drawer of forgotten cookie cutters and icing tips while the clock ticks down to a Halloween party, I realized I was missing one crucial thing: a festive, fun cookie that didn’t look like the usual black-and-orange spook-fest. Half a bag of powdered sugar left, pastel food coloring smeared on my fingers, and not a second to spare — that’s when these pastel Halloween witch hat sugar cookies with royal icing came to life. Honestly, they’re the kind of treat that sneaks up on you, turning a rushed afternoon into something delightfully whimsical. The soft pastel colors cut through the usual Halloween darkness, making them feel fresh and unexpectedly joyful.
The scent of vanilla and almond extract filled the kitchen as I rolled out the dough, the icing slowly hardening into delicate, glossy hats. It was chaotic, yes, but in that chaos, I found a recipe that stuck—not just because of the taste, but because of how it brought a subtle sweetness and charm that even the pickiest kids at the party couldn’t resist. These cookies aren’t just cute; they’re a little magic in pastel form, perfect for anyone who wants to celebrate the season with a twist. And that quiet moment when the last cookie disappeared? That’s when I knew this recipe was a keeper.
Why You’ll Love This Recipe
This recipe has been through the wringer of frantic Halloween prep and still comes out shining. Here’s why it’s a go-to for me every October:
- Quick & Easy: Comes together in under 45 minutes from start to finish — perfect for last-minute baking sprints.
- Simple Ingredients: No need for specialty stores; you probably have most of these goodies in your pantry already.
- Perfect for Halloween Parties: These pastel witch hat sugar cookies add a playful, lighthearted touch to your spooky spread.
- Crowd-Pleaser: Kids love the soft, sweet texture and the fun shapes, while adults appreciate the delicate almond undertone.
- Unbelievably Delicious: The royal icing sets perfectly smooth and crisp, contrasting with the tender cookie base for a satisfying bite.
What really sets this apart is the royal icing tutorial included here — it’s not your standard gloppy mess but a smooth, pipeable dream that dries to a clean finish. The pastel palette softens the Halloween vibe, making these cookies as charming as any brown butter peach cobbler or smoky paprika chicken thighs are comforting in their own right. These witch hats feel special without fuss — the kind of recipe that turns baking stress into something genuinely fun.
What Ingredients You Will Need
This recipe uses simple, wholesome ingredients to deliver bold flavor and satisfying texture without the fuss. Most are pantry staples, and you can easily swap a few if needed.
- For the Sugar Cookie Dough:
- All-purpose flour, 2 ¾ cups (345g) — the base for the perfect sturdy yet tender cookie
- Baking powder, 1 teaspoon — helps the cookies rise just enough
- Salt, ½ teaspoon — balances sweetness
- Unsalted butter, 1 cup (226g), softened — I prefer Land O’Lakes for consistent creaminess
- Granulated sugar, 1 ½ cups (300g) — for that classic sweet crunch
- Large egg, 1, room temperature — binds the dough
- Pure vanilla extract, 2 teaspoons — essential for warm flavor
- Almond extract, ½ teaspoon — adds a subtle nutty hint that makes these cookies memorable
- For the Royal Icing:
- Powdered sugar, 4 cups (480g), sifted — the smooth sweetness
- Pasteurized egg whites, 3 tablespoons (or meringue powder equivalent) — for structure
- Fresh lemon juice, 1 tablespoon — balances sweetness and helps set the icing
- Water, 2-3 tablespoons — to adjust consistency
- Gel food coloring in pastel shades (lavender, mint green, pale pink, soft yellow) — these give the cookies their unique look
- Optional Decoration:
- Edible silver stars or pearls — adds a magical sparkle
- Fine sanding sugar in pastel hues — for texture and shine
If you want to make these gluten-free, swapping in almond flour or a gluten-free baking blend works well, though the texture will be a little different. For a dairy-free option, use vegan butter substitutes and check your icing ingredients accordingly.
Equipment Needed
- Mixing bowls — a medium and a large one
- Electric mixer or stand mixer (a handheld mixer works fine too) — makes creaming the butter and sugar a breeze
- Rolling pin — essential for even dough thickness
- Witch hat-shaped cookie cutter or a combination of triangle and circle cutters — I found a set on Amazon that’s super affordable
- Baking sheets lined with parchment paper or silicone mats — prevents sticking
- Cooling racks — to let cookies cool completely before icing
- Piping bags with small round tips (#2 or #3) — for neat royal icing details
- Small bowls or cups — to mix and separate icing colors
Don’t have a witch hat cutter? No worries. You can cut triangles and circles separately and assemble them with a dab of icing after baking. For budget-friendly icing bags, zip-top plastic bags with a tiny corner snipped off do just fine. Cleaning royal icing tips can be tedious; soaking them right after use saves a lot of headaches.
Preparation Method
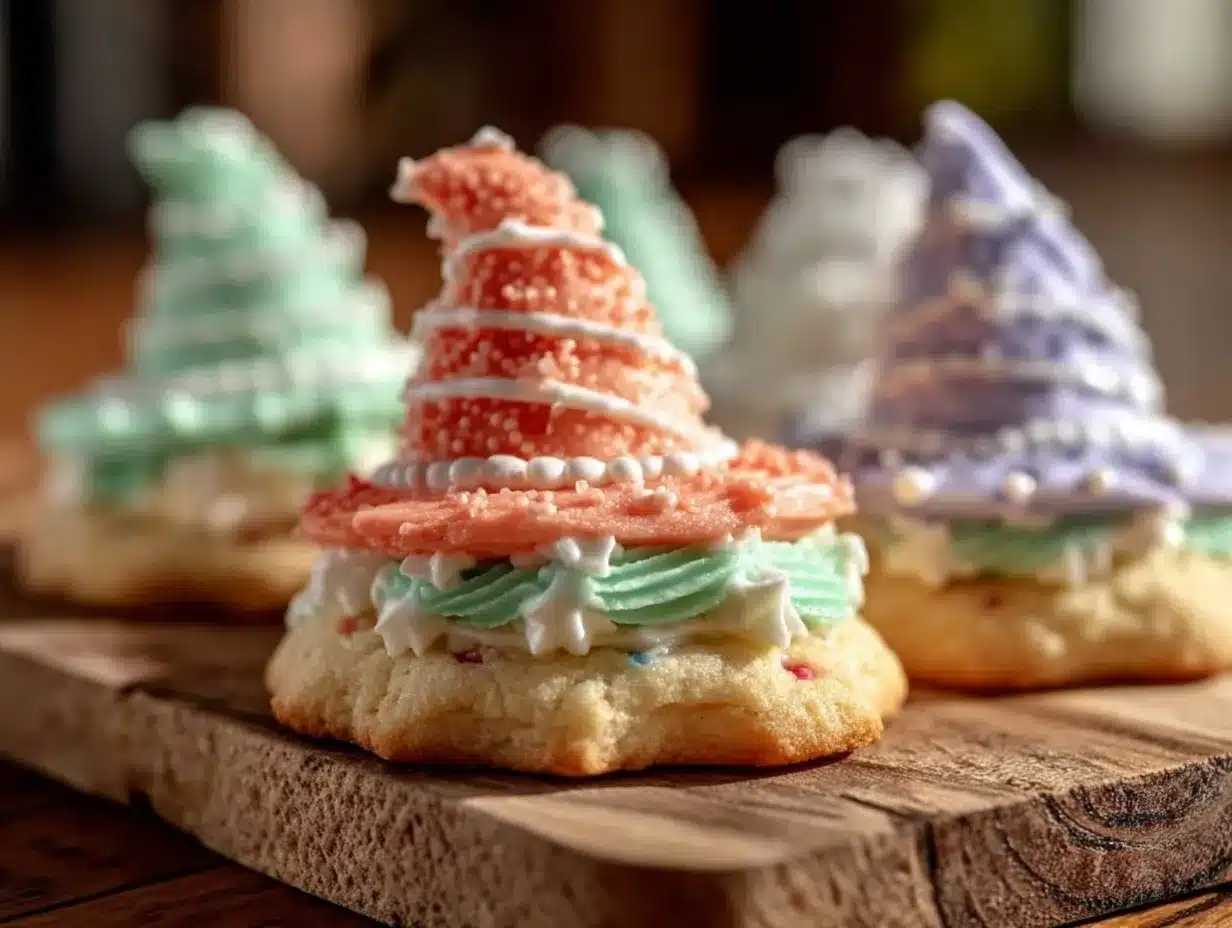
- Mix Dry Ingredients: In a medium bowl, whisk together 2 ¾ cups (345g) all-purpose flour, 1 teaspoon baking powder, and ½ teaspoon salt. Set aside. This keeps your leavening even and prevents lumps.
- Cream Butter and Sugar: Using a mixer, beat 1 cup (226g) softened unsalted butter with 1 ½ cups (300g) granulated sugar on medium speed for about 3 minutes until light and fluffy. This aeration is key for tender cookies.
- Add Egg and Extracts: Beat in 1 large room-temperature egg, then 2 teaspoons pure vanilla and ½ teaspoon almond extract. The mixture might look a bit curdled—that’s normal.
- Combine Wet and Dry: Gradually add the flour mixture to the wet ingredients, mixing on low speed just until combined. Avoid overmixing or the cookies get tough.
- Chill the Dough: Shape dough into a disk, wrap in plastic, and refrigerate for at least 1 hour (or up to overnight). This helps prevent spreading and makes rolling easier.
- Preheat Oven: Set to 350°F (175°C) and line baking sheets with parchment paper.
- Roll and Cut: On a lightly floured surface, roll dough to about ¼ inch (6 mm) thickness. Cut out witch hats using your cutter (or triangles and circles separately). Transfer carefully to baking sheets.
- Bake: Bake for 8–10 minutes until edges just start to turn golden but centers remain pale. Overbaking dries them out.
- Cool: Let cookies cool on sheets 5 minutes before transferring to wire racks to cool completely—no icing on warm cookies or it melts!
- Prepare Royal Icing: In a clean bowl, beat 4 cups (480g) sifted powdered sugar with 3 tablespoons pasteurized egg whites and 1 tablespoon lemon juice. Add 2–3 tablespoons water gradually until icing reaches piping consistency (thick but flowy). Separate into small bowls and tint with pastel gel colors.
- Decorate: Transfer icing to piping bags fitted with small round tips. Pipe hat brims and cones, layering colors and letting them dry between sections if you want neat edges. Add edible stars or sanding sugar while icing is wet for sparkle.
- Dry Completely: Allow decorated cookies to dry at room temperature for at least 4 hours or overnight. Store in an airtight container once dry.
Pro tip: If your icing gets too thick while decorating, add a few drops of water to loosen it. If it’s too runny, add a pinch more powdered sugar. This balance is the secret to smooth, crisp royal icing.
Cooking Tips & Techniques
Working with royal icing can feel intimidating, but a few tricks make it manageable (and even fun). First, always sift your powdered sugar—lumps are the enemy! Mixing the icing at medium speed helps incorporate air but don’t overdo it or you risk bubbles.
When coloring the icing, gel colors are better than liquid—they won’t thin out your icing. Start with a tiny bit and build up to pastel shades; it’s easier to add than subtract.
While piping, keep your hand steady and use gentle pressure for even lines. If you’re nervous, practice on parchment before moving to cookies. Drying is crucial—don’t rush by stacking or bagging them too early or the icing will smudge.
Common mistake? Not chilling the dough enough. I learned that the hard way when my cookies spread into odd shapes. Also, resist the urge to roll dough too thin—¼ inch is just right to hold shape while staying tender.
Multitasking helps: while cookies bake, mix your icing and prep colors. This avoids downtime and keeps the process smooth. And if you want to speed up drying, a fan helps, but don’t blast them or the icing cracks.
Variations & Adaptations
These pastel witch hat sugar cookies are as flexible as your imagination. Here are some ways to make them your own:
- Flavor Variations: Swap almond extract for peppermint or orange zest to give a seasonal twist. I once tried lavender extract for a soft floral note that surprised everyone.
- Color Themes: Instead of pastels, try shimmering metallic food dust or classic Halloween black and orange royal icing for a more traditional vibe.
- Dietary Adaptations: Use gluten-free flour blends for a celiac-friendly batch, and replace egg whites in the icing with aquafaba for vegan-friendly royal icing. The texture changes a bit but still tastes great.
- Cooking Methods: If you don’t want to roll and cut, try scooping dough into small disks and shaping hats by hand, then piping icing for details.
One personal favorite variation was adding tiny edible flowers on the hat brims for a spring witch theme—not Halloween, but whimsical and fun. You could also try incorporating fresh grilled peaches alongside for a light, seasonal snack platter.
Serving & Storage Suggestions
Serve these pastel witch hat sugar cookies at room temperature to fully enjoy the crisp royal icing and tender cookie base. They make delightful party favors or a charming addition to a Halloween dessert table.
Pair them with warm apple cider or a lightly spiced herbal tea to balance the sweetness. For a more grown-up twist, a sparkling elderflower lemonade complements the pastel hues beautifully.
Store cookies in an airtight container layered with parchment paper to keep them from sticking. They stay fresh for up to a week at room temperature; for longer storage, freeze un-iced cookies in zip-top bags and decorate after thawing.
When reheating, avoid microwaves — they soften the icing too much. Instead, bring to room temperature naturally. Over time, flavors meld and the almond notes become more prominent, making leftovers even better the next day.
Nutritional Information & Benefits
Each pastel Halloween witch hat sugar cookie (about 2.5 inches wide) contains roughly 120 calories, 5g fat, 18g carbohydrates, and 1g protein. While a treat, the recipe uses real butter and almond extract, adding natural richness without artificial flavors.
Almond extract, besides flavor, contains trace antioxidants, and the egg whites in the royal icing provide a bit of protein. Of course, this is a sweet treat best enjoyed in moderation, but it’s free from artificial dyes when you choose natural gel colors.
For those mindful of allergens, this recipe contains gluten, dairy, and eggs, but can be adapted easily as noted. Compared to store-bought Halloween cookies loaded with preservatives, these homemade versions feel cleaner and more satisfying.
Conclusion
These pastel Halloween witch hat sugar cookies with royal icing have become a staple for me when October rolls around. They’re the perfect blend of whimsical design and homey flavor, combining the nostalgia of sugar cookies with a fresh, fun aesthetic. What I love most is how they bring joy in the middle of chaos—whether you’re a busy parent or last-minute baker, these cookies feel doable and special.
Feel free to tweak the colors, flavors, or shapes to fit your style. Baking is all about making things yours, after all! If you want to try a different cozy recipe for the season, my slow cooker Moroccan chickpea stew is a warm, comforting counterpoint to sweet treats like these.
Drop me a comment if you try the recipe or have your own pastel Halloween twist to share — I love hearing how these cookies come to life in your kitchens. Now, grab that rolling pin and get baking. Happy crafting!
FAQs about Perfect Pastel Halloween Witch Hat Sugar Cookies
Can I make these cookies ahead of time?
Absolutely! You can prepare the dough and refrigerate it up to 2 days before baking. Decorated cookies keep well for about a week stored in an airtight container at room temperature.
What if I don’t have a witch hat cookie cutter?
No problem! Use a triangle cutter for the hat and a small circle cutter for the brim, then assemble after baking with a little royal icing as “glue.”
How do I fix royal icing that’s too runny?
Add small amounts of sifted powdered sugar until it thickens to your desired consistency. Conversely, add a few drops of water if it’s too stiff.
Can I use store-bought royal icing instead?
You can, but homemade royal icing dries harder and tastes fresher. Store-bought versions sometimes stay tacky and lack that crisp finish.
Are these cookies suitable for kids with food allergies?
The base recipe contains gluten, dairy, and eggs. However, you can substitute gluten-free flour, dairy-free butter, and aquafaba for egg whites in the icing to accommodate many allergies.
Pin This Recipe!
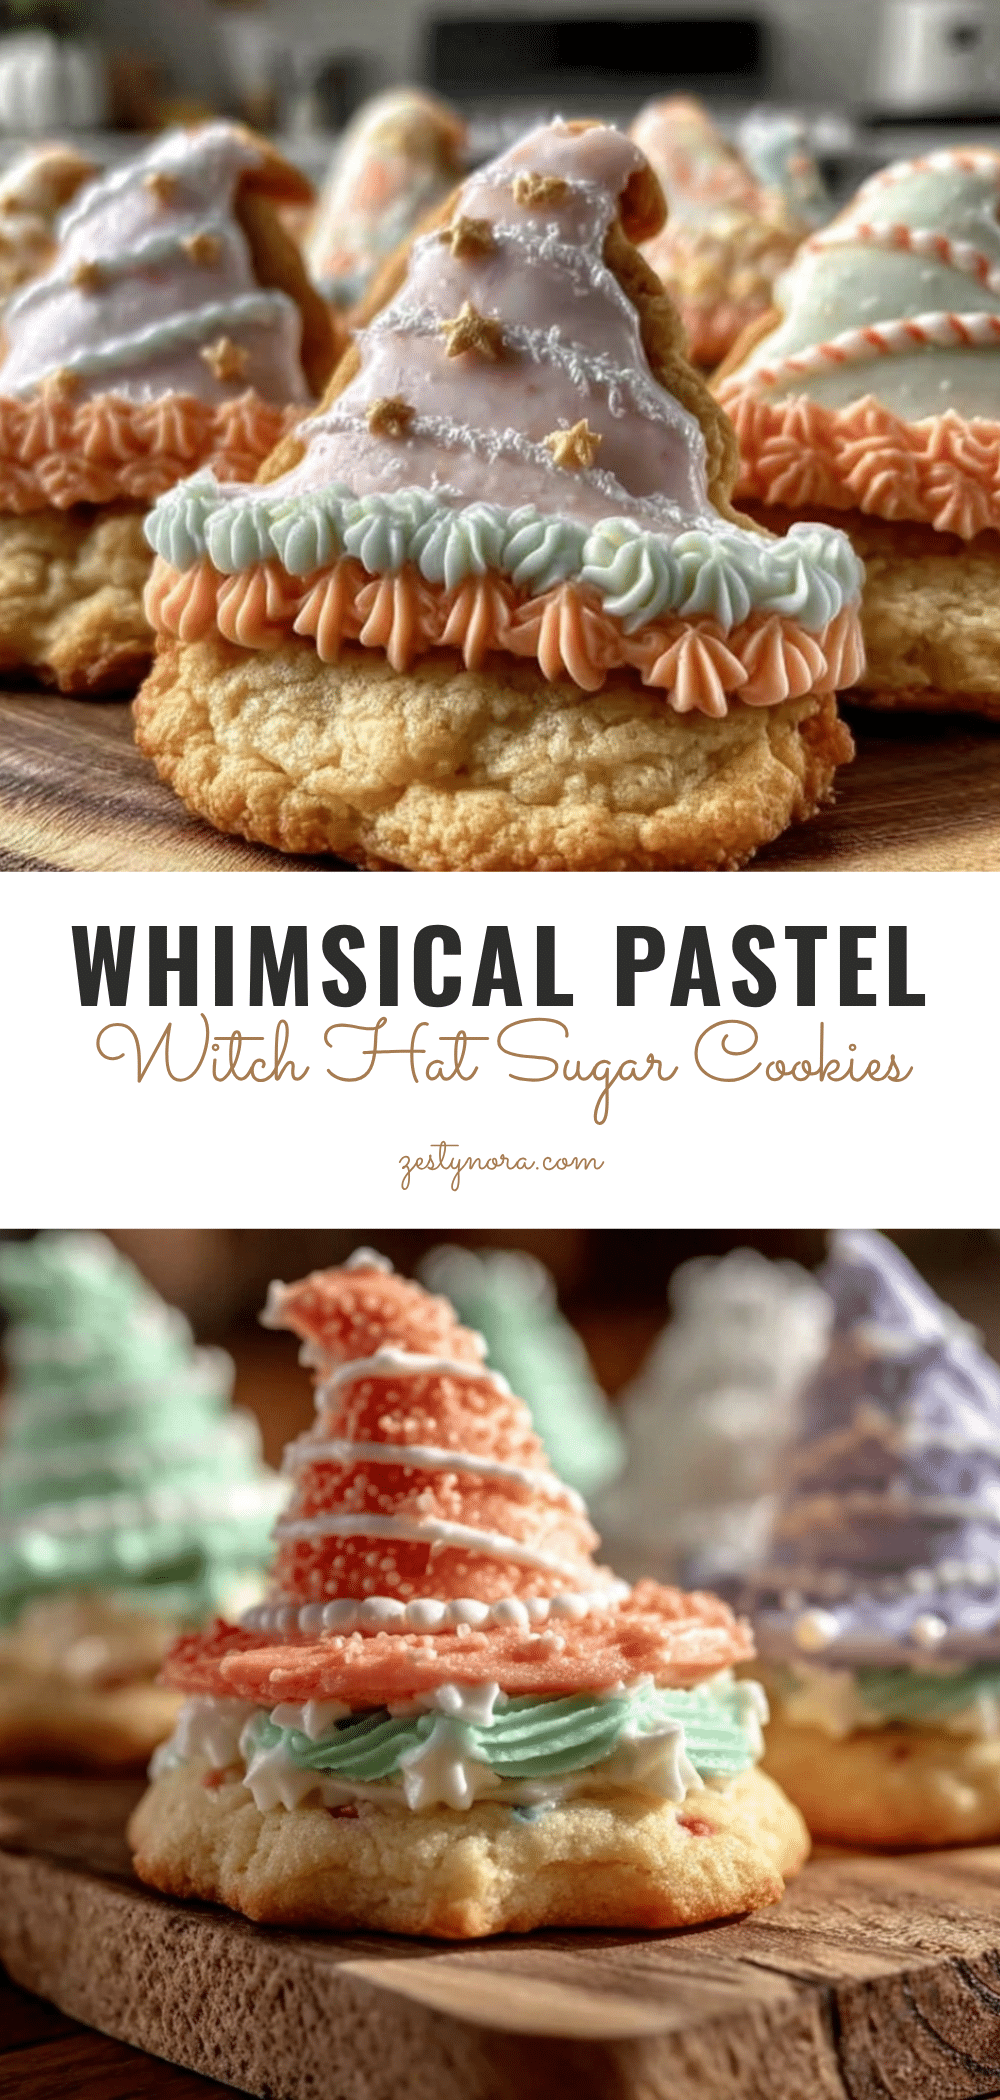
Perfect Pastel Halloween Witch Hat Sugar Cookies

These pastel Halloween witch hat sugar cookies feature a tender sugar cookie base topped with smooth, crisp royal icing in soft pastel colors, perfect for a whimsical and festive treat.
- Prep Time: 20 minutes
- Cook Time: 10 minutes
- Total Time: 1 hour 30 minutes
- Yield: 24 cookies 1x
- Category: Dessert
- Cuisine: American
Ingredients
- 2 ¾ cups (345g) all-purpose flour
- 1 teaspoon baking powder
- ½ teaspoon salt
- 1 cup (226g) unsalted butter, softened
- 1 ½ cups (300g) granulated sugar
- 1 large egg, room temperature
- 2 teaspoons pure vanilla extract
- ½ teaspoon almond extract
- 4 cups (480g) powdered sugar, sifted
- 3 tablespoons pasteurized egg whites (or meringue powder equivalent)
- 1 tablespoon fresh lemon juice
- 2–3 tablespoons water
- Gel food coloring in pastel shades (lavender, mint green, pale pink, soft yellow)
- Optional decorations: edible silver stars or pearls, fine sanding sugar in pastel hues
Instructions
- In a medium bowl, whisk together flour, baking powder, and salt. Set aside.
- Using a mixer, beat softened butter with granulated sugar on medium speed for about 3 minutes until light and fluffy.
- Beat in the egg, vanilla extract, and almond extract until combined.
- Gradually add the flour mixture to the wet ingredients, mixing on low speed just until combined. Avoid overmixing.
- Shape dough into a disk, wrap in plastic, and refrigerate for at least 1 hour or up to overnight.
- Preheat oven to 350°F (175°C) and line baking sheets with parchment paper.
- Roll dough on a lightly floured surface to about ¼ inch (6 mm) thickness. Cut out witch hats using a witch hat cookie cutter or assemble triangles and circles separately.
- Transfer cookies to baking sheets and bake for 8–10 minutes until edges start to turn golden but centers remain pale.
- Let cookies cool on baking sheets for 5 minutes, then transfer to wire racks to cool completely.
- Prepare royal icing by beating powdered sugar with egg whites and lemon juice. Add water gradually until icing reaches piping consistency.
- Divide icing into small bowls and tint with pastel gel colors.
- Transfer icing to piping bags fitted with small round tips and decorate cookies with hat brims and cones, layering colors and adding edible decorations while icing is wet.
- Allow decorated cookies to dry at room temperature for at least 4 hours or overnight before storing.
Notes
If icing becomes too thick while decorating, add a few drops of water to loosen it. If too runny, add more powdered sugar. Chill dough well to prevent spreading. Use gel food coloring for best pastel shades. Store cookies in an airtight container layered with parchment paper. For gluten-free, substitute almond flour or gluten-free baking blend; for dairy-free, use vegan butter and aquafaba for egg whites in icing.
Nutrition
- Serving Size: 1 cookie (about 2.5
- Calories: 120
- Fat: 5
- Carbohydrates: 18
- Protein: 1
Keywords: Halloween cookies, sugar cookies, royal icing, witch hat cookies, pastel cookies, Halloween dessert, easy sugar cookies


