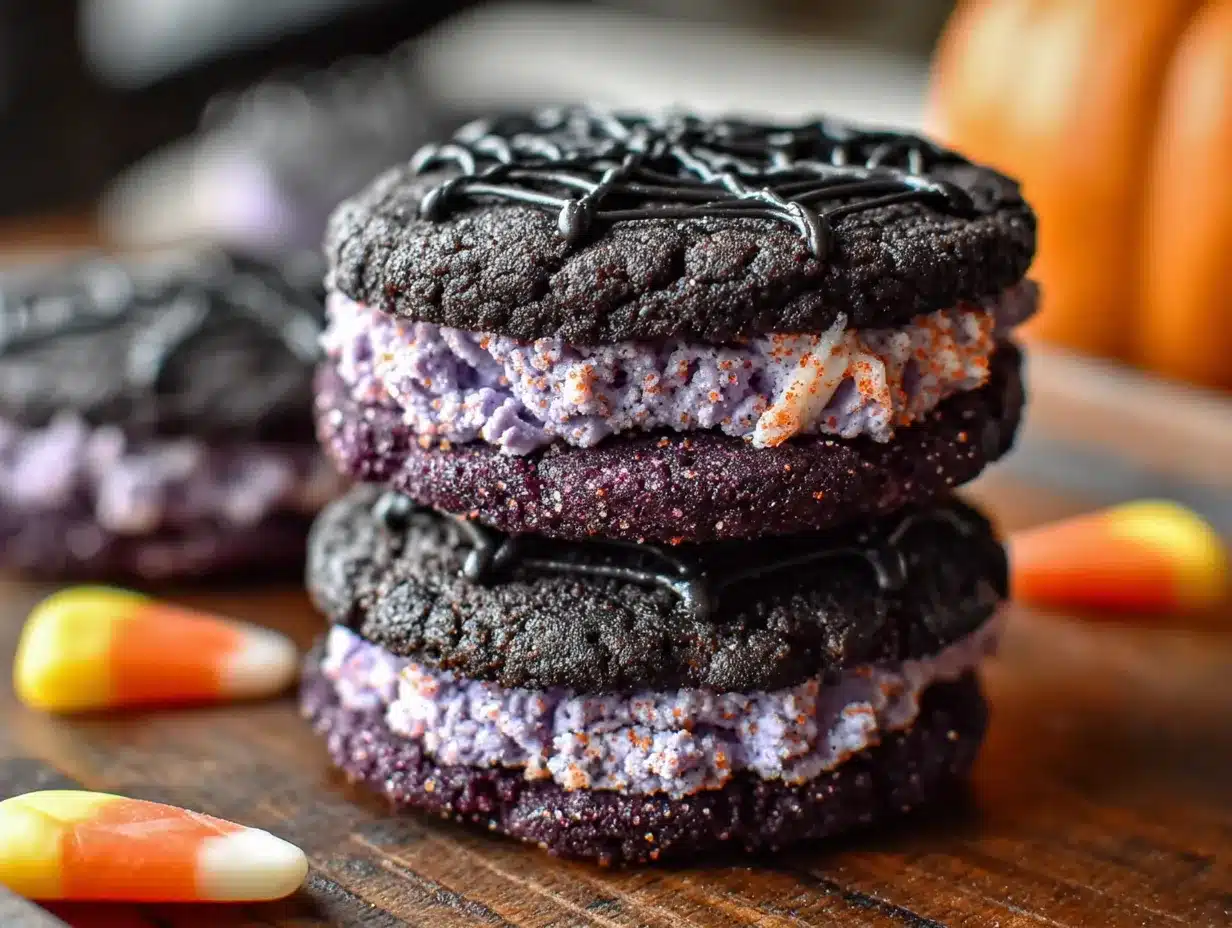
Third batch in three days, and I finally stopped overmixing. The first tray came out flat and sad—still tasty, but not the show-stopping purple ombre I had in my head. The second batch? Better color, but the edges spread too much, losing that sharp cookie cutter definition. By Friday night, with purple gel staining my fingernails and powdered sugar dusting every surface of my kitchen, I finally pulled out a tray of these Perfect Purple Ombre Halloween Sugar Cookies that actually looked like the vision.
It’s funny how a simple idea—gradating purple icing from deep violet to soft lavender—can turn into a full-blown kitchen project. But that’s the thing about Halloween baking. It demands a little extra effort, and honestly, that’s what makes it fun. These aren’t just sugar cookies; they’re conversation starters at parties, the ones people photograph before they eat. The cookie itself is a classic vanilla sugar base, sturdy enough to hold the royal icing without crumbling, but tender enough that you won’t break a tooth on the first bite.
I’ve tested this recipe six times now, tweaking the icing consistency and the baking time until everything clicked. The purple ombre effect works best when you use a gel food coloring and thin your royal icing to that perfect 15-second flood consistency. It’s a little technique-heavy, sure, but I promise—once you see that gradient come together, you’ll understand why I couldn’t stop baking.
Why You’ll Love This Recipe
These cookies are the kind of project that looks like you spent hours (and okay, you will spend some time on the icing), but the payoff is massive. Here’s why they’ve become my go-to Halloween treat:
- Stunning Visual Impact: The purple ombre gradient is pure magic. It catches the light, photographs beautifully, and makes people say “wait, you made these?” every single time.
- Perfectly Sturdy Base: This sugar cookie recipe doesn’t spread. The edges stay sharp, which means your shapes—whether bats, ghosts, or simple circles—come out exactly as cut.
- Kid-Friendly Fun: Get the kids involved with the icing stage. They can help with the lighter layers while you handle the deep purple base coat.
- Make-Ahead Friendly: The dough freezes beautifully, and the baked cookies stay fresh for days. You can prep everything in stages without stress.
- Customizable Color Palette: Purple ombre is my favorite for Halloween, but you could do orange-to-yellow, green-to-teal, or even a spooky black-to-gray gradient.
I’ve been baking sugar cookies for years, and this recipe nails the texture balance—crisp on the outside, slightly soft in the center, with just enough vanilla flavor to complement the sweet royal icing. It’s the kind of cookie that makes you close your eyes after the first bite, even if you’re the one who baked them.
What Ingredients You Will Need
This recipe uses simple, mostly pantry-staple ingredients to deliver that perfect sugar cookie texture and a vibrant, professional-looking ombre icing. The quality of your vanilla and food coloring will make the biggest difference here, so don’t skimp on those.
For the Sugar Cookies
- Unsalted butter, 1 cup (226g), softened – Use good-quality butter here. I prefer Kerrygold for its richness, but any European-style butter works. Make sure it’s truly softened to room temperature, not melted.
- Granulated sugar, 1 cup (200g) – Standard white sugar. No need for superfine or caster sugar.
- Large egg, 1, room temperature – Cold egg can seize the butter mixture. Leave it on the counter for 30 minutes before starting.
- Vanilla extract, 1½ teaspoons – Pure vanilla, not imitation. It makes a real difference in the final flavor. I use Nielsen-Massey.
- All-purpose flour, 2½ cups (312g) – Spoon and level your flour. Scooping directly from the bag packs it down and leads to dry cookies.
- Baking powder, ½ teaspoon – Gives just a tiny lift without making the cookies puff up.
- Salt, ¼ teaspoon – Fine sea salt. Balances the sweetness.
For the Royal Icing
- Powdered sugar, 3 cups (340g) – Sift it first to avoid lumps. Trust me on this one.
- Meringue powder, 2 tablespoons – Stabilizes the icing and gives it that smooth, glossy finish. Wilton brand is my go-to.
- Warm water, 4-5 tablespoons – Start with 4, then add more drop by drop until you reach the right consistency.
- Purple gel food coloring – Americolor Deep Purple and Violet gels are perfect. Liquid food coloring will thin your icing too much.
- Vanilla extract, ½ teaspoon – For flavor, optional but recommended.
Ingredient Tips & Substitutions
If you’re dairy-free, swap the butter with a high-quality vegan butter stick (not the spreadable kind in a tub). The texture will be slightly different, but still solid. For a gluten-free version, use a 1:1 gluten-free baking flour blend that contains xanthan gum. I’ve tested this with Bob’s Red Mill 1:1, and it worked beautifully. The royal icing is naturally gluten-free as long as your meringue powder is certified gluten-free.
Equipment Needed
You don’t need a professional bakery setup to nail these cookies, but a few key tools make the job infinitely easier.
- Stand mixer or hand mixer – Either works. The dough comes together quickly, so a hand mixer is fine if that’s what you have.
- Rolling pin with thickness rings – This is non-negotiable for even cookies. I use a wooden pin with removable rings set to ¼ inch.
- Halloween cookie cutters – Bat, ghost, pumpkin, or simple round shapes all work. Wilton has great affordable sets.
- Parchment paper or silicone baking mats – Prevents sticking and promotes even baking. Silpat mats are my favorite.
- Piping bags and small round tips – Wilton tip #2 or #3 for outlining and flooding. You can also use squeeze bottles for the flood icing.
- Toothpicks or scribe tool – For popping air bubbles and spreading icing into corners.
- Cooling rack – Cookies need to cool completely before icing. No shortcuts here.
- Small bowls and spoons – For mixing your ombre colors. You’ll need at least four separate containers.
I bought a cheap set of piping tips from Amazon years ago, and they’ve held up fine. You don’t need to spend a fortune—just make sure your bags don’t leak at the seams. That’s a messy lesson I learned the hard way.
Preparation Method
Step 1: Make the Dough
In a stand mixer fitted with the paddle attachment, cream the softened butter and granulated sugar together on medium speed until light and fluffy, about 2-3 minutes. Scrape down the sides of the bowl. Add the egg and vanilla extract, then beat on medium until fully combined, about 1 minute. Don’t overmix at this stage—you just want everything incorporated.
In a separate bowl, whisk together the flour, baking powder, and salt. With the mixer on low speed, gradually add the dry ingredients to the wet mixture. Mix until just combined and no streaks of flour remain. The dough should be soft but not sticky. If it feels too wet, add a tablespoon more flour. If it’s crumbly, add a teaspoon of cold water.
Step 2: Chill the Dough
Divide the dough into two discs, wrap each tightly in plastic wrap, and refrigerate for at least 1 hour. Chilling is crucial—it prevents the cookies from spreading during baking and makes the dough easier to roll. You can chill it overnight if you’re planning ahead. I’ve left it for up to 48 hours with no issues.
Step 3: Roll and Cut
Preheat your oven to 350°F (175°C). Line two baking sheets with parchment paper or silicone mats. Lightly flour your work surface and rolling pin. Roll one disc of dough to ¼-inch thickness. Use your cookie cutters to press out shapes, dipping the cutters in flour between cuts to prevent sticking. Transfer the shapes to the prepared baking sheets, spacing them about 1½ inches apart.
Re-roll the scraps and cut more cookies. You’ll get about 24-30 cookies depending on the size of your cutters.
Step 4: Bake
Bake for 8-10 minutes, rotating the pans halfway through. The cookies are done when the edges are just barely golden—the centers should look pale and set, not brown. Let them cool on the baking sheets for 5 minutes, then transfer to a wire rack to cool completely. Do not attempt to ice warm cookies. The icing will slide right off, and you’ll be frustrated. I know this from personal experience.
Step 5: Prepare the Royal Icing
In a stand mixer bowl, combine the sifted powdered sugar and meringue powder. Add 4 tablespoons of warm water and the vanilla extract. Beat on low speed until combined, then increase to medium-high and beat for 4-5 minutes until the icing is thick, glossy, and forms stiff peaks. Add the remaining tablespoon of water if needed, one teaspoon at a time, until the icing reaches a consistency that slowly settles back into itself when you lift the beater—this is your 15-second flood consistency.
Step 6: Create the Ombre Colors
Divide the icing into four separate bowls. Leave one bowl white. Add a tiny amount of purple gel to the second bowl for a very pale lavender. Add more to the third bowl for a medium purple. Add a generous amount to the fourth bowl for a deep, dramatic violet. Stir each until the color is uniform. Transfer each color to its own piping bag fitted with a small round tip, or use squeeze bottles if you prefer.
Step 7: Decorate the Cookies
Start with the darkest purple icing. Outline each cookie, then flood the center, using a toothpick to spread the icing into the edges and pop any air bubbles. Immediately, while the dark icing is still wet, pipe a ring of the medium purple inside the dark border. Use a toothpick to gently pull the medium color into the dark, creating a blended gradient. Repeat with the light lavender and white, working inward. The key is speed—if the icing starts to set, the ombre effect won’t blend smoothly.
Let the cookies dry at room temperature for at least 4 hours, or overnight for best results. The icing should be completely hard to the touch before stacking or storing.
Cooking Tips & Techniques
I’ve made every mistake in the book with these cookies, so let me save you some trouble. First, the biggest issue people face is icing that’s too thick or too thin. The 15-second rule is your best friend: drag a spoon through the icing, and count how long it takes for the surface to smooth over. If it takes longer than 20 seconds, add a drop of water. If it smooths over in under 10 seconds, add more powdered sugar.
Second, don’t skip the meringue powder. It’s what gives royal icing that crisp, crack-free finish. Without it, your icing will be sticky and soft, and the ombre layers will bleed into each other instead of blending gracefully.
Third, work in batches. I only ice 3-4 cookies at a time before moving on to the next color layer. If you try to do a whole tray at once, the first cookies will already be setting by the time you get to the last ones. Keep your piping bags covered with a damp paper towel to prevent the icing from drying out.
Fourth, if you’re feeling nervous about the ombre technique, practice on a piece of parchment paper first. Pipe a small circle, flood it, then add your lighter colors and practice the toothpick swirl. It takes two minutes and saves you from ruining a whole batch of cookies.
Finally, store these cookies in an airtight container at room temperature, separated by layers of parchment paper. They’ll stay fresh for up to a week—if they last that long. The flavor actually improves after a day or two as the cookies soften slightly against the icing.
Variations & Adaptations
This recipe is surprisingly flexible. Here are some ways to make it your own:
- Spooky Color Palette: Swap purple for black, gray, and white for a dramatic gothic look. Americolor Super Black gel works perfectly.
- Gluten-Free Version: As mentioned, use a 1:1 gluten-free flour blend. Add ½ teaspoon of xanthan gum if your blend doesn’t already contain it. The dough will be slightly more fragile, so handle it gently.
- Citrus Twist: Add 1 teaspoon of lemon or orange zest to the dough for a bright, fresh flavor that cuts through the sweetness. It pairs beautifully with the vanilla.
- Spiced Halloween: Add ½ teaspoon of pumpkin pie spice or cinnamon to the dough. It gives the cookies a warm, autumnal flavor that’s perfect for October.
- No-Fail Glaze Alternative: If royal icing feels intimidating, use a simple powdered sugar glaze (powdered sugar + milk + vanilla) and tint it with purple gel. The ombre effect won’t be as sharp, but it’s much faster and still beautiful.
I once tried a chocolate version by swapping ¼ cup of flour with cocoa powder. The cookies were delicious, but the dark base made the purple icing look muddy. Stick with the vanilla base for the best color contrast.
Serving & Storage Suggestions
These cookies are best served at room temperature. Arrange them on a decorative platter or cake stand for Halloween parties, or package them in clear cellophane bags tied with purple ribbon for party favors. They make excellent edible gifts for neighbors, teachers, or coworkers.
For storage, place the fully dried cookies in an airtight container with layers of parchment or wax paper between each layer. Do not refrigerate—the humidity will soften the icing and make it tacky. Store at cool room temperature for up to 7 days. If you need to freeze them, freeze the undecorated baked cookies in a freezer-safe bag for up to 3 months. Thaw at room temperature, then ice as directed.
The flavor actually develops overnight. The cookies absorb a bit of moisture from the icing, becoming slightly softer and more tender. I always bake and ice a day ahead of any event for this reason. If you’re planning a Halloween party, these are perfect to make on a Friday night for a Saturday gathering. They also pair beautifully with a warm mug of apple cider donut loaf cake or a slice of pumpkin cream cheese swirl muffins for a full fall dessert spread.
Nutritional Information & Benefits
Per cookie (based on a 2-inch cutter, iced): approximately 120 calories, 5g fat, 18g carbohydrates, 1g protein, and 12g sugar. These are a treat, not a health food, and that’s perfectly fine. The butter provides a small amount of vitamin A, and the egg adds a touch of protein. The royal icing is mostly sugar, but it’s what gives the cookies that professional, glossy finish.
For dietary considerations: this recipe contains dairy, eggs, and gluten. For a dairy-free version, use vegan butter. For an egg-free version, substitute the egg in the dough with a flax egg (1 tablespoon ground flaxseed + 3 tablespoons water) and use a vegan royal icing recipe that replaces meringue powder with aquafaba. The texture will be slightly different, but the flavor will still be wonderful.
If you’re watching your sugar intake, these are definitely an occasional treat. But honestly, Halloween comes once a year. I say enjoy the cookie, savor the purple ombre, and don’t stress about the numbers.
Conclusion
These Perfect Purple Ombre Halloween Sugar Cookies are the kind of recipe that turns a simple baking session into a memorable experience. The process is meditative—mixing the dough, rolling it out, watching the colors blend into something beautiful. And the result? A tray of cookies that look like they belong in a bakery window, but taste like home.
I love that this recipe gives you room to play. Maybe you’ll stick with the purple ombre, or maybe you’ll try a green-to-black gradient for a witchy vibe. Maybe you’ll add sprinkles or edible glitter. The base is solid, and the technique is forgiving once you get the hang of it. Don’t be afraid to experiment—some of my best batches came from happy accidents.
If you make these cookies, I’d love to hear about it. Drop a comment below with your color combos, your biggest wins, and even your icing mishaps. Tag me in your photos on social media—I’m always scrolling for Halloween baking inspiration. And if you’re looking for more spooky treats to round out your party menu, don’t miss my crispy Halloween mummy hot dogs or these mini caramel apple tartlets for a savory-sweet balance. Happy baking, and may your ombre always be smooth.
Frequently Asked Questions
Can I use liquid food coloring instead of gel?
I wouldn’t recommend it. Liquid food coloring will thin your royal icing too much, making it runny and difficult to control. Gel food coloring gives you vibrant color without changing the consistency. It’s worth the small investment, and a set of gels will last you through many baking projects.
Why did my cookies spread in the oven?
This usually happens for one of two reasons: your dough wasn’t chilled long enough, or your butter was too soft when you creamed it. Make sure your butter is softened but still cool to the touch—not greasy or shiny. And never skip the 1-hour chill. If your kitchen is warm, chill the cut-out cookies on the baking sheet for 10 minutes before baking.
How do I get the ombre effect to look smooth?
Speed is everything. Work on one cookie at a time, and have all your colored icing bags ready before you start. Flood the base color, then immediately pipe the lighter colors and use a toothpick to blend them outward. If the icing starts to form a skin, it won’t blend. Work in small batches of 3-4 cookies at a time.
Can I freeze the decorated cookies?
I don’t recommend freezing them after they’re iced. The royal icing can crack or become sticky when thawed due to condensation. Instead, freeze the undecorated baked cookies, then thaw and ice them fresh. They’ll look and taste much better.
How far in advance can I make these cookies?
You can make the dough up to 3 days ahead and keep it refrigerated. Bake the cookies up to 2 days ahead, store them in an airtight container, and ice them the day before your event. The iced cookies need at least 4 hours to dry, so plan accordingly. I often bake on a Thursday, ice on Friday, and serve on Saturday for Halloween parties.
Pin This Recipe!
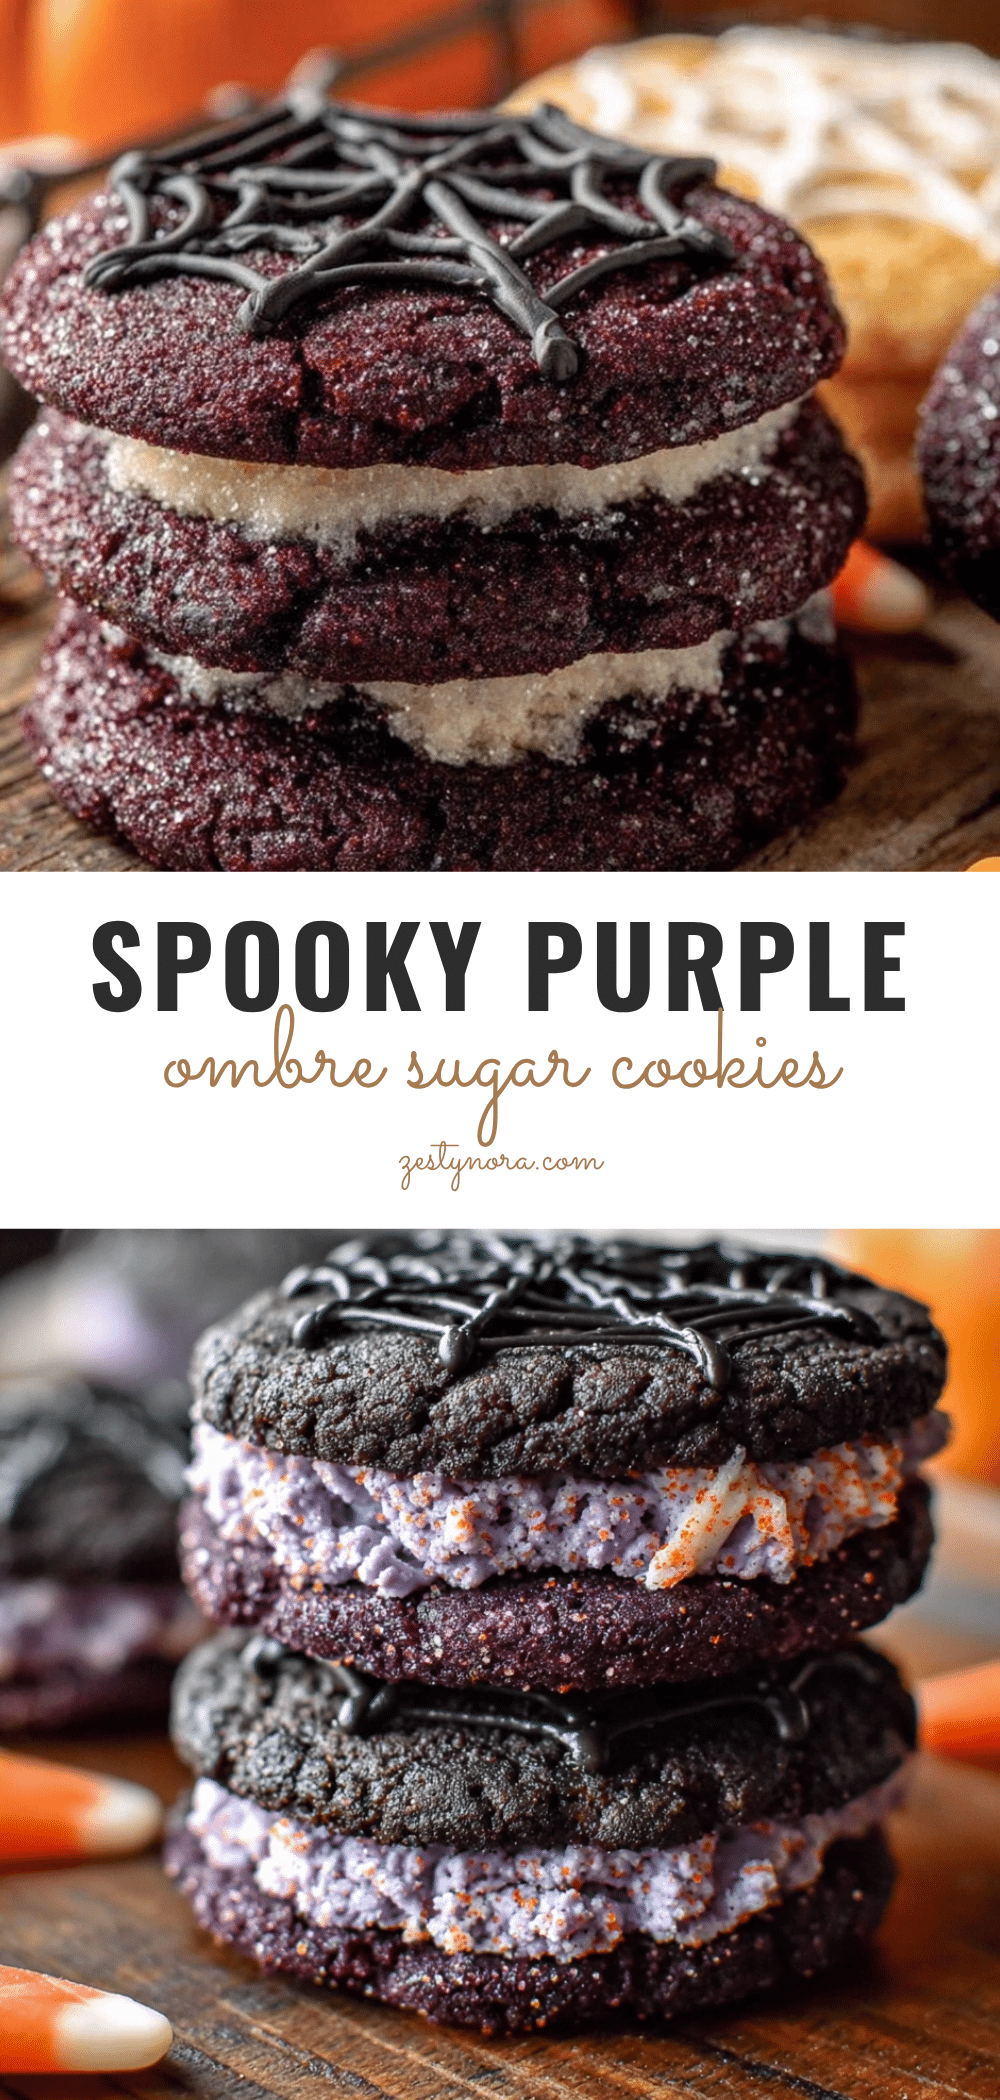
Perfect Purple Ombre Halloween Sugar Cookies – Easy DIY Recipe
These stunning purple ombre Halloween sugar cookies feature a classic vanilla sugar base with a gradient royal icing from deep violet to soft lavender. Perfect for parties, they’re sturdy enough to hold intricate icing designs yet tender and delicious.
- Prep Time: 30 minutes
- Cook Time: 10 minutes
- Total Time: 1 hour 40 minutes (plus 4 hours drying time)
- Yield: 24-30 cookies 1x
- Category: Dessert
- Cuisine: American
Ingredients
- 1 cup (226g) unsalted butter, softened
- 1 cup (200g) granulated sugar
- 1 large egg, room temperature
- 1½ teaspoons vanilla extract
- 2½ cups (312g) all-purpose flour
- ½ teaspoon baking powder
- ¼ teaspoon fine sea salt
- 3 cups (340g) powdered sugar, sifted
- 2 tablespoons meringue powder
- 4–5 tablespoons warm water
- Purple gel food coloring (Americolor Deep Purple and Violet)
- ½ teaspoon vanilla extract (optional, for icing)
Instructions
- Make the dough: In a stand mixer with paddle attachment, cream softened butter and granulated sugar on medium speed until light and fluffy, about 2-3 minutes. Scrape down sides. Add egg and vanilla extract, beat on medium until combined, about 1 minute.
- In a separate bowl, whisk together flour, baking powder, and salt. With mixer on low, gradually add dry ingredients to wet mixture. Mix until just combined and no flour streaks remain. Dough should be soft but not sticky.
- Divide dough into two discs, wrap tightly in plastic wrap, and refrigerate for at least 1 hour (up to 48 hours).
- Preheat oven to 350°F (175°C). Line two baking sheets with parchment paper or silicone mats.
- Lightly flour work surface and rolling pin. Roll one disc to ¼-inch thickness. Cut shapes with cookie cutters, dipping cutters in flour between cuts. Transfer to prepared baking sheets, spacing 1½ inches apart. Re-roll scraps and cut more cookies.
- Bake for 8-10 minutes, rotating pans halfway through. Cookies are done when edges are just barely golden; centers should look pale and set. Cool on baking sheets for 5 minutes, then transfer to wire rack to cool completely.
- Prepare royal icing: In stand mixer bowl, combine sifted powdered sugar and meringue powder. Add 4 tablespoons warm water and vanilla extract. Beat on low until combined, then increase to medium-high and beat 4-5 minutes until thick, glossy, and forms stiff peaks. Add remaining water if needed, one teaspoon at a time, until 15-second flood consistency.
- Create ombre colors: Divide icing into four bowls. Leave one white. Add tiny amount of purple gel to second bowl for pale lavender. Add more to third bowl for medium purple. Add generous amount to fourth bowl for deep violet. Stir each until uniform. Transfer each color to piping bag with small round tip or squeeze bottle.
- Decorate cookies: Start with darkest purple. Outline each cookie, then flood center, using toothpick to spread icing and pop air bubbles. While dark icing is still wet, pipe ring of medium purple inside dark border. Use toothpick to gently pull medium color into dark, creating blended gradient. Repeat with light lavender and white, working inward. Work quickly.
- Let cookies dry at room temperature for at least 4 hours, or overnight, until icing is completely hard to the touch before stacking or storing.
Notes
Chill dough for at least 1 hour to prevent spreading. Use gel food coloring, not liquid, to avoid thinning icing. Work in small batches of 3-4 cookies at a time for best ombre effect. Store in airtight container at room temperature for up to 7 days. Freeze undecorated baked cookies for up to 3 months.
Nutrition
- Serving Size: 1 cookie
- Calories: 120
- Sugar: 12
- Sodium: 45
- Fat: 5
- Saturated Fat: 3
- Carbohydrates: 18
- Protein: 1
Keywords: Halloween cookies, sugar cookies, purple ombre, royal icing, decorated cookies, Halloween baking, ombre cookies


