“Mom, can you make me a purple rainbow cake?” My seven-year-old niece looked at me with those big, hopeful eyes, holding up a picture on her tablet that was so filtered it practically glowed. I stared at the screen, then back at her, and honestly, my first thought was, well, that’s not happening with boxed mix. But I said yes anyway, because you don’t say no to a request like that on a rainy Saturday afternoon. And that’s how this magical purple ombre birthday cake was born—out of a promise, a bit of panic, and a whole lot of food coloring.
The thing is, I’m not a fancy baker. I don’t own a turntable or a million piping tips. My kitchen is small, my counter space is smaller, and I’ve definitely had my fair share of cakes that looked more like leaning towers than birthday masterpieces. But this purple ombre birthday cake? It was different. It came together in a way that felt almost too easy, and the look on her face when she saw those layers of lavender, violet, and deep plum stacked up high? That was pure magic. No filter needed.
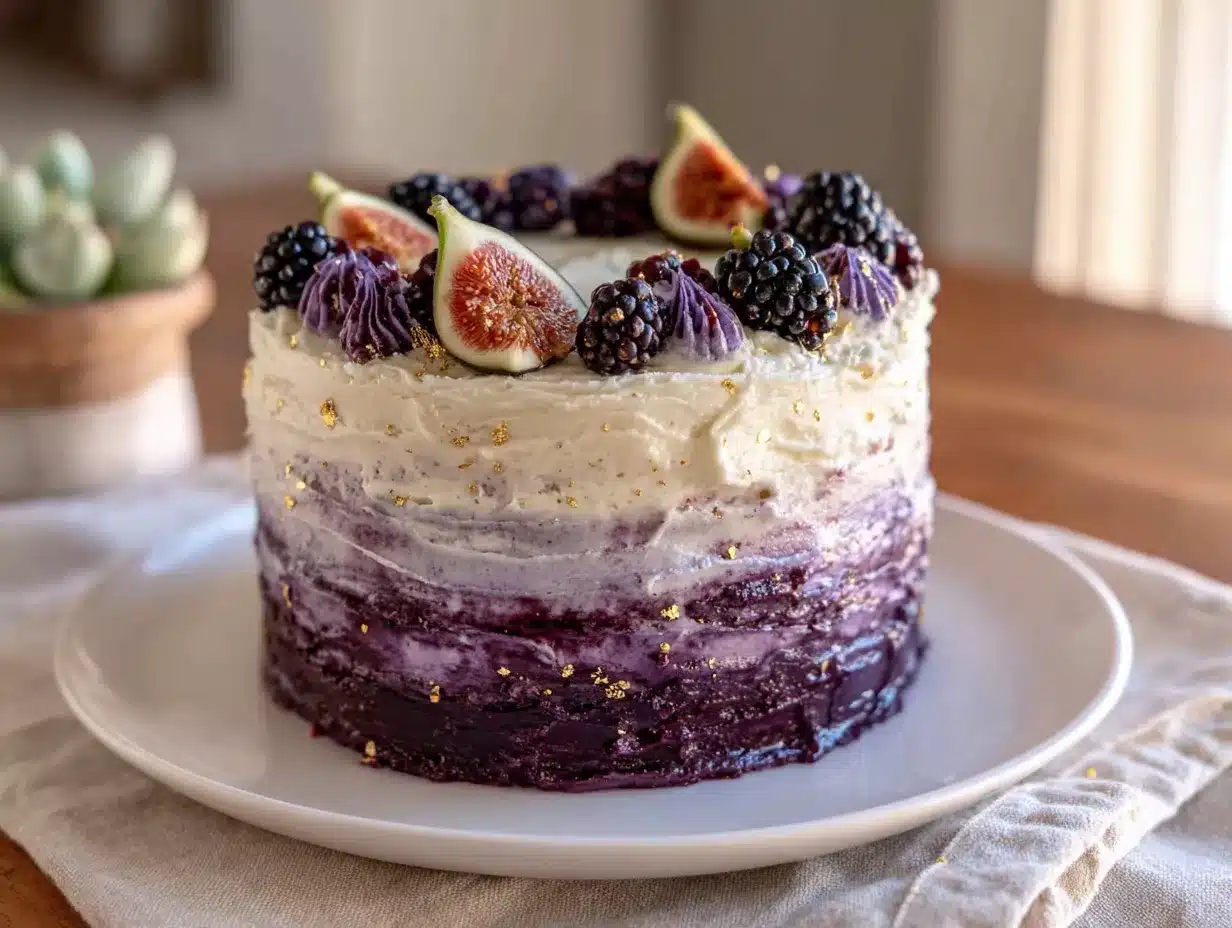
This recipe is for anyone who wants to make a showstopper without the stress. It’s a simple vanilla cake base, dyed in three shades of purple, stacked with a creamy buttercream that’s just sweet enough. It looks like something from a fancy bakery, but I promise you, if I can pull this off in my cramped kitchen with a hand mixer, you absolutely can too. There’s something really satisfying about cutting into that first slice and seeing the ombre reveal itself—it’s like a little surprise every time. And honestly, that feeling never gets old.
Why You’ll Love This Recipe
Let’s be real for a second—most layered cakes are a project. They require patience, precision, and sometimes a degree in pastry arts. This purple ombre birthday cake is not that cake. It’s the kind of recipe that makes you look like a rockstar without the rockstar effort. Here’s why it works:
- Visually Stunning, Deceptively Simple: The ombre effect looks complicated, but it’s just three bowls and a little food coloring. No special tools, no artistic talent required.
- Made with Pantry Staples: You probably have everything you need for the cake base right now—flour, sugar, eggs, butter, vanilla. The only special ingredient is the gel food coloring.
- Perfect for Birthdays and Celebrations: Whether it’s a kid’s party, a milestone birthday, or just a Tuesday that needs a little magic, this cake fits the bill. It’s a guaranteed crowd-pleaser.
- Moist and Flavorful: This isn’t a dry, crumbly cake. The buttermilk and oil keep it incredibly tender, and the vanilla flavor is classic and beloved by all ages.
- Customizable to Your Heart’s Content: Don’t like purple? Make it pink, blue, or rainbow. The technique is the same, and the possibilities are endless.
What really sets this recipe apart is the texture. I’ve tested this cake base more times than I can count—sometimes with different flours, different fats, different mixing methods. The version I’m sharing today is the one that consistently produces a soft, velvety crumb that doesn’t dry out, even after a day or two in the fridge. It’s the kind of cake that makes you close your eyes after the first bite, because it just tastes like happiness. And isn’t that what a birthday cake is supposed to do?
What Ingredients You Will Need
This recipe uses simple, wholesome ingredients to create a cake that’s both beautiful and delicious. The magic is in the technique, not the grocery list. Here’s everything you’ll need:
For the Cake
- Unsalted butter, softened (1 cup / 2 sticks) – Make sure it’s truly at room temperature. Cold butter won’t cream properly, and melted butter changes the texture entirely.
- Granulated sugar (2 cups) – Regular white sugar gives the cake the right structure and sweetness.
- Large eggs (4, at room temperature) – Room temperature eggs emulsify better into the batter, creating a smoother, more even crumb.
- Vanilla extract (2 teaspoons) – Use pure vanilla extract if you can. The flavor difference is noticeable.
- All-purpose flour (3 cups) – Spoon and level your flour for the most accurate measurement. Scooping directly from the bag can pack it down and make the cake dry.
- Baking powder (1 tablespoon) – This is what gives the cake its lift. Make sure it’s fresh.
- Salt (1/2 teaspoon) – Balances the sweetness and enhances the vanilla flavor.
- Buttermilk (1 cup) – This is the secret to a tender crumb. If you don’t have buttermilk, you can make a quick substitute by adding 1 tablespoon of lemon juice or white vinegar to 1 cup of milk and letting it sit for 5 minutes.
- Vegetable oil (1/4 cup) – Adds extra moisture that butter alone can’t provide.
- Purple gel food coloring – I recommend Americolor or Wilton gels. Liquid food coloring will work, but you’ll need a lot more, and it can thin out the batter. You’ll need shades of violet, lavender, and deep purple, or you can mix your own from primary colors.
For the Buttercream Frosting
- Unsalted butter, softened (1 1/2 cups / 3 sticks) – Again, room temperature is key. Cold butter will give you lumpy frosting.
- Powdered sugar (5 cups, sifted) – Sifting removes lumps and ensures a silky smooth frosting.
- Heavy cream (3-4 tablespoons) – Adds richness and helps achieve the perfect spreading consistency.
- Vanilla extract (2 teaspoons) – For that classic buttercream flavor.
- Salt (a pinch) – Cuts the sweetness and rounds out the flavor.
- Purple gel food coloring – For tinting the frosting to match your ombre layers.
I personally prefer using European-style butter like Plugrà for the frosting. It has a higher fat content, which makes the buttercream richer and more stable, especially if you’re piping decorations. For the cake itself, any good-quality unsalted butter works perfectly fine.
Equipment Needed
You don’t need a professional bakery setup for this cake, but having the right tools makes the process smoother and the results more polished. Here’s what I recommend:
- Three 8-inch round cake pans – This is non-negotiable for a three-layer cake. If you only have two pans, you can bake in batches, but the batter may deflate slightly while waiting.
- Stand mixer or hand mixer – A stand mixer makes creaming butter and sugar a breeze, but a hand mixer works just as well. You’ll just need a bit more elbow grease.
- Mixing bowls – At least three medium bowls for dividing and coloring the batter.
- Rubber spatula – For folding and scraping every last bit of batter.
- Parchment paper – Cut circles to line the bottom of your cake pans. This guarantees your cakes won’t stick.
- Cooling rack – Essential for letting the cakes cool completely before frosting. Frosting a warm cake is a recipe for disaster.
- Offset spatula – This is my favorite tool for spreading frosting evenly. A butter knife works in a pinch, but an offset spatula gives you so much more control.
- Cake turntable (optional but helpful) – If you plan on making layered cakes regularly, a turntable is a game-changer. A lazy Susan works too.
- Bench scraper – For getting those clean, sharp edges on your frosting.
If you’re just starting out, don’t feel like you need to buy everything at once. I made my first ombre cake with a hand mixer, a butter knife, and a lot of patience. It wasn’t perfect, but it was delicious, and that’s what matters most.
Preparation Method
Alright, let’s get to the fun part. This method is broken down into clear steps, and I’ve included all the little tricks I’ve learned along the way to help you avoid the same mistakes I made.
Step 1: Prep Your Pans and Preheat
Preheat your oven to 350°F (175°C). Grease three 8-inch round cake pans with butter or non-stick spray, then line the bottoms with parchment paper circles. Dust the sides with a little flour and tap out the excess. This double-layer of protection is your best defense against stuck cakes. Trust me, nothing ruins a mood like a cake that refuses to leave its pan.
Step 2: Cream the Butter and Sugar
In the bowl of your stand mixer fitted with the paddle attachment, beat the softened butter and granulated sugar together on medium speed for about 3-4 minutes. You’re looking for a light, fluffy, pale yellow mixture. It should look almost like whipped frosting. Don’t rush this step—proper creaming incorporates air into the batter, which helps the cake rise beautifully. Scrape down the sides and bottom of the bowl halfway through.
Step 3: Add the Eggs and Vanilla
Add the eggs one at a time, beating well after each addition. The batter might look a little curdled at this point—that’s totally normal, especially if your eggs were cold. Don’t panic. Add the vanilla extract and beat until combined.
Step 4: Combine Dry Ingredients
In a separate medium bowl, whisk together the all-purpose flour, baking powder, and salt. Whisking aerates the flour and ensures the baking powder is evenly distributed. No one wants a pocket of baking powder in their cake slice.
Step 5: Alternate Wet and Dry
With the mixer on low speed, add about one-third of the flour mixture to the butter mixture, mixing until just combined. Pour in half of the buttermilk and the vegetable oil, mixing again. Repeat with another third of the flour, the remaining buttermilk, and finally the last of the flour. Mix just until you no longer see streaks of flour. Overmixing at this stage will develop gluten and make your cake tough. Stop the mixer and finish folding with a rubber spatula to ensure everything is incorporated from the bottom.
Step 6: Divide and Color the Batter
Divide the batter evenly into three medium bowls. You should have about 2 cups of batter per bowl. Now comes the magic part. Using gel food coloring, tint each bowl a different shade of purple. I like to do one light lavender (just a tiny drop of violet), one medium violet (a few more drops), and one deep purple (a generous amount). Stir gently until the color is uniform. Remember, the color will bake slightly lighter, so go a shade darker than you think you want.
Step 7: Bake the Layers
Pour each colored batter into a prepared pan and spread it evenly. Bake for 22-28 minutes, or until a toothpick inserted into the center comes out clean or with a few moist crumbs. The cakes should spring back when lightly touched. Let them cool in the pans for 10 minutes, then turn them out onto a cooling rack and remove the parchment paper. Let them cool completely—this is crucial. If you try to frost a warm cake, your buttercream will melt into a sad, greasy mess.
Step 8: Make the Buttercream
While the cakes are cooling, make the frosting. In the bowl of your stand mixer with the paddle attachment, beat the softened butter on medium speed for about 5 minutes, until it’s pale, fluffy, and almost white. This step is key for a silky, non-grainy frosting. Reduce the speed to low and gradually add the sifted powdered sugar, one cup at a time. Add the heavy cream, vanilla extract, and a pinch of salt. Increase the speed to medium-high and beat for another 2-3 minutes, until the frosting is light and airy. If it’s too thick, add a little more cream. Too thin, add a bit more sugar.
Step 9: Assemble and Frost
Place the darkest purple cake layer on your serving plate or cake board. Spread a generous layer of buttercream on top. Place the medium purple layer on top, and repeat. Finally, add the lightest lavender layer on top. Apply a thin “crumb coat” of frosting all over the cake—just enough to seal in the crumbs. Refrigerate for 20-30 minutes to set the crumb coat. Then, apply the final, thicker layer of frosting, using your offset spatula and bench scraper to get smooth, clean edges.
Cooking Tips & Techniques
I’ve learned a lot from my cake failures, and I’m sharing them so you don’t have to repeat them. Here are the most important tips for this purple ombre birthday cake:
- Gel food coloring is your best friend. I once tried to make a purple cake with liquid food coloring, and I ended up with a grayish-blue mess that tasted faintly of chemicals. Gel colors are concentrated, so you use less, and they don’t mess with the batter’s consistency. Americolor “Violet” and “Deep Purple” are my go-tos.
- Weigh your batter for even layers. If you have a kitchen scale, weigh each bowl of batter to make sure they’re equal. This ensures your layers bake to the same height, which makes stacking so much easier. If you don’t have a scale, use a measuring cup and eyeball it carefully.
- Don’t overbake. A dry cake is a sad cake. Start checking for doneness at the 22-minute mark. The edges should be lightly golden and pulling away from the pan, and the center should spring back when touched.
- Chill the layers before assembling. If your cake layers are fully cooled but still a bit soft, pop them in the freezer for 15-20 minutes. A slightly frozen cake is much easier to handle and less likely to crumble when you’re stacking and frosting.
- Use a serrated knife to level the tops. Even if your cakes bake flat, they often have a slight dome. Use a long serrated knife to gently slice off the domed tops so each layer is perfectly flat. This prevents your cake from leaning like the Tower of Pisa.
One mistake I made early on was trying to rush the crumb coat. I thought, “Eh, it’s fine, I’ll just put a thick layer on.” Big mistake. The crumbs mixed into the frosting, and my final cake looked speckled and messy. Taking that extra 20 minutes to do a proper crumb coat and chill it makes all the difference between a homemade-looking cake and a professional-looking one.
Variations & Adaptations
This recipe is incredibly versatile. Once you’ve mastered the basic technique, you can adapt it for any occasion or dietary need. Here are some of my favorite variations:
- Rainbow Ombre Cake: Instead of three shades of purple, divide the batter into four or five bowls and color each a different color of the rainbow. It’s a bit more work, but the result is absolutely stunning for a child’s birthday party.
- Chocolate Ombre Cake: Swap out 1/2 cup of the flour for 1/2 cup of unsweetened cocoa powder. Then use orange and yellow food coloring to create a sunset ombre effect. The chocolate flavor pairs beautifully with the warm tones.
- Vegan Version: Replace the butter with a high-quality vegan butter stick (like Earth Balance), use flax eggs (1 tablespoon ground flaxseed + 3 tablespoons water per egg), and substitute the buttermilk with almond milk mixed with a teaspoon of apple cider vinegar. The texture will be slightly denser, but still delicious.
- Gluten-Free Option: Use a 1:1 gluten-free baking flour blend that contains xanthan gum. I’ve had good results with King Arthur’s Measure for Measure flour. Don’t overmix the batter, as gluten-free flours can become gummy.
- Lemon Lavender Twist: Add the zest of two lemons to the batter and substitute 1 teaspoon of the vanilla extract with lavender extract. The floral notes are a perfect match for the purple theme, and the lemon brightens everything up.
I once made a batch of cozy pumpkin cream cheese swirl muffins for a fall party, and the same principle of layering flavors applies here. Don’t be afraid to experiment with extracts and spices. A little almond extract in the batter adds a lovely, subtle nuttiness that complements the vanilla.
Serving & Storage Suggestions
This cake is best served at room temperature. Cold buttercream can be stiff and less flavorful, so let the cake sit out for about 30-60 minutes before slicing and serving. The flavors really bloom as it warms up.
For presentation, I love adding a few simple decorations that don’t compete with the ombre effect. A sprinkle of edible glitter or silver dragées on top adds a touch of magic without overwhelming the design. Fresh edible flowers, like pansies or violas, also look gorgeous against the purple tones. Just make sure they’re truly edible and pesticide-free.
This cake pairs beautifully with a tall glass of cold milk, a scoop of vanilla bean ice cream, or even a cup of hot coffee for the adults. If you’re serving it at a party, consider making a batch of perfect mini caramel apple tartlets as a second dessert option—they’re a nice contrast to the rich, creamy cake.
Storage Instructions: Store any leftover cake in an airtight container in the refrigerator for up to 4 days. The buttercream helps seal in the moisture, so the cake stays soft. Let slices come to room temperature before eating for the best texture.
Freezing Instructions: You can freeze the unfrosted cake layers for up to 3 months. Wrap each cooled layer tightly in plastic wrap, then in aluminum foil. When you’re ready to assemble, let them thaw in the refrigerator overnight. The frosted cake can also be frozen, but the texture of the buttercream may change slightly upon thawing. I prefer to freeze the layers separately.
Reheating Tip: If you’re eating a slice that’s been refrigerated, you can microwave it for about 10-15 seconds. This softens the buttercream and warms the cake just enough to make it taste freshly baked. Just don’t overdo it, or you’ll end up with a puddle of frosting.
Nutritional Information & Benefits
Let’s be honest—this is a celebration cake, not a health food. But that doesn’t mean it can’t have some redeeming qualities. Here’s a rough estimate of the nutritional information per slice (based on 12 servings):
| Nutrient | Amount per Slice |
|---|---|
| Calories | 520 |
| Total Fat | 28g |
| Saturated Fat | 17g |
| Cholesterol | 120mg |
| Sodium | 280mg |
| Total Carbohydrates | 65g |
| Sugars | 48g |
| Protein | 5g |
Health Benefits of Key Ingredients: The buttermilk in this recipe provides a small amount of calcium and probiotics, which are good for gut health. The eggs are a great source of high-quality protein and essential vitamins like B12 and D. And hey, a little bit of happiness from a beautiful cake is good for your mental health, right?
Dietary Considerations: This recipe contains dairy, eggs, and gluten. For a dairy-free version, use the vegan adaptations mentioned earlier. For a gluten-free version, use a quality gluten-free flour blend. The cake is not low-carb or sugar-free, but it’s meant to be an occasional indulgence, not an everyday snack.
Potential Allergens: Wheat, dairy, eggs. If you’re serving this at a party, be sure to label it clearly so guests with allergies are aware.
Conclusion
This magical purple ombre birthday cake is more than just a dessert—it’s an experience. It’s the cake you make when you want to see someone’s face light up. It’s the cake that turns a regular birthday into a memorable celebration. And honestly, it’s the cake that made me believe I could actually bake something beautiful, even in my tiny, chaotic kitchen.
I hope you give this recipe a try. Don’t stress about making it perfect—the ombre effect is incredibly forgiving, and even a slightly messy cake tastes amazing. Customize the colors to match your party theme, add your favorite decorations, and most importantly, have fun with it. Baking should be joyful, not stressful.
If you make this cake, I’d love to hear about it! Leave a comment below and let me know how it turned out. What colors did you use? Did you add any special decorations? Your feedback and adaptations inspire me and help other readers too. And if you’re looking for another fun, colorful dessert to try, check out my recipe for perfect pastel Halloween witch hat sugar cookies—they’re another guaranteed showstopper.
Happy baking, friend. Here’s to cakes that are as magical as the people we celebrate.
Frequently Asked Questions
Can I use liquid food coloring instead of gel?
You can, but I don’t recommend it. Liquid food coloring is much less concentrated, so you’ll need a lot more to achieve a vibrant purple. This can thin out your batter and affect the texture of the cake. Gel food coloring gives you intense color with just a few drops and doesn’t alter the consistency. It’s worth the extra dollar or two.
How do I get my cake layers to bake evenly?
The best trick is to weigh your batter. Use a kitchen scale to ensure each pan has the same amount of batter. You can also use “cake strips”—wet fabric strips that you wrap around the outside of the pans—to help the layers bake flat instead of doming. If you don’t have cake strips, you can use a damp paper towel wrapped in aluminum foil as a DIY version.
My buttercream is too runny. What did I do wrong?
This usually happens if your butter was too soft or if you added too much liquid. The easiest fix is to pop the bowl of frosting in the refrigerator for 15-20 minutes to firm it up, then re-whip it. If it’s still too runny, add a little more sifted powdered sugar, one tablespoon at a time, until it reaches the right consistency.
Can I make this cake ahead of time?
Absolutely! You can bake the cake layers up to two days in advance. Let them cool completely, wrap them tightly in plastic wrap, and store them at room temperature. You can also make the buttercream up to a week ahead and keep it in an airtight container in the refrigerator. Let it come to room temperature and re-whip it before using. For best results, assemble and frost the cake the day you plan to serve it.
How do I get those perfectly clean, sharp edges on my frosting?
The secret is a good crumb coat and a bench scraper. After you apply the crumb coat, chill the cake for at least 20 minutes. Then apply your final layer of frosting, starting with a generous amount on top and spreading it down the sides. Hold a bench scraper (or a large offset spatula) against the side of the cake at a 45-degree angle and slowly rotate the cake on a turntable. This smooths out the frosting and creates those crisp, clean edges. A little patience goes a long way!
Pin This Recipe!
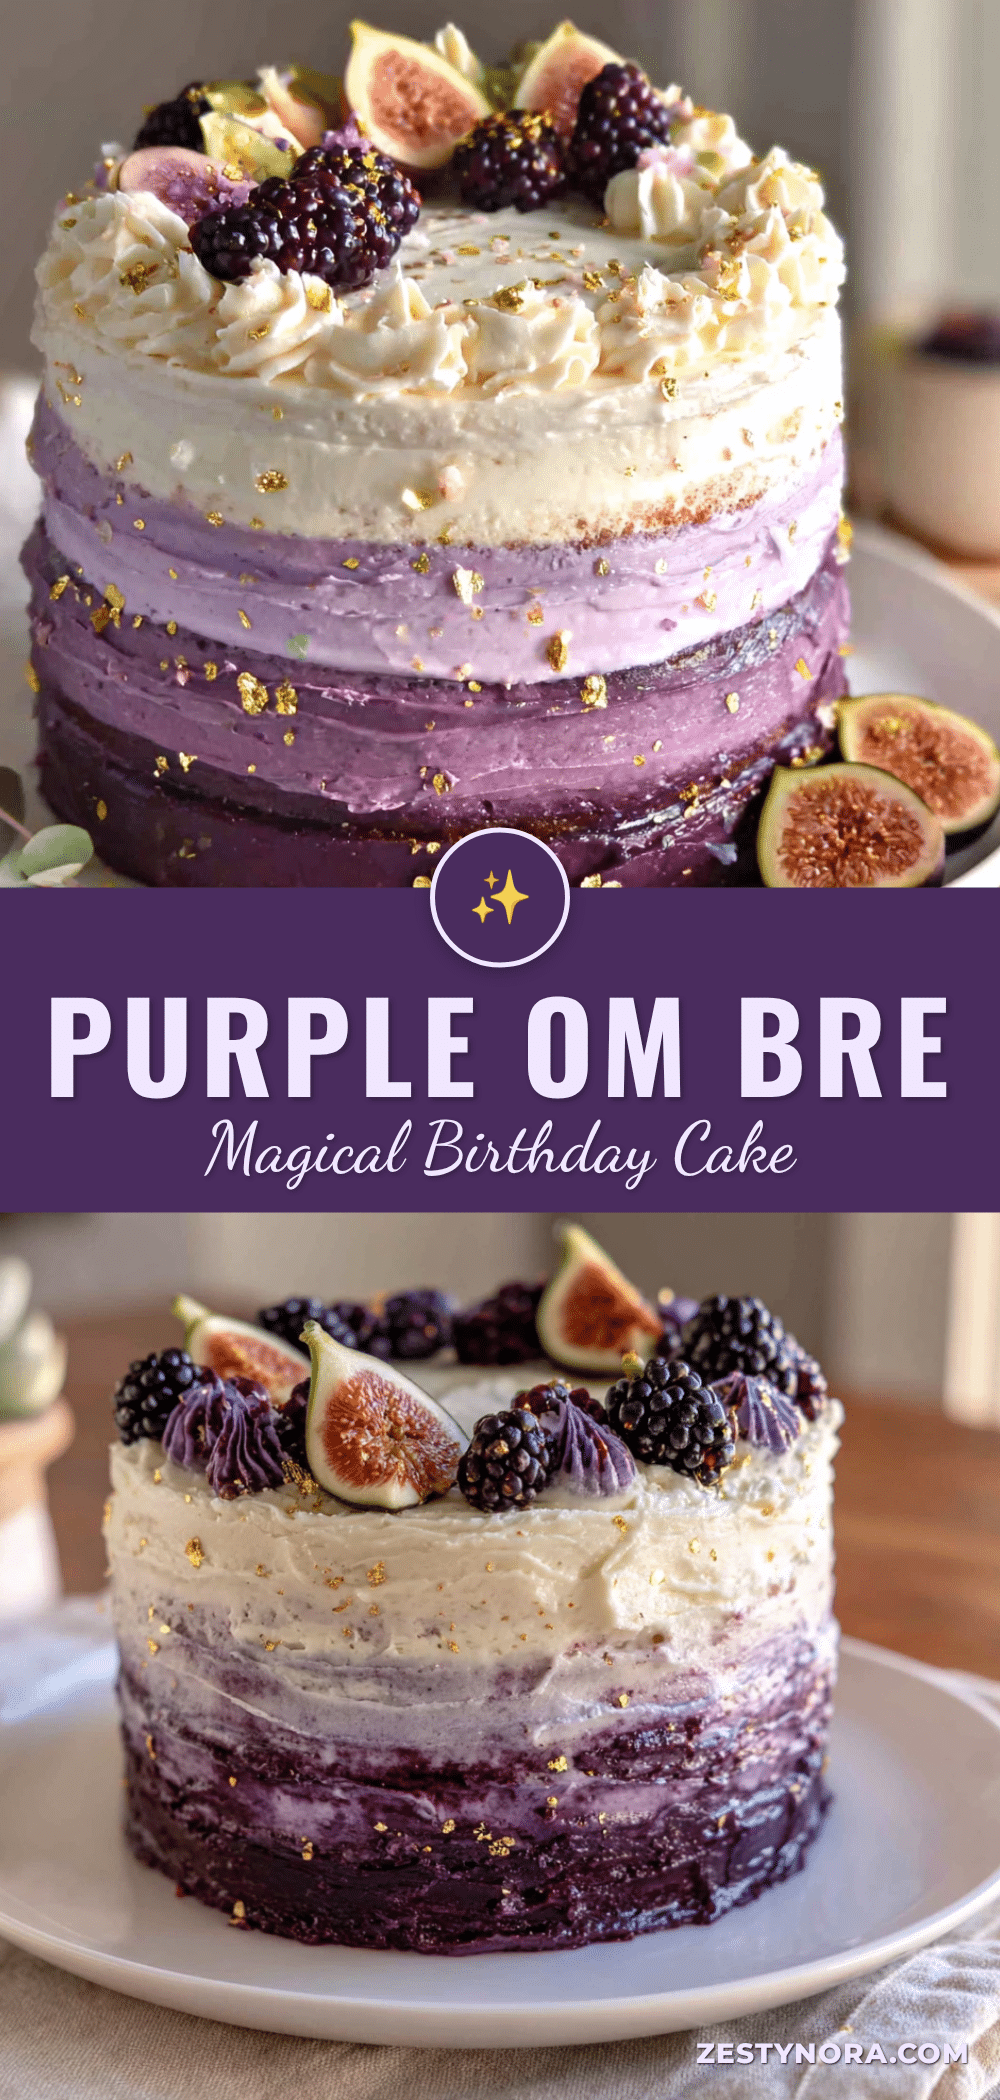
Magical Purple Ombre Birthday Cake: Easy Homemade Recipe
A stunning purple ombre birthday cake with a moist vanilla base and creamy buttercream frosting. This showstopper is deceptively simple to make and perfect for any celebration.
- Prep Time: 30 minutes
- Cook Time: 25 minutes
- Total Time: 1 hour 55 minutes
- Yield: 12 servings 1x
- Category: Dessert
- Cuisine: American
Ingredients
- 1 cup (2 sticks) unsalted butter, softened
- 2 cups granulated sugar
- 4 large eggs, at room temperature
- 2 teaspoons vanilla extract
- 3 cups all-purpose flour
- 1 tablespoon baking powder
- 1/2 teaspoon salt
- 1 cup buttermilk
- 1/4 cup vegetable oil
- Purple gel food coloring (violet, lavender, deep purple)
- 1 1/2 cups (3 sticks) unsalted butter, softened (for frosting)
- 5 cups powdered sugar, sifted
- 3–4 tablespoons heavy cream
- 2 teaspoons vanilla extract (for frosting)
- Pinch of salt (for frosting)
- Purple gel food coloring (for frosting)
Instructions
- Preheat oven to 350°F (175°C). Grease three 8-inch round cake pans, line bottoms with parchment paper, and dust sides with flour.
- In a stand mixer with paddle attachment, beat softened butter and granulated sugar on medium speed for 3-4 minutes until light and fluffy.
- Add eggs one at a time, beating well after each. Add vanilla extract and mix until combined.
- In a separate bowl, whisk together flour, baking powder, and salt.
- With mixer on low, add one-third of flour mixture, mixing until just combined. Add half of buttermilk and vegetable oil, mixing again. Repeat with remaining flour and buttermilk, ending with flour. Do not overmix.
- Divide batter evenly into three bowls. Tint each bowl a different shade of purple using gel food coloring: light lavender, medium violet, and deep purple.
- Pour each colored batter into prepared pans and spread evenly. Bake for 22-28 minutes, until a toothpick inserted in center comes out clean. Cool in pans for 10 minutes, then turn out onto cooling rack and remove parchment. Cool completely.
- For buttercream: Beat softened butter on medium speed for 5 minutes until pale and fluffy. Gradually add sifted powdered sugar, one cup at a time, on low speed. Add heavy cream, vanilla extract, and pinch of salt. Beat on medium-high for 2-3 minutes until light and airy.
- Assemble cake: Place darkest purple layer on serving plate. Spread a generous layer of buttercream on top. Repeat with medium purple layer, then lightest lavender layer on top.
- Apply a thin crumb coat of frosting over entire cake. Refrigerate for 20-30 minutes to set. Then apply final layer of frosting, smoothing with offset spatula and bench scraper for clean edges.
Notes
Use gel food coloring for best results; liquid coloring may thin batter. Weigh batter for even layers. Chill layers before assembling for easier handling. Do a proper crumb coat for a professional finish.
Nutrition
- Serving Size: 1 slice
- Calories: 520
- Sugar: 48
- Sodium: 280
- Fat: 28
- Saturated Fat: 17
- Carbohydrates: 65
- Protein: 5
Keywords: purple ombre cake, birthday cake, homemade cake, vanilla cake, buttercream frosting, layered cake, celebration cake


