My neighbor showed up at my door with a basket of zucchini the size of small baseball bats. I mean, what do you even do with that much zucchini? (Besides locking your doors next August.) I had a bunch of spotty bananas on the counter too—the kind that are basically begging to be baked before they turn into science experiments. So I just started throwing things into a bowl. No game plan. No recipe pulled up on my phone. Just me, a grater, and the quiet hope that this wouldn’t be a total disaster.
And honestly? The first bite of this moist banana zucchini walnut bread made me stop mid-chew. It was that good. The zucchini keeps everything tender without making it taste like a salad (we’ve all had *that* zucchini bread), and the banana adds this natural sweetness that plays perfectly with the walnuts. I’ve made it four times since that day, tweaking little things here and there—more walnuts, less sugar, a pinch of cinnamon that I didn’t measure because who has time for that?
This recipe stuck with me because it solves a real problem: what do you make when your produce is about to turn and you need something that feels like comfort food? It’s the kind of loaf that doesn’t need butter to be good (though it certainly doesn’t mind a pat). I’m sharing it because I think you’ll feel the same way I did—surprised, satisfied, and already thinking about when you can make it again.
Why You’ll Love This Recipe
I’ve tested this recipe more times than I care to admit—through over-ripe bananas, under-ripe bananas, and one memorable batch where I forgot the sugar entirely (do not recommend). Each time, I learned something that made the final version better. This isn’t just another quick bread; it’s the one I keep coming back to.
- One-Bowl Wonder: No stand mixer needed. No separating wet and dry ingredients like some fussy baking recipe. Just one bowl, a whisk, and a spatula. Cleanup takes less time than preheating the oven.
- Pantry-Friendly Ingredients: You probably already have everything except maybe the zucchini—and if you don’t, a neighbor definitely does. This recipe uses basic staples without any specialty flours or hard-to-find extracts.
- Perfect for Sneaking in Veggies: My kids have no idea there’s zucchini in this bread. None. They just know it’s moist, sweet, and disappears faster than I can slice it. If you’ve got picky eaters, this is your secret weapon.
- Freezer-Friendly: This loaf freezes beautifully for up to three months. I always make two—one for now, one for future me who will inevitably need a quick breakfast or snack.
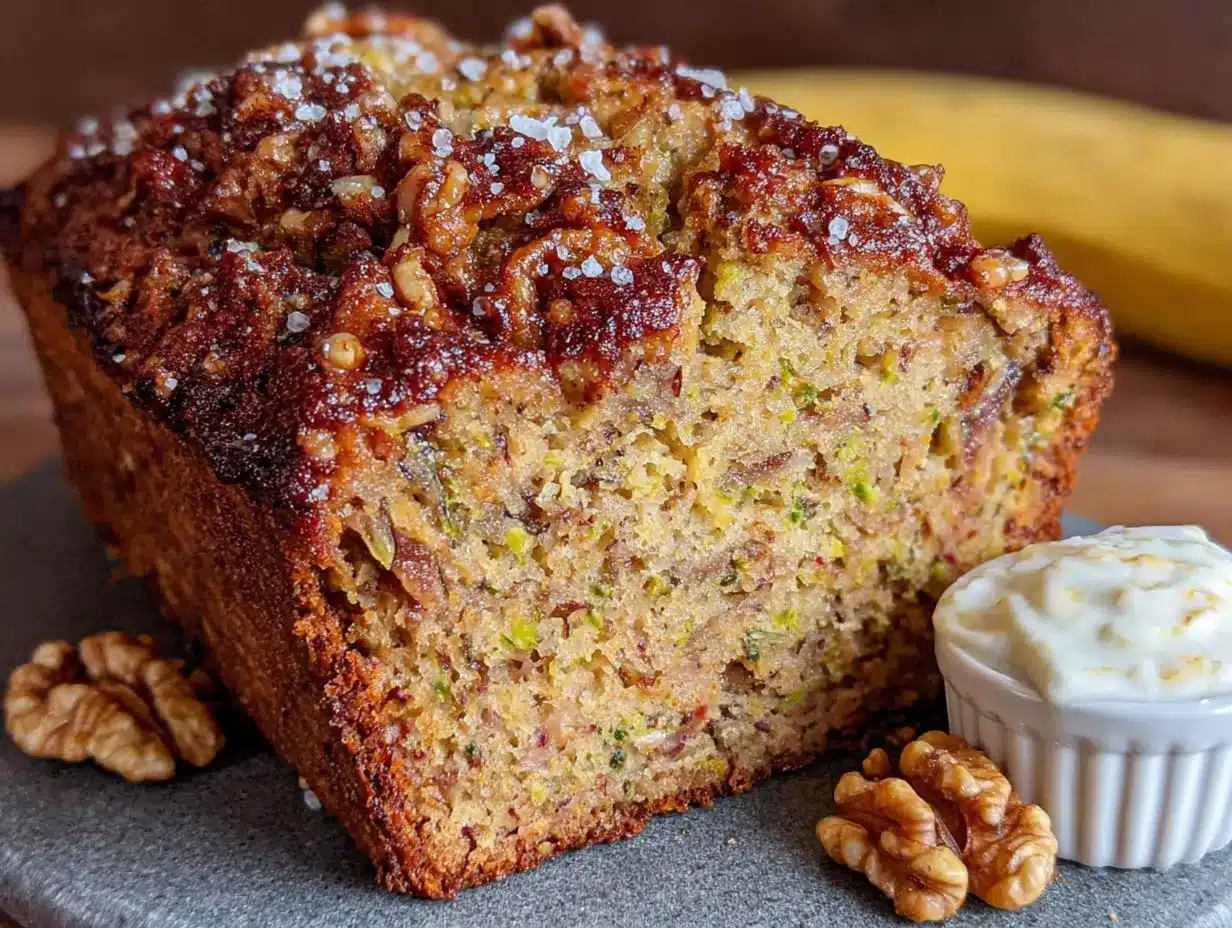
- That Texture Though: The combination of banana and zucchini creates a crumb that’s tender without being gummy, with little pockets of walnut crunch in every bite. It’s the kind of texture that makes you close your eyes on the first bite.
What makes this version different from the dozens of other zucchini bread recipes out there? It’s the ratio. I spent a lot of time figuring out the perfect balance of banana to zucchini—too much zucchini and the bread gets soggy, too much banana and it’s dense. This recipe hits that sweet spot where both ingredients shine without overpowering each other. Plus, the walnuts get toasted before they go in, which makes a bigger difference than you’d think.
What Ingredients You Will Need
This recipe uses simple, wholesome ingredients that work together to create something genuinely special. No weird additives, no obscure pantry items—just real food that bakes up into pure comfort.
For the Bread
- Ripe Bananas (3 medium, about 1½ cups mashed): The spottier, the better. Seriously—if your bananas are still yellow with no brown spots, they’re not ready. Overripe bananas are sweeter and mash more easily, which means better flavor and texture in your bread.
- Grated Zucchini (1½ cups, loosely packed): About one medium zucchini. Don’t peel it—the green flecks look beautiful in the finished bread. I recommend squeezing out the excess moisture with a clean kitchen towel or paper towels. This step matters more than you think.
- All-Purpose Flour (2 cups, 260g): I use unbleached all-purpose flour for this recipe. It gives the perfect structure without making the bread tough. Spoon and level your flour—don’t scoop directly from the bag or you’ll end up with too much.
- Granulated Sugar (¾ cup, 150g): Just enough to sweeten without overwhelming the banana flavor. You can reduce this to ½ cup if your bananas are very ripe and sweet.
- Light Brown Sugar (¼ cup, 50g, packed): Adds a subtle molasses note that pairs beautifully with the walnuts. If you’re out of brown sugar, use all granulated—it’ll still be delicious, just slightly less complex.
- Vegetable Oil (½ cup, 120ml): Keeps the bread incredibly moist. I use neutral oil like canola or avocado oil. Melted coconut oil works too if that’s what you have.
- Large Eggs (2, room temperature): Room temperature eggs incorporate more evenly into the batter. If you forgot to take them out of the fridge, place them in a bowl of warm water for 5 minutes.
- Vanilla Extract (2 teaspoons): Pure vanilla extract makes a noticeable difference here. Save the imitation stuff for cookies where it’s less noticeable.
- Baking Soda (1 teaspoon): The only leavening agent you need. Make sure it’s fresh—test it by dropping a bit into vinegar; it should fizz immediately.
- Baking Powder (½ teaspoon): Gives a little extra lift. Yes, you need both—they do different things in the batter.
- Salt (½ teaspoon): Don’t skip it. Salt balances the sweetness and enhances all the other flavors.
- Ground Cinnamon (1 teaspoon): Warm, cozy, and essential. Fresh cinnamon makes a big difference—if yours has been in the cabinet for years, consider replacing it.
- Chopped Walnuts (1 cup, 120g): Toasted first, then cooled. Toasting brings out their natural oils and makes them crunchier. I buy raw walnut halves and chop them myself for better texture.
I recommend using King Arthur Flour for consistent results every time. Their all-purpose flour has a slightly higher protein content that gives baked goods better structure. For the walnuts, Fisher Nuts or bulk bin walnuts from a store with good turnover are both excellent choices.
When selecting zucchini, look for ones that are firm and medium-sized—about 6 to 8 inches long. Huge zucchini tend to be watery and have larger seeds that you’ll need to remove. Small zucchini work great and require less squeezing.
Equipment Needed
Nothing fancy here—just basic kitchen tools you probably already own.
- 9×5-inch Loaf Pan: Standard size works perfectly. If you only have an 8×4-inch pan, increase the baking time by 5-10 minutes and check for doneness with a toothpick.
- Large Mixing Bowl: One bowl is all you need. I use a 4-quart glass bowl because I can see when everything is fully incorporated.
- Box Grater: For shredding the zucchini. The large holes work best. A food processor with a grating disc works too if you’re making a double batch.
- Whisk and Rubber Spatula: The whisk for combining wet ingredients, the spatula for folding in the dry ingredients and walnuts. A wooden spoon works fine too.
- Parchment Paper: Lining your loaf pan makes removal effortless. I cut a strip that hangs over the long sides as handles.
- Cooling Rack: Essential for even cooling. If you don’t have one, let the bread cool in the pan for 10 minutes, then transfer to a cutting board.
- Kitchen Scale: Optional, but I highly recommend it for consistent results. Baking by weight is more accurate than measuring cups.
I bought my loaf pan at a thrift store for two dollars, and it’s my favorite baking pan. You don’t need expensive equipment—just something that conducts heat evenly. If you’re buying new, a light-colored metal pan gives the best results. Dark pans can cause the crust to brown too quickly.
Preparation Method
Preheat your oven to 350°F (175°C). Position a rack in the center of the oven. Line your loaf pan with parchment paper, leaving overhang on the two long sides. Lightly grease the exposed ends with butter or cooking spray.
- Prepare the zucchini: Wash your zucchini and trim off the stem end. Grate it using the large holes of a box grater. You should have about 1½ cups loosely packed. Place the grated zucchini in a clean kitchen towel or several layers of paper towels and squeeze firmly over the sink. You’ll be shocked at how much liquid comes out—this is good! Set the squeezed zucchini aside.
- Mash the bananas: In your large mixing bowl, mash the bananas with a fork until mostly smooth. A few small lumps are fine—they add texture. You want about 1½ cups of mashed banana.
- Combine wet ingredients: Add the vegetable oil, both sugars, eggs, and vanilla extract to the mashed bananas. Whisk until everything is well combined and slightly lighter in color, about 30 seconds. The mixture should look smooth and glossy.
- Add the zucchini: Fold in the squeezed zucchini until evenly distributed throughout the wet mixture. Don’t overmix here—just a few folds until you can’t see any more zucchini clumps.
- Mix dry ingredients: In a separate small bowl (yes, I know I said one bowl, but this is quick), whisk together the flour, baking soda, baking powder, salt, and cinnamon. Alternatively, you can sift them directly over the wet ingredients if you’re feeling fancy.
- Combine wet and dry: Add the dry ingredients to the wet mixture. Fold gently with a rubber spatula until just combined—a few streaks of flour are okay. Overmixing at this stage develops gluten and makes the bread tough. Trust me on this one.
- Fold in walnuts: Add the toasted, cooled walnuts. Fold 3-4 times until evenly distributed. The batter will be thick and slightly lumpy—that’s perfect.
- Transfer to pan: Pour the batter into your prepared loaf pan. Spread it evenly with the spatula. Give the pan a gentle tap on the counter to release any air bubbles.
- Bake: Place the pan in the preheated oven. Bake for 55-65 minutes, or until a toothpick inserted into the center comes out clean or with just a few moist crumbs. The top should be golden brown and spring back when lightly touched. If the top is browning too quickly (around 40 minutes), tent loosely with aluminum foil.
- Cool properly: Let the bread cool in the pan for 15 minutes. Then use the parchment handles to lift it out and transfer to a cooling rack. Cool completely before slicing—about 1 hour. I know it’s hard to wait, but slicing too early will give you a gummy texture.
Your kitchen will smell incredible at this point. Like fall and comfort and everything good. The hardest part is waiting for it to cool enough to eat.
Cooking Tips & Techniques
I’ve made this bread at least a dozen times, and I’ve learned a few things the hard way so you don’t have to.
Don’t skip squeezing the zucchini. I did this once because I was in a hurry, and the bread came out so wet it barely held together. Zucchini is mostly water, and if you don’t remove that excess moisture, it’ll steam the bread from the inside. You want tender, not soggy. Squeeze firmly—you should see liquid running into the sink.
Toast your walnuts. This is non-negotiable in my kitchen. Spread the walnuts on a baking sheet and toast at 350°F for 6-8 minutes, shaking the pan halfway through. You’ll smell them when they’re done. Let them cool completely before adding to the batter. Toasting deepens their flavor and keeps them crunchy in the finished bread. I learned this after making a batch with raw walnuts that tasted flat and slightly bitter.
Room temperature ingredients matter. Cold eggs can seize up the batter and make it tough. If you forgot to set them out, place the eggs in a bowl of warm water for 5 minutes. Same goes for any dairy you might add—room temperature ingredients emulsify better and create a more tender crumb.
Check for doneness early. Ovens vary wildly. Start checking at 50 minutes by inserting a toothpick into the center. If it comes out clean, it’s done. If there’s wet batter, give it 5 more minutes and check again. If the toothpick has moist crumbs but no batter, take it out—it’ll continue cooking from residual heat as it cools.
Let it cool completely. I cannot stress this enough. The first time I made this, I cut into it after 20 minutes because I couldn’t wait. The center was gummy and fell apart. The bread needs time to set up as it cools. Give it a full hour on the cooling rack before you even think about slicing.
Variations & Adaptations
This recipe is incredibly forgiving and adaptable. Here are some variations I’ve tried and loved.
Chocolate Chip Version: Fold in ¾ cup of semi-sweet or dark chocolate chips along with the walnuts. The chocolate melts into little pockets of richness throughout the bread. My kids prefer this version, and honestly, I do too sometimes. If you go this route, reduce the sugar by 2 tablespoons since the chocolate adds sweetness.
Gluten-Free Adaptation: Substitute the all-purpose flour with a good 1:1 gluten-free baking flour blend (I like Bob’s Red Mill or King Arthur Measure for Measure). Add 1 teaspoon of xanthan gum if your blend doesn’t already include it. The texture will be slightly more delicate, but it’s still delicious. Let the batter rest for 15 minutes before baking to allow the gluten-free flour to hydrate.
Lower Sugar Option: Reduce the granulated sugar to ½ cup and the brown sugar to 2 tablespoons. The bananas provide enough sweetness that you won’t miss the extra sugar much. Add an extra ¼ teaspoon of cinnamon to compensate for the flavor loss. This version is great for breakfast or snacking.
Dairy-Free Version: This recipe is already dairy-free since it uses oil instead of butter. If you’re adding chocolate chips, make sure to use dairy-free chocolate. That’s it—no other changes needed.
Spiced Variation: Add ¼ teaspoon of ground nutmeg, ¼ teaspoon of ground ginger, and a pinch of ground cloves along with the cinnamon. This turns the bread into something that tastes like autumn in a slice. I make this version when I’m craving something cozy, especially alongside a bowl of creamy roasted butternut squash soup.
Nut-Free Option: Simply omit the walnuts. The bread will still be delicious and moist. You can add ½ cup of raisins, dried cranberries, or chocolate chips instead for texture and flavor.
Serving & Storage Suggestions
This bread is versatile enough for breakfast, snack time, or dessert. Here’s how to make the most of it.
Serving temperature: Serve at room temperature for the best texture. If you’ve stored it in the refrigerator (which I don’t recommend—more on that below), let slices sit out for 15-20 minutes before eating. A quick 10-second zap in the microwave warms it up nicely too, but be careful not to overheat or it’ll get rubbery.
Perfect pairings: A slice of this bread with a pat of salted butter is pure heaven. For breakfast, spread with cream cheese or Greek yogurt. For dessert, warm a slice and top with vanilla ice cream and a drizzle of honey. It also pairs beautifully with a cup of coffee or tea—the mild sweetness complements both without overwhelming them.
Storage: Store the bread wrapped tightly in plastic wrap or aluminum foil at room temperature for up to 4 days. Do not refrigerate—the cold temperature actually speeds up staling and dries out the bread. If your kitchen is very warm, you can refrigerate it, but bring slices to room temperature before serving.
Freezing: This bread freezes beautifully. Wrap the completely cooled loaf (or individual slices) tightly in plastic wrap, then in aluminum foil. Freeze for up to 3 months. To thaw, leave at room temperature for several hours or overnight. Individual slices thaw in about 30 minutes. You can also toast frozen slices directly—just add a minute or two to the toasting time.
Flavor development: Like many quick breads, this one actually tastes better the day after baking. The flavors meld together overnight, and the texture becomes even more moist. If you can resist eating it right away, wrap it tightly and let it sit at room temperature overnight. You’ll be rewarded with an even better loaf the next day.
Nutritional Information & Benefits
Here’s the approximate nutritional breakdown per slice (based on 12 slices):
| Nutrient | Amount Per Slice |
|---|---|
| Calories | 285 |
| Total Fat | 14g |
| Saturated Fat | 2g |
| Cholesterol | 31mg |
| Sodium | 218mg |
| Total Carbohydrates | 37g |
| Dietary Fiber | 2g |
| Sugars | 19g |
| Protein | 5g |
This bread offers some real nutritional perks. Bananas provide potassium and vitamin B6, while zucchini adds vitamin C, vitamin A, and antioxidants like lutein and zeaxanthin that support eye health. Walnuts are packed with omega-3 fatty acids, which are great for heart and brain health. The fiber from the bananas, zucchini, and whole wheat flour (if you use it) helps with digestion and keeps you feeling full longer.
This recipe is naturally dairy-free and can easily be made gluten-free or nut-free. It contains eggs and wheat (gluten), so it’s not suitable for those with celiac disease or egg allergies without modifications. The lower sugar variation makes it a reasonable option for those watching their sugar intake.
I love that this bread feels indulgent but secretly has vegetables and healthy fats in it. It’s the kind of recipe that makes you feel good about feeding it to your family—or yourself.
Conclusion
This moist banana zucchini walnut bread is proof that the best recipes often come from unexpected places—like an overstocked neighbor and a counter full of sad bananas. It’s simple enough for a Tuesday afternoon but special enough to bring to a brunch or holiday gathering. The combination of tender crumb, sweet banana, and crunchy walnuts is genuinely hard to beat.
I encourage you to make this recipe your own. Add chocolate chips if that’s your thing. Swap the walnuts for pecans. Throw in some dried cranberries. The base is so solid that you can play around without worrying about ruining it. That’s the mark of a great recipe—it’s forgiving, adaptable, and always delicious.
If you make this bread, I’d love to hear about it. Leave a comment below and let me know how it turned out, what variations you tried, or if you have any questions. And if you’re looking for more ways to use up summer zucchini, check out this crispy cheesy zucchini and corn fritters recipe—it’s another favorite in my house. Happy baking, friends!
Frequently Asked Questions
Can I use frozen zucchini for this recipe?
Yes, but you’ll need to thaw it completely and squeeze out even more water than you would with fresh zucchini. Frozen zucchini releases a lot of liquid when it thaws, so be thorough with the squeezing. I recommend using fresh zucchini when possible for the best texture.
Why did my banana zucchini bread sink in the middle?
This usually happens for one of three reasons: the batter was overmixed (which develops too much gluten), the oven temperature was too low (causing the bread to rise then collapse), or the bread was underbaked. Make sure your oven is properly calibrated and that you’re testing for doneness with a toothpick.
Can I make this into muffins instead of a loaf?
Absolutely! Grease a 12-cup muffin tin or line with paper liners. Fill each cup about ¾ full. Bake at 350°F for 18-22 minutes, or until a toothpick inserted into the center of a muffin comes out clean. Muffins will be done faster than a loaf, so start checking at 18 minutes.
How do I know when my bananas are ripe enough?
Look for bananas with plenty of brown spots on the peel—the more spots, the sweeter and more flavorful they’ll be. The banana should be soft to the touch but not mushy or leaking. If your bananas aren’t ripe enough, you can speed up the process by placing them in a paper bag with an apple overnight.
Can I reduce the oil in this recipe?
You can reduce the oil to ⅓ cup without significantly affecting the texture, but I wouldn’t go lower than that. The oil is what keeps this bread incredibly moist. If you want to reduce fat further, you can substitute ¼ cup of the oil with unsweetened applesauce, but the texture will be slightly denser and less tender.
Pin This Recipe!
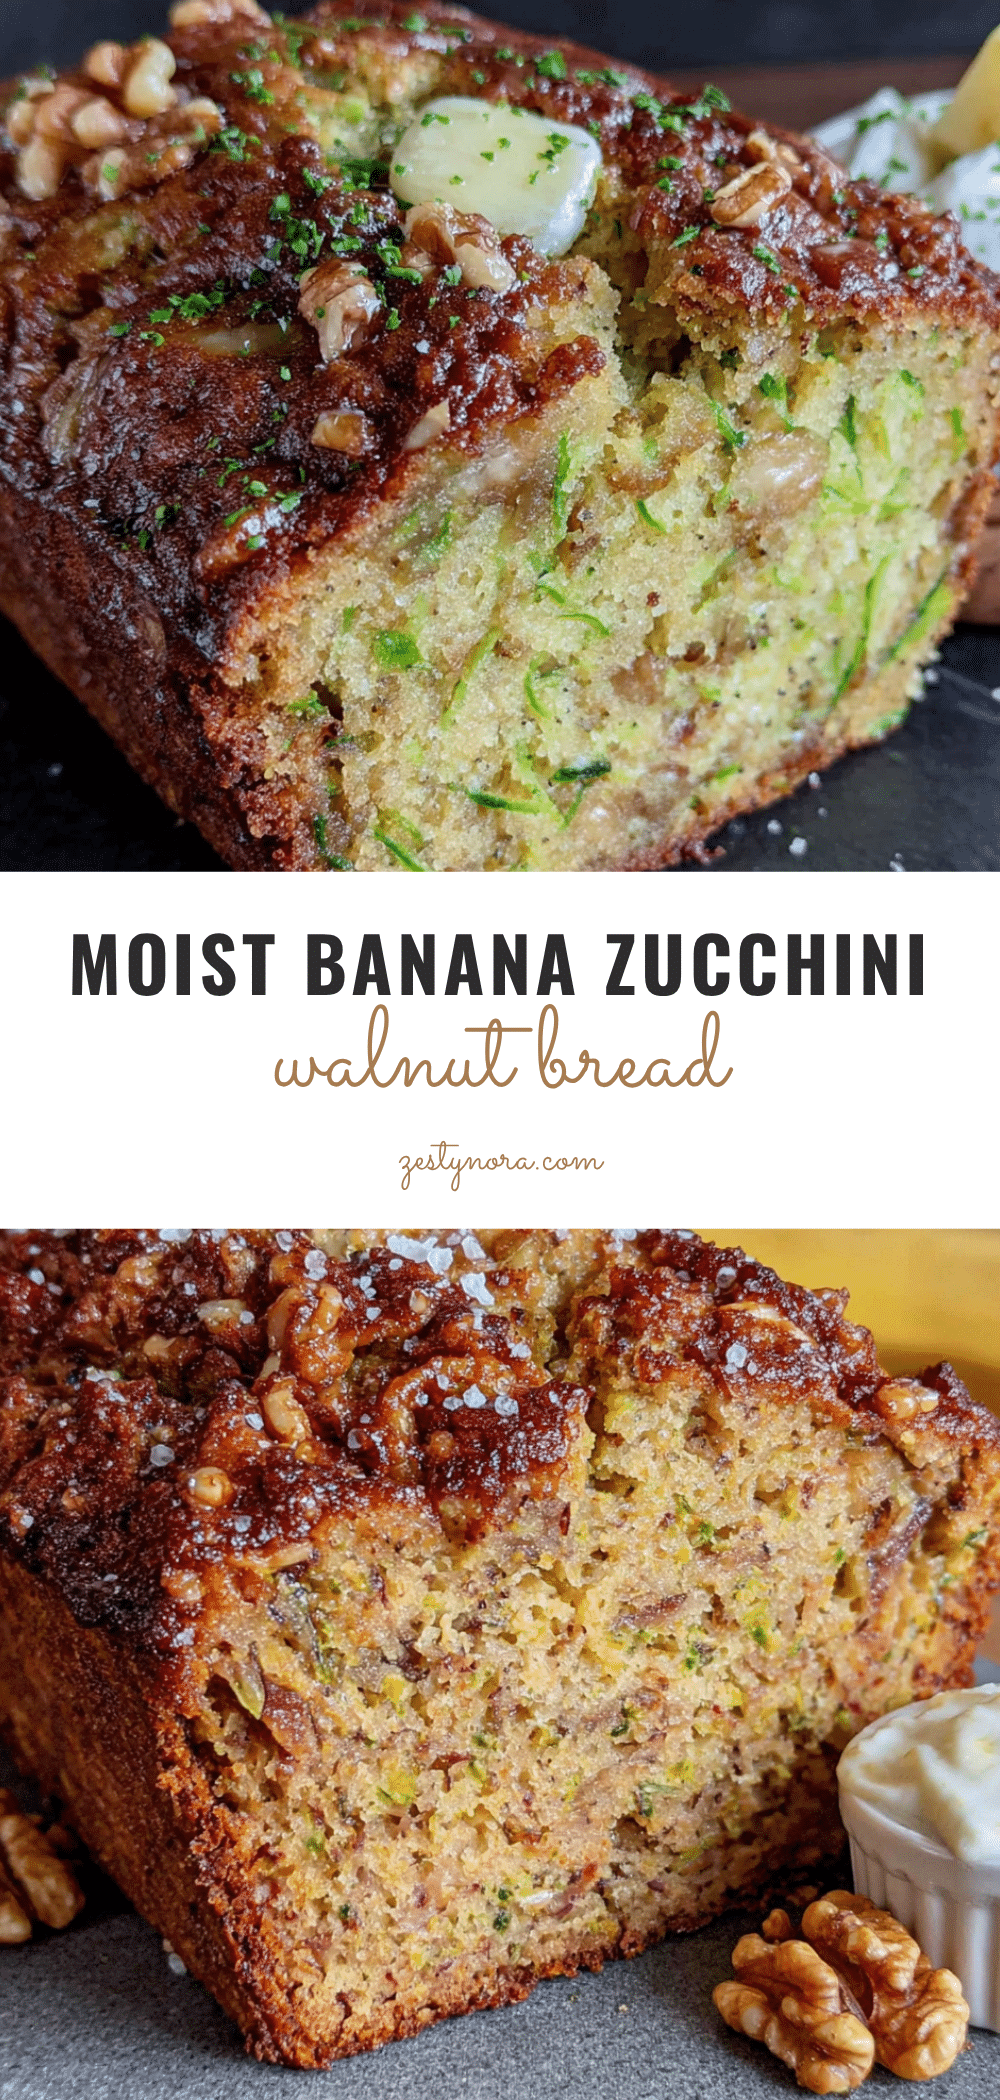
Moist Banana Zucchini Walnut Bread

This moist banana zucchini walnut bread is a one-bowl wonder that combines ripe bananas and fresh zucchini for a tender, naturally sweet loaf with crunchy walnuts. Perfect for using up overripe produce, it’s a comforting, freezer-friendly treat that’s great for breakfast, snack, or dessert.
- Prep Time: 15 minutes
- Cook Time: 55 minutes
- Total Time: 1 hour 10 minutes
- Yield: 12 servings 1x
- Category: Quick Bread
- Cuisine: American
Ingredients
- 3 medium ripe bananas (about 1½ cups mashed)
- 1½ cups grated zucchini (loosely packed, squeezed dry)
- 2 cups all-purpose flour (260g)
- ¾ cup granulated sugar (150g)
- ¼ cup light brown sugar (50g, packed)
- ½ cup vegetable oil (120ml)
- 2 large eggs (room temperature)
- 2 teaspoons vanilla extract
- 1 teaspoon baking soda
- ½ teaspoon baking powder
- ½ teaspoon salt
- 1 teaspoon ground cinnamon
- 1 cup chopped walnuts (120g, toasted)
Instructions
- Preheat oven to 350°F (175°C). Position rack in center. Line a 9×5-inch loaf pan with parchment paper, leaving overhang on long sides. Lightly grease exposed ends.
- Wash zucchini, trim stem, and grate using large holes of a box grater. Place grated zucchini in a clean kitchen towel or paper towels and squeeze firmly to remove excess moisture. Set aside.
- In a large mixing bowl, mash bananas with a fork until mostly smooth (a few lumps are fine).
- Add vegetable oil, granulated sugar, brown sugar, eggs, and vanilla extract to mashed bananas. Whisk until well combined and slightly lighter in color, about 30 seconds.
- Fold in squeezed zucchini until evenly distributed.
- In a separate small bowl, whisk together flour, baking soda, baking powder, salt, and cinnamon.
- Add dry ingredients to wet mixture. Fold gently with a rubber spatula until just combined (a few streaks of flour are okay). Do not overmix.
- Fold in toasted, cooled walnuts until evenly distributed. Batter will be thick and slightly lumpy.
- Pour batter into prepared loaf pan and spread evenly. Tap pan gently on counter to release air bubbles.
- Bake for 55-65 minutes, or until a toothpick inserted into center comes out clean or with a few moist crumbs. If top browns too quickly (around 40 minutes), tent loosely with aluminum foil.
- Let bread cool in pan for 15 minutes. Use parchment handles to lift out and transfer to a cooling rack. Cool completely before slicing (about 1 hour).
Notes
Don’t skip squeezing the zucchini—excess moisture makes the bread soggy. Toast walnuts before adding for deeper flavor and crunch. Room temperature ingredients emulsify better. Check for doneness at 50 minutes. Let bread cool completely before slicing to avoid gummy texture. Bread tastes even better the day after baking. Store wrapped at room temperature for up to 4 days; freeze for up to 3 months.
Nutrition
- Serving Size: 1 slice
- Calories: 285
- Sugar: 19
- Sodium: 218
- Fat: 14
- Saturated Fat: 2
- Carbohydrates: 37
- Fiber: 2
- Protein: 5
Keywords: banana zucchini bread, zucchini bread, banana bread, walnut bread, one-bowl recipe, moist bread, quick bread, summer zucchini, freezer-friendly, dairy-free


