Homemade Elderberry Syrup Gummies Kids Actually Love (Easy Recipe)
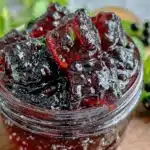
These homemade elderberry syrup gummies are naturally sweetened with honey and have a fruity, slightly tart flavor that kids actually enjoy. They’re simple to make, packed with immune-boosting goodness, and most importantly, kids actually ask for them.
- Prep Time: 20 minutes
- Cook Time: 40 minutes
- Total Time: 3 hours (including setting time)
- Yield: 24-32 gummies (depending on mold size) 1x
- Category: Snack
- Cuisine: American
Ingredients
Scale
- 1 cup dried elderberries
- 4 cups filtered water
- 1/2 cup raw honey
- Optional: 1 cinnamon stick, 1-inch piece of fresh ginger (sliced), 1/2 teaspoon cloves
- 1 cup prepared elderberry syrup
- 3 tablespoons grass-fed gelatin
- 1–2 tablespoons extra honey (optional)
- 1/4 cup cold water
Instructions
- Combine the dried elderberries, water, and any optional spices (cinnamon, ginger, cloves) in a medium saucepan.
- Bring to a boil over medium-high heat, then reduce the heat to low and let it simmer uncovered for 30-40 minutes. The liquid will reduce by about half, and the berries will become soft and plump.
- Remove the pot from the heat and let it cool for about 10 minutes. Use a potato masher or the back of a spoon to gently press the berries, releasing as much liquid as possible.
- Strain the mixture through a fine-mesh strainer or cheesecloth into a clean bowl or glass jar. Press on the berries to extract every last drop of that deep purple syrup. Discard the solids.
- While the syrup is still warm, stir in the honey until fully dissolved. If you’re using spices, you can leave them in the liquid during simmering but remove them before adding honey. (Pro tip: if your syrup is too hot, it can degrade the beneficial compounds in the honey, so let it cool to about 120°F before stirring in the honey.)
- Let the syrup cool completely before using it for the gummies. You’ll need 1 cup for this recipe. Store any extra syrup in an airtight jar in the fridge for up to 2 weeks—it’s great in tea, smoothies, or drizzled over pancakes.
- Pour the 1/4 cup cold water into a small bowl and sprinkle the gelatin evenly over the surface. Let it sit for 5-10 minutes until it becomes a firm, jiggly blob. This is called ‘blooming’ and it prevents lumps.
- While the gelatin blooms, warm the 1 cup of elderberry syrup in a small saucepan over low heat. You want it to be warm but not boiling—about 110-120°F. If it’s too hot, it can weaken the gelatin’s setting power.
- Once the syrup is warm, add the bloomed gelatin and whisk gently until completely dissolved. The mixture should be smooth and silky, with no visible gelatin granules. If you see lumps, keep whisking—they’ll usually dissolve with a bit of patience.
- If you want sweeter gummies, stir in the extra tablespoon of honey at this point. Taste the mixture (carefully—it’s warm!) and adjust as needed.
- Using a dropper or small measuring cup, carefully fill your silicone molds with the liquid mixture. Work quickly, because the gelatin will start to set as it cools. If it thickens too much, gently reheat it for a few seconds on the stove.
- Place the filled molds on a tray or plate and refrigerate for at least 2-3 hours, or until the gummies are firm to the touch. I usually leave them overnight for the best texture.
- Once set, pop the gummies out of the molds. They should release easily—if they stick, try placing the mold in the freezer for 5 minutes.
Notes
Don’t skip blooming the gelatin. Keep the syrup warm, not hot. Work quickly when filling molds. Use a non-stick spray for stubborn molds. Store them properly to extend shelf life. Don’t over-simmer the elderberries.
Nutrition
- Serving Size: 6-8 gummies
- Calories: 4560
- Sugar: 810
- Sodium: 5
- Carbohydrates: 1012
- Protein: 23
Keywords: elderberry gummies, homemade gummies, immune boosting gummies, kid-friendly gummies, elderberry syrup gummies, natural gummies, honey sweetened gummies