This was supposed to be a quiet batch of classic deviled eggs for a potluck. You know the kind—simple, reliable, nothing fancy. But I got distracted. My nephew was trying to show me his new magic trick, the timer for the eggs was beeping, and I grabbed the paprika container without looking. It was cayenne pepper. By the time I realized what happened, I’d already mixed it into the filling. I stood there, staring at the bowl, thinking I’d just ruined a dozen perfectly boiled eggs. Honestly, I was ready to toss the whole thing and start over.
But I didn’t. I added a little extra mayo to calm the heat, piped the filling anyway, and then—out of pure frustration—I grabbed a jar of black olives from the fridge and started slicing them into shapes. I don’t know why. Maybe I was just stalling. But suddenly, those angry little eggs looked like they had eight legs and beady eyes. They were spiders. Spooky, silly, and completely accidental. My nephew thought it was the coolest thing he’d ever seen. And you know what? They were actually delicious—the cayenne gave them a tiny, unexpected kick that made everyone go back for seconds.
I never did make it to that potluck with the plain deviled eggs. But I showed up with a platter of these spooky spiders, and let me tell you, they disappeared in about five minutes. That’s the thing about mistakes in the kitchen—sometimes they turn into your best ideas. This recipe is proof that even when things go wrong, you can still end up with something amazing. And honestly, it’s way more fun than the original plan ever was.
Why You’ll Love This Recipe
Let’s face it—Halloween entertaining can be a lot of pressure. Between the costume planning, the decorations, and the candy bowls, the last thing you need is a complicated appetizer that takes hours. These Easy Spooky Spider Deviled Eggs are here to save the night. They come together in just 20 minutes, and they look like you spent way more time on them than you actually did.
- Quick & Easy: From start to finish, you’re looking at 20 minutes flat. Hard-boil the eggs ahead of time, and you can assemble these in under 10 minutes. Perfect for those last-minute Halloween parties or when the kids are already hyped up on sugar.
- Simple Ingredients: You probably already have eggs, mayo, and mustard in your kitchen. The only special addition is black olives, and those are easy to find at any grocery store. No fancy trips to specialty shops needed.
- Crowd-Pleaser: Kids love the creepy-crawly look, and adults appreciate the classic deviled egg flavor with a tiny surprise kick. I’ve brought these to three different Halloween gatherings now, and they always get the most comments.
- Unbelievably Delicious: The creamy filling with that subtle cayenne warmth paired with the briny olive legs—it’s a combination that just works. You won’t believe something so simple can taste this good.
- Make-Ahead Friendly: Boil the eggs and prep the filling the day before. Just assemble the spiders right before serving, and you’re good to go.
What makes this recipe different from every other deviled egg out there is the story behind it. This isn’t just another appetizer—it’s a happy accident that turned into a Halloween tradition. The cayenne pepper gives it a little personality, and the olive spiders make it memorable. It’s the kind of recipe that makes people stop, smile, and ask, “How did you do that?”
What Ingredients You Will Need
This recipe uses simple, everyday ingredients to create something that looks impressive but takes almost no effort. Most of these are pantry staples, so you probably already have everything you need.
For the Deviled Eggs
- 6 large eggs – Use the freshest eggs you can find for the best flavor. Older eggs are actually easier to peel after boiling, so don’t stress if they’ve been in the fridge for a week.
- 3 tablespoons mayonnaise – I prefer Hellmann’s or Duke’s for that creamy, tangy base. If you’re dairy-free, vegan mayo works fine here.
- 1 teaspoon yellow mustard – Adds that classic deviled egg tang. Dijon works too if you want a slightly sharper flavor.
- 1/4 teaspoon cayenne pepper – This is the secret ingredient that makes these eggs memorable. It’s not spicy—just a tiny warmth that sneaks up on you. If you’re nervous about heat, start with 1/8 teaspoon.
- 1/8 teaspoon salt – Just a pinch to bring everything together.
- 1/8 teaspoon black pepper – Freshly ground is always better, but pre-ground works in a pinch.
- 1 teaspoon white vinegar – A tiny splash brightens up the filling and helps balance the richness. Don’t skip it—it makes a difference.
For the Spider Decoration
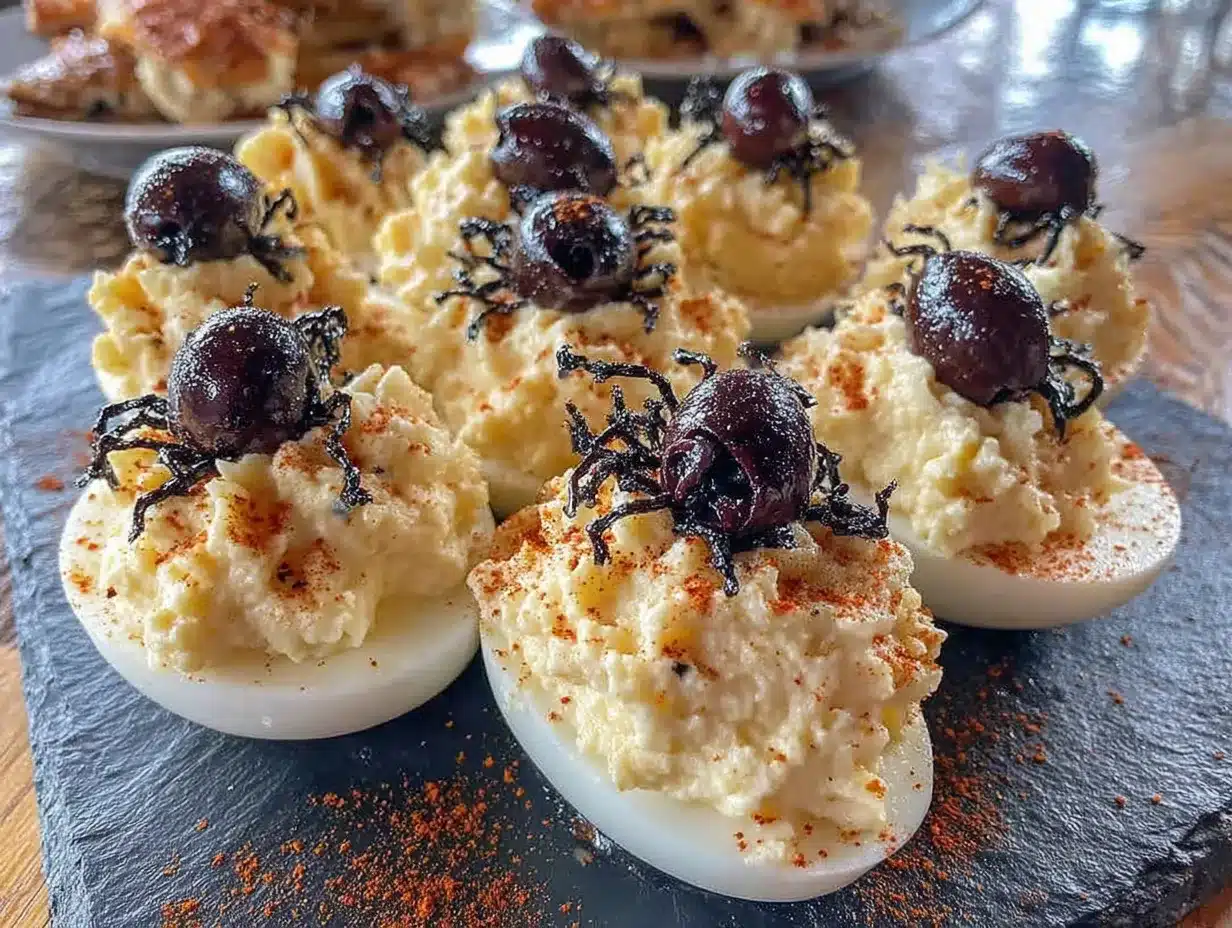
- 1 can (6 ounces) black olives – You’ll need whole pitted olives for the spider bodies. Look for large, firm olives—they’re easier to slice and arrange. I recommend Lindsay or Early California brands for consistent size.
- Optional: 1 tablespoon paprika – For dusting the finished eggs. It adds color and a mild smoky flavor that complements the cayenne nicely.
Substitution Notes
If you’re feeding a crowd, double the recipe easily—just use 12 eggs and double everything else. For a milder version, swap the cayenne for regular paprika. And if black olives aren’t your thing, you can use sliced black beans or even small pieces of roasted red pepper for the spider legs. The look won’t be as dark and dramatic, but it’ll still be fun.
Equipment Needed
- Medium saucepan – For boiling the eggs. Any pot works, but a wider pan helps the eggs cook evenly.
- Mixing bowl – Medium-sized for mashing the yolks with the other ingredients.
- Fork or potato masher – For breaking up the yolks. A fork works perfectly—no need for anything fancy.
- Cutting board and sharp knife – For slicing the olives into spider shapes. A paring knife is ideal for precision.
- Piping bag or zip-top bag – For filling the egg whites neatly. A zip-top bag with the corner snipped off works just as well as a real piping bag.
- Small spoon or melon baller – For scooping out the yolks. A regular teaspoon does the job fine.
- Serving platter – Any flat dish works. A dark-colored platter makes the spider eggs pop visually.
I’ve made these eggs in kitchens with everything from fancy marble countertops to a cramped dorm room setup. The only non-negotiable tool is the saucepan. Everything else can be improvised. I once used a butter knife to slice the olives—not ideal, but it worked. Don’t let equipment hold you back.
Preparation Method
- Boil the eggs (10 minutes): Place the eggs in a single layer in your saucepan. Cover them with cold water by about an inch. Bring the water to a rolling boil over high heat. Once boiling, cover the pot, remove it from the heat, and let it sit for exactly 10 minutes. This method gives you perfectly cooked yolks—firm but not rubbery—without the green ring that happens when eggs are overcooked.
- Cool the eggs (5 minutes): While the eggs are resting, fill a bowl with ice water. After 10 minutes, transfer the eggs to the ice bath using a slotted spoon. Let them cool for at least 5 minutes. This stops the cooking process and makes peeling way easier. I’ve learned the hard way that skipping this step leads to eggs that look like they’ve been through a war.
- Peel and halve the eggs (3 minutes): Gently tap each egg on the counter to crack the shell all over. Start peeling under running cold water—the water helps separate the shell from the egg white. Pat the peeled eggs dry with a paper towel. Slice each egg in half lengthwise with a sharp knife. Carefully pop out the yolks into your mixing bowl. Arrange the white halves on your serving platter, cut side up.
- Make the filling (2 minutes): Add the mayonnaise, yellow mustard, cayenne pepper, salt, black pepper, and white vinegar to the bowl with the yolks. Mash everything together with a fork until it’s smooth and creamy. Taste it. Adjust the salt or cayenne if needed. The filling should be rich, tangy, and just barely warm on the finish.
- Pipe the filling (2 minutes): Spoon the yolk mixture into a piping bag or a zip-top bag. If using a zip-top bag, squeeze the filling into one corner and snip off about 1/4 inch from the tip. Pipe the filling into each egg white half, dividing it evenly. You want a nice little mound that rises slightly above the edge of the white. Don’t overfill—you need room for the spider decorations.
- Create the spider bodies (3 minutes): Drain the black olives and pat them dry with a paper towel. For each spider, you’ll need one whole olive for the body. Slice each olive in half crosswise—you want two round pieces. One half becomes the spider body, and the other half gets sliced into thin strips for the legs. You should get 6-8 thin slices from each half. Arrange 4 slices on each side of the olive body to create the legs. Gently press the legs into the filling so they stay in place.
- Add the eyes (1 minute): For the spider eyes, you can use tiny dots of mayonnaise or small pieces of white cheese. I usually just add a tiny dab of the filling mixture on top of the olive body. It gives the spider a cute, slightly goofy expression that kids love.
- Finish and serve (1 minute): If you’re using paprika, lightly dust the finished eggs with it right before serving. Arrange them on your platter, and watch them disappear.
Cooking Tips & Techniques
Here’s the thing about deviled eggs—they’re simple, but a few small tricks make the difference between good and great. First, always use room-temperature eggs for boiling. Cold eggs crack more easily when they hit the hot water. If you forgot to take them out of the fridge, just run them under warm water for a minute before boiling.
Peeling eggs is the part everyone dreads, but here’s what I’ve learned: older eggs peel easier than fresh ones. If your eggs are less than a week old, add a teaspoon of baking soda to the boiling water. It raises the pH and helps the shell slide off. Also, start peeling from the wider end of the egg—there’s an air pocket there that gives you a good starting point.
I once tried to rush the cooling step and ended up with green-ringed yolks that tasted like sulfur. Don’t be me. Let those eggs sit in the ice bath for the full 5 minutes. Your patience will be rewarded with bright yellow yolks and a smooth, creamy texture.
For the olive legs, use a sharp knife and slice slowly. Dull knives crush the olives and make uneven legs. If you’re making these for a party, prep the olive legs ahead of time and store them in a sealed container in the fridge. Just make sure they’re dry before you arrange them on the eggs—wet olives slide around in the filling.
Variations & Adaptations
- Spicy Version: Double the cayenne pepper and add a dash of hot sauce to the filling. The heat pairs surprisingly well with the briny olives. I tried this for a Halloween party with friends who love spicy food, and they couldn’t stop eating them.
- Smoky Version: Replace the cayenne with smoked paprika. It gives the filling a deep, smoky flavor that feels more sophisticated. Add a tiny pinch of garlic powder for extra depth.
- Herb Version: Mix in a tablespoon of finely chopped fresh chives or dill. The green flecks look pretty against the yellow filling, and the freshness balances the richness of the mayo.
- Dairy-Free Version: Use vegan mayonnaise and skip any dairy-based garnishes. The recipe works perfectly without any dairy at all—just make sure your mustard is dairy-free too.
- Low-Carb Version: This recipe is already low-carb and keto-friendly. The eggs and olives are both great for low-carb diets. Just watch the mustard—some brands add sugar.
I’ve also experimented with using green olives instead of black ones. The look is different—more like alien spiders than classic ones—but the flavor is fantastic. The brininess of green olives adds a tangy pop that contrasts nicely with the creamy filling.
Serving & Storage Suggestions
These spooky spider deviled eggs are best served chilled or at room temperature. I recommend arranging them on a dark platter or a bed of fresh spinach leaves to make the spider shapes stand out. If you’re serving them at a Halloween party, set them out about 15 minutes before guests arrive so they lose the chill from the fridge but stay cool enough to be safe.
For storage, place any leftover eggs in a single layer in an airtight container. They’ll keep in the refrigerator for up to 2 days. Don’t freeze them—the texture of the filling gets watery and weird when thawed. Trust me, I tried it once during a particularly ambitious meal prep session, and it was a mistake.
When reheating (though I don’t recommend it), let them sit at room temperature for about 20 minutes. Don’t microwave them. The egg whites get rubbery, and the olive legs fall off. If you’re making these ahead for a party, boil the eggs and prepare the filling up to 24 hours in advance. Store the filling in a piping bag in the fridge, and assemble the spiders right before serving. The legs stay crispier that way, and the eggs look fresher.
One thing I love about this recipe is that the flavors actually get better after a few hours in the fridge. The cayenne mellows out and blends with the mayo, and the olive flavor seeps into the filling just a little. If you can, make them in the morning for an evening party—they’ll taste even better.
Nutritional Information & Benefits
Per serving (2 deviled eggs): approximately 180 calories, 14g fat, 2g carbohydrates, 10g protein. These numbers are estimates and will vary based on your specific ingredients and portion sizes.
Eggs are a fantastic source of high-quality protein and contain important nutrients like vitamin D, vitamin B12, and choline, which supports brain health. The black olives add healthy monounsaturated fats and a small amount of iron. This recipe is naturally gluten-free, low-carb, and suitable for keto diets. The cayenne pepper contains capsaicin, which has anti-inflammatory properties and can give your metabolism a tiny boost.
If you’re watching your sodium intake, use low-sodium olives and go easy on the added salt. The mustard and olives already bring plenty of flavor. I’ve made these for friends with various dietary restrictions, and they’re always a safe bet—just check your mayo and mustard labels if you’re avoiding specific allergens.
Conclusion
These Easy Spooky Spider Deviled Eggs are proof that the best recipes often come from happy accidents. What started as a distracted mistake in my kitchen turned into a Halloween tradition that my family and friends look forward to every year. They’re quick, simple, and guaranteed to make people smile—which is really what Halloween is all about.
I’d love to hear how your spiders turn out. Did you add your own twist? Did the kids help arrange the legs? Drop a comment below and let me know. And if you’re looking for more quick and easy appetizers for your next gathering, check out my spicy jalapeno poppers or these garlic parmesan pull-apart bread. Happy Halloween, and happy cooking!
Frequently Asked Questions
Can I make these spider deviled eggs a day ahead?
Yes, you can boil the eggs and prepare the filling up to 24 hours in advance. Store the peeled eggs and filling separately in the fridge. Assemble the spiders right before serving for the best presentation.
How do I keep the olive legs from falling off?
Make sure the filling is thick enough to hold the legs in place. If it’s too runny, add a little more mayo or an extra yolk. Gently press the olive slices into the filling so they’re anchored.
Can I use a different type of olive?
Absolutely. Green olives, kalamata olives, or even stuffed olives work. Just keep in mind that the color and flavor will change. Green olives give a brighter, tangier taste, while kalamata olives add a richer, fruitier note.
How do I get perfectly boiled eggs every time?
Use the method I described: bring eggs to a boil, cover, remove from heat, and let sit for 10 minutes. Then immediately transfer to an ice bath. This gives you firm yolks without the green ring and makes peeling much easier.
Are these spider deviled eggs kid-friendly?
Definitely! Kids love the spider design, and the cayenne pepper is mild enough that most children won’t notice it. If you’re serving very young kids, you can skip the cayenne entirely and use regular paprika instead.
Pin This Recipe!
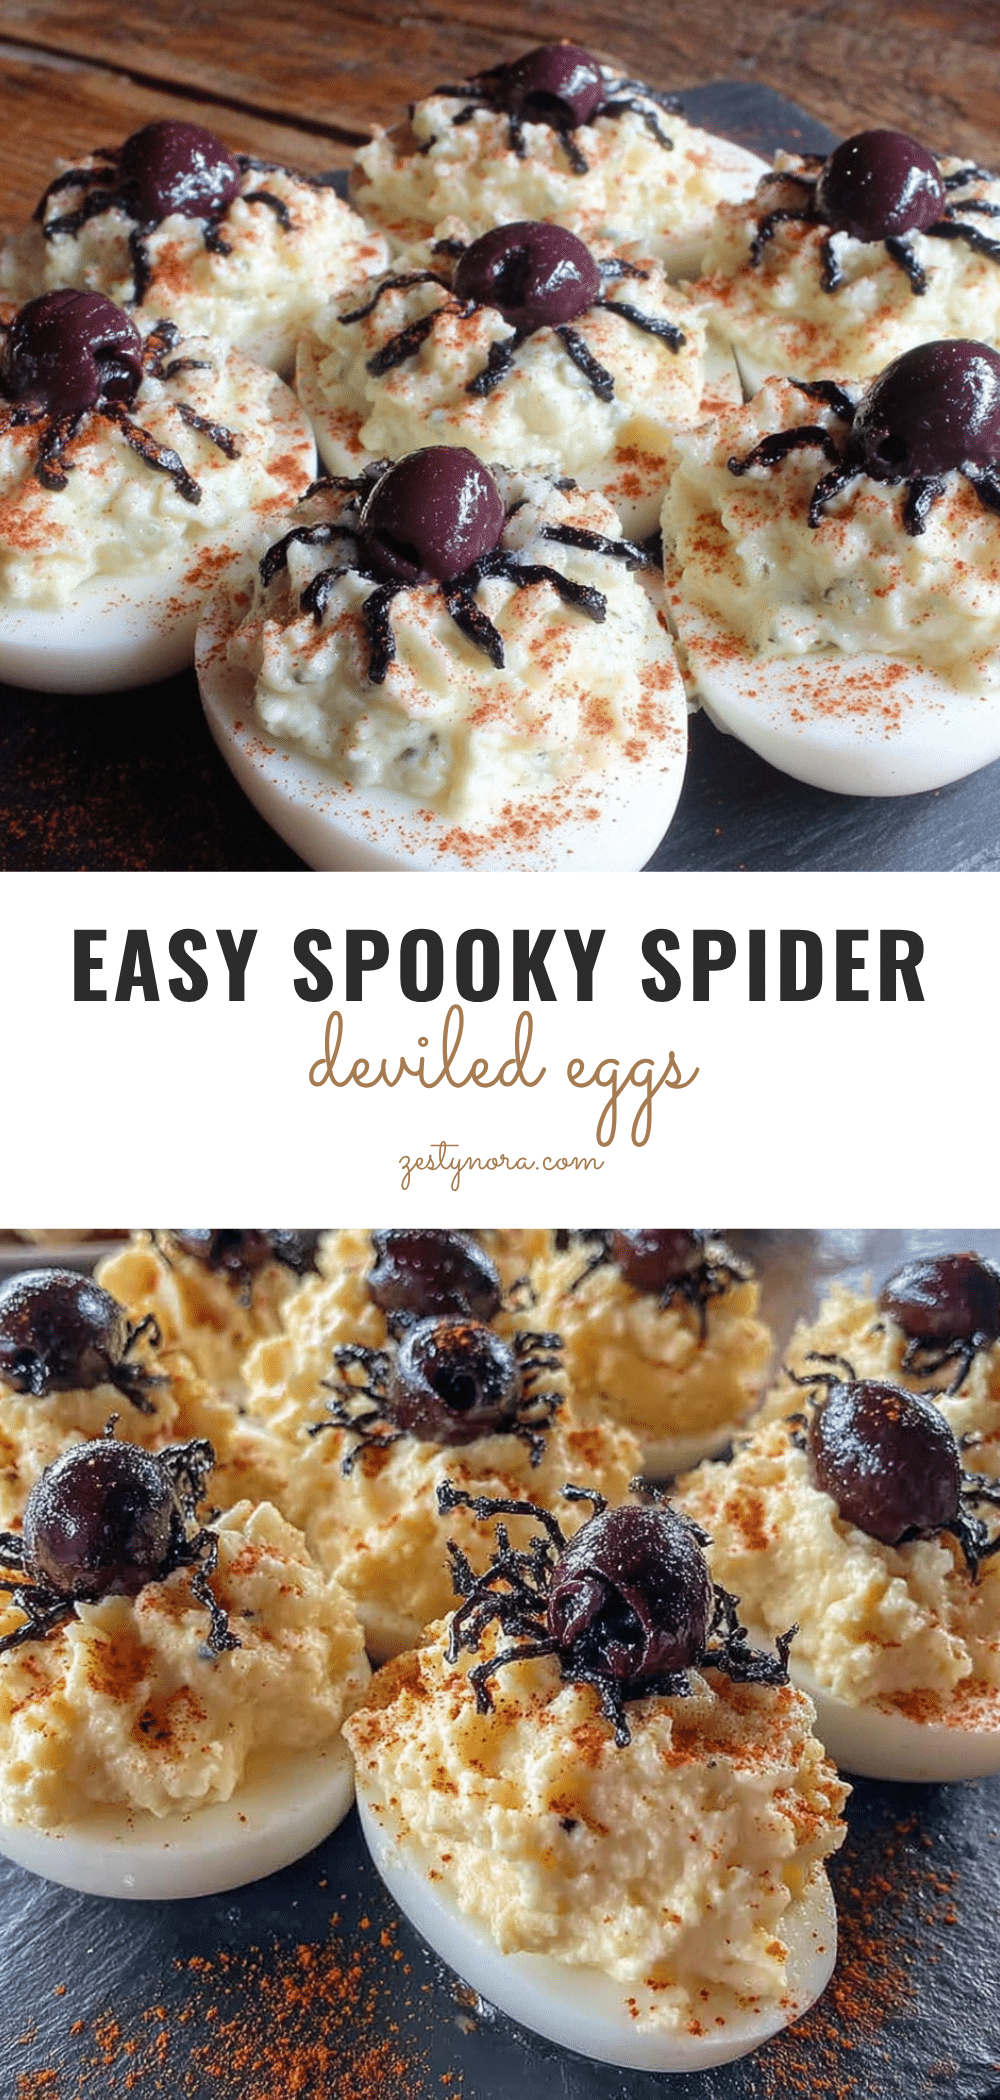
Easy Spooky Spider Deviled Eggs: Best 20-Minute Halloween Appetizer
These spooky spider deviled eggs are a quick and easy Halloween appetizer that comes together in just 20 minutes. With a creamy, slightly spicy filling and olive spider decorations, they’re a crowd-pleasing treat that looks impressive but requires minimal effort.
- Prep Time: 10 minutes
- Cook Time: 10 minutes
- Total Time: 20 minutes
- Yield: 6 servings (12 deviled eggs) 1x
- Category: Appetizer
- Cuisine: American
Ingredients
- 6 large eggs
- 3 tablespoons mayonnaise
- 1 teaspoon yellow mustard
- 1/4 teaspoon cayenne pepper
- 1/8 teaspoon salt
- 1/8 teaspoon black pepper
- 1 teaspoon white vinegar
- 1 can (6 ounces) black olives, pitted
- Optional: 1 tablespoon paprika for dusting
Instructions
- Boil the eggs: Place eggs in a single layer in a saucepan, cover with cold water by 1 inch. Bring to a rolling boil over high heat, then cover, remove from heat, and let sit for exactly 10 minutes.
- Cool the eggs: Transfer eggs to an ice bath and let cool for at least 5 minutes.
- Peel and halve the eggs: Gently crack and peel eggs under cold running water. Pat dry, slice each in half lengthwise, and pop out yolks into a mixing bowl. Arrange whites on a serving platter cut side up.
- Make the filling: Add mayonnaise, yellow mustard, cayenne pepper, salt, black pepper, and white vinegar to the yolks. Mash with a fork until smooth and creamy. Taste and adjust seasoning if needed.
- Pipe the filling: Spoon filling into a piping bag or zip-top bag. Snip off a small corner and pipe filling into each egg white half, dividing evenly.
- Create the spider bodies: Drain and pat olives dry. For each spider, slice one olive in half crosswise. Use one half as the body; slice the other half into thin strips (6-8 per half) for legs. Arrange 4 strips on each side of the olive body and gently press into the filling.
- Add the eyes: Use tiny dots of mayonnaise or filling on top of the olive body for eyes.
- Finish and serve: If desired, lightly dust with paprika. Serve immediately or refrigerate until ready.
Notes
For easier peeling, use older eggs or add 1 teaspoon baking soda to the boiling water. Start peeling from the wider end of the egg. The filling can be made a day ahead; assemble spiders just before serving. For a milder version, substitute cayenne with paprika.
Nutrition
- Serving Size: 2 deviled eggs
- Calories: 180
- Sugar: 1
- Sodium: 350
- Fat: 14
- Saturated Fat: 3
- Carbohydrates: 2
- Protein: 10
Keywords: Halloween appetizer, deviled eggs, spider deviled eggs, easy Halloween recipe, 20-minute appetizer, spooky eggs, party appetizer