I wasn’t expecting baking advice from a plumber, but there I was, standing in the hardware aisle at Lowe’s on a rainy Tuesday afternoon, listening to a man named Frank describe exactly how to make the most incredible pecan pie bars I’d ever taste. He was holding a pipe wrench in one hand and gesturing wildly with the other, telling me that the secret wasn’t in the filling—it was in the crust. “Most people get the crust wrong,” he said, shaking his head. “They make it too thick, or worse, too soggy. You need a shortbread base that’s sturdy enough to hold up but tender enough to melt.” I honestly thought I’d just nod politely and go about my day, but something about his conviction made me grab a notepad from my purse. I mean, when a plumber takes time out of his workday to share a family recipe, you listen.
Frank told me this recipe came from his grandmother, who ran a small bakery in Savannah for forty years. She called them “company bars” because they were fancy enough for guests but simple enough to throw together on a whim. The brown sugar filling is rich and caramel-like, studded with toasted pecans, and that buttery shortbread crust? Let me tell you, it’s the kind of crust you’ll want to eat on its own. I made my first batch that very weekend, and my kitchen smelled like a bakery in the South. The bars came out golden, with that perfect crackly top and a soft, chewy center. I may have burned my tongue on the first bite because I couldn’t wait for them to cool. Maybe you’ve been there—cutting into something way too early because the smell is just too much to resist.
These bars have become my go-to for everything from holiday cookie exchanges to random Tuesday pick-me-ups. They’re the kind of dessert that makes people close their eyes when they take a bite, and honestly, that’s my favorite kind of recipe. So here it is, courtesy of Frank the plumber and his Savannah grandmother—cozy brown sugar pecan pie bars with a buttery shortbread crust that will change the way you think about pecan pie forever.
Why You’ll Love This Recipe
I’ve tested this recipe more times than I care to admit, tweaking the ratios and the baking times until everything was just right. Here’s why these brown sugar pecan pie bars are worth every single calorie:
- Quick & Easy: No rolling pins, no chilling the dough for hours, no fussing with a pie crust that cracks and tears. These bars come together in about 45 minutes start to finish, making them perfect for last-minute baking emergencies.
- Simple Ingredients: You probably have most of these in your pantry right now. Butter, flour, brown sugar, pecans, eggs—that’s the backbone of this recipe. No weird specialty items or trips to three different stores.
- Perfect for Entertaining: These bars slice cleanly, travel well, and look stunning on a dessert platter. They’re great for Thanksgiving, Christmas cookie swaps, potlucks, or just having something special on the counter when friends stop by.
- Crowd-Pleaser: I’ve served these to kids, grandparents, picky eaters, and self-proclaimed pecan pie haters. Every single person has asked for the recipe. The shortbread crust is the game-changer—it’s less overwhelming than traditional pie crust and somehow more satisfying.
- Unbelievably Delicious: The texture is pure magic. The crust is buttery and crumbly, the filling is rich and gooey, and the pecans add that perfect crunch. It’s comfort food at its finest—the kind of dessert that makes a bad day better and a good day even sweeter.
What makes these different from every other pecan bar recipe out there? It’s the ratio. Most recipes use way too much filling, which makes the bars soggy and impossible to cut. I spent weeks perfecting the balance between crust and filling so you get that satisfying shortbread bite in every single piece. Plus, toasting the pecans beforehand is non-negotiable—it brings out their natural oils and makes the flavor infinitely deeper. Trust me on this one.
What Ingredients You Will Need
This recipe uses simple, wholesome ingredients to deliver that rich, caramel-like flavor and satisfying texture. Most of these are pantry staples, which means you can whip up a batch anytime the craving hits.
For the Buttery Shortbread Crust
- 1 ½ cups all-purpose flour (spooned and leveled—don’t scoop directly from the bag or you’ll pack it too tight)
- ½ cup powdered sugar (this keeps the crust tender, unlike granulated sugar which can make it gritty)
- ¾ cup unsalted butter, cold and cut into small cubes (I use Kerrygold for the best flavor, but any good-quality unsalted butter works)
- ¼ teaspoon salt (a little salt in the crust balances the sweetness of the filling)
For the Brown Sugar Pecan Filling
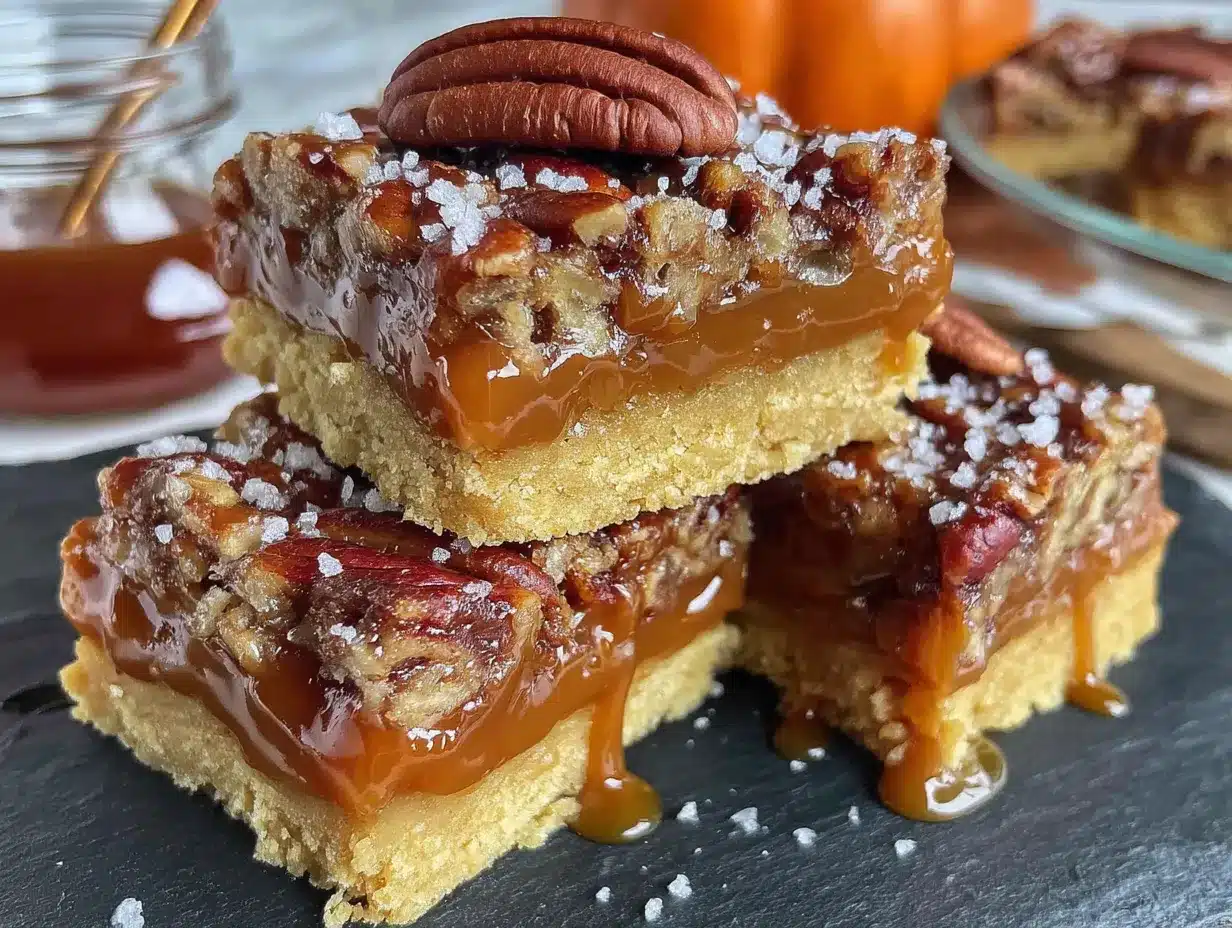
- 1 ½ cups packed light brown sugar (dark brown sugar works too, but light gives a more classic caramel flavor—I recommend Domino or C&H for consistent results)
- ½ cup unsalted butter, melted (let it cool slightly so it doesn’t cook the eggs when you mix everything together)
- 2 large eggs, room temperature (cold eggs can seize the butter and make the filling lumpy—set them out 30 minutes before starting)
- 2 tablespoons whole milk (adds richness and helps the filling set up properly)
- 1 teaspoon vanilla extract (pure vanilla, not imitation—it makes a noticeable difference)
- 2 tablespoons all-purpose flour (this is the secret to a filling that’s set but still soft and chewy)
- ¼ teaspoon salt (to enhance all those warm, nutty flavors)
- 1 ½ cups pecan halves or chopped pecans (toasted for 5-7 minutes in a dry pan or oven until fragrant—this step is crucial)
Ingredient Tips: For the pecans, I prefer pecan halves because they look prettier on top, but chopped pecans distribute more evenly throughout the bars. Either works great. If you’re using salted butter, reduce the added salt in both the crust and filling to just a pinch. And if you’re out of powdered sugar for the crust, you can blitz granulated sugar in a food processor until it’s fine and powdery—it’s not perfect, but it works in a pinch.
Substitution Guidance: Need a dairy-free option? Use a high-quality vegan butter stick (not the spreadable kind in a tub) and substitute the milk with oat milk or almond milk. For a gluten-free version, swap the all-purpose flour in both the crust and filling with a 1:1 gluten-free baking flour blend—I’ve had good results with Bob’s Red Mill. The texture will be slightly more delicate, so let the bars cool completely before slicing.
Equipment Needed
You don’t need a fancy kitchen to make these bars, which is part of why I love this recipe so much. Here’s what you’ll need:
- 9×13-inch baking pan (a metal pan gives the crispiest crust, but glass or ceramic works too—just watch the baking time as glass retains heat longer)
- Parchment paper (non-negotiable—you need the overhang to lift the bars out cleanly)
- Large mixing bowls (one for the crust, one for the filling)
- Pastry cutter or fork (for cutting the butter into the flour for the crust—your hands work too, but a pastry cutter keeps the butter from melting from your body heat)
- Whisk (for the filling ingredients)
- Measuring cups and spoons
- Cooling rack (essential for getting those clean slices)
- Sharp knife (a serrated knife works best for cutting through the crust without dragging the filling)
If you don’t have a pastry cutter, don’t stress. You can use two forks, a food processor (just pulse until the mixture looks like coarse sand), or even your fingertips. Just work quickly so the butter stays cold. And if you don’t have a 9×13 pan, you can use a 9×9 square pan—just increase the baking time by about 5-7 minutes and expect thicker bars. I’ve done it before when I forgot my big pan at a friend’s house, and honestly, the thicker bars were even more decadent.
Preparation Method
Let me walk you through this step by step. I’ve made these bars probably twenty times by now, so I’ve learned exactly where things can go wrong and how to avoid it.
- Preheat your oven to 350°F (175°C). Line your 9×13-inch baking pan with parchment paper, leaving about 2 inches of overhang on the long sides. This is your handle for lifting the bars out later. Lightly grease the parchment with butter or non-stick spray.
- Toast the pecans. Spread your pecans on a baking sheet and toast them in the preheating oven for 5-7 minutes, stirring once halfway through. You’ll know they’re done when they smell incredibly nutty and look slightly darker. Set them aside to cool while you make the crust. Pro tip: Don’t skip this step. Raw pecans in the filling will taste flat and slightly bitter. Toasting transforms them completely.
- Make the shortbread crust. In a large bowl, whisk together the flour, powdered sugar, and salt. Add the cold butter cubes. Using a pastry cutter or your fingertips, work the butter into the flour mixture until it resembles coarse meal with some pea-sized butter pieces remaining. Don’t overwork it—those little butter pockets are what make the crust tender and flaky.
- Press the crust into the pan. Dump the crust mixture into your prepared pan and press it down firmly and evenly. I use the bottom of a flat measuring cup to really pack it in. Make sure the corners are covered and the surface is level. This is important because an uneven crust will bake unevenly.
- Bake the crust. Bake for 15-18 minutes, until the edges are lightly golden and the center looks set but not browned. You want it partially baked so it can support the filling without getting soggy. Remove from the oven and let it cool for 5 minutes while you make the filling. Warning: The crust will be hot and fragile—don’t try to move it.
- Make the filling. In a medium bowl, whisk together the melted butter and brown sugar until smooth. Add the eggs one at a time, whisking well after each addition. Stir in the milk and vanilla extract. Sprinkle the flour and salt over the mixture and whisk until just combined—don’t overmix or the filling can get tough.
- Add the pecans. Fold in the toasted pecans with a spatula, reserving about ¼ cup to sprinkle on top for a prettier presentation. The filling will be thin and liquidy—that’s normal.
- Assemble and bake. Pour the filling over the warm crust, spreading it evenly. Sprinkle the reserved pecans on top. Bake for 22-25 minutes, until the edges are set and the center is slightly jiggly (like a cheesecake). The filling will puff up a bit and develop that beautiful crackly top. Sensory cue: When it’s done, the kitchen will smell like caramel, toasted nuts, and butter—absolutely intoxicating.
- Cool completely. This is the hardest part. Let the bars cool in the pan on a wire rack for at least 2 hours at room temperature, then refrigerate for another hour before slicing. I know you want to dig in immediately, but warm bars will be a gooey mess. Patience pays off here.
- Slice and serve. Use the parchment overhang to lift the entire block of bars out of the pan. Place on a cutting board and use a sharp knife to slice into squares. For clean cuts, wipe the knife clean between slices. I like to cut 24 small squares for parties, or 12 larger bars when I’m feeling generous.
Cooking Tips & Techniques
I’ve messed up this recipe in almost every way possible, so let me save you from my mistakes. Here’s what I’ve learned:
Don’t overbake the crust. The first time I made these, I baked the crust until it was deeply golden, thinking I wanted it extra crispy. Big mistake. The second bake with the filling dried it out completely, and the bars were hard and crumbly instead of tender. You want the crust pale and just set—it will continue baking when you add the filling.
Room temperature eggs matter. I learned this the hard way when I used cold eggs straight from the fridge. The cold eggs seized the melted butter, creating little butter clumps in my filling. It still tasted fine, but the texture was uneven. Set your eggs out 30 minutes before starting, or if you’re in a rush, place them in a bowl of warm water for 5 minutes.
Let them cool completely. I cannot stress this enough. The first time I made these, I cut into them after 45 minutes because I couldn’t wait. The filling oozed everywhere, the crust crumbled, and I ended up eating what was essentially pecan pie soup with a spoon. Delicious? Yes. Presentable? Absolutely not. The refrigeration step is what gives you those clean, beautiful squares.
Toast your pecans. I know I’ve said this already, but it bears repeating. Raw pecans are fine in a pinch, but toasting brings out their natural oils and deepens the flavor in a way that makes these bars taste like they came from a professional bakery. Don’t skip it.
Use a metal pan for the crispiest crust. Glass and ceramic pans are great for many things, but they don’t conduct heat as efficiently as metal. If you use glass, reduce the oven temperature by 25°F and expect a slightly softer crust. I’ve done it, and the bars are still delicious—just different.
Variations & Adaptations
One of the best things about this recipe is how easily it adapts to different tastes and dietary needs. Here are some variations I’ve tried and loved:
Chocolate Pecan Pie Bars: Add ½ cup of semi-sweet chocolate chips to the filling along with the pecans. The chocolate melts into the brown sugar mixture, creating a flavor combination that’s absolutely irresistible. I made these for a Super Bowl party and they disappeared in minutes.
Bourbon Maple Variation: Replace the vanilla extract with 1 tablespoon of bourbon and add 2 tablespoons of pure maple syrup to the filling. The bourbon adds warmth and complexity, while the maple complements the brown sugar perfectly. These are my go-to for holiday gatherings.
Gluten-Free Version: Use a 1:1 gluten-free baking flour blend in both the crust and filling. I’ve tested this with Bob’s Red Mill and King Arthur Measure for Measure, and both work well. The crust will be slightly more delicate, so handle it gently when pressing it into the pan.
Vegan Adaptation: Substitute the butter in both the crust and filling with a high-quality vegan butter stick. Use flax eggs (1 tablespoon ground flaxseed mixed with 3 tablespoons water per egg) instead of regular eggs, and use oat milk or almond milk in place of whole milk. The texture is slightly different—less gooey, more fudge-like—but still delicious.
Spiced Pecan Bars: Add 1 teaspoon of cinnamon, ½ teaspoon of nutmeg, and a pinch of cloves to the filling. The warm spices make these bars taste like autumn in a pan. I like to serve these with a dollop of whipped cream and a dusting of cinnamon on top.
Serving & Storage Suggestions
These bars are incredibly versatile when it comes to serving. Here’s how I like to enjoy them:
Serving Temperature: I prefer these bars at room temperature or slightly chilled. Room temperature brings out the gooey texture of the filling, while chilled bars cut more cleanly and have a firmer bite. Both are wonderful—it just depends on your mood.
Presentation Ideas: Dust the tops with a little powdered sugar right before serving for a beautiful snowy effect. For an extra decadent treat, warm a bar in the microwave for 10 seconds and top with a scoop of vanilla ice cream or a drizzle of caramel sauce. The contrast between warm, gooey filling and cold ice cream is pure heaven.
What to Serve With Them: These bars pair beautifully with coffee, tea, or a glass of cold milk. For a dessert platter, arrange them alongside other bar cookies like lemon bars or chocolate chip cookie bars. They also make a fantastic addition to a Thanksgiving dessert table alongside pumpkin pie and apple crisp.
Storage Instructions: Store the bars in an airtight container at room temperature for up to 3 days, or in the refrigerator for up to a week. Layer them between sheets of parchment paper to prevent sticking. If you’re stacking them in a container, make sure they’re completely cool first—warm bars will stick together and create a mess.
Freezing Instructions: These bars freeze beautifully. Wrap individual bars tightly in plastic wrap, then place them in a freezer-safe bag or container. They’ll keep for up to 3 months. To thaw, let them sit at room temperature for about 30 minutes, or warm them in a 300°F oven for 5-7 minutes. I like to keep a stash in my freezer for unexpected guests or late-night cravings.
Flavor Development: Honestly, these bars taste even better the next day. The flavors meld together overnight, and the filling sets up to the perfect texture. If you can resist eating them right away, make them a day ahead and let them rest in the refrigerator. You’ll be rewarded with the most incredible flavor and texture.
Nutritional Information & Benefits
Let’s be real—these are not health food. They’re a decadent treat meant to be enjoyed in moderation. But that doesn’t mean there aren’t some redeeming qualities:
| Nutrient | Per Bar (1/24 of recipe) |
|---|---|
| Calories | 210 |
| Total Fat | 14g |
| Saturated Fat | 6g |
| Cholesterol | 35mg |
| Sodium | 85mg |
| Total Carbohydrates | 21g |
| Dietary Fiber | 1g |
| Sugars | 15g |
| Protein | 2g |
Health Benefits: Pecans are a good source of healthy monounsaturated fats, which are great for heart health. They also contain antioxidants, fiber, and important minerals like magnesium and zinc. The butter in the shortbread crust provides vitamin A and healthy fats—though obviously, we’re not eating these for the nutritional value. Think of them as a treat that happens to have a few nutritional perks, not the other way around.
Dietary Considerations: This recipe contains dairy, eggs, gluten, and tree nuts (pecans). For a dairy-free version, use vegan butter and oat milk. For a gluten-free version, use a 1:1 gluten-free flour blend. For a nut-free version, substitute the pecans with toasted sunflower seeds or pumpkin seeds—though honestly, it won’t be the same. These bars are not suitable for vegan or egg-free diets without significant modification.
Conclusion
These cozy brown sugar pecan pie bars with buttery shortbread crust have become a staple in my kitchen for good reason. They’re simple enough for a Tuesday night baking session but impressive enough for holiday gatherings. The shortbread crust is tender and buttery, the filling is rich and gooey, and the toasted pecans add that perfect crunch. Every time I make them, I think of Frank the plumber and his grandmother in Savannah, and I’m grateful he took the time to share his family recipe with a stranger in a hardware store.
I’d love to hear how these turn out for you. Did you try any of the variations? Did you add chocolate or bourbon or extra cinnamon? Drop a comment below and let me know—I genuinely read every single one. And if you make these for a holiday gathering or a potluck, take a picture and tag me. There’s nothing that makes me happier than seeing these bars bring joy to someone else’s table.
So go ahead, preheat that oven, toast those pecans, and make something that tastes like a hug. You deserve it.
Frequently Asked Questions
Can I use a different type of nut instead of pecans?
Absolutely! Walnuts are the most common substitute and work beautifully. You can also use almonds, hazelnuts, or even a mix of nuts. Just make sure to toast them first for the best flavor. If you’re avoiding nuts entirely, toasted sunflower seeds or pumpkin seeds make a good alternative, though the texture will be different.
Why did my filling turn out grainy?
Grainy filling usually happens when the sugar isn’t fully dissolved. Make sure your butter is melted but not too hot, and whisk the sugar and butter together thoroughly before adding the eggs. Also, make sure your brown sugar is fresh and soft—hard, clumpy brown sugar can lead to a grainy texture. If your brown sugar has hardened, microwave it with a damp paper towel for 20 seconds to soften it.
Can I make these bars ahead of time for a party?
Yes, and I actually recommend it! These bars taste even better the next day. Make them a day ahead, let them cool completely, then store them in the refrigerator in an airtight container. Take them out about 30 minutes before serving to let them come to room temperature. They’ll slice more cleanly when cold, so you can cut them ahead of time and arrange them on a platter.
How do I get clean, perfect slices?
The key is patience. Let the bars cool completely at room temperature, then refrigerate them for at least an hour before slicing. Use a sharp knife and wipe it clean between each cut with a damp paper towel. For the cleanest cuts, run the knife under hot water and dry it before slicing—the heat helps glide through the filling without dragging.
Can I double this recipe for a larger crowd?
Yes, but don’t try to bake it in a larger pan. Instead, make two separate batches in two 9×13 pans. Doubling the recipe in one pan will result in bars that are too thick and may not bake evenly. If you only have one pan, just make the batches one after the other—the bars keep well and you’ll have plenty for a crowd.
Pin This Recipe!
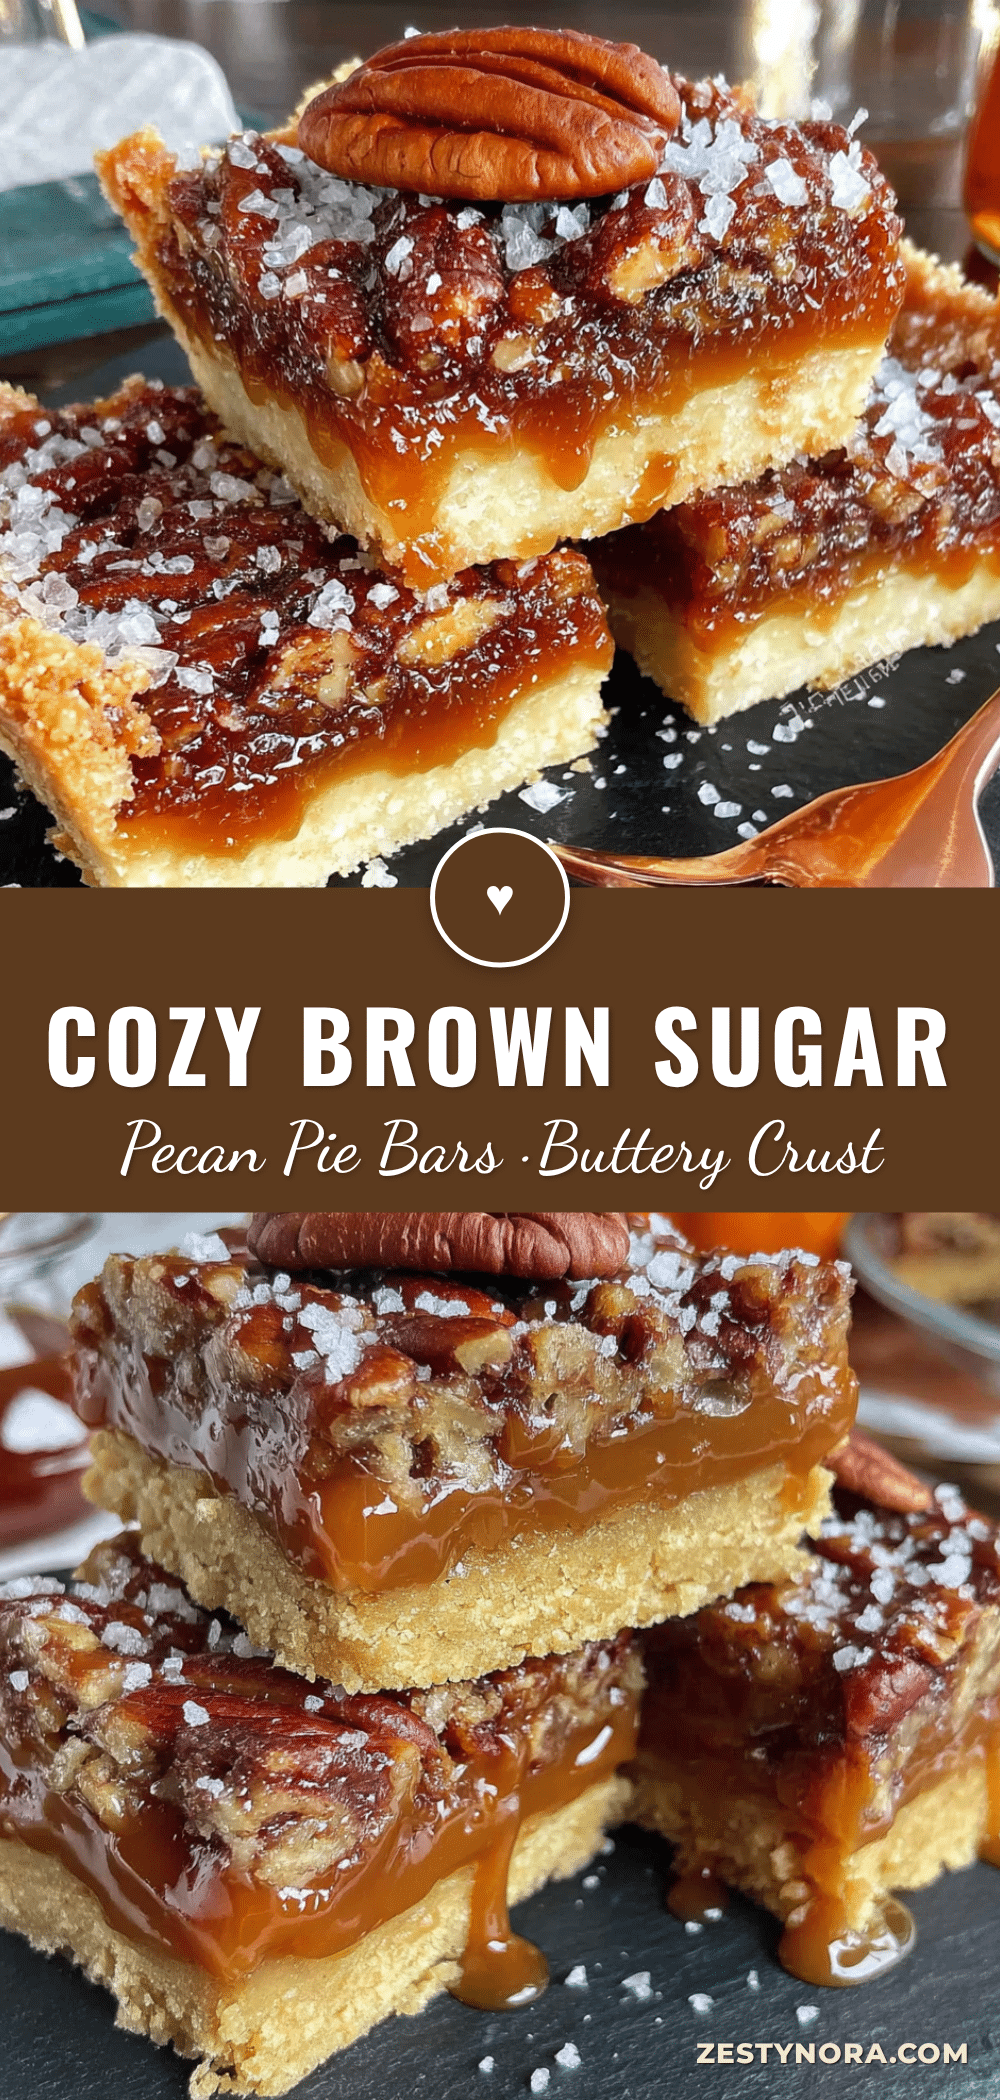
Best Brown Sugar Pecan Pie Bars with Easy Shortbread Crust
These brown sugar pecan pie bars feature a buttery shortbread crust and a rich, gooey filling studded with toasted pecans. They’re quick to make, perfect for entertaining, and taste even better the next day.
- Prep Time: 15 minutes
- Cook Time: 30 minutes
- Total Time: 45 minutes
- Yield: 24 servings 1x
- Category: Dessert
- Cuisine: American
Ingredients
- 1 ½ cups all-purpose flour (spooned and leveled)
- ½ cup powdered sugar
- ¾ cup unsalted butter, cold and cut into small cubes
- ¼ teaspoon salt
- 1 ½ cups packed light brown sugar
- ½ cup unsalted butter, melted
- 2 large eggs, room temperature
- 2 tablespoons whole milk
- 1 teaspoon vanilla extract
- 2 tablespoons all-purpose flour
- ¼ teaspoon salt
- 1 ½ cups pecan halves or chopped pecans, toasted
Instructions
- Preheat your oven to 350°F (175°C). Line a 9×13-inch baking pan with parchment paper, leaving about 2 inches of overhang on the long sides. Lightly grease the parchment with butter or non-stick spray.
- Toast the pecans: Spread pecans on a baking sheet and toast in the preheating oven for 5-7 minutes, stirring once halfway through. Set aside to cool.
- Make the shortbread crust: In a large bowl, whisk together flour, powdered sugar, and salt. Add cold butter cubes. Using a pastry cutter or fingertips, work the butter into the flour mixture until it resembles coarse meal with some pea-sized butter pieces remaining.
- Press the crust into the pan: Dump the crust mixture into the prepared pan and press it down firmly and evenly, using the bottom of a flat measuring cup to pack it in.
- Bake the crust: Bake for 15-18 minutes, until the edges are lightly golden and the center looks set but not browned. Remove from the oven and let cool for 5 minutes.
- Make the filling: In a medium bowl, whisk together melted butter and brown sugar until smooth. Add eggs one at a time, whisking well after each addition. Stir in milk and vanilla extract. Sprinkle flour and salt over the mixture and whisk until just combined.
- Add the pecans: Fold in the toasted pecans with a spatula, reserving about ¼ cup to sprinkle on top.
- Assemble and bake: Pour the filling over the warm crust, spreading it evenly. Sprinkle reserved pecans on top. Bake for 22-25 minutes, until the edges are set and the center is slightly jiggly.
- Cool completely: Let the bars cool in the pan on a wire rack for at least 2 hours at room temperature, then refrigerate for another hour before slicing.
- Slice and serve: Use the parchment overhang to lift the entire block of bars out of the pan. Place on a cutting board and slice into squares using a sharp knife, wiping the knife clean between cuts.
Notes
Toast pecans for best flavor. Use room temperature eggs to prevent butter from seizing. Cool completely before slicing for clean cuts. Bars taste even better the next day.
Nutrition
- Serving Size: 1 bar (1/24 of recip
- Calories: 210
- Sugar: 15
- Sodium: 85
- Fat: 14
- Saturated Fat: 6
- Carbohydrates: 21
- Fiber: 1
- Protein: 2
Keywords: pecan pie bars, brown sugar pecan bars, shortbread crust, pecan bars, holiday dessert, easy pecan bars