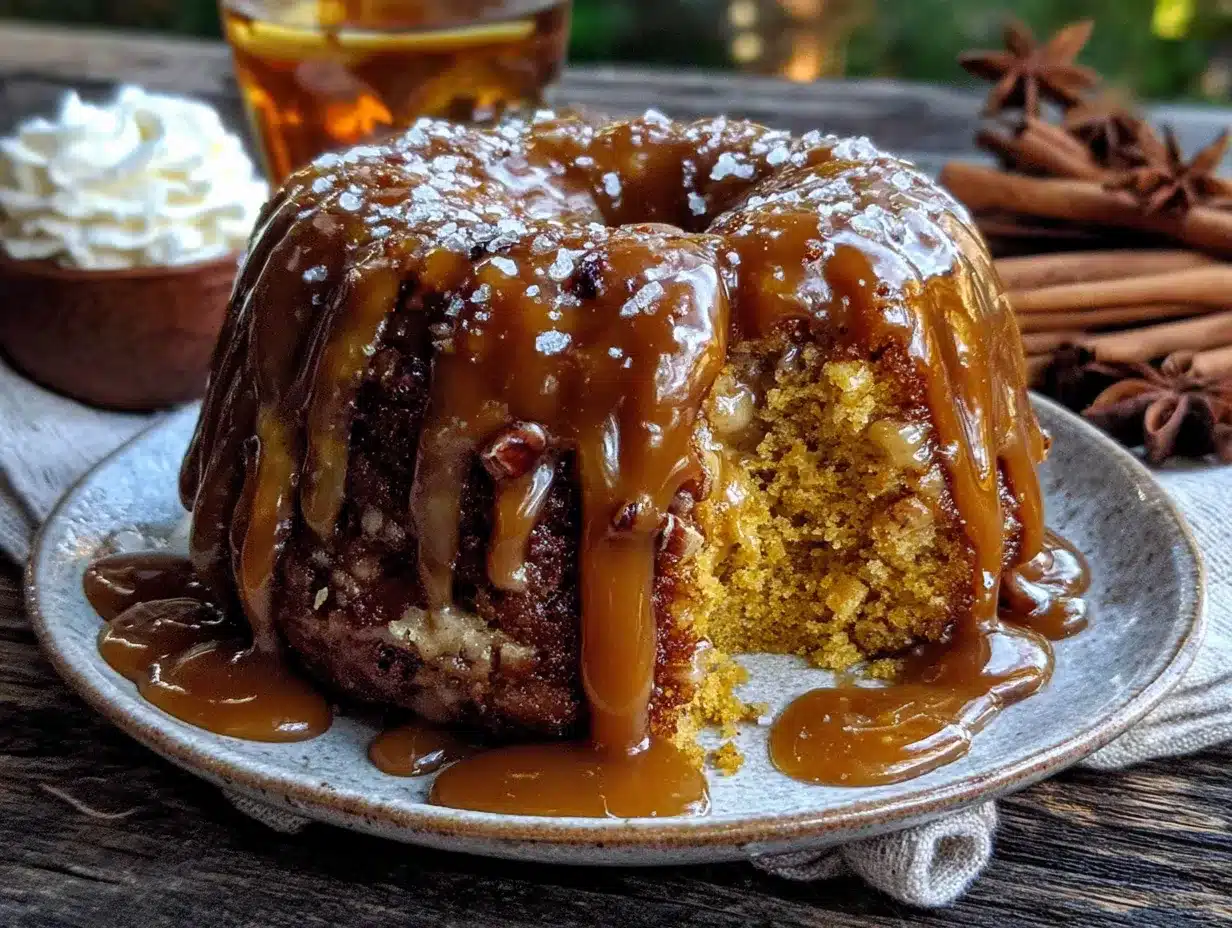
The way the caramel sauce pools in the little divots of the pumpkin cake batter—thick and glossy, catching the light like amber glass—that’s the whole reason I make this. Everything else is just logistics. I remember standing over my kitchen island last October, staring down at a 9×13 pan, thinking, “Did I really just dump a can of pumpkin filling over a box of cake mix and call it baking?” Yes. Yes I did. And it was the most honest I’d ever been with myself about dessert.
This Easy Salted Caramel Pumpkin Dump Cake isn’t trying to be fancy. It’s not layered, not piped, not anything you’d see on a competition show. It’s the kind of recipe you make when you want something warm, sweet, and spiced without spending an hour measuring flour. I first threw this together on a Tuesday night because I needed a dessert for a last-minute get-together and my pantry was basically just pumpkin puree and a box of yellow cake mix. (Don’t judge my pantry—it’s a reflection of my optimism.)
The salted caramel drizzle was a late addition. I’d made a batch for something else and had maybe half a cup left. I figured, why not? And honestly, that accidental pour changed everything. The salt cuts the sweetness, the caramel adds this buttery depth, and the whole thing tastes like fall in a spoon. It’s the kind of dessert that makes people say, “Wait, this only took you five minutes?” and you just smile and nod.
This recipe stuck because it’s not about technique. It’s about knowing that sometimes the best things come from the simplest actions—opening a can, sprinkling a box, pouring a drizzle. No whisking, no creaming, no fuss. Just pure, unapologetic comfort.
Why You’ll Love This Recipe
Look, I’ve tested a lot of pumpkin desserts over the years. Some are fussy. Some require a stand mixer and a degree in patience. This one? It practically makes itself. And that’s coming from someone who once burned water. (Yes, water. Don’t ask.)
- 5 Minutes to Assemble : No joke. You’ll spend more time deciding what to watch on Netflix than you will putting this together. Dump the pumpkin, sprinkle the cake mix, pour the caramel. Done.
- Simple Pantry Ingredients : Pumpkin puree, evaporated milk, cake mix, butter, caramel sauce, and salt. That’s it. You probably have most of these already, unless you’re one of those people who doesn’t keep caramel sauce in the fridge. (If so, no judgment—but also, why?)
- Perfect for Fall Gatherings : This is the dessert you bring to Friendsgiving, potlucks, or cozy family dinners when you want to impress without the stress. It pairs beautifully with a warm slice of apple cider donut loaf cake for a full autumn spread.
- Crowd-Pleaser : I’ve served this to kids, grandparents, and that one friend who “doesn’t really like sweets.” Every single one of them went back for seconds. The salted caramel is like a secret weapon—it wins over even the toughest critics.
- Unbelievably Delicious : The texture is where this recipe shines. The top gets this beautiful, crackly crust while the bottom stays soft and almost pudding-like. It’s like a cobbler and a custard had a baby, and that baby was drizzled with liquid gold.
What makes this different from every other pumpkin dump cake out there? The salted caramel. Most recipes just dump and bake. But that caramel layer—swirled right into the batter before it hits the oven—creates pockets of gooey sweetness in every bite. It’s not just a topping; it’s part of the cake’s DNA. And the flaky sea salt on top? That’s the chef’s kiss. It balances the sweetness and makes the pumpkin spice sing.
This isn’t just another version of a fall dessert. It’s the one you’ll come back to year after year. The one that makes you close your eyes after the first bite. The one that tastes like a hug from someone who knows exactly what you need.
What Ingredients You Will Need
This recipe uses simple, wholesome ingredients to deliver bold fall flavor and that irresistible salted caramel finish. Nothing fancy, nothing hard to find—just pantry staples that come together like magic. Here’s what you’ll need:
For the Pumpkin Base:
- 1 can (15 oz) pumpkin puree (not pumpkin pie filling—make sure it’s 100% pure pumpkin. I prefer Libby’s for consistent texture.)
- 1 can (12 oz) evaporated milk (adds richness without making it too heavy. You can use full-fat or low-fat—both work great.)
- 1 cup granulated sugar (just regular white sugar. No need for anything fancy here.)
- 3 large eggs (room temperature is best, but if you forget like I always do, just run them under warm water for a minute.)
- 2 teaspoons pumpkin pie spice (or make your own with 1 tsp cinnamon, 1/2 tsp ginger, 1/4 tsp nutmeg, and 1/4 tsp cloves.)
- 1 teaspoon vanilla extract (pure vanilla if you have it, but imitation works fine too. No judgment.)
For the Topping:
- 1 box (15.25 oz) yellow cake mix (Duncan Hines or Betty Crocker—both work. Do not use a “butter recipe” or “extra moist” version unless you want a denser cake.)
- 1 cup unsalted butter, melted (salted butter will work, just reduce the added salt later. I use Land O’Lakes.)
- 1/2 cup caramel sauce (homemade or store-bought. I’ve used both, and honestly? Store-bought is fine. Just get a good-quality one.)
- 1 teaspoon flaky sea salt (like Maldon. Regular table salt will be too intense. Trust me on this one.)
For the Caramel Drizzle:
- 1/4 cup caramel sauce (extra for drizzling after baking. Because you can never have too much caramel.)
- 1/2 teaspoon flaky sea salt (for garnish. It’s optional but highly recommended.)
Ingredient Selection Tips: When buying pumpkin puree, look for cans that feel heavy for their size—that means less air and more pumpkin. For the caramel sauce, I’ve found that the kind in the squeeze bottle works just fine, but if you want to get fancy, try a salted caramel sauce from the baking aisle. It adds an extra layer of flavor.
Substitution Guidance: Need to make this gluten-free? Use a gluten-free yellow cake mix. They’ve gotten so much better in recent years. Want to cut the sugar? Swap the granulated sugar for coconut sugar (it’ll be a little less sweet but still delicious). Dairy-free? Use coconut milk instead of evaporated milk and a vegan butter substitute. The texture might be slightly different, but the flavor will still be there.
Equipment Needed
You don’t need a lot of fancy equipment for this recipe. That’s kind of the point. Here’s what you’ll need:
- 9×13-inch baking dish (glass or metal both work. I prefer glass because you can see the caramel pooling at the bottom. It’s oddly satisfying.)
- Large mixing bowl (any size works, but you want enough room to whisk without splashing pumpkin everywhere.)
- Whisk (for mixing the pumpkin base. A fork works in a pinch, but you’ll get lumps.)
- Measuring cups and spoons (for the sugar, spice, and vanilla. Eyeballing is not recommended here.)
- Spatula (for spreading the cake mix evenly. A spoon works too, but a spatula is easier.)
- Small saucepan or microwave-safe bowl (for melting butter. I use the microwave because I’m impatient.)
- Parchment paper (optional but recommended for easy cleanup. You can also use non-stick spray.)
If you don’t have a 9×13 dish, you can use two 8×8 square pans. Just adjust the baking time slightly—check at 40 minutes instead of 45. And if you’re using a disposable aluminum pan (I’ve done this for potlucks), place it on a baking sheet for stability. Trust me, you don’t want to spill caramel pumpkin goo all over your oven. I learned that the hard way.
For the caramel sauce, you don’t need a fancy double boiler. Store-bought is fine. But if you want to make your own, a heavy-bottomed saucepan is your best friend. Just be careful—caramel gets dangerously hot. I still have a scar on my thumb from a sugar splatter incident. Worth it, but still.
Preparation Method
Alright, let’s get to it. This is the easiest part of your day, I promise.
- Preheat your oven to 350°F (175°C). While it’s heating, grease your 9×13 baking dish with butter or non-stick spray. If you’re using parchment paper, line the bottom and let the edges hang over the sides for easy lifting later. (Future you will thank present you for this.)
- Make the pumpkin base. In your large mixing bowl, combine the pumpkin puree, evaporated milk, granulated sugar, eggs, pumpkin pie spice, and vanilla extract. Whisk until smooth. It should be a uniform orange color with no streaks of egg white. If you see lumps, keep whisking. This takes about 2 minutes. (I usually put on music for this part. It’s not necessary, but it makes the whole thing feel like a cooking show.)
- Pour the pumpkin mixture into the prepared dish. Use your spatula to spread it evenly. The mixture should be about 1/2 inch deep. Don’t worry if it looks thin—it will thicken as it bakes.
- Drizzle the 1/2 cup of caramel sauce over the pumpkin mixture. Don’t stir it in. Just let it sit on top in ribbons. It will sink and swirl during baking, creating those gorgeous caramel pockets. (This is the part where you should take a picture. Trust me, it looks beautiful.)
- Sprinkle the dry cake mix evenly over the top. This is the “dump” part of the dump cake. Just open the box and pour it over the pumpkin mixture. Use your spatula to spread it into an even layer. Don’t press it down—just let it sit on top. (I know it looks weird at this point. Like a sandy beach over pumpkin soup. But trust the process.)
- Pour the melted butter evenly over the cake mix. Try to cover as much of the dry mix as possible. The butter will soak into the cake mix and create that golden, crispy top. If you miss a spot, it’s okay—it’ll still bake, but it might be a little dry. (I usually swirl the pan a bit to help the butter spread.)
- Sprinkle the flaky sea salt over the top. Don’t be shy. The salt will balance the sweetness and enhance the caramel flavor. (I use about 1 teaspoon, but adjust based on your salt preference.)
- Bake for 45-50 minutes. The top should be golden brown and the edges should be bubbling. The center might still jiggle slightly—that’s okay. It will set as it cools. (I usually check at 45 minutes and add 5 more if needed. Every oven is different.)
- Let it cool for at least 15 minutes. This is the hardest part. The smell will be incredible—pumpkin spice, caramel, and butter all mingling together. But if you dig in too soon, it will be too runny. Patience, my friend. (I usually use this time to make coffee or tea. Or just stare at the cake. No judgment.)
- Drizzle with the remaining 1/4 cup caramel sauce and sprinkle with extra flaky salt. This is the final touch. It makes the cake look like it came from a bakery. (And it adds that extra hit of caramel goodness.)
Sensory Cues: At the 20-minute mark, your kitchen will start smelling like fall. By 35 minutes, the caramel will be bubbling around the edges. At 45 minutes, the top should be golden brown and slightly crackled. If you tap the center, it should feel firm but not hard. The edges will be darker and slightly crispy—that’s the best part.
Common Issues: If the top is browning too quickly, tent the dish with aluminum foil for the last 10 minutes. If the cake seems too wet after 50 minutes, let it cool completely—it will thicken as it sets. And if you accidentally over-bake it (it happens), just serve it with extra caramel sauce. Caramel fixes everything.
Cooking Tips & Techniques
I’ve made this cake about a dozen times now, and I’ve learned a few things along the way. Here are my best tips for getting it right every time:
- Use room temperature eggs. Cold eggs can seize the pumpkin mixture and create lumps. If you forgot to take them out of the fridge, place them in a bowl of warm water for 5 minutes. (I learned this after making a lumpy pumpkin base and spending 10 minutes trying to whisk out the clumps.)
- Don’t over-mix the pumpkin base. You want it smooth, but you don’t want to incorporate too much air. Over-mixing can make the cake puff up and then collapse. Just whisk until everything is combined. (I usually count to 30 whisks and call it good.)
- Spread the cake mix evenly. If you have clumps of dry mix, they won’t absorb the butter properly and you’ll end up with dry spots. Use your fingers to break up any lumps before sprinkling. (This is one of those small steps that makes a big difference.)
- Melt the butter slowly. If you’re using the microwave, do it in 30-second intervals. Butter can go from melted to burned in seconds. Burnt butter has a bitter taste that will ruin the caramel. (I learned this the hard way. My kitchen smelled like burnt popcorn for hours.)
- Let it cool completely before cutting. I know it’s tempting to dig in while it’s warm, but the cake needs time to set. If you cut it too soon, it will fall apart. I usually let it cool for at least 30 minutes, then refrigerate for another 15 if I’m impatient. (Which is always.)
Multitasking Strategy: While the cake is baking, make a batch of pumpkin spice cake pops for an extra fall treat. Or just clean up your kitchen. Either way, you’re winning.
Pro Tip: For an extra-crispy top, sprinkle a tablespoon of granulated sugar over the cake mix before adding the butter. It creates a delicate, crackly crust that’s absolutely addictive. I started doing this after a friend suggested it, and now I can’t go back.
Variations & Adaptations
This recipe is endlessly adaptable. Here are some of my favorite variations:
- Chocolate Pumpkin Dump Cake: Use a chocolate cake mix instead of yellow. The chocolate and pumpkin are surprisingly good together. Add chocolate chips on top before baking for extra gooeyness. (I tried this on a whim and it was a hit at my book club.)
- Spiced Pecan Version: Add 1/2 cup chopped pecans to the cake mix before sprinkling. The nuts toast in the oven and add a wonderful crunch. For extra flavor, toss the pecans with a tablespoon of melted butter and a pinch of cinnamon. (This is my husband’s favorite version.)
- Gluten-Free Option: Use a gluten-free yellow cake mix. The texture will be slightly different—a bit more crumbly—but the flavor is still spot-on. I’ve used King Arthur’s gluten-free mix with great results. (Just make sure to let it cool completely before cutting, as gluten-free cakes are more delicate.)
- Dairy-Free Version: Substitute the evaporated milk with full-fat coconut milk and use a dairy-free butter substitute. The coconut flavor is subtle and actually complements the pumpkin nicely. (I’ve served this to dairy-free friends and they didn’t even notice the difference.)
- Extra Spicy: Add 1/4 teaspoon of cayenne pepper to the pumpkin base. The heat cuts through the sweetness and makes the salted caramel pop. (This is for adventurous eaters. I tried it once and it was surprisingly good, but definitely not for everyone.)
Seasonal Adaptation: In the summer, swap the pumpkin puree for sweet potato puree and use a spice cake mix. It’s a completely different dessert but just as delicious. (I discovered this when I ran out of pumpkin and had a sweet potato sitting on my counter. Necessity is the mother of invention.)
Serving & Storage Suggestions
This cake is best served warm, but it’s also delicious at room temperature. Here’s how to serve and store it:
- Serving Temperature: Serve warm with a scoop of vanilla ice cream or a dollop of whipped cream. The cold creaminess against the warm, gooey cake is pure magic. (I also love it with a drizzle of extra caramel sauce. Because why not?)
- Presentation: Cut into squares and serve on a platter. Sprinkle with extra flaky salt and a few pumpkin seeds for a pretty presentation. (I sometimes dust it with powdered sugar, but that’s optional.)
- Complementary Dishes: This cake pairs beautifully with a cup of hot apple cider or a spiced latte. For a full fall spread, serve it alongside pumpkin cream cheese swirl muffins and a warm bowl of roasted butternut squash soup for a cozy autumn meal.
- Storage: Store leftovers in an airtight container in the refrigerator for up to 5 days. The cake will become denser and more pudding-like as it sits. (Some people prefer it this way. I’m one of them.)
- Reheating: To reheat, microwave individual servings for 20-30 seconds. Or place the entire dish in a 300°F oven for 10 minutes. (The oven method is better if you’re serving a crowd.)
- Freezing: This cake freezes beautifully. Wrap individual squares in plastic wrap, then place them in a freezer bag. They’ll keep for up to 3 months. Thaw in the refrigerator overnight and reheat as directed. (I always keep a few squares in the freezer for emergencies. You know, like a bad day or an unexpected guest.)
Flavor Development: The flavors actually get better after a day or two. The pumpkin and caramel meld together, and the spices become more pronounced. So don’t worry if you have leftovers—they’ll be even more delicious tomorrow.
Nutritional Information & Benefits
Let’s be real—this is a dessert, not a health food. But it does have some redeeming qualities:
Estimated Nutritional Values (per serving, based on 12 servings):
- Calories: 380
- Total Fat: 18g
- Saturated Fat: 11g
- Cholesterol: 85mg
- Sodium: 420mg
- Total Carbohydrates: 52g
- Dietary Fiber: 2g
- Sugars: 38g
- Protein: 5g
Health Benefits: Pumpkin is packed with vitamin A (great for your eyes and immune system), fiber (good for digestion), and antioxidants. The eggs provide protein, and the butter… well, the butter makes you happy. That counts for something, right?
Dietary Considerations: This recipe can be adapted for gluten-free and dairy-free diets (see variations above). It is not suitable for low-carb or keto diets due to the sugar content. It contains eggs, dairy, and gluten (unless modified).
My Wellness Perspective: I believe in balance. This cake is a treat, not an everyday thing. But when you do indulge, make it count. Use good ingredients, savor every bite, and don’t feel guilty. Food is about joy, not just fuel. And this cake brings a lot of joy.
Conclusion
This Easy Salted Caramel Pumpkin Dump Cake is the kind of recipe that makes you look like a hero with almost no effort. It’s warm, spiced, gooey, and absolutely irresistible. The salted caramel takes it from good to unforgettable, and the fact that it comes together in five minutes? That’s just the cherry on top.
I love this recipe because it reminds me that cooking doesn’t have to be complicated to be special. Some of the best meals—and desserts—come from the simplest ingredients and the most straightforward methods. It’s about knowing when to let the ingredients shine and when to step back and let the oven do the work.
I hope you give this recipe a try. And when you do, I’d love to hear about it. Did you add pecans? Use a different cake mix? Drizzle extra caramel on top? (The answer to that last one should always be yes.) Leave a comment below or tag me in your photos—I love seeing your creations. And if you have any questions, just ask. I’m here to help.
Now go make some magic. Your kitchen is about to smell incredible.
Frequently Asked Questions
Can I use pumpkin pie filling instead of pumpkin puree?
I wouldn’t recommend it. Pumpkin pie filling is already sweetened and spiced, so it will throw off the sugar and spice balance. Stick with 100% pure pumpkin puree for the best results. If you only have pie filling, reduce the sugar by half and skip the pumpkin pie spice.
Can I make this in a slow cooker?
Yes! Grease the slow cooker, pour in the pumpkin mixture, and top with cake mix and butter. Cook on low for 3-4 hours or on high for 1.5-2 hours. The top won’t get as crispy, but it will be just as delicious. (I’ve done this for potlucks and it works great.)
Why is my dump cake runny in the middle?
This is usually because it hasn’t baked long enough or it hasn’t cooled enough. The center will be slightly jiggly when it comes out of the oven, but it should set as it cools. If it’s still runny after 30 minutes of cooling, pop it back in the oven for another 10 minutes.
Can I use a different cake mix flavor?
Absolutely! Spice cake mix is amazing with pumpkin. White cake mix works too. And if you’re feeling adventurous, try carrot cake mix. The possibilities are endless. (I’ve tried about six different flavors, and they’ve all been good.)
How do I prevent the cake mix from clumping?
Sprinkle the cake mix slowly and evenly over the pumpkin mixture. If you dump it all in one spot, it will clump. Use your fingers to break up any lumps before adding the butter. And make sure the butter covers the entire surface—dry spots will stay powdery.
Pin This Recipe!
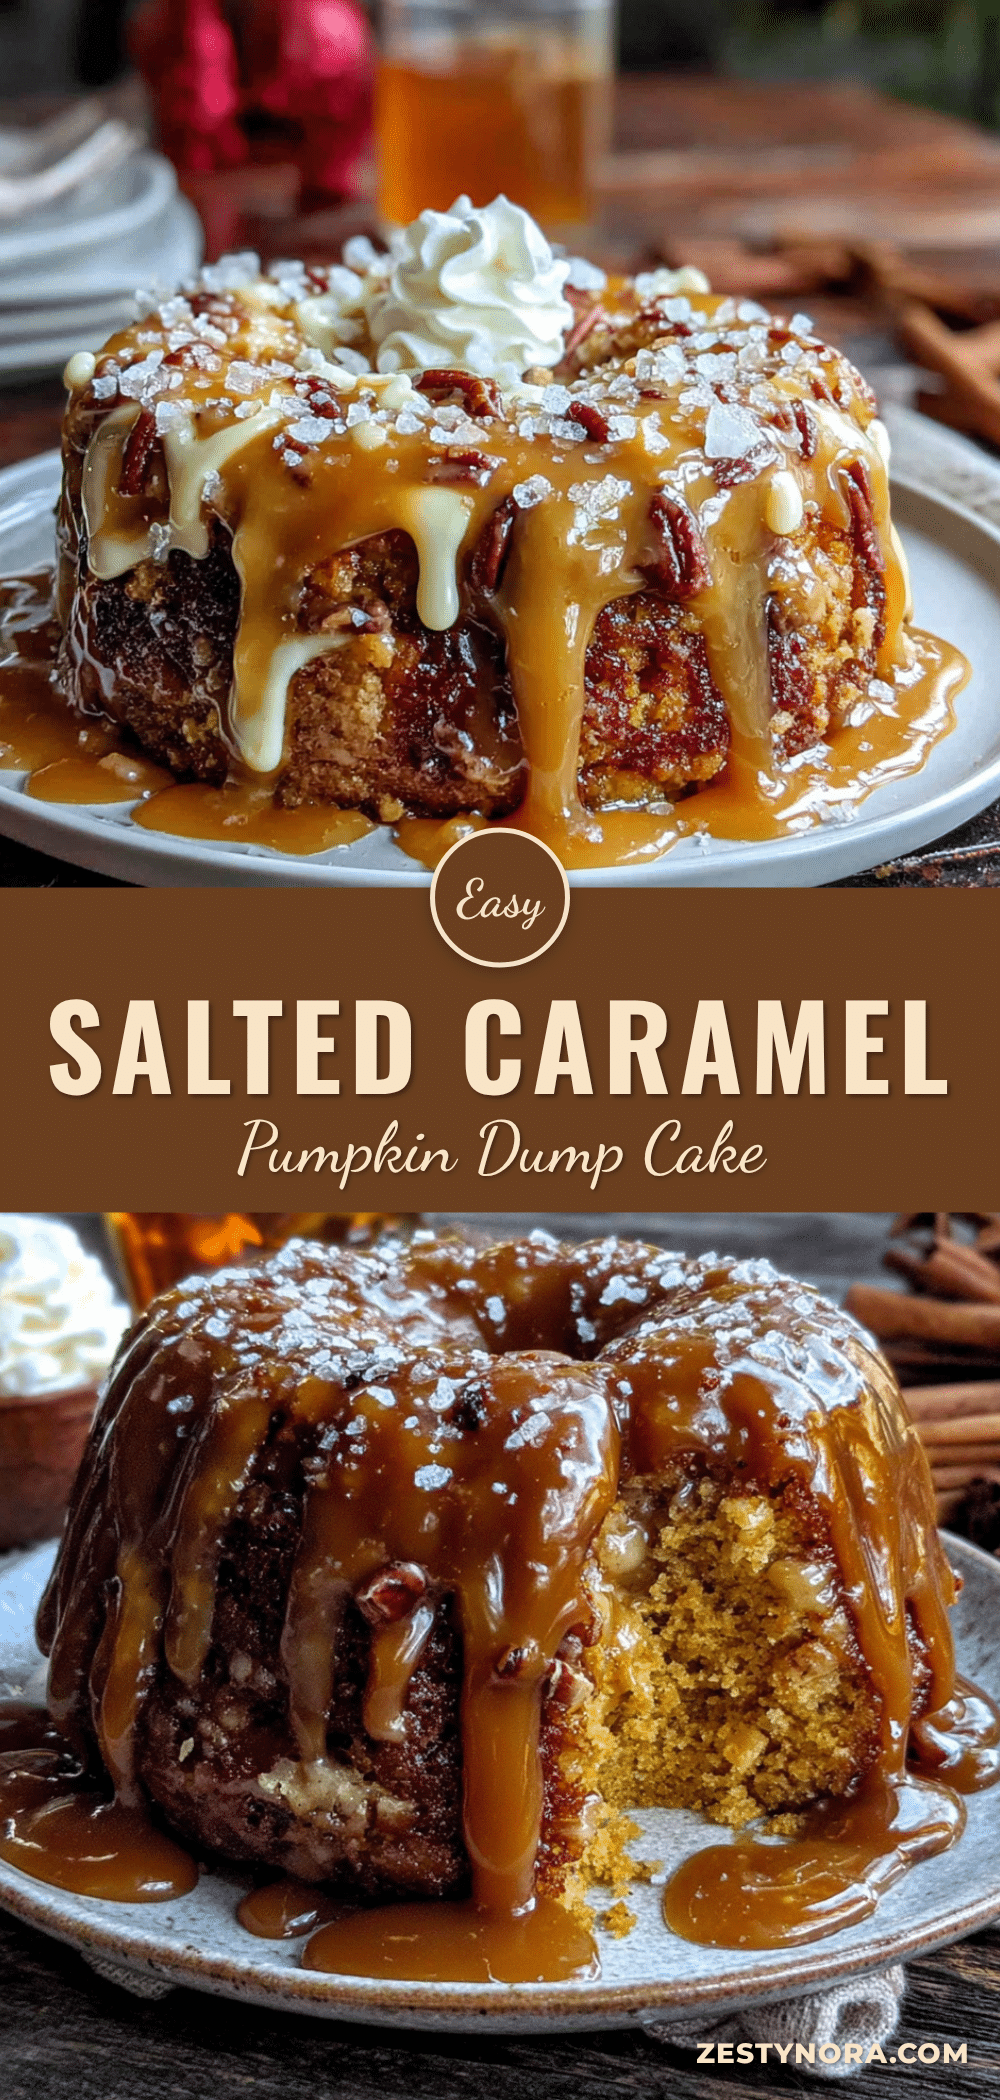
Easy Salted Caramel Pumpkin Dump Cake: Best 5-Minute Dessert
This Easy Salted Caramel Pumpkin Dump Cake is a warm, spiced, and gooey dessert that comes together in just five minutes. With a crackly top, soft pudding-like center, and ribbons of salted caramel, it’s the perfect no-fuss treat for fall gatherings.
- Prep Time: 5 minutes
- Cook Time: 45 minutes
- Total Time: 50 minutes
- Yield: 12 servings 1x
- Category: Dessert
- Cuisine: American
Ingredients
- 1 can (15 oz) pumpkin puree (not pumpkin pie filling)
- 1 can (12 oz) evaporated milk
- 1 cup granulated sugar
- 3 large eggs, room temperature
- 2 teaspoons pumpkin pie spice
- 1 teaspoon vanilla extract
- 1 box (15.25 oz) yellow cake mix (not butter recipe or extra moist)
- 1 cup unsalted butter, melted
- 1/2 cup caramel sauce
- 1 teaspoon flaky sea salt
- 1/4 cup caramel sauce (for drizzling after baking)
- 1/2 teaspoon flaky sea salt (for garnish)
Instructions
- Preheat oven to 350°F (175°C). Grease a 9×13-inch baking dish with butter or non-stick spray. Optionally line with parchment paper.
- In a large mixing bowl, whisk together pumpkin puree, evaporated milk, granulated sugar, eggs, pumpkin pie spice, and vanilla extract until smooth.
- Pour the pumpkin mixture into the prepared dish and spread evenly.
- Drizzle 1/2 cup caramel sauce over the pumpkin mixture. Do not stir.
- Sprinkle the dry cake mix evenly over the top. Use a spatula to spread into an even layer without pressing down.
- Pour the melted butter evenly over the cake mix, covering as much of the dry mix as possible.
- Sprinkle 1 teaspoon flaky sea salt over the top.
- Bake for 45-50 minutes, until the top is golden brown and edges are bubbling. The center may still jiggle slightly.
- Let cool for at least 15 minutes.
- Drizzle with remaining 1/4 cup caramel sauce and sprinkle with extra flaky salt before serving.
Notes
For an extra-crispy top, sprinkle a tablespoon of granulated sugar over the cake mix before adding the butter. If the top browns too quickly, tent with aluminum foil for the last 10 minutes. Let the cake cool completely before cutting for best results.
Nutrition
- Serving Size: 1 square
- Calories: 380
- Sugar: 38
- Sodium: 420
- Fat: 18
- Saturated Fat: 11
- Carbohydrates: 52
- Fiber: 2
- Protein: 5
Keywords: pumpkin dump cake, salted caramel pumpkin cake, easy pumpkin dessert, 5-minute dessert, fall dessert, dump cake recipe


