Three bento boxes lined up on the counter, a half-eaten sleeve of crackers, and the distinct sound of a preschooler announcing she’s “not hungry” for the third time this week. That’s where this whole thing started. I was staring into the fridge, honestly feeling a little defeated, when I spotted the leftover roasted carrots from last night’s dinner, a few cherry tomatoes, and a single cucumber that had seen better days. Instead of another sad sandwich, I grabbed the smallest cookie cutter I owned—a little star shape—and started cutting vegetables.
You know how sometimes the most unplanned things turn out to be the biggest wins? That’s this lunch. The rainbow veggie bento box was born from a desperate Tuesday, not a craft fair or a wellness kick. I just wanted something colorful and fun that my kid would actually eat without negotiation. And let me tell you, when she saw those little star-shaped cucumbers next to a pile of bright orange bell pepper strips and a tiny container of her favorite hummus, she sat down without a single complaint. Honestly, I almost took a picture for proof.
This isn’t about being a Pinterest-perfect parent. It’s about making lunch feel less like a chore and more like a little surprise. The best part? It takes less than 15 minutes to put together, and you probably already have most of the ingredients in your fridge. I’ve been making some version of this easy rainbow veggie bento box for over a year now, and it’s the one lunch that never comes home uneaten. That quiet moment of watching her actually eat her vegetables without being asked? That’s the thing that made this recipe stick.
Why You’ll Love This Recipe
Let’s be real for a second. Getting kids to eat vegetables can feel like a full-time job you never applied for. But this rainbow veggie bento box changes the game. It’s not just another lunch idea—it’s the one that actually works. I’ve tested this with my own picky eater, with neighbor kids at playdates, and even with grown-ups who swear they don’t like raw veggies. The secret isn’t a fancy sauce or a hidden ingredient. It’s the presentation, the variety, and the fact that it feels like a snack, not a meal.
- Quick & Easy: Comes together in under 15 minutes. Perfect for busy mornings when you’re packing lunches between school drop-offs and coffee refills.
- Simple Ingredients: No fancy grocery trips needed. You can use whatever vegetables are in your fridge right now—carrots, bell peppers, cucumbers, cherry tomatoes, snap peas. It’s that flexible.
- Perfect for Lunchboxes: Great for school lunches, work lunches, picnics, or even a light dinner on a warm evening. It travels beautifully and stays fresh for hours.
- Crowd-Pleaser: Kids love the colorful arrangement and fun shapes. Adults love the freshness and crunch. It’s a rare recipe that makes everyone happy.
- Unbelievably Delicious: The combination of crisp vegetables with creamy dips and a little protein makes every bite satisfying. It’s not just healthy—it’s genuinely good.
What makes this rainbow veggie bento box different from every other veggie lunch out there? It’s the method. I don’t just chop vegetables and throw them in a container. I use small cookie cutters to make fun shapes, I arrange everything by color so it looks like a rainbow, and I always include at least one dip that feels like a treat. This isn’t just another version of a veggie tray—it’s the best version. The one that makes your kid say “wow” instead of “ew.”
This recipe connects to something deeper, too. It’s about making food feel like a gift instead of a battle. When I pack this lunch, I’m not just sending vegetables. I’m sending a little moment of joy. A tiny edible rainbow that says, “I thought about you, and I wanted your lunch to be fun.” That emotional connection is why this recipe stuck in our house. It’s comfort food reimagined—healthier, faster, but with the same soul-soothing satisfaction of a meal made with love.
What Ingredients You Will Need
This rainbow veggie bento box uses simple, fresh ingredients that come together to create a lunch that’s as beautiful as it is delicious. The beauty of this recipe is its flexibility—you can swap vegetables based on what’s in season or what your family loves most.
- For the Rainbow Vegetables:
- Red: Cherry tomatoes (halved or whole), red bell pepper strips, or thinly sliced radishes
- Orange: Carrot sticks or baby carrots, orange bell pepper strips, or roasted sweet potato cubes (leftover from dinner)
- Yellow: Yellow bell pepper strips, yellow cherry tomatoes, or corn kernels (fresh or thawed frozen)
- Green: Cucumber slices or sticks, snap peas, sugar snap peas, broccoli florets (blanched or raw), or green bell pepper strips
- Purple/Blue: Purple cabbage (thinly shredded), purple carrots (if you can find them), or red onion (thinly sliced)
- For the Protein:
- Hard-boiled eggs: Peeled and halved. I recommend using eggs that are at least a week old for easier peeling.
- Cheese cubes or cheese sticks: Cut into rounds or small cubes. Cheddar, mozzarella, or colby jack all work great.
- Turkey or ham roll-ups: Thin slices rolled into little pinwheels. A great option if you have leftover deli meat.
- For the Dips:
- Hummus: Classic, roasted red pepper, or even a beet hummus for extra color. I prefer store-bought for convenience, but homemade works beautifully too.
- Greek yogurt ranch dip: Mix plain Greek yogurt with a packet of ranch seasoning. It’s higher in protein and lower in fat than traditional ranch.
- Peanut butter or sun butter: Perfect for dipping carrot sticks or cucumber slices. Always check school nut policies before including.
- For the Extras (Optional but Fun):
- Fresh fruit: Grapes, berries, apple slices, or melon balls add natural sweetness and more color.
- Whole grain crackers or pita chips: For scooping dips and adding crunch.
- Edible flowers or herb garnishes: A tiny sprig of mint or a few edible pansies make the lunch feel extra special (totally optional, but kids love it).
Ingredient Selection Tips: For the best texture, look for firm, crisp vegetables without any soft spots. I prefer organic carrots and bell peppers when possible, but conventional works just fine. For the hummus, I’m partial to the roasted garlic flavor from Sabra or a local brand if I’m feeling fancy. If you’re packing this for school, remember to check for any nut allergies in the classroom before including peanut butter or sun butter.
Substitution Guidance: This recipe is incredibly forgiving. If your kid hates bell peppers, swap in more cucumber or add some blanched green beans. If you’re dairy-free, skip the cheese and use a plant-based yogurt dip. For a gluten-free option, make sure your crackers or pita chips are certified gluten-free. The rainbow concept works with whatever vegetables you have on hand—that’s the whole point!
Equipment Needed
You don’t need a lot of fancy equipment to make this rainbow veggie bento box, but a few key tools make the process faster and more fun. Here’s what I use:
- Bento box or compartmentalized lunch container: I love the Yumbox or Bentgo brands because they’re leakproof and have perfect compartments for portion control. If you don’t have a bento box, a regular lunch container with silicone muffin cups works great to separate foods.
- Small cookie cutters: Star, heart, flower, or animal shapes. These are the secret weapon for getting kids excited about vegetables. I found a set of 12 mini cookie cutters on Amazon for under $10, and they’ve paid for themselves a hundred times over.
- Vegetable peeler: For making carrot ribbons or peeling cucumber strips. A standard Y-peeler works best.
- Sharp knife and cutting board: A good chef’s knife makes quick work of chopping vegetables. I use a medium-size bamboo cutting board that’s easy to clean.
- Small condiment containers: For dips and sauces. Many bento boxes come with these, but you can also buy reusable silicone cups separately.
- Egg slicer (optional): Makes perfectly even slices of hard-boiled eggs in seconds. Not necessary, but it’s one of those tools that makes lunch prep feel a little more professional.
Budget-Friendly Options: If you’re just starting out, you don’t need to invest in a fancy bento box. A simple plastic container with compartments from the dollar store works perfectly. You can also use small silicone baking cups to separate foods in a regular lunch container. The most important tool is the cookie cutters—they’re cheap and they make all the difference in getting kids excited about vegetables.
Maintenance Tip: Hand wash your cookie cutters and bento box compartments to keep them looking new. The silicone parts of some bento boxes can hold onto food odors, so I give them a quick soak in warm water and baking soda every few weeks to freshen them up.
Preparation Method
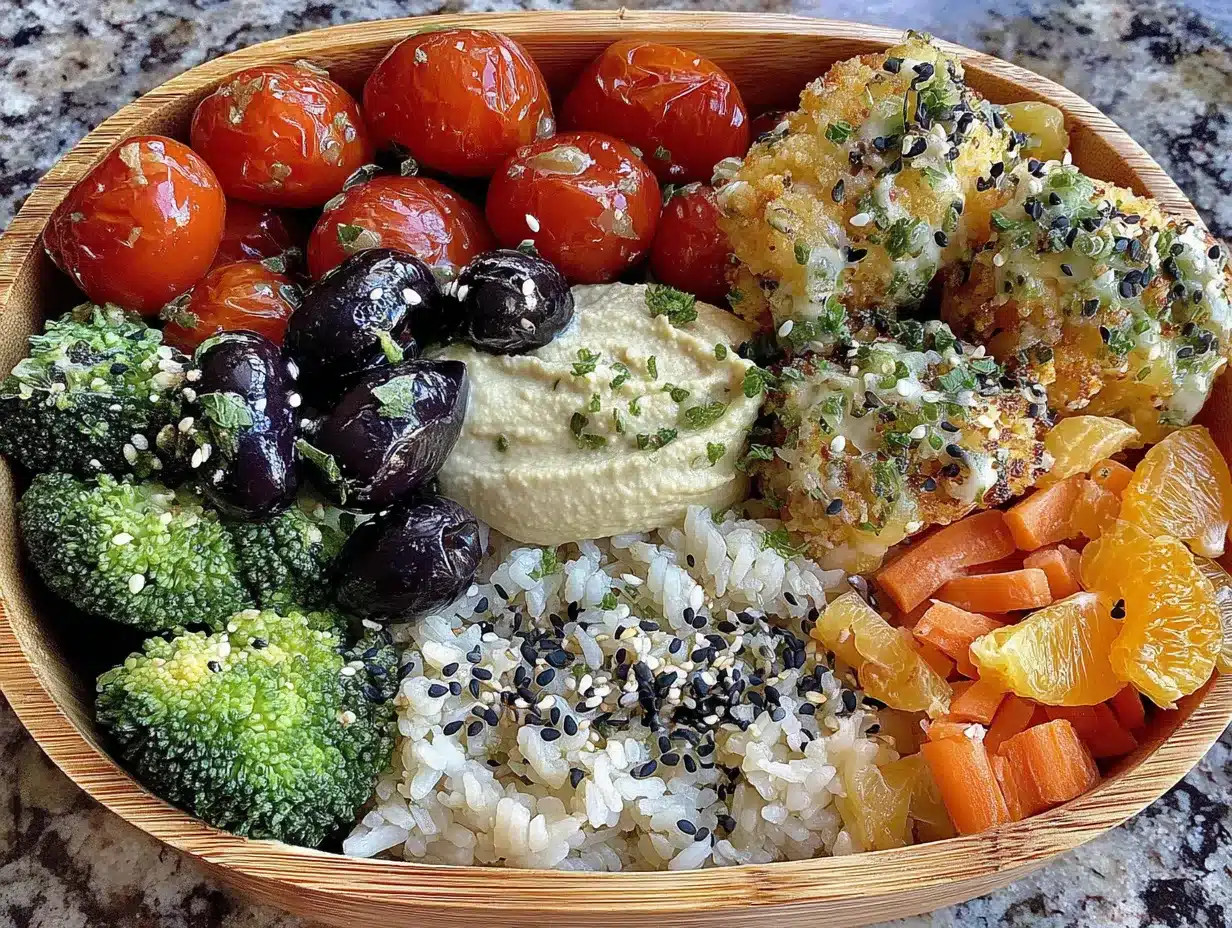
Let’s get to the fun part—building your rainbow veggie bento box. I’ve broken this down into simple steps that you can follow even on your most chaotic morning. The total active time is about 15 minutes, and the results are honestly beautiful.
- Prep your vegetables (5 minutes): Wash all your vegetables thoroughly under cold water. Pat them dry with a clean kitchen towel or paper towels. Dry vegetables stay crisp longer and don’t make the other foods soggy. If you’re using carrots, peel them first. For bell peppers, cut off the top, remove the seeds and white membranes, and slice into thin strips about 2 inches long. Cucumbers can be sliced into rounds or cut into sticks. Cherry tomatoes can be left whole or halved, depending on your child’s preference.
- Cut fun shapes (3 minutes): This is where the magic happens. Take your cucumber slices, carrot rounds, or bell pepper strips and press your small cookie cutters firmly into the vegetable. You’ll get the cleanest cuts if the vegetable slice is about 1/4 inch thick. For softer vegetables like cucumber, you might need to wiggle the cutter slightly to get through. I love using star and flower shapes—they’re recognizable and exciting for little kids. Save the scraps for snacking or add them to a lunch salad for yourself. Waste not, want not!
- Prepare the protein (3 minutes): If you’re using hard-boiled eggs, peel them and slice them in half lengthwise or use an egg slicer for even rounds. For cheese, cut into small cubes about 1/2 inch wide, or use a cookie cutter to make fun shapes (yes, cheese takes shapes beautifully). For turkey or ham roll-ups, lay a slice of deli meat flat, place a cheese stick at one edge, and roll it up tightly. Slice into 1-inch pinwheels. These look adorable and are easy for little fingers to pick up.
- Prepare the dips (2 minutes): Spoon your chosen dips into small condiment containers. I usually fill them about three-quarters full—enough for dipping without being wasteful. If you’re using store-bought hummus, give it a quick stir first to make it smooth and creamy. For the Greek yogurt ranch dip, mix 1/4 cup plain Greek yogurt with 1 tablespoon ranch seasoning in a small bowl. Taste and adjust seasoning if needed. A squeeze of fresh lemon juice brightens up any dip beautifully.
- Arrange the bento box (2 minutes): Now comes the artistic part. Start by placing your dip containers in the largest compartment or in a corner of the box. Then arrange your vegetables by color to create a rainbow effect. I like to go in order: red (cherry tomatoes or red pepper), orange (carrots), yellow (yellow pepper or corn), green (cucumber, snap peas, broccoli), and purple (cabbage or red onion). Place the protein in the remaining space. If you’re including fruit or crackers, tuck them into any empty spots. The goal is a full, colorful box that looks like a little work of art.
- Add finishing touches (1 minute): If you want to go the extra mile, add a small sprig of fresh mint or a few edible flowers on top of the vegetables. It’s totally optional, but it makes the lunch feel like a gift. Close the lid and refrigerate until ready to pack. The bento box will stay fresh for up to 24 hours in the fridge, making it perfect for meal prep.
Sensory Cues: At each stage, pay attention to how things look and feel. The vegetables should be crisp and bright, not limp or dull. When you press the cookie cutter into a cucumber, you should hear a clean snap. The hummus should be smooth and creamy, not watery or separated. A well-arranged bento box should look like a rainbow—vibrant, inviting, and almost too pretty to eat (almost).
Personal Tip for Efficiency: I often prep the vegetables and hard-boiled eggs on Sunday evening while I’m already in the kitchen making dinner. Store the cut vegetables in separate airtight containers in the fridge, and keep the peeled eggs in a bowl of cold water. Then in the morning, all I have to do is assemble. It turns a 15-minute process into a 3-minute one, which makes a huge difference on busy school mornings.
Cooking Tips & Techniques
After making this rainbow veggie bento box more times than I can count, I’ve picked up a few tricks that make the process easier and the results better. Let me share what I’ve learned—including the mistakes I’ve made so you don’t have to repeat them.
The Perfect Hard-Boiled Egg Every Time: This was my biggest struggle for years. I’d end up with green rings around the yolk or eggs that were impossible to peel. Here’s the method that finally worked: Place eggs in a saucepan and cover with cold water by about an inch. Bring to a rolling boil, then cover the pot and remove from heat. Let sit for exactly 10 minutes for large eggs. Transfer to an ice bath immediately. The cold shock stops the cooking and makes the shells slide right off. I learned this trick from a chef friend, and it changed my egg game completely.
Keeping Vegetables Crisp: Nobody likes a soggy bento box. The secret is to make sure your vegetables are completely dry before assembling. After washing, I spread them out on a clean kitchen towel and pat them dry. For extra crispness, you can soak cucumber slices in ice water for 5 minutes before drying. This firms them up and makes them extra crunchy. Also, keep wet ingredients like dips separate from dry vegetables until it’s time to eat. Those little compartments in the bento box aren’t just for looks—they serve a real purpose.
Making Shapes Without Waste: When I first started using cookie cutters on vegetables, I felt like I was wasting so much food. Then I realized I could chop up the scraps and use them in a fresh Greek orzo pasta salad for my own lunch, or toss them into a quick stir-fry for dinner. The scraps are also great for adding to soups or omelets. Nothing goes to waste in my kitchen—it’s just a matter of thinking ahead.
The Timing Trick: I used to try to make the entire bento box in one go, and it always felt rushed. Now I break it into two sessions. In the evening, I wash and cut all the vegetables, make the hard-boiled eggs, and portion out the dips. In the morning, I just assemble. This approach has saved me from many a frantic morning. It also means I’m more relaxed and can arrange the vegetables in a way that actually looks like a rainbow, instead of just tossing them in haphazardly.
A Mistake I Made: One time, I packed the bento box with wet vegetables right after washing them. By lunchtime, the entire box was a soggy mess. The cucumber shapes had lost their definition, the crackers were soft, and the whole thing looked sad. Now I’m obsessive about drying vegetables thoroughly. It’s a small step that makes a huge difference in the final result. Learn from my mistake—dry those veggies!
Variations & Adaptations
One of the best things about this rainbow veggie bento box is how endlessly adaptable it is. I’ve tried dozens of variations over the past year, and here are my favorites. Feel free to mix and match based on what your family loves and what you have on hand.
Dietary Variations:
- Vegan: Skip the cheese and hard-boiled eggs. Add extra hummus, roasted chickpeas, or edamame for protein. Use a dairy-free yogurt dip or just load up on extra hummus.
- Gluten-Free: Make sure any crackers or pita chips are certified gluten-free. Most vegetables are naturally gluten-free, so this is usually an easy adaptation.
- Low-Carb/Keto: Focus on low-carb vegetables like cucumber, bell peppers, and broccoli. Skip the crackers and fruit. Add extra cheese and hard-boiled eggs for fat and protein.
- Nut-Free: Replace peanut butter with sunflower seed butter or simply use more hummus and cheese. Always double-check labels on packaged items.
Seasonal Adaptations:
- Spring: Add fresh sugar snap peas, radishes, and baby carrots. Include edible flowers like pansies or nasturtiums for a garden-fresh feel.
- Summer: Use cherry tomatoes straight from the garden, fresh corn kernels, and cucumber slices. Add watermelon cubes or melon balls for a sweet contrast.
- Fall: Roasted butternut squash cubes (cooled), apple slices, and a small container of pumpkin seed butter for dipping. The warm colors feel perfect for autumn.
- Winter: Blanched broccoli florets, roasted sweet potato cubes, and citrus segments. The bright colors are especially welcome on gray winter days.
Flavor Twists: If you want to change up the flavor profile, try different dips. A creamy sun-dried tomato pesto pairs beautifully with cucumber and bell peppers. A spicy chipotle hummus adds a kick for older kids and adults. Or try a simple balsamic vinaigrette for dipping—it sounds fancy but takes two minutes to whisk together.
Personal Variation I Love: My daughter’s absolute favorite version includes star-shaped cucumber slices, heart-shaped cheese cubes, and a tiny container of “dragon eggs” (which are just halved cherry tomatoes with a little smiley face drawn on each one with edible marker). She calls it her “fairy lunch” and eats every single bite. Sometimes the silliest ideas are the ones that work best.
Serving & Storage Suggestions
This rainbow veggie bento box is designed to be served cold or at room temperature, making it perfect for packed lunches. Here’s everything you need to know about serving and storing it.
Serving Temperature and Presentation: The vegetables are best when they’re crisp and cold, straight from the refrigerator. If you’re serving this at home, arrange everything on a large platter instead of a bento box for a beautiful party presentation. The rainbow effect is especially stunning when spread out on a white platter. For school lunches, keep the bento box refrigerated until it’s time to pack, and include an ice pack if the lunch will sit out for more than a couple of hours.
Complementary Dishes and Beverages: This bento box is a complete meal on its own, but it pairs beautifully with a warm cup of soup on cold days. I love serving it alongside a bowl of creamy roasted butternut squash soup for a cozy lunch at home. For drinks, water with a slice of lemon or cucumber is perfect. If you’re packing for school, a small box of milk or a water bottle completes the meal nicely.
Storage Instructions: The assembled bento box can be stored in the refrigerator for up to 24 hours. Keep the lid tightly closed to prevent the vegetables from drying out. If you’re meal-prepping for the week, I recommend storing the components separately: cut vegetables in one container, dips in another, and protein in a third. Assemble each morning for the freshest results. The hard-boiled eggs will keep in their shells in the fridge for up to a week, making them a great make-ahead option.
Reheating Methods: This is a cold lunch, so reheating isn’t necessary. However, if you’ve included any roasted vegetables or if someone prefers their vegetables at room temperature, simply let the bento box sit out for 10-15 minutes before serving. Never microwave the entire box—the different components have different heating needs, and the dips might separate or become watery.
How Flavors Develop Over Time: Interestingly, some of the flavors actually improve after a few hours in the fridge. The hummus absorbs the subtle aromas of the vegetables, and the cheese becomes slightly creamier. The vegetables themselves stay crisp if they were properly dried before packing. I’ve found that the bento box tastes best when eaten within 6-8 hours of assembly, but it’s still good the next day. Just don’t expect the cucumber shapes to hold their definition perfectly after 24 hours—they’ll still taste great, but they might look a little tired.
Nutritional Information & Benefits
This rainbow veggie bento box is packed with nutrients, making it a lunch that parents can feel good about packing. Here’s a rough breakdown of what you’re getting in a typical serving.
Estimated Nutritional Values (per serving, approximately):
- Calories: 350-450 (depending on dips and protein choices)
- Protein: 18-25 grams (from eggs, cheese, and hummus)
- Carbohydrates: 25-35 grams (mostly from vegetables and fruit)
- Fiber: 8-12 grams (excellent for digestive health)
- Fat: 18-25 grams (healthy fats from hummus, cheese, and eggs)
- Vitamin A: High (from carrots, bell peppers, and sweet potatoes)
- Vitamin C: Very high (from bell peppers, broccoli, and citrus if included)
Health Benefits of Key Ingredients:
- Bell peppers: One of the best sources of vitamin C—more than an orange! They support immune health and skin health.
- Carrots: Rich in beta-carotene, which the body converts to vitamin A. Great for eye health and immune function.
- Cucumbers: High in water content, making them hydrating and low in calories. They also contain antioxidants that reduce inflammation.
- Hummus: Made from chickpeas, which are high in protein, fiber, and iron. The tahini (sesame paste) adds healthy fats and calcium.
- Hard-boiled eggs: A complete protein source with all nine essential amino acids. They also provide choline, which supports brain health.
Dietary Considerations: This recipe is naturally vegetarian and can easily be made vegan, gluten-free, or dairy-free with simple substitutions. It’s also low in added sugars and processed ingredients. The main allergens to be aware of are dairy (cheese, yogurt dip), eggs, nuts (peanut butter), and sesame (tahini in hummus). Always check labels and adapt as needed for your family’s dietary needs.
Personal Wellness Perspective: I love this recipe because it makes healthy eating feel like a treat instead of a chore. When my daughter eats her rainbow veggie bento box, she’s getting a wide variety of nutrients without even realizing it. The colorful presentation encourages her to try different vegetables, and the fun shapes make her feel special. For me, that’s the ultimate win—nourishing her body while making her smile.
Conclusion
This rainbow veggie bento box has honestly become a staple in our house, and I hope it becomes one in yours too. It’s quick, flexible, and—most importantly—it actually gets eaten. No more uneaten lunches coming home in the backpack. No more negotiating over vegetables. Just a colorful, delicious lunch that makes everyone feel good.
I love this recipe because it proves that healthy food doesn’t have to be boring. A few simple cookie cutters, a little attention to color, and suddenly vegetables become exciting. It’s the kind of small effort that pays off in big ways—a happy lunchtime, a nourished body, and maybe even a smile from your picky eater.
I’d love to hear how your rainbow veggie bento box turns out! Did your kids have a favorite shape? Did you discover a new vegetable combination that works? Drop a comment below and share your creations. And if you found this recipe helpful, please share it with a friend who’s also navigating the world of picky eaters and packed lunches. We’re all in this together, and a little color makes the journey so much brighter.
Frequently Asked Questions
How long does a rainbow veggie bento box stay fresh?
The assembled bento box stays fresh in the refrigerator for up to 24 hours. For best results, store components separately and assemble each morning. The vegetables stay crisp longest when they’re thoroughly dried before packing.
Can I make this bento box the night before?
Absolutely! I often prep the vegetables and hard-boiled eggs the night before, then assemble in the morning. If you need to assemble the night before, make sure everything is completely dry and keep the dips in separate containers to prevent sogginess.
What if my child doesn’t like hummus?
No problem at all! There are so many dip options to try. Greek yogurt ranch dip, peanut butter, sun butter, cream cheese, or even a simple vinaigrette all work beautifully. You can also skip the dip entirely and focus on making the vegetables extra fun with shapes and colors.
How do I keep the vegetables from getting soggy?
The number one rule is to dry your vegetables thoroughly after washing. Pat them with a clean kitchen towel or paper towels until they’re completely dry. Also, keep dips in separate leakproof containers and don’t add them to the main compartment until it’s time to eat.
Can I use frozen vegetables for this recipe?
Frozen vegetables work in a pinch, but they tend to release moisture as they thaw, which can make the bento box soggy. If you’re using frozen corn or peas, thaw them completely in the refrigerator and pat them dry before adding to the box. Fresh vegetables are always the best choice for texture and crunch.
Pin This Recipe!
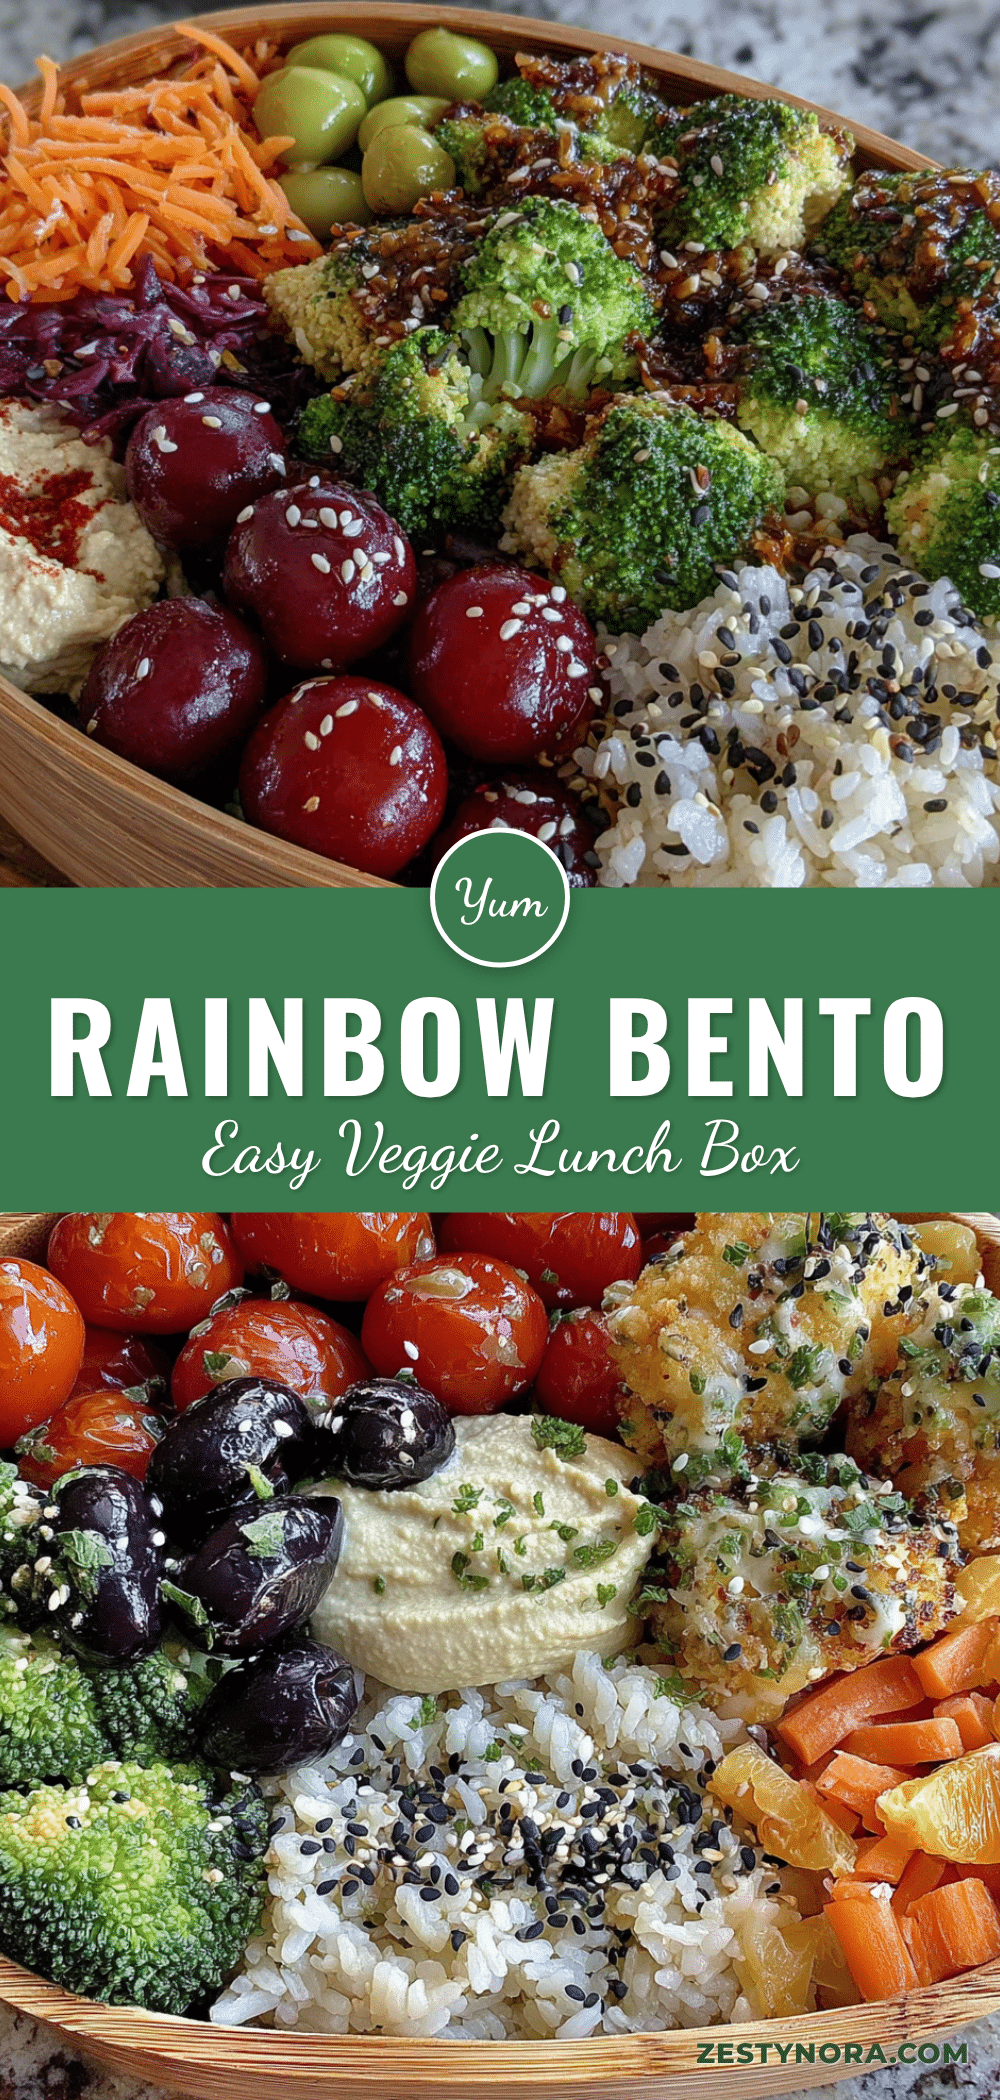
Easy Rainbow Veggie Bento Box: Best Kid-Friendly Lunch
A colorful and fun bento box lunch made with fresh vegetables, protein, and dips. Quick to assemble in under 15 minutes, this kid-friendly meal is perfect for school lunches, picnics, or a light dinner.
- Prep Time: 15 minutes
- Cook Time: 0 minutes
- Total Time: 15 minutes
- Yield: 4 servings
- Category: Lunch
- Cuisine: American
Ingredients
- Cherry tomatoes (halved or whole)
- Red bell pepper strips
- Thinly sliced radishes
- Carrot sticks or baby carrots
- Orange bell pepper strips
- Roasted sweet potato cubes (leftover from dinner)
- Yellow bell pepper strips
- Yellow cherry tomatoes
- Corn kernels (fresh or thawed frozen)
- Cucumber slices or sticks
- Snap peas
- Sugar snap peas
- Broccoli florets (blanched or raw)
- Green bell pepper strips
- Purple cabbage (thinly shredded)
- Purple carrots (if available)
- Red onion (thinly sliced)
- Hard-boiled eggs (peeled and halved)
- Cheese cubes or cheese sticks (cheddar, mozzarella, or colby jack)
- Turkey or ham roll-ups (thin slices rolled into pinwheels)
- Hummus (classic, roasted red pepper, or beet hummus)
- Greek yogurt ranch dip (plain Greek yogurt mixed with ranch seasoning)
- Peanut butter or sun butter
- Fresh fruit (grapes, berries, apple slices, or melon balls)
- Whole grain crackers or pita chips
- Edible flowers or herb garnishes (optional)
Instructions
- Wash all vegetables thoroughly under cold water and pat dry with a clean kitchen towel or paper towels. Peel carrots if using, cut bell peppers into thin strips about 2 inches long, slice cucumbers into rounds or sticks, and leave cherry tomatoes whole or halved.
- Use small cookie cutters (star, heart, flower, or animal shapes) to cut fun shapes from cucumber slices, carrot rounds, or bell pepper strips. Aim for vegetable slices about 1/4 inch thick for clean cuts. Save scraps for other uses.
- Prepare protein: Peel and halve hard-boiled eggs lengthwise or use an egg slicer for even rounds. Cut cheese into small cubes about 1/2 inch wide or use cookie cutters for shapes. For turkey or ham roll-ups, lay a slice of deli meat flat, place a cheese stick at one edge, roll tightly, and slice into 1-inch pinwheels.
- Prepare dips: Spoon hummus or other dips into small condiment containers, filling about three-quarters full. For Greek yogurt ranch dip, mix 1/4 cup plain Greek yogurt with 1 tablespoon ranch seasoning. Stir store-bought hummus to make it smooth.
- Arrange bento box: Place dip containers in the largest compartment or a corner. Arrange vegetables by color to create a rainbow effect: red (cherry tomatoes or red pepper), orange (carrots), yellow (yellow pepper or corn), green (cucumber, snap peas, broccoli), purple (cabbage or red onion). Add protein in remaining space. Tuck fruit or crackers into empty spots.
- Add finishing touches: Optionally garnish with a small sprig of fresh mint or edible flowers. Close lid and refrigerate until ready to pack. Bento box stays fresh for up to 24 hours in the fridge.
Notes
For best texture, use firm, crisp vegetables without soft spots. Dry vegetables thoroughly after washing to prevent sogginess. Prep vegetables and hard-boiled eggs the night before for quicker assembly in the morning. The bento box is best eaten within 6-8 hours of assembly but stays fresh up to 24 hours. For school lunches, check nut policies before including peanut butter or sun butter.
Nutrition
- Serving Size: 1 bento box
- Calories: 350450
- Sugar: 1015
- Sodium: 400600
- Fat: 1825
- Saturated Fat: 58
- Carbohydrates: 2535
- Fiber: 812
- Protein: 1825
Keywords: rainbow veggie bento box, kid-friendly lunch, healthy lunchbox, vegetable bento, easy lunch idea, picky eater lunch, school lunch, vegetarian lunch


