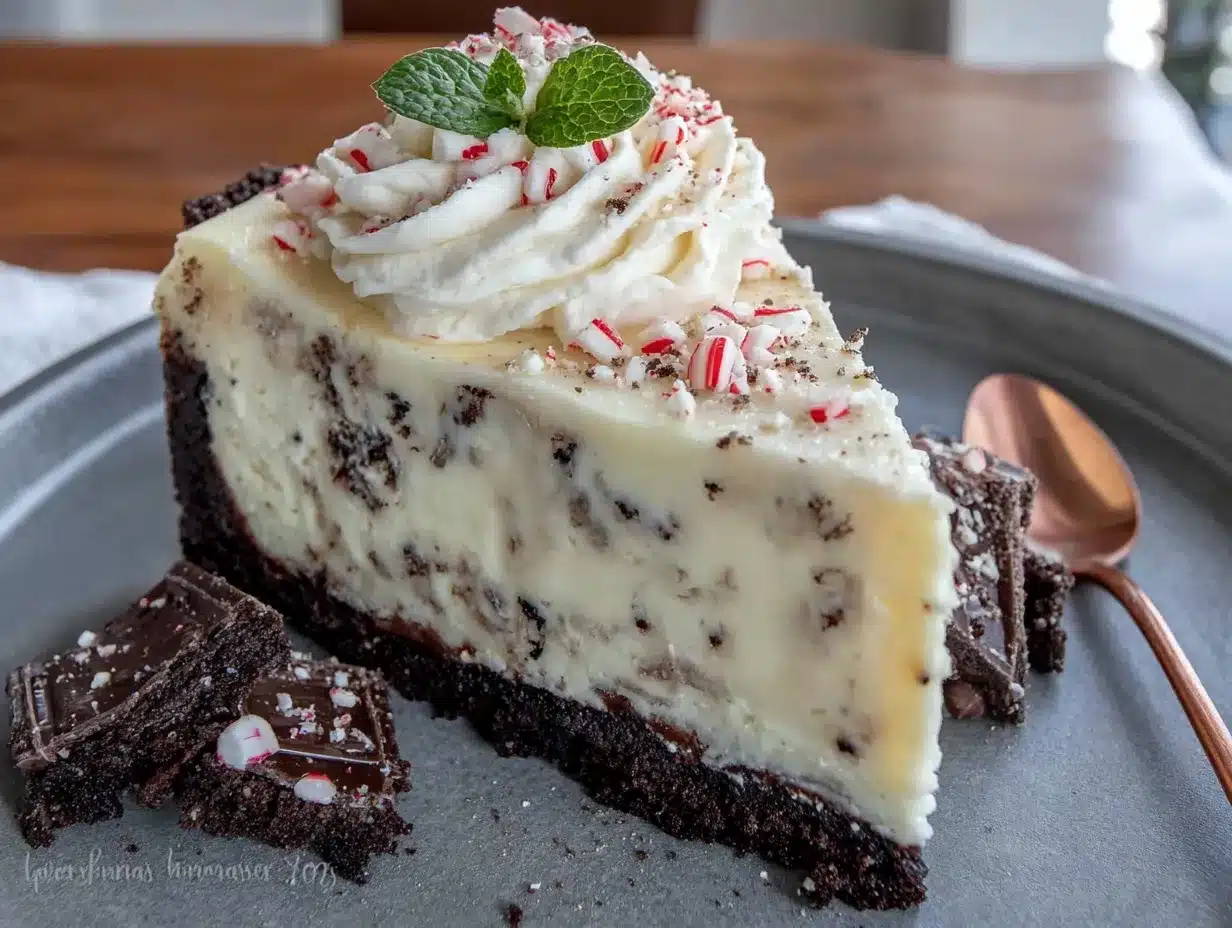
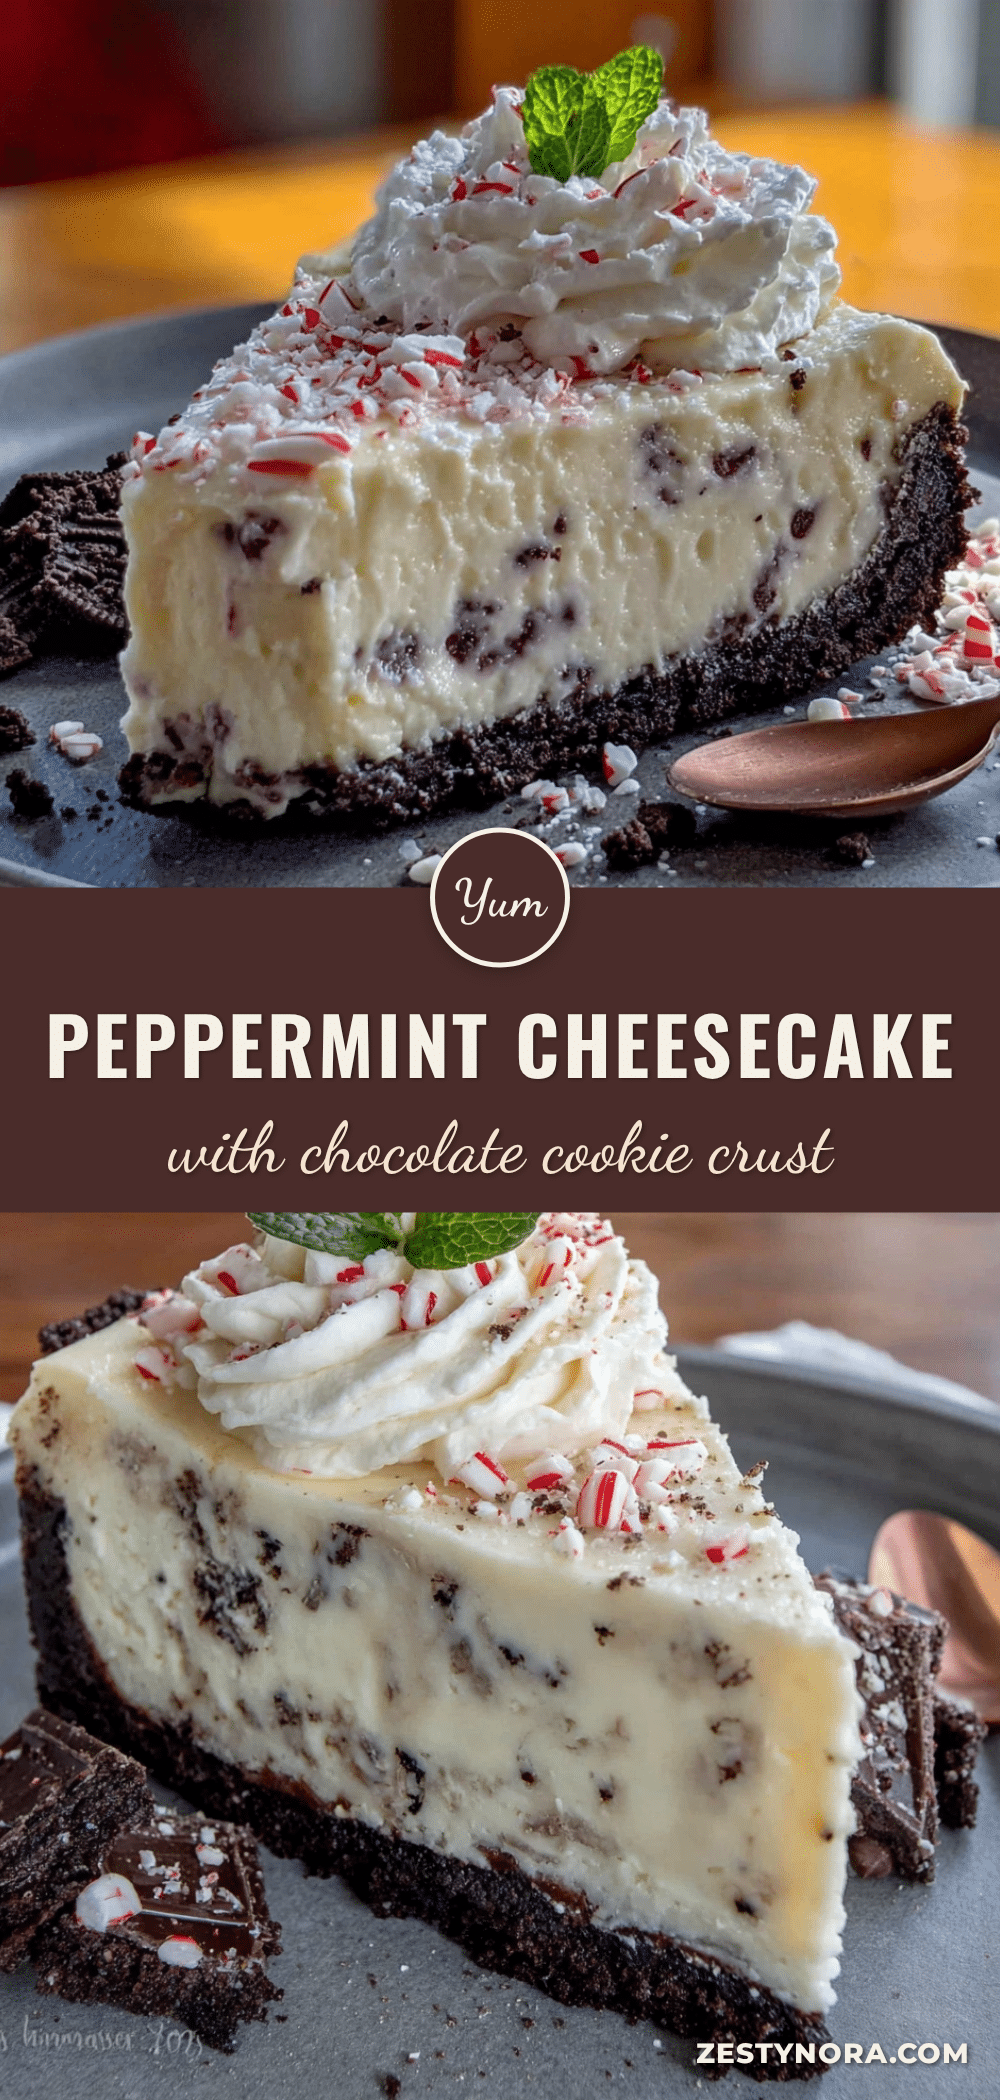
There used to be a tiny bakery tucked between a laundromat and a dusty antiques shop on Main Street called The Frosted Spoon that made a peppermint cheesecake that absolutely ruined me for all other desserts. When they closed their doors three years ago—just a handwritten sign in the window saying “Thank you, it’s been sweet”—I honestly felt a little dramatic about how sad I was. I mean, it was just a bakery, right? But that cheesecake. That silky, cool, peppermint-studded slice of heaven with a dark chocolate cookie crust that crunched just so. After seventeen tries—seventeen, let me tell you, including one that cracked so badly it looked like a map of a small earthquake—I finally got it. This Easy Peppermint Cheesecake with Chocolate Cookie Crust is the one. It’s the one I make every December (and, okay, sometimes in July when I’m feeling festive). If you’ve ever lost a favorite food spot and wished you could bottle up that exact taste, you know exactly what I’m talking about.
This recipe came together on a random Tuesday night when I was out of heavy cream and too tired to go back to the store. Desperation made me try sour cream instead, and honestly? It worked better. That little happy accident is what makes this cheesecake so ridiculously creamy without being heavy. The chocolate crust is made from crushed Oreo-type cookies (the filling stays in, because life’s too short to scrape it out), and the filling gets a double hit of peppermint from both extract and crushed candy canes. It’s the kind of dessert that makes people close their eyes when they take a bite. I keep making it because it reminds me that sometimes the best things come from places that don’t exist anymore—and that’s okay. You can carry the taste with you.
Why You’ll Love This Easy Peppermint Cheesecake with Chocolate Cookie Crust
This isn’t just another holiday dessert that takes all afternoon and leaves you with a sink full of dishes. This Easy Peppermint Cheesecake with Chocolate Cookie Crust is the one you’ll actually want to make on a Wednesday night when you’ve got a work thing tomorrow and still need to pack lunches. Here’s why it works:
- Quick & Easy : The active prep time is about 20 minutes. Twenty. The oven does the rest of the work while you fold laundry or finally answer that email from your mom.
- Simple Ingredients : Cream cheese, sour cream, eggs, sugar, peppermint extract, and chocolate sandwich cookies. That’s it. No trips to a specialty baking store.
- Perfect for Holiday Gatherings : Christmas dinner, cookie exchanges, or just a Tuesday that needs a little sparkle—this cheesecake fits right in without being fussy.
- Crowd-Pleaser : I’ve brought this to four different parties now, and every single time someone asks for the recipe. Even people who “don’t like cheesecake” have been converted.
- Unbelievably Delicious : The contrast between the cool, creamy peppermint filling and that dark, crunchy chocolate crust is honestly next-level. It’s like a Thin Mint grew up and got a fancy job.
What makes this version different from the other peppermint cheesecakes out there? It’s the sour cream trick. Most recipes call for heavy cream, but sour cream gives the filling a tangy depth that balances the sweet peppermint perfectly. Plus, it makes the texture impossibly smooth without needing a water bath. No water bath! That alone should make you want to try this. This recipe isn’t just good—it’s the kind that makes you close your eyes after the first bite and forget what you were stressed about for a solid thirty seconds.
What Ingredients You Will Need
This Easy Peppermint Cheesecake with Chocolate Cookie Crust uses simple, honest ingredients that you probably already have in your kitchen, minus maybe the peppermint extract. Here’s what you’ll need and why each one matters:
For the Chocolate Cookie Crust
- 24 chocolate sandwich cookies (like Oreo—keep the filling in! It adds sweetness and helps the crust hold together)
- 5 tablespoons unsalted butter, melted (I use salted in a pinch and just skip the extra salt; it works fine)
- Pinch of salt (if your butter is unsalted; skip if using salted)
For the Peppermint Cheesecake Filling
- 24 ounces cream cheese, softened (three 8-ounce blocks—set them out on the counter for at least an hour; cold cream cheese makes lumpy cheesecake, and nobody has time for that)
- 1 cup granulated sugar (regular white sugar; don’t use brown sugar here, it’ll change the color and flavor)
- 3 large eggs, room temperature (if you forgot to take them out, place them in a bowl of warm water for 5 minutes)
- 1 cup sour cream (full-fat works best, but I’ve used Greek yogurt in a pinch and it was still delicious)
- 1 teaspoon vanilla extract (pure vanilla if you have it, imitation works fine too)
- 1 ½ teaspoons peppermint extract (this is key—use a good brand like Nielsen-Massey or Simply Organic for the cleanest flavor)
- ½ cup crushed candy canes or peppermint candies (plus more for topping; crush them in a ziplock bag with a rolling pin—it’s oddly satisfying)
- Red food coloring (optional) (just a drop or two for that classic pink swirl; I’ve skipped it plenty of times and the cheesecake still tastes amazing)
Ingredient Tips from Experience
Let me save you a mistake I made on attempt number four: don’t use mint extract instead of peppermint extract. They’re different! Peppermint extract is stronger and has that cool, wintergreen-y kick. Mint extract tastes more like spearmint gum. Your cheesecake will taste like toothpaste. Learn from my pain.
For the candy canes, I recommend buying a box of the cheap ones right after Christmas when they’re on clearance. They crush beautifully and taste exactly the same as the fancy ones. Just make sure you crush them finely enough—big chunks can get chewy and weird in the filling.
If you’re dairy-free, I’ve had good luck with dairy-free cream cheese (Kite Hill is my favorite) and a plant-based sour cream. The texture is slightly less firm, but the flavor is still spot-on.
Equipment Needed
You don’t need a fancy kitchen to make this Easy Peppermint Cheesecake with Chocolate Cookie Crust. Here’s what you’ll actually use:
- 9-inch springform pan (the kind with the latch on the side—absolutely essential for getting the cheesecake out in one piece)
- Food processor or ziplock bag (for crushing cookies; a rolling pin works too, and honestly, smashing things is therapeutic)
- Electric hand mixer or stand mixer (you can do this by hand if you have Popeye arms, but a mixer makes it so much easier)
- Large mixing bowls (one for crust, one for filling)
- Rubber spatula (the one that can handle heat—get a good one, they’re cheap and last forever)
- Measuring cups and spoons (the peppermint extract measurement matters, so don’t eyeball it)
- Cooling rack (for letting the cheesecake cool gradually; a wire rack from the oven works great)
If you don’t have a springform pan, you can use a deep-dish pie plate. The slices won’t be as clean, but it’ll taste just as good. I actually used a pie plate on attempt number seven and it worked fine—just line it with parchment paper so you can lift the cheesecake out.
Preparation Method
Let’s make this Easy Peppermint Cheesecake with Chocolate Cookie Crust. I’ll walk you through it step by step, including what things should look and feel like so you know you’re on the right track.
- Preheat your oven to 325°F (160°C). Place a rack in the middle position. While the oven heats, get your springform pan ready—no need to grease it, the butter in the crust will do that job.
- Make the crust. Place the 24 chocolate sandwich cookies (filling and all) in a food processor and pulse until you have fine crumbs. If you don’t have a food processor, put the cookies in a ziplock bag and go to town with a rolling pin. It’s a great way to release some pent-up stress. You should have about 2 cups of crumbs. Pour them into a medium bowl, add the melted butter and salt, and stir with a fork until every crumb is coated. The mixture should look like wet sand and hold together when you squeeze it in your fist.
- Press the crust into the pan. Dump the crumb mixture into your springform pan. Using the bottom of a flat measuring cup or a glass, press the crumbs firmly into an even layer across the bottom and about 1 inch up the sides. Take your time here—a well-packed crust means no crumbling when you cut slices later. Pop the pan in the fridge while you make the filling.
- Beat the cream cheese. In a large mixing bowl, beat the softened cream cheese with an electric mixer on medium speed until it’s completely smooth, about 2 minutes. Scrape down the sides and bottom of the bowl with your spatula. There should be no lumps—if you see any, keep beating. This is the most important step for a silky cheesecake.
- Add the sugar. With the mixer on low, gradually add the sugar. Beat until combined, then scrape the bowl again. Increase speed to medium and beat for another minute until the mixture looks light and fluffy.
- Add the eggs one at a time. Crack each egg into a small bowl first (no shell surprises!), then add it to the cream cheese mixture. Beat on low after each egg just until the yolk disappears. Overbeating at this stage can incorporate too much air, which leads to cracks. You want the mixture to look thick and glossy, like a very fancy pudding.
- Mix in the sour cream, vanilla, and peppermint extract. Add the sour cream, vanilla extract, and peppermint extract. Beat on low until just combined. Scrape the bowl one more time. If you’re using food coloring, add 1-2 drops now and give it one more quick stir. The batter should be pale and creamy with a subtle peppermint scent that makes your kitchen smell like a holiday candle.
- Fold in the crushed candy canes. Gently fold in the ½ cup of crushed peppermint using a rubber spatula. Don’t overmix—you want little red and white flecks distributed throughout, not a pink mess. The batter will have tiny speckles of candy that will mostly dissolve during baking, leaving behind pockets of peppermint flavor.
- Pour the filling into the crust. Take the crust out of the fridge and pour the filling over it. Gently spread it into an even layer with your spatula. Tap the pan on the counter a few times to release any air bubbles that might have formed.
- Bake the cheesecake. Place the pan on the middle rack and bake for 50-60 minutes. The edges should look set and slightly puffed, but the center should still jiggle like Jell-O when you gently shake the pan. Don’t worry if there’s a slight wobble—that’s exactly what you want. If the center looks liquid, give it 5 more minutes and check again.
- Cool the cheesecake slowly. Turn off the oven, crack the door open, and let the cheesecake sit inside for 1 hour. This gradual cooling prevents cracks. After an hour, take it out and let it cool completely on a wire rack, about another hour. You’ll notice the top will settle and become perfectly flat.
- Chill the cheesecake. Once it’s at room temperature, cover the pan with plastic wrap and refrigerate for at least 6 hours, but overnight is best. I know it’s hard to wait, but trust me—this is where the magic happens. The flavors meld, the texture firms up, and the crust sets perfectly.
- Serve and enjoy. When you’re ready to serve, run a thin knife around the edge of the pan before releasing the springform latch. Top with additional crushed candy canes, whipped cream, or chocolate shavings. Slice with a sharp knife that you wipe clean between cuts for the prettiest slices.
Cooking Tips & Techniques
After seventeen attempts at this Easy Peppermint Cheesecake with Chocolate Cookie Crust, I’ve collected some hard-won wisdom. Here’s what I wish someone had told me:
Room temperature ingredients are non-negotiable. I know, I know—you’re in a hurry. But cold cream cheese creates lumps that no amount of beating can fully fix. Take everything out of the fridge at least an hour before you start. Set a timer on your phone. Future you will be grateful.
Don’t overmix the filling after adding eggs. This was mistake number three for me. I beat the mixture like I was angry at it, and the cheesecake came out with a soufflé-like puffiness that collapsed into a canyon of cracks. Mix on low speed and stop as soon as the yolk disappears. Your cheesecake will be dense and creamy instead of airy and cracked.
Skip the water bath. Most cheesecake recipes insist on a water bath, but this one doesn’t need it. The sour cream keeps the filling moist enough that it won’t crack from dry oven heat. Plus, a water bath is a hassle—wrapping the pan in foil, worrying about leaks, steaming up your kitchen. I’ve made this recipe four times without a water bath and gotten perfect results every time.
Let it cool in the oven. This is the real secret to a crack-free top. That gradual cooling in the turned-off oven with the door cracked lets the cheesecake adjust to temperature changes slowly. If you pull it out and set it on the counter immediately, the sudden temperature drop can cause cracking. Be patient—go fold that laundry or watch half an episode of your show.
Crush candy canes finely. Big chunks of candy cane don’t fully dissolve during baking and leave chewy, sticky spots in your otherwise silky cheesecake. I use a food processor for the candy canes too, or I put them in a ziplock bag and go at them with a meat mallet. You want mostly powder with a few tiny pieces for texture.
Variations & Adaptations
One of the best things about this Easy Peppermint Cheesecake with Chocolate Cookie Crust is how flexible it is. Here are some ways to make it your own:
Chocolate Peppermint Swirl: Melt ½ cup of semi-sweet chocolate chips and swirl it into the filling before baking. Drop spoonfuls of melted chocolate on top of the filling, then use a knife to create figure-eight patterns. It looks gorgeous and adds another layer of chocolate goodness.
Gluten-Free Version: Use gluten-free chocolate sandwich cookies for the crust. I’ve tested this with the Glutino brand and it worked beautifully. Everything else in the recipe is naturally gluten-free, so this is an easy swap.
No-Bake Option: If you don’t want to turn on the oven, you can make this as a no-bake cheesecake. Use the same crust but press it into the pan and freeze it for 15 minutes. For the filling, beat 16 ounces of cream cheese with ½ cup sugar, then fold in 2 cups of whipped cream (or Cool Whip), 1 teaspoon peppermint extract, and ¼ cup crushed candy canes. Pour into the crust and chill for at least 4 hours. It’s lighter and fluffier, but still delicious.
Individual Mini Cheesecakes: Press the crust into a muffin tin lined with paper liners (about 2 tablespoons per cup), then divide the filling evenly. Bake for 18-22 minutes. These are perfect for parties or portion control. Plus, they’re adorable.
White Chocolate Peppermint: Melt 4 ounces of white chocolate and fold it into the filling along with the crushed candy canes. The white chocolate adds a creamy sweetness that pairs beautifully with the peppermint. I tried this on attempt number eleven and it was one of my favorites.
Serving & Storage Suggestions
This Easy Peppermint Cheesecake with Chocolate Cookie Crust is best served cold, straight from the fridge. Let it sit at room temperature for about 10 minutes before slicing—this takes the chill off just enough to let the flavors shine without making the cheesecake too soft.
For serving: Top each slice with a dollop of lightly sweetened whipped cream, a sprinkle of crushed candy canes, and maybe a chocolate curl or two. A drizzle of warm chocolate sauce over the top is never a bad idea either. I like to serve it alongside a cup of strong coffee or a glass of cold milk—the bitterness balances the sweetness perfectly.
For storage: Cover the cheesecake tightly with plastic wrap or foil and keep it in the refrigerator for up to 5 days. The flavor actually improves after a day or two as the peppermint mellows and melds with the cream cheese. Just make sure the plastic wrap touches the surface of the cheesecake to prevent a skin from forming.
For freezing: This cheesecake freezes beautifully. Once it’s fully chilled and set, wrap the entire cheesecake (still in the springform pan) in a layer of plastic wrap, then a layer of aluminum foil. Freeze for up to 3 months. To serve, thaw it in the refrigerator overnight. Don’t thaw it on the counter—it’ll get weepy and lose its silky texture. I’ve frozen slices individually too, wrapped in plastic wrap and stored in a freezer bag. They’re perfect for those random peppermint cravings.
One thing I’ve noticed: the crushed candy canes on top will soften and get a little sticky after a day in the fridge. If you want that crunch, add the topping right before serving instead.
Nutritional Information & Benefits
Let’s be honest—this Easy Peppermint Cheesecake with Chocolate Cookie Crust is a treat, not a health food. But here’s the nutritional breakdown for one slice (based on 12 servings):
| Nutrient | Amount per Slice |
|---|---|
| Calories | 410 |
| Total Fat | 28g |
| Saturated Fat | 16g |
| Cholesterol | 115mg |
| Sodium | 320mg |
| Total Carbohydrates | 36g |
| Sugar | 28g |
| Protein | 7g |
| Calcium | 80mg |
On the bright side, cream cheese and sour cream provide calcium and protein, and peppermint has been known to aid digestion and freshen breath. So there’s that! If you’re watching your sugar intake, you can reduce the sugar to ¾ cup and use sugar-free candy canes. The texture will be slightly less creamy, but it’ll still be delicious.
This recipe is vegetarian-friendly and can be made gluten-free with a simple swap. It contains dairy, eggs, and gluten (in the cookies), so it’s not suitable for vegan or dairy-free diets without modifications. But hey, sometimes a little indulgence is exactly what the soul needs.
Conclusion
This Easy Peppermint Cheesecake with Chocolate Cookie Crust is more than just a holiday dessert—it’s a little piece of nostalgia that you can recreate in your own kitchen without spending hours or stressing over complicated techniques. The silky peppermint filling, the crunchy chocolate crust, the festive pop of crushed candy canes—it all comes together in a way that feels special but totally doable on a weeknight.
I love this recipe because it reminds me that you don’t need a fancy bakery or a professional pastry chef to make something unforgettable. You just need good ingredients, a little patience, and the willingness to try again when things don’t work out the first time (or the seventeenth time). This cheesecake has become my go-to for holiday gatherings, cozy winter evenings, and any time I need a little extra cheer in my life.
Now I want to hear from you! Have you tried making this Easy Peppermint Cheesecake with Chocolate Cookie Crust? Did you add your own twist or discover a new favorite variation? Drop a comment below and tell me all about it. And if you loved this recipe, share it with a friend who needs a little holiday magic in their kitchen. Happy baking, friends!
Frequently Asked Questions
Can I use mint extract instead of peppermint extract?
I wouldn’t recommend it. Mint extract is made from spearmint and has a different flavor profile that can make your cheesecake taste like toothpaste or gum. Peppermint extract is stronger and has that cool, wintergreen taste that pairs perfectly with chocolate. Stick with peppermint for the best results.
Why did my cheesecake crack on top?
Cracks usually happen from overmixing the filling (which incorporates too much air) or from sudden temperature changes. Make sure your cream cheese is fully softened, mix on low speed after adding eggs, and let the cheesecake cool slowly in the turned-off oven. If it still cracks, don’t worry—the crushed candy canes and whipped cream on top will hide it perfectly.
Can I make this cheesecake ahead of time?
Absolutely! In fact, I recommend it. This cheesecake needs at least 6 hours to chill and set, but it actually tastes better after a day or two in the fridge. You can make it up to 3 days ahead of time and keep it covered in the refrigerator. Just add the toppings right before serving.
How do I get clean slices when cutting the cheesecake?
Use a sharp knife and wipe it clean with a damp paper towel between each cut. For the cleanest slices, you can also dip the knife in hot water and dry it off before cutting. This helps the knife glide through the cheesecake without dragging the filling. And make sure the cheesecake is fully chilled—room temperature cheesecake is too soft to cut neatly.
Can I freeze leftover cheesecake?
Yes! Wrap individual slices or the whole cheesecake tightly in plastic wrap, then in aluminum foil, and freeze for up to 3 months. Thaw in the refrigerator overnight. The texture stays creamy and delicious. Just don’t add the crushed candy cane topping until after thawing, as it can get soggy in the freezer.
Pin This Recipe!
Easy Peppermint Cheesecake with Chocolate Cookie Crust
A silky, cool peppermint cheesecake with a dark chocolate cookie crust that’s easy to make and perfect for holiday gatherings. The sour cream trick makes it impossibly smooth without a water bath.
- Prep Time: 20 minutes
- Cook Time: 55 minutes
- Total Time: 8 hours 15 minutes (includes chilling)
- Yield: 12 servings 1x
- Category: Dessert
- Cuisine: American
Ingredients
- 24 chocolate sandwich cookies (like Oreo, filling included)
- 5 tablespoons unsalted butter, melted
- Pinch of salt (if using unsalted butter)
- 24 ounces cream cheese, softened
- 1 cup granulated sugar
- 3 large eggs, room temperature
- 1 cup sour cream
- 1 teaspoon vanilla extract
- 1 ½ teaspoons peppermint extract
- ½ cup crushed candy canes or peppermint candies (plus more for topping)
- Red food coloring (optional)
Instructions
- Preheat oven to 325°F (160°C). Place rack in middle position.
- Make the crust: Pulse 24 chocolate sandwich cookies in a food processor until fine crumbs. Mix with melted butter and salt until it holds together when squeezed.
- Press crust firmly into bottom and 1 inch up sides of a 9-inch springform pan. Refrigerate while making filling.
- Beat softened cream cheese with an electric mixer on medium speed until smooth, about 2 minutes. Scrape bowl.
- Gradually add sugar, beating on low until combined. Increase to medium and beat 1 minute until light and fluffy.
- Add eggs one at a time, beating on low after each just until yolk disappears. Do not overmix.
- Mix in sour cream, vanilla, and peppermint extract on low until just combined. Add food coloring if desired.
- Gently fold in ½ cup crushed candy canes with a rubber spatula.
- Pour filling over crust. Spread evenly and tap pan on counter to release air bubbles.
- Bake 50-60 minutes until edges are set and center jiggles slightly.
- Turn off oven, crack door, and let cheesecake cool inside for 1 hour.
- Remove from oven and cool completely on a wire rack (about 1 hour).
- Cover with plastic wrap and refrigerate at least 6 hours, preferably overnight.
- Run a thin knife around edge before releasing springform latch. Top with additional crushed candy canes, whipped cream, or chocolate shavings before serving.
Notes
Room temperature ingredients are essential for a smooth texture. Do not use mint extract instead of peppermint extract. Skip the water bath—sour cream keeps it moist. Cool slowly in the oven to prevent cracks. Crush candy canes finely to avoid chewy spots.
Nutrition
- Serving Size: 1 slice
- Calories: 410
- Sugar: 28
- Sodium: 320
- Fat: 28
- Saturated Fat: 16
- Carbohydrates: 36
- Protein: 7
Keywords: peppermint cheesecake, chocolate cookie crust, easy cheesecake, holiday dessert, Christmas cheesecake, no water bath cheesecake