The first time I brought a no-bake pumpkin pie to a Friendsgiving, I watched someone scrape the last bit of filling from the dish with a butter knife. Not a spoon. A knife. That was the moment I knew I had stumbled onto something worth keeping. For years, I’d just accepted that pumpkin pie meant standing over a hot oven, praying the crust didn’t shrink and the filling didn’t crack. But what if you could skip all that and still get a slice that holds its shape, tastes deeply spiced, and doesn’t require you to own a pie stone?
This Easy No-Bake Pumpkin Pie with Gingersnap Crust started as a late-night experiment when I had a can of pumpkin, a box of gingersnaps, and zero patience for pastry. I figured the worst that could happen was a sloppy mess. Instead, I got a dessert that felt like cheating. The crust is crunchy, the filling is silky, and the whole thing sets up in the fridge while you go do literally anything else. It’s the kind of recipe that makes you look like you planned ahead when you really just didn’t feel like turning on the oven.
What stuck with me—besides that butter knife moment—was how unpretentious it felt. No blind baking, no water bath, no worrying about whether the custard is set. Just a few ingredients, a food processor, and a fridge. If you’ve been looking for a fall dessert that actually delivers on both flavor and ease, this one’s for you. Honestly, it might ruin traditional pumpkin pie for you. But in the best way.
Why You’ll Love This Recipe
This isn’t just another pumpkin pie recipe. It’s the one I bring to every gathering because it works without fail. Here’s why you’ll keep coming back to it:
- Quick & Easy: No oven required. You’ll spend about 20 minutes actively working on it, then the fridge does the rest. Perfect for when you need a dessert but don’t have the energy for a full baking project.
- Simple Ingredients: You probably have most of this in your pantry right now. Canned pumpkin, cream cheese, heavy cream, sugar, and a box of gingersnaps. No fancy extracts or hard-to-find spices.
- Perfect for Fall Gatherings: Whether it’s a Friendsgiving, a cozy dinner party, or a quiet Thursday night when you just want pie, this recipe fits. It travels well, slices cleanly, and looks impressive on a plate.
- Crowd-Pleaser: I’ve served this to pumpkin pie purists and people who swear they don’t like pumpkin. Both groups asked for seconds. The gingersnap crust adds a warmth that complements the filling without overpowering it.
- Unbelievably Delicious: The texture is what gets people. It’s creamy but firm, spiced but balanced, and the crust stays crunchy even after a day in the fridge. It’s comfort food that doesn’t weigh you down.
What makes this different from other no-bake pies is the technique. Instead of relying on instant pudding or gelatin, we use cream cheese and whipped cream to create a stable, mousse-like filling that actually tastes like pumpkin, not artificial flavoring. It’s the kind of dessert that makes you close your eyes after the first bite—not because it’s fancy, but because it’s exactly right.
What Ingredients You Will Need
This recipe keeps things simple. Each ingredient plays a specific role in creating that silky texture and balanced flavor. Here’s what you’ll need:
For the Gingersnap Crust
- 2 cups (200g) gingersnap cookie crumbs – I use Nabisco brand for consistency, but any crunchy gingersnap works. Pulse them in a food processor until you get fine crumbs. You want them even so the crust holds together.
- 6 tablespoons (85g) unsalted butter, melted – Use real butter here. Margarine changes the texture and flavor. Let it cool slightly before mixing with the crumbs.
- 2 tablespoons (25g) granulated sugar – Just a little extra sweetness to balance the spice in the cookies.
- Pinch of salt – Don’t skip this. Salt sharpens the flavors and keeps the crust from tasting flat.
For the Pumpkin Filling
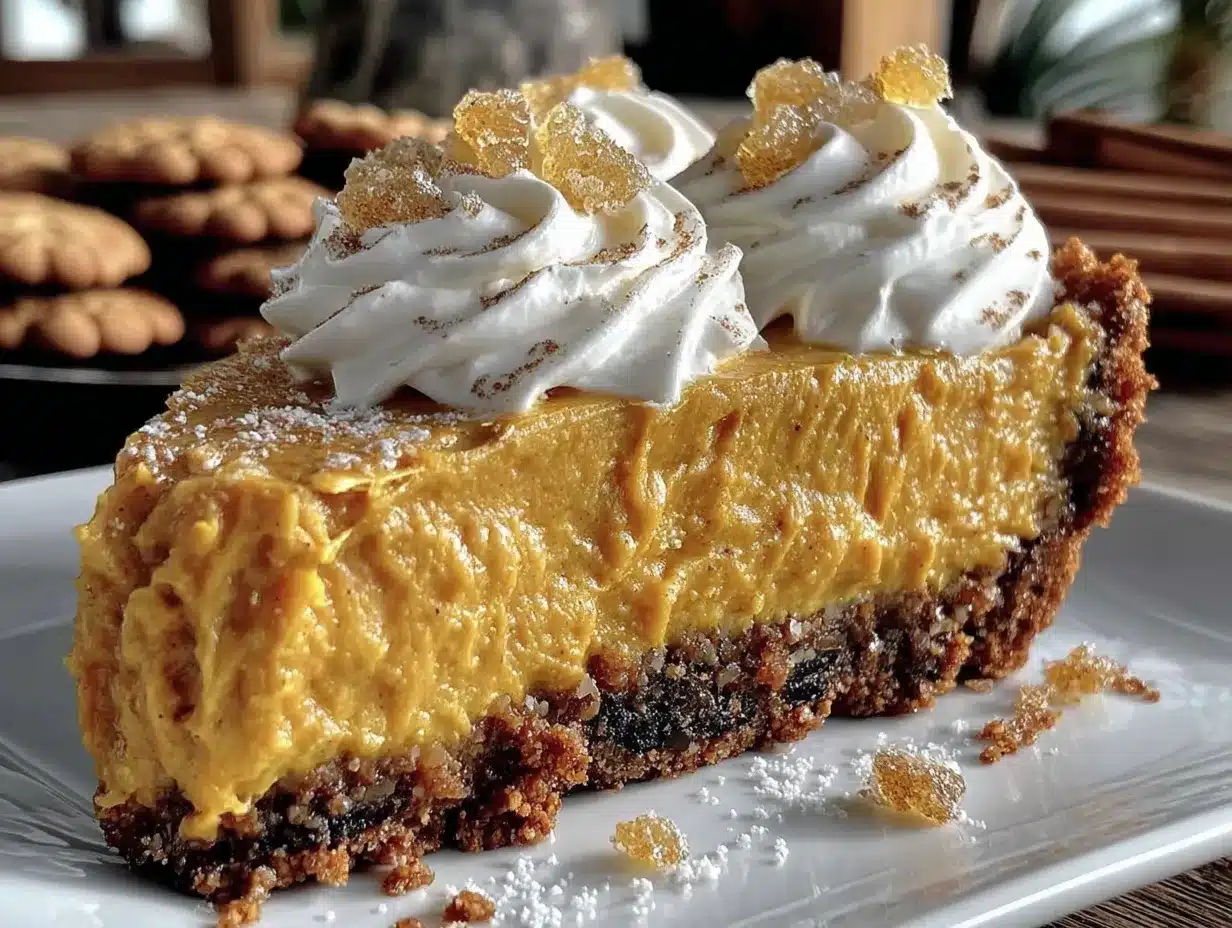
- 1 cup (225g) cream cheese, softened – Full-fat cream cheese gives the best texture. Let it sit at room temperature for about 30 minutes before you start. Cold cream cheese creates lumps that are hard to smooth out.
- 1 cup (200g) granulated sugar – You can reduce this to ¾ cup if you prefer a less sweet pie, but I find 1 cup balances the tang of the cream cheese nicely.
- 1 can (15 oz or 425g) pumpkin purée – Make sure you buy pumpkin purée, not pumpkin pie filling. Libby’s is my go-to. The filling is already seasoned, so we’re adding our own spices.
- 1 teaspoon vanilla extract – Pure vanilla adds depth. Imitation works in a pinch, but pure is better.
- 1 teaspoon ground cinnamon – The backbone of the spice blend. Use fresh cinnamon if you can; it makes a difference.
- ½ teaspoon ground ginger – This echoes the gingersnap crust and ties the whole dessert together.
- ¼ teaspoon ground nutmeg – Freshly grated is best, but pre-ground works too.
- ¼ teaspoon ground cloves – Go easy here. Cloves are strong and can overpower the other spices.
- 1 ½ cups (360ml) heavy cream – Cold heavy cream whips better. You’ll whip it to stiff peaks and fold it into the pumpkin mixture.
If you want to swap the heavy cream for a dairy-free alternative, coconut cream works surprisingly well. Just chill the can overnight and scoop out the solid part. The texture will be slightly different but still delicious.
Equipment Needed
You don’t need a fully stocked kitchen to make this pie. Here’s what you’ll actually use:
- 9-inch pie dish – A standard glass or ceramic pie dish works perfectly. Avoid metal pans if you can; they conduct heat differently and can affect the crust’s texture during chilling.
- Food processor – For crushing the gingersnaps into fine crumbs. You can also use a rolling pin and a zip-top bag, but the food processor is faster and gives more even results.
- Electric mixer – A hand mixer or stand mixer with the whisk attachment works for whipping the cream. You can do it by hand with a whisk, but your arm will get tired.
- Large mixing bowls – You’ll need at least two: one for the crust mixture and one for the filling.
- Rubber spatula – For folding the whipped cream into the pumpkin mixture without deflating it.
- Measuring cups and spoons – Accuracy matters with the spices. Too much clove can ruin the balance.
- Plastic wrap – To cover the pie while it chills. Press it directly onto the surface of the filling to prevent a skin from forming.
Preparation Method
- Make the crust. In a food processor, pulse the gingersnap cookies until they become fine crumbs. You should have about 2 cups. Transfer the crumbs to a medium bowl and stir in the sugar and salt. Pour the melted butter over the mixture and stir with a fork until every crumb is coated. It should look like wet sand.
- Press the crust into the pie dish. Dump the crumb mixture into your 9-inch pie dish. Using the bottom of a measuring cup or a flat-bottomed glass, press the crumbs firmly into the bottom and up the sides. Don’t rush this step—a loose crust will crumble when you slice the pie. Make sure the edges are even and the bottom is compact. Place the crust in the fridge to firm up while you make the filling.
- Soften the cream cheese. In a large mixing bowl, beat the softened cream cheese with an electric mixer on medium speed until it’s smooth and fluffy, about 2 minutes. Scrape down the sides of the bowl with a rubber spatula.
- Add the pumpkin and sugar. Add the pumpkin purée, granulated sugar, vanilla extract, cinnamon, ginger, nutmeg, and cloves to the cream cheese. Beat on medium speed until everything is combined and smooth. Stop and scrape the bowl at least once to make sure there are no streaks of unincorporated cream cheese.
- Whip the cream. In a separate bowl, pour the cold heavy cream. Using clean beaters, whip the cream on medium-high speed until stiff peaks form. You’ll know it’s ready when you lift the beaters and the cream holds its shape without drooping. Be careful not to overwhip, or you’ll end up with butter.
- Fold the cream into the pumpkin mixture. Add about a third of the whipped cream to the pumpkin mixture. Gently fold it in with a rubber spatula using a sweeping motion—cut through the center, scrape along the bottom, and fold over the top. Repeat until the cream is mostly incorporated, then add the remaining whipped cream and fold until no white streaks remain. The mixture should be light and airy.
- Fill the crust. Remove the crust from the fridge. Spoon the pumpkin filling into the crust and spread it evenly with the spatula. Smooth the top as best you can. It doesn’t have to be perfect since you’ll likely top it with whipped cream later.
- Chill the pie. Cover the pie loosely with plastic wrap, pressing it directly onto the surface of the filling to prevent a skin from forming. Refrigerate for at least 6 hours, but overnight is better. The filling needs time to set properly. If you’re in a rush, 4 hours will work, but the slices won’t be as clean.
- Serve. When you’re ready to serve, slice the pie with a sharp knife. Wipe the blade clean between cuts for the neatest slices. Add a dollop of whipped cream and a sprinkle of cinnamon if you like.
Cooking Tips & Techniques
I’ve made this pie more times than I can count, and I’ve learned a few things along the way. Here are the tips that make the biggest difference:
- Don’t skip the crust chill. I once got impatient and skipped the 15-minute chill for the crust before adding the filling. The result was a crumbly mess that fell apart when I tried to serve it. That short chill lets the butter firm up and helps the crust hold together.
- Use room temperature cream cheese. Cold cream cheese doesn’t blend smoothly. You’ll end up with little white lumps in your filling that won’t disappear no matter how long you beat. Let it sit on the counter for 30 minutes before you start.
- Whip the cream to stiff peaks. If you only whip the cream to soft peaks, the filling won’t set as firmly. You want peaks that stand straight up when you lift the beaters. It takes an extra minute, but it’s worth it.
- Fold gently. When you combine the whipped cream with the pumpkin mixture, use a light hand. Overmixing deflates the air you just whipped into the cream, and the filling will be dense instead of light and mousse-like.
- Patience with chilling. This is the hardest part. The pie needs at least 6 hours to set, and overnight is genuinely better. If you cut into it too early, the filling will be soft and messy. Trust the process.
- Clean knife for clean slices. Run your knife under hot water, dry it, then slice. Wipe the blade clean between each cut. It takes an extra 30 seconds and makes your slices look professional.
Variations & Adaptations
One of the best things about this recipe is how easy it is to adapt. Here are a few ways I’ve changed it up depending on the occasion:
- Gluten-Free Version: Swap the gingersnap cookies for gluten-free gingersnaps. The rest of the ingredients are naturally gluten-free. Just double-check the label on your pumpkin purée and spices.
- Dairy-Free Version: Use dairy-free cream cheese (I like Kite Hill) and replace the heavy cream with full-fat coconut cream. Chill the can of coconut cream overnight, then scoop out the solid part. The texture will be slightly less firm, but the flavor is still fantastic.
- Spice It Up: Add a pinch of cayenne pepper or black pepper to the filling for a subtle heat that plays well with the pumpkin and ginger. I tried this on a whim for a Halloween party, and it was a hit.
- Chocolate Twist: Melt 4 ounces of dark chocolate and drizzle it over the crust before adding the filling. Let the chocolate set in the fridge for 10 minutes, then proceed with the recipe. The chocolate adds a rich layer that pairs beautifully with the gingersnap crust.
- Pumpkin Cheesecake Style: Increase the cream cheese to 12 ounces and reduce the heavy cream to 1 cup. The filling will be denser and more cheesecake-like. It’s a great option if you want something that feels more decadent.
Serving & Storage Suggestions
This pie is best served cold, straight from the fridge. I like to let it sit at room temperature for about 10 minutes before slicing—it takes the chill off and makes the flavors more pronounced. Top each slice with a generous dollop of whipped cream and a light dusting of cinnamon or freshly grated nutmeg.
For a prettier presentation, pipe the whipped cream using a star tip. It looks fancy but takes almost no extra effort. You can also garnish with a few whole gingersnap cookies or a drizzle of caramel sauce.
Storage: Cover the pie tightly with plastic wrap or transfer slices to an airtight container. It will keep in the refrigerator for up to 4 days. The crust stays crunchy for the first 2 days, then starts to soften slightly. I actually don’t mind the softer crust—it reminds me of a cookie crust that’s been sitting in a tin.
Freezing: You can freeze the whole pie or individual slices. Wrap it tightly in plastic wrap, then a layer of aluminum foil. Freeze for up to 2 months. Thaw in the refrigerator overnight before serving. The texture will be slightly less creamy, but it’s still delicious.
The flavors actually deepen after a day in the fridge. I’ve made this pie two days before Thanksgiving and found it tasted even better on the big day. The spices meld together, and the filling becomes more cohesive.
Nutritional Information & Benefits
Here’s the approximate nutritional breakdown for one slice (based on 8 servings):
- Calories: 410
- Fat: 28g
- Carbohydrates: 38g
- Protein: 5g
- Fiber: 2g
- Sugar: 28g
Pumpkin is packed with vitamin A, which supports eye health and immune function. It’s also a good source of fiber and potassium. The cream cheese and heavy cream add calcium and protein, though this is definitely a treat, not a health food. If you want to lighten it up, you can use reduced-fat cream cheese and swap half the heavy cream for Greek yogurt. The texture will be slightly different, but it still works.
This recipe is vegetarian and can easily be made gluten-free or dairy-free with the substitutions mentioned above. It contains dairy and gluten in its standard form.
Frequently Asked Questions
Can I use fresh pumpkin instead of canned?
You can, but you’ll need to roast and purée it first, then drain off as much liquid as possible. Canned pumpkin is more consistent and has less water content, which helps the filling set properly. If you use fresh, expect a slightly softer texture.
How do I know when the pie is fully set?
Give it a gentle jiggle. The center should be firm but not hard, with just a slight wobble. If it ripples like liquid, it needs more time. Overnight chilling is the safest bet.
Can I make this pie a day ahead?
Absolutely. In fact, I recommend it. The flavors meld and deepen overnight, and the texture firms up perfectly. Just cover it tightly and keep it refrigerated.
What if I don’t have a food processor for the crust?
No problem. Put the gingersnaps in a zip-top bag and crush them with a rolling pin or the bottom of a heavy pan. It takes a few extra minutes, but it works just as well.
Can I use a different type of cookie for the crust?
Yes. Graham crackers, vanilla wafers, or shortbread cookies all work. Just adjust the sugar slightly—graham crackers are less sweet than gingersnaps, so you might want to add an extra tablespoon of sugar to the crust.
Conclusion
This Easy No-Bake Pumpkin Pie with Gingersnap Crust is the kind of recipe that becomes a staple. It’s simple enough for a weeknight craving but impressive enough for a holiday table. The crunchy, spiced crust and silky, mousse-like filling come together without turning on the oven, which means more time for the things that actually matter—like the people you’re sharing it with.
I love that this recipe doesn’t ask for much. A few ingredients, a little patience, and you’ve got a dessert that tastes like you spent hours in the kitchen. It’s forgiving, adaptable, and always delivers. Whether you make it for a pumpkin-themed brunch or a quiet fall evening, it’s a reminder that the best desserts don’t have to be complicated.
If you try this recipe, I’d love to hear how it turned out. Did you add your own twist? Did it disappear faster than you expected? Drop a comment below or tag me in your photos. And if you’re looking for another no-fuss fall dessert, you might also enjoy these mini caramel apple tartlets—they’re just as easy and just as satisfying.
Happy baking—or, in this case, happy no-baking.
Pin This Recipe!
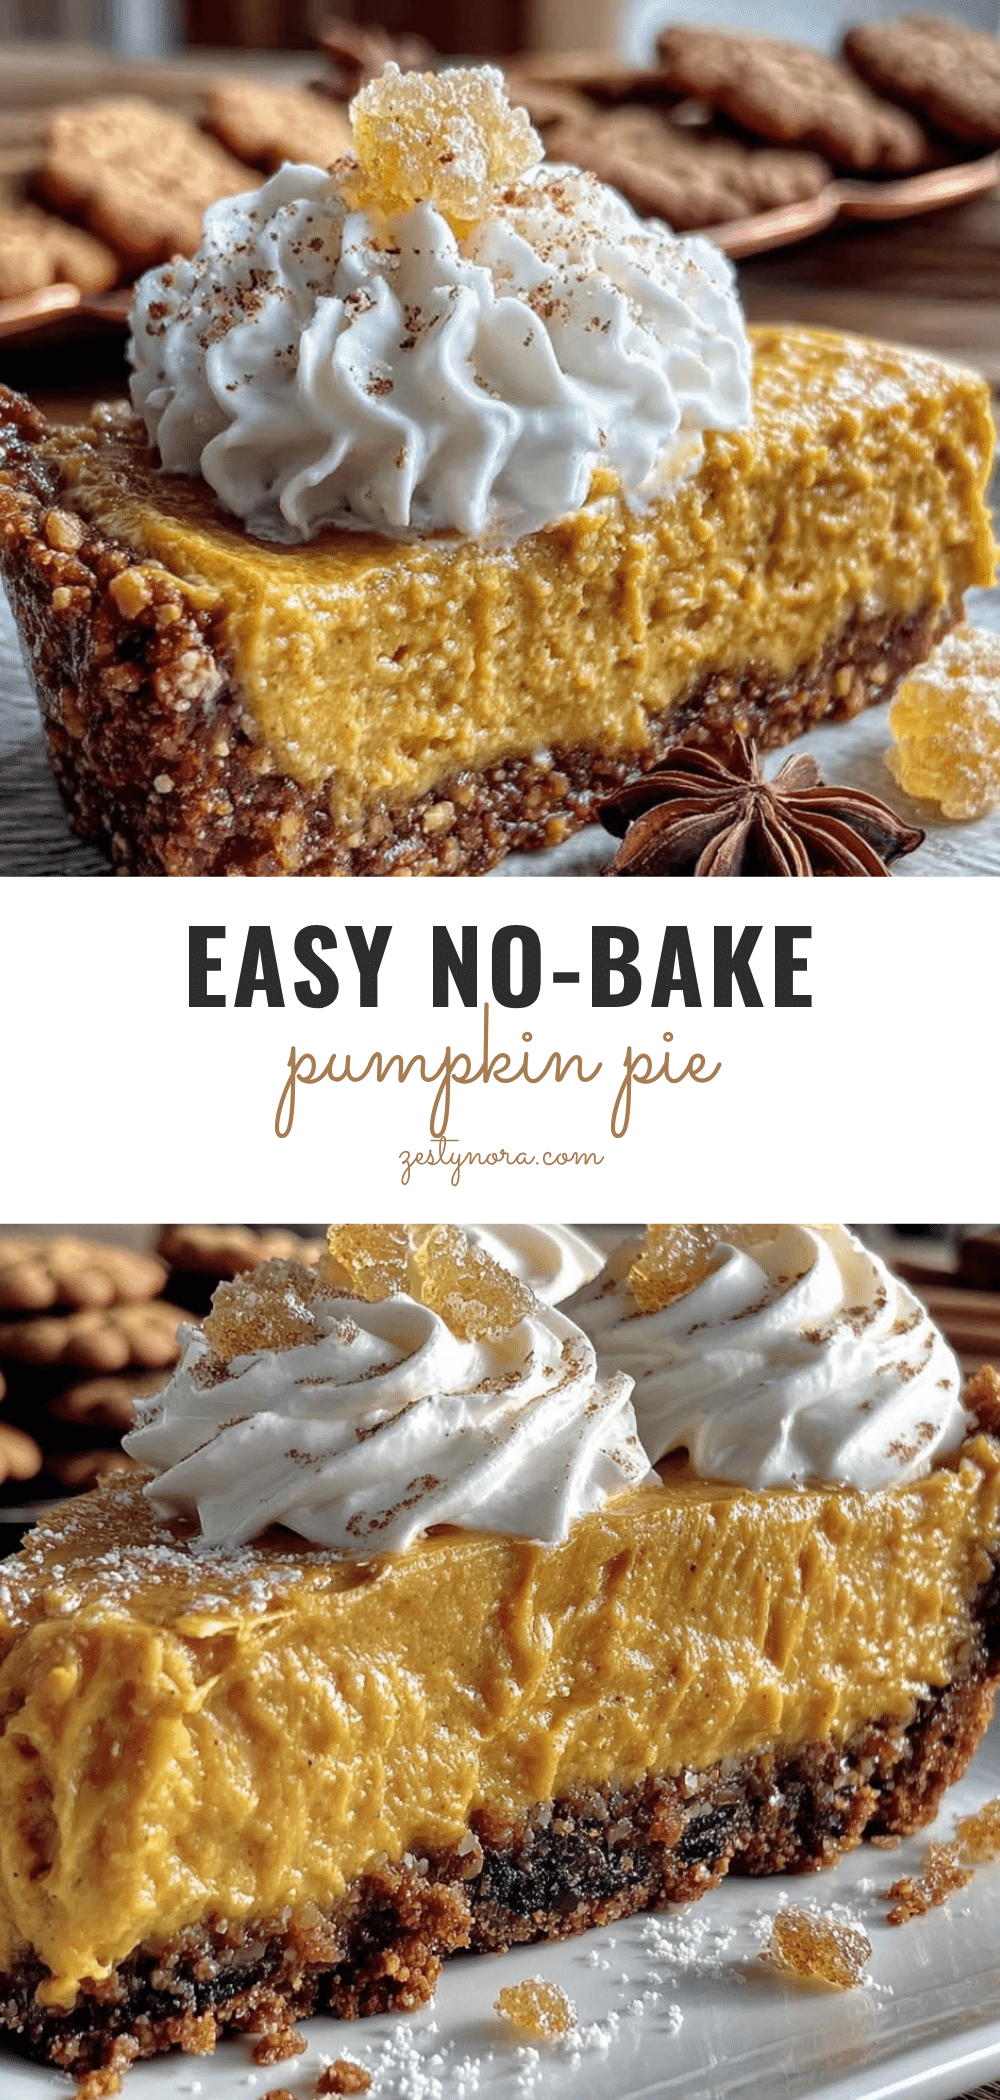
Easy No-Bake Pumpkin Pie with Gingersnap Crust: Best Fall Dessert
A creamy, spiced no-bake pumpkin pie with a crunchy gingersnap crust that sets in the fridge. Perfect for fall gatherings, this easy dessert requires no oven and delivers silky, mousse-like texture with deep pumpkin flavor.
- Prep Time: 20 minutes
- Cook Time: 0 minutes
- Total Time: 6 hours 20 minutes (includes chilling)
- Yield: 8 servings 1x
- Category: Dessert
- Cuisine: American
Ingredients
- 2 cups (200g) gingersnap cookie crumbs
- 6 tablespoons (85g) unsalted butter, melted
- 2 tablespoons (25g) granulated sugar
- Pinch of salt
- 1 cup (225g) cream cheese, softened
- 1 cup (200g) granulated sugar
- 1 can (15 oz or 425g) pumpkin purée
- 1 teaspoon vanilla extract
- 1 teaspoon ground cinnamon
- ½ teaspoon ground ginger
- ¼ teaspoon ground nutmeg
- ¼ teaspoon ground cloves
- 1 ½ cups (360ml) heavy cream
Instructions
- Make the crust: In a food processor, pulse the gingersnap cookies until they become fine crumbs. Transfer to a medium bowl and stir in the sugar and salt. Pour the melted butter over the mixture and stir with a fork until every crumb is coated.
- Press the crust into the pie dish: Dump the crumb mixture into a 9-inch pie dish. Using the bottom of a measuring cup or a flat-bottomed glass, press the crumbs firmly into the bottom and up the sides. Place the crust in the fridge to firm up while you make the filling.
- Soften the cream cheese: In a large mixing bowl, beat the softened cream cheese with an electric mixer on medium speed until smooth and fluffy, about 2 minutes. Scrape down the sides of the bowl.
- Add the pumpkin and sugar: Add the pumpkin purée, granulated sugar, vanilla extract, cinnamon, ginger, nutmeg, and cloves to the cream cheese. Beat on medium speed until combined and smooth.
- Whip the cream: In a separate bowl, pour the cold heavy cream. Using clean beaters, whip the cream on medium-high speed until stiff peaks form.
- Fold the cream into the pumpkin mixture: Add about a third of the whipped cream to the pumpkin mixture. Gently fold it in with a rubber spatula. Repeat with the remaining whipped cream until no white streaks remain.
- Fill the crust: Remove the crust from the fridge. Spoon the pumpkin filling into the crust and spread it evenly with the spatula. Smooth the top.
- Chill the pie: Cover the pie loosely with plastic wrap, pressing it directly onto the surface of the filling. Refrigerate for at least 6 hours, but overnight is better.
- Serve: Slice the pie with a sharp knife. Wipe the blade clean between cuts. Add a dollop of whipped cream and a sprinkle of cinnamon if desired.
Notes
For best results, chill the pie overnight. Use room temperature cream cheese to avoid lumps. Whip cream to stiff peaks for a firm filling. The crust stays crunchy for 2 days; after that it softens slightly. The pie can be frozen for up to 2 months.
Nutrition
- Serving Size: 1 slice
- Calories: 410
- Sugar: 28
- Sodium: 320
- Fat: 28
- Saturated Fat: 16
- Carbohydrates: 38
- Fiber: 2
- Protein: 5
Keywords: no-bake pumpkin pie, gingersnap crust, easy fall dessert, pumpkin pie without oven, Friendsgiving dessert, creamy pumpkin pie


