My brother-in-law Mark had sworn off Halloween-themed food for years. “It’s just regular food with a scary name,” he’d announce every October, crossing his arms at the kitchen counter. Then I caught him at my last Halloween party—midnight, the party winding down, and there he stood by the snack table. He had three of these Easy Mummy Stuffed Pigs in a Blanket with Mustard Eyes on his napkin and, I’m not kidding, another one halfway to his mouth. “These are different,” he mumbled, not even trying to hide it anymore. “The mustard changes everything.”
Honestly, that moment made my whole night. I mean, here’s a guy who spent years refusing to participate in the fun of themed appetizers, and there he was, completely caught in the act of proving himself wrong. Maybe you know someone like that in your life—the one who rolls their eyes at cute food but then can’t stop eating it. That’s the magic of this recipe. It looks like you fussed for hours, but let me tell you, it comes together in about 25 minutes flat. The crescent dough wraps around little smoky sausages like tiny bandages, and those mustard eyes give them just the right amount of personality without being creepy.
I keep coming back to this recipe because it solves the eternal Halloween party problem. You want something festive that actually tastes good, not just a gimmick that sits on the plate. These little mummies deliver every time. They disappear fast, they make people laugh, and they require absolutely no special skills. The first time I made them, I accidentally overbaked the first batch by two minutes and the edges got a little too brown. You know what? Nobody cared. They still vanished. That’s when I knew this recipe was a keeper.
Why You’ll Love This Recipe
Let me tell you exactly why these Easy Mummy Stuffed Pigs in a Blanket with Mustard Eyes have become my most-requested Halloween recipe. I’ve tested this probably a dozen times across different parties and family gatherings, and the feedback is always the same—people can’t believe how simple it is.
- Quick & Easy : Ready in under 25 minutes from start to finish. You can make these while answering the door for trick-or-treaters, no joke.
- Simple Ingredients : You need exactly four things—crescent roll dough, little smoked sausages, cream cheese, and mustard. That’s it. No weird grocery store runs.
- Perfect for Halloween Parties : These fit any spooky gathering from classroom celebrations to adult costume parties. They’re cute without being childish.
- Crowd-Pleaser : Kids devour them. Adults hover by the serving tray. Even my brother-in-law Mark ate half a dozen before admitting he liked them.
- Unbelievably Delicious : The creamy filling inside the flaky dough paired with the smoky sausage and tangy mustard eyes creates this perfect bite that keeps people coming back.
What makes this recipe different from every other pigs-in-a-blanket recipe out there is the cream cheese filling. Most versions just wrap dough around sausage and call it a day. I spent three batches testing different fillings before landing on this one—the cream cheese adds a richness that balances the saltiness of the sausage, and it keeps the inside moist while the outside gets golden and flaky. It’s not just another version. It’s the one that makes people close their eyes after the first bite, even at a loud Halloween party with kids running everywhere.
This recipe is comfort food reimagined for the spooky season. It’s faster than making actual appetizers, but it has the same soul-soothing satisfaction. Perfect for impressing guests without stress, or turning a simple weeknight snack into something memorable.
What Ingredients You Will Need
This recipe uses simple, pantry-friendly ingredients to deliver big flavor and that perfect mummy look without any fuss. Most of these items you probably already have in your kitchen, which makes this a last-minute Halloween hero.
For the Mummies
- 1 can (8 oz) refrigerated crescent roll dough — I prefer Pillsbury for the flakiest texture, but any brand works. Look for the sheet-style crescent dough if you can find it—it saves you from pressing the perforations together.
- 24 little smoked sausages — Hillshire Farm Lit’l Smokies are my go-to. They’re the perfect size for one-bite mummies. You can also use cocktail wieners if that’s what you have.
- 4 oz cream cheese, softened — Full-fat cream cheese gives the best creamy texture. Let it sit on the counter for 20 minutes before starting, or microwave it for 10 seconds to soften it quickly. (I’ve forgotten to soften it before and learned that hard cream cheese does NOT spread easily.)
- Yellow mustard — This is for the eyes. French’s classic yellow mustard works perfectly. The bright yellow color makes the mummies look alive and cute. Dijon or spicy brown mustard will work in a pinch, but the color won’t be as vibrant.
For Serving (Optional but Recommended)

- Ketchup or marinara sauce — For dipping. Some people in my family swear by ranch dressing. I won’t judge.
- Fresh parsley or chives — Finely chopped for garnish if you want to get fancy. Totally optional, but it adds a nice pop of green.
Ingredient Selection Tips: When buying crescent roll dough, check the expiration date on the can. Fresh dough puffs up better. For the cream cheese, Philadelphia brand gives the most consistent results, but store brands work fine too. If you’re dairy-free, you can use a plant-based cream cheese alternative—just make sure it’s the block style, not the spreadable tub version, which has too much water content.
Substitution Guidance: For a gluten-free version, use gluten-free crescent roll dough if you can find it, or swap in gluten-free puff pastry sheets cut into strips. For a lower-fat option, use Neufchâtel cheese instead of cream cheese—it has about a third less fat but similar texture. You can also skip the cream cheese entirely and just wrap the sausages in dough, but honestly, the filling is what makes these special.
Equipment Needed
You don’t need much for this recipe, which is part of its charm. Here’s what you’ll need:
- Baking sheet — A standard 13×18 inch sheet pan works perfectly. Line it with parchment paper for easy cleanup. (I learned this the hard way after my first batch stuck to the pan.)
- Parchment paper or silicone baking mat — Silpat mats are my favorite because they’re reusable and nothing sticks. Parchment paper is a great budget-friendly alternative.
- Sharp knife or pizza cutter — For cutting the crescent dough into strips. A pizza cutter makes this step go much faster.
- Small bowl — For softening the cream cheese and mixing it if needed.
- Butter knife or small offset spatula — For spreading the cream cheese onto the dough strips.
- Toothpick — For dotting the mustard eyes onto the mummies. You can also use the tip of a knife or a squeeze bottle if you have one.
- Cooling rack — Optional, but helps the mummies stay crispy on the bottom instead of getting soggy.
Budget-Friendly Options: If you don’t have a pizza cutter, a regular kitchen knife works just fine. No parchment paper? Lightly grease your baking sheet with cooking spray. No offset spatula? A regular butter knife does the job. I’ve made these in a friend’s kitchen with none of my usual tools, and they turned out great.
Preparation Method
Follow these steps carefully, and you’ll have a tray of adorable mummies in no time. I’ve included all my little tricks and warnings so you don’t make the same mistakes I did.
- Preheat your oven to 375°F (190°C). Line your baking sheet with parchment paper or a silicone mat. This is non-negotiable—trust me, cleaning melted cream cheese off a bare pan is not fun.
- Prepare the crescent dough. Open the can of crescent rolls carefully—I always jump when it pops open. Unroll the dough onto a cutting board. If you’re using perforated crescent dough, press the seams together firmly with your fingers to create one solid sheet. If you found the sheet-style dough, you’re already ahead of the game. Cut the dough into 24 thin strips lengthwise, about 1/2 inch wide each. A pizza cutter makes this step take about 30 seconds.
- Soften the cream cheese. Place the cream cheese in a small microwave-safe bowl and microwave for 10-15 seconds until it’s soft but not melted. You want it spreadable, not runny. If you forgot to take it out of the fridge earlier, this is your save. Stir it with a fork until smooth.
- Assemble the mummies. Take one strip of crescent dough and spread a thin layer of cream cheese along the center of the strip using your butter knife or offset spatula. Don’t go overboard—you just need a thin coating. Place one little smoked sausage at one end of the strip. Wrap the dough strip around the sausage, overlapping slightly as you go, like you’re wrapping a bandage around a finger. Leave a small gap near the top of the sausage for the face. The cream cheese helps the dough stick to itself, so press gently to seal the end.
- Place on the baking sheet. Arrange the wrapped mummies on the prepared baking sheet, leaving about 1 inch of space between each one. They don’t spread much, but you want air to circulate for even browning. Position them so the face gap is facing up and slightly toward you.
- Bake for 10-12 minutes. Place the baking sheet in the preheated oven. Bake until the crescent dough is golden brown and flaky. At 10 minutes, check them—you want them golden, not dark brown. My first batch went to 13 minutes and the edges got crispy in a way that wasn’t ideal. Keep an eye on them during the last 2 minutes.
- Cool slightly. Remove the baking sheet from the oven and let the mummies cool on the pan for 2-3 minutes. This is important—the cream cheese inside is molten hot right out of the oven. Moving them too soon can cause them to fall apart.
- Add the mustard eyes. While the mummies are still warm but not hot, use a toothpick to dab two small dots of yellow mustard on the exposed sausage face. Dip the toothpick into the mustard, then gently touch it to the sausage to create small dots. You’re going for cute, not precise. If you mess up, just wipe it off and try again—mustard wipes away easily from cooked sausage.
- Serve immediately. Transfer the mummies to a serving platter. They’re best eaten warm when the dough is flaky and the cream cheese is still soft. Watch them disappear.
Sensory Cues: When the dough is properly baked, it should be light golden brown on the outside and feel firm to the touch. You’ll smell the buttery crescent dough mixing with the smoky sausage aroma—that’s how you know they’re ready. The cream cheese should be melted inside but not oozing out. If you see cream cheese bubbling on the baking sheet, you spread a little too much—no worries, it still tastes great.
Cooking Tips & Techniques
After making these Easy Mummy Stuffed Pigs in a Blanket with Mustard Eyes for every Halloween gathering for the past three years, I’ve collected some hard-won wisdom. Let me save you from my mistakes.
Don’t overfill the cream cheese. I know it’s tempting to slather it on, but too much cream cheese will ooze out during baking and make the dough soggy. You want a thin, even layer—think of it as a secret surprise inside, not the main event. A little goes a long way here.
Cut the dough strips evenly. Uneven strips mean some mummies will be undercooked while others get too brown. Take the extra 20 seconds to make sure your strips are roughly the same width. I use a ruler the first time I made these—now I just eyeball it, but I still check myself.
Leave room for the face. When wrapping the dough around the sausage, stop about 1/4 inch from the top. You need that exposed sausage to draw the eyes on. I made the mistake of wrapping too tightly on my first batch and ended up with mummies that had no visible face. They still tasted fine, but they just looked like weird dough balls.
Timing is everything. These are best served within 15 minutes of coming out of the oven. If you’re making them for a party, assemble them ahead of time on the baking sheet, cover with plastic wrap, and refrigerate for up to 4 hours. Then just pop them in the oven when guests arrive. The cream cheese filling actually gets more flavorful as it sits.
Don’t skip the cooling step. I know you’re excited to serve them, but letting them rest for 2-3 minutes after baking is crucial. The cream cheese needs to set slightly so it doesn’t burn everyone’s mouths. Plus, the dough continues to crisp up as it cools. Patience pays off here.
Variations & Adaptations
One of the best things about this recipe is how easy it is to customize. Here are some variations I’ve tried and loved:
Spicy Mummies: Mix a teaspoon of sriracha or your favorite hot sauce into the cream cheese before spreading. The heat pairs beautifully with the smoky sausage. My spice-loving friend Sarah requests these every year now.
Cheesy Mummies: Sprinkle a pinch of shredded cheddar or pepper jack cheese on top of the cream cheese before wrapping. The cheese melts into the dough and adds another layer of flavor. I tried this with mozzarella once and it was good, but cheddar gives the best taste.
Breakfast Mummies: Swap the little smoked sausages for breakfast sausage links. Serve these at a Halloween morning brunch with a side of scrambled eggs. The maple-flavored breakfast sausages add a sweet-savory twist that’s surprisingly good.
Vegetarian Version: Use vegetarian cocktail sausages or even small pieces of cooked carrot or zucchini instead of meat. The cream cheese filling helps everything stick together. I made these for my vegetarian cousin last year and she said they were the best thing at the party.
Different Eye Colors: If you’re not a mustard fan, use ketchup for red eyes, sriracha for orange eyes, or even small dots of cream cheese with a tiny piece of black olive on top for a more detailed look. My niece insisted on using blue food coloring mixed with cream cheese one year—they looked like alien mummies, and honestly, it was hilarious.
Serving & Storage Suggestions
These mummies are best served warm, straight from the oven, when the dough is at its flakiest and the cream cheese is still soft and melty. Arrange them on a platter with a small bowl of dipping sauce in the center. Ketchup, marinara, ranch dressing, or honey mustard all work beautifully.
For presentation, I like to arrange them in a circle around the dipping bowl, with the mustard eyes facing outward so everyone can see their cute little faces. Sprinkle some finely chopped fresh parsley or chives over the top for a pop of green that contrasts with the golden dough. If you’re feeling extra festive, place them on a black or orange platter to match the Halloween theme.
Storage: Leftover mummies can be stored in an airtight container in the refrigerator for up to 3 days. The dough will lose some of its crispness, but they’ll still taste great. To reheat, place them on a baking sheet in a 350°F oven for 5-7 minutes, or until warmed through. The microwave works in a pinch, but the dough will be soft rather than crispy.
Freezing: You can freeze these either before or after baking. To freeze unbaked mummies, assemble them on a baking sheet and freeze until solid, then transfer to a freezer bag. Bake from frozen, adding 2-3 minutes to the baking time. To freeze baked mummies, let them cool completely, then freeze in a single layer on a baking sheet before transferring to a freezer bag. Reheat directly from frozen in a 350°F oven for 8-10 minutes.
Flavor Development: Honestly, these taste best fresh out of the oven. The dough is at its peak flakiness, and the cream cheese is perfectly melted. If you’re making them ahead, I recommend assembling them raw and baking just before serving.
Nutritional Information & Benefits
Here’s the nutritional breakdown for one mummy (based on 24 servings per recipe):
- Calories: Approximately 85-100 per mummy
- Protein: 3-4 grams
- Fat: 6-7 grams
- Carbohydrates: 5-6 grams
- Sodium: 250-300 mg
Health Benefits: While these are definitely a treat rather than a health food, the cream cheese adds a small amount of calcium and protein. The little smoked sausages provide some protein and iron. The mustard seeds in yellow mustard contain antioxidants and anti-inflammatory compounds. Plus, the portion-controlled size makes it easy to enjoy a few without overindulging.
Dietary Considerations: This recipe contains gluten (from the crescent dough), dairy (from the cream cheese), and processed meat. For a gluten-free version, use gluten-free crescent dough or puff pastry. For a dairy-free version, use plant-based cream cheese. For a lower-sodium option, look for low-sodium smoked sausages or turkey cocktail wieners.
Potential Allergens: Wheat, milk, and soy (sometimes found in processed sausages). Always check ingredient labels if you’re serving guests with allergies.
Conclusion
These Easy Mummy Stuffed Pigs in a Blanket with Mustard Eyes are proof that Halloween food can be both fun and genuinely delicious. They’re quick enough for a busy weeknight, cute enough for a party, and tasty enough that even the skeptics in your life will come around. My brother-in-law Mark now asks me to make these for every gathering, not just Halloween. That’s the kind of recipe you want in your back pocket.
I encourage you to make these your own—try different fillings, experiment with the eyes, or add your favorite dipping sauce. The beauty of this recipe is how forgiving it is. Even if your dough strips aren’t perfect or your mustard dots are a little wonky, they’ll still taste amazing. That’s the kind of cooking I love.
If you make these, I’d love to hear how they turned out. Drop a comment below and let me know if your family loved them as much as mine does. And if you have your own variation, please share it—I’m always looking for new ideas to try. Happy Halloween, and happy cooking!
Frequently Asked Questions
Can I make these ahead of time for a party?
Absolutely! Assemble the mummies up to 4 hours ahead, cover the baking sheet with plastic wrap, and refrigerate. Bake just before serving for the best texture. You can also freeze them unbaked for up to 3 months.
Can I use puff pastry instead of crescent dough?
Yes, puff pastry works great. Thaw it according to package directions, cut it into strips, and proceed with the recipe. The bake time may be slightly longer—check for golden brown color. Puff pastry gives a flakier, more buttery result.
What can I use instead of little smoked sausages?
You can use cocktail wieners, mini hot dogs, or even cooked chicken sausage cut into 2-inch pieces. For a vegetarian option, try vegetarian cocktail sausages or pieces of cooked carrot or zucchini. The cooking time stays the same.
How do I get the mustard eyes to look neat?
Dip a toothpick into the mustard and gently touch it to the sausage. For smaller dots, use less mustard on the toothpick. If you mess up, wipe it off with a paper towel and try again. You can also use a squeeze bottle with a fine tip for more control.
Can I use a different filling instead of cream cheese?
Definitely! Try flavored cream cheese (chive and onion works great), Boursin cheese, or even a thin layer of pesto. For a sweet version, use a thin layer of cream cheese mixed with a little honey. The possibilities are endless.
Pin This Recipe!
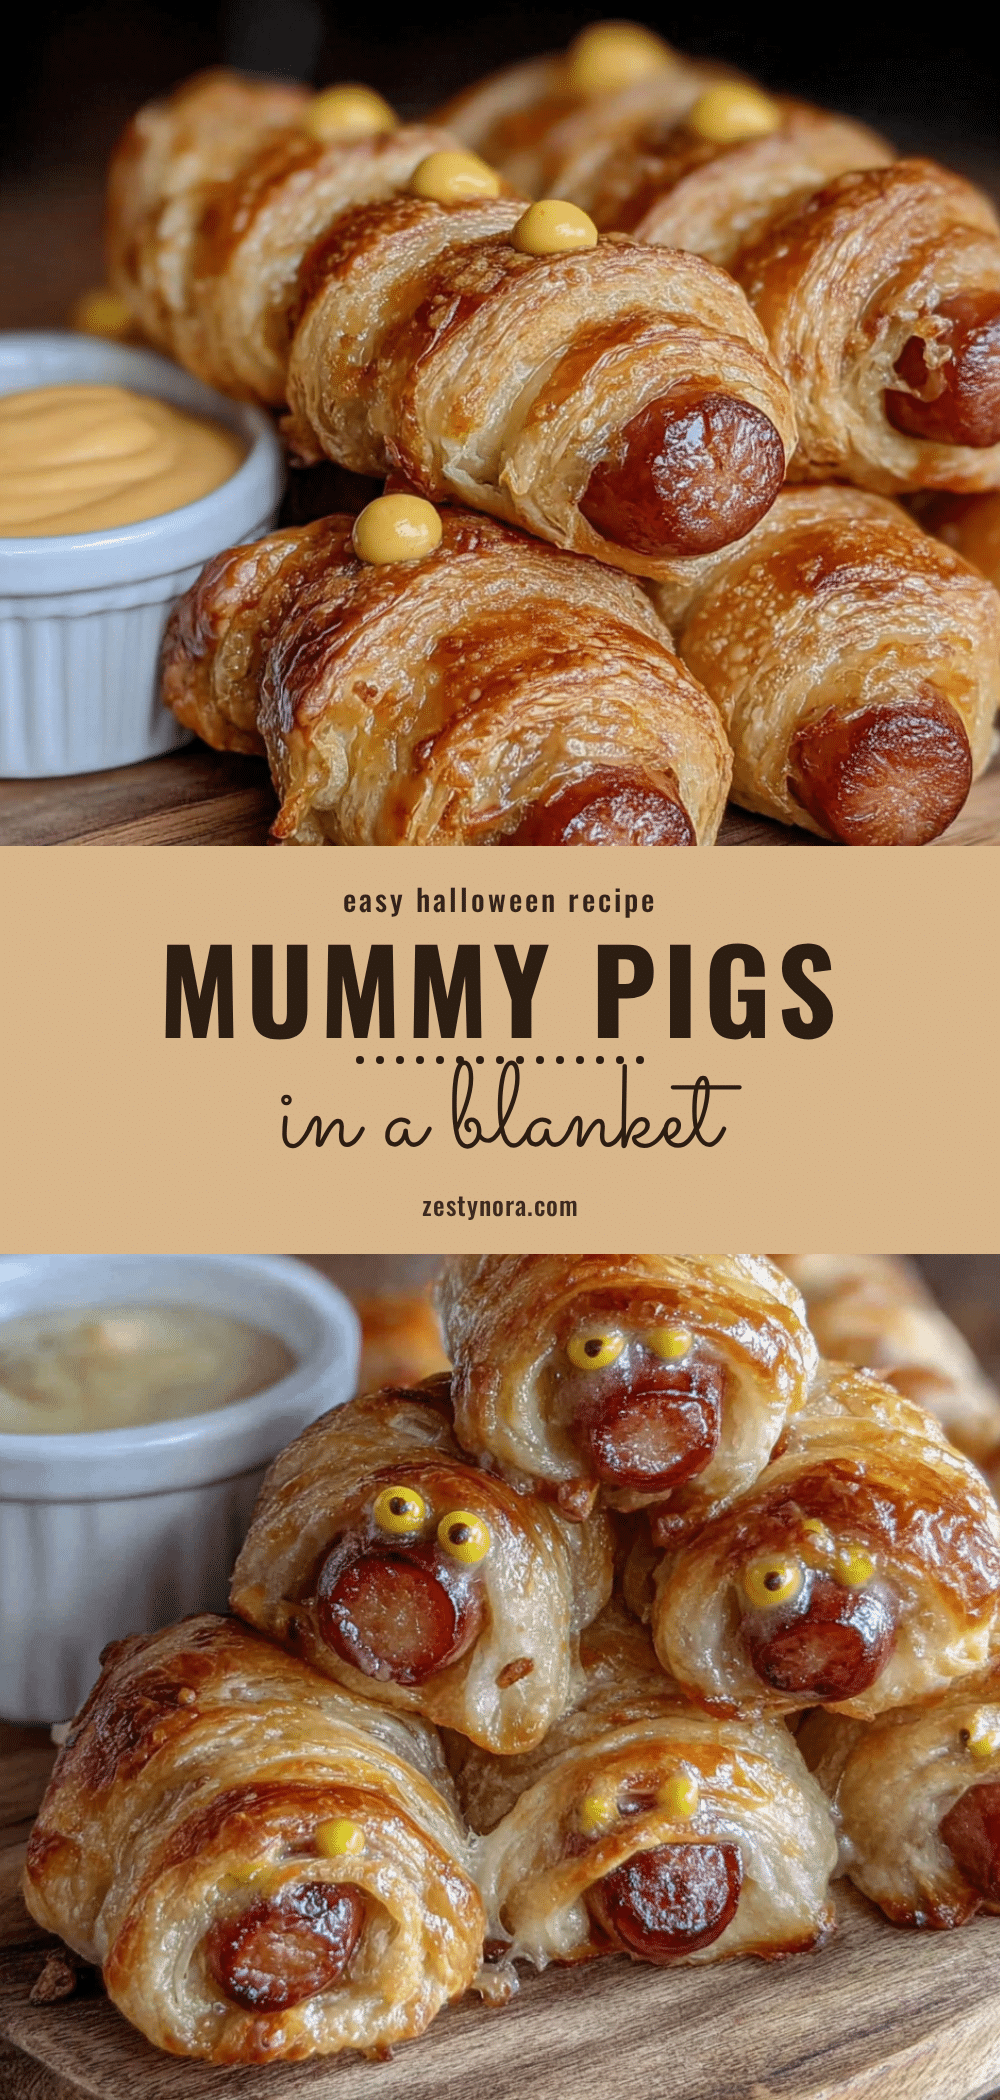
Easy Mummy Stuffed Pigs in a Blanket with Mustard Eyes

These adorable mummy-themed pigs in a blanket feature a creamy cream cheese filling and mustard eyes, ready in under 25 minutes. Perfect for Halloween parties, they’re a crowd-pleaser that even skeptics will love.
- Prep Time: 15 minutes
- Cook Time: 12 minutes
- Total Time: 27 minutes
- Yield: 24 servings 1x
- Category: Appetizer
- Cuisine: American
Ingredients
- 1 can (8 oz) refrigerated crescent roll dough
- 24 little smoked sausages (e.g., Hillshire Farm Lit’l Smokies)
- 4 oz cream cheese, softened
- Yellow mustard (for eyes)
- Ketchup or marinara sauce (for dipping, optional)
- Fresh parsley or chives, finely chopped (for garnish, optional)
Instructions
- Preheat your oven to 375°F (190°C). Line a baking sheet with parchment paper or a silicone mat.
- Open the can of crescent rolls and unroll the dough onto a cutting board. If using perforated dough, press the seams together to form one solid sheet. Cut the dough into 24 thin strips, about 1/2 inch wide each.
- Place the cream cheese in a small microwave-safe bowl and microwave for 10-15 seconds until soft but not melted. Stir until smooth.
- Take one strip of crescent dough and spread a thin layer of cream cheese along the center. Place one little smoked sausage at one end of the strip. Wrap the dough strip around the sausage, overlapping slightly, leaving a small gap near the top for the face. Press gently to seal the end.
- Arrange the wrapped mummies on the prepared baking sheet, leaving about 1 inch of space between each. Position them with the face gap facing up.
- Bake for 10-12 minutes, until the crescent dough is golden brown and flaky.
- Remove from the oven and let cool on the pan for 2-3 minutes.
- While still warm, use a toothpick to dab two small dots of yellow mustard on the exposed sausage face to create eyes.
- Serve immediately, optionally with dipping sauce and garnish.
Notes
Don’t overfill with cream cheese to avoid sogginess. Cut dough strips evenly for consistent baking. Leave room for the face when wrapping. Best served within 15 minutes of baking. Can be assembled up to 4 hours ahead and refrigerated before baking. For freezing, assemble unbaked and freeze, then bake from frozen adding 2-3 minutes.
Nutrition
- Serving Size: 1 mummy
- Calories: 95
- Sugar: 1
- Sodium: 275
- Fat: 7
- Saturated Fat: 3
- Carbohydrates: 6
- Protein: 4
Keywords: Halloween, mummy, pigs in a blanket, appetizer, party food, crescent rolls, smoked sausages, cream cheese, mustard eyes


