I want something crunchy, salty, and cheesy right now, and I have everything except the willpower to deep-fry anything. That’s the exact moment these crispy low-carb zucchini parmesan chips were born in my kitchen—a Tuesday afternoon, a slightly sad zucchini in the crisper drawer, and a serious craving for something that snaps when you bite it. No batter, no breadcrumbs, just cheese doing the heavy lifting like it always does.
Honestly, I was skeptical at first. Could zucchini really get that shatteringly crisp texture without a coating of flour or panko? The first batch came out a little sad—soggy, weeping onto the baking sheet like it was giving up on life. But I tweaked, tested, and learned the trick: you have to coax the moisture out first. Once you do, these little green coins transform into something almost addictive. They’re the kind of snack you eat standing at the counter, telling yourself you’ll save some for later, knowing full well you won’t.
These chips aren’t just a low-carb win. They’re the answer to that 3 p.m. slump when you need something crunchy but don’t want to undo your day’s good choices. And let’s face it—anything covered in parmesan and baked until golden feels like a treat, not a compromise. This recipe stuck because it’s simple, fast, and genuinely delivers on the crunch promise. No gimmicks, just good food logic.
Why You’ll Love This Recipe
I’ve tested this recipe more times than I care to admit, tweaking oven temperatures, cheese ratios, and slicing thickness until I landed on the version that works every single time. Here’s why this one earns a permanent spot in your rotation:
- Low-Carb & Keto-Friendly: With just a few grams of net carbs per serving, these chips fit perfectly into a low-carb lifestyle without sacrificing flavor or texture.
- Naturally Gluten-Free: No flour, no breadcrumbs—just zucchini, cheese, and seasoning. Perfect for anyone avoiding gluten.
- Quick & Easy: From fridge to table in under 30 minutes. That’s faster than ordering takeout.
- Simple Ingredients: You probably already have everything in your fridge and pantry right now.
- Crowd-Pleaser: I’ve served these at parties next to bowls of marinara and ranch, and they disappear faster than the potato chips. Even my picky nephew asked for seconds.
- Unbelievably Crispy: The secret is all in the prep—and I’ll walk you through every step so you don’t end up with sad, limp zucchini.
What makes this recipe different from every other zucchini chip out there? It’s the technique. Most recipes skip the crucial salting step or use too much cheese, which burns before the zucchini gets crisp. I’ve dialed in the exact ratio of parmesan to zucchini, the perfect oven temperature, and a simple trick for removing moisture that guarantees crunch every time. This isn’t just another version—it’s the best version.
What Ingredients You Will Need
This recipe relies on a short list of everyday ingredients, each one playing a specific role in creating that perfect crispy, cheesy bite. Here’s what you’ll need:
For the Zucchini Chips
- 2 medium zucchini (about 8-10 ounces each) – Look for firm, medium-sized zucchini without soft spots. Smaller ones tend to be less watery and have fewer seeds, which means crispier chips.
- 1 teaspoon fine sea salt – This isn’t just for flavor. Salt draws out excess moisture from the zucchini, which is the single most important step for achieving crispiness.
- 1 cup finely grated parmesan cheese (about 3 ounces) – Use the real stuff from a wedge, not the powdery stuff in a green can. I prefer Parmigiano-Reggiano for its nutty flavor and superior melting properties. Pre-shredded cheese contains anti-caking agents that won’t melt as smoothly.
- 1/2 teaspoon garlic powder – Adds savory depth without burning like fresh garlic would.
- 1/2 teaspoon dried oregano – Optional but recommended for that Italian-inspired flavor profile.
- 1/4 teaspoon black pepper – Freshly ground, please.
- Olive oil spray – Just enough to help the cheese adhere and promote browning. A mister works better than aerosol spray.
For Serving (Optional)
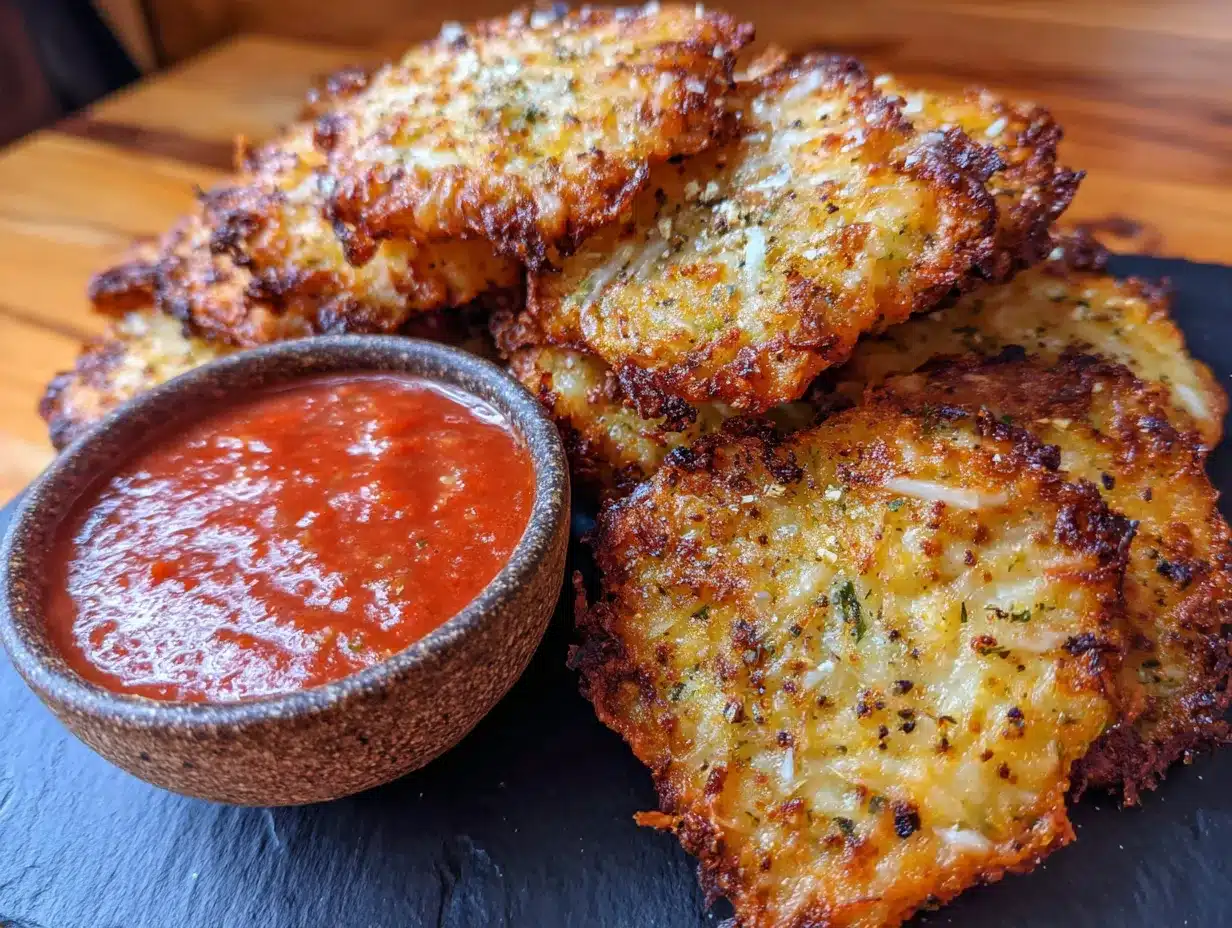
- Marinara sauce – For dipping. Look for a no-sugar-added brand to keep things low-carb.
- Fresh basil or parsley – A sprinkle of green makes them look fancy with zero effort.
That’s it. Seven ingredients (plus optional dip and garnish) and you’re on your way to the crispiest low-carb snack you’ve ever made at home. I’ve tried swapping the parmesan for pecorino romano, and while it’s delicious, it’s saltier, so adjust accordingly. If you’re dairy-free, this recipe won’t work as written, but I’ve included a variation below using nutritional yeast that comes surprisingly close.
Equipment Needed
You don’t need a professional kitchen to nail these chips. Here’s what I use:
- Baking sheet – A half-sheet pan works perfectly. Avoid dark nonstick pans, which can cause the cheese to burn before the zucchini crisps up.
- Parchment paper or silicone baking mat – Non-negotiable. The cheese will stick to bare metal, and you’ll spend more time scrubbing than snacking.
- Sharp knife or mandoline – Consistent thickness is key. A mandoline gives you even slices every time, but a steady hand and a sharp chef’s knife work fine too. I’ve used both, and the mandoline is worth the splurge if you make veggie chips often.
- Paper towels or clean kitchen towel – For pressing out moisture after salting.
- Cooling rack – Not essential, but placing chips on a rack after baking helps them stay crisp instead of steaming on the hot pan.
Budget-friendly tip: If you don’t own a mandoline, just slice as evenly as you can by hand. Aim for coins about 1/4-inch thick—thicker than a potato chip but thinner than a hockey puck.
Preparation Method
Follow these steps carefully, and you’ll be rewarded with chips that actually crunch. I learned the hard way that skipping steps leads to disappointment.
- Preheat your oven to 425°F (218°C). Line a baking sheet with parchment paper or a silicone mat. Position the rack in the middle of the oven—not too close to the top, where the cheese might burn.
- Slice the zucchini into 1/4-inch rounds. Aim for uniform thickness so they all cook at the same rate. Trim off the ends, but don’t peel the zucchini—the skin helps hold everything together and adds a nice color contrast.
- Salt the zucchini to draw out moisture. Place the slices in a colander set over a bowl or in the sink. Sprinkle with the teaspoon of salt and toss gently to coat. Let them sit for 10-15 minutes. You’ll see beads of water forming on the surface—that’s exactly what you want. Pat each slice dry thoroughly with paper towels. Don’t skip this step. Seriously. Wet zucchini = soggy chips.
- Mix the coating. In a shallow bowl, combine the grated parmesan, garlic powder, oregano, and black pepper. Stir with a fork to distribute the seasonings evenly.
- Coat each zucchini round. Working one at a time, press each slice into the parmesan mixture, coating both sides. Shake off any excess. Place the coated slices on the prepared baking sheet in a single layer, leaving a little space between each one. The cheese will spread as it melts, so overcrowding leads to one giant cheese disc.
- Spray lightly with olive oil. A quick spritz helps the cheese brown evenly and gives that golden, crispy finish. Don’t drench them—just a light mist.
- Bake for 12-15 minutes, then flip. After 12 minutes, check the bottoms. They should be golden brown. Flip each chip carefully with a thin spatula and bake for another 5-8 minutes, until the second side is also golden and the edges are deeply browned.
- Cool on a rack. Transfer the chips to a cooling rack immediately. This step is crucial—if you leave them on the hot baking sheet, they’ll continue to cook and can burn, plus they’ll steam and lose their crunch. Let them cool completely (about 5 minutes) before serving. They’ll crisp up even more as they cool.
Visual cue: When done, the cheese should be deep golden brown with slightly darker edges, and the zucchini should look shrunken and firm, not puffy or wet. If they still look moist in the center, give them another 2 minutes and check again.
Cooking Tips & Techniques
After a few failed batches (and one that ended up in the trash), I’ve gathered some hard-won wisdom. Here’s what I wish someone had told me:
Don’t skip the salting step. I know it adds time. I know it feels like an extra chore. But zucchini is basically a sponge full of water, and that water is the enemy of crispiness. I once skipped it because I was in a hurry, and the chips turned out limp and sad. Never again. Ten minutes of salting makes the difference between a chip that snaps and one that flops.
Grate your own cheese. Pre-shredded parmesan is coated with cellulose and other anti-caking agents that prevent it from melting smoothly. It’ll still taste okay, but it won’t create that lacy, crispy crust that makes these chips so addictive. Spend the extra 30 seconds grating a block of real parmesan. Your taste buds will thank you.
Watch the oven like a hawk. Oven temperatures vary wildly. Your 425°F might run hotter or cooler than mine. Start checking at the 10-minute mark. If the edges are browning too fast, reduce the temperature to 400°F. If they look pale at 15 minutes, give them more time. Trust your eyes over the timer.
Flip carefully. The cheese can stick to the parchment if you’re not gentle. Use a thin, flexible spatula and slide it under each chip with confidence. If a chip breaks, just eat it right there—cook’s privilege.
Make extra. These shrink significantly during baking. A whole zucchini yields maybe 15-20 chips, depending on thickness. If you’re serving a crowd, double or triple the recipe and bake in batches. They’re best fresh out of the oven, so plan your timing accordingly.
Variations & Adaptations
One of the best things about this recipe is how easily it adapts to different tastes and dietary needs. Here are some variations I’ve tried and loved:
- Dairy-Free Version: Swap the parmesan for 1/2 cup nutritional yeast mixed with 1/2 cup almond flour. The nutritional yeast gives that cheesy, umami flavor, and the almond flour helps create structure. The texture won’t be exactly the same, but it’s surprisingly good. I tested this for a friend with dairy allergies, and she asked for the recipe.
- Spicy Kick: Add 1/4 teaspoon cayenne pepper or red pepper flakes to the parmesan mixture. The heat pairs beautifully with a cool ranch or yogurt dip. My husband loves this version and calls them “fire chips.”
- Everything Bagel Seasoning: Skip the oregano and garlic powder, and mix 2 tablespoons of everything bagel seasoning into the parmesan. The sesame seeds and poppy seeds add extra crunch. This is my current obsession.
- Herb & Lemon: Add the zest of one lemon and 1 tablespoon of fresh thyme or rosemary to the parmesan mixture. The bright citrus cuts through the richness of the cheese and makes these feel lighter.
- Air Fryer Method: If you have an air fryer, these chips cook beautifully in it. Preheat to 375°F (190°C), arrange the coated chips in a single layer (you may need to work in batches), and cook for 6-8 minutes, flipping halfway through. They come out even crispier than the oven version, honestly.
- Different Cheeses: Try a mix of parmesan and asiago, or swap in pecorino romano for a saltier, sharper flavor. Just be careful with the salt if you’re using a salty cheese—you might need to reduce or skip the added salt in the salting step.
Serving & Storage Suggestions
These chips are best enjoyed immediately, while they’re still warm and shatteringly crisp. Here’s how I like to serve them:
- As a snack: Pile them on a plate with a small bowl of warm marinara sauce for dipping. The acidity of the tomato sauce cuts through the richness of the cheese perfectly.
- As a side dish: Serve alongside grilled chicken, fish, or a juicy steak instead of fries. They pair especially well with crispy garlic parmesan boneless chicken thighs for a complete low-carb meal.
- On a cheese board: Arrange them around a wedge of brie or goat cheese for a crunchy, salty element that contrasts with soft cheeses.
- On a salad: Crush a few chips over a simple green salad with lemon vinaigrette for a crouton-like crunch without the carbs.
- With dip: They’re amazing with ranch dressing, tzatziki, or even a simple garlic aioli.
Storage: These chips don’t store well for long—they’ll lose their crispness within a few hours. If you have leftovers (unlikely, but possible), store them in an airtight container at room temperature for up to 24 hours. To re-crisp them, pop them back in a 350°F oven for 3-5 minutes. Don’t use the microwave—it’ll turn them into sad, cheesy rubber.
Make-ahead tip: You can slice and salt the zucchini up to 2 hours ahead. Just pat them dry right before coating and baking. The parmesan mixture can also be prepped in advance and stored in an airtight container at room temperature for up to a week.
Nutritional Information & Benefits
Here’s the estimated nutritional breakdown per serving (about 15 chips, assuming the recipe serves 2):
| Nutrient | Amount per Serving |
|---|---|
| Calories | 185 |
| Total Fat | 11g |
| Saturated Fat | 6g |
| Cholesterol | 30mg |
| Sodium | 680mg |
| Total Carbohydrates | 6g |
| Dietary Fiber | 2g |
| Sugars | 3g |
| Net Carbs | 4g |
| Protein | 14g |
Health Benefits: Zucchini is packed with vitamin C, potassium, and antioxidants like lutein and zeaxanthin that support eye health. It’s also incredibly low in calories and high in water content, making it a great choice for weight management. Parmesan cheese adds a significant amount of protein and calcium, plus probiotics from the aging process. Together, they create a snack that’s actually satisfying—not just empty crunch.
Dietary Considerations: This recipe is naturally low-carb, keto-friendly, gluten-free, and vegetarian. It contains dairy from the parmesan, so it’s not suitable for vegans or those with dairy allergies. If you’re watching your sodium intake, you can reduce the salt in the salting step, but you may need to press the zucchini longer to remove enough moisture.
Conclusion
These crispy low-carb zucchini parmesan chips are proof that eating well doesn’t mean eating boring. They’re crunchy, cheesy, salty, and satisfying in a way that makes you forget you’re eating vegetables. I love them because they solve that universal craving for something crispy without the guilt or the complicated ingredient list.
I hope you make these chips and fall in love with them the way I did. Play around with the seasonings, try different dips, and don’t be afraid to double the batch—they go fast. If you make them, drop a comment below and let me know how they turned out. Did you try the spicy version? The everything bagel version? I’d love to hear about your twists and tweaks.
Until next time, happy snacking. And remember—the real secret to crispy chips is patience, not perfection.
Frequently Asked Questions
Can I use yellow squash instead of zucchini?
Absolutely. Yellow squash works just as well and has a similar moisture content. The flavor is slightly milder, but the texture and cooking time remain the same. Feel free to mix both for a colorful batch.
Why did my zucchini chips come out soggy?
This usually happens for one of three reasons: you skipped the salting step, you didn’t pat the zucchini dry enough, or you overcrowded the baking sheet. Make sure each slice is thoroughly dried, and give them room to breathe on the pan. If they’re still soggy after baking, pop them back in the oven for another 3-5 minutes.
Can I freeze these chips?
I don’t recommend freezing them. The texture degrades significantly upon thawing, and they’ll end up soft and rubbery. These are best made fresh and eaten within a few hours. If you need to prep ahead, slice and salt the zucchini up to 2 hours in advance, then bake just before serving.
How do I make these chips extra crispy?
Three secrets: First, salt the zucchini and pat it bone-dry. Second, use a silicone baking mat instead of parchment—it promotes better browning. Third, let the chips cool completely on a wire rack after baking. They’ll continue to crisp up as they cool, so don’t rush the process.
Can I use a different cheese?
Yes, but stick with hard, dry cheeses that melt well and brown nicely. Asiago, pecorino romano, or a mix of parmesan and cheddar all work. Avoid soft cheeses like mozzarella or feta—they’ll melt too much and won’t create that crispy coating. If you’re looking for other ways to use zucchini, you might enjoy these crispy cheesy zucchini and corn fritters for a different take on crispy zucchini goodness.
Pin This Recipe!
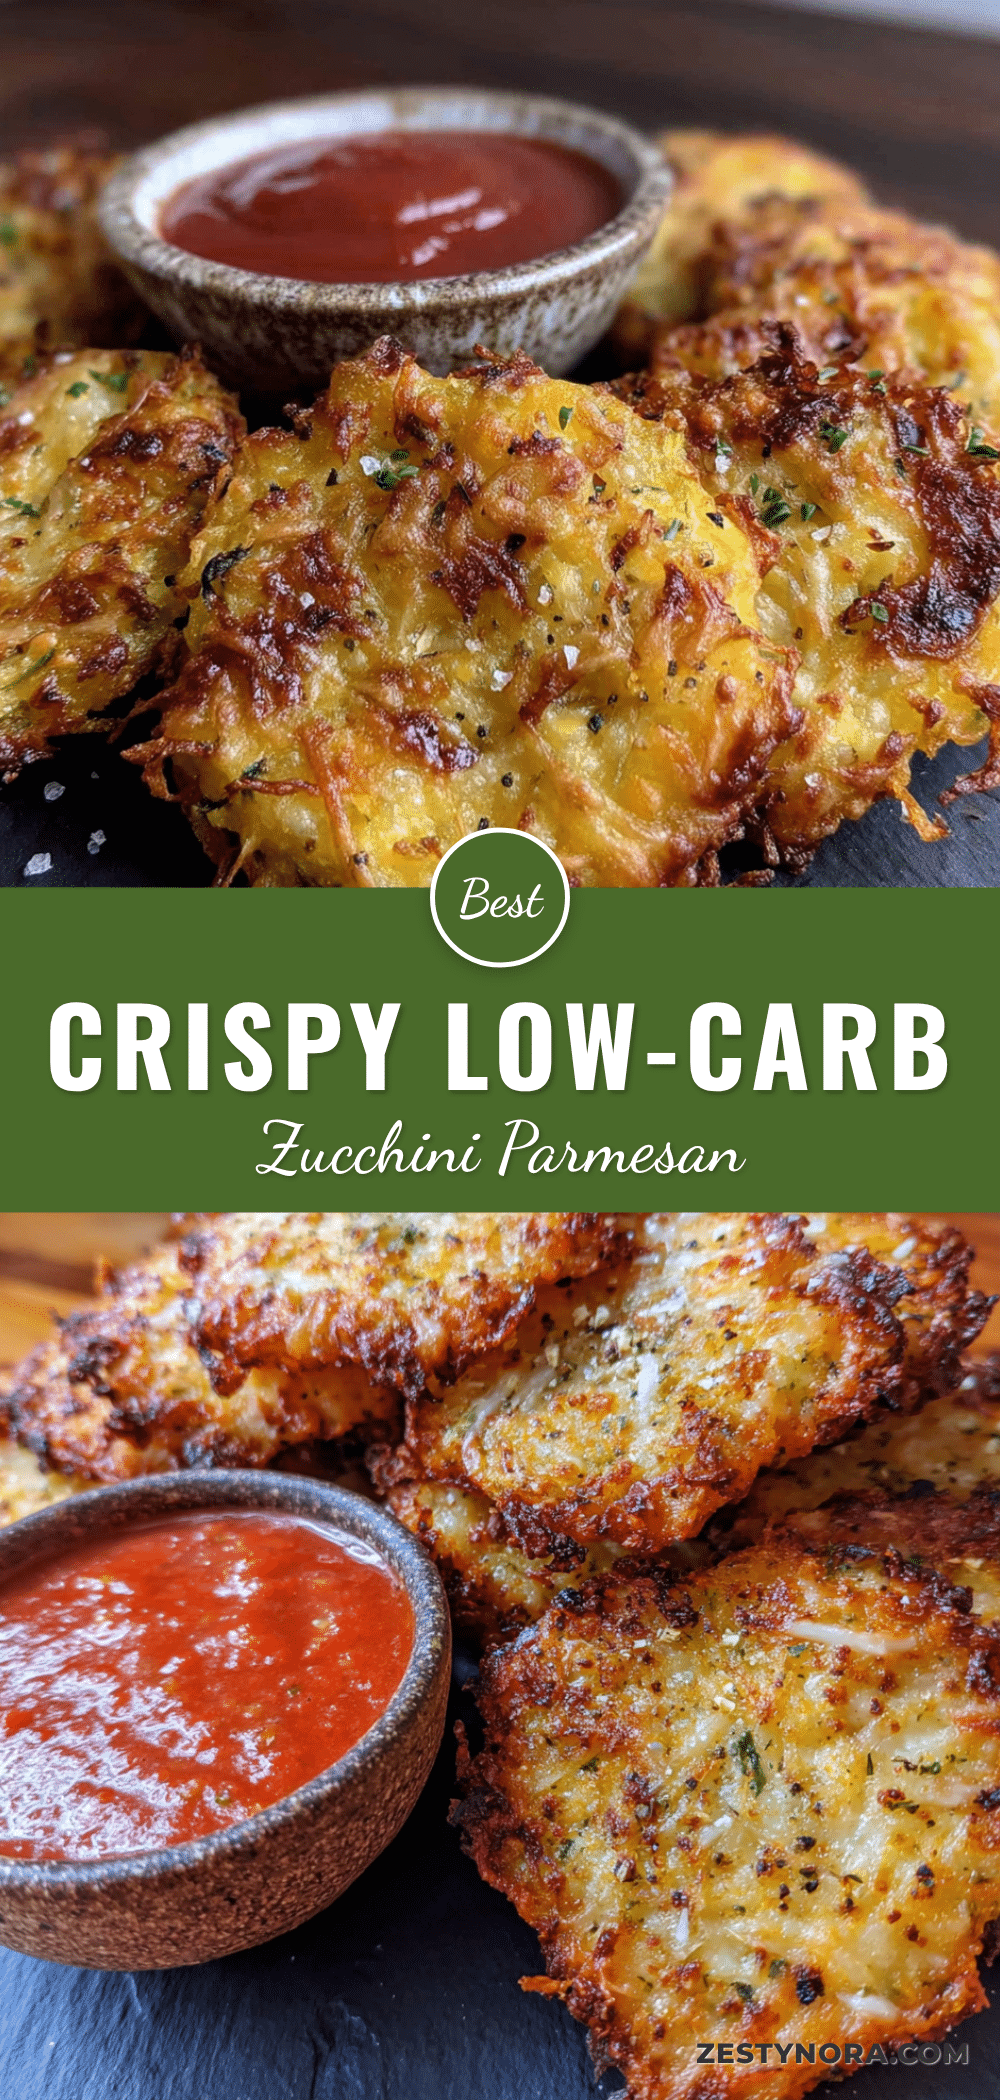
Crispy Low-Carb Zucchini Parmesan Chips

These crispy low-carb zucchini parmesan chips are the perfect crunchy, salty, and cheesy snack. Made with simple ingredients and baked to golden perfection, they’re a guilt-free treat that satisfies cravings without the carbs.
- Prep Time: 15 minutes
- Cook Time: 20 minutes
- Total Time: 35 minutes
- Yield: 2 servings 1x
- Category: Snack
- Cuisine: Italian-American
Ingredients
- 2 medium zucchini (about 8–10 ounces each)
- 1 teaspoon fine sea salt
- 1 cup finely grated parmesan cheese (about 3 ounces)
- 1/2 teaspoon garlic powder
- 1/2 teaspoon dried oregano
- 1/4 teaspoon black pepper
- Olive oil spray
- Marinara sauce (for serving, optional)
- Fresh basil or parsley (for garnish, optional)
Instructions
- Preheat your oven to 425°F (218°C). Line a baking sheet with parchment paper or a silicone mat. Position the rack in the middle of the oven.
- Slice the zucchini into 1/4-inch rounds. Trim off the ends, but don’t peel the zucchini.
- Place the slices in a colander set over a bowl or in the sink. Sprinkle with the teaspoon of salt and toss gently to coat. Let them sit for 10-15 minutes. Pat each slice dry thoroughly with paper towels.
- In a shallow bowl, combine the grated parmesan, garlic powder, oregano, and black pepper. Stir with a fork to distribute the seasonings evenly.
- Working one at a time, press each slice into the parmesan mixture, coating both sides. Shake off any excess. Place the coated slices on the prepared baking sheet in a single layer, leaving a little space between each one.
- Spray lightly with olive oil.
- Bake for 12-15 minutes, then flip each chip carefully with a thin spatula and bake for another 5-8 minutes, until the second side is also golden and the edges are deeply browned.
- Transfer the chips to a cooling rack immediately. Let them cool completely (about 5 minutes) before serving.
Notes
Don’t skip the salting step—it’s crucial for crispiness. Grate your own cheese for best results. Watch the oven closely as temperatures vary. These chips are best enjoyed immediately. For dairy-free version, swap parmesan for 1/2 cup nutritional yeast mixed with 1/2 cup almond flour.
Nutrition
- Serving Size: About 15 chips
- Calories: 185
- Sugar: 3
- Sodium: 680
- Fat: 11
- Saturated Fat: 6
- Carbohydrates: 6
- Fiber: 2
- Protein: 14
Keywords: zucchini chips, low-carb snack, keto snack, gluten-free snack, parmesan zucchini, crispy zucchini chips, healthy snack, baked zucchini chips


