I had been looking for a chicken dinner that actually delivered that perfect crunch without a deep fryer or a greasy stovetop mess. For a while, I just accepted that crispy chicken thighs were something you only got at restaurants or from a box of frozen stuff. My air fryer sat on the counter, mostly used for reheating fries and making sad little frozen egg rolls. Then one Tuesday night—nothing special, just a regular weeknight where I was tired of the same old baked chicken routine—I decided to experiment. I had some chicken thighs thawed in the fridge, a block of Parmesan that needed using up, and a hunch that garlic and heat could do something magical together.
The first batch came out okay. Edible, but not what I was chasing. The coating was there, the flavor was promising, but the texture was more “crispy-ish” than genuinely crispy. You know that feeling when you bite into something and it’s good, but you can tell it could be great with just a little more attention? That was my Tuesday night. So I tweaked things. I adjusted the temperature, changed how I prepped the chicken, and played with the coating ratio until the crust shattered when I bit into it. Honestly, it took about four attempts before I felt confident enough to call it a recipe.
What I ended up with is this: air fryer chicken thighs with a garlic Parmesan crust that stays crunchy even after sitting for a few minutes. No flipping required halfway through. No breading falling off in sad little clumps. Just golden, savory, garlicky chicken that makes you forget you’re eating something cooked in a countertop appliance. It’s the kind of recipe that makes you wonder why you ever bothered with takeout chicken in the first place.
Why You’ll Love This Recipe
This isn’t just another air fryer chicken recipe. I’ve tested enough of those to know the difference between “good for air fryer” and “actually genuinely good.” This one falls into the second category, and here’s why it works.
- Actually crispy without deep frying. The air fryer gets hot enough to create that golden, shatter-crisp crust, but you’re using a fraction of the oil. No standing over a sputtering pan, no lingering kitchen grease smell for days.
- Simple ingredients you probably already have. Chicken thighs, garlic, Parmesan, breadcrumbs, oil, and basic seasonings. No weird specialty items or trips to three different stores. This is a pantry-friendly recipe that delivers way above its ingredient list.
- Perfect for busy weeknights. From start to finish, you’re looking at about 35 minutes. Most of that is hands-off cooking time. You can prep a quick salad or steam some vegetables while the air fryer does the work.
- Kid-approved and adult-worthy. My niece, who usually picks the breading off chicken, ate three pieces without complaint. My brother-in-law asked for the recipe twice. It’s one of those rare dishes that satisfies picky eaters and food snobs alike.
- No flipping required. I designed this method so the chicken cooks evenly without you having to open the basket halfway through and wrestle with tongs. Set it and forget it until the timer goes off.
What makes this recipe different from the dozens of other garlic Parmesan chicken recipes out there? It’s the technique. Instead of a wet batter that gets soggy or a dry breading that falls off, I use a light coating of mayonnaise mixed with garlic as the binder. I know, mayonnaise sounds weird in a savory chicken recipe, but trust me—it keeps the meat incredibly moist while helping the Parmesan crust stick and crisp up beautifully. The result is chicken that tastes like it took way more effort than it actually did.
This is the kind of meal that makes you close your eyes after the first bite. It’s comfort food reimagined—healthier, faster, but with the same soul-soothing satisfaction. Perfect for impressing guests without stress, or turning a simple Tuesday dinner into something memorable.
What Ingredients You Will Need
This recipe uses simple, wholesome ingredients to deliver bold flavor and satisfying texture without the fuss. Most of these are pantry staples, and the ones that aren’t are easy to find at any grocery store.
- Chicken thighs (bone-in, skin-on or boneless, skinless) – I prefer bone-in, skin-on for maximum flavor and juiciness, but boneless works great too. If using boneless, reduce cooking time by about 5-7 minutes. Look for thighs that are similar in size so they cook evenly.
- Fresh garlic (4-5 cloves, minced) – Fresh garlic makes a huge difference here. The jarred stuff works in a pinch, but it won’t give you that same punchy, aromatic flavor. I’ve tried both, and fresh is undeniably better.
- Parmesan cheese (¾ cup, freshly grated) – Please, for the love of crispy chicken, grate your own Parmesan. The pre-shredded stuff in the green can has anti-caking agents that prevent it from melting and crisping properly. A block of good Parmesan grated on a microplane or box grater makes all the difference.
- Panko breadcrumbs (½ cup) – Panko gives you that light, airy crunch that regular breadcrumbs just can’t match. They stay crispy longer and don’t get dense or greasy. I recommend Kikkoman or Ian’s brand for consistent texture.
- Mayonnaise (3 tablespoons) – This is my secret weapon. It acts as the binder that helps the coating stick while keeping the chicken incredibly moist. Use full-fat mayo for best results—the reduced-fat versions have more water content and don’t work as well.
- Olive oil (1 tablespoon) – A little oil mixed into the coating helps with browning and crisping. Extra virgin is fine, but regular olive oil works just as well.
- Salt (1 teaspoon) – I use fine sea salt. If you’re using kosher salt, you might need a bit more.
- Black pepper (½ teaspoon, freshly ground) – Freshly ground pepper adds a subtle warmth that pre-ground pepper just doesn’t have.
- Paprika (1 teaspoon) – Adds color and a mild smokiness. Smoked paprika works beautifully here if you want a deeper flavor.
- Garlic powder (½ teaspoon) – This reinforces the fresh garlic without being overpowering. Don’t skip it—it adds depth.
- Dried parsley (1 teaspoon) – Mostly for color, but it adds a tiny bit of herbaceousness too. Fresh parsley works if you have it.
- Optional: Red pepper flakes (¼ teaspoon) – If you like a little heat, add these to the coating. It’s not spicy, just a gentle warmth that complements the garlic.
Substitution notes: If you’re avoiding dairy, use nutritional yeast in place of Parmesan and dairy-free mayo. For a gluten-free version, swap the panko for gluten-free breadcrumbs or crushed pork rinds. I’ve tried both, and the pork rind version is surprisingly good—extra crispy, with a different but delicious flavor profile.
Equipment Needed
You don’t need a professional kitchen to make this recipe. Here’s what you’ll need:
- Air fryer – Any brand works. I use a 6-quart basket-style air fryer, but oven-style models work too. Just make sure there’s enough room for the chicken thighs to sit in a single layer without touching. If you have a smaller air fryer, cook in batches.
- Mixing bowls – One medium bowl for the coating mixture, one small bowl for the mayo-garlic paste.
- Tongs – For handling the chicken without getting your hands messy. Silicone-tipped tongs are great because they won’t scratch your air fryer basket.
- Microplane or box grater – For grating the Parmesan. A microplane gives you that fine, fluffy texture that melts and crisps perfectly.
- Meat thermometer – This is non-negotiable for me. Chicken thighs need to reach 165°F internally, and a thermometer takes the guesswork out. I’ve ruined enough dry chicken to know better now.
- Cutting board and knife – For mincing the garlic and any prep work.
- Paper towels – For patting the chicken dry before coating. This step matters more than you think.
Budget-friendly tip: If you don’t have an air fryer, you can bake these in a conventional oven at 400°F for 25-30 minutes, flipping halfway through. They won’t be quite as crispy, but they’ll still be delicious. Just place them on a wire rack set over a baking sheet so air circulates underneath.
Preparation Method
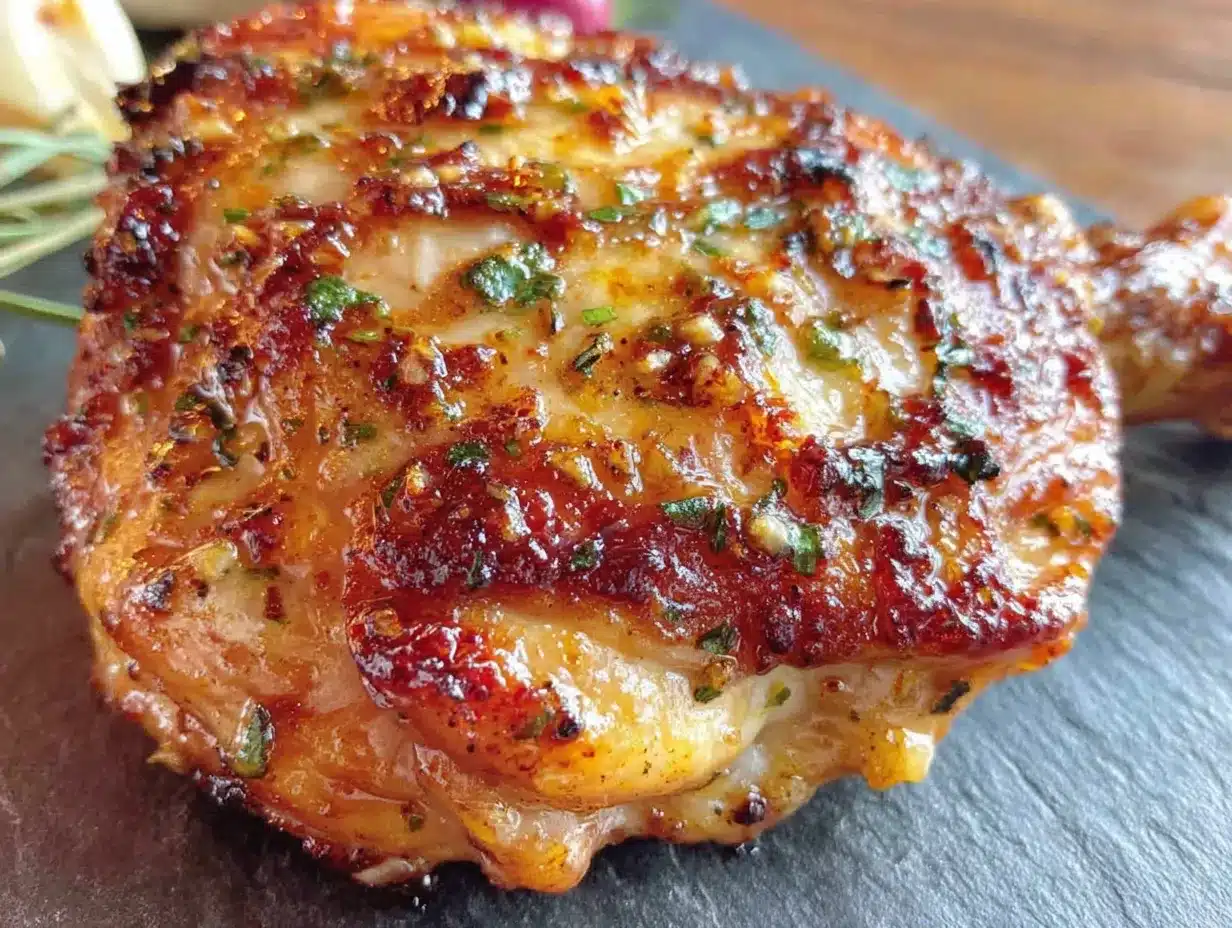
Let’s get cooking. This method is straightforward, but I’ve included all the little details that make the difference between good chicken and great chicken.
- Preheat your air fryer to 400°F (200°C). Give it a full 5 minutes to come to temperature. A properly preheated air fryer is the first step to achieving that golden crust. While it’s heating, you can prep everything else.
- Pat the chicken thighs completely dry with paper towels. This is crucial. Any moisture on the surface will steam the coating instead of crisping it. I usually pat them dry, then let them sit on a clean paper towel for a few minutes while I prepare the coating mixture. You’d be surprised how much extra moisture comes off.
- In a small bowl, combine the mayonnaise and minced garlic. Mix until smooth. Let this sit for a minute or two—it gives the garlic time to infuse the mayo. The smell at this point is already amazing.
- In a separate medium bowl, combine the grated Parmesan, panko breadcrumbs, olive oil, salt, pepper, paprika, garlic powder, dried parsley, and red pepper flakes if using. Use a fork to mix everything together until the oil is evenly distributed. The mixture should look like coarse, damp sand. If it’s too dry, add another teaspoon of olive oil.
- Brush or spread the mayonnaise-garlic mixture evenly over each chicken thigh. Don’t drench them—just a thin, even layer on all sides. Use your fingers or a silicone brush. This layer is what the coating will stick to, so make sure there are no bare spots.
- Press each chicken thigh into the Parmesan-panko mixture, coating all sides. Really press it in—don’t just sprinkle it on. I use my fingers to gently pat the coating into the mayonnaise layer. Shake off any excess, but don’t be too aggressive. You want a nice, thick crust.
- Place the coated chicken thighs in the air fryer basket in a single layer. Make sure they’re not touching. If they’re crowded, the steam can’t escape and you’ll end up with soggy spots. Cook in batches if you need to. I can fit 4 bone-in thighs in my 6-quart basket comfortably.
- Spray the tops of the chicken thighs lightly with cooking spray. This extra spritz helps the coating brown and crisp even more. Avocado oil spray works great because it has a high smoke point.
- Air fry at 400°F for 18-22 minutes for bone-in thighs, or 12-15 minutes for boneless. Do not open the basket during cooking. I know it’s tempting, but every time you open it, you let heat escape and mess with the cooking time. The chicken will be golden brown and the coating will feel firm to the touch when it’s done.
- Check the internal temperature with a meat thermometer. Insert it into the thickest part of the thigh, avoiding the bone. You’re looking for 165°F (74°C). If it’s not quite there, cook for another 2-3 minutes and check again.
- Let the chicken rest for 5 minutes before serving. This is important. The juices need time to redistribute, and the coating will continue to crisp up as it cools slightly. If you cut into it immediately, you’ll lose all those delicious juices.
Sensory cues to watch for: The coating should be deep golden brown and feel crispy when you touch it with a fork. You should hear a slight crackle when you press on it. The chicken will smell intensely garlicky and savory, with that nutty Parmesan aroma coming through. If the coating looks pale or feels soft, it needs more time.
Cooking Tips & Techniques
I’ve made this recipe at least a dozen times, and I’ve learned a few things the hard way. Here’s what I wish I knew from the start.
Don’t skip the resting step. I know it’s hard to wait when the chicken smells this good, but resting is non-negotiable. The first time I made these, I was so excited that I cut into a thigh right away. The juices ran out, the coating got soggy from the steam, and I was disappointed. Five minutes of patience makes a huge difference.
If your coating is falling off, your chicken is too wet. This was my biggest struggle early on. I was patting the chicken dry, but not thoroughly enough. Now I use paper towels and actually press down to absorb as much moisture as possible. If the chicken still feels tacky after patting, let it air-dry on a paper towel for 5 minutes.
Grate your own Parmesan. I cannot stress this enough. Pre-grated Parmesan contains cellulose and anti-caking agents that prevent it from melting and crisping. Freshly grated Parmesan has a much finer texture and melts into the panko beautifully, creating that shatter-crisp crust. A block of Parmesan costs about the same as the pre-grated stuff, and it lasts for weeks in the fridge.
Use a thermometer, not the timer. Air fryers can vary wildly in temperature. My friend’s air fryer runs 25 degrees hotter than mine. Relying solely on the timer is a recipe for dry chicken or undercooked thighs. A good instant-read thermometer costs about $15 and takes all the guesswork out.
Multitasking strategy: While the chicken is air frying, I usually make a quick side dish. A simple cucumber salad with rice vinegar dressing takes about 5 minutes and pairs perfectly with the rich, savory chicken. Or I steam some broccoli and toss it with lemon juice. The timing works out perfectly—the sides are done when the chicken is resting.
One mistake I still make: Overcrowding the basket. I know better, but sometimes I try to squeeze in an extra thigh. Every time I do, the coating comes out less crispy. Trust the single layer rule. Cook in batches if you have to—it’s worth the extra few minutes.
Variations & Adaptations
This recipe is flexible. Here are some variations I’ve tried and loved.
Spicy buffalo version: Add 2 tablespoons of buffalo sauce to the mayonnaise mixture and reduce the garlic slightly. The coating gets a beautiful orange-red color and a tangy kick. Serve with ranch or blue cheese dressing for dipping. This is my go-to game day recipe now—way better than wings.
Herb and lemon version: Replace the dried parsley with 1 tablespoon of fresh chopped rosemary and thyme. Add the zest of one lemon to the coating mixture. The lemon brightens up the richness of the chicken, and the herbs make it feel more elegant. Perfect for spring dinners or when you want something a little lighter.
Gluten-free adaptation: Swap the panko for gluten-free breadcrumbs or crushed pork rinds. I’ve tried both, and the pork rind version is surprisingly addictive. They’re already crispy, so they air fry beautifully. Just crush them in a bag with a rolling pin until they’re about the same texture as panko. If you’re looking for a low-carb option, this is also a great way to go. You might also enjoy my low-carb zucchini Parmesan chips for another crunchy, low-carb option.
Dairy-free version: Use nutritional yeast in place of Parmesan. It won’t have the exact same flavor, but nutritional yeast has a cheesy, nutty quality that works surprisingly well. Use a dairy-free mayonnaise as well. The texture will be slightly different—less crispy, more crunchy—but still delicious.
Oven-baked method: If you don’t have an air fryer, bake these at 400°F on a wire rack set over a baking sheet. The wire rack allows air to circulate underneath, mimicking the air fryer effect. Bake for 25-30 minutes, flipping halfway through. They won’t be quite as crispy, but they’ll still be better than regular baked chicken.
Personal variation I love: Sometimes I add a tablespoon of Dijon mustard to the mayonnaise mixture. It adds a subtle tang that cuts through the richness and complements the garlic beautifully. My husband didn’t even notice the mustard—he just said the chicken tasted “more interesting.”
Serving & Storage Suggestions
These chicken thighs are versatile enough for weeknight dinners, meal prep, or even entertaining.
Serving temperature: Serve them hot, right after the 5-minute rest. The coating is at its crispiest point right then. If you let them sit too long, the steam from the chicken will soften the crust. That said, they’re still very good at room temperature—I’ve eaten them cold straight from the fridge and enjoyed them.
What to serve with them: These chicken thighs pair well with almost anything. I love them with a simple green salad tossed in lemon vinaigrette, or with roasted vegetables like asparagus or Brussels sprouts. For a heartier meal, serve them over garlic butter pasta or with mashed potatoes to soak up the juices. A side of creamy roasted tomato basil soup makes for a cozy, satisfying dinner on colder nights.
Storage instructions: Store leftover chicken in an airtight container in the refrigerator for up to 4 days. The coating will soften in the fridge, but don’t worry—you can revive it. To reheat, place the chicken back in the air fryer at 350°F for 3-4 minutes. The microwave will make the coating soggy, so avoid it if you can. If you’re in a hurry, a toaster oven works better than a microwave.
Freezer instructions: You can freeze the cooked chicken for up to 3 months. Let it cool completely, then wrap each thigh individually in plastic wrap and place them in a freezer bag. To reheat, thaw in the refrigerator overnight, then air fry at 350°F for 5-6 minutes until heated through and crispy again.
How flavors develop: Honestly, these chicken thighs are best fresh, but the leftovers have a different charm. The garlic flavor mellows and melds with the Parmesan overnight, creating a more unified taste. I’ve been known to make extra just so I can have cold chicken thigh slices on a salad the next day. The coating softens, but the flavor is still incredible.
Nutritional Information & Benefits
Here’s the approximate nutritional breakdown per serving (one bone-in chicken thigh with coating):
- Calories: 320-350
- Protein: 28-30g
- Fat: 22-24g
- Carbohydrates: 6-8g
- Fiber: 0.5g
- Sugar: 1g
- Sodium: 580-620mg
Health benefits: Chicken thighs are a great source of protein, iron, and B vitamins. They’re more flavorful and forgiving than chicken breasts, and they contain healthy fats that keep you satisfied. The garlic in this recipe is known for its anti-inflammatory and immune-boosting properties. Parmesan cheese adds calcium and protein, though it’s also higher in sodium, so keep that in mind if you’re watching your salt intake.
Dietary considerations: This recipe can be made gluten-free (use gluten-free panko), low-carb (use pork rinds instead of breadcrumbs), or dairy-free (use nutritional yeast). It’s naturally nut-free and egg-free as written. If you’re avoiding processed foods, make your own mayonnaise or use avocado oil as a binder instead.
My perspective: I don’t believe in labeling foods as “good” or “bad.” This recipe is a balanced option—it’s higher in fat than some chicken recipes, but it’s also incredibly satisfying. I find that when I eat food I genuinely enjoy, I’m less likely to snack on less nutritious things later. A crispy, garlicky chicken thigh with a side of vegetables is a meal that nourishes both body and soul.
Conclusion
This crispy garlic Parmesan chicken thigh recipe is proof that you don’t need complicated techniques or hard-to-find ingredients to make something genuinely delicious. It’s the kind of recipe that becomes a regular in your rotation because it works every time, it’s easy to customize, and it makes everyone at the table happy. Whether you’re cooking for a busy weeknight, meal prepping for the week, or impressing guests, these chicken thighs deliver.
I love this recipe because it taught me something important about cooking: sometimes the best dishes come from simple ingredients treated with a little extra care. The mayonnaise trick, the freshly grated Parmesan, the patience to let the chicken rest—these small choices add up to something greater than the sum of their parts. It’s not about having fancy equipment or years of culinary training. It’s about paying attention and trusting the process.
I’d love to hear how these turn out for you. Did you try a variation? Did you serve them with something unexpected? Leave a comment below and let me know. And if you share a photo on Pinterest, tag me—I love seeing your creations. Happy cooking, friend. You’ve got this.
Frequently Asked Questions
Can I use chicken breasts instead of thighs?
Yes, but you’ll need to adjust the cooking time. Boneless, skinless chicken breasts cook faster and can dry out more easily. Pound them to an even thickness first, then air fry at 400°F for 12-15 minutes, checking the internal temperature at the 12-minute mark. The coating might not stick as well since breasts have less fat, so be extra careful with the mayonnaise layer.
Why is my coating not crispy?
This usually happens for one of three reasons: the chicken wasn’t patted dry enough, the air fryer wasn’t preheated, or the basket was overcrowded. Make sure your chicken is thoroughly dry, give your air fryer a full 5 minutes to preheat, and cook in a single layer without touching. Also, don’t skip the cooking spray on top—it helps with browning.
Can I make these ahead of time for a party?
You can prep the coated chicken up to 24 hours in advance and keep it in the refrigerator on a parchment-lined baking sheet. Cook them just before serving for the crispiest results. If you need to reheat, use the air fryer at 350°F for 3-4 minutes—never the microwave.
How do I make this recipe dairy-free?
Use nutritional yeast in place of Parmesan cheese and a dairy-free mayonnaise. The nutritional yeast won’t crisp up exactly like Parmesan, but it adds a cheesy, nutty flavor that works well. You might also want to add an extra tablespoon of panko to compensate for the missing cheese volume.
Can I double this recipe?
Absolutely. Just cook in batches to avoid overcrowding the air fryer basket. You can keep the first batch warm in a 200°F oven on a wire rack while you cook the second batch. The coating stays crispy in the oven as long as the chicken isn’t covered or stacked.
Pin This Recipe!
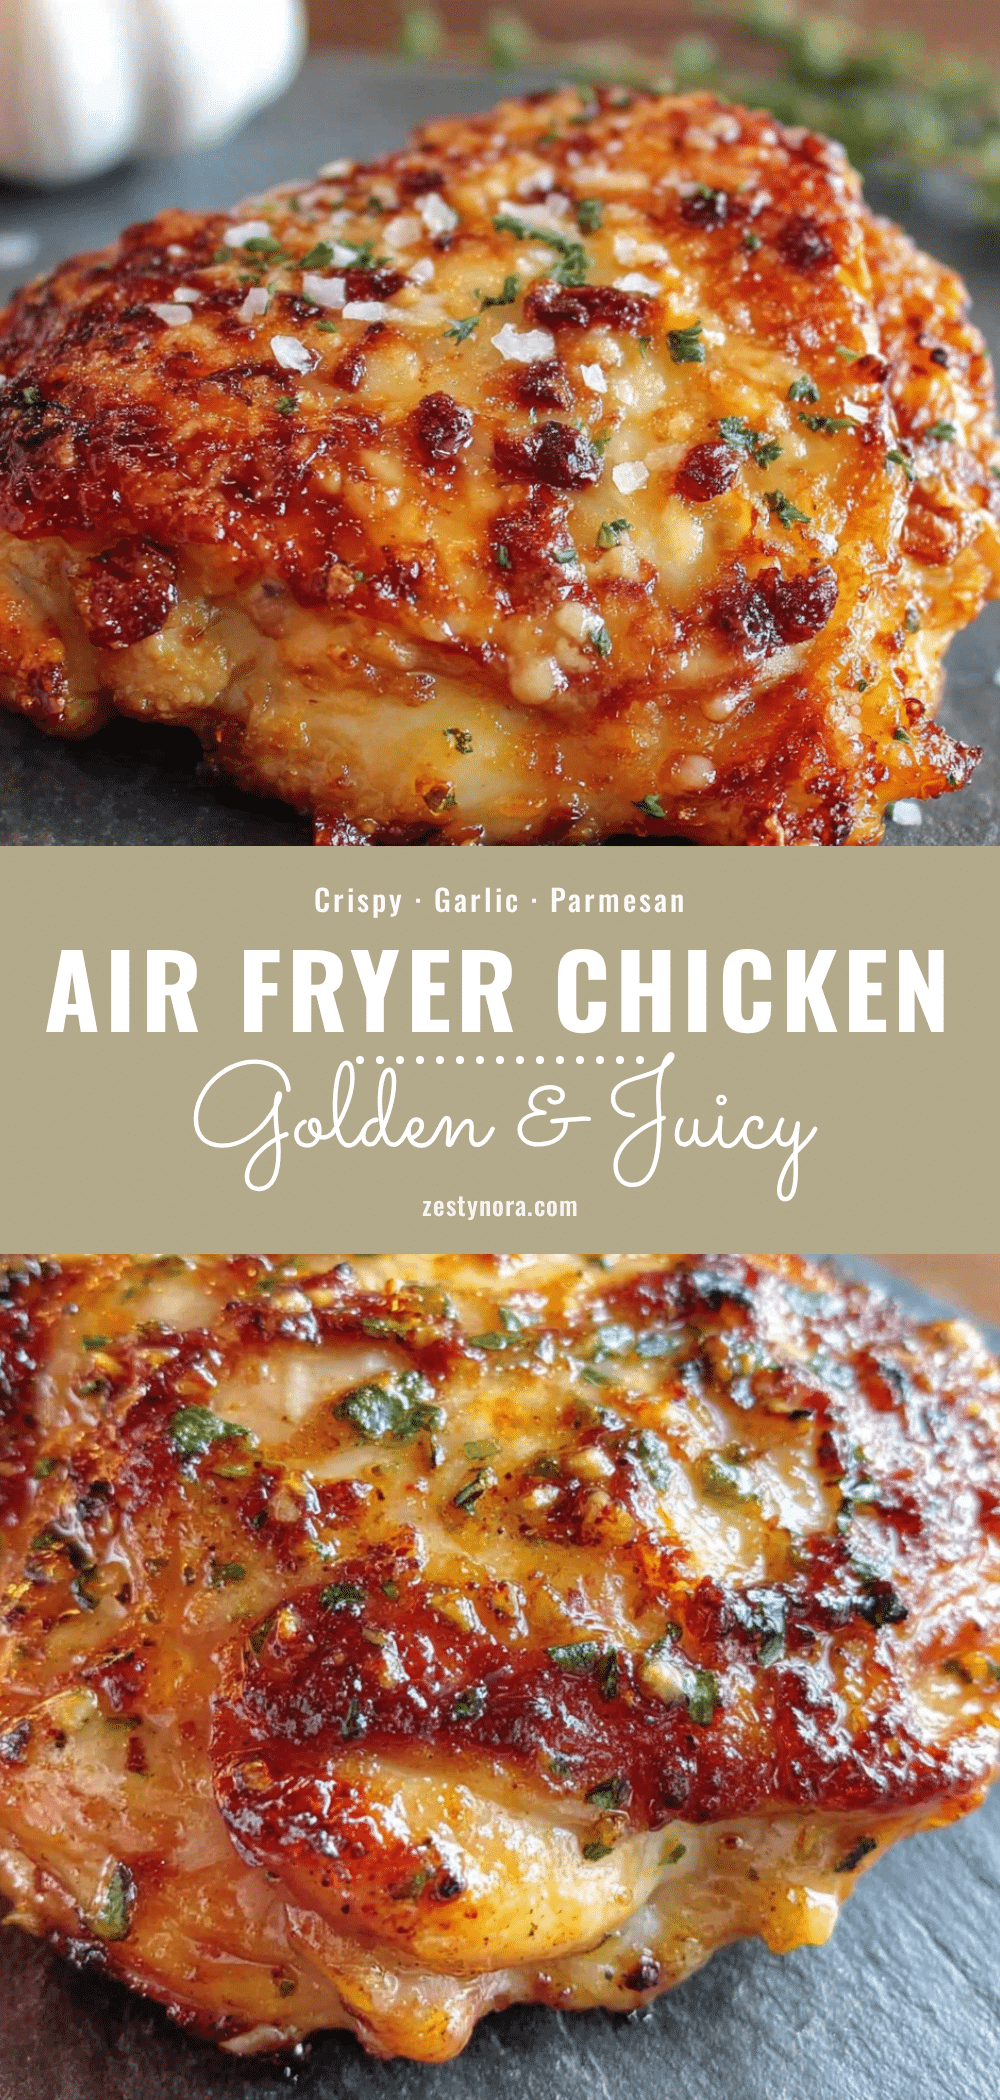
Crispy Garlic Parmesan Chicken Thighs in Air Fryer

These air fryer chicken thighs feature a garlic Parmesan crust that stays crunchy even after sitting for a few minutes. No flipping required, no breading falling off—just golden, savory, garlicky chicken that’s perfect for busy weeknights.
- Prep Time: 15 minutes
- Cook Time: 20 minutes
- Total Time: 35 minutes
- Yield: 4 servings 1x
- Category: Main Course
- Cuisine: American
Ingredients
- 4–6 chicken thighs (bone-in, skin-on or boneless, skinless)
- 4–5 cloves fresh garlic, minced
- 3/4 cup freshly grated Parmesan cheese
- 1/2 cup panko breadcrumbs
- 3 tablespoons mayonnaise
- 1 tablespoon olive oil
- 1 teaspoon fine sea salt
- 1/2 teaspoon freshly ground black pepper
- 1 teaspoon paprika
- 1/2 teaspoon garlic powder
- 1 teaspoon dried parsley
- 1/4 teaspoon red pepper flakes (optional)
- Cooking spray (avocado oil recommended)
Instructions
- Preheat your air fryer to 400°F (200°C) for 5 minutes.
- Pat the chicken thighs completely dry with paper towels.
- In a small bowl, combine the mayonnaise and minced garlic until smooth.
- In a separate medium bowl, combine the grated Parmesan, panko breadcrumbs, olive oil, salt, pepper, paprika, garlic powder, dried parsley, and red pepper flakes (if using). Mix until the oil is evenly distributed.
- Brush or spread the mayonnaise-garlic mixture evenly over each chicken thigh.
- Press each chicken thigh into the Parmesan-panko mixture, coating all sides. Shake off excess.
- Place the coated chicken thighs in the air fryer basket in a single layer, ensuring they are not touching.
- Spray the tops of the chicken thighs lightly with cooking spray.
- Air fry at 400°F for 18-22 minutes for bone-in thighs, or 12-15 minutes for boneless. Do not open the basket during cooking.
- Check the internal temperature with a meat thermometer; it should reach 165°F (74°C).
- Let the chicken rest for 5 minutes before serving.
Notes
For best results, grate your own Parmesan cheese. Pat chicken thoroughly dry to ensure crispy coating. Do not overcrowd the air fryer basket. Let chicken rest 5 minutes before serving to maintain crispiness.
Nutrition
- Serving Size: 1 bone-in chicken th
- Calories: 335
- Sugar: 1
- Sodium: 600
- Fat: 23
- Saturated Fat: 6
- Carbohydrates: 7
- Fiber: 0.5
- Protein: 29
Keywords: air fryer chicken thighs, garlic parmesan chicken, crispy chicken thighs, easy chicken recipe, weeknight dinner