My husband took one bite of these Crispy Cheesy Garlic Zucchini Bites, looked at me with that surprised expression he gets when something actually works, and said, “Wait, these are mostly vegetables?” He reached for another one before I could even answer. That moment—watching him snack on zucchini without a single complaint—is exactly why this recipe exists in my kitchen now.
I wasn’t trying to reinvent the wheel that Tuesday night. I had a couple of zucchinis sitting in the crisper drawer (you know how that goes), and I was tired of the same old sautéed situation. I wanted something that felt like a treat, not a chore. Something crispy. Something cheesy. Something that would disappear before I had to hear anyone ask what’s for dinner.
These little bites are basically fritters, but without the fuss of deep frying. You mix shredded zucchini with cheese, garlic, breadcrumbs, and an egg, then pan-fry them until golden and crunchy on the outside. The inside stays tender and flavorful, thanks to all that melted cheese and garlic. They come together in about 20 minutes flat, which is honestly the only reason I make them on a weeknight.
The first batch I made was a little too wet—zucchini holds a lot of water, let me tell you. I learned the hard way that squeezing out that moisture is non-negotiable. But once I figured that out, these bites became a regular rotation in my kitchen. They’re the kind of recipe that makes you feel like you’re getting away with something, because they taste indulgent but you’re really just eating a pile of vegetables.
I’ve made these for friends who swore they didn’t like zucchini, and watched them go back for thirds. There’s something about the crispy cheese crust that just gets people. So if you’ve got a zucchini sitting around and you’re not sure what to do with it, this is your answer.
Why You’ll Love This Recipe
Let me tell you why these Crispy Cheesy Garlic Zucchini Bites have earned a permanent spot in my recipe collection. First off, they’re genuinely quick—from start to finish, you’re looking at about 20 minutes. That’s faster than ordering takeout in some neighborhoods. And they use ingredients you probably already have in your fridge and pantry, which is always a win in my book.
- Quick & Easy: Ready in under 20 minutes, these are perfect for busy weeknights when you need something satisfying fast. No complicated techniques, just simple cooking.
- Simple Ingredients: Zucchini, cheese, garlic, breadcrumbs, and an egg. That’s basically it. No fancy grocery store trips required.
- Crowd-Pleaser: I’ve served these to kids, picky adults, and vegetable skeptics. They disappear every single time. The crispy cheese exterior is basically magic.
- Versatile: Serve them as an appetizer, a side dish, a snack, or even a light lunch. They work for pretty much any occasion.
- Unbelievably Delicious: The contrast between the crunchy outside and the soft, cheesy inside is next-level comfort food. You won’t believe they’re mostly vegetables.
What makes this recipe different from the countless other zucchini fritters out there? It’s the ratio. I’ve tested this more times than I care to admit, and the perfect balance of cheese to zucchini to breadcrumbs is what gives these bites their signature texture. Not too dense, not too fragile—just right. Plus, using a combination of mozzarella and Parmesan gives you that gooey pull and that crispy golden crust.
Honestly, this is the kind of recipe that makes you close your eyes after the first bite. It’s comfort food reimagined—healthier, faster, but with the same soul-soothing satisfaction. Perfect for impressing guests without stress, or turning a simple weeknight dinner into something memorable.
What Ingredients You Will Need
This recipe uses simple, wholesome ingredients to deliver bold flavor and satisfying texture without the fuss. Most of these are pantry staples, which makes these bites perfect for those nights when you need dinner inspiration fast.
For the Zucchini Bites
- Zucchini: 2 medium zucchini (about 1 pound total), grated. You don’t need to peel them—the skin adds color and nutrients. Look for firm, medium-sized zucchini that aren’t too seedy.
- Salt: 1 teaspoon kosher salt, divided. We use some to draw moisture out of the zucchini and some for seasoning. I prefer kosher salt here because it’s easier to control the amount.
- Mozzarella cheese: 1 cup shredded, low-moisture preferred. This gives you that gooey, stretchy texture. Pre-shredded works in a pinch, but freshly shredded melts better.
- Parmesan cheese: ½ cup grated. This adds a savory, nutty flavor and helps create that crispy exterior. I recommend real Parmesan (the kind in the refrigerated section), not the green can stuff.
- Garlic: 3 cloves, minced. Fresh garlic makes a huge difference here. Don’t use the jarred stuff—it won’t give you the same punch.
- Large egg: 1, lightly beaten. This acts as the binder that holds everything together. Make sure it’s room temperature for best results.
- Breadcrumbs: ¼ cup plain or panko. Panko gives a lighter, crispier texture, but regular breadcrumbs work fine too. I’ve used both and honestly prefer panko for the extra crunch.
- Black pepper: ¼ teaspoon, freshly ground. Just a touch to round out the flavors.
- Red pepper flakes: ¼ teaspoon (optional). I add these for a tiny kick of heat. Totally optional, but I love the contrast.
- Fresh parsley or chives: 2 tablespoons, chopped (optional). For garnish and a pop of freshness. Not essential, but nice if you have them.
For Cooking

- Olive oil or avocado oil: 2-3 tablespoons, for pan-frying. Avocado oil has a higher smoke point, but olive oil works great for the flavor. I use a light olive oil to keep things neutral.
Substitution Notes
If you need a gluten-free option, swap the breadcrumbs for almond flour or gluten-free panko. The texture will be slightly different, but still delicious. For a dairy-free version, use vegan mozzarella and omit the Parmesan (add an extra ¼ cup of nutritional yeast for that cheesy flavor). I haven’t tested this with a flax egg, but I imagine it would work—just note that the texture might be a bit more delicate.
Equipment Needed
You don’t need much fancy equipment for these Crispy Cheesy Garlic Zucchini Bites, which is part of their charm. Here’s what I use:
- Box grater or food processor with grating disc: For shredding the zucchini. A box grater is what I usually use because it’s easier to clean, but a food processor makes quick work of it if you’re making a double batch.
- Clean kitchen towel or cheesecloth: This is crucial for squeezing the moisture out of the shredded zucchini. A thin dish towel works perfectly. Don’t use paper towels—they’ll fall apart.
- Large mixing bowl: For combining all the ingredients. Any medium-to-large bowl will do.
- Medium skillet or frying pan: A 10-inch non-stick skillet is ideal. Cast iron works too, but you might need a little more oil to prevent sticking.
- Spatula: For flipping the bites. A thin, flexible spatula makes it easier to get underneath without breaking them.
- Paper towels: For draining the cooked bites. This keeps them crispy instead of soggy.
If you don’t have a non-stick skillet, a well-seasoned cast iron pan works beautifully. Just make sure it’s hot enough before adding the oil. I’ve also made these on an electric griddle with great results—perfect for making a large batch all at once.
Preparation Method
Making these Crispy Cheesy Garlic Zucchini Bites is straightforward, but there are a few key steps that make the difference between good and great. Follow these carefully, and you’ll be rewarded with perfectly crispy, cheesy bites every time.
Step 1: Prep the Zucchini
Start by washing your zucchini and trimming off the ends. Using a box grater or food processor, grate the zucchini into a large bowl. You should end up with about 3-4 cups of shredded zucchini. Don’t worry about the skin—it adds color and nutrients.
Now here’s the most important step: sprinkle ½ teaspoon of kosher salt over the grated zucchini and toss to combine. Let it sit for about 5-10 minutes. You’ll start to see beads of moisture forming on the surface. This salt draws out the excess water that would otherwise make your bites soggy.
Step 2: Squeeze Out the Moisture
Transfer the salted zucchini to a clean kitchen towel or cheesecloth. Gather the corners and twist, squeezing firmly over the sink. You’ll be amazed at how much liquid comes out—usually about ½ cup. Keep squeezing until no more water drips out. This step is non-negotiable. I learned this the hard way after making a batch of sad, soggy fritters.
Once squeezed, transfer the zucchini to a clean, dry bowl. It should feel like a dry, fluffy pile of shreds.
Step 3: Mix the Batter
To the squeezed zucchini, add the shredded mozzarella, grated Parmesan, minced garlic, beaten egg, breadcrumbs, remaining ½ teaspoon salt, black pepper, and red pepper flakes if using. Stir everything together with a fork or spatula until well combined. The mixture should hold together when pressed—if it seems too wet, add another tablespoon of breadcrumbs. If it seems too dry, add a splash of milk or a tiny bit more egg.
The mixture should look like a thick, chunky batter. Don’t overmix—you want it just combined.
Step 4: Heat the Pan
Place your skillet over medium heat and add enough oil to coat the bottom (about 1-2 tablespoons). Let the oil heat for about 1-2 minutes. You’ll know it’s ready when a tiny bit of the mixture sizzles immediately when dropped in. If it smokes, the oil is too hot—turn the heat down slightly.
Step 5: Form and Cook the Bites
Using a spoon or your hands (lightly oiled hands work great), scoop about 2 tablespoons of the mixture and shape it into a small patty about 2 inches wide and ½ inch thick. Gently place it in the hot oil. Repeat with more patties, leaving about 1 inch of space between each one. Don’t overcrowd the pan—work in batches if needed.
Cook for 3-4 minutes on the first side, until the bottom is deep golden brown and crispy. You’ll see the edges turning brown and the cheese starting to bubble. Carefully flip each bite using a thin spatula. Cook for another 2-3 minutes on the second side, until golden brown.
Transfer the cooked bites to a plate lined with paper towels to drain excess oil. Season immediately with a tiny pinch of salt while they’re still hot.
Step 6: Repeat and Serve
Repeat with the remaining batter, adding more oil to the pan as needed. You should get about 12-14 bites total. Serve immediately while they’re hot and crispy. The texture is best fresh, but they’re still good at room temperature.
Cooking Tips & Techniques
After making these Crispy Cheesy Garlic Zucchini Bites more times than I can count, I’ve picked up a few tricks that make the process smoother and the results more consistent. Let me share what I’ve learned.
The moisture squeeze is everything. I cannot stress this enough. If you skip the salting and squeezing step, your bites will be soggy and fall apart in the pan. I once tried to rush this step and ended up with a pan full of zucchini mush. Take the extra 10 minutes—it’s worth it.
Use a hot pan, but not too hot. Medium heat is your friend here. If the pan is too hot, the outside will burn before the inside is cooked through. If it’s too cool, the bites will absorb too much oil and become greasy. Test with a tiny piece of batter first—it should sizzle gently, not violently.
Don’t overcrowd the pan. Give each bite room to breathe. If you crowd them, they’ll steam instead of fry, and you’ll lose that crispy exterior. Cook in batches if necessary. I usually do 4-5 bites at a time in my 10-inch skillet.
Let them rest on paper towels. This absorbs any excess oil and keeps the bottoms crispy. If you stack them without paper towels, the steam will make them soggy. I’ve made that mistake more than once.
Keep them warm in the oven. If you’re making a large batch, preheat your oven to 200°F and place the cooked bites on a baking sheet in a single layer. They’ll stay warm and crispy while you finish cooking the rest.
Season immediately. A tiny sprinkle of salt right after they come out of the pan enhances all the flavors. Don’t skip this—it makes a noticeable difference.
Variations & Adaptations
One of the best things about these Crispy Cheesy Garlic Zucchini Bites is how adaptable they are. I’ve experimented with all sorts of variations, and here are some of my favorites.
Dietary Variations
Gluten-Free: Swap the breadcrumbs for almond flour or gluten-free panko. I’ve tried both, and gluten-free panko gives the most similar texture. Just note that the bites might be slightly more delicate, so handle them gently when flipping.
Low-Carb/Keto: Use almond flour or crushed pork rinds instead of breadcrumbs. Pork rinds give an incredibly crispy texture that’s almost addictive. Just be mindful of the sodium content.
Dairy-Free: Use vegan mozzarella and nutritional yeast instead of Parmesan. The texture won’t be as gooey, but the flavor is still great. I’ve also used dairy-free cream cheese with good results.
Flavor Variations
Herb & Garlic: Add 2 tablespoons of chopped fresh herbs like basil, oregano, or dill. This gives the bites a fresh, garden-fresh flavor that’s perfect for summer.
Spicy: Double the red pepper flakes and add a pinch of cayenne. For extra heat, mix in some finely chopped jalapeño. My husband loves this version with a side of ranch dressing.
Mediterranean: Add ¼ cup of crumbled feta cheese and 2 tablespoons of chopped sun-dried tomatoes. Serve with tzatziki sauce for dipping. This is my personal favorite variation.
Cooking Method Variations
Air Fryer: Preheat your air fryer to 375°F. Lightly spray the basket with oil and arrange the bites in a single layer. Cook for 8-10 minutes, flipping halfway through. They come out incredibly crispy with less oil. I’ve tested this method and it works beautifully.
Baked: Place the bites on a parchment-lined baking sheet and brush with oil. Bake at 400°F for 15-18 minutes, flipping halfway through. They won’t be as crispy as pan-fried, but they’re still delicious and healthier.
Oven-Baked Alternative: For a larger batch, bake at 425°F for 12-15 minutes. The higher temperature helps create a crispy exterior without drying out the inside.
Serving & Storage Suggestions
These Crispy Cheesy Garlic Zucchini Bites are best served immediately, but they’re versatile enough to work for different occasions. Here’s how I like to serve and store them.
Serving Suggestions
Serve these bites hot, right out of the pan. The contrast between the crispy exterior and the soft, cheesy interior is at its peak within the first few minutes. Arrange them on a platter and garnish with fresh parsley or chives for a pop of color.
For dipping, I love marinara sauce (classic and always a hit), ranch dressing (especially with the spicy version), or tzatziki (perfect for the Mediterranean variation). A simple garlic aioli or sour cream dip works beautifully too.
These bites pair wonderfully with a fresh green salad for a light lunch, or alongside grilled chicken or fish for a complete dinner. They also make fantastic appetizers for parties—just keep them warm in a low oven until ready to serve.
If you’re looking for a cozy meal, I love serving these alongside a bowl of creamy slow cooker chicken and wild rice soup for a comforting dinner that feels like a hug in a bowl. The crispy bites add a nice textural contrast to the creamy soup.
Storage Instructions
Store leftover bites in an airtight container in the refrigerator for up to 3 days. Place a paper towel at the bottom of the container to absorb any excess moisture. They’ll lose some crispiness, but they’re still tasty.
To reheat, I recommend using an air fryer at 350°F for 3-4 minutes, or a skillet over medium heat with a tiny bit of oil. The microwave works in a pinch, but the texture won’t be as good. If you’re reheating a large batch, the oven at 350°F for 5-7 minutes works well.
Freezing instructions: These bites freeze surprisingly well. Arrange them in a single layer on a baking sheet and freeze until solid (about 1-2 hours). Transfer to a freezer-safe bag or container. They’ll keep for up to 2 months. Reheat directly from frozen in an air fryer or oven—no need to thaw.
How Flavors Develop
These bites are best fresh, but the flavors actually meld and deepen after a day in the fridge. The garlic becomes more mellow and the cheese flavors blend together. If you’re meal-prepping, you can make the batter ahead of time and cook them fresh—just keep the squeezed zucchini and the dry ingredients separate until you’re ready to cook.
Nutritional Information & Benefits
These Crispy Cheesy Garlic Zucchini Bites are a great way to enjoy vegetables in a satisfying, indulgent-feeling way. Here’s a rough nutritional breakdown per serving (about 3-4 bites, based on 12 total bites):
| Nutrient | Amount per Serving |
|---|---|
| Calories | 180-200 |
| Protein | 12g |
| Fat | 12g |
| Carbohydrates | 8g |
| Fiber | 2g |
| Sugar | 3g |
| Sodium | 450mg |
Health benefits: Zucchini is low in calories but high in fiber, vitamin C, and potassium. The cheese adds calcium and protein, while the garlic offers anti-inflammatory properties. These bites are naturally gluten-free if you use the right breadcrumbs, and they’re lower in carbs than traditional fritters.
Dietary considerations: This recipe contains dairy and eggs. For a dairy-free version, use vegan cheese and nutritional yeast. For egg-free, try a flax egg (1 tablespoon flaxseed meal + 3 tablespoons water, let sit for 5 minutes). The texture will be slightly different, but still good.
I personally love that these bites let me eat a pile of vegetables without feeling like I’m eating a pile of vegetables. It’s a win-win in my book.
Frequently Asked Questions
Can I make these ahead of time?
Yes! You can prep the zucchini up to 24 hours in advance—just squeeze it dry and store it in the fridge. You can also form the patties and refrigerate them on a baking sheet for up to 4 hours before cooking. Cook them fresh for the best texture.
Why are my zucchini bites falling apart?
This usually happens when there’s too much moisture in the mixture. Make sure you squeeze the zucchini really well after salting. Also, check that your egg is large enough to bind everything together. If the mixture seems too wet, add another tablespoon of breadcrumbs.
Can I use yellow squash instead of zucchini?
Absolutely! Yellow squash works perfectly in this recipe. It has a slightly milder flavor and a bit more moisture, so make sure to squeeze it well. The color is beautiful too—a nice golden hue.
How do I make these extra crispy?
Use panko breadcrumbs instead of regular ones, and make sure your pan is hot enough before adding the oil. Don’t overcrowd the pan, and let the bites cook without moving them for the full 3-4 minutes on the first side. A little extra oil also helps.
Can I bake these instead of frying?
Yes! Preheat your oven to 400°F and place the bites on a parchment-lined baking sheet. Brush or spray them with oil and bake for 15-18 minutes, flipping halfway through. They won’t be as crispy as pan-fried, but they’re still delicious and healthier.
Conclusion
These Crispy Cheesy Garlic Zucchini Bites have become one of my most-requested recipes, and for good reason. They’re quick, simple, and incredibly satisfying. The combination of crispy exterior, gooey cheese, and tender zucchini is just… perfect. And the fact that they come together in 20 minutes? That’s the kind of magic we all need in our kitchen.
I love that this recipe is flexible enough to work for any occasion—weeknight dinner, game day snack, or party appetizer. And I love even more that it turns a humble zucchini into something people actually get excited about. That’s the kind of recipe that makes cooking feel worthwhile.
If you try these bites, I’d love to hear how they turn out. Leave a comment below and let me know what variations you tried, or share a photo on Pinterest. And if you’re looking for another way to use up summer zucchini, you might enjoy these crispy cheesy zucchini and corn fritters—they’re a close cousin to these bites and just as delicious.
Happy cooking, friends. Go make something crispy.
Pin This Recipe!
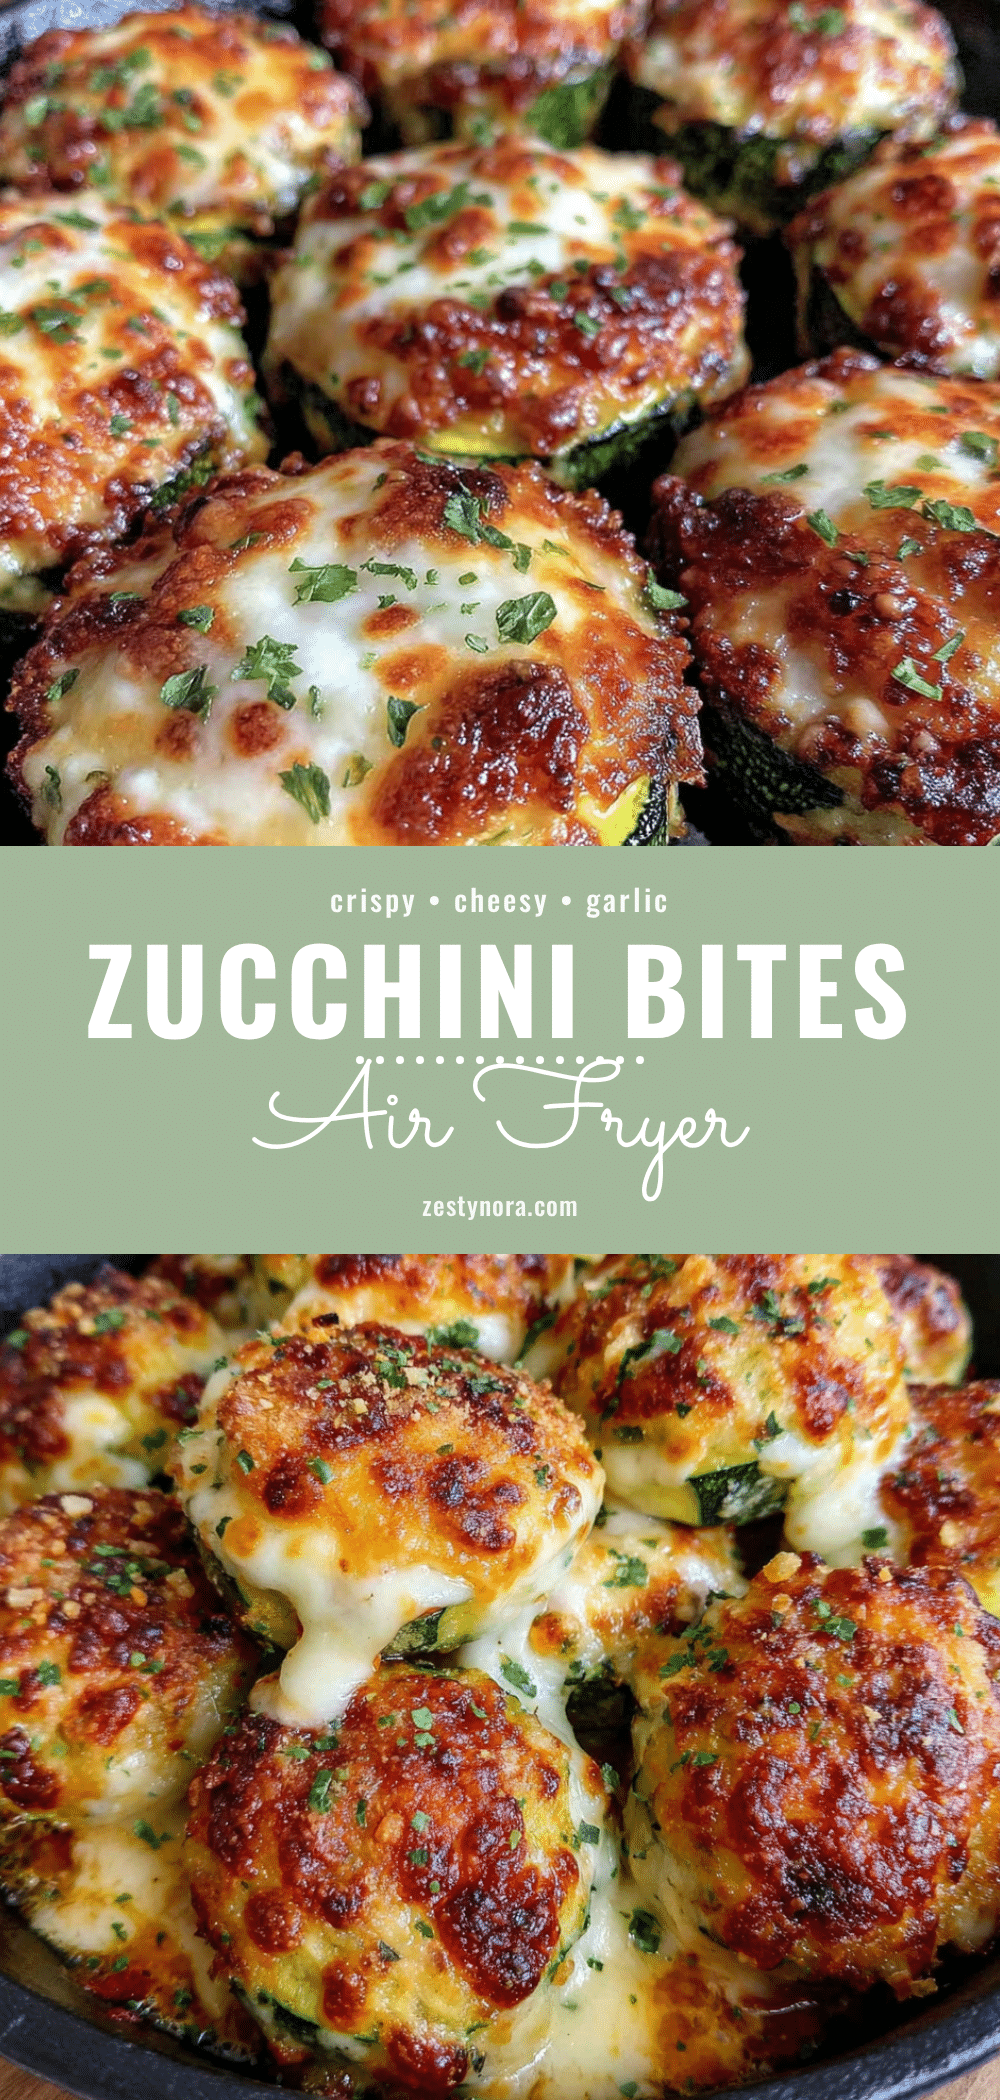
Crispy Cheesy Garlic Zucchini Bites: Easy 20-Minute Recipe

These crispy, cheesy zucchini bites are pan-fried to golden perfection in just 20 minutes. Made with simple ingredients like zucchini, mozzarella, Parmesan, and garlic, they’re a crowd-pleasing appetizer, side dish, or snack that even vegetable skeptics will love.
- Prep Time: 10 minutes
- Cook Time: 10 minutes
- Total Time: 20 minutes
- Yield: 4 servings 1x
- Category: Appetizer
- Cuisine: American
Ingredients
- 2 medium zucchini (about 1 pound total), grated
- 1 teaspoon kosher salt, divided
- 1 cup shredded low-moisture mozzarella cheese
- ½ cup grated Parmesan cheese
- 3 cloves garlic, minced
- 1 large egg, lightly beaten
- ¼ cup plain or panko breadcrumbs
- ¼ teaspoon freshly ground black pepper
- ¼ teaspoon red pepper flakes (optional)
- 2 tablespoons fresh parsley or chives, chopped (optional, for garnish)
- 2–3 tablespoons olive oil or avocado oil, for pan-frying
Instructions
- Wash zucchini and trim ends. Grate using a box grater or food processor. Place in a large bowl.
- Sprinkle ½ teaspoon kosher salt over grated zucchini and toss to combine. Let sit for 5-10 minutes to draw out moisture.
- Transfer salted zucchini to a clean kitchen towel or cheesecloth. Gather corners and twist firmly over the sink to squeeze out as much liquid as possible (about ½ cup). Transfer squeezed zucchini to a clean, dry bowl.
- To the squeezed zucchini, add shredded mozzarella, grated Parmesan, minced garlic, beaten egg, breadcrumbs, remaining ½ teaspoon salt, black pepper, and red pepper flakes (if using). Stir until well combined. The mixture should hold together when pressed; if too wet, add another tablespoon of breadcrumbs.
- Place a skillet over medium heat and add enough oil to coat the bottom (about 1-2 tablespoons). Heat for 1-2 minutes until a tiny bit of mixture sizzles immediately when dropped in.
- Using a spoon or lightly oiled hands, scoop about 2 tablespoons of mixture and shape into a small patty about 2 inches wide and ½ inch thick. Gently place in hot oil. Repeat with more patties, leaving about 1 inch of space between each. Cook in batches if needed.
- Cook for 3-4 minutes on the first side until deep golden brown and crispy. Carefully flip using a thin spatula and cook for another 2-3 minutes on the second side until golden brown.
- Transfer cooked bites to a plate lined with paper towels to drain excess oil. Season immediately with a tiny pinch of salt while hot.
- Repeat with remaining batter, adding more oil to the pan as needed. Serve immediately while hot and crispy.
Notes
Squeezing moisture from the zucchini is crucial to avoid soggy bites. Use a hot pan over medium heat—not too hot or the outside will burn. Don’t overcrowd the pan; cook in batches for best crispiness. For a gluten-free version, use almond flour or gluten-free panko. For dairy-free, use vegan mozzarella and nutritional yeast. Leftovers can be stored in an airtight container in the refrigerator for up to 3 days; reheat in an air fryer or skillet for best texture.
Nutrition
- Serving Size: 3-4 bites
- Calories: 190
- Sugar: 3
- Sodium: 450
- Fat: 12
- Saturated Fat: 5
- Carbohydrates: 8
- Fiber: 2
- Protein: 12
Keywords: zucchini bites, cheesy zucchini, garlic zucchini, crispy zucchini, easy appetizer, 20-minute recipe, vegetable fritters, summer squash recipe