The Obsession Spiral
Fourth time this week and the chia seeds still look like little black pebbles at the bottom of the mason jar. I know, I know. It sounds ridiculous to spend this much mental energy on a bowl of soaked seeds. But here’s the thing about the creamy high-fiber overnight chia pudding parfait: it is a deceptively tricky beast if you don’t respect the hydration process. I have been making this specific version of the pudding on repeat for the last month, mostly because my mornings are chaotic and I need something that doesn’t require a stove or a blender.
By the second iteration, I realized my mistake was rushing the soak. I was dumping the seeds into cold milk and hoping for the best. That’s a rookie move. The third time, I used warm milk and let it sit for twenty minutes before the fridge. That was better, but the texture was still a bit grainy. Honestly, it felt like I was trying to negotiate with a stubborn toddler. I wanted that thick, custard-like consistency that holds its shape when you spoon it, not a runny soup that separates into water and gel.
The fourth attempt was the one that clicked. I stopped treating it like a quick mix-and-chug task. I whisked the seeds with the liquid and a touch of sweetener, then let them bloom in a warm spot for half an hour before layering. The result? A pudding so smooth it felt like cheating. It’s not just breakfast; it’s a texture game. And once you get the gel right, the rest is just fun. I started layering in fresh fruit and crunchy granola, turning a simple bowl into something that looked like it came from a fancy café. It’s become my anchor meal. When the day feels like it’s spinning too fast, I have this jar in the fridge, ready to go. It’s quiet, it’s steady, and it doesn’t ask anything of me but a spoon.
Why You’ll Love This Recipe
More Than Just Soaked Seeds
Let’s be real for a second. Chia pudding has a reputation for being a bit… boring. Like, “health food for people who don’t enjoy food” boring. But this creamy high-fiber overnight chia pudding parfait completely shatters that stereotype. I’ve tested dozens of versions over the years, from the overly sweetened protein-packed ones to the bland, plain-yogurt experiments. This one hits the sweet spot. It’s rich, it’s satisfying, and it actually feels like a treat rather than a chore.
- Quick & Easy Prep: The active time is less than ten minutes. You mix, you wait, you sleep. It is perfect for busy weeknights or lazy Sunday mornings when you want to feel productive without lifting a heavy pan.
- Simple Ingredients: You likely have everything in your kitchen right now. Chia seeds, milk, a sweetener, and whatever fruit is in your fridge. No fancy grocery trips needed for obscure superfoods.
- Perfect for Meal Prep: This recipe is the ultimate grab-and-go solution. Make three jars on Sunday, and you have breakfast sorted for the entire work week. It saves money and reduces food waste.
- Crowd-Pleaser: Even my picky eaters, who usually turn their noses up at “healthy” breakfasts, devour this. The texture is creamy enough to feel indulgent, and the fruit adds a natural sweetness they love.
- Unbelievably Delicious: The combination of the gel-like chia texture with the crunch of nuts and the burst of fresh fruit creates a sensory experience that is next-level comfort food. It’s not just good; it’s the kind of meal that makes you pause and appreciate your morning.
What makes this recipe different is the layering technique. Most people just stir everything together. But by creating distinct layers of pudding, fruit, and crunch, you get a different bite every single time. It’s like eating a dessert in the morning. I use a specific ratio of liquid to seeds that ensures no dry pockets remain, and I add a pinch of salt to balance the sweetness. It’s not just another chia pudding; it’s the one that finally made me convert to the cause.
What Ingredients You Will Need
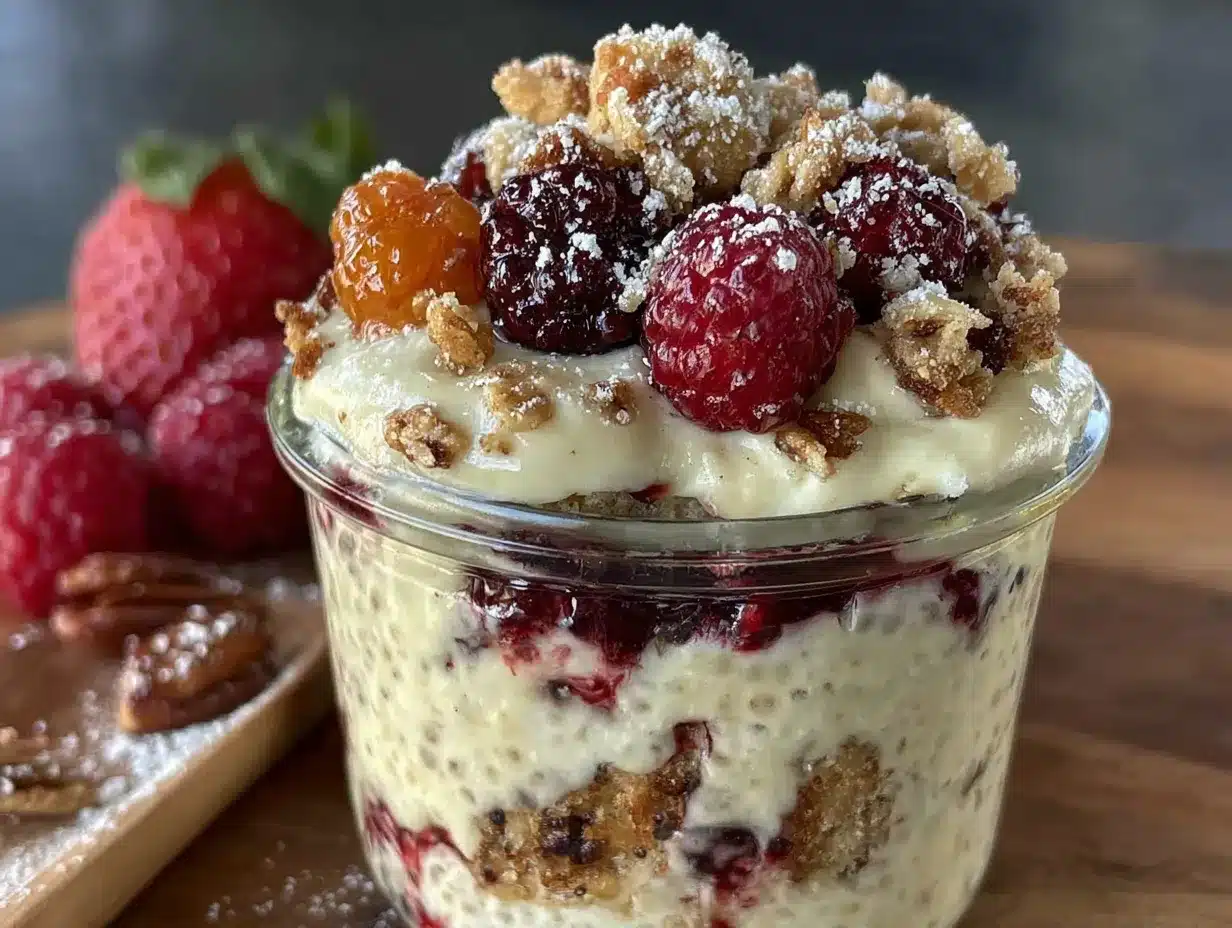
Building the Perfect Base
This recipe uses simple, wholesome ingredients to deliver bold flavor and satisfying texture without the fuss. The magic happens in the interaction between the seeds and the liquid, so quality matters more than quantity here. You don’t need expensive organic everything, but using good basics makes a noticeable difference in the final taste.
- Chia Seeds (1/2 cup): The star of the show. I prefer black chia seeds for their slightly nuttier flavor, but white works just as well. Look for brands like Navitas or Bob’s Red Mill for consistent size and freshness. Fresh seeds gel better; old ones might stay gritty.
- Milk (1 1/2 cups): You can use dairy milk or any plant-based alternative. I recommend full-fat coconut milk for an extra creamy, rich texture, or oat milk for a neutral, smooth base. Almond milk works but can be thinner. If using unsweetened almond milk, you might want to add a touch more sweetener.
- Sweetener (2-3 tbsp): Maple syrup is my go-to because it adds a warm, caramel-like depth that pairs beautifully with fruit. Honey works too, but it can make the texture slightly sticky. For a low-glycemic option, use monk fruit or stevia, but start with less as these are potent.
- Vanilla Extract (1 tsp): Pure vanilla extract is non-negotiable. It ties all the flavors together. Avoid imitation vanilla, which can taste chemical and harsh.
- Salt (1/4 tsp): A pinch of sea salt is crucial. It enhances the sweetness and balances the earthiness of the seeds. Don’t skip this step.
- Fresh Berries (1 cup): Strawberries, blueberries, or raspberries work best. They add acidity and brightness. In summer, use fresh berries. In winter, frozen berries thawed and drained work perfectly fine.
- Granola or Nuts (1/4 cup): For crunch. I like a mix of sliced almonds and walnuts. Toasting them first in a dry pan for two minutes brings out their oils and flavor significantly.
- Optional Add-ins: A spoonful of nut butter (almond or peanut) adds protein and richness. A dash of cinnamon or pumpkin spice adds warmth. Get creative here.
Substitution tip: If you are allergic to nuts, use toasted sunflower seeds or pumpkin seeds for the crunch. For a dairy-free option, stick to coconut or oat milk. The key is to keep the liquid-to-seed ratio consistent, regardless of what milk you choose.
Equipment Needed
Tools for Success
You don’t need a fancy kitchen to make this, but having the right tools makes the process smoother. A few good mason jars (8-12 oz capacity) are essential for the parfait layers. I use wide-mouth jars because they are easier to layer with a spoon. If you don’t have mason jars, any airtight glass container will work.
A small whisk is better than a fork for mixing the chia seeds. It breaks up clumps more effectively, ensuring an even texture. If you only have a fork, just be prepared to whisk vigorously for a minute or two. A small saucepan is helpful if you choose to warm the milk slightly to help the seeds bloom faster, though it’s not strictly necessary.
I also recommend a set of small measuring spoons and a liquid measuring cup. Precision matters here because chia seeds absorb liquid differently depending on the brand. Keep your equipment clean and dry before starting. Moisture in the jars before you add the pudding can affect the setting process. Budget-friendly tip: Thrift stores are great for finding unique glass jars that look beautiful on your counter.
Preparation Method
Step-by-Step Guide to Perfect Pudding
Getting the texture right is the most important part of this recipe. Follow these steps carefully to avoid a runny or grainy result.
- Warm the Milk (Optional but Recommended): Heat your milk in a small saucepan over medium-low heat until it is just warm to the touch, about 100°F (38°C). Do not boil it. This step helps the chia seeds start absorbing liquid immediately. If you skip this, just use room temperature milk, but expect a slightly longer setting time. (Time: 3-5 minutes)
- Whisk the Base: In a medium bowl, combine the warm milk, chia seeds, sweetener, vanilla extract, and salt. Whisk vigorously for about one minute. You want to see no dry clumps of seeds at the bottom. If you see clumps, keep whisking. This is the most critical step for a smooth texture. (Time: 1 minute)
- Let it Bloom: Let the mixture sit at room temperature for 15-20 minutes. Stir it again after 10 minutes to prevent the seeds from sinking to the bottom and forming a hard layer. You’ll notice the mixture starting to thicken slightly. (Time: 20 minutes)
- Refrigerate: Pour the mixture into your prepared mason jars, filling them about 1/3 full. Cover tightly with lids or plastic wrap. Refrigerate for at least 4 hours, or ideally overnight (8-12 hours). The seeds will expand and create a gel-like pudding. (Time: 4-12 hours)
- Prepare the Toppings: While the pudding sets, wash and slice your fruit. If using nuts or granola, toast them in a dry skillet over medium heat for 2-3 minutes until fragrant. Set aside to cool. (Time: 5-10 minutes)
- Layer the Parfait: Take a jar of set chia pudding. If it looks too thick, stir in a splash of milk to loosen it. Add a layer of pudding, then a layer of fruit, then a layer of granola/nuts. Repeat until the jar is full, ending with a decorative topping of fruit or seeds. (Time: 5 minutes)
- Serve: Enjoy immediately. The crunch of the granola is best when fresh, so don’t layer it too far in advance if you want maximum texture contrast. (Time: 0 minutes)
Troubleshooting tip: If your pudding is too thick, add more milk, one tablespoon at a time, and stir. If it’s too thin, add more chia seeds and let it sit for another hour.
Cooking Tips & Techniques
Mastery Through Repetition
I learned the hard way that not all chia seeds are created equal. Some brands absorb more liquid than others. If you switch brands, you may need to adjust the milk ratio slightly. Always taste the mixture before refrigerating. If it’s not sweet enough now, it won’t be sweet enough later. The cold temperature dulls our perception of sweetness, so err on the side of slightly sweeter.
Another common mistake is not stirring the mixture after the initial mix. If you don’t stir it after 10 minutes, the seeds sink to the bottom and form a hard, unappetizing clump. Give it a quick stir halfway through the blooming phase. Also, using warm milk isn’t just a trick; it actually helps the mucilage inside the seeds release faster, leading to a creamier texture in less time. If you’re in a rush, this is the hack to use.
Multitasking tip: While the pudding is in the fridge, you can prep your fruit and toast your nuts. This way, when you wake up, everything is ready to assemble. It feels like magic to have a restaurant-quality breakfast ready in five minutes. Consistency comes from measuring your ingredients accurately. Use a scale for best results, but volume measurements work fine if you are consistent.
Variations & Adaptations
Make It Your Own
One of the best things about this creamy high-fiber overnight chia pudding parfait is its versatility. Here are a few variations I love:
- Pumpkin Spice: Add 1 tsp pumpkin pie spice and 2 tbsp canned pumpkin puree to the base. Use apple slices and pecans for toppings. Perfect for fall.
- Tropical: Use coconut milk as the base. Add mango and pineapple chunks. Top with toasted coconut flakes and macadamia nuts.
- Berry Bliss: Use almond milk and add a handful of mixed berries to the base mixture itself. Top with fresh raspberries and a drizzle of honey.
- Protein Power: Stir in one scoop of vanilla protein powder into the base mixture. You may need to add an extra tablespoon of milk as protein powder absorbs liquid. Top with peanut butter slices.
- Gluten-Free: Ensure your granola is certified gluten-free, or swap it for toasted quinoa flakes or gluten-free oats.
I once tried making this with almond butter instead of milk, and it was way too thick. Stick to liquid milk for the base. If you want nut butter flavor, swirl it in after the pudding has set. It’s all about balance.
Serving & Storage Suggestions
Keeping It Fresh
These parfaits are best served cold, straight from the fridge. The contrast between the cool, creamy pudding and the crunchy toppings is what makes it special. If you are meal prepping, assemble the jars on Sunday, but keep the granola separate in a small container. Add the crunch just before eating to maintain the texture. This is a crucial tip for the perfect bite.
Store the assembled parfaits in the refrigerator for up to 5 days. The chia pudding will continue to thicken over time, so you may need to add a splash of milk if you plan to keep it for more than 2 days. Do not freeze the chia pudding, as the texture will become grainy and unpleasant upon thawing. If you want to freeze components, freeze the fruit separately.
Complementary drinks: This pairs wonderfully with a hot black coffee or a green tea. If you’re having guests, serve it with a side of fresh orange juice or a light fruit smoothie. The flavors develop nicely over time, with the fruit juices slightly infusing the pudding, creating a more complex taste profile on day two.
Nutritional Information & Benefits
Fuel for Your Body
This creamy high-fiber overnight chia pudding parfait is a nutritional powerhouse. Chia seeds are packed with omega-3 fatty acids, which are great for heart health and reducing inflammation. They are also one of the best plant-based sources of fiber, aiding in digestion and keeping you full for hours. A typical serving contains about 10-15 grams of fiber, which is a significant portion of your daily recommendation.
The protein content varies depending on the milk and add-ins you choose. Using soy milk or adding protein powder can boost the protein content to 15-20 grams per jar. This makes it a balanced meal that stabilizes blood sugar levels, preventing the mid-morning crash. It is naturally gluten-free and can be made dairy-free, vegan, and nut-free with simple substitutions. For those watching their calorie intake, be mindful of the sweetener and nut portions, as these are calorie-dense. But overall, this is a nutrient-dense food that supports long-term health.
Conclusion
My Morning Anchor
I hope this guide helps you create your own version of the creamy high-fiber overnight chia pudding parfait. It’s become such an integral part of my routine that I can’t imagine starting the day without it. The simplicity of the prep combined with the luxury of the taste makes it a winner every single time. I encourage you to experiment with different fruits and spices to find your favorite combination. Maybe you’ll discover a new favorite, just like I did with the warm milk method.
Please share your creations with me! I love seeing how you adapt this recipe. Leave a comment below with your favorite topping combo or any tips you’ve discovered. If you try this recipe, don’t forget to rate it and share it with a friend who needs a healthy breakfast idea. Here’s to making mornings easier and tastier, one jar at a time.
FAQs
Common Questions About Chia Pudding
Can I use white chia seeds instead of black?
Yes, absolutely. White chia seeds work exactly the same way and have a slightly milder flavor. The texture and nutritional profile are identical. Use them in the same ratio.
How long does chia pudding last in the fridge?
It stays fresh for up to 5 days when stored in an airtight container. The texture may thicken over time, so add a splash of milk before eating if needed.
Can I make this recipe ahead of time for meal prep?
Yes, this is perfect for meal prep. Prepare 3-4 jars on Sunday, and they will be ready to grab throughout the week. Just keep crunchy toppings separate until serving.
What is the best milk to use for chia pudding?
Any milk works, but full-fat coconut milk and oat milk provide the creamiest texture. Almond milk is lighter and works well if you prefer a less rich pudding.
Can I sweeten this recipe with artificial sweeteners?
Yes, you can use stevia, monk fruit, or erythritol. Start with a small amount as these are much sweeter than sugar. Taste and adjust as needed.
Pin This Recipe!
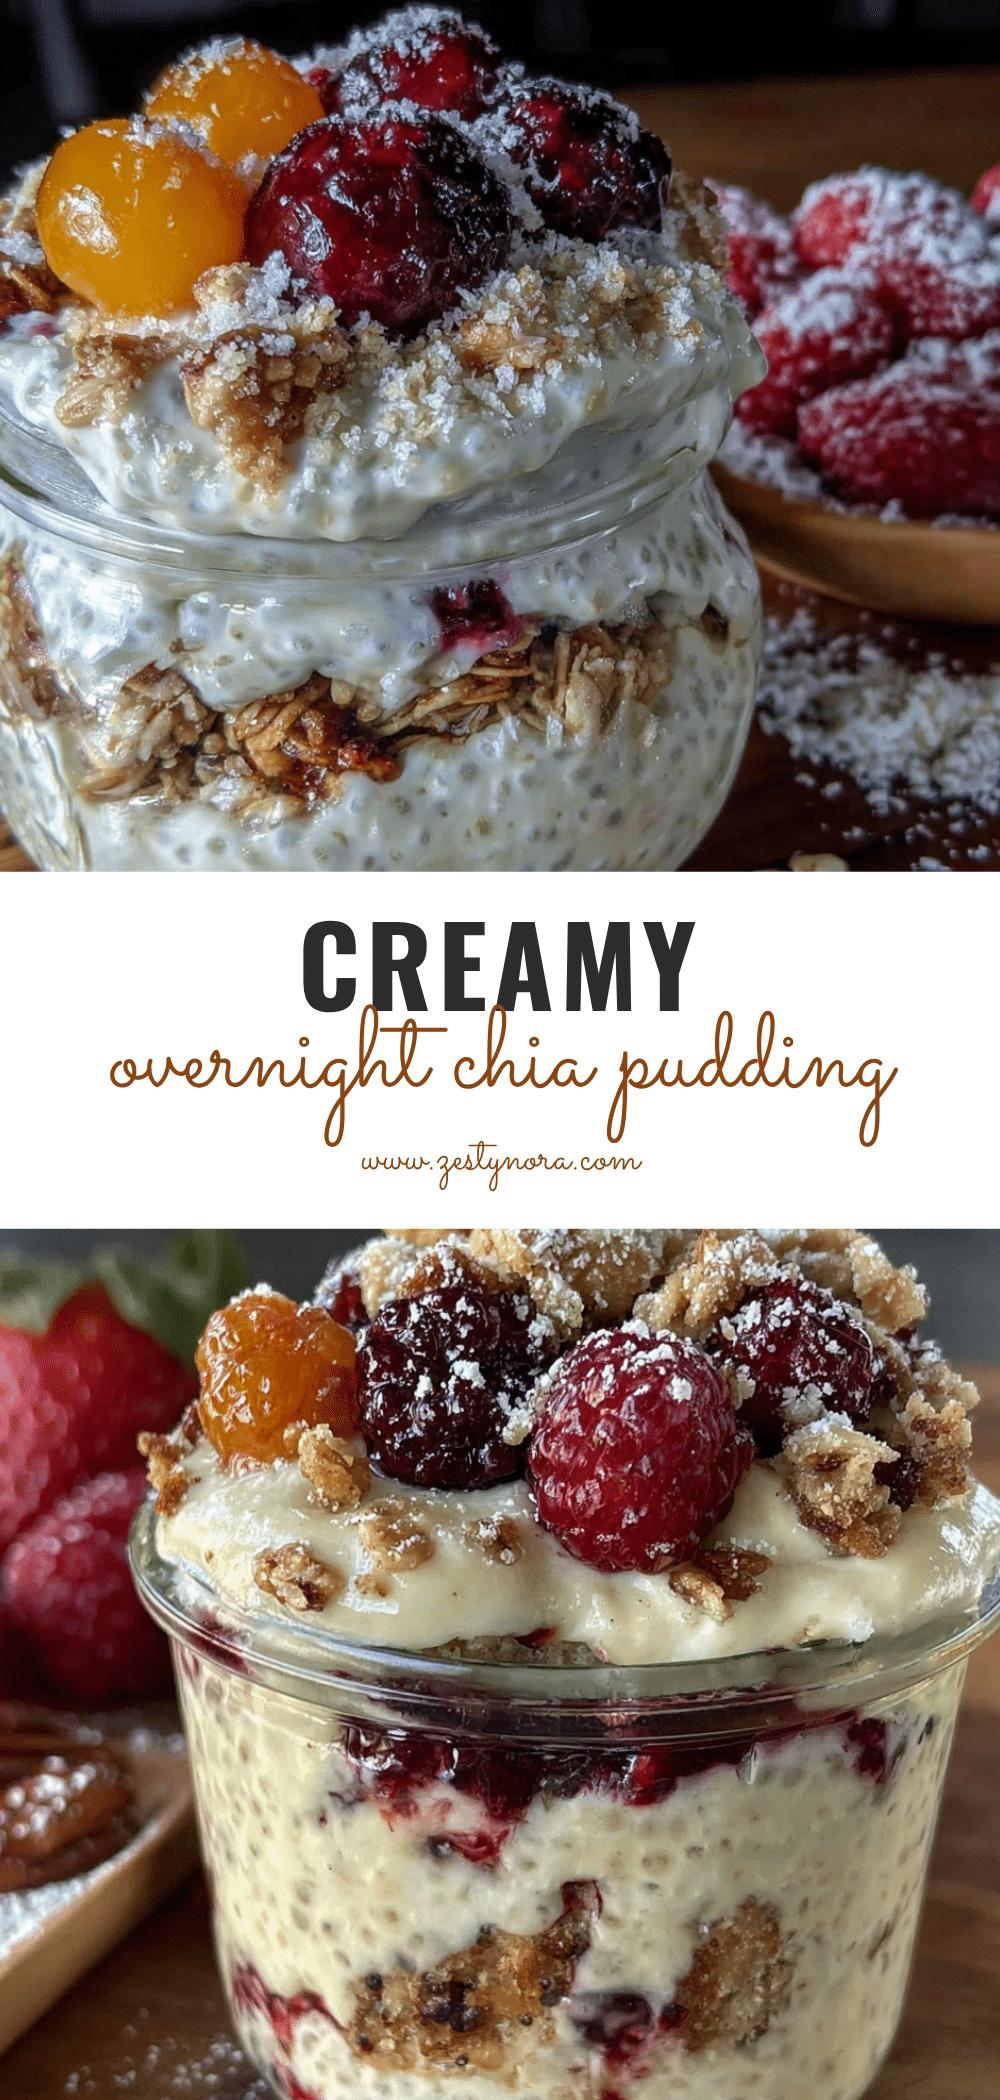
Creamy High-Fiber Overnight Chia Pudding Parfait
A smooth, custard-like overnight chia pudding parfait that is rich, satisfying, and perfect for busy mornings. Layered with fresh fruit and crunchy granola, this high-fiber breakfast requires minimal active prep time.
- Prep Time: 10 minutes
- Cook Time: 5 minutes
- Total Time: 4 hours 15 minutes
- Yield: 2 servings 1x
- Category: Breakfast
- Cuisine: American
Ingredients
- 1/2 cup chia seeds (black or white)
- 1 1/2 cups milk (dairy, coconut, oat, or almond)
- 2–3 tbsp sweetener (maple syrup, honey, or monk fruit)
- 1 tsp vanilla extract
- 1/4 tsp sea salt
- 1 cup fresh berries (strawberries, blueberries, or raspberries)
- 1/4 cup granola or nuts (sliced almonds, walnuts, or sunflower seeds)
- Optional: Nut butter, cinnamon, or pumpkin spice
Instructions
- Warm the milk in a small saucepan over medium-low heat until just warm (about 100°F/38°C), then remove from heat.
- In a medium bowl, whisk together the warm milk, chia seeds, sweetener, vanilla extract, and salt vigorously for one minute to prevent clumps.
- Let the mixture sit at room temperature for 15-20 minutes, stirring again after 10 minutes to ensure even thickening.
- Pour the mixture into mason jars, filling them about 1/3 full. Cover tightly and refrigerate for at least 4 hours, or ideally overnight (8-12 hours).
- While the pudding sets, wash and slice the fruit. Toast the granola or nuts in a dry skillet for 2-3 minutes until fragrant, then set aside to cool.
- Once the pudding has set, stir in a splash of milk if it is too thick. Layer the pudding, fruit, and granola/nuts in the jars, ending with a decorative topping.
- Serve immediately to enjoy the contrast between the creamy pudding and crunchy toppings.
Notes
Use warm milk to help chia seeds bloom faster for a creamier texture. Stir the mixture after 10 minutes of blooming to prevent seeds from sinking. If meal prepping, keep granola separate until serving to maintain crunch. Do not freeze the pudding as it becomes grainy upon thawing.
Nutrition
- Serving Size: 1 jar
- Calories: 350
- Sugar: 15
- Sodium: 150
- Fat: 18
- Saturated Fat: 3
- Carbohydrates: 40
- Fiber: 12
- Protein: 10
Keywords: chia pudding, overnight oats, healthy breakfast, high fiber, meal prep, vegan breakfast, gluten-free, parfait, easy recipe