“I just want something that tastes like a hug.” That’s what my sister said when she called me on a chilly October evening, the kind where the wind rattles the windows and the only sensible thing to do is bake. She didn’t ask for a recipe. She just described a feeling—warm, sweet, a little bit buttery, with something soft underneath and something crunchy on top. And honestly, I knew exactly what she meant.
I hung up and stared at the bowl of apples sitting on my counter. They were a little past their prime, the kind of apples you buy with big plans for snacking and then forget about. But that’s the thing about a Cozy Cinnamon Apple Crisp with Oat Crumble—it doesn’t need perfect apples. It needs a little patience, a lot of cinnamon, and that oat topping that gets all golden and craggy in the oven.
This isn’t a fussy dessert. There’s no pastry to roll, no lattice to weave, no worrying about a soggy bottom. It’s the kind of recipe you can throw together while you’re still in your sweats, and it somehow makes your whole kitchen smell like a fall candle, but better. Real. Like apples bubbling away with brown sugar and a whisper of nutmeg.
I’ve made this crisp more times than I can count, tweaking the crumble ratio until it was just right—not too sandy, not too clumpy, with oats that toast up instead of turning chewy. And every single time, it works. It’s the dessert I bring to potlucks when I want to hear people sigh after the first bite. It’s the one I make on a Tuesday night just because.
So if you’re looking for something that feels like a warm blanket on a cold day, you’re in the right place. Let’s make a crisp that tastes like home.
Why You’ll Love This Recipe
Let me tell you why this particular crisp has earned a permanent spot in my fall rotation. It’s not just because it’s delicious—though it absolutely is—but because it checks every single box I look for in a dessert.
- Quick & Easy : From start to oven in about 15 minutes. No mixer required, no chilling time, no complicated steps. Just chop, mix, and bake.
- Simple Ingredients : You probably have most of these in your pantry right now. Apples, oats, flour, butter, sugar, cinnamon. That’s the backbone of this whole thing.
- Perfect for Fall Gatherings : Whether it’s Thanksgiving, a cozy dinner party, or just a quiet Sunday, this crisp fits right in. It’s rustic enough for a casual meal and impressive enough for company.
- Crowd-Pleaser : I’ve served this to kids, grandparents, and everyone in between. It disappears every single time. People go back for seconds, and sometimes thirds.
- Unbelievably Delicious : The apples get tender and jammy, swimming in a cinnamon-spiced syrup. The oat crumble turns deeply golden and buttery, with that irresistible contrast of soft fruit and crunchy topping.
What makes this version different? It’s the crumble, honestly. I spent weeks testing ratios—too much butter and it turns into a greasy mess, too little and it’s dry. This one hits that sweet spot where the oats toast perfectly and the brown sugar caramelizes just enough to create little clusters of crunchy goodness. Plus, I add a pinch of salt to the topping, which sounds weird but trust me, it makes the sweetness sing.
This is the kind of dessert that makes you close your eyes after the first bite. It’s comfort food at its finest—simple, honest, and deeply satisfying. And the best part? You don’t need any special skills to pull it off.
What Ingredients You Will Need
This recipe uses simple, honest ingredients that work together to create something truly special. Most of these are pantry staples, which is exactly what I love about it. Here’s what you’ll need and why each one matters.
For the Apple Filling
- 6-7 medium apples, peeled, cored, and sliced (about 6 cups) — I recommend a mix of sweet and tart varieties like Honeycrisp, Granny Smith, or Braeburn. The tart ones hold their shape better and balance the sweetness.
- 1/3 cup granulated sugar — Adds sweetness and helps create that syrupy texture as the apples break down.
- 1/4 cup light brown sugar, packed — Adds depth and a hint of molasses flavor that pairs beautifully with cinnamon.
- 1 tablespoon lemon juice — Brightens the flavors and prevents the apples from browning too much.
- 2 tablespoons all-purpose flour — Helps thicken the juices so the filling isn’t watery.
- 1 1/2 teaspoons ground cinnamon — The star of the show. Don’t skimp here.
- 1/4 teaspoon ground nutmeg — Adds warmth and complexity. Freshly grated is best if you have it.
- 1/4 teaspoon salt — Balances the sweetness and enhances all the flavors.
For the Oat Crumble Topping
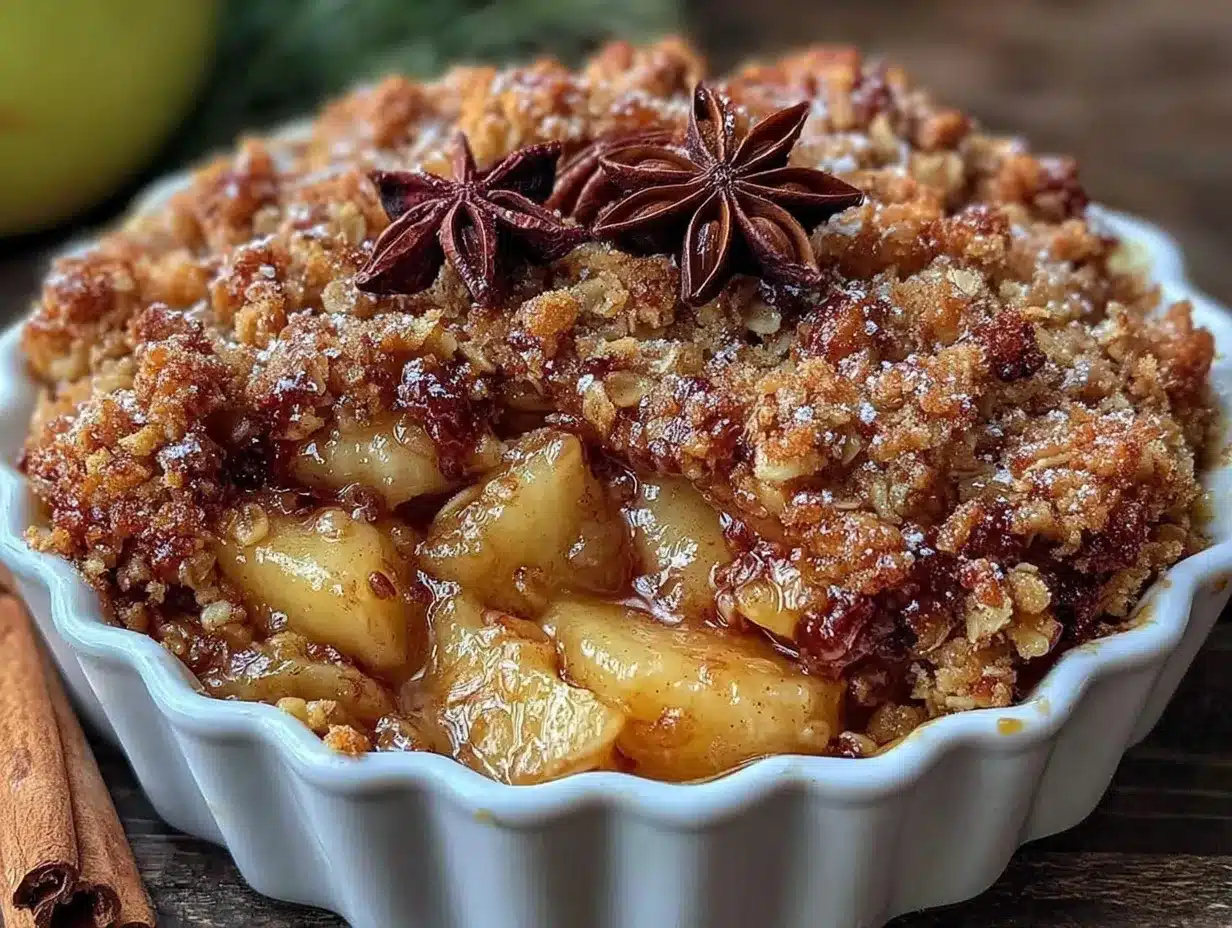
- 1 cup old-fashioned rolled oats — Not quick oats! The old-fashioned ones give you that perfect chewy-crunchy texture. I prefer Bob’s Red Mill for consistent results.
- 3/4 cup all-purpose flour — Provides structure to the crumble.
- 1/2 cup light brown sugar, packed — For sweetness and that caramelized edge.
- 1/4 cup granulated sugar — Helps with browning and texture.
- 1/2 teaspoon ground cinnamon — Because you can never have too much cinnamon.
- 1/4 teaspoon salt — Crucial for balancing the sweetness. Don’t skip it.
- 1/2 cup unsalted butter, cold and cut into small cubes — This is what makes the crumble rich and flaky. Use good quality butter here—it makes a difference.
- 1 teaspoon vanilla extract — Adds warmth and rounds out the flavors.
Ingredient Selection Tips: For the apples, look for firm ones without any soft spots. If you’re using mostly sweet apples like Fuji or Gala, reduce the granulated sugar by a tablespoon. For the butter, make sure it’s cold—this is key for a crumbly topping. If you only have salted butter, just reduce the added salt to 1/8 teaspoon.
Substitution Guidance: Gluten-free? Use a 1:1 gluten-free flour blend in place of the all-purpose flour. The oats should be certified gluten-free as well. Dairy-free? Cold coconut oil or a plant-based butter works surprisingly well in the crumble. For a lower-sugar version, reduce both sugars by a quarter and add an extra tablespoon of flour to the filling.
Equipment Needed
You don’t need a fancy kitchen to make this crisp, which is one of the reasons I love it. Here’s what you’ll need:
- 9×13-inch baking dish — This is the perfect size for a generous crisp. An 8×8 or 9×9 will also work, but you’ll need to bake it a bit longer since the filling will be deeper.
- Large mixing bowl — For the apple filling.
- Medium mixing bowl — For the crumble topping.
- Sharp chef’s knife — For peeling and slicing apples. A good knife makes this job so much faster.
- Vegetable peeler — Unless you’re a pro with a paring knife, a peeler is your friend.
- Pastry cutter or two forks — For cutting the butter into the dry ingredients. You can also use your fingertips, but work quickly so the butter stays cold.
- Measuring cups and spoons — Accuracy matters, especially for the flour and sugar.
- Baking sheet — Place this under your baking dish to catch any bubbly overflow. Trust me on this one.
I’ve made this crisp in a cast iron skillet before, and it works beautifully—the even heat distribution gives you perfectly cooked apples and a gorgeous golden topping. If you have a 10-inch skillet, go for it. Just keep an eye on the baking time since cast iron retains heat differently.
For the pastry cutter, I’ve used the same one for years—it’s a simple metal one from a kitchen supply store. But honestly, your hands work just fine. The key is to work quickly so the butter doesn’t warm up too much.
Preparation Method
Alright, let’s get to the good part. This recipe comes together in layers, and each step builds on the last. Take your time, enjoy the process, and don’t rush the crumble.
Step 1: Preheat and Prep
Preheat your oven to 350°F (175°C). Grease your 9×13-inch baking dish with a little butter or non-stick spray. Place a baking sheet on the rack below to catch any drips—because this crisp gets bubbly and you don’t want to deal with a smoky oven.
Step 2: Make the Apple Filling
In your large mixing bowl, combine the sliced apples, granulated sugar, brown sugar, lemon juice, flour, cinnamon, nutmeg, and salt. Use your hands or a large spoon to toss everything together until the apples are evenly coated. The flour might look a little dusty at first, but it will dissolve as the apples release their juices during baking. Let this sit for about 5 minutes while you make the topping—this gives the apples time to start releasing their liquid.
Sensory cue: The apples should look glossy and smell intensely of cinnamon. You might notice a little liquid pooling at the bottom of the bowl—that’s a good sign.
Step 3: Make the Oat Crumble
In your medium mixing bowl, whisk together the oats, flour, brown sugar, granulated sugar, cinnamon, and salt. Add the cold butter cubes and vanilla extract. Now, using your pastry cutter, two forks, or your fingertips, work the butter into the dry ingredients until the mixture resembles coarse meal with some pea-sized butter pieces remaining. You want some larger clumps—those will turn into those irresistible crunchy bits.
Personal tip: Don’t overwork the crumble. If the butter gets too warm, the topping will turn into a paste instead of staying crumbly. If your kitchen is warm, pop the bowl in the fridge for 5 minutes before assembling.
Step 4: Assemble the Crisp
Pour the apple filling into your prepared baking dish and spread it into an even layer. Now, take handfuls of the crumble topping and squeeze them gently to form clumps, then drop them evenly over the apples. Don’t press the topping down—you want it to sit loosely on top so it bakes up light and crunchy.
Warming note: If the crumble feels too soft or sticky at this point, pop it in the fridge for 10 minutes before baking. Cold crumble = better texture.
Step 5: Bake
Place the dish on the preheated baking sheet and bake for 40-45 minutes, or until the filling is bubbly and the topping is deep golden brown. The apples should be tender when pierced with a fork. If the topping is browning too quickly but the apples aren’t done, loosely tent the dish with foil for the last 10 minutes.
Sensory cue: Your kitchen will smell like a fall festival. The topping should look browned and slightly caramelized, and you should see bubbles of apple juice creeping up around the edges.
Step 6: Cool and Serve
Let the crisp cool on a wire rack for at least 15 minutes before serving. This is crucial—the filling needs time to set up, or it will be runny. Serve warm, preferably with a scoop of vanilla ice cream or a drizzle of heavy cream.
Troubleshooting tip: If your crisp seems too watery after baking, you might have used very juicy apples. Next time, add an extra tablespoon of flour to the filling. If it’s too thick, your apples were probably on the drier side—add a splash of apple cider or water next time.
Cooking Tips & Techniques
Over the years, I’ve made every mistake you can imagine with apple crisp. I’ve used the wrong apples (too mushy), forgotten the salt (flat and boring), and overbaked the topping until it was practically charcoal. But those failures taught me a few things worth sharing.
Apple variety matters more than you think. I learned this the hard way when I used only Red Delicious apples once—they turned into applesauce. A mix of firm tart apples (Granny Smith) and sweet ones (Honeycrisp) gives you the best texture and flavor. The tartness cuts through the sweetness beautifully.
Don’t skip the lemon juice. It’s not just for flavor—it prevents the apples from oxidizing and turning brown. Plus, that little bit of acidity makes the cinnamon and nutmeg pop.
Cold butter is non-negotiable. I know it’s tempting to use room temperature butter because it’s easier to mix, but warm butter will give you a dense, greasy topping instead of a light, crumbly one. Cut your butter into cubes and pop them in the freezer for 10 minutes before you start.
Let it rest. I know you want to dig in right away—I do too. But if you serve it too soon, the filling will run all over the plate like a sad puddle. Fifteen minutes of resting time makes a world of difference. The juices thicken, the topping sets, and every bite is perfectly cohesive.
Multitasking tip: While the crisp is baking, make a batch of cozy apple cider donut loaf cake for another fall treat. Or, if you’re planning a full meal, start on a creamy roasted butternut squash soup to serve alongside.
Variations & Adaptations
One of the best things about this crisp is how adaptable it is. Here are some of my favorite variations, all tested and approved.
Gluten-Free Version
Swap the all-purpose flour with a 1:1 gluten-free baking blend. Make sure your oats are certified gluten-free. The texture will be slightly more delicate, but the flavor is just as good. I’ve used King Arthur’s Measure for Measure blend with great results.
Vegan Version
Use cold coconut oil or a high-quality vegan butter in the crumble. For the filling, everything is already plant-based. Serve with coconut ice cream for a fully vegan dessert that doesn’t feel like a compromise.
Apple-Pear Crisp
Replace half the apples with firm pears like Bosc or Anjou. Pears add a lovely floral sweetness and a slightly different texture. Reduce the sugar by a tablespoon since pears are naturally sweeter than tart apples.
Maple-Bourbon Twist
Replace the granulated sugar in the filling with maple syrup (reduce the flour by a tablespoon to compensate) and add 2 tablespoons of bourbon. The bourbon adds warmth and depth, and the maple pairs beautifully with the apples. This is my go-to for adult gatherings.
Berry-Apple Crisp
Toss a cup of fresh or frozen cranberries, blueberries, or raspberries into the apple mixture. The tart berries contrast beautifully with the sweet apples and add a pop of color. If using frozen berries, add them directly—no need to thaw.
Slow Cooker Method
Layer the apples and crumble in a slow cooker and cook on low for 3-4 hours or high for 1.5-2 hours. The topping won’t get as crispy, but the apples will be incredibly tender. For a crunchier topping, transfer to a baking dish and broil for 2-3 minutes before serving.
Serving & Storage Suggestions
This crisp is best served warm, straight from the oven, with something cold and creamy to balance the warmth. A scoop of vanilla bean ice cream is the classic choice—the melting cream mingles with the cinnamon syrup and it’s pure magic. But I’ve also served it with whipped cream, crème fraîche, or a drizzle of heavy cream, and every version is wonderful.
For a truly decadent presentation, serve it in a shallow bowl with a generous scoop of ice cream, a sprinkle of flaky sea salt, and a drizzle of caramel sauce. The salt brings out all the flavors and makes the sweetness more complex.
Storage: Cover the cooled crisp tightly with foil or plastic wrap and store in the refrigerator for up to 4 days. The topping will soften over time, but the flavor actually gets better as the apples and spices meld together.
Reheating: The best way to reheat is in a 350°F oven for 10-15 minutes, which helps re-crisp the topping. You can also microwave individual portions for about 30 seconds, but the topping will be softer. If you’re reheating from frozen, thaw overnight in the fridge and then reheat in the oven.
Freezing: You can freeze the unbaked crisp for up to 3 months. Assemble it in a freezer-safe dish, wrap tightly with plastic wrap and foil, and freeze. Bake directly from frozen, adding about 15-20 minutes to the baking time. Baked crisp can also be frozen, but the texture of the topping will be softer after thawing.
Flavor development: Here’s a little secret—this crisp is even better the next day. The apples continue to absorb the syrup, and the spices mellow into something deeply comforting. If you can resist eating it all in one sitting, save some for breakfast. It’s amazing with a dollop of Greek yogurt.
Nutritional Information & Benefits
While this is definitely a treat, it’s made with whole-food ingredients that offer some surprising benefits. Here’s a rough breakdown per serving (based on 8 servings):
- Calories: Approximately 380-420
- Fat: 14g
- Carbohydrates: 65g
- Fiber: 6g
- Sugar: 42g
- Protein: 4g
Health Highlights: Apples are packed with fiber and vitamin C, and the pectin in them supports gut health. Oats are a great source of soluble fiber, which helps with heart health and keeps you feeling full. Cinnamon has anti-inflammatory properties and may help regulate blood sugar. So while this isn’t a health food, it’s certainly not empty calories either.
Dietary Considerations: This recipe can easily be made gluten-free, vegan, or lower in sugar with the substitutions mentioned above. It contains dairy and gluten in its standard form, but both can be adapted. The apples provide natural sweetness, so you can reduce the added sugar if you prefer a less sweet dessert.
I love that this crisp feels indulgent but is made with ingredients I feel good about eating. It’s the kind of dessert that satisfies a craving without leaving you feeling weighed down.
Conclusion
This Cozy Cinnamon Apple Crisp with Oat Crumble is more than just a dessert—it’s a feeling. It’s the smell of cinnamon filling your kitchen on a cold afternoon. It’s the sound of that first spoonful breaking through the crunchy topping into the soft, warm apples below. It’s the kind of recipe that makes people pause, close their eyes, and say “mmm” without even thinking about it.
I’ve made this crisp for holiday dinners, casual weeknights, and everything in between. It never fails to bring a little warmth and joy to the table. And the best part? It’s forgiving. You can tweak the apples, adjust the spices, swap in whatever fruit you have—and it will still be delicious.
I’d love to hear how yours turns out. Did you try a variation? Add a secret ingredient? Serve it with something unexpected? Drop a comment below and let me know. And if you’re looking for more cozy fall recipes, don’t miss my creamy pumpkin spice cake pops or my brown butter salted caramel apple blondies for even more apple-inspired goodness.
Until next time, happy baking—and don’t forget the ice cream.
Frequently Asked Questions
Can I use quick oats instead of old-fashioned oats?
You can, but the texture won’t be the same. Quick oats are more finely chopped and will absorb more liquid, resulting in a softer, less crunchy topping. If that’s all you have, it will still taste good, but old-fashioned oats are really the way to go for that perfect texture.
How do I prevent a soggy bottom?
This is a common concern, but honestly, apple crisp is supposed to be juicy. The key is letting it rest for 15 minutes after baking so the juices thicken. Also, make sure your topping isn’t packed down too tightly—it needs to sit loosely on top so it can crisp up. If your apples are very juicy, add an extra tablespoon of flour to the filling.
Can I make this ahead of time?
Absolutely! You can assemble the crisp up to 24 hours in advance and keep it covered in the fridge. Add about 10 minutes to the baking time since you’re starting from cold. You can also make the crumble topping separately and store it in the fridge for up to a week—just bring it to room temperature before using.
What’s the best apple for apple crisp?
I recommend a mix of Granny Smith (for tartness and structure) and Honeycrisp (for sweetness and juiciness). Braeburn, Pink Lady, and Jonagold are also excellent choices. Avoid Red Delicious, Gala, and Fuji if you’re using them alone—they tend to break down too much. A good rule of thumb is to use apples that are firm and hold their shape when baked.
Can I freeze apple crisp?
Yes! You can freeze it either before or after baking. To freeze unbaked, assemble the crisp in a freezer-safe dish, wrap tightly in plastic wrap and foil, and freeze for up to 3 months. Bake from frozen, adding 15-20 minutes to the baking time. To freeze baked crisp, let it cool completely, then wrap and freeze. Reheat in a 350°F oven until warmed through—the topping will be softer, but the flavor will still be wonderful.
Pin This Recipe!
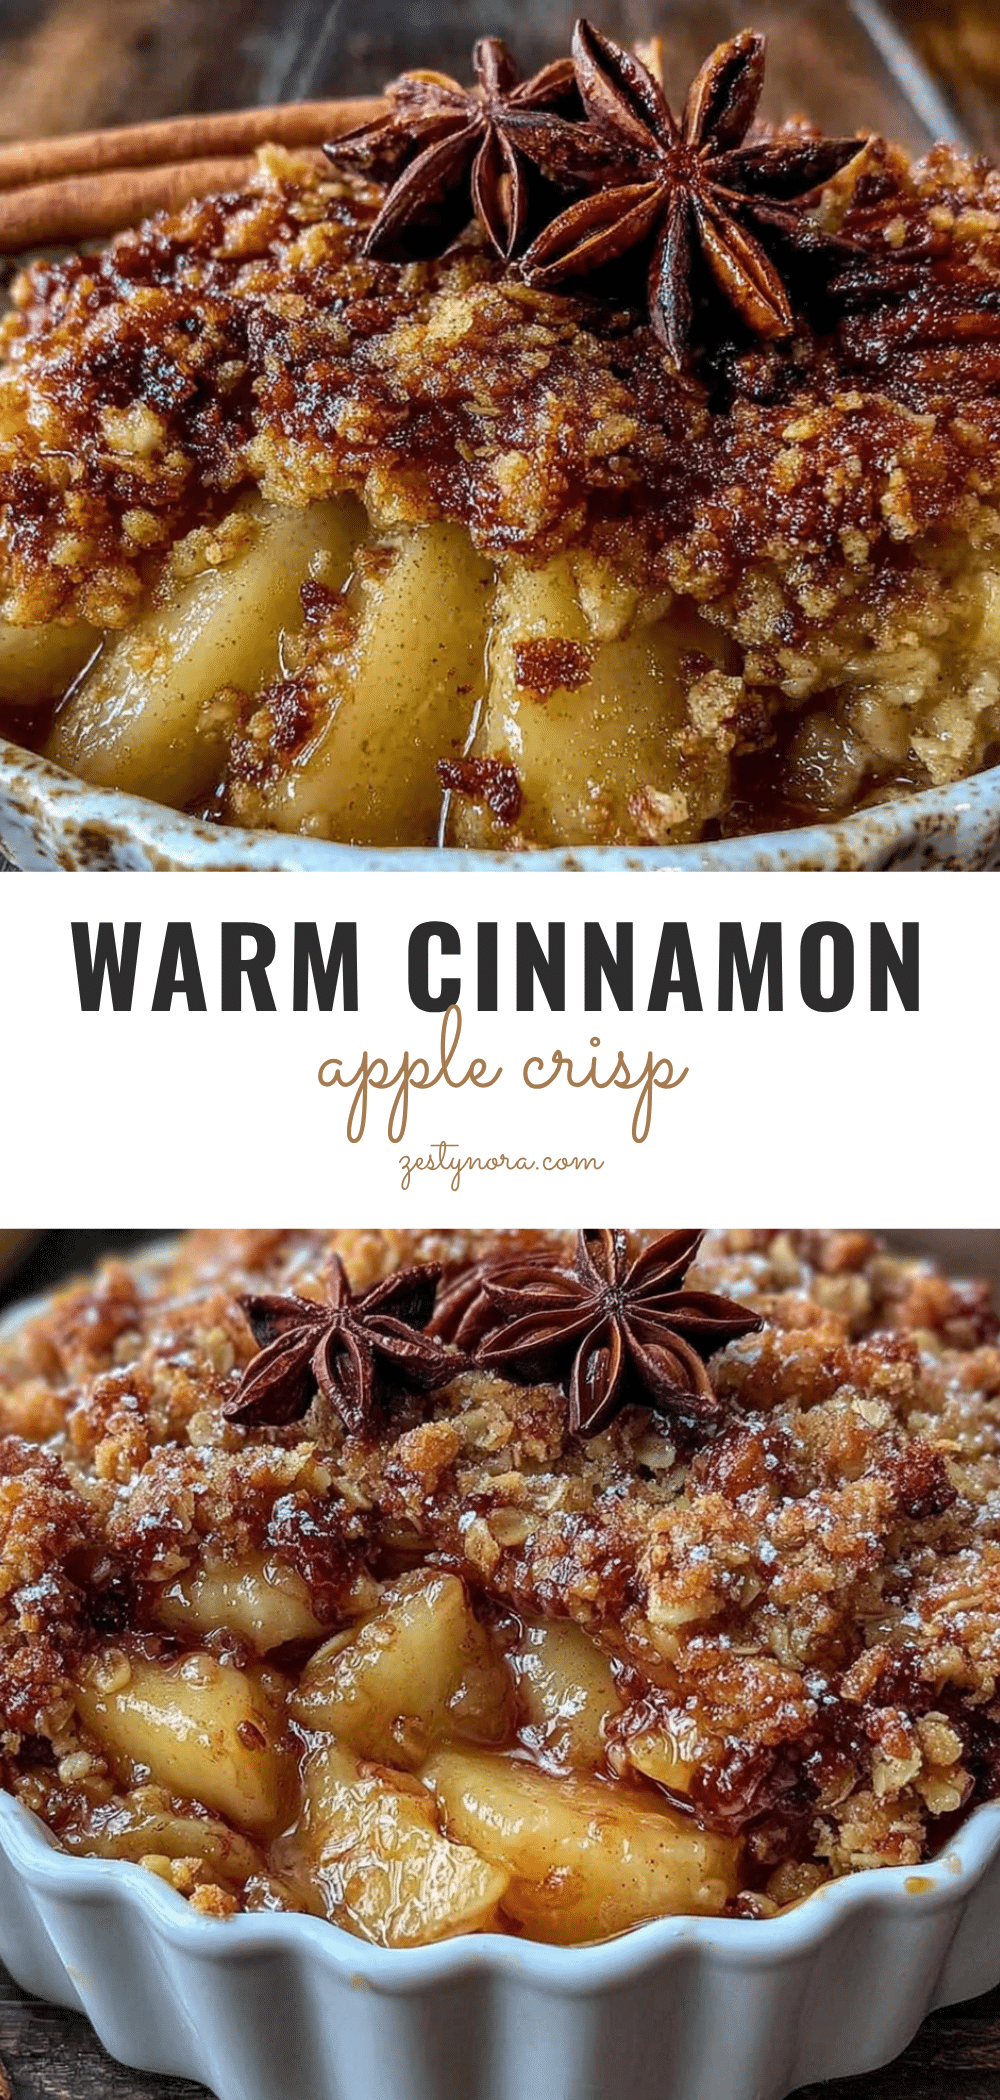
Cozy Cinnamon Apple Crisp with Oat Crumble (Easy Fall Dessert)

This Cozy Cinnamon Apple Crisp with Oat Crumble is a warm, comforting fall dessert featuring tender cinnamon-spiced apples and a golden, buttery oat crumble topping. It’s quick to assemble with simple ingredients and perfect for any gathering.
- Prep Time: 15 minutes
- Cook Time: 45 minutes
- Total Time: 1 hour
- Yield: 8 servings 1x
- Category: Dessert
- Cuisine: American
Ingredients
- 6–7 medium apples, peeled, cored, and sliced (about 6 cups)
- 1/3 cup granulated sugar
- 1/4 cup light brown sugar, packed
- 1 tablespoon lemon juice
- 2 tablespoons all-purpose flour
- 1 1/2 teaspoons ground cinnamon
- 1/4 teaspoon ground nutmeg
- 1/4 teaspoon salt
- 1 cup old-fashioned rolled oats
- 3/4 cup all-purpose flour
- 1/2 cup light brown sugar, packed
- 1/4 cup granulated sugar
- 1/2 teaspoon ground cinnamon
- 1/4 teaspoon salt
- 1/2 cup unsalted butter, cold and cut into small cubes
- 1 teaspoon vanilla extract
Instructions
- Preheat your oven to 350°F (175°C). Grease a 9×13-inch baking dish with butter or non-stick spray. Place a baking sheet on the rack below to catch any drips.
- In a large mixing bowl, combine the sliced apples, granulated sugar, brown sugar, lemon juice, flour, cinnamon, nutmeg, and salt. Toss until the apples are evenly coated. Let sit for about 5 minutes.
- In a medium mixing bowl, whisk together the oats, flour, brown sugar, granulated sugar, cinnamon, and salt. Add the cold butter cubes and vanilla extract. Using a pastry cutter, two forks, or your fingertips, work the butter into the dry ingredients until the mixture resembles coarse meal with some pea-sized butter pieces remaining.
- Pour the apple filling into the prepared baking dish and spread into an even layer. Take handfuls of the crumble topping, squeeze gently to form clumps, and drop them evenly over the apples. Do not press the topping down.
- Place the dish on the preheated baking sheet and bake for 40-45 minutes, or until the filling is bubbly and the topping is deep golden brown. If the topping browns too quickly, loosely tent with foil for the last 10 minutes.
- Let the crisp cool on a wire rack for at least 15 minutes before serving. Serve warm, preferably with vanilla ice cream or a drizzle of heavy cream.
Notes
For best results, use a mix of firm tart apples (like Granny Smith) and sweet apples (like Honeycrisp). Keep the butter cold for a crumbly topping. Let the crisp rest for 15 minutes after baking to allow the juices to thicken. The crisp can be stored in the refrigerator for up to 4 days and reheated in a 350°F oven for 10-15 minutes.
Nutrition
- Serving Size: 1 serving
- Calories: 400
- Sugar: 42
- Sodium: 200
- Fat: 14
- Saturated Fat: 8
- Carbohydrates: 65
- Fiber: 6
- Protein: 4
Keywords: apple crisp, cinnamon apple crisp, oat crumble, fall dessert, easy apple crisp, apple dessert, comfort food


