I was scraping the last bit of pumpkin goo off my kitchen counter last October when the smell hit me—that warm, earthy, almost nutty scent of raw pumpkin guts. And just like that, I was seven years old, sitting on my Nana’s cracked linoleum floor in Buffalo, watching her pull a sheet pan of golden, salted seeds out of her ancient oven. She’d let me sprinkle the salt myself, my tiny fingers shaking over the pan. She’s been gone ten years now, and I can’t remember the sound of her voice anymore, but I’d know that smell anywhere. I mean, I’d never made pumpkin seeds myself—not once. It felt like something only she could do. But there I was, staring at a pile of slippery seeds, determined to get it right. Honestly, I almost chickened out and tossed them. But then I remembered the air fryer sitting on my counter, and a little voice in my head said, “Why not?” And let me tell you—that first batch was a revelation. Not just because they were crunchy and salty and perfect, but because I finally felt like I’d brought a piece of her back into my kitchen. Maybe you’ve been there too—that moment when a simple recipe feels like a time machine. This easy air fryer pumpkin seeds recipe is exactly that. It’s fast, it’s kid-approved, and it’s the kind of snack that makes you close your eyes after the first bite.
Why You’ll Love This Recipe
Let’s be real—roasting pumpkin seeds in the oven works, but it takes forever and you have to babysit them. This air fryer version? It’s a total game changer. I’ve tested this recipe at least a dozen times (my family was very patient), and here’s why it’s the one you’ll come back to every fall.
- Quick & Easy: Ready in under 15 minutes, including prep. No more waiting 45 minutes for the oven to do its thing.
- Simple Ingredients: You probably have everything in your pantry right now. Salt, oil, maybe some garlic powder. That’s it.
- Kid-Approved: My own kids—who usually turn up their noses at anything “healthy”—devour these by the handful. I’ve had neighbors’ kids ask for the recipe, too.
- Crowd-Pleaser: Bring a bowl of these to a party, and watch them disappear. Adults love them, kids love them, even picky eaters can’t resist.
- Perfect for Fall: Whether it’s Halloween night, Thanksgiving leftovers, or just a cozy Sunday, these seeds hit the spot.
What makes this recipe different from the rest? It’s the texture. The air fryer gives them a crunch that’s almost impossible to get in a conventional oven—crispy on the outside, tender on the inside, with zero burnt edges. Plus, you can season them any way you like. It’s not just another version; it’s the best version I’ve found after years of trial and error. And honestly, it’s the kind of snack that makes you feel like you’re treating yourself, even though it’s just pumpkin seeds.
What Ingredients You Will Need
This recipe uses simple, wholesome ingredients that you probably already have in your kitchen. No fancy trips to specialty stores—just good, honest pantry staples that come together to make something truly satisfying.
- Fresh pumpkin seeds: About 1 cup, scooped straight from a pumpkin. Rinse them well in a colander to remove the stringy pulp. Pat them dry with a clean kitchen towel—this is key for getting that crunch.
- Olive oil or avocado oil: 1 tablespoon. Olive oil adds a nice fruity flavor, but avocado oil works great too. I personally prefer olive oil for its taste, but use what you have.
- Salt: 1/2 teaspoon, or more to taste. I use fine sea salt because it sticks better. Kosher salt works too, but you might need a bit more.
- Optional seasonings: 1/4 teaspoon each of garlic powder, onion powder, smoked paprika, or cayenne pepper. I’ve also used everything bagel seasoning and it’s fantastic. For a sweet version, try 1 tablespoon of maple syrup and a pinch of cinnamon.
When it comes to ingredient selection, I always recommend buying organic pumpkin seeds if you can—they just taste cleaner. But honestly, the ones you scoop out of your Halloween pumpkin work perfectly. Just make sure they’re fresh; if they smell musty or look shriveled, toss them. For the oil, I’ve tried both and olive oil gives a slightly richer flavor, but avocado oil is more neutral and works well if you’re doing sweet seasonings. And here’s a little tip I learned the hard way: don’t oversalt. You can always add more at the end, but you can’t take it away.
Substitution guidance: If you’re out of olive oil, melted coconut oil works beautifully. For a lower-fat version, you can skip the oil entirely—just spray the air fryer basket well and toss the seeds with seasonings. The texture won’t be quite as crunchy, but it’s still good. And if you’re gluten-free (these are naturally gluten-free anyway), just double-check your seasonings for any hidden additives.
Equipment Needed
You don’t need much for this recipe, which is part of its charm. Here’s what I use:
- Air fryer: Any model works. I use a 5.8-quart Cosori, but a smaller basket will work too—just cook in batches.
- Colander: For rinsing the seeds. A fine-mesh sieve works even better.
- Clean kitchen towel or paper towels: For drying the seeds. Don’t skip this step—wet seeds won’t crisp up.
- Mixing bowl: Any medium bowl will do. I use a glass one because it’s easy to clean.
- Spatula or spoon: For tossing the seeds with oil and seasonings.
If you don’t have an air fryer, you can use a conventional oven at 350°F for about 20-25 minutes, but you’ll need to stir them halfway through. The texture won’t be quite as crunchy, but it’s still delicious. I’ve also tried making these in a toaster oven with convection setting—works great, just watch them closely. And if you’re on a budget, a basic air fryer can be found for under $50 these days, and it’s worth every penny for snacks like these. One tip: clean your air fryer basket well after cooking, because the seeds can leave a little residue. A quick soak in warm soapy water does the trick.
Preparation Method
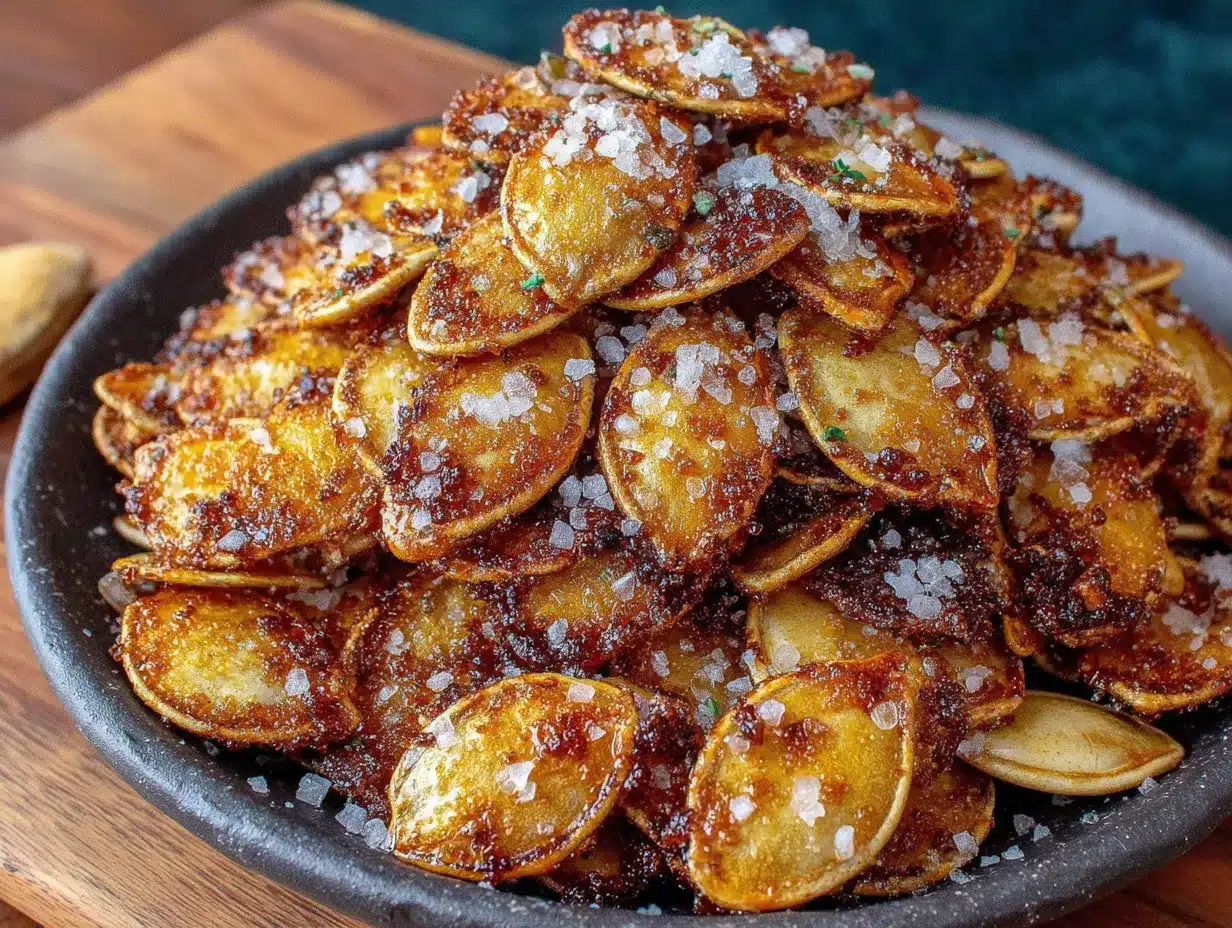
Okay, let’s get to the good part. Here’s how to make the best air fryer pumpkin seeds, step by step. I’ve included all the little details I wish someone had told me the first time.
- Prep the seeds: After carving your pumpkin, separate the seeds from the pulp. Place them in a colander and rinse under cold water, using your fingers to rub off any sticky bits. It takes about 2-3 minutes. Don’t worry if a little pulp remains—it adds flavor.
- Dry them thoroughly: This is the most important step. Spread the seeds on a clean kitchen towel and pat them dry. Let them sit for 5-10 minutes to air-dry a bit more. If they’re still damp, they’ll steam instead of crisp. Trust me on this—I learned the hard way with a soggy batch.
- Season the seeds: In a mixing bowl, combine the dried seeds with 1 tablespoon of olive oil and 1/2 teaspoon of salt. Toss until every seed is coated. If you’re adding garlic powder or paprika, sprinkle it in now and toss again. For sweet seeds, add the maple syrup and cinnamon at this stage.
- Preheat the air fryer: Set your air fryer to 350°F (175°C) and let it run for 3 minutes. Preheating ensures even cooking. I’ve skipped this step before and ended up with unevenly roasted seeds.
- Arrange in the basket: Spread the seeds in a single layer in the air fryer basket. Don’t overcrowd—if you have more than 1 cup of seeds, cook them in two batches. Overcrowding leads to steaming, not roasting.
- Cook for 8-10 minutes: Air fry at 350°F for 8 minutes, then shake the basket. Check for doneness—they should be golden brown and smell nutty. If they need more time, cook in 1-minute increments. I usually go for 9 minutes total. The seeds will continue to crisp as they cool, so don’t overdo it.
- Cool completely: Transfer the seeds to a plate or baking sheet and let them cool for at least 10 minutes. This is crucial—they’ll get crunchier as they cool. I know it’s hard to wait, but resist the urge to snack immediately.
- Serve and enjoy: Once cooled, transfer to a bowl and dig in. Store any leftovers in an airtight container at room temperature for up to a week (if they last that long).
A quick note: if your seeds are larger or smaller than average, adjust the cooking time by a minute or two. You’ll know they’re done when they’re lightly golden and make a slight cracking sound when you bite into them. And if you see any dark spots, that’s normal—it’s just the natural sugars caramelizing.
Cooking Tips & Techniques
After making these seeds more times than I can count, I’ve picked up a few tricks that make all the difference. Here’s what I’ve learned—sometimes the hard way.
First, don’t skip the drying step. I know it’s tempting to just toss them in the air fryer straight from the colander, but wet seeds turn out chewy and sad. Pat them dry with a towel and let them air-dry for a few minutes. It’s a small step that pays off big time.
Second, watch the timing carefully. Every air fryer runs a little differently. My first batch burned because I walked away for two minutes. Start checking at 8 minutes, and if you’re nervous, cook at 330°F for a slightly longer time—it’s more forgiving. And remember, they crisp up as they cool, so pull them out when they’re just barely golden.
Third, season generously but thoughtfully. I once went overboard with cayenne and ended up with seeds that made my eyes water. Start with a little, taste one (careful, it’s hot), and add more if needed. For kids, stick to salt and maybe a touch of garlic powder—they’ll love them.
Fourth, multitask like a pro. While the seeds are cooking, clean up your pumpkin carving mess or prep other snacks. The air fryer does the work for you, so use that time wisely. I often make a batch while the kids are doing homework, and it’s ready before they even ask for a snack.
Finally, store them right. An airtight container at room temperature is your best bet. Don’t refrigerate them—they’ll absorb moisture and lose their crunch. If they do get a little soft, just pop them back in the air fryer for 2 minutes at 350°F to revive them.
Variations & Adaptations
One of the best things about this recipe is how easy it is to change it up. Here are a few variations I’ve tried and loved.
- Spicy Chili Lime: Add 1/2 teaspoon of chili powder, 1/4 teaspoon of cayenne, and the zest of one lime before cooking. After they’re done, squeeze a little fresh lime juice over the top. My husband’s favorite—he calls them “adult popcorn.”
- Sweet Maple Cinnamon: Swap the olive oil for melted coconut oil, and add 1 tablespoon of maple syrup and 1/2 teaspoon of cinnamon. Toss well and cook as directed. These are dangerously good—my kids ask for them as a dessert.
- Everything Bagel: After tossing with oil and salt, sprinkle 1 tablespoon of everything bagel seasoning over the seeds. Cook as directed. Perfect for snacking or topping a salad for extra crunch.
- Cheesy Garlic Parmesan: After cooking, toss the hot seeds with 1 tablespoon of grated Parmesan cheese and 1/4 teaspoon of garlic powder. The cheese melts slightly and sticks to the seeds. So good.
For dietary adaptations, these are naturally gluten-free and vegan (if you skip the Parmesan version). If you’re watching your salt, use a salt-free seasoning blend or just a pinch of salt. And if you have a nut allergy, rest assured—pumpkin seeds are seed-based and nut-free.
I once made a batch with smoked paprika and a tiny bit of brown sugar, and it was like eating barbecue-flavored popcorn. Don’t be afraid to experiment—that’s half the fun.
Serving & Storage Suggestions
These seeds are best served at room temperature, right after they’ve cooled. I like to pile them in a big wooden bowl for a casual snack, or portion them into small paper cones for a Halloween party. They’re also fantastic as a topping for soups—try them on butternut squash soup for a crunchy contrast. Or sprinkle them over a simple green salad for extra texture.
For storage, transfer any leftovers to an airtight container or a zip-top bag. Keep them in a cool, dark place—your pantry works perfectly. They’ll stay fresh for up to a week, though I’ve never had them last that long. If you’re making a big batch for a party, you can store them for up to two weeks, but check for any signs of staleness after day seven.
Reheating is easy: if they lose their crunch, just pop them back in the air fryer at 350°F for 2-3 minutes. Let them cool again before serving. And here’s a little secret—the flavors actually develop overnight. I made a batch on a Tuesday, and by Wednesday, the garlic and onion powder had mellowed into something even more delicious. So don’t be afraid to make them a day ahead.
If you’re packing them for a lunchbox, let them cool completely first, then seal them in a small container. They’ll stay crunchy all day. Just don’t store them in the fridge—the moisture will ruin the texture.
Nutritional Information & Benefits
Pumpkin seeds are a nutritional powerhouse, and this air fryer version keeps them healthy without sacrificing flavor. Here’s a rough estimate per 1/4 cup serving (about 30 grams):
- Calories: 180
- Protein: 8 grams
- Fat: 15 grams (mostly healthy unsaturated fats)
- Carbohydrates: 5 grams
- Fiber: 2 grams
- Iron: 15% of the daily value
- Magnesium: 20% of the daily value
- Zinc: 15% of the daily value
These seeds are naturally gluten-free, low in sugar, and packed with antioxidants. The magnesium in pumpkin seeds is great for sleep and muscle recovery, while zinc supports your immune system—perfect for the fall season. I love that my kids are getting a nutrient-dense snack without even realizing it. Just be mindful of the salt if you’re watching your sodium intake; you can always use less or skip it entirely.
Conclusion
So there you have it—the easiest, crunchiest, most kid-approved air fryer pumpkin seeds you’ll ever make. This recipe is more than just a snack; it’s a little piece of nostalgia, a way to bring back a memory or create a new one with your own family. Whether you’re carving pumpkins for Halloween, looking for a healthy after-school snack, or just craving something salty and satisfying, these seeds deliver every single time.
I love this recipe because it’s forgiving, adaptable, and so simple that even beginner cooks can nail it on the first try. And honestly, it’s become a fall tradition in my house—the kids help scoop the seeds, we season them together, and then we fight over the last handful. I hope it becomes a tradition in your home too.
Have you tried this recipe? I’d love to hear about your favorite seasoning combos or how your family enjoyed them. Drop a comment below, share your photos, and don’t forget to tag me on Pinterest. Happy snacking!
Frequently Asked Questions
Can I use store-bought pumpkin seeds instead of fresh?
Absolutely! If you don’t have a pumpkin to carve, you can use raw, shelled pumpkin seeds (also called pepitas) from the store. Just skip the rinsing step and toss them directly with oil and seasonings. The cooking time might be slightly shorter—check at 6 minutes.
Why are my pumpkin seeds chewy instead of crunchy?
This usually happens if the seeds weren’t dried thoroughly before cooking. Make sure to pat them completely dry with a towel and let them air-dry for a few minutes. Overcrowding the air fryer basket can also cause steaming, so cook in batches if needed.
Can I make these without oil?
Yes, you can! The seeds will be a little less crunchy, but they’ll still taste great. Just spray the air fryer basket well with non-stick spray, and toss the seeds with dry seasonings only. Cook at the same temperature and check a minute earlier.
How do I get the salt to stick better?
Tossing the seeds with oil before adding salt helps the seasoning adhere. I also like to use fine sea salt instead of coarse salt—it sticks more evenly. If you’re making a sweet version, the maple syrup acts as a natural adhesive.
Can I double this recipe?
Sure! Just make sure to cook the seeds in a single layer in the air fryer basket. If you have a larger air fryer, you might fit 2 cups at once, but I recommend doing two separate batches for the best texture. The extra time is worth it.
Pin This Recipe!
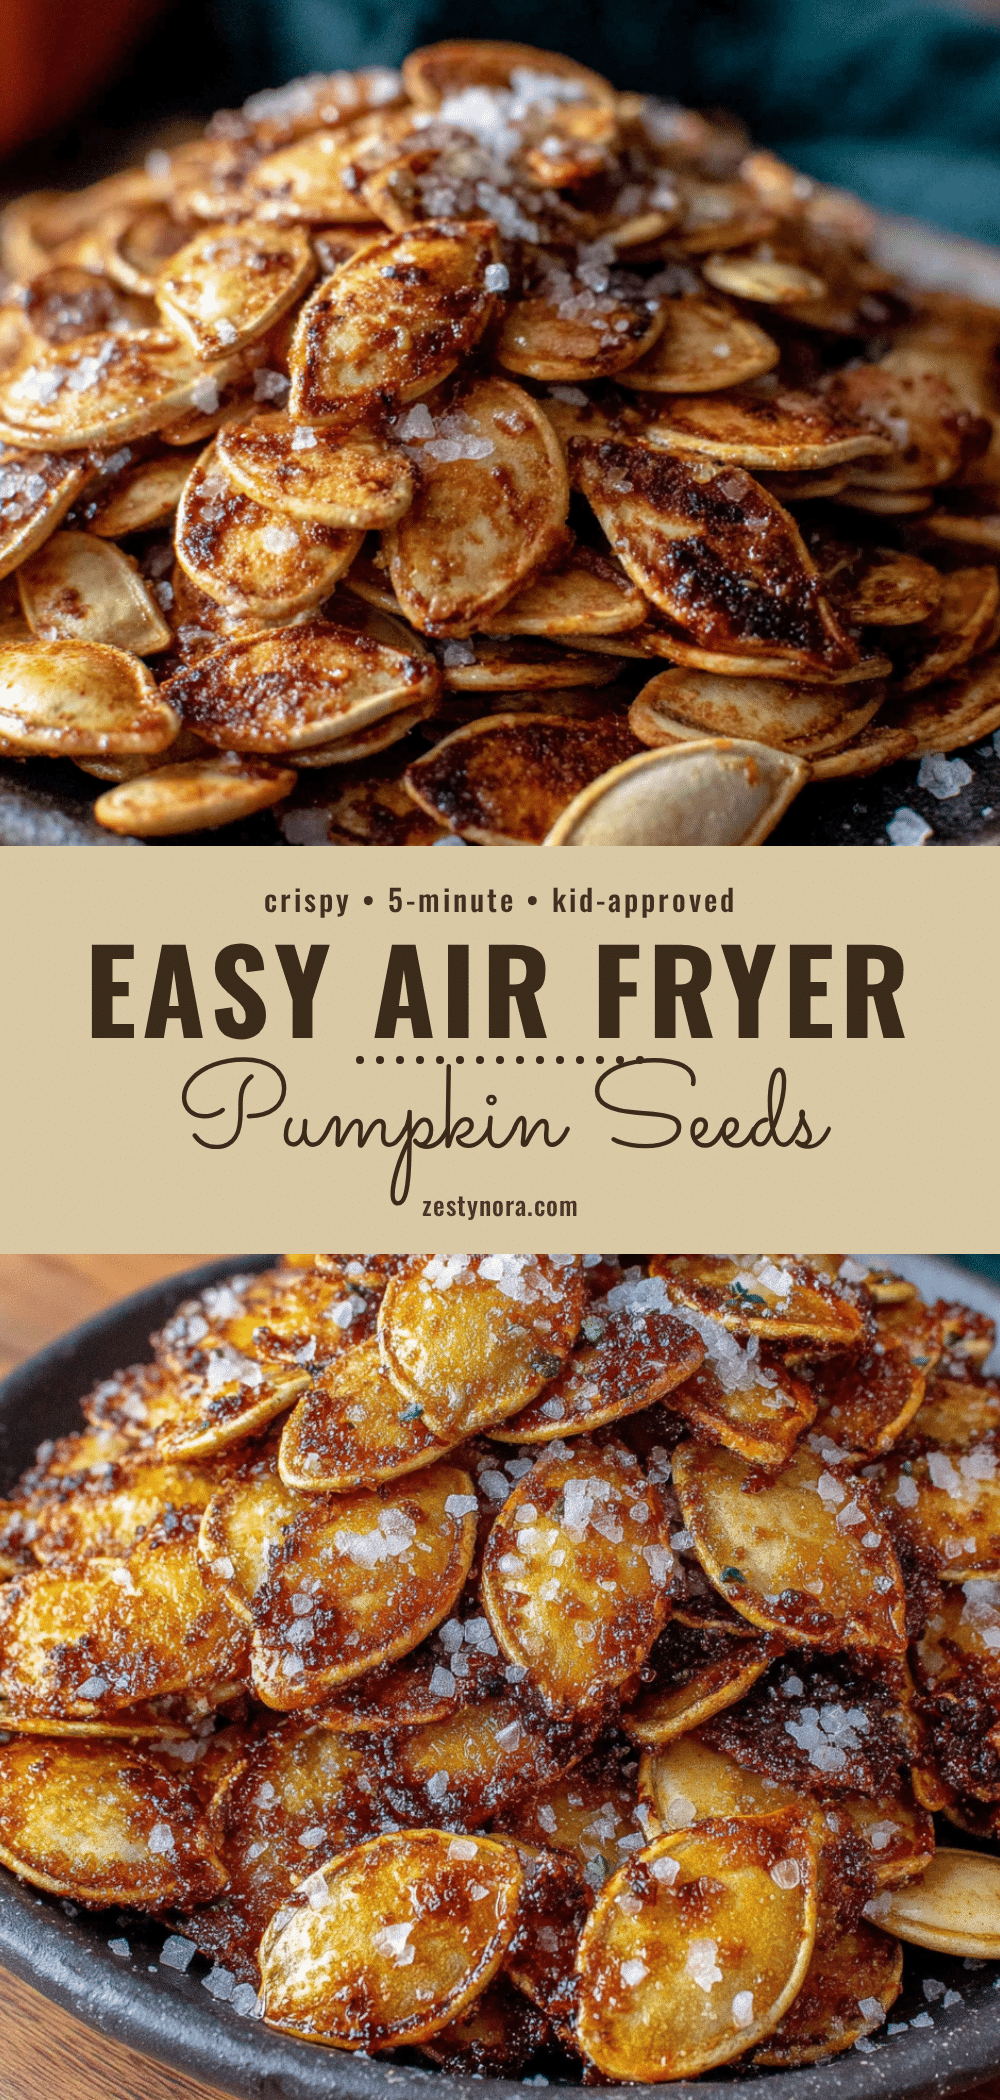
The Best Easy Air Fryer Pumpkin Seeds Recipe
This easy air fryer pumpkin seeds recipe delivers perfectly crunchy, salty seeds in under 15 minutes. It’s a nostalgic, kid-approved snack that’s perfect for fall.
- Prep Time: 10 minutes
- Cook Time: 9 minutes
- Total Time: 19 minutes
- Yield: 4 servings 1x
- Category: Snack
- Cuisine: American
Ingredients
- 1 cup fresh pumpkin seeds
- 1 tablespoon olive oil or avocado oil
- 1/2 teaspoon fine sea salt (or to taste)
- 1/4 teaspoon garlic powder (optional)
- 1/4 teaspoon onion powder (optional)
- 1/4 teaspoon smoked paprika (optional)
- 1/4 teaspoon cayenne pepper (optional)
- 1 tablespoon maple syrup and a pinch of cinnamon (for sweet version, optional)
Instructions
- Prep the seeds: After carving your pumpkin, separate the seeds from the pulp. Place them in a colander and rinse under cold water, using your fingers to rub off any sticky bits. It takes about 2-3 minutes. Don’t worry if a little pulp remains—it adds flavor.
- Dry them thoroughly: Spread the seeds on a clean kitchen towel and pat them dry. Let them sit for 5-10 minutes to air-dry a bit more. If they’re still damp, they’ll steam instead of crisp.
- Season the seeds: In a mixing bowl, combine the dried seeds with 1 tablespoon of olive oil and 1/2 teaspoon of salt. Toss until every seed is coated. If you’re adding garlic powder or paprika, sprinkle it in now and toss again. For sweet seeds, add the maple syrup and cinnamon at this stage.
- Preheat the air fryer: Set your air fryer to 350°F (175°C) and let it run for 3 minutes.
- Arrange in the basket: Spread the seeds in a single layer in the air fryer basket. Don’t overcrowd—if you have more than 1 cup of seeds, cook them in two batches.
- Cook for 8-10 minutes: Air fry at 350°F for 8 minutes, then shake the basket. Check for doneness—they should be golden brown and smell nutty. If they need more time, cook in 1-minute increments. I usually go for 9 minutes total.
- Cool completely: Transfer the seeds to a plate or baking sheet and let them cool for at least 10 minutes. This is crucial—they’ll get crunchier as they cool.
- Serve and enjoy: Once cooled, transfer to a bowl and dig in. Store any leftovers in an airtight container at room temperature for up to a week.
Notes
Don’t skip the drying step—wet seeds will steam instead of crisp. Watch the timing carefully; every air fryer runs differently. Start checking at 8 minutes. The seeds will continue to crisp as they cool, so pull them out when just barely golden. Store in an airtight container at room temperature; do not refrigerate. If they lose crunch, reheat in the air fryer at 350°F for 2-3 minutes.
Nutrition
- Serving Size: 1/4 cup (about 30 gr
- Calories: 180
- Sugar: 1
- Sodium: 150
- Fat: 15
- Saturated Fat: 2
- Carbohydrates: 5
- Fiber: 2
- Protein: 8
Keywords: air fryer pumpkin seeds, easy pumpkin seeds, crunchy pumpkin seeds, fall snack, kid-approved snack