Introduction
Meredith wasn’t making a big deal of it. I’d stopped by her place on a blustery Saturday in early April to pick up a gardening book she’d promised to lend me, and the smell of warm vanilla and toasted sugar hit me before I even got through the front door. It was one of those smells that stops you mid-sentence, you know? Like your brain just forgets what you were about to say because it’s too busy trying to figure out what heaven smells like.
I found her in the kitchen, pulling a baking sheet out of the oven with this completely nonchalant expression on her face. “Oh, those are just my forgotten cookies,” she said, like it was nothing. Like she hadn’t just created these pillowy, crackled clouds of sweetness that were practically glowing on the pan. I mean, honestly — I’d been standing there for maybe thirty seconds and I was already plotting how to get the recipe out of her without sounding too desperate.
She told me the story while we sipped coffee at her farmhouse table, the cookies cooling between us. Her grandmother used to make them every spring, and the name comes from the fact that you literally put them in the oven, turn the heat off, and then forget about them for hours. No peeking, no fussing, no checking. You just… let the oven do its thing while you go about your day. Maybe you’ve been there — that feeling when you discover a recipe that’s almost too simple to be real, yet it produces something so genuinely special it feels like a secret.
These springtime forgotten meringue cookies with chocolate chips have become my April ritual ever since. They’re light as air, with that perfect snap when you bite into them and that tiny bit of chew in the center. The chocolate chips add little pockets of richness that balance the sweetness just right. And honestly? They’re the kind of cookie that makes you close your eyes after the first bite, even if you’re standing in your kitchen alone on a Tuesday afternoon.
Why You’ll Love This Recipe
Let me tell you why these cookies have earned a permanent spot in my spring rotation. I’ve tested this recipe about seven times now — yes, seven — because I wanted to get every detail right. The first batch was too chewy, the second was too dry, and the third? Well, let’s just say I learned the hard way that humidity is meringue’s worst enemy. But now? This version is absolutely foolproof, and I can say that with confidence because I’ve made every mistake so you don’t have to.
- Practically Effortless : The active prep time is about 10 minutes. After that, the oven does all the work. You literally forget about them.
- Pantry-Friendly Ingredients : Eggs, sugar, vanilla, chocolate chips, and a pinch of salt. That’s it. No butter, no flour, no special trips to the store.
- Perfect for Spring Gatherings : These are light and airy, making them ideal for Easter brunch, baby showers, garden parties, or just celebrating the fact that it’s finally warm enough to open the windows.
- Naturally Gluten-Free : Since there’s no flour involved, these cookies are a wonderful option for guests with gluten sensitivities.
- Absolutely Addictive : The texture is what gets you. That initial crunch followed by the melt-in-your-mouth center is pure magic.
What makes this recipe different from all the other meringue cookies out there? It’s the technique. Instead of fussing with low-temperature baking and constant monitoring, you’re using the residual heat of the oven to slowly dry the meringues out. This creates a cookie that’s crisp on the outside with a slightly marshmallowy interior — something you just don’t get with traditional baking methods. And the chocolate chips? I use mini chips because they distribute more evenly and don’t sink to the bottom of the meringue. Small tweak, huge difference.
This is the kind of cookie that makes you feel like a genius with almost no effort. It’s spring in cookie form — light, sweet, and gone before you know it.
Ingredients Needed
This recipe uses simple, wholesome ingredients to create something truly special. The magic is in the ratios and the technique, not in a long list of obscure items. Here’s what you’ll need:
For the Meringue Cookies
- 4 large egg whites, room temperature (this is important — cold eggs won’t whip up properly)
- 1 cup (200g) granulated sugar (I prefer organic cane sugar for a cleaner flavor)
- 1/4 teaspoon cream of tartar (this stabilizes the meringue and helps it hold its shape)
- 1 teaspoon vanilla extract (use pure vanilla extract, not imitation — the flavor difference is noticeable)
- 1/8 teaspoon salt (just enough to balance the sweetness)
- 1/2 cup (90g) mini chocolate chips (I like Ghirardelli or Enjoy Life for allergy-friendly options)
Ingredient Tips and Substitutions
Let me share a few things I’ve learned the hard way. First, egg whites need to be completely free of any yolk. Even a tiny bit of fat will prevent them from whipping into stiff peaks. I separate my eggs while they’re still cold (the yolks are firmer and less likely to break), then let the whites come to room temperature in a clean bowl.
The cream of tartar is non-negotiable in my opinion. I’ve made these without it, and while they still worked, they were more prone to weeping and collapsing. If you don’t have cream of tartar, you can substitute with 1 teaspoon of lemon juice or white vinegar, but the cream of tartar gives the most reliable results.
For the chocolate chips, mini chips really are the way to go. Regular-sized chips tend to sink to the bottom of the meringue during the resting period. If all you have are regular chips, give them a quick chop before folding them in. I’ve also made these with dark chocolate chunks, white chocolate chips, and even crushed freeze-dried strawberries for a fruity twist.
If you’re making these for someone with dietary restrictions, know that they’re naturally gluten-free and dairy-free as written. Just double-check that your chocolate chips are dairy-free if that’s a concern — some brands add milk solids.
Equipment Needed
You don’t need much for this recipe, which is part of its charm. Here’s what you’ll want to have on hand:
- Electric mixer : A stand mixer is ideal, but a hand mixer works perfectly fine. You could technically do this by hand with a whisk, but your arm will hate you by the end. Trust me, I tried it once for the sake of research.
- Large mixing bowl : Make sure it’s completely clean and dry. Any grease residue will ruin your meringue. I wipe mine down with a bit of lemon juice and a paper towel before starting, just to be safe.
- Baking sheets : Two large baking sheets, lined with parchment paper. Do not use wax paper or foil — the meringues will stick.
- Rubber spatula : For folding in the chocolate chips gently.
- Cooling rack : Optional, but helpful for cooling the cookies after they come out of the oven.
- Piping bag or zip-top bag : For piping the meringue into uniform shapes. You can also use two spoons to drop the meringue, but piping gives prettier results.
If you don’t have a piping bag, just snip the corner off a sturdy zip-top bag. It’s not fancy, but it works like a charm. I’ve been using the same hack for years and honestly prefer it to my actual piping bags because there’s less cleanup.
Preparation Method
Alright, let’s make some cookies. I’ll walk you through every step, including the little details that make the difference between good meringues and absolutely perfect ones.
- Preheat your oven to 350°F (175°C). Line two baking sheets with parchment paper. Here’s the thing — you’re going to turn the oven off later, so the preheating needs to be accurate. Use an oven thermometer if you have one, because oven temperatures can be notoriously off.
- Prepare your egg whites. In your perfectly clean mixing bowl, combine the room temperature egg whites and cream of tartar. Start mixing on medium speed until the mixture becomes frothy and bubbly, about 1-2 minutes. You should see small bubbles forming throughout.
- Gradually add the sugar. With the mixer running on medium-high, add the sugar one tablespoon at a time. I know this seems fussy, but adding it slowly allows each addition to dissolve before the next one goes in. This is crucial for a smooth, stable meringue. Continue beating until all the sugar is incorporated, about 3-4 minutes.
- Whip to stiff peaks. Increase the speed to high and beat until the meringue is glossy and forms stiff peaks. You’ll know it’s ready when you lift the beater and the meringue stands up straight without drooping. Rub a little between your fingers — if it feels gritty, keep beating until the sugar is fully dissolved. This usually takes about 5-7 minutes total. The meringue should look like marshmallow fluff and feel silky smooth.
- Add the vanilla and salt. With the mixer on low, add the vanilla extract and salt. Mix just until combined, about 10 seconds. Don’t overmix at this stage or you’ll deflate all that beautiful air you just whipped in.
- Fold in the chocolate chips. Remove the bowl from the mixer and switch to a rubber spatula. Gently fold in the mini chocolate chips using a cutting motion — down through the center, across the bottom, and up the side. Rotate the bowl as you go. Stop as soon as the chips are evenly distributed. Overfolding will deflate the meringue.
- Pipe or drop the meringues. Transfer the meringue to your piping bag or zip-top bag. Pipe 1.5-inch rounds onto the prepared baking sheets, spacing them about 1 inch apart. They won’t spread much, so you can fit quite a few on each sheet. If you’re using spoons, drop rounded tablespoons of meringue onto the sheets. Try to make them uniform in size so they dry evenly.
- The “forgotten” part. Place both baking sheets in the preheated oven. Immediately turn the oven OFF. Do not open the door. I repeat — do not open the oven door! Let the cookies sit in the cooling oven for at least 4 hours, but overnight is best. I usually make these before bed and leave them in the oven until morning. The residual heat slowly dries the meringues, creating that perfect texture.
- Remove and cool. After the minimum 4 hours (or overnight), remove the baking sheets from the oven. The cookies should peel easily off the parchment paper. If they stick, they need more time. Let them cool completely on the baking sheets before serving or storing.
A quick note about timing — don’t rush the cooling process. I once took them out after only 3 hours because I was impatient, and they were chewy and sticky instead of crisp and light. The overnight rest is truly the secret to success here.
Cooking Tips & Techniques
I’ve made enough batches of these cookies to fill a small bakery, and I’ve learned a few things along the way. Let me save you some trouble.
Humidity is the enemy. Meringue is basically sugar and egg whites, and sugar attracts moisture. If you’re making these on a rainy or humid day, they might turn out sticky instead of crisp. Wait for a dry day if you can. I learned this the hard way when I made a batch during a spring thunderstorm and ended up with sad, tacky cookies.
Room temperature eggs matter. Cold egg whites don’t whip as well and won’t reach their full volume. Take your eggs out of the refrigerator about 30 minutes before you start. If you’re in a hurry, place the whole eggs in a bowl of warm water for 5 minutes before separating them.
Don’t overbeat. There’s a fine line between stiff peaks and overbeaten meringue. Overbeaten meringue looks grainy and curdled, and it will weep moisture during the drying process. Stop beating as soon as the mixture is glossy and holds stiff peaks. When in doubt, err on the side of slightly underbeaten rather than overbeaten.
Use a clean bowl. I cannot stress this enough. Any trace of grease or fat will prevent your egg whites from whipping properly. I wash my bowl and beaters with hot soapy water, then wipe them with a bit of lemon juice or white vinegar before starting. This is especially important if you’re using a plastic bowl, which can hold onto grease more than glass or metal.
Size matters. Try to pipe or drop your meringues in uniform sizes. Smaller cookies will dry faster than larger ones, so if you have a mix of sizes, some might be perfectly crisp while others are still soft in the center. I aim for about 1.5 inches in diameter, which gives a nice ratio of crisp exterior to soft interior.
Variations & Adaptations
One of the best things about this recipe is how easily it adapts. Here are some variations I’ve tried and loved:
Spring Citrus Meringues. Add 1 teaspoon of finely grated lemon or orange zest along with the vanilla. The citrus brightens up the flavor and makes these feel even more spring-like. I made these for a baby shower last year and they disappeared before the cupcakes did.
Mint Chocolate Chip. Substitute 1/2 teaspoon of peppermint extract for half of the vanilla. The combination of cool mint and rich chocolate is absolutely divine. These are perfect for Easter or any spring celebration.
Berry Swirl Meringues. Gently swirl in 2 tablespoons of seedless raspberry or strawberry jam after folding in the chocolate chips. Don’t overmix — you want ribbons of fruit running through the meringue. The jam adds a fruity sweetness and a beautiful pink hue.
Coffee Chocolate Meringues. Add 1 teaspoon of instant espresso powder dissolved in 1 teaspoon of hot water along with the vanilla. The coffee deepens the chocolate flavor without making the cookies taste like coffee. This is my husband’s favorite variation.
Coconut Macaroon Style. Fold in 1/4 cup of toasted shredded coconut along with the chocolate chips. The coconut adds texture and a tropical note that’s lovely for spring.
If you need to make these nut-free, simply skip any nut-based variations and stick with the classic chocolate chip version. For a vegan option, you can try using aquafaba (the liquid from a can of chickpeas) instead of egg whites, but I’ll be honest — the texture isn’t quite the same. I’ve tested it, and while it works, the cookies are less crisp and more chewy.
Serving & Storage Suggestions
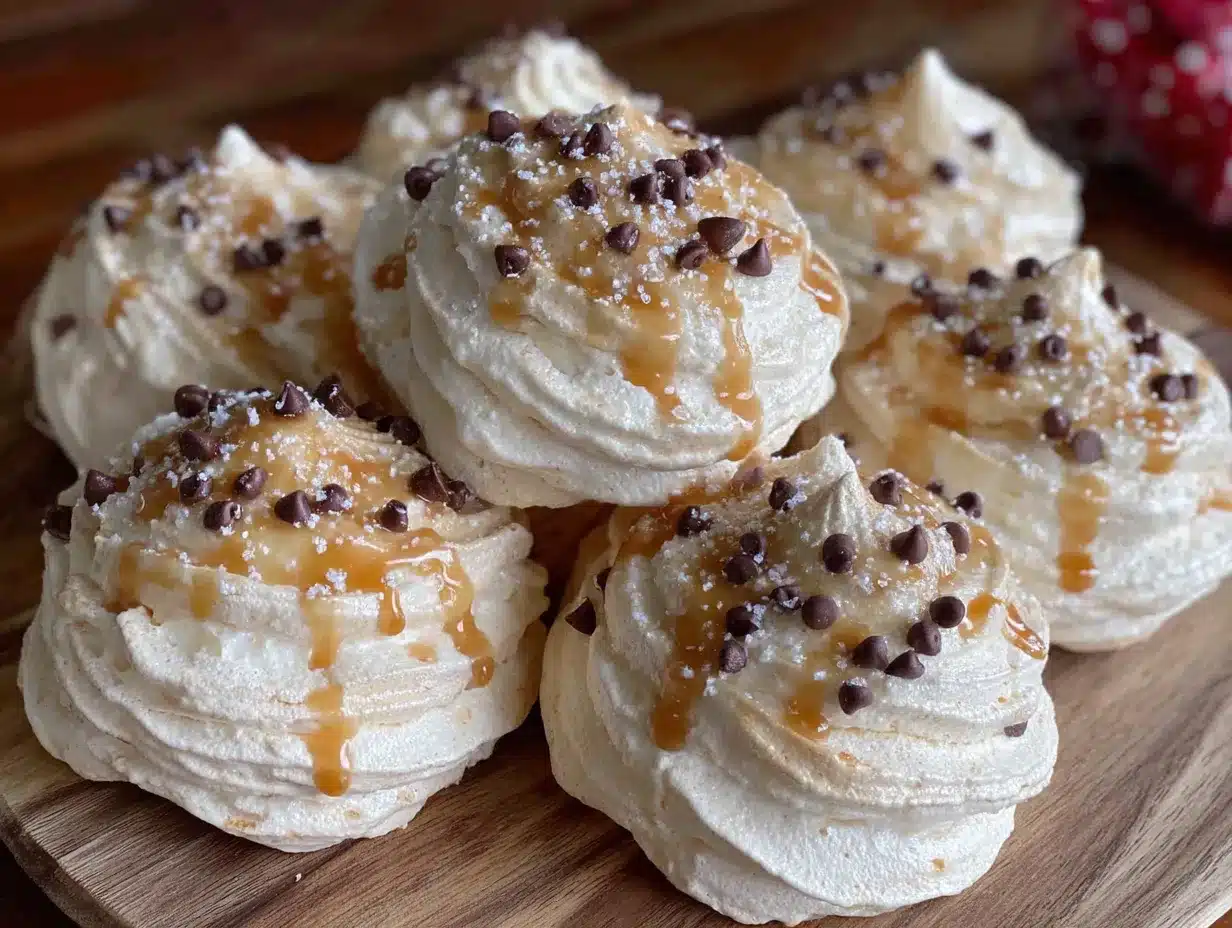
These cookies are best served at room temperature, and they’re wonderful on their own or as part of a cookie platter. I love arranging them on a cake stand for spring brunches — they look so pretty with their crackled tops and speckles of chocolate.
For a truly special presentation, serve them alongside fresh berries and a dollop of lightly sweetened whipped cream. The tartness of the berries cuts through the sweetness of the meringue beautifully. A cup of hot tea or coffee is the perfect beverage pairing — the slight bitterness balances the sugar.
Storage Tips:
- Store in an airtight container at room temperature for up to 2 weeks. Do not refrigerate — the moisture in the fridge will make them sticky.
- If you live in a humid climate, add a silica gel packet or a piece of parchment paper to the container to absorb excess moisture.
- These cookies freeze beautifully! Place them in a single layer in a freezer-safe container with parchment between layers. They’ll keep for up to 3 months. Thaw at room temperature for about 15 minutes before serving.
- Do not store meringues with other cookies, especially soft or chewy ones. The moisture from other cookies will ruin the meringues’ texture.
One thing I love about these cookies is that their flavor actually improves after a day or two. The vanilla mellows and the chocolate seems to deepen. If you can resist eating them all immediately, they’ll be even better tomorrow.
Nutritional Information & Benefits
Per cookie (based on 36 cookies per batch):
- Calories: 45
- Fat: 1g
- Carbohydrates: 9g
- Sugar: 8g
- Protein: 1g
- Sodium: 15mg
These cookies are naturally low in fat and contain no butter or oil. The egg whites provide a small amount of protein, and the chocolate chips offer a touch of antioxidants. While they’re certainly a treat, they’re lighter than most traditional cookies.
For those watching their sugar intake, you can reduce the sugar to 3/4 cup, but the texture will be slightly different — the cookies won’t be as crisp and will have a more marshmallowy texture. I’ve made them this way and they’re still delicious, just different.
These cookies are gluten-free, dairy-free (check your chocolate chips), and contain no nuts unless you add them in a variation. The main allergen to be aware of is eggs, so they’re not suitable for those with egg allergies.
Conclusion
These springtime forgotten meringue cookies with chocolate chips have become one of those recipes I turn to again and again, and I think you’ll feel the same way. There’s something magical about a recipe that asks so little of you yet delivers something so genuinely wonderful. No complicated techniques, no fancy equipment, no stressful timing — just simple ingredients and a little patience.
I love that I can make them the night before a gathering and not think about them again until morning. I love that they make my kitchen smell like vanilla and spring. And I really love watching people’s faces when they take that first bite — that little moment of surprise when they realize how good something so simple can be.
So go ahead and give these a try. Make them for Easter, make them for a spring brunch, or make them just because it’s Tuesday and you want something sweet. Customize them with your favorite add-ins, and don’t be afraid to experiment. And when you do, I’d love to hear about it — drop a comment below and let me know how they turned out, what variations you tried, or any questions you have. Happy spring baking, friends!
Frequently Asked Questions
Can I make these cookies on a humid day?
I don’t recommend it. Meringue is very sensitive to humidity, and the cookies may turn out sticky or soft instead of crisp. If you absolutely must make them on a humid day, run your air conditioner or dehumidifier in the kitchen, and consider leaving them in the oven with the door slightly ajar for an extra hour to ensure they dry completely.
Why did my meringue collapse?
This usually happens for one of three reasons: the egg whites had traces of yolk or grease, you overbeat the meringue, or you opened the oven door during the cooling process. Make sure your bowl is spotless, stop beating as soon as stiff peaks form, and resist the urge to peek!
Can I use liquid egg whites from a carton?
Technically yes, but I don’t recommend it. Carton egg whites are pasteurized, which affects their ability to whip into stiff peaks. The cookies won’t be as light and airy. Fresh egg whites give much better results.
How do I know when the cookies are done?
They’re done when they peel easily off the parchment paper without sticking. The outside should be crisp and dry, and the inside should be light and airy with a slight chew. If they stick, they need more time in the cooling oven.
Can I double this recipe?
Absolutely! Just make sure your mixing bowl is large enough to accommodate the volume. Doubled meringue will take slightly longer to whip, and you may need to use two oven racks to fit all the cookies. Rotate the baking sheets halfway through the preheating process for even baking.
Pin This Recipe!
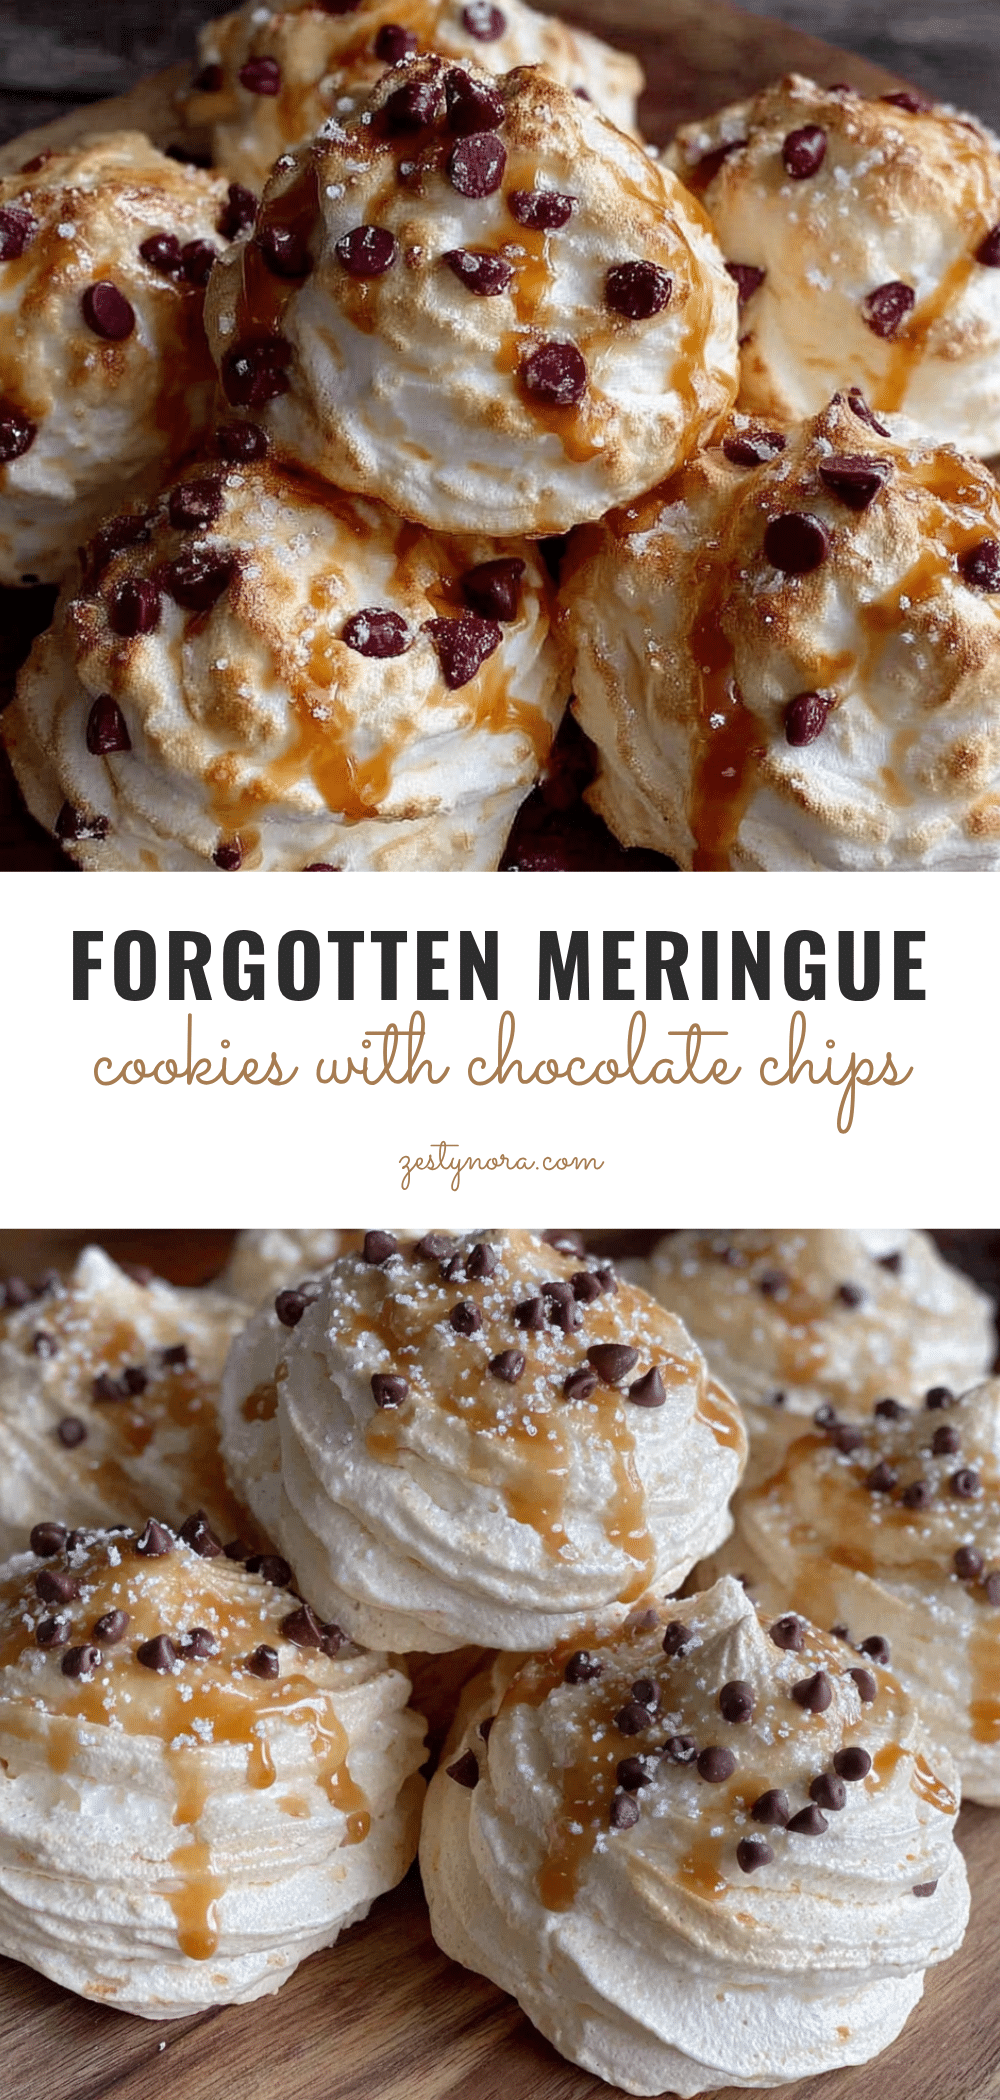
Springtime Forgotten Meringue Cookies with Chocolate Chips

Light, airy meringue cookies with mini chocolate chips that are baked using residual oven heat. A simple, gluten-free spring treat with a crisp exterior and marshmallowy center.
- Prep Time: 10 minutes
- Cook Time: 0 minutes (oven off)
- Total Time: 4 hours 10 minutes (or overnight)
- Yield: 36 cookies 1x
- Category: Dessert
- Cuisine: American
Ingredients
- 4 large egg whites, room temperature
- 1 cup (200g) granulated sugar
- 1/4 teaspoon cream of tartar
- 1 teaspoon vanilla extract
- 1/8 teaspoon salt
- 1/2 cup (90g) mini chocolate chips
Instructions
- Preheat your oven to 350°F (175°C). Line two baking sheets with parchment paper.
- In a clean mixing bowl, combine the room temperature egg whites and cream of tartar. Mix on medium speed until frothy and bubbly, about 1-2 minutes.
- With the mixer running on medium-high, add the sugar one tablespoon at a time. Continue beating until all sugar is incorporated, about 3-4 minutes.
- Increase speed to high and beat until the meringue is glossy and forms stiff peaks, about 5-7 minutes total. The meringue should feel silky smooth between your fingers.
- With the mixer on low, add the vanilla extract and salt. Mix just until combined, about 10 seconds.
- Remove the bowl from the mixer. Gently fold in the mini chocolate chips using a rubber spatula until evenly distributed.
- Transfer the meringue to a piping bag or zip-top bag with the corner snipped. Pipe 1.5-inch rounds onto the prepared baking sheets, spacing them about 1 inch apart.
- Place both baking sheets in the preheated oven. Immediately turn the oven OFF. Do not open the door. Let the cookies sit in the cooling oven for at least 4 hours, but overnight is best.
- After the minimum 4 hours (or overnight), remove the baking sheets from the oven. The cookies should peel easily off the parchment paper. Let them cool completely on the baking sheets before serving or storing.
Notes
Do not open the oven door during the cooling process. Humidity is the enemy of meringue; make on a dry day. Room temperature eggs are essential. Cream of tartar is non-negotiable for stability. Mini chocolate chips distribute better and don’t sink.
Nutrition
- Serving Size: 1 cookie
- Calories: 45
- Sugar: 8
- Sodium: 15
- Fat: 1
- Carbohydrates: 9
- Protein: 1
Keywords: meringue cookies, forgotten cookies, chocolate chip meringue, spring cookies, gluten-free cookies, easy meringue


