This was supposed to be a lemony herb sauce. I had it all planned out—fresh dill, parsley, a little lemon zest, the whole thing. Spring had just shown up, finally, and I was determined to make something that tasted like sunshine. But somewhere between grabbing the almond slivers instead of pine nuts and realizing my garlic was about to sprout, the whole plan went sideways. I stood there, staring at a pan of green beans I’d already blanched, with no sauce, no plan, and honestly, a little bit of panic setting in.
It was a Tuesday afternoon. The kind of quiet Tuesday where you think you have everything under control, and then you don’t. My neighbor Linda had just dropped off a bag of green beans from her garden—the first real harvest of the season. They were beautiful, thin and bright, and I wanted to do them justice. Instead, I was about to ruin them with my distracted cooking. I grabbed the wrong garlic press (it broke halfway through, pieces flying everywhere), I used the wrong pan (too small, of course), and I was already running late for a phone call. Honestly, it was a mess.
But here’s the thing about happy accidents in the kitchen—sometimes they work out better than the plan. I tossed those almonds in butter because that’s all I had left, threw in the garlic I’d mangled, and let it all get brown and crispy. When I poured it over the green beans, something clicked. The crunch, the nuttiness, the little bits of burnt garlic—it was nothing like the sauce I’d imagined. It was better. You know that feeling when you accidentally stumble onto something so good you can’t believe you didn’t plan it? That’s this dish. I’ve been making it ever since, and honestly, I haven’t tried to make that herb sauce again. Some things are just meant to go wrong.
Why You’ll Love This Recipe
Let me tell you why this Spring Green Bean Almondine with Crispy Garlic has become my go-to side dish for pretty much everything. I’ve tested it at least a dozen times—for Easter brunch, quick weeknight dinners, even a fancy dinner party where I pretended I had it all planned out. It never fails.
- Quick & Easy: This comes together in under 15 minutes. I’m serious. From start to finish, you’re looking at about the time it takes to boil water and toast some almonds. Perfect for those nights when you need something green on the table fast.
- Simple Ingredients: Green beans, almonds, garlic, butter, lemon. That’s it. No fancy grocery trips, no weird ingredients you’ll never use again. You probably have most of this in your kitchen right now.
- Perfect for Spring: This dish screams spring. It’s light, fresh, and makes the most of those first tender green beans from the market or your neighbor’s garden. Great for Easter, Mother’s Day brunch, or just celebrating the fact that winter is finally over.
- Crowd-Pleaser: I’ve served this to picky kids, vegetable-avoiding adults, and serious foodies. Everyone loves it. The crispy garlic and toasted almonds add this irresistible crunch that even green bean skeptics can’t resist.
- Unbelievably Delicious: The texture combo here is next-level. You’ve got tender-crisp beans, crunchy almonds, and those little crispy bits of garlic that are honestly the best part. It’s comfort food that feels fancy without trying.
What makes this different from other green bean recipes? It’s the technique. Most versions either steam the beans to mush or undercook them. This method—blanching then quickly sautéing with the almond-garlic mixture—gives you that perfect snap. Plus, the crispy garlic isn’t just a garnish. It’s the star. I’ve had people ask me for the “garlic chip recipe” more times than I can count.
This isn’t just another side dish. It’s the kind that makes you close your eyes after the first bite. It’s spring on a plate, and it comes together so fast you’ll wonder why you ever bought those frozen green bean casseroles.
What Ingredients You Will Need
This recipe uses simple, wholesome ingredients that come together to create something surprisingly elegant. Most are pantry staples, and the ones that aren’t are easy to find at any grocery store this time of year.
For the Green Beans
- 1 pound fresh green beans, trimmed – Look for bright, firm beans that snap when you bend them. I prefer thin haricots verts if I can find them—they’re more tender and cook faster. If you’re using thicker beans, just add an extra minute to the blanching time.
- 1 tablespoon salt – For the blanching water. This helps the beans stay bright green and seasoned throughout, not just on the surface.
- Ice water bath – A bowl of ice water to shock the beans after blanching. This stops the cooking immediately and locks in that gorgeous green color.
For the Crispy Garlic Almondine
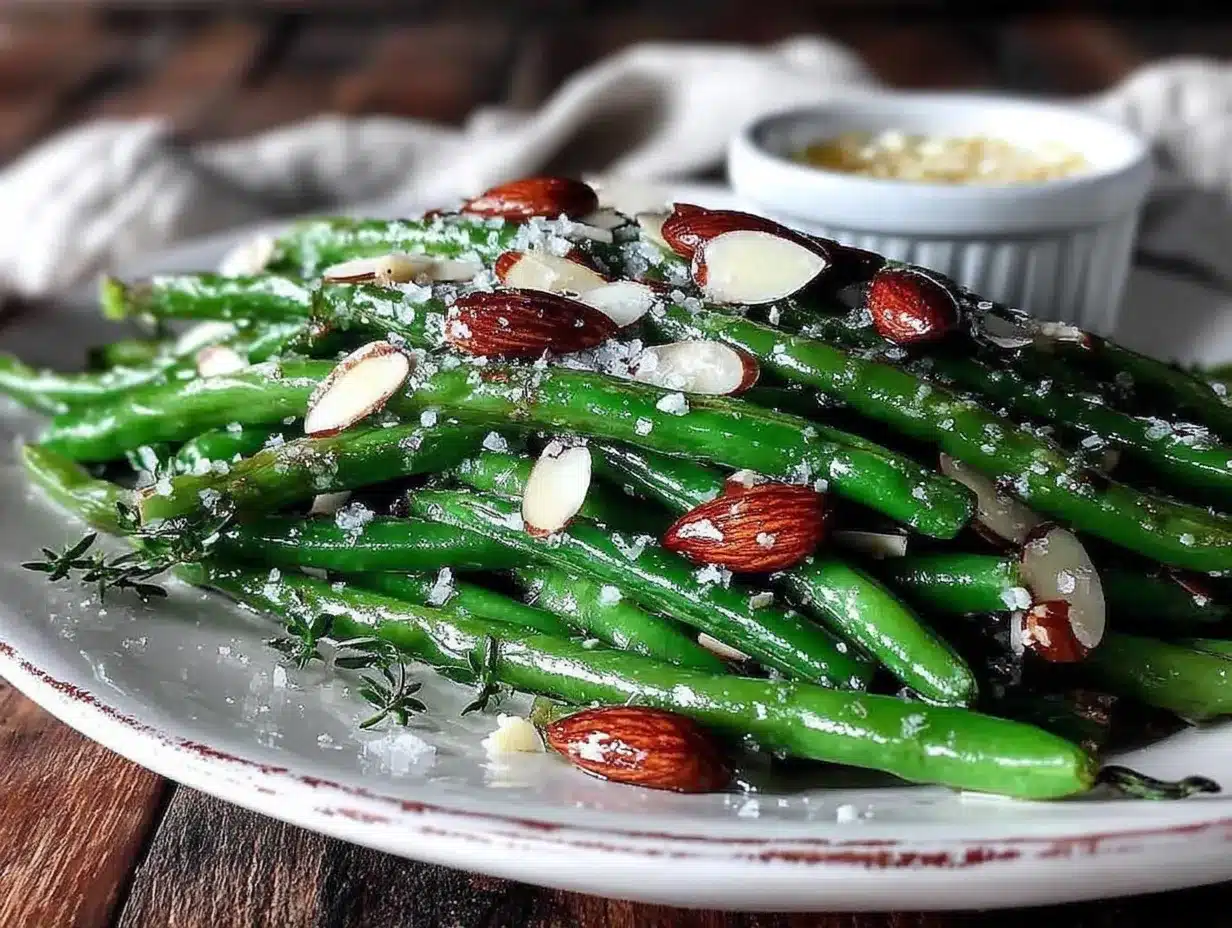
- 3 tablespoons unsalted butter – I use unsalted so I can control the salt level. But honestly, in a pinch, salted butter works fine—just reduce the added salt later. I like Kerrygold for the richness, but any good butter works.
- 1/3 cup sliced almonds – Sliced, not slivered. The slices get nice and toasty in the butter. If all you have are slivered almonds, they’ll work too, just watch them closely—they burn faster.
- 4 cloves garlic, thinly sliced – This is important. You want thin, even slices so they crisp up evenly. A mandoline makes this easy, but a sharp knife works great too. Don’t use minced garlic here—it’ll burn before the almonds toast.
- 1/4 teaspoon red pepper flakes – Optional, but I love the little kick. It cuts through the richness of the butter and wakes up the whole dish.
- Salt and black pepper to taste
For the Finish
- 1 tablespoon fresh lemon juice – Always fresh, never bottled. The brightness is essential here—it balances the rich butter and toasty nuts.
- 1 teaspoon lemon zest – Adds another layer of citrus without the acidity. I zest the lemon before juicing it.
- Flaky sea salt for finishing – Maldon or any flaky salt. It adds little bursts of saltiness that make the dish sing. Trust me on this one.
Ingredient Tips: For the best texture, use fresh green beans. Frozen ones get too soft and won’t hold up to the sauté. If you’re dairy-free, you can swap the butter for a good quality olive oil—it changes the flavor a bit but is still delicious. Look for almonds that are fresh—rancid nuts can ruin the whole dish. Give them a sniff before using; they should smell nutty and sweet, not like old paint.
Equipment Needed
You don’t need much for this recipe, which is part of why I love it. Here’s what you’ll need:
- Large pot – For blanching the beans. You need enough water to fully submerge them.
- Large skillet or sauté pan – For toasting the almonds and garlic. A 12-inch pan works best so everything has room to brown evenly.
- Slotted spoon or spider strainer – For transferring the beans from the boiling water to the ice bath. Tongs work too, but a spider is easier.
- Bowl for ice water – Large enough to hold the beans and ice.
- Sharp knife and cutting board – For trimming the beans and slicing the garlic.
- Microplane or zester – For the lemon zest. A fine grater works too.
- Paper towels or clean kitchen towel – For drying the blanched beans. Wet beans won’t get that nice char in the pan.
Budget-friendly alternatives: No spider strainer? Use tongs or a regular slotted spoon. No microplane? Just use the fine side of a box grater. No ice? Run the beans under cold water for a minute—it’s not as effective but works in a pinch. I’ve done it when my freezer was empty, and the beans still turned out fine.
Personal note: I’ve made this in a cheap nonstick pan and in my fancy cast iron. Both work, but the cast iron gives better browning on the almonds. Just be careful not to burn the garlic—cast iron holds heat like a champ, so you have to watch it closely.
Preparation Method
Let me walk you through this step by step. It looks like a lot, but I promise it moves fast. Once you’ve done it once, you’ll have it memorized.
- Prep the green beans. Wash them well, then trim off the stem ends. You can snap them off by hand if you prefer—that’s how my grandmother did it. Just bend the bean near the stem and it’ll break right where it should. If you have a lot of beans, line them up on the cutting board and cut the ends off all at once to save time.
- Set up your blanching station. Fill a large pot with water and bring it to a rolling boil. Add 1 tablespoon of salt—this is important. It seasons the beans from the inside out and helps them stay bright green. While the water heats, fill a large bowl with ice water and set it nearby.
- Blanch the beans. Drop the trimmed beans into the boiling water. Cook them for exactly 2 minutes for thin beans, 3 minutes for thicker ones. You want them tender but still crisp—they should bend slightly but still have a snap. Start your timer as soon as they hit the water.
- Shock the beans. Using your slotted spoon or spider, transfer the beans immediately to the ice water bath. This stops the cooking instantly and sets that beautiful bright green color. Let them sit in the ice water for at least 30 seconds, then drain well. Pat them dry with paper towels or a clean kitchen towel. Wet beans won’t brown properly in the pan.
- Start the almondine. In your large skillet, melt the butter over medium heat. Watch it closely—you want it to foam and start to brown slightly, but not burn. Swirl the pan occasionally to help it cook evenly.
- Toast the almonds. Add the sliced almonds to the foaming butter. Stir them constantly for 1-2 minutes until they start to turn golden brown. The smell at this point is incredible—nutty and rich. Don’t walk away. Almonds go from perfect to burnt in about 10 seconds.
- Add the garlic. Toss in the thinly sliced garlic and red pepper flakes (if using). Stir everything together. The garlic will start to crisp up quickly—about 1 minute. You want it golden and fragrant, not dark brown. If it starts browning too fast, reduce the heat.
- Sauté the beans. Add the blanched, dried green beans to the pan. Toss them with the almond-garlic mixture. Let them cook for 1-2 minutes, stirring occasionally, until they’re heated through and starting to get a little color. The beans should be sizzling lightly in the butter.
- Finish with lemon. Remove the pan from the heat. Squeeze the fresh lemon juice over the beans and sprinkle on the lemon zest. Toss everything one last time. Taste a bean and add salt and pepper as needed.
- Serve immediately. Transfer the beans to a serving platter. Sprinkle with flaky sea salt right before serving. The contrast of the tender beans, crunchy almonds, and crispy garlic is best enjoyed right away.
Time-saving tip: You can blanch the beans up to 24 hours ahead. Just keep them in the fridge, wrapped in a paper towel in a sealed container. Then when you’re ready to serve, all you have to do is make the almondine and toss everything together. This is my go-to move when I’m hosting dinner.
Cooking Tips & Techniques
I’ve made this recipe more times than I can count, and I’ve learned a few things the hard way. Let me save you some trouble.
The biggest mistake people make is burning the garlic. I did it my first three times. The problem is that garlic and almonds cook at different speeds. Almonds take a little longer to toast, but garlic burns fast. The trick is to add the almonds first, let them get a head start, then add the garlic. And keep the heat at medium, not high. Patience pays off here.
Another common issue is soggy beans. This happens when you don’t dry them well after blanching. Water and hot butter don’t mix—the water creates steam, which steams the beans instead of sautéing them. Take the extra 30 seconds to pat them dry. Your beans will thank you.
About the blanching water: Don’t skip the salt. I know it seems like a lot, but most of it stays in the water. The salt helps the beans stay bright green and adds flavor deep into the vegetable, not just on the surface. It’s a chef trick that makes a real difference.
Timing is everything. This dish comes together fast, so have everything prepped before you start. I like to trim the beans, slice the garlic, zest and juice the lemon, and measure out the almonds before I even turn on the stove. Once you start cooking, there’s no time to stop and chop.
One more thing: If you’re making this for a crowd, don’t try to double it in the same pan. The beans need room to brown, not steam. Cook in batches if needed, or use two pans. I learned this the hard way when I tried to make a triple batch for a family gathering. The beans came out gray and sad. Never again.
Variations & Adaptations
This recipe is forgiving, and I’ve tried quite a few variations. Here are some of my favorites:
Dietary Adaptations: Make it vegan by swapping the butter for a good quality olive oil or vegan butter. I’ve used both, and honestly, olive oil gives it a lovely peppery note that works well. For a nut-free version, swap the almonds for toasted pumpkin seeds or sunflower seeds. They get just as crispy and add a similar crunch.
Seasonal Variations: In summer, swap the green beans for fresh haricots verts or even asparagus—the cooking time stays the same. In fall, try this with roasted Brussels sprouts instead. The almondine topping works on just about any vegetable. I’ve even used it on roasted cauliflower, and it was amazing.
Flavor Twists: Add a tablespoon of capers along with the garlic for a briny pop. Or throw in some fresh herbs at the end—parsley, chives, or dill work beautifully. I once added a splash of white wine vinegar instead of lemon juice when I was out of lemons, and it was surprisingly good. A little different, but still delicious.
Spice It Up: If you like heat, add more red pepper flakes or a pinch of cayenne. I’ve also tried it with a drizzle of chili oil at the end, which gives it a nice kick and extra richness.
Personal variation I love: Sometimes I add a handful of golden raisins along with the almonds. They plump up in the butter and add little bursts of sweetness that contrast perfectly with the garlic and lemon. It’s a bit unconventional, but my family requests it that way now.
Serving & Storage Suggestions
This dish is best served immediately, while the beans are still warm and the almonds are crunchy. But here’s how to handle leftovers and make-ahead situations.
Serving Temperature: Serve warm, not piping hot. Let the beans rest for a minute after cooking so the flavors meld. Room temperature works too—I’ve served this at picnics and potlucks, and it’s still delicious after it cools.
Presentation: Arrange the beans in a single layer on a platter so the crispy bits don’t get buried. Sprinkle the flaky salt right before serving so it stays crunchy. A squeeze of extra lemon on top makes it look fresh and bright.
Pairing Suggestions: This side dish goes with almost anything. Try it alongside grilled chicken, roasted salmon, or a simple steak. It’s also fantastic with Easter ham or Mother’s Day brunch quiche. For a vegetarian meal, serve it with a grain bowl or lentil patties.
Storage: Leftovers keep in the fridge for up to 2 days in an airtight container. The beans will soften, and the almonds will lose some crunch, but the flavor is still good. I wouldn’t recommend freezing this—the texture just isn’t the same after thawing.
Reheating: The best way to reheat is in a skillet over medium heat. Add a tiny splash of water or butter to refresh them. Microwave works in a pinch, but the beans will be softer. If you want to restore some crunch, add fresh toasted almonds on top after reheating.
Flavor Development: Honestly, this dish is best fresh. The magic is in the contrast of textures—crispy, tender, crunchy. That said, the flavors do meld together overnight, and I’ve been known to eat cold leftovers straight from the fridge as a snack. No judgment here.
Nutritional Information & Benefits
This dish is as good for you as it is delicious. Here’s a quick look at what you’re getting per serving (based on 4 servings):
| Nutrient | Amount per Serving |
|---|---|
| Calories | 185 |
| Total Fat | 14g |
| Saturated Fat | 6g |
| Carbohydrates | 12g |
| Fiber | 5g |
| Protein | 5g |
| Vitamin C | 25% DV |
| Vitamin A | 15% DV |
| Iron | 8% DV |
Health Benefits: Green beans are packed with fiber, which is great for digestion, and vitamin K for bone health. Almonds provide healthy fats and vitamin E, a powerful antioxidant. Garlic has anti-inflammatory properties and is great for immune support—especially welcome in spring when allergies start acting up.
Dietary Considerations: This recipe is naturally gluten-free and can be made vegan with a simple butter swap. It’s low-carb friendly and fits into most eating plans. The main allergens are dairy (butter) and tree nuts (almonds).
Personal wellness perspective: I love that this dish feels indulgent but is actually pretty healthy. The butter and almonds add richness, but the portion sizes are reasonable. It’s the kind of side dish that makes you feel good about eating your vegetables—no guilt, just pure enjoyment.
Conclusion
I know I started this story with a kitchen disaster, but honestly, that’s why I keep making this recipe. It reminds me that not everything has to go perfectly to turn out amazing. Some of the best things in life—and in cooking—come from happy accidents. This Spring Green Bean Almondine with Crispy Garlic is proof of that.
If you try this recipe, I’d love to hear how it goes. Did you add your own twist? Burn the garlic like I did the first time? Serve it at a spring gathering? Drop a comment below and let me know. And if you’re looking for more easy spring sides, don’t miss my lemon herb roasted potatoes or this simple spring pea risotto—they’re both perfect for this time of year.
Until next time, happy cooking—and don’t be afraid to let things go wrong. You never know what you might discover.
Frequently Asked Questions
Can I use frozen green beans for this recipe?
I don’t recommend it. Frozen green beans release too much water when they cook, which makes them soggy instead of tender-crisp. Fresh green beans really do make a difference here. If frozen is all you have, thaw and pat them very dry before cooking, and reduce the sauté time.
How do I keep the garlic from burning?
Add the garlic to the pan after the almonds have started to toast, not before. Keep the heat at medium and stir constantly. Garlic slices should turn golden, not dark brown. If they start browning too fast, pull the pan off the heat for a few seconds.
Can I make this dish ahead of time?
You can blanch the beans up to 24 hours ahead and keep them in the fridge. But the final cooking—toasting the almonds and garlic and sautéing the beans—should be done right before serving. The crispy texture doesn’t hold up well overnight.
What can I use instead of almonds?
Pumpkin seeds, sunflower seeds, or pine nuts all work well. For a different flavor, try chopped hazelnuts or walnuts. Just adjust the toasting time since different nuts toast at different speeds. Watch them closely.
Is this recipe keto-friendly?
Yes, it is. Green beans are relatively low in carbs compared to other vegetables, and the recipe has no added sugar. One serving has about 12g of carbs and 5g of fiber, making it a great option for low-carb and keto diets. Just be mindful of the butter portion if you’re strictly counting macros.
Pin This Recipe!
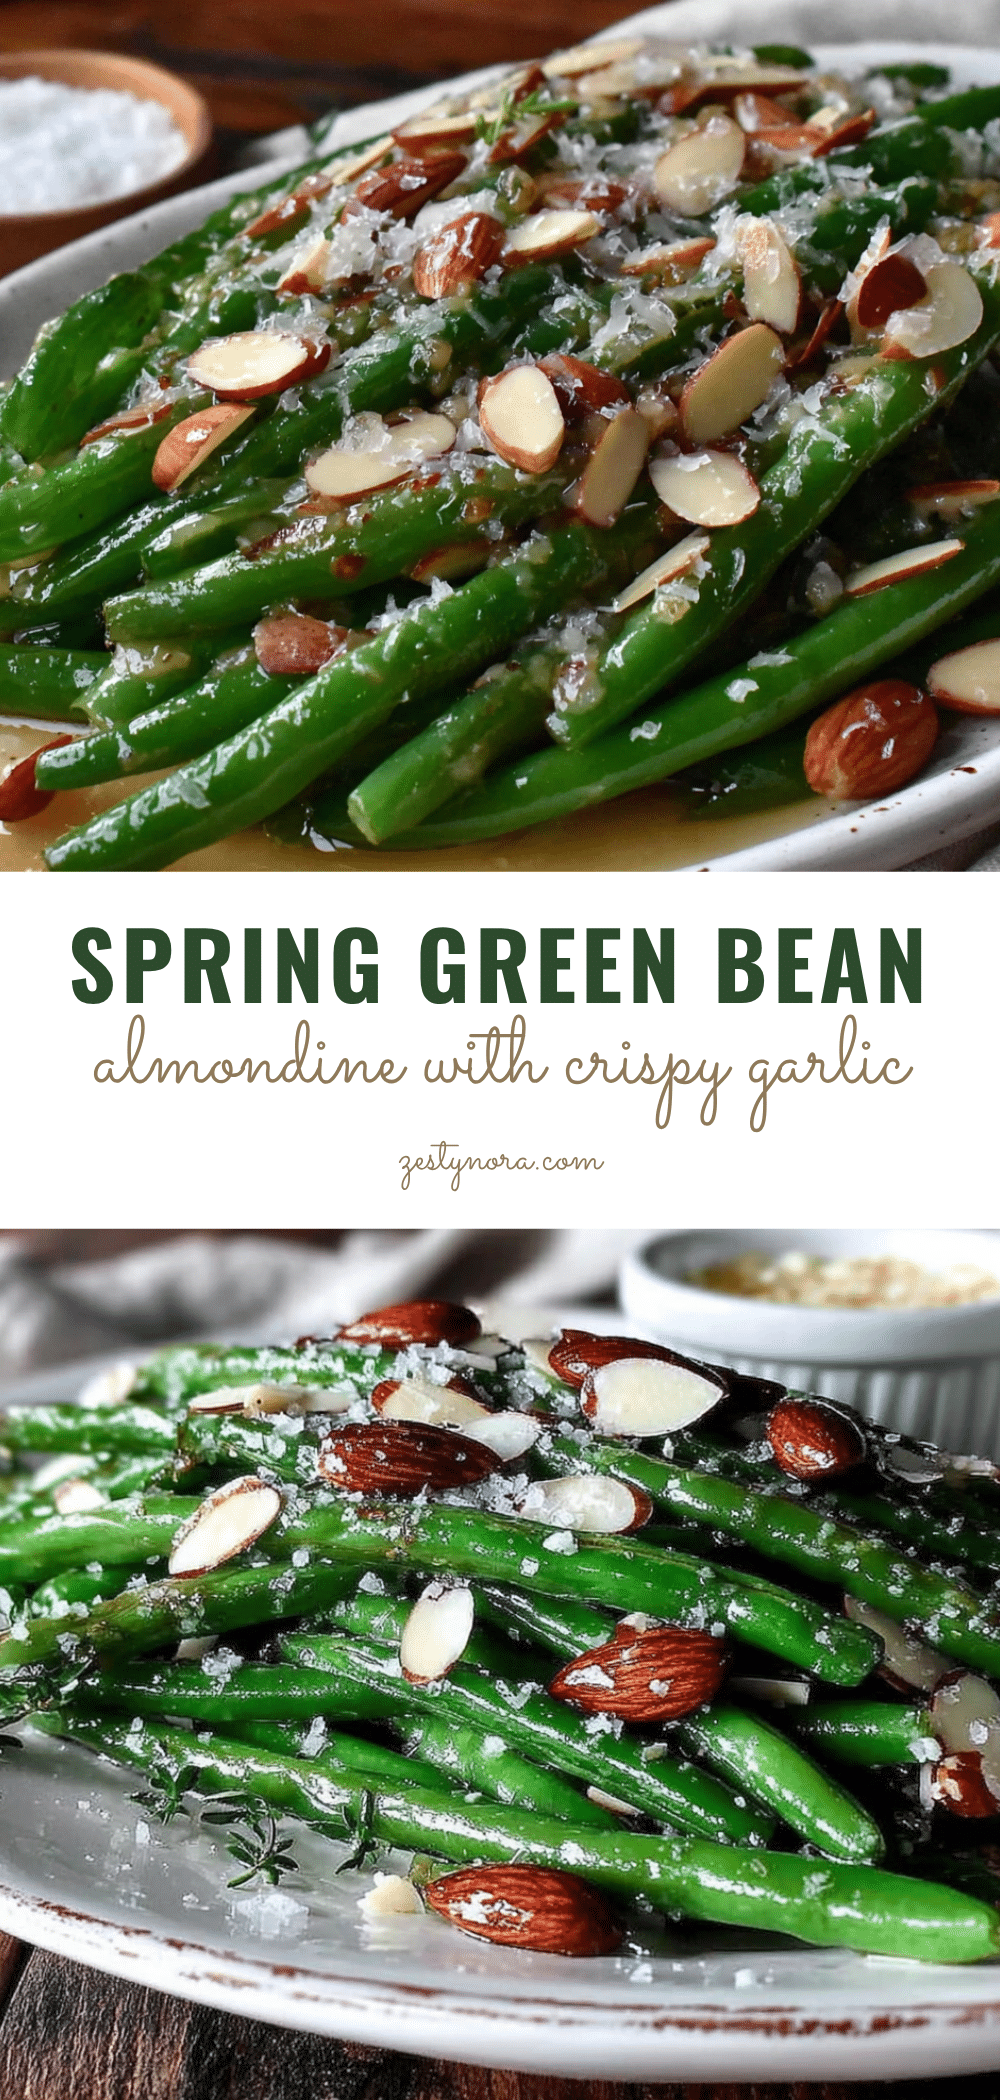
Spring Green Bean Almondine with Crispy Garlic: Easy 15-Minute Side Dish
A quick and easy side dish featuring tender-crisp green beans tossed with buttery toasted almonds and crispy garlic, finished with fresh lemon. Perfect for spring gatherings or weeknight dinners.
- Prep Time: 10 minutes
- Cook Time: 5 minutes
- Total Time: 15 minutes
- Yield: 4 servings 1x
- Category: Side Dish
- Cuisine: American
Ingredients
- 1 pound fresh green beans, trimmed
- 1 tablespoon salt
- Ice water bath
- 3 tablespoons unsalted butter
- 1/3 cup sliced almonds
- 4 cloves garlic, thinly sliced
- 1/4 teaspoon red pepper flakes (optional)
- Salt and black pepper to taste
- 1 tablespoon fresh lemon juice
- 1 teaspoon lemon zest
- Flaky sea salt for finishing
Instructions
- Prep the green beans. Wash them well, then trim off the stem ends.
- Set up your blanching station. Fill a large pot with water and bring it to a rolling boil. Add 1 tablespoon of salt. While the water heats, fill a large bowl with ice water and set it nearby.
- Blanch the beans. Drop the trimmed beans into the boiling water. Cook them for exactly 2 minutes for thin beans, 3 minutes for thicker ones.
- Shock the beans. Using a slotted spoon or spider, transfer the beans immediately to the ice water bath. Let them sit for at least 30 seconds, then drain well and pat dry.
- Start the almondine. In a large skillet, melt the butter over medium heat until it foams and starts to brown slightly.
- Toast the almonds. Add the sliced almonds to the foaming butter. Stir constantly for 1-2 minutes until they start to turn golden brown.
- Add the garlic. Toss in the thinly sliced garlic and red pepper flakes (if using). Stir for about 1 minute until the garlic is golden and fragrant.
- Sauté the beans. Add the blanched, dried green beans to the pan. Toss with the almond-garlic mixture and cook for 1-2 minutes, stirring occasionally, until heated through.
- Finish with lemon. Remove the pan from the heat. Squeeze fresh lemon juice over the beans and sprinkle on the lemon zest. Toss and season with salt and pepper to taste.
- Serve immediately. Transfer to a serving platter and sprinkle with flaky sea salt.
Notes
Blanch beans up to 24 hours ahead for quicker prep. For best texture, serve immediately. To prevent burning garlic, add it after almonds have started toasting. Pat beans dry thoroughly to avoid soggy results.
Nutrition
- Serving Size: 1 serving (about 1/4
- Calories: 185
- Sugar: 4
- Sodium: 480
- Fat: 14
- Saturated Fat: 6
- Carbohydrates: 12
- Fiber: 5
- Protein: 5
Keywords: green bean almondine, crispy garlic, spring side dish, easy side dish, 15-minute recipe, green beans, almonds, garlic, lemon