My six-year-old niece took one look at the tray and whispered, “Are we allowed to eat these, or are they too scary?” That’s when I knew the white chocolate witch finger pretzels had worked exactly as planned. She circled the plate three times before finally grabbing one, biting into the tip with a crunch, and then immediately reaching for another. Honestly, that moment of hesitation followed by pure delight is the whole point of Halloween baking.
I wasn’t trying to make something overly complicated or gory. I just wanted a treat that looked creepy enough to make people do a double-take but tasted like something you’d actually want to eat more than one of. These witch finger pretzels deliver on both fronts. The salty pretzel base gets coated in smooth white chocolate, then topped with a sliced almond fingernail and a dab of red gel for that “fresh from the cauldron” look. They’re spooky without being gross, which is a hard balance to strike.
The first time I made these, I accidentally used too much red gel and they looked like something out of a horror movie prop department. My husband refused to touch them. So I scaled back, learned to use the gel sparingly, and now they hit that sweet spot between creepy and cute. Perfect for Halloween parties, classroom treats, or just scaring your coworkers at the office potluck.
These witch finger pretzels have become my go-to Halloween recipe because they require zero baking skills, come together in under thirty minutes, and somehow make adults act like kids again. You’ll see what I mean the first time someone asks permission before taking one.
Why You’ll Love This Recipe
Let me tell you why these spooky white chocolate witch finger pretzel rods have earned a permanent spot in my Halloween rotation. They check every box I look for in a holiday treat.
- Unbelievably Easy : You don’t need a pastry degree or any special baking knowledge. If you can dip a pretzel in melted chocolate, you can make these. Total active time is about fifteen minutes.
- Minimal Ingredients : Four main ingredients. That’s it. Pretzel rods, white chocolate chips or melting wafers, sliced almonds, and red gel food coloring. You probably already have most of these in your pantry.
- Perfect for Halloween Gatherings : These are the star of any Halloween party, trunk-or-treat event, or spooky movie night. They look impressive but require almost no effort.
- Kid-Friendly Fun : My niece and nephew help me make these every year now. The dipping and decorating part is messy but totally worth it. They feel like little witches creating their own creepy snacks.
- Surprisingly Delicious : The salty-sweet combo is absolutely addictive. The white chocolate coating gets nice and crisp, the pretzel stays crunchy, and the almond adds a subtle nutty flavor that ties everything together.
What makes this recipe different from other Halloween treats you’ll find online is the texture. Most spooky sweets are either all sugar or all chocolate. These have that satisfying pretzel crunch that makes you want to keep eating them. Plus, they don’t get stale as fast as cookies or cupcakes, so you can make them a day or two ahead without worrying.
There’s something special about watching someone’s face when they realize the “finger” they’re about to bite into is actually a pretzel. It’s the kind of treat that sparks conversation and makes people smile. And honestly, isn’t that what Halloween is really about?
What Ingredients You Will Need
This recipe uses simple, everyday ingredients to create something that looks genuinely spooky. No weird specialty items or expensive decorating tools required. Here’s what you need to gather.
For the Witch Fingers
- Pretzel rods (12-15 rods) – Get the thick, straight ones, not the thin twists. The thicker rods give you more surface area for the white chocolate and look more like actual fingers. I prefer the Snyder’s brand for consistent size and crunch.
- White chocolate melting wafers (12 ounces) – These melt smoother than regular white chocolate chips and set up with a nice, even coating. Ghirardelli white chocolate melting wafers are my go-to, but any brand works. If you only have white chocolate chips, add a teaspoon of coconut oil to help them melt smoothly.
- Sliced almonds (about 30-40 slices) – These become the fingernails. Look for raw or blanched sliced almonds. You want them thin enough to look like a nail but sturdy enough to stick into the chocolate. I usually buy the pre-sliced ones from the baking aisle to save time.
- Red gel food coloring – This creates the “blood” effect at the base of the nail. Gel works much better than liquid food coloring because it stays in place and doesn’t bleed into the white chocolate. A little goes a long way, trust me.
Optional Decorations
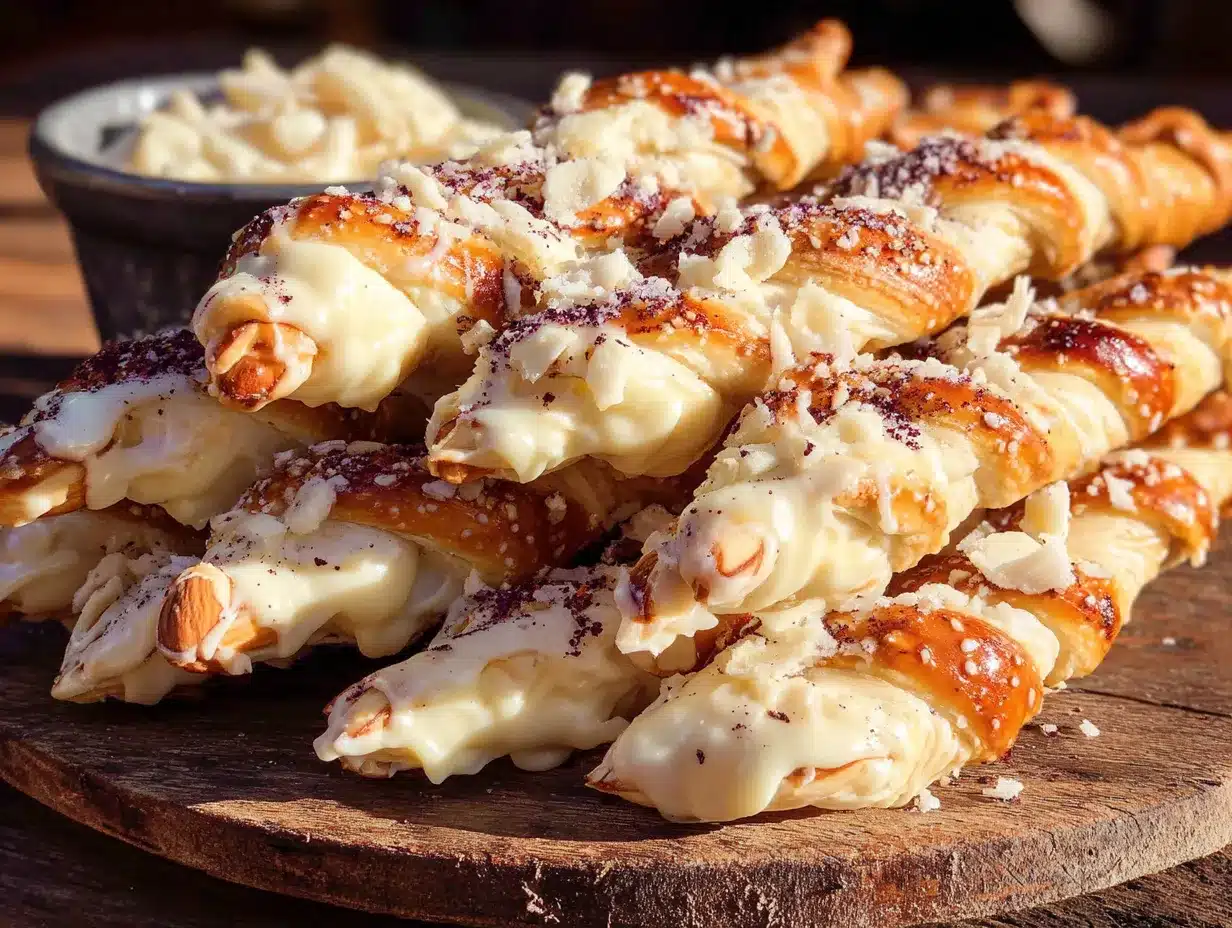
- Edible glitter or luster dust – Adds a creepy, shimmery effect that makes the fingers look slightly magical. I use it sometimes for Halloween parties where I want extra drama.
- Black or orange sprinkles – For adding a festive touch to the base of the pretzel if you’re serving these at a party.
When selecting your pretzel rods, try to find ones that are relatively straight and similar in length. Curved ones can still work, but they won’t look as much like fingers. If you’re making these for a classroom or party, double the recipe because they disappear fast.
One thing I learned the hard way – don’t use white chocolate bars chopped into pieces. They don’t melt evenly and tend to seize up. Stick with melting wafers or high-quality white chocolate chips for the best results.
Equipment Needed
You don’t need fancy kitchen gadgets for these spooky white chocolate witch finger pretzel rods. Here’s what I use and what you can substitute if needed.
- Microwave-safe bowl – For melting the white chocolate. A glass measuring cup works great because the spout makes dipping easier.
- Baking sheet – Lined with parchment paper or a silicone baking mat. This is where your witch fingers will set up.
- Spatula or spoon – For stirring the chocolate and helping coat the pretzels. A small offset spatula works beautifully if you have one.
- Toothpick or small skewer – For applying the red gel food coloring. You want precision here, not a big glob.
- Piping bag or small zip-top bag – Optional, but makes applying the red gel much easier. Just snip off a tiny corner.
If you don’t have parchment paper, wax paper works fine. Just make sure it’s flat and secure on your baking sheet. I’ve also used a wire cooling rack set over a baking sheet, which catches any dripping chocolate and makes cleanup easier.
For melting the chocolate, you can use a double boiler if you prefer. I’m usually too impatient for that, so the microwave method works perfectly. Just go in short bursts and stir between each one.
Preparation Method
Making these witch finger pretzels is surprisingly straightforward. Here’s my exact process, including all the little tricks I’ve picked up along the way.
Step 1: Prepare Your Workspace
Line a baking sheet with parchment paper and set it aside. Arrange your pretzel rods, sliced almonds, and red gel food coloring within easy reach. Trust me, once you start dipping, you don’t want to be hunting for supplies with chocolate-covered hands.
Step 2: Melt the White Chocolate
Place the white chocolate melting wafers in a microwave-safe bowl. Microwave in 30-second intervals at 50% power, stirring thoroughly after each interval. White chocolate burns easily, so don’t rush this step. It usually takes me about 2-3 minutes total. The chocolate should be smooth, glossy, and completely melted with no lumps.
If your chocolate seems too thick for dipping, add a teaspoon of coconut oil or vegetable shortening and stir until smooth. This helps the chocolate coat the pretzels more evenly.
Step 3: Dip the Pretzels
Hold a pretzel rod by the end and dip it into the melted white chocolate, leaving about an inch uncoated at the top. This uncoated part becomes the “base” of the finger where it would connect to the hand. Rotate the pretzel as you lift it out to let excess chocolate drip off. Gently tap the pretzel against the side of the bowl to encourage any extra chocolate to fall off.
Place the coated pretzel on the prepared baking sheet. Repeat with the remaining pretzels, working quickly before the chocolate sets. You should have enough chocolate to coat 12-15 pretzels depending on their size.
Step 4: Add the Fingernails
While the white chocolate is still wet, take a sliced almond and gently press it into the tip of the pretzel at a slight angle. The pointed end of the almond should face outward, just like a real fingernail. Don’t push it in too far – you want about half the almond visible. The chocolate will hold it in place as it sets.
I usually do the almonds right after each dip while the chocolate is still very wet. If you wait too long, the chocolate starts to set and the almonds won’t stick properly.
Step 5: Add the “Blood” Detail
Using a toothpick or the tip of a piping bag, dab a small amount of red gel food coloring at the base of the almond fingernail. This creates the illusion of a freshly cut or bloody nail bed. Less is more here – you want a subtle creepy effect, not a gory mess. A tiny dot that you slightly smear toward the almond looks the most realistic.
I learned this the hard way after my first batch looked like a crime scene. A single small dab is plenty. You can always add more, but you can’t take it away.
Step 6: Let Them Set
Allow the witch finger pretzels to set completely at room temperature. This takes about 20-30 minutes depending on your kitchen temperature. Don’t put them in the refrigerator unless you’re in a huge hurry, because condensation can make the white chocolate look blotchy.
Once set, the chocolate should be firm and the almonds should be securely attached. If any almonds feel loose, you can dab a tiny bit of melted chocolate underneath them to secure them better.
Step 7: Add Optional Details
If you want extra detail, use a toothpick to create small knuckle lines on the white chocolate coating. Gently drag the toothpick across the surface to create subtle wrinkles. You can also sprinkle a little edible glitter over the wet chocolate for a magical, witchy shimmer.
Cooking Tips & Techniques
After making these spooky white chocolate witch finger pretzel rods more times than I can count, I’ve collected some tips that make the process smoother and the results more impressive.
Temperature matters. White chocolate is finicky. If your kitchen is hot and humid, the chocolate may take longer to set or develop streaks. Work in a cool, dry area if possible. On humid days, I sometimes pop the finished pretzels in the refrigerator for exactly 10 minutes to help them set, then immediately move them to the counter to avoid condensation.
Don’t overheat the chocolate. This is the most common mistake I see. White chocolate scorches easily and turns grainy. Always melt at 50% power and stir frequently. If your chocolate starts to look thick or lumpy, it’s overheated. You can try stirring in a teaspoon of coconut oil to smooth it out, but sometimes it’s better to start fresh.
Work in small batches. Don’t dip all the pretzels at once if you’re new to this. Dip 3-4 at a time, add their almonds and red gel, then move on. This prevents the chocolate from setting before you finish decorating. As you get faster, you can increase your batch size.
The almond placement matters. Position the almond at a slight upward angle, like a real fingernail growing from the fingertip. If you place it straight on, it looks like a flat disc, not a nail. Also, make sure the almond is centered on the tip of the pretzel, not off to one side.
Use a piping bag for the red gel. I know I said you can use a toothpick, but a piping bag gives you so much more control. Fill a small zip-top bag with a tiny amount of red gel, snip off the tiniest corner, and squeeze gently. You’ll get a precise dot every time.
One mistake I made early on was using too much red gel and it running down the white chocolate. It looked like the fingers were actively bleeding everywhere. Not the vibe I was going for. Keep it minimal and controlled.
Variations & Adaptations
These witch finger pretzels are incredibly versatile. Here are some ways I’ve adapted them for different occasions and dietary needs.
Dark Chocolate Witch Fingers
Swap the white chocolate for dark or milk chocolate. The dark chocolate gives them a more sinister, gothic look that some people prefer. Use the same technique – just melt and dip. The red gel shows up beautifully against dark chocolate.
Vegan Version
Use dairy-free white chocolate or dark chocolate chips. Many brands now offer vegan white chocolate that melts and sets beautifully. Check the label to make sure your pretzels are also vegan – most are, but some contain honey or milk solids. The sliced almonds are naturally vegan, so you’re good there.
Gluten-Free Adaptation
Simply swap regular pretzel rods for gluten-free pretzel rods. They’re available at most grocery stores now. The rest of the ingredients are naturally gluten-free, so this is an easy switch. I’ve used Glutino brand with great results.
Extra Spooky Details
Add edible eyeballs to the base of the pretzel for a truly creepy look. You can also use black gel food coloring to draw tiny stitches or spiderwebs on the white chocolate. For a more elegant Halloween look, dust the finished pretzels with black luster dust.
Mini Witch Finger Bites
Instead of pretzel rods, use mini pretzel twists. Dip them in white chocolate, add a small almond sliver for the nail, and you have bite-sized witch finger snacks. These are perfect for parties where you want smaller portions.
I once made a batch with green-tinted white chocolate for a Wicked Witch theme. Just add a few drops of green gel food coloring to the melted white chocolate and stir until evenly colored. They looked amazing and were a huge hit at the party.
Serving & Storage Suggestions
These spooky white chocolate witch finger pretzel rods are best served at room temperature. The white chocolate coating is firm but not hard, and the pretzel stays perfectly crunchy. If you’ve refrigerated them, let them sit out for 10-15 minutes before serving to take the chill off.
For presentation, I like to arrange them on a black or dark purple platter with the “fingernails” pointing outward. You can also stand them upright in a small vase or jar filled with candy corn or black jelly beans for a dramatic effect. Just make sure the chocolate is fully set before you try to stand them up.
These pair beautifully with other Halloween treats. I often serve them alongside my soft pumpkin chocolate chip cookies for a fall dessert spread that covers both spooky and seasonal cravings. They also go great with a warm cup of apple cider or hot chocolate.
Storage: Store the witch finger pretzels in an airtight container at room temperature for up to one week. Layer them between sheets of parchment paper to prevent them from sticking together. Do not refrigerate them unless absolutely necessary, as the moisture can cause the white chocolate to develop white streaks (bloom).
Freezing: You can freeze these for up to three months. Place them in a single layer on a baking sheet and freeze until solid, then transfer to a freezer-safe container with parchment paper between layers. Thaw at room temperature for about 20 minutes before serving. The texture holds up surprisingly well.
The flavors actually develop nicely over a day or two. The white chocolate sets more firmly, and the saltiness of the pretzel becomes more pronounced. I actually prefer them on day two, but they rarely last that long in my house.
Nutritional Information & Benefits
Let’s be real – these are a treat, not a health food. But here’s what you should know if you’re keeping track.
Per serving (one witch finger pretzel rod): approximately 180-200 calories, 10g fat, 24g carbohydrates, 3g protein, 15g sugar. These numbers vary based on the specific brands you use and how much chocolate coating ends up on each pretzel.
The white chocolate provides a small amount of calcium from the milk solids. The almonds add healthy fats, vitamin E, and a bit of protein. And the pretzel itself is low in fat and provides some iron from the enriched flour. It’s not a nutritional powerhouse, but it’s not the worst thing you could eat either.
If you’re watching your sugar intake, you can use sugar-free white chocolate chips. They melt a bit differently and may not set as firmly, but they work in a pinch. For a lower-carb option, try using dark chocolate with a higher cocoa percentage, which contains less sugar.
These are not gluten-free unless you specifically buy gluten-free pretzels. They also contain dairy from the white chocolate. For dairy-free and vegan options, see the variations section above.
Conclusion
These spooky white chocolate witch finger pretzel rods have become my most-requested Halloween recipe for good reason. They’re ridiculously easy to make, require minimal ingredients, and deliver that perfect mix of creepy and delicious that makes Halloween baking so much fun. Every time I bring them to a party or set them out for trick-or-treaters, people can’t stop talking about them.
What I love most about this recipe is how customizable it is. You can make them as scary or as cute as you want. Add more red gel for a gorier look, or skip it entirely for a more subtle witchy vibe. Use dark chocolate, add sprinkles, or dust them with edible glitter – the possibilities are endless. Don’t be afraid to experiment and make them your own.
I’d love to hear how your witch finger pretzels turn out. Did you try any fun variations? Did your kids help make them? Drop a comment below and share your photos – I always get inspired by seeing how other people put their own spin on recipes. And if you’re looking for more Halloween baking ideas, check out my moist chocolate chip pumpkin bread for another fall favorite that’s perfect for the season.
Happy Halloween, and happy snacking! These witch fingers are about to become your new October tradition.
Frequently Asked Questions
Can I make these witch finger pretzels ahead of time?
Absolutely. You can make them up to one week in advance. Store them in an airtight container at room temperature, layered between parchment paper. They actually stay fresh and crunchy for several days.
Why did my white chocolate seize up?
White chocolate seizes when it gets too hot or when even a tiny drop of water gets into the bowl. Always melt at 50% power in the microwave, stirring every 30 seconds. Make sure your bowl and utensils are completely dry before you start.
Can I use milk chocolate instead of white chocolate?
Yes, definitely. Milk chocolate or dark chocolate both work great. The red gel food coloring shows up beautifully against darker chocolate. Just follow the same melting and dipping instructions.
How do I get the red gel to stay in place?
Apply the red gel while the white chocolate is still slightly warm and wet. It will sink into the chocolate slightly and stay put. If you apply it after the chocolate has set, it may bead up and roll off. A toothpick or piping bag gives you the most control.
Are these safe for kids to make?
Yes, with supervision. Melting the chocolate requires adult help since it involves the microwave. But kids can absolutely help with dipping the pretzels, placing the almond fingernails, and adding the red gel dots. It’s a fun Halloween activity that gets everyone involved.
Pin This Recipe!
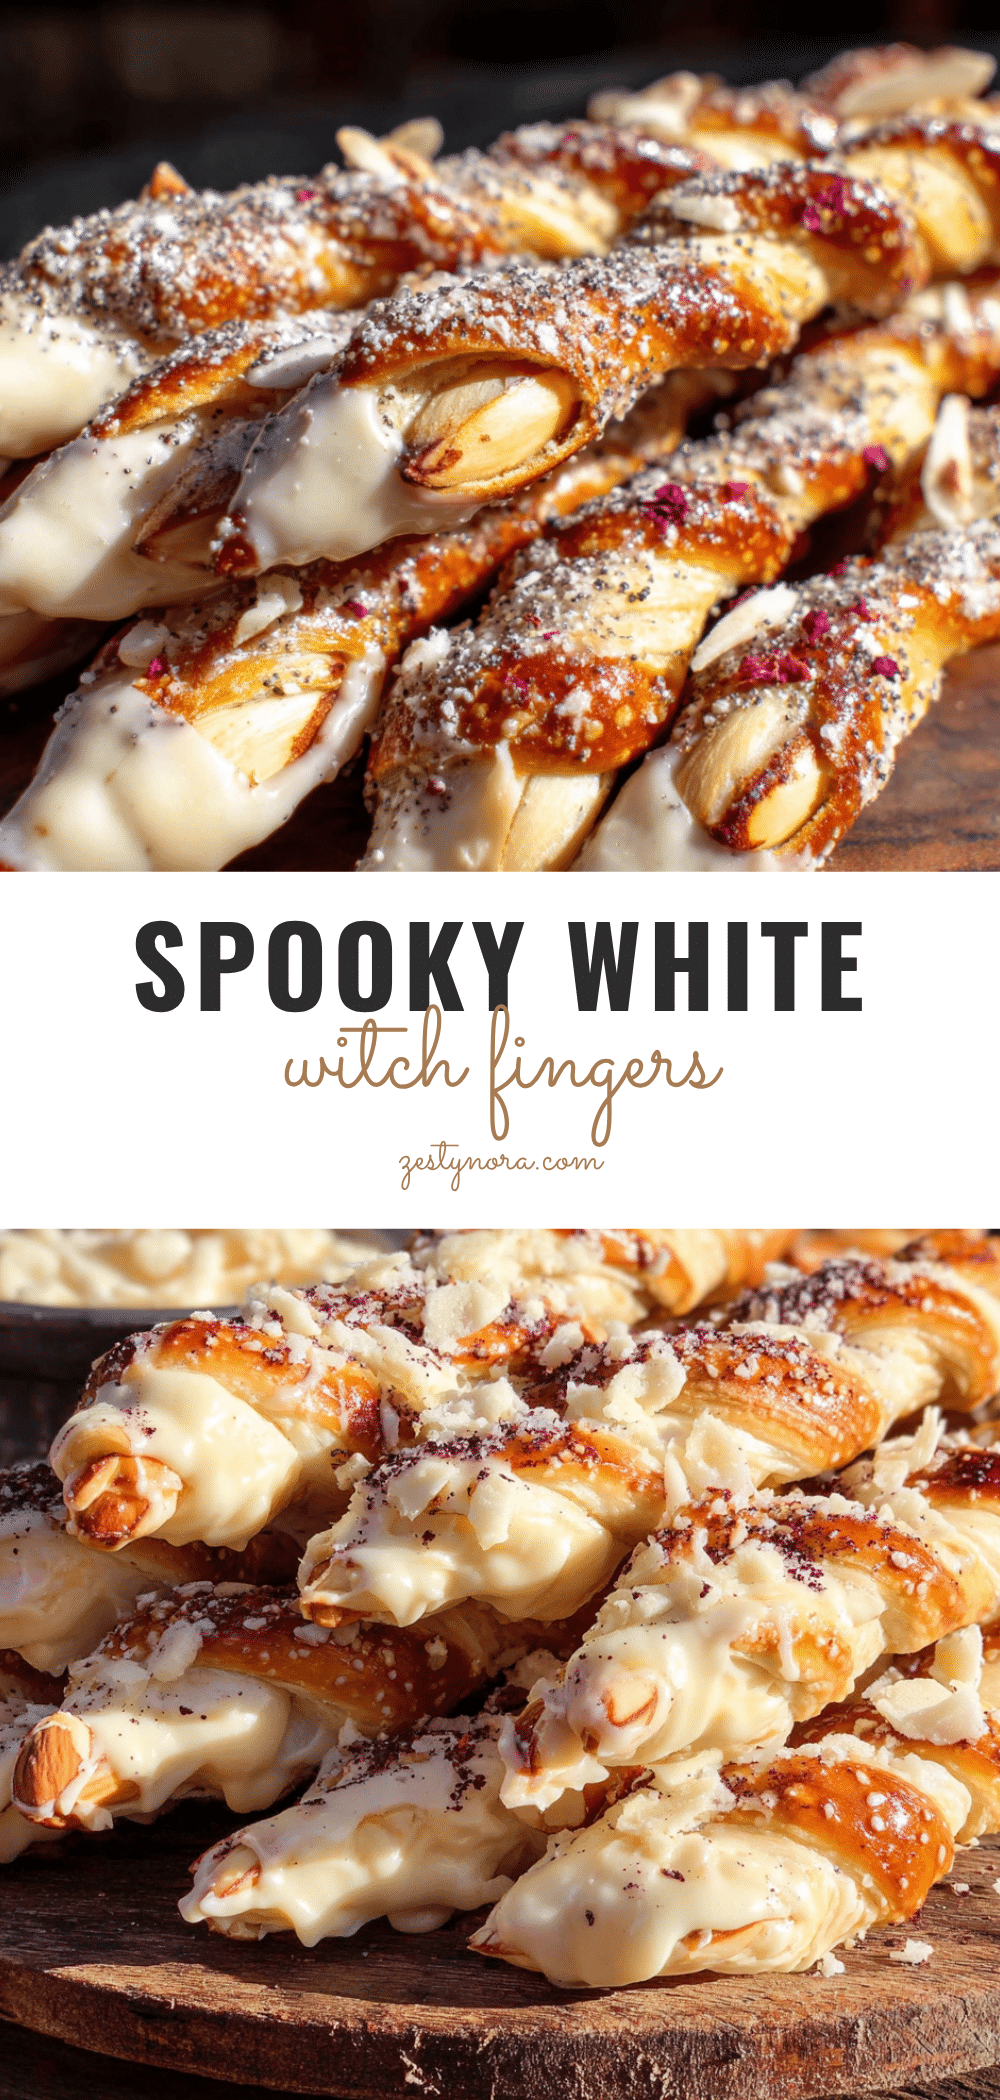
Spooky White Chocolate Witch Finger Pretzels: Easy Halloween Treat
These spooky white chocolate witch finger pretzels are a perfect Halloween treat that looks creepy but tastes delicious. Made with pretzel rods, white chocolate, sliced almonds, and red gel food coloring, they come together in under 30 minutes and are sure to be a hit at any Halloween gathering.
- Prep Time: 15 minutes
- Cook Time: 0 minutes
- Total Time: 30 minutes
- Yield: 12-15 servings 1x
- Category: Dessert
- Cuisine: American
Ingredients
- 12–15 pretzel rods (thick, straight ones)
- 12 ounces white chocolate melting wafers (or white chocolate chips with 1 tsp coconut oil)
- 30–40 sliced almonds (raw or blanched)
- Red gel food coloring
- Optional: edible glitter or luster dust
- Optional: black or orange sprinkles
Instructions
- Line a baking sheet with parchment paper and set aside. Arrange pretzel rods, sliced almonds, and red gel food coloring within easy reach.
- Place white chocolate melting wafers in a microwave-safe bowl. Microwave in 30-second intervals at 50% power, stirring thoroughly after each interval, until smooth and glossy (about 2-3 minutes total). If too thick, stir in 1 teaspoon coconut oil or vegetable shortening.
- Hold a pretzel rod by the end and dip it into the melted white chocolate, leaving about an inch uncoated at the top. Rotate to let excess drip off, then gently tap against the bowl. Place on prepared baking sheet. Repeat with remaining pretzels.
- While the white chocolate is still wet, press a sliced almond into the tip of each pretzel at a slight angle, pointed end outward, so about half the almond is visible.
- Using a toothpick or piping bag, dab a small amount of red gel food coloring at the base of each almond fingernail. A tiny dot slightly smeared toward the almond looks most realistic.
- Allow the witch finger pretzels to set completely at room temperature for 20-30 minutes. Do not refrigerate unless in a hurry, as condensation can cause blotching.
- Optional: Use a toothpick to create subtle knuckle lines on the white chocolate coating, or sprinkle edible glitter over wet chocolate for a magical shimmer.
Notes
White chocolate burns easily; melt at 50% power and stir frequently. Use red gel sparingly to avoid a gory look. Work in small batches to prevent chocolate from setting before decorating. For best results, use straight pretzel rods and high-quality melting wafers.
Nutrition
- Serving Size: 1 witch finger pretz
- Calories: 190
- Sugar: 15
- Sodium: 200
- Fat: 10
- Saturated Fat: 6
- Carbohydrates: 24
- Fiber: 1
- Protein: 3
Keywords: Halloween treats, witch finger pretzels, white chocolate pretzels, easy Halloween recipe, spooky snacks, no-bake Halloween treats


