A friend asked me why I couldn’t just use whole wheat pastry flour and brown butter instead of the usual stuff. I started to explain the science of why that wouldn’t work — then stopped. Honestly, I had no good reason except that I was being stubborn.
This was a Tuesday night, and my friend Jenna was standing in my kitchen with a bag of chocolate chips and this look of pure confidence. She’d been reading about brown butter online and thought it sounded “fancy but doable.” I was about to launch into my whole spiel about fat content and sugar ratios when I realized I’d never actually tried making cookies this way. I mean, I’d been baking for years — fifteen years, maybe more — and I had my go-to recipe memorized. Why mess with a good thing?
But Jenna kept pushing. “What’s the worst that could happen? We waste a stick of butter?” She had a point. So I grabbed a saucepan, tossed in the butter, and watched it melt. That nutty smell hit me about two minutes later, and I knew I was in trouble. The cookies came out golden, crackly on top, soft in the middle, with this deep, almost caramel-like flavor that made the regular version taste flat. I forgot to add salt to the dough that night — a total rookie mistake — but the flaky sea salt on top saved it. Maybe that was the happy accident.
These cookies have been in my regular rotation ever since. They’re the kind that make you close your eyes after the first bite, and honestly, they’re better than the full-fat originals. You know that feeling when something turns out better than you planned? That’s this recipe.
Why You’ll Love This Recipe
Let me tell you why these salted brown butter chocolate chip cookies are different from every other recipe you’ve tried. I’ve tested this version about twelve times — yes, twelve — and each batch taught me something new. The first batch was too flat. The third batch was too cakey. The seventh batch? That was the one where I finally nailed the texture.
- Quick & Easy: These come together in about 30 minutes, plus chill time. Perfect for when you need cookies fast but still want that wow factor.
- Simple Ingredients: No weird flours or obscure sweeteners. You probably have everything except maybe the whole wheat pastry flour, which is easy to find.
- Perfect for Everyday Indulgence: They’re light enough that you don’t feel guilty having two. Or three. Let’s be real.
- Crowd-Pleaser: I brought these to a potluck last month and three people asked for the recipe before I’d even put the container down.
- Unbelievably Delicious: The brown butter adds this nutty depth that regular cookies just can’t touch. And the salt? It’s the perfect finish.
What makes this recipe different is the technique. Browning the butter changes everything — it deepens the flavor without adding extra fat or sugar. And swapping half the all-purpose flour for whole wheat pastry flour gives you a tender crumb with a little extra fiber. It’s not just another chocolate chip cookie. It’s the one you’ll actually want to make again.
This recipe is comfort food reimagined — healthier, faster, but with the same soul-soothing satisfaction. Perfect for impressing guests without stress, or turning a simple Tuesday into something memorable.
What Ingredients You Will Need
This recipe uses simple, wholesome ingredients to deliver bold flavor and satisfying texture without the fuss. Most of these are pantry staples, but a few key players make all the difference.
- Unsalted butter, 1 cup (2 sticks) — browning this is the whole point. I recommend Kerrygold or Challenge for the best flavor. The milk solids in European-style butter brown more evenly.
- Whole wheat pastry flour, 1 ½ cups (180g) — this is the secret to the lighter texture. It’s not the same as regular whole wheat flour; pastry flour is softer and won’t make your cookies dense. Bob’s Red Mill makes a good one.
- All-purpose flour, 1 cup (120g) — unbleached is best. King Arthur is my go-to.
- Light brown sugar, ¾ cup (150g) — packed. This adds moisture and that subtle molasses flavor that pairs so well with brown butter.
- Granulated sugar, ¼ cup (50g) — just enough for structure and a little crunch on the edges.
- Large egg, 1, plus 1 egg yolk — the extra yolk adds richness without needing more butter. Let them come to room temperature first.
- Vanilla extract, 2 teaspoons — pure, not imitation. Trust me on this.
- Baking soda, 1 teaspoon — make sure it’s fresh. Old baking soda won’t give you that nice spread.
- Salt, ½ teaspoon — fine sea salt for the dough.
- Dark chocolate chips, 1 ½ cups (270g) — I like Ghirardelli 60% cacao. You can also chop a good dark chocolate bar for those melty puddles.
- Flaky sea salt, for finishing — Maldon is my favorite. Don’t skip this; it’s what makes the cookies sing.
Substitution Notes: If you don’t have whole wheat pastry flour, you can use all-purpose for the whole amount, but the cookies will be a bit less tender. For a dairy-free version, use vegan butter — just know it won’t brown the same way. Coconut sugar can replace the brown sugar, but the texture will be slightly grainier.
Equipment Needed
You don’t need much for these cookies, which is part of why I love making them. Here’s what you’ll need:
- Light-colored saucepan — this is important. A dark pan makes it hard to see when the butter is browning, and you’ll end up with burnt butter. I learned this the hard way.
- Mixing bowls — one medium, one large. I use glass or stainless steel.
- Whisk — for the dry ingredients and for mixing the wet ingredients.
- Rubber spatula — for folding in the chocolate chips. A wooden spoon works too, but the spatula gets every last bit.
- Baking sheets — two, preferably light-colored so the cookies don’t over-brown on the bottom. Half-sheet pans are perfect.
- Parchment paper — or a silicone baking mat. Parchment is cheaper and gives the cookies a slightly crisper bottom.
- Cookie scoop — a 1.5-tablespoon scoop gives you consistent cookies. If you don’t have one, use two spoons.
- Cooling rack — essential for getting that perfect texture. Cookies that sit on the hot pan continue to cook and can get overdone.
That’s it. No stand mixer required, though you can use one if you prefer. I actually like mixing these by hand — it’s more forgiving and you’re less likely to overmix.
Preparation Method
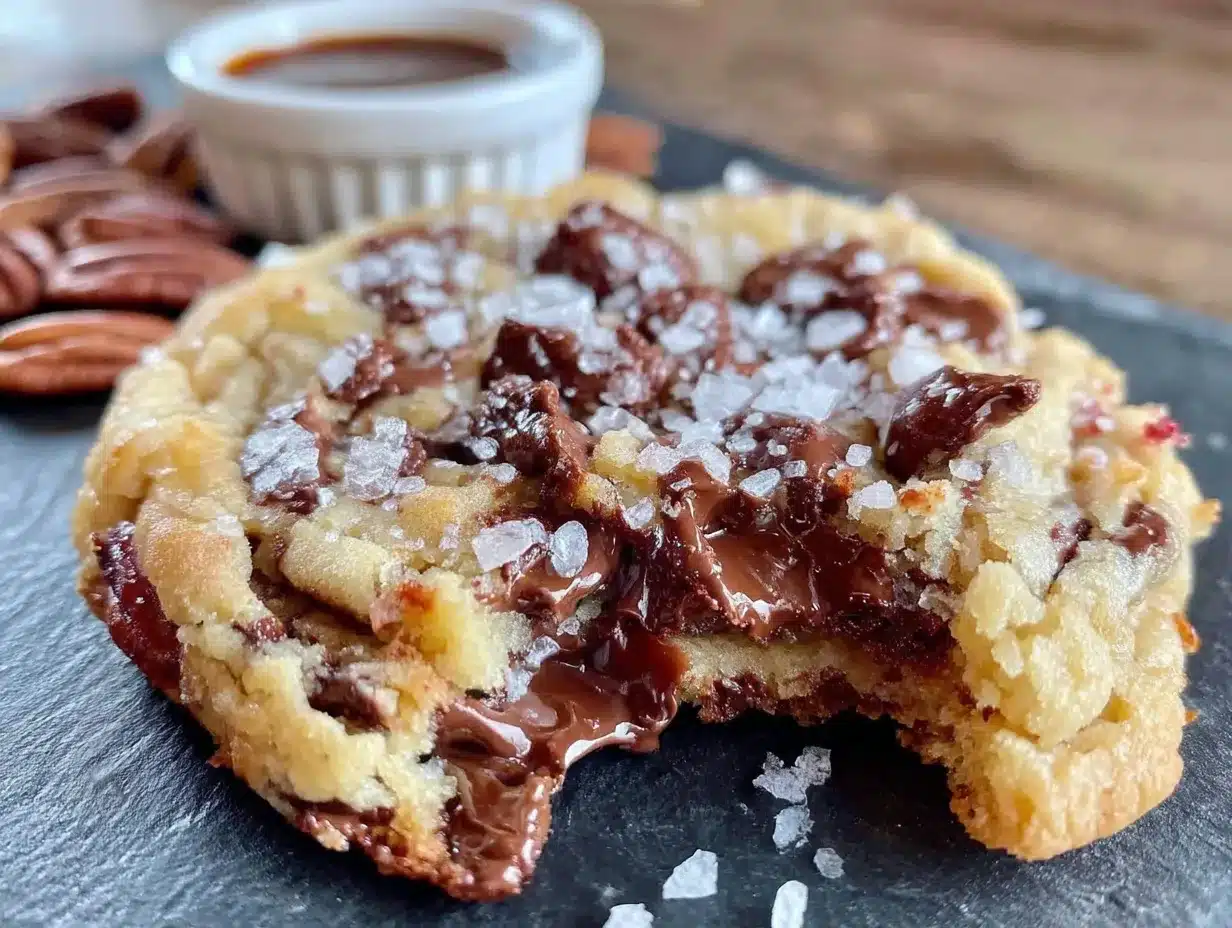
- Brown the butter: Cut the butter into pieces and add it to your light-colored saucepan. Melt it over medium heat, swirling occasionally. After about 5 minutes, you’ll hear it start to crackle and foam. Keep swirling. The milk solids will turn golden brown, and you’ll smell that nutty aroma. This takes about 6-8 minutes total. Watch carefully — it goes from brown to burnt fast. Pour it into a heatproof bowl immediately and let it cool for 10 minutes.
- Mix the dry ingredients: In a medium bowl, whisk together the whole wheat pastry flour, all-purpose flour, baking soda, and fine sea salt. Set aside.
- Combine the sugars and butter: Once the brown butter has cooled slightly (it should be warm but not hot), add the brown sugar and granulated sugar. Whisk vigorously for about 2 minutes until the mixture looks like wet sand and has slightly lightened in color. This step is important — it helps dissolve the sugar and creates that crackly top.
- Add the egg and vanilla: Whisk in the whole egg and egg yolk one at a time, mixing well after each. Add the vanilla extract. The mixture should look smooth and glossy. If it looks greasy or separated, your butter was too hot — don’t worry, just keep whisking and it will come together.
- Fold in the dry ingredients: Add the flour mixture to the wet ingredients. Use your rubber spatula to fold gently until just combined. A few streaks of flour are okay. Overmixing will make the cookies tough.
- Add the chocolate chips: Fold in the dark chocolate chips. The dough will be soft and slightly sticky. That’s perfect.
- Chill the dough: Cover the bowl with plastic wrap and refrigerate for at least 30 minutes, or up to 48 hours. This step is non-negotiable. Chilling prevents the cookies from spreading too much and deepens the flavor. If you skip it, you’ll get flat, greasy cookies.
- Preheat and prepare: When you’re ready to bake, preheat your oven to 350°F (175°C). Line two baking sheets with parchment paper.
- Scoop and shape: Use your cookie scoop to portion the dough into 1.5-tablespoon balls. Place them about 2 inches apart on the prepared sheets. I like to slightly flatten each ball with my palm for a more even bake.
- Bake: Bake one sheet at a time for 10-12 minutes. The edges should be golden brown and the centers should look slightly underdone and puffy. They’ll continue to set as they cool. My oven runs hot, so I start checking at 9 minutes.
- Add the finishing salt: Right when the cookies come out of the oven, sprinkle a pinch of flaky sea salt on each one. This is the moment where everything comes together.
- Cool: Let the cookies cool on the baking sheet for 5 minutes, then transfer them to a cooling rack. If you try to move them too soon, they’ll fall apart. Trust me, I’ve made that mistake.
Cooking Tips & Techniques
After twelve batches, I’ve learned a few things that make these cookies consistently perfect. Here’s what I wish someone had told me:
The butter is the boss. Browning butter is simple but requires attention. Don’t walk away from the stove. Once you see those brown specks forming and smell that nutty aroma, pour it out immediately. The residual heat in the pan can burn it in seconds. I once got distracted by a phone call and ended up with black butter. The cookies tasted like ash.
Temperature matters more than you think. Your egg and egg yolk should be at room temperature. Cold ingredients will seize the brown butter and give you a lumpy dough. If you forgot to take them out ahead of time, place the eggs in a bowl of warm water for 5 minutes.
Don’t overmix the dough. When you add the dry ingredients, fold until just combined. A few streaks of flour are fine. Overmixing develops gluten, which makes cookies tough instead of tender. I learned this lesson after making a batch that could have doubled as hockey pucks.
The chill is worth it. I know you want cookies now. I get it. But that 30-minute chill makes a huge difference. The dough spreads less, the flavors meld together, and you get that perfect chewy texture. If you’re in a hurry, pop the dough in the freezer for 15 minutes instead.
Bake one sheet at a time. Putting two sheets in the oven at once leads to uneven baking. The top sheet will brown faster than the bottom one. Just bake them in batches — it takes a little longer, but the results are worth it.
Variations & Adaptations
These cookies are forgiving, so feel free to play around. Here are some variations I’ve tried and loved:
Gluten-Free Version: Swap both flours for a good gluten-free all-purpose blend. I like Cup4Cup or King Arthur’s measure-for-measure blend. Add ¼ teaspoon of xanthan gum if your blend doesn’t already include it. The texture will be slightly more delicate, but the flavor is still incredible.
Vegan Adaptation: Use vegan butter (Miyoko’s is my favorite) and a flax egg (1 tablespoon ground flaxseed mixed with 3 tablespoons water, let sit for 5 minutes). The brown butter flavor won’t be as intense, but you’ll still get that nutty depth. Add an extra tablespoon of brown sugar for moisture.
Nutty Twist: Fold in ½ cup of toasted chopped pecans or walnuts along with the chocolate chips. Toast them first in a dry pan for 3-4 minutes until fragrant. This adds crunch and complements the brown butter beautifully.
Double Chocolate: Replace ¼ cup of the all-purpose flour with dark cocoa powder. Use white chocolate chips instead of dark for a beautiful contrast. My kids beg for this version.
Seasonal Swap: In fall, add 1 teaspoon of pumpkin pie spice to the dry ingredients and use butterscotch chips instead of chocolate. In summer, fold in ½ cup of dried cherries for a tart pop.
Serving & Storage Suggestions
These cookies are best served warm, about 10 minutes after they come out of the oven. The chocolate is still melty, the edges are crisp, and the salt is just starting to dissolve into the surface. Pair them with a cold glass of milk or a hot cup of coffee — honestly, there’s no wrong choice.
If you’re serving these at a party, arrange them on a wooden board with a few extra pinches of flaky salt scattered around. They look beautiful and rustic. I’ve also crumbled them over vanilla ice cream for an easy dessert that feels fancy.
Storage: Keep baked cookies in an airtight container at room temperature for up to 5 days. Place a slice of bread in the container to keep them soft — the cookies will absorb the moisture and stay chewy. Replace the bread every other day.
Freezing: You have two options. Freeze the baked cookies in a single layer on a baking sheet, then transfer to a freezer bag. They’ll keep for 3 months. Or freeze the dough balls on a sheet pan, then pop them into a bag. When you want cookies, bake from frozen — just add 2-3 minutes to the baking time. This is my favorite trick for having fresh cookies any time.
Reheating: Microwave a cookie for 10 seconds to get that just-baked feel. Or pop them in a 300°F oven for 5 minutes. The flavor actually deepens after a day or two — the brown butter notes become more pronounced.
Nutritional Information & Benefits
Here’s the honest breakdown for one cookie (based on a batch of 24):
- Calories: 165
- Fat: 9g
- Saturated Fat: 5g
- Carbohydrates: 21g
- Fiber: 2g
- Sugar: 12g
- Protein: 3g
- Sodium: 95mg
These numbers are lower than your average chocolate chip cookie because of the whole wheat pastry flour and the reduced butter. The whole wheat flour adds fiber and a little protein, which helps with satiety. Dark chocolate brings antioxidants, and the brown butter gives you that rich flavor without needing extra fat.
If you’re watching your sugar intake, you can reduce the brown sugar to ½ cup, but the cookies will be less chewy. For a lower-fat option, replace the egg yolk with another egg white. The texture will be slightly cakier, but still delicious.
I’m not a nutritionist, but I’ve found that these cookies satisfy that craving without the heavy feeling you get from traditional recipes. They’re a treat, but a smart one.
Conclusion
These salted brown butter chocolate chip cookies are proof that small changes make a big difference. The brown butter adds depth you didn’t know you were missing, and the whole wheat pastry flour keeps things light without sacrificing texture. Honestly, I don’t think I’ll go back to the regular version.
What I love most about this recipe is how adaptable it is. You can make it your own — swap the chocolate, add nuts, go gluten-free. The base is solid, and it invites experimentation. That’s the mark of a great recipe, if you ask me.
I’d love to hear how these turn out for you. Did you try a variation? Did you forget the salt on top like I did that first time? Drop a comment below and let me know. Share this recipe with someone who needs a good cookie in their life — because honestly, don’t we all?
Happy baking, friends. You’ve got this.
Frequently Asked Questions
Can I use salted butter instead of unsalted?
You can, but reduce the added salt in the dough to ¼ teaspoon. The flaky salt on top is still essential — it’s what gives these cookies their signature finish.
Why did my cookies spread too much?
This usually means the dough wasn’t chilled long enough, or your butter was too warm when you mixed it. Pop the dough in the fridge for at least 30 minutes next time, and make sure the brown butter has cooled before adding the sugars.
Can I make these cookies without a mixer?
Absolutely. I actually prefer making them by hand. A whisk and a rubber spatula are all you need. Just be prepared for a little arm workout when you’re mixing the dough.
How do I know when the butter is properly browned?
Look for two signs: the color should be a deep amber, and you should smell a nutty, toasty aroma. The milk solids will settle at the bottom of the pan as tiny brown specks. If you see black specks, you’ve gone too far.
Can I use milk chocolate instead of dark?
Yes, but the cookies will be sweeter. If you’re using milk chocolate, reduce the brown sugar by 2 tablespoons to balance the sweetness. I’d still recommend dark chocolate for the best contrast with the salty finish.
Pin This Recipe!
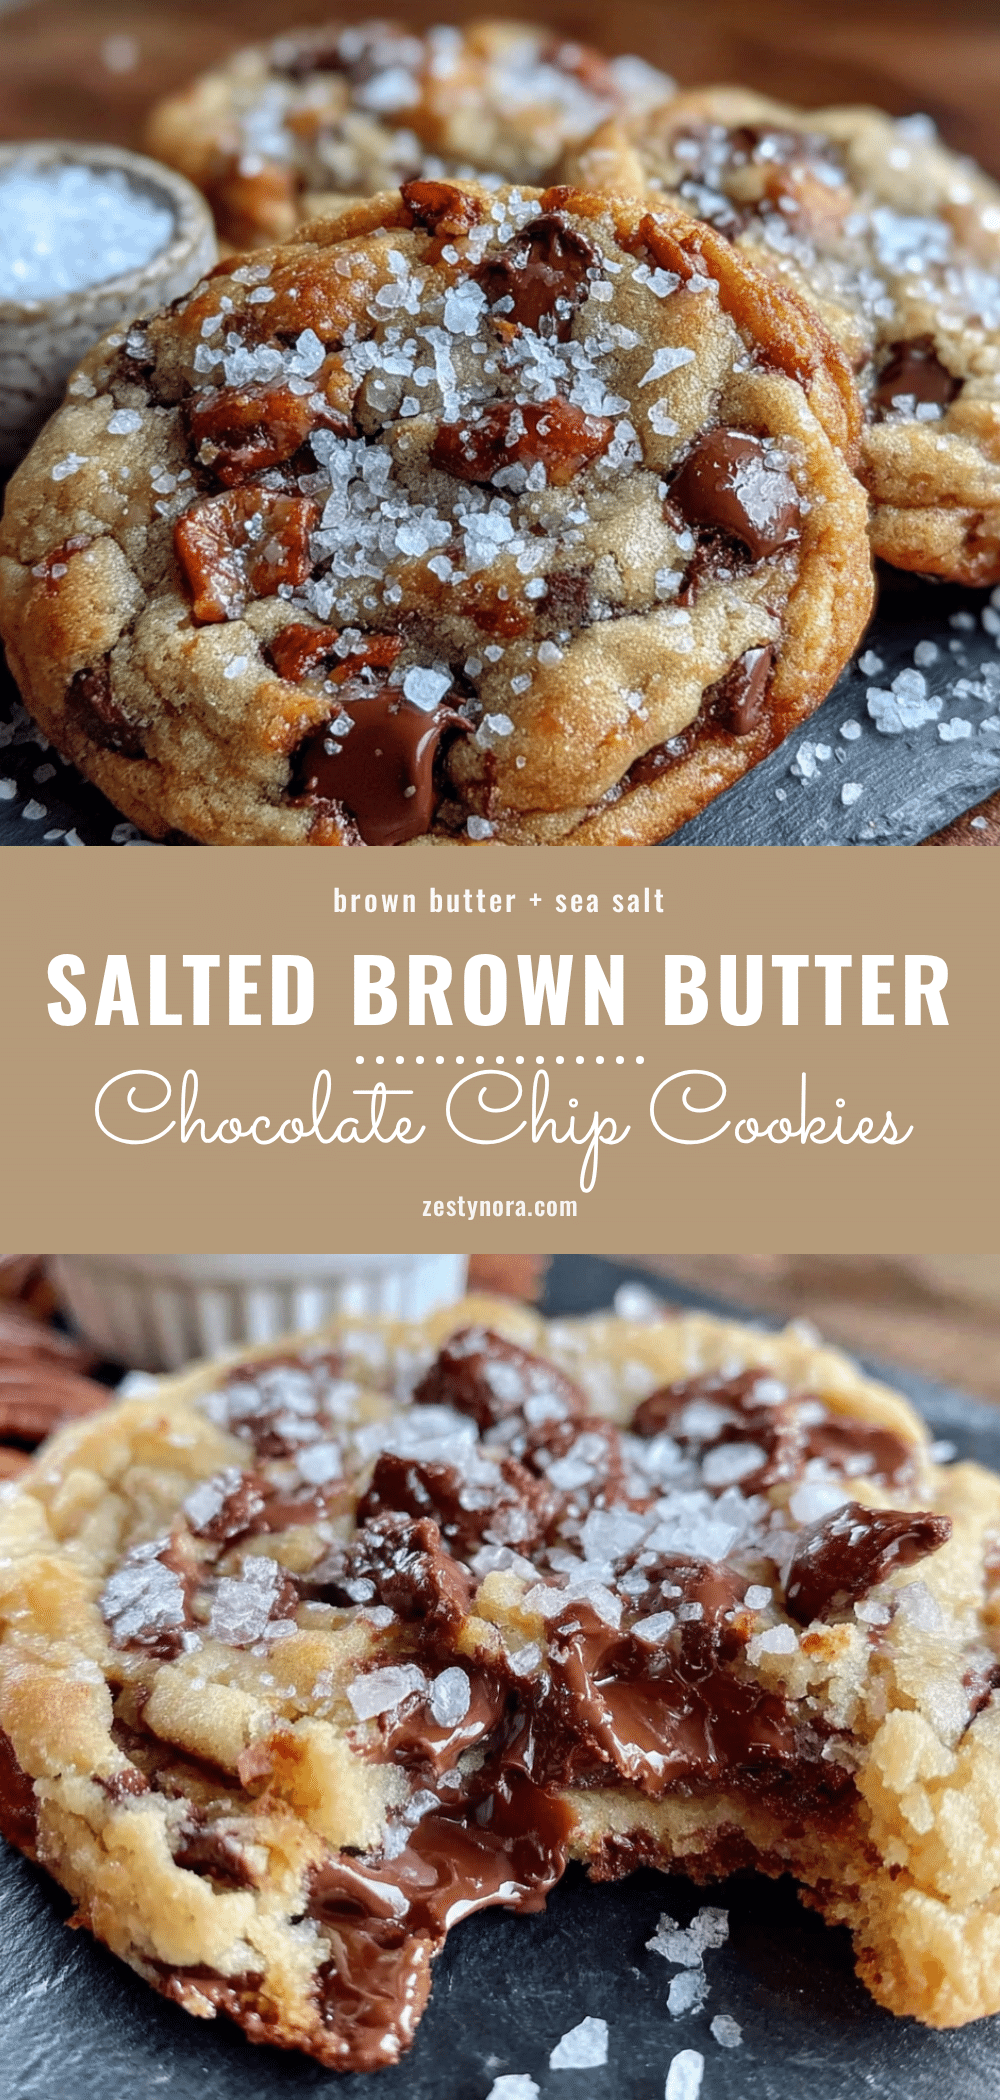
Salted Brown Butter Chocolate Chip Cookies (Lightened Up)
These salted brown butter chocolate chip cookies are proof that small changes make a big difference. The brown butter adds depth you didn’t know you were missing, and the whole wheat pastry flour keeps things light without sacrificing texture.
- Prep Time: 15 minutes
- Cook Time: 12 minutes
- Total Time: 57 minutes (including 30 minutes chill time)
- Yield: 24 cookies 1x
- Category: Dessert
- Cuisine: American
Ingredients
- 1 cup (2 sticks) unsalted butter
- 1 ½ cups (180g) whole wheat pastry flour
- 1 cup (120g) all-purpose flour
- ¾ cup (150g) light brown sugar, packed
- ¼ cup (50g) granulated sugar
- 1 large egg, plus 1 egg yolk, room temperature
- 2 teaspoons vanilla extract
- 1 teaspoon baking soda
- ½ teaspoon fine sea salt
- 1 ½ cups (270g) dark chocolate chips
- Flaky sea salt, for finishing
Instructions
- Brown the butter: Cut the butter into pieces and add it to a light-colored saucepan. Melt it over medium heat, swirling occasionally. After about 5 minutes, it will start to crackle and foam. Keep swirling until the milk solids turn golden brown and you smell a nutty aroma (about 6-8 minutes total). Pour into a heatproof bowl immediately and let cool for 10 minutes.
- Mix the dry ingredients: In a medium bowl, whisk together the whole wheat pastry flour, all-purpose flour, baking soda, and fine sea salt. Set aside.
- Combine the sugars and butter: Once the brown butter has cooled slightly (warm but not hot), add the brown sugar and granulated sugar. Whisk vigorously for about 2 minutes until the mixture looks like wet sand and has slightly lightened in color.
- Add the egg and vanilla: Whisk in the whole egg and egg yolk one at a time, mixing well after each. Add the vanilla extract. The mixture should look smooth and glossy.
- Fold in the dry ingredients: Add the flour mixture to the wet ingredients. Use a rubber spatula to fold gently until just combined. A few streaks of flour are okay.
- Add the chocolate chips: Fold in the dark chocolate chips. The dough will be soft and slightly sticky.
- Chill the dough: Cover the bowl with plastic wrap and refrigerate for at least 30 minutes, or up to 48 hours.
- Preheat and prepare: When ready to bake, preheat oven to 350°F (175°C). Line two baking sheets with parchment paper.
- Scoop and shape: Use a cookie scoop to portion the dough into 1.5-tablespoon balls. Place them about 2 inches apart on the prepared sheets. Slightly flatten each ball with your palm.
- Bake: Bake one sheet at a time for 10-12 minutes. The edges should be golden brown and the centers should look slightly underdone and puffy.
- Add the finishing salt: Right when the cookies come out of the oven, sprinkle a pinch of flaky sea salt on each one.
- Cool: Let the cookies cool on the baking sheet for 5 minutes, then transfer to a cooling rack.
Notes
Chilling the dough is non-negotiable to prevent spreading. Use a light-colored saucepan to monitor browning. Don’t overmix the dough. Bake one sheet at a time for even results. For gluten-free, use a gluten-free all-purpose blend with xanthan gum. For vegan, use vegan butter and a flax egg.
Nutrition
- Serving Size: 1 cookie
- Calories: 165
- Sugar: 12
- Sodium: 95
- Fat: 9
- Saturated Fat: 5
- Carbohydrates: 21
- Fiber: 2
- Protein: 3
Keywords: brown butter, chocolate chip cookies, lightened up, whole wheat pastry flour, salted cookies, easy dessert


