My neighbor across the hall, a retired pastry chef named Rosa, watched me fumbling with a can of pumpkin puree one rainy Tuesday evening. I was trying to make something—anything—from the sad squash I’d impulse-bought at the farmers market. She didn’t say anything at first. Just leaned against her doorframe, arms crossed, a little smile playing on her lips. Then she walked over, took the can from my hands, and said, “You’re overthinking it. Pumpkin wants to be fast. It’s not a complicated vegetable.”
That conversation changed how I bake in autumn. Rosa taught me that pumpkin doesn’t need to be fussed over for hours. It’s forgiving, it’s moist, and it pairs with warm spices like they were made for each other. She scribbled a rough recipe on a napkin—her handwriting was terrible, honestly—and I’ve been tweaking it ever since. These quick pumpkin scones with brown butter glaze are the result of that rainy evening and about a dozen test batches later.
I mean, let me tell you, I messed up the first few tries. Too dry, too flat, not enough spice. But Rosa kept encouraging me from across the hall, and eventually, I landed on something that made her nod approvingly. “Not bad,” she said. Coming from her, that was a five-star review.
These scones are everything I want in a fall breakfast or afternoon snack: tender, spiced just right, and topped with a brown butter glaze that tastes like liquid gold. They come together in under 30 minutes, which is honestly the only way I bake on weeknights. Maybe you’ve been there—staring at a can of pumpkin, wanting something cozy but not having the energy for a whole production. This one’s for you.
Why You’ll Love This Recipe
These quick pumpkin scones with brown butter glaze are the kind of recipe that makes you look like a baking hero without actually working that hard. After testing this recipe about seven times (my coworkers were very happy taste testers), I can confidently say this version is the one.
- Quick & Easy: From start to finish, these scones are on your table in under 30 minutes. No chilling the dough, no complicated folds—just mix, shape, bake, and glaze.
- Simple Ingredients: You probably have most of these in your pantry right now. Pumpkin puree, flour, butter, sugar, and a few warm spices. No fancy grocery trips required.
- Perfect for Fall Mornings: These scones are made for cozy autumn breakfasts, afternoon tea, or even a quick dessert after dinner. They’re not too sweet, so they work for any time of day.
- Crowd-Pleaser: I brought these to a potluck last month, and three people asked for the recipe before I even sat down. Kids love them, adults love them—everyone wins.
- Unbelievably Delicious: The brown butter glaze is the real star here. It adds a nutty, caramel-like depth that takes these scones from “good” to “I need another one immediately.”
What makes these different from other pumpkin scone recipes? It’s the brown butter. Most recipes skip this step because it takes an extra five minutes, but honestly, that five minutes transforms everything. The glaze becomes almost toffee-like, and it pairs so perfectly with the soft, spiced scone underneath. I’ve tried versions with regular butter glaze, and they just don’t compare. This is the one.
These scones are the kind of thing that makes you close your eyes after the first bite. It’s comfort food reimagined—faster, simpler, but with the same soul-soothing satisfaction. Perfect for impressing weekend guests without stress, or turning a regular Tuesday morning into something memorable.
What Ingredients You Will Need
This recipe uses simple, wholesome ingredients to deliver bold flavor and satisfying texture without the fuss. Most of these are pantry staples, especially if you bake during fall.
For the Scones
- 2 cups all-purpose flour (spooned and leveled—don’t pack it)
- 1/3 cup granulated sugar (adds just enough sweetness without overpowering the pumpkin)
- 1 tablespoon baking powder (make sure it’s fresh for the best rise)
- 1/2 teaspoon baking soda
- 1/2 teaspoon salt
- 1 teaspoon ground cinnamon
- 1/2 teaspoon ground ginger
- 1/4 teaspoon ground nutmeg (freshly grated if you have it—it makes a difference)
- 1/4 teaspoon ground cloves
- 6 tablespoons cold unsalted butter, cut into small cubes (keep it cold—this is key for flaky scones)
- 1/2 cup pumpkin puree (not pumpkin pie filling—make sure it’s 100% pure pumpkin)
- 1/4 cup heavy cream (or whole milk if that’s what you have)
- 1 large egg
- 1 teaspoon vanilla extract
For the Brown Butter Glaze
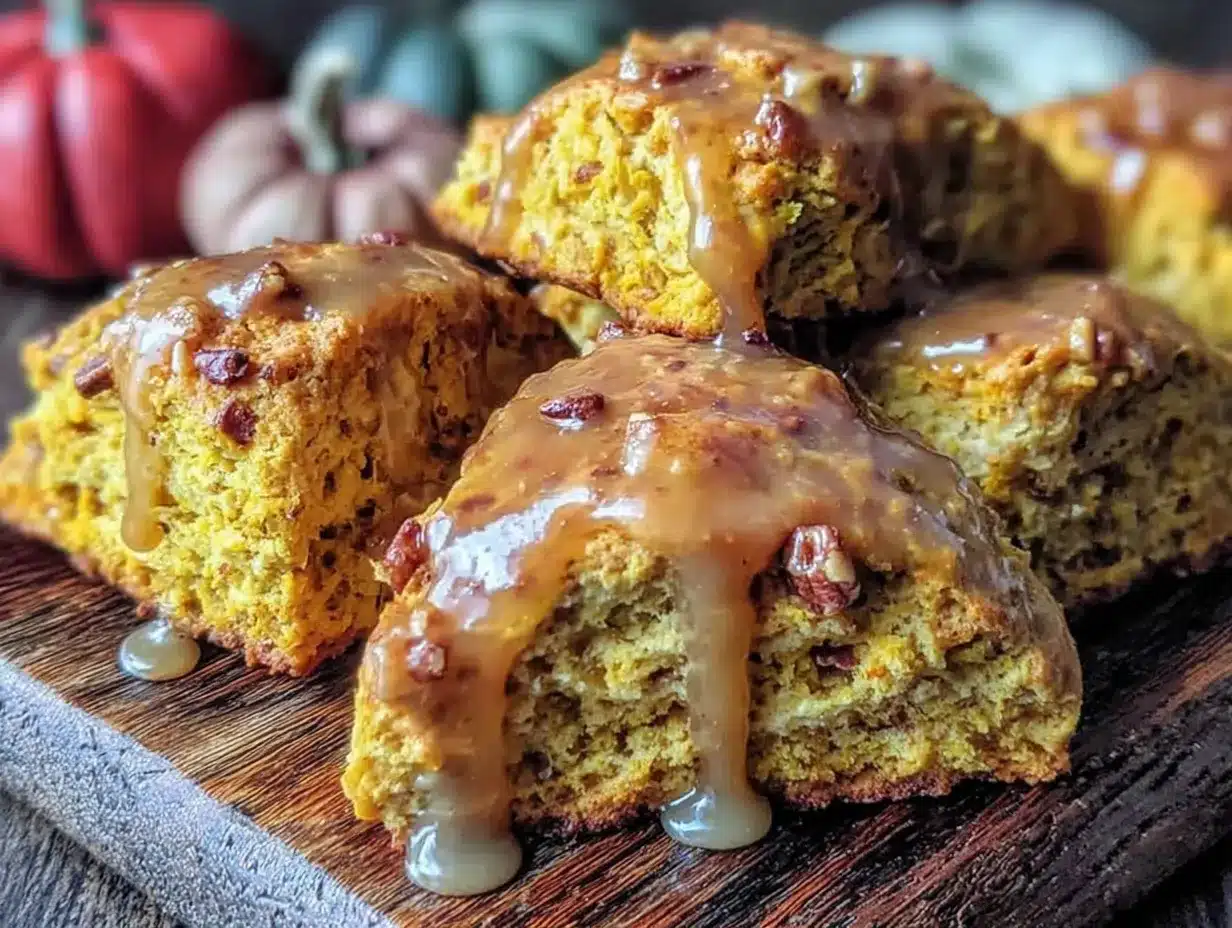
- 1/4 cup unsalted butter (you’ll brown this first)
- 1 cup powdered sugar, sifted (sifting prevents lumps)
- 2-3 tablespoons milk (start with 2 and add more if needed)
- 1/2 teaspoon vanilla extract
- Pinch of salt (trust me on this—it balances the sweetness)
Ingredient Notes: I recommend using Libby’s pumpkin puree for consistent results—it’s thicker and less watery than some store brands. For the butter, I use Kerrygold because it browns beautifully and has a richer flavor, but any unsalted butter works. If you’re out of heavy cream, whole milk is fine, but the scones will be slightly less tender. For a dairy-free version, substitute the butter with a plant-based baking stick and use oat milk in the glaze—just know the texture will be a bit different.
For the spices, feel free to use 2 teaspoons of pumpkin pie spice instead of the individual spices if that’s what you have on hand. I often do this when I’m in a rush, and it works perfectly.
Equipment Needed
You don’t need much fancy equipment for these quick pumpkin scones with brown butter glaze. Here’s what I use:
- Large mixing bowl for the dry ingredients
- Medium mixing bowl for the wet ingredients
- Pastry cutter or two forks for cutting butter into flour (your hands work too, but work fast so the butter stays cold)
- Baking sheet lined with parchment paper (I prefer parchment over silicone mats for scones—better browning on the bottom)
- Small saucepan for browning the butter (light-colored pans work best so you can see the color change)
- Whisk for the glaze
- Bench scraper or sharp knife for cutting the scone dough
- Pastry brush (optional, for brushing cream on top before baking)
If you don’t have a pastry cutter, honestly, two butter knives work fine. Just cut the butter into the flour in a crisscross motion until it looks like coarse meal. I’ve also used a food processor in a pinch—just pulse a few times until the butter is pea-sized, then transfer to a bowl before adding the wet ingredients. Don’t over-process or you’ll end up with tough scones.
For the baking sheet, any rimmed sheet pan works. I use a Nordic Ware one because it distributes heat evenly, but your regular baking sheet is totally fine.
Preparation Method
Let me walk you through this step by step. These quick pumpkin scones with brown butter glaze really do come together fast, but there are a few tricks I learned the hard way.
- Preheat your oven to 400°F (200°C). Line a baking sheet with parchment paper. This is one of those steps you don’t want to skip—the scones need that initial blast of heat to rise properly.
- In a large bowl, whisk together the flour, sugar, baking powder, baking soda, salt, cinnamon, ginger, nutmeg, and cloves. Make sure everything is evenly distributed. I usually give it about 20 seconds of whisking to break up any lumps in the flour.
- Add the cold cubed butter to the flour mixture. Using a pastry cutter or two forks, cut the butter into the flour until the mixture resembles coarse meal with pea-sized butter pieces. Some larger pieces are okay—those create flaky pockets in the scones. Work quickly so the butter doesn’t soften. If your kitchen is warm, pop the bowl in the fridge for 5 minutes.
- In a separate bowl, whisk together the pumpkin puree, heavy cream, egg, and vanilla extract. Make sure the egg is fully incorporated. The mixture should be smooth and a beautiful orange color.
- Pour the wet ingredients into the dry ingredients. Stir with a spatula just until combined. Stop when you no longer see dry flour—overmixing will make the scones tough. The dough will be shaggy and a bit sticky, and that’s exactly what you want.
- Turn the dough out onto a lightly floured surface. Gently bring it together with your hands, patting it into a circle about 3/4-inch thick. Don’t knead it—just press it into shape. Use a bench scraper to help if the dough is sticking.
- Cut the dough into 8 wedges like you’re cutting a pizza. Place them on the prepared baking sheet, spacing them about 2 inches apart. They’ll spread a little, but not too much.
- Optional but recommended: Brush the tops with a little extra cream. This helps them brown beautifully in the oven. Sprinkle with a tiny bit of coarse sugar if you want a crunchy top.
- Bake for 14-16 minutes, until the scones are golden brown on the bottom and lightly golden on top. A toothpick inserted in the center should come out clean. The kitchen will smell incredible at this point—like fall in a bakery.
- Let the scones cool on the baking sheet for 5 minutes, then transfer to a wire rack to cool completely before glazing. If you glaze them while they’re warm, the glaze will just melt right off.
- While the scones cool, make the brown butter glaze. In a small saucepan over medium heat, melt the 1/4 cup butter. Swirl the pan occasionally. The butter will foam, then start to turn golden, then amber. Watch carefully—it goes from brown to burnt very quickly. When you see brown specks forming and smell a nutty aroma (about 4-5 minutes), remove it from the heat immediately.
- Pour the brown butter into a medium bowl, including all the brown bits. Let it cool for 2 minutes. Add the sifted powdered sugar, 2 tablespoons of milk, vanilla extract, and a pinch of salt. Whisk until smooth. If the glaze is too thick, add the remaining tablespoon of milk. If it’s too thin, add a bit more powdered sugar.
- Drizzle the glaze over the cooled scones. Use a spoon or a piping bag—I just use a spoon and let it drip naturally. Let the glaze set for about 10 minutes before serving.
Cooking Tips & Techniques
After making these quick pumpkin scones with brown butter glaze about a dozen times, I’ve collected some hard-won wisdom. Here are the things I wish someone had told me.
Keep everything cold. This is the number one rule for tender, flaky scones. Cold butter creates steam pockets as it melts in the oven, which gives you those beautiful layers. If your butter softens while you’re cutting it in, pop the bowl in the fridge for 10 minutes. I’ve ruined batches by being impatient—the scones spread into flat pancakes instead of rising nicely.
Don’t overwork the dough. I know it’s tempting to keep mixing until everything looks perfectly smooth, but stop as soon as the dough comes together. Overmixing develops gluten, and gluten makes scones tough. The dough should look a little shaggy and imperfect. That’s a good sign.
Watch the brown butter like a hawk. I’m not kidding. I burned my first batch of brown butter because I looked away for 30 seconds to answer a text. The butter will foam up, then the foam will subside, and then you’ll see brown specks forming at the bottom. Swirl the pan constantly and take it off the heat the second you smell that nutty aroma. Pour it into a bowl immediately—the hot pan will keep cooking it otherwise.
Let the scones cool completely before glazing. I know you’re excited. I know they smell amazing. But warm scones will turn your beautiful glaze into a puddle. Give them at least 20 minutes on a wire rack. Use that time to make your coffee or clean up—you’ll thank yourself later.
For the fluffiest scones, measure your flour correctly. Spoon it into your measuring cup and level it off with a knife. Scooping directly from the bag packs the flour down, and you’ll end up with dry, dense scones. I learned this the hard way after making hockey pucks my first time.
Variations & Adaptations
These quick pumpkin scones with brown butter glaze are pretty perfect as-is, but I love playing around with variations. Here are some I’ve tried and loved.
Gluten-Free Version: Substitute the all-purpose flour with a good 1:1 gluten-free baking flour (I like Bob’s Red Mill). Add 1/2 teaspoon of xanthan gum if your blend doesn’t already include it. The texture will be slightly more crumbly, but still delicious. My gluten-free friend Sarah devoured four of these in one sitting, so I consider it a win.
Vegan Adaptation: Use a plant-based butter stick (not margarine) and substitute the egg with a flax egg (1 tablespoon ground flaxseed mixed with 3 tablespoons water, let sit for 5 minutes). Use oat milk or almond milk instead of heavy cream. The scones will be a bit less tender, but the brown butter glaze made with vegan butter still works wonderfully—just watch it carefully as plant-based butters brown faster.
Spice It Up: Add 1/4 teaspoon of cardamom or allspice for a more complex flavor profile. I tried this last Thanksgiving, and it was a hit. You can also add a pinch of black pepper—sounds weird, but it really brings out the pumpkin flavor.
Add Mix-Ins: Fold in 1/2 cup of dried cranberries, chopped pecans, or white chocolate chips before shaping the dough. The cranberry version is my personal favorite—the tartness balances the sweet glaze perfectly.
Maple Variation: Replace the granulated sugar with 1/3 cup of maple syrup (reduce the cream by 2 tablespoons to compensate for the extra liquid). For the glaze, use maple extract instead of vanilla. This version tastes like a cozy autumn morning in New England.
Pumpkin Chocolate Chip: Fold in 1/2 cup of semi-sweet chocolate chips. The chocolate pairs surprisingly well with the pumpkin and spices. My kids request this version every weekend in October.
Serving & Storage Suggestions
These quick pumpkin scones with brown butter glaze are best served slightly warm or at room temperature. The glaze should be set but still soft—that first bite with the crunchy glaze and tender scone is pure magic.
Serving Ideas: Pair these scones with a hot cup of coffee, chai latte, or spiced apple cider for the ultimate fall experience. They’re also wonderful with a dollop of clotted cream or a smear of salted butter if you’re feeling extra indulgent. For a brunch spread, serve them alongside scrambled eggs and fresh fruit—the sweetness balances the savory perfectly.
Storage Instructions: Store unglazed scones in an airtight container at room temperature for up to 3 days. If you’ve already glazed them, layer them between sheets of parchment paper so they don’t stick together. The glaze will soften slightly over time, but they’ll still be delicious.
Freezing: These scones freeze beautifully. Freeze unglazed scones in a single layer on a baking sheet, then transfer to a freezer bag for up to 3 months. When you’re ready to enjoy them, thaw at room temperature and warm in a 300°F oven for 5 minutes. Make the glaze fresh—it takes 5 minutes and makes a huge difference.
Reheating: Pop a scone in the microwave for 15 seconds for a quick warm-up, or in a 350°F oven for 5 minutes for a crispier exterior. The microwave is faster, but the oven brings back that fresh-baked texture.
Flavor Development: Honestly, these scones are even better the next day. The spices have time to meld, and the texture becomes even more tender. If you can resist eating them all on day one, you’re in for a treat on day two.
Nutritional Information & Benefits
Here’s the approximate nutritional breakdown for one scone (with glaze):
- Calories: 320
- Fat: 16g
- Carbohydrates: 42g
- Protein: 4g
- Fiber: 2g
- Sugar: 22g
These numbers will vary based on your specific ingredients and portion sizes. The brown butter glaze adds most of the sugar and fat, so if you’re watching your intake, you can use a lighter drizzle or skip the glaze entirely—the scones are still delicious on their own.
Health Highlights: Pumpkin is packed with vitamin A (great for eye health and immunity), fiber, and antioxidants. The spices—cinnamon, ginger, nutmeg, and cloves—are anti-inflammatory and add flavor without extra calories or sugar. Using cold butter creates flaky layers without needing shortening or other processed fats.
Dietary Considerations: This recipe contains dairy (butter, cream) and gluten (flour). It can be adapted for gluten-free and vegan diets using the substitutions mentioned in the variations section. The scones are nut-free as written, making them safe for school lunches or nut-free households.
I personally love that these scones feel like a treat but aren’t loaded with weird ingredients. They’re made with real food, and you can feel good about serving them to your family.
Conclusion
These quick pumpkin scones with brown butter glaze have become my signature fall recipe. They’re the thing I bring to gatherings, the thing I make when I want to feel cozy, the thing my neighbor Rosa actually asks for by name. And honestly, that makes me pretty proud.
What I love most about this recipe is how forgiving it is. You don’t need to be a pastry chef to pull these off. The dough comes together in minutes, the brown butter feels fancy but is actually simple, and the result tastes like you spent hours in the kitchen. It’s the perfect recipe for busy weeknights when you want something special without the stress.
I encourage you to make these your own. Add your favorite mix-ins, play with the spices, or double the glaze if you’re feeling decadent. That’s the beauty of baking—it’s meant to be adapted and shared.
So go ahead, preheat that oven, and make some scones. Your kitchen will smell amazing, your family will love you, and you’ll wonder why you didn’t try this sooner. When you do make them, come back and let me know how they turned out. Did you add chocolate chips? Try the maple version? I’d love to hear about it.
Happy baking, friends. Fall is waiting.
Frequently Asked Questions
Can I use pumpkin pie filling instead of pumpkin puree?
No, I don’t recommend it. Pumpkin pie filling is pre-sweetened and spiced, which will throw off the sugar and spice balance in this recipe. Stick with 100% pure pumpkin puree for the best results. If you only have pumpkin pie filling, reduce the sugar by half and skip the added spices, but honestly, it’s easier to just use the right ingredient.
Why did my scones turn out dry?
This usually happens for one of two reasons: too much flour or overbaking. Make sure you’re spooning and leveling your flour rather than scooping it directly from the bag. Also, check your oven temperature—ovens run hot sometimes, and those extra 2 minutes can make a big difference. Take the scones out when they’re just barely golden on the bottom.
Can I make the dough ahead of time?
Absolutely. Shape the scones, place them on a parchment-lined baking sheet, and refrigerate for up to 24 hours. You can even freeze them at this point. When you’re ready to bake, add an extra 2-3 minutes to the baking time if baking from cold, or 5-7 minutes if baking from frozen. Fresh scones with zero morning effort—that’s a win.
How do I know when the brown butter is done?
Watch for three signs: the butter will turn a golden-amber color, you’ll see small brown specks forming at the bottom of the pan, and you’ll smell a nutty, toasty aroma. The whole process takes about 4-5 minutes over medium heat. Remove it from the heat immediately when you see and smell these changes—it burns fast.
Can I skip the brown butter glaze?
You can, but you’ll be missing out on the best part! If you want a simpler topping, brush the warm scones with melted butter and sprinkle with cinnamon sugar. Or just enjoy them plain—they’re still tender and spiced and delicious. But honestly, the brown butter glaze is what makes these scones unforgettable. It’s worth the extra 5 minutes.
Pin This Recipe!
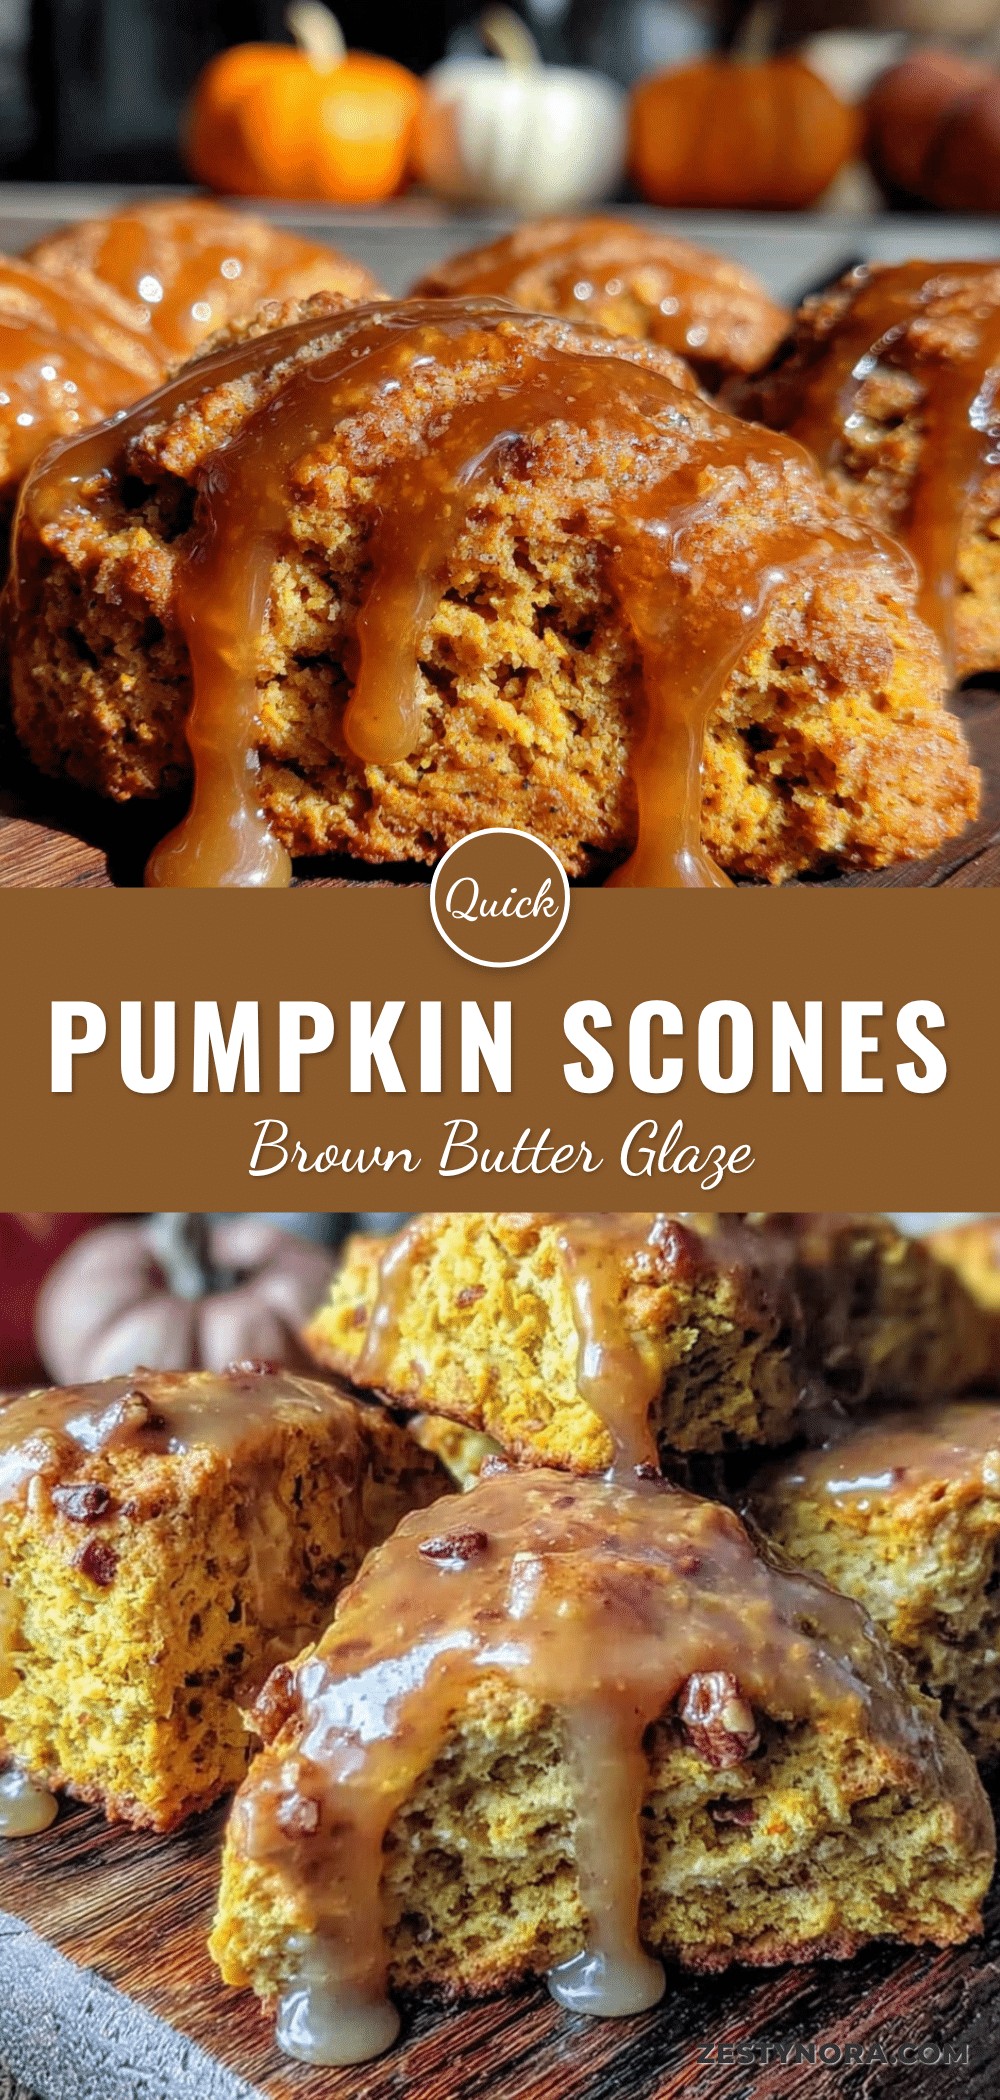
Quick Pumpkin Scones with Brown Butter Glaze: Easy Homemade Recipe
These quick pumpkin scones with brown butter glaze are tender, spiced just right, and topped with a nutty, caramel-like glaze. They come together in under 30 minutes, making them perfect for fall mornings, afternoon tea, or a quick dessert.
- Prep Time: 15 minutes
- Cook Time: 16 minutes
- Total Time: 31 minutes
- Yield: 8 servings 1x
- Category: Breakfast
- Cuisine: American
Ingredients
- 2 cups all-purpose flour
- 1/3 cup granulated sugar
- 1 tablespoon baking powder
- 1/2 teaspoon baking soda
- 1/2 teaspoon salt
- 1 teaspoon ground cinnamon
- 1/2 teaspoon ground ginger
- 1/4 teaspoon ground nutmeg
- 1/4 teaspoon ground cloves
- 6 tablespoons cold unsalted butter, cut into small cubes
- 1/2 cup pumpkin puree
- 1/4 cup heavy cream
- 1 large egg
- 1 teaspoon vanilla extract
- 1/4 cup unsalted butter (for glaze)
- 1 cup powdered sugar, sifted
- 2–3 tablespoons milk
- 1/2 teaspoon vanilla extract (for glaze)
- Pinch of salt
Instructions
- Preheat your oven to 400°F (200°C). Line a baking sheet with parchment paper.
- In a large bowl, whisk together the flour, sugar, baking powder, baking soda, salt, cinnamon, ginger, nutmeg, and cloves.
- Add the cold cubed butter to the flour mixture. Using a pastry cutter or two forks, cut the butter into the flour until the mixture resembles coarse meal with pea-sized butter pieces.
- In a separate bowl, whisk together the pumpkin puree, heavy cream, egg, and vanilla extract.
- Pour the wet ingredients into the dry ingredients. Stir with a spatula just until combined. The dough will be shaggy and a bit sticky.
- Turn the dough out onto a lightly floured surface. Gently bring it together with your hands, patting it into a circle about 3/4-inch thick.
- Cut the dough into 8 wedges like you’re cutting a pizza. Place them on the prepared baking sheet, spacing them about 2 inches apart.
- Optional but recommended: Brush the tops with a little extra cream. Sprinkle with a tiny bit of coarse sugar if you want a crunchy top.
- Bake for 14-16 minutes, until the scones are golden brown on the bottom and lightly golden on top. A toothpick inserted in the center should come out clean.
- Let the scones cool on the baking sheet for 5 minutes, then transfer to a wire rack to cool completely before glazing.
- While the scones cool, make the brown butter glaze. In a small saucepan over medium heat, melt the 1/4 cup butter. Swirl the pan occasionally. The butter will foam, then start to turn golden, then amber. When you see brown specks forming and smell a nutty aroma (about 4-5 minutes), remove it from the heat immediately.
- Pour the brown butter into a medium bowl, including all the brown bits. Let it cool for 2 minutes. Add the sifted powdered sugar, 2 tablespoons of milk, vanilla extract, and a pinch of salt. Whisk until smooth. If the glaze is too thick, add the remaining tablespoon of milk. If it’s too thin, add a bit more powdered sugar.
- Drizzle the glaze over the cooled scones. Use a spoon or a piping bag—I just use a spoon and let it drip naturally. Let the glaze set for about 10 minutes before serving.
Notes
Keep everything cold for flaky scones. Don’t overwork the dough. Watch the brown butter carefully to avoid burning. Let scones cool completely before glazing. For best results, spoon and level the flour.
Nutrition
- Serving Size: 1 scone
- Calories: 320
- Sugar: 22
- Sodium: 320
- Fat: 16
- Saturated Fat: 10
- Carbohydrates: 42
- Fiber: 2
- Protein: 4
Keywords: pumpkin scones, brown butter glaze, quick scones, fall breakfast, easy scone recipe


