My sister, who has never once asked me to bake her anything in her adult life, texted me a photo of a zodiac wheel at 10:47 PM on a Tuesday. “Can you make this into a cake for my birthday?” she wrote. And that, honestly, is how this whole vanilla bean zodiac cake with gold leaf situation began. I mean, I’ve baked her chocolate chip cookies before, sure, but she’d never specifically requested something so… intentional.
She’s a Capricorn, so she wanted it to feel grounded but special. Not too frilly, but definitely a little extra. So I started playing around with a classic vanilla bean cake base, one that’s tender but sturdy enough to stack and carve. The kind of cake that doesn’t crumble under pressure—which, if you know any Capricorns, is kind of fitting.
The first time I made this, I used a store-bought vanilla extract and it was fine. But the second time, I splurged on real vanilla bean paste, and let me tell you, the difference was night and day. Those tiny black specks floating through the batter? Pure magic. And the gold leaf? I was terrified to touch it at first, but once you get past the initial “oh no, I’m going to ruin it” feeling, it’s actually pretty forgiving.
This cake ended up being more than just a birthday dessert. It became a whole conversation starter. People at the party were pointing at their zodiac signs and laughing about their astrological compatibility while eating cake. And my sister? She just smiled, took a bite, and said, “This tastes like it was made for me.” And honestly, that’s the whole point of this recipe. It’s not just a cake—it’s a cake with a story, a little bit of intention, and a whole lot of vanilla flavor.
Why You’ll Love This Recipe
- Stunning Presentation : The gold leaf and zodiac design make this cake look like it came from a high-end bakery, but you’re making it in your own kitchen.
- Real Vanilla Flavor : We’re using real vanilla bean paste, not extract, so you get those beautiful specks and a deep, authentic taste that extract just can’t mimic.
- Perfect for Celebrations : Birthdays, anniversaries, or just because—this cake is designed to make someone feel seen and celebrated.
- Beginner-Friendly Decorating : Don’t let the gold leaf scare you. It’s surprisingly easy to work with, and the zodiac design is forgiving because it’s meant to look hand-drawn.
- Moist and Tender Crumb : This cake stays soft for days thanks to a buttermilk and sour cream combo that locks in moisture.
What makes this recipe different from other vanilla cakes? It’s the way the vanilla bean flavor hits you first, then the buttery richness lingers. And the gold leaf isn’t just for show—it adds this subtle, almost imperceptible texture that feels luxurious. You won’t find a box mix that does any of that.
This is the kind of cake that makes people stop mid-conversation and go, “Wait, did you make this?” And when you say yes, you get to watch their face light up. That’s the feeling I’m chasing with every bake, and this cake delivers it every single time.
What Ingredients You Will Need
This recipe uses simple, high-quality ingredients to build a cake that’s both elegant and approachable. Most of these are pantry staples, but I’ve included notes on where you might want to splurge.
- Unsalted butter (1 cup / 226 grams) — softened to room temperature. I prefer using European-style butter like Kerrygold for a richer flavor, but any unsalted butter works. The fat content in European butter (82%) gives a slightly more tender crumb.
- Granulated sugar (2 cups / 400 grams) — standard white sugar. This gives the cake structure and sweetness without overpowering the vanilla.
- Large eggs (4, room temperature) — room temperature eggs emulsify better into the batter, creating a smoother texture. If you forget to take them out, place them in a bowl of warm water for 5 minutes.
- Vanilla bean paste (2 tablespoons) — this is the star of the show. I use Nielsen-Massey vanilla bean paste. It’s thick, speckled, and has a flavor that’s almost floral. Do not substitute with extract unless you absolutely have to—the specks are part of the visual appeal.
- All-purpose flour (3 cups / 375 grams) — spoon and level it into your measuring cup. Scooping directly from the bag can pack in too much flour, making the cake dense.
- Baking powder (2 teaspoons) — make sure it’s fresh. Test it by dropping a little into hot water; if it fizzes, it’s good.
- Baking soda (1/2 teaspoon) — helps the cake rise and brown slightly.
- Salt (1 teaspoon) — fine sea salt is best. It balances the sweetness.
- Buttermilk (1 cup / 240 ml) — adds tanginess and activates the baking soda. No buttermilk? Add 1 tablespoon of lemon juice or vinegar to regular milk and let it sit for 5 minutes.
- Sour cream (1/2 cup / 120 grams) — full-fat sour cream adds moisture and richness. Greek yogurt can be substituted, but the cake will be slightly less tender.
- Vegetable oil (1/4 cup / 60 ml) — a neutral oil like canola or grapeseed. This adds extra moisture that butter alone can’t provide.
- For the Vanilla Bean Buttercream:
- Unsalted butter (1 1/2 cups / 340 grams), softened
- Powdered sugar (4 cups / 480 grams), sifted
- Vanilla bean paste (1 tablespoon)
- Heavy cream (3-4 tablespoons)
- Salt (1/4 teaspoon)
- For the Decorating:
- Edible gold leaf sheets (1-2 sheets)
- Edible gold paint or luster dust (optional, for the zodiac symbols)
- Small paintbrush (dedicated for food use)
Equipment Needed
You don’t need a professional bakery setup for this cake, but having the right tools makes the process smoother. Here’s what I use:
- Two 8-inch round cake pans — I prefer light-colored metal pans for even baking. Dark pans can cause the edges to brown too quickly.
- Stand mixer or hand mixer — a stand mixer with the paddle attachment is ideal for creaming butter and sugar, but a hand mixer works fine. You’ll just need to cream a little longer.
- Offset spatula — this is my favorite tool for frosting. It gives you clean, smooth edges. A regular butter knife works, but the offset spatula is worth the $10 investment.
- Cake turntable — not strictly necessary, but it makes frosting so much easier. I got a cheap plastic one on Amazon years ago and it still works perfectly.
- Parchment paper rounds — cut to fit your cake pans. This prevents sticking and makes cleanup a breeze.
- Cooling rack — wire racks allow air to circulate around the cake, preventing a soggy bottom.
- Small paintbrush — for applying the gold leaf. Make sure it’s never been used with paint. A cheap synthetic brush from a craft store works great.
- Toothpicks or a scribe tool — for drawing the zodiac symbols before painting them.
Preparation Method
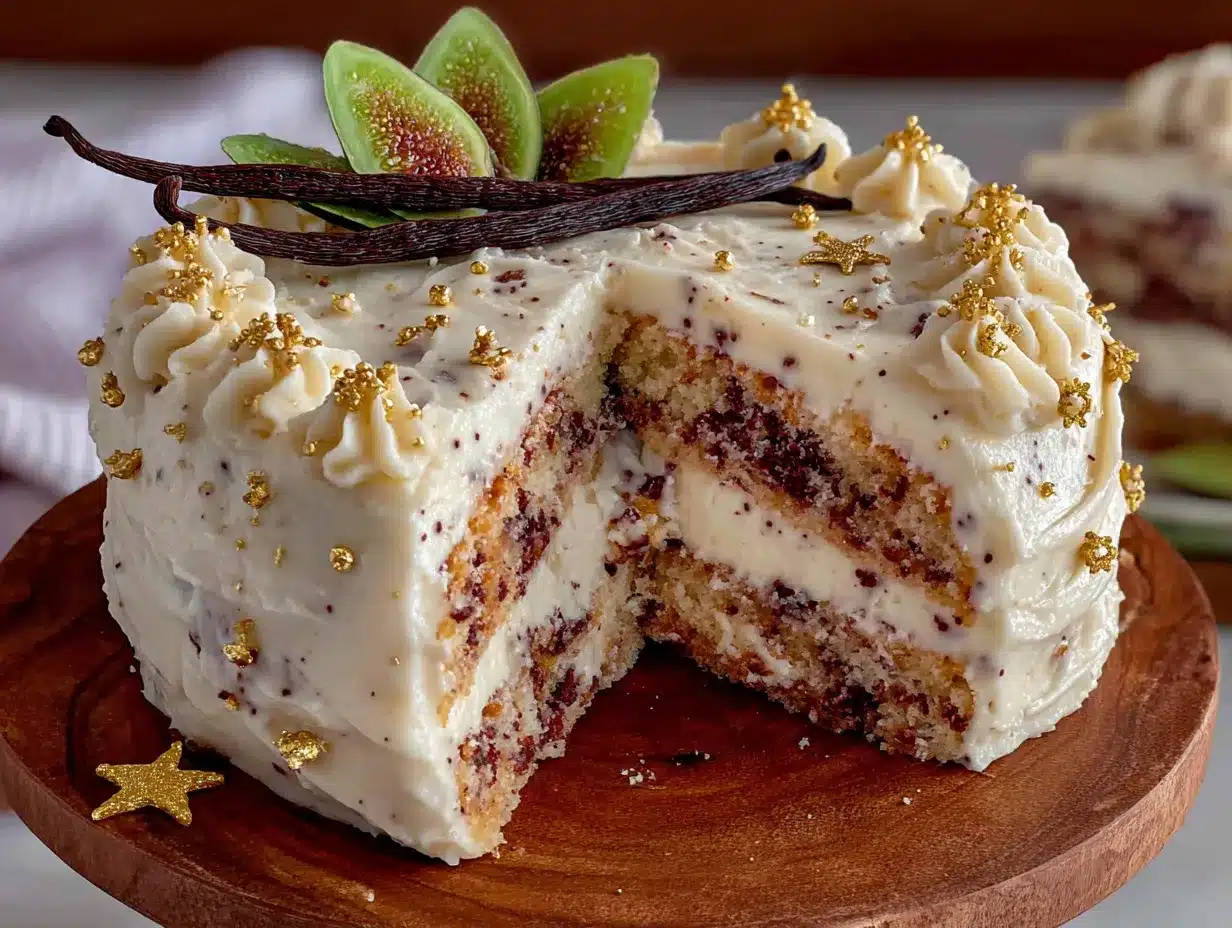
Let’s break this down so it feels manageable. I’ve included time estimates and sensory cues so you know exactly what to look for at each stage.
- Preheat and Prep (10 minutes)
Preheat your oven to 350°F (175°C). Grease two 8-inch cake pans with butter or non-stick spray, then line the bottoms with parchment paper rounds. Grease the parchment too. This step is non-negotiable—I’ve had cakes stick even with “non-stick” pans. - Whisk Dry Ingredients (5 minutes)
In a medium bowl, whisk together the flour, baking powder, baking soda, and salt. Set aside. This distributes the leavening agents evenly so you don’t get pockets of baking powder in your cake. - Cream Butter and Sugar (5-7 minutes)
In the bowl of a stand mixer fitted with the paddle attachment, beat the softened butter and granulated sugar on medium speed until light and fluffy. This should take about 5 minutes. You’ll know it’s ready when the mixture looks pale yellow and feels airy when you touch it. Scrape down the sides and bottom of the bowl at least once. - Add Eggs and Vanilla (3 minutes)
Add the eggs one at a time, beating well after each addition. The batter should look smooth and glossy. Then add the vanilla bean paste and beat until combined. The specks should be evenly distributed. - Combine Wet Ingredients (2 minutes)
In a separate bowl or liquid measuring cup, whisk together the buttermilk, sour cream, and vegetable oil. The mixture will look a little lumpy—that’s fine. - Alternate Additions (5 minutes)
With the mixer on low speed, add the flour mixture in three additions, alternating with the buttermilk mixture in two additions. Start and end with the flour. Mix just until combined after each addition—overmixing at this stage develops gluten and makes the cake tough. The final batter should be thick, smooth, and slightly shiny. - Bake the Cakes (30-35 minutes)
Divide the batter evenly between the two prepared pans. Bake for 30-35 minutes, or until a toothpick inserted into the center comes out clean or with a few moist crumbs. The tops should be golden brown and spring back when lightly pressed. Let the cakes cool in the pans for 10 minutes, then turn them out onto a wire rack to cool completely. Do not frost warm cakes—the buttercream will melt into a sad, greasy mess. - Make the Buttercream (10 minutes)
While the cakes cool, make the frosting. Beat the softened butter on medium speed for 3-4 minutes until it’s pale and creamy. Gradually add the sifted powdered sugar, one cup at a time, beating on low speed to avoid a sugar cloud. Add the vanilla bean paste and salt. Then add the heavy cream, one tablespoon at a time, until the frosting is smooth and spreadable. You want it thick enough to hold its shape but soft enough to spread easily. - Level and Fill the Cakes (10 minutes)
Once the cakes are completely cool, use a serrated knife to level the tops if they domed. Place one layer on your cake board or serving plate. Spread about 1 cup of buttercream evenly on top. Place the second layer on top, cut-side down for a flat top. - Crumb Coat and Chill (15 minutes + 30 minutes chill)
Apply a thin layer of buttercream all over the cake—this is the crumb coat. It traps any loose crumbs so your final layer is clean. Refrigerate for 30 minutes until the crumb coat is firm to the touch. - Final Frosting Layer (15 minutes)
Apply the remaining buttercream in a thick, even layer. Use your offset spatula to smooth the sides and top. For a rustic look, leave some swirls. For a clean look, run the spatula under hot water, dry it, and use it to smooth the buttercream. - Decorate with Zodiac and Gold Leaf (20-30 minutes)
Using a toothpick, lightly sketch the zodiac symbols around the side of the cake. You can also draw a zodiac wheel on top if you’re feeling ambitious. Once you’re happy with the design, use a small paintbrush to apply edible gold paint or luster dust over the lines. For the gold leaf, gently pick up a small piece with the brush (static electricity helps it stick) and place it on the frosting. Press it down lightly. It will tear and crack—that’s the look we’re going for. Don’t try to make it perfect; the imperfections are what make it look handmade and beautiful.
Cooking Tips & Techniques
I’ve made this cake about seven times now, and I’ve learned a few things the hard way. Here’s what I wish someone had told me:
- Room temperature ingredients matter. I know it’s annoying, but cold butter doesn’t cream properly and cold eggs can cause the batter to curdle. Set everything out an hour before you start baking.
- Don’t overmix the batter. Once you add the flour, mix just until you can’t see any more white streaks. Overmixing develops gluten, which makes the cake dense and tough instead of tender and fluffy.
- Use a light hand with the gold leaf. It’s incredibly thin and fragile. I try to pick it up with a dry brush and let static electricity do the work. If you touch it with your fingers, it will stick to you and tear.
- Chill the cake before decorating. A cold cake is easier to frost because the buttercream sets faster. It also gives you a smoother surface for the gold leaf.
- Practice the zodiac symbols on parchment first. I drew the Capricorn symbol about five times on a piece of paper before I attempted it on the cake. It saved me from having to scrape off a lopsided design.
- If the buttercream gets too soft, pop it in the fridge for 10 minutes. This happens especially on warm days. A quick chill makes it much easier to work with.
Variations & Adaptations
This cake is surprisingly flexible. Here are a few ways to make it your own:
- Gluten-Free Version : Substitute the all-purpose flour with a 1:1 gluten-free baking flour blend that contains xanthan gum. I’ve used King Arthur’s Measure for Measure blend with great results. The texture will be slightly more crumbly, but still delicious.
- Dairy-Free Version : Use vegan butter (I like Miyoko’s), oat milk mixed with 1 tablespoon of lemon juice for the buttermilk, and a dairy-free sour cream alternative. The cake will be a little less rich, but still moist.
- Different Flavor Profiles : Swap the vanilla bean paste for almond extract (use 1 teaspoon) or lemon zest (2 tablespoons) for a completely different vibe. Almond pairs beautifully with the gold leaf for an elegant, almost wedding-cake feel.
- Seasonal Twist : In the fall, add 1 teaspoon of cinnamon and 1/2 teaspoon of nutmeg to the dry ingredients. The warm spices contrast nicely with the vanilla and gold.
- Mini Cake Version : Bake the batter in 4-inch cake pans for 20-25 minutes. These make adorable individual birthday cakes. You’ll need to adjust the zodiac symbols to fit the smaller surface.
- No Gold Leaf Option : If gold leaf isn’t your thing, use edible glitter or silver dragées instead. Or skip the metallic look entirely and pipe the zodiac symbols with a contrasting buttercream color.
Serving & Storage Suggestions
This cake is best served at room temperature, so take it out of the fridge about 30 minutes before you plan to cut it. The buttercream softens slightly and the cake becomes more tender.
For serving, I like to place the cake on a simple white stand to let the gold leaf pop. Slice it with a sharp, non-serrated knife, wiping the blade clean between cuts for neat slices. Each slice should show the vanilla bean specks and a hint of gold.
Leftover cake keeps well in an airtight container in the refrigerator for up to 5 days. The gold leaf will stay intact if you don’t touch it, but it may dull slightly over time. If you’re storing it for more than a day, I recommend placing a piece of parchment paper over the cut sides to prevent them from drying out.
You can also freeze the unfrosted cake layers for up to 3 months. Wrap them tightly in plastic wrap and then foil. Thaw at room temperature before frosting. The frosted cake can be frozen for up to 1 month, but the gold leaf may lose its shine after thawing.
The flavors actually deepen after a day in the fridge. The vanilla becomes more pronounced and the buttercream sets into a firmer, almost fudge-like texture. It’s honestly even better on day two.
Nutritional Information & Benefits
Let’s be real—this is a celebratory cake, not a health food. But I do think there’s something to be said for the quality of ingredients. Real butter, eggs, and vanilla bean paste provide nutrients that processed cake mixes just don’t have.
Per slice (based on 12 servings): approximately 520 calories, 28g fat, 65g carbohydrates, 5g protein, and 42g sugar. The gold leaf has no nutritional value—it’s purely decorative.
Vanilla bean paste contains trace amounts of antioxidants, and the eggs provide protein and choline, which is good for brain health. The butter gives you vitamin A, and if you use European butter, you’re getting a little extra fat-soluble vitamins.
For dietary considerations, this recipe contains gluten, dairy, and eggs. It is not suitable for vegans or those with celiac disease unless you make the substitutions listed above. If you’re watching your sugar intake, you can reduce the sugar in the cake to 1 3/4 cups without affecting the texture too much, but the buttercream needs the full amount for structure.
I personally believe that food like this—made with intention, shared with people you love—has a different kind of value. It’s not about the calories. It’s about the moment.
Conclusion
This vanilla bean zodiac cake with gold leaf is more than just a pretty dessert. It’s a way to show someone you see them, that you know their sign, their birthday, their story. The gold leaf feels extravagant, but the real luxury is in the vanilla bean specks and the tender, buttery crumb.
I love this recipe because it makes me feel like a professional baker, even when I’m just standing in my own kitchen in mismatched socks. It’s forgiving enough for beginners but impressive enough for seasoned bakers. And honestly? Watching someone’s face light up when they see their zodiac sign on a cake covered in real gold is a feeling I’ll never get tired of.
Try it for your next birthday, or for a friend who needs a little extra magic. Customize the zodiac symbols to match the person you’re baking for—mix and match signs if it’s for a group. And when you make it, I’d love to hear how it turned out. Leave a comment below and tell me what sign you put on your cake. I’m genuinely curious.
Happy baking, and may your cake always be as golden as the moment you’re celebrating.
Frequently Asked Questions
Can I use vanilla extract instead of vanilla bean paste?
You can, but the cake won’t have those beautiful black specks that make it look so special. The flavor will also be slightly less intense. If you’re in a pinch, use 2 teaspoons of good-quality vanilla extract. Just know that the visual effect won’t be the same.
How do I keep the gold leaf from sticking to everything?
Use a dry, soft paintbrush to pick up the gold leaf. The static electricity from the brush will help it lift. Avoid touching it with your fingers—the oils on your skin will make it stick to you and tear. Work in a low-humidity environment if possible.
Can I make this cake a day ahead?
Yes, and I actually recommend it. The flavors meld together overnight and the cake becomes even more moist. Bake and frost the cake, then refrigerate it uncovered for 1 hour to set the buttercream. Once it’s firm, wrap it loosely in plastic wrap and store it in the fridge. Add the gold leaf just before serving for the best shine.
What if I don’t have a turntable for frosting?
No problem. Place the cake on a cake board or a flat plate. Use an offset spatula to smooth the frosting, rotating the plate with your other hand. It takes a little longer, but the results are still great. A lazy Susan from your kitchen cabinet works in a pinch too.
How do I draw the zodiac symbols on the cake?
Use a toothpick or a scribe tool to lightly scratch the design into the buttercream. Start with simple shapes—circles, lines, and curves. If you make a mistake, just smooth the buttercream over with your spatula and start again. Once you’re happy, trace over the lines with edible gold paint or a thin layer of gold luster dust mixed with a drop of vodka or lemon extract.
Pin This Recipe!
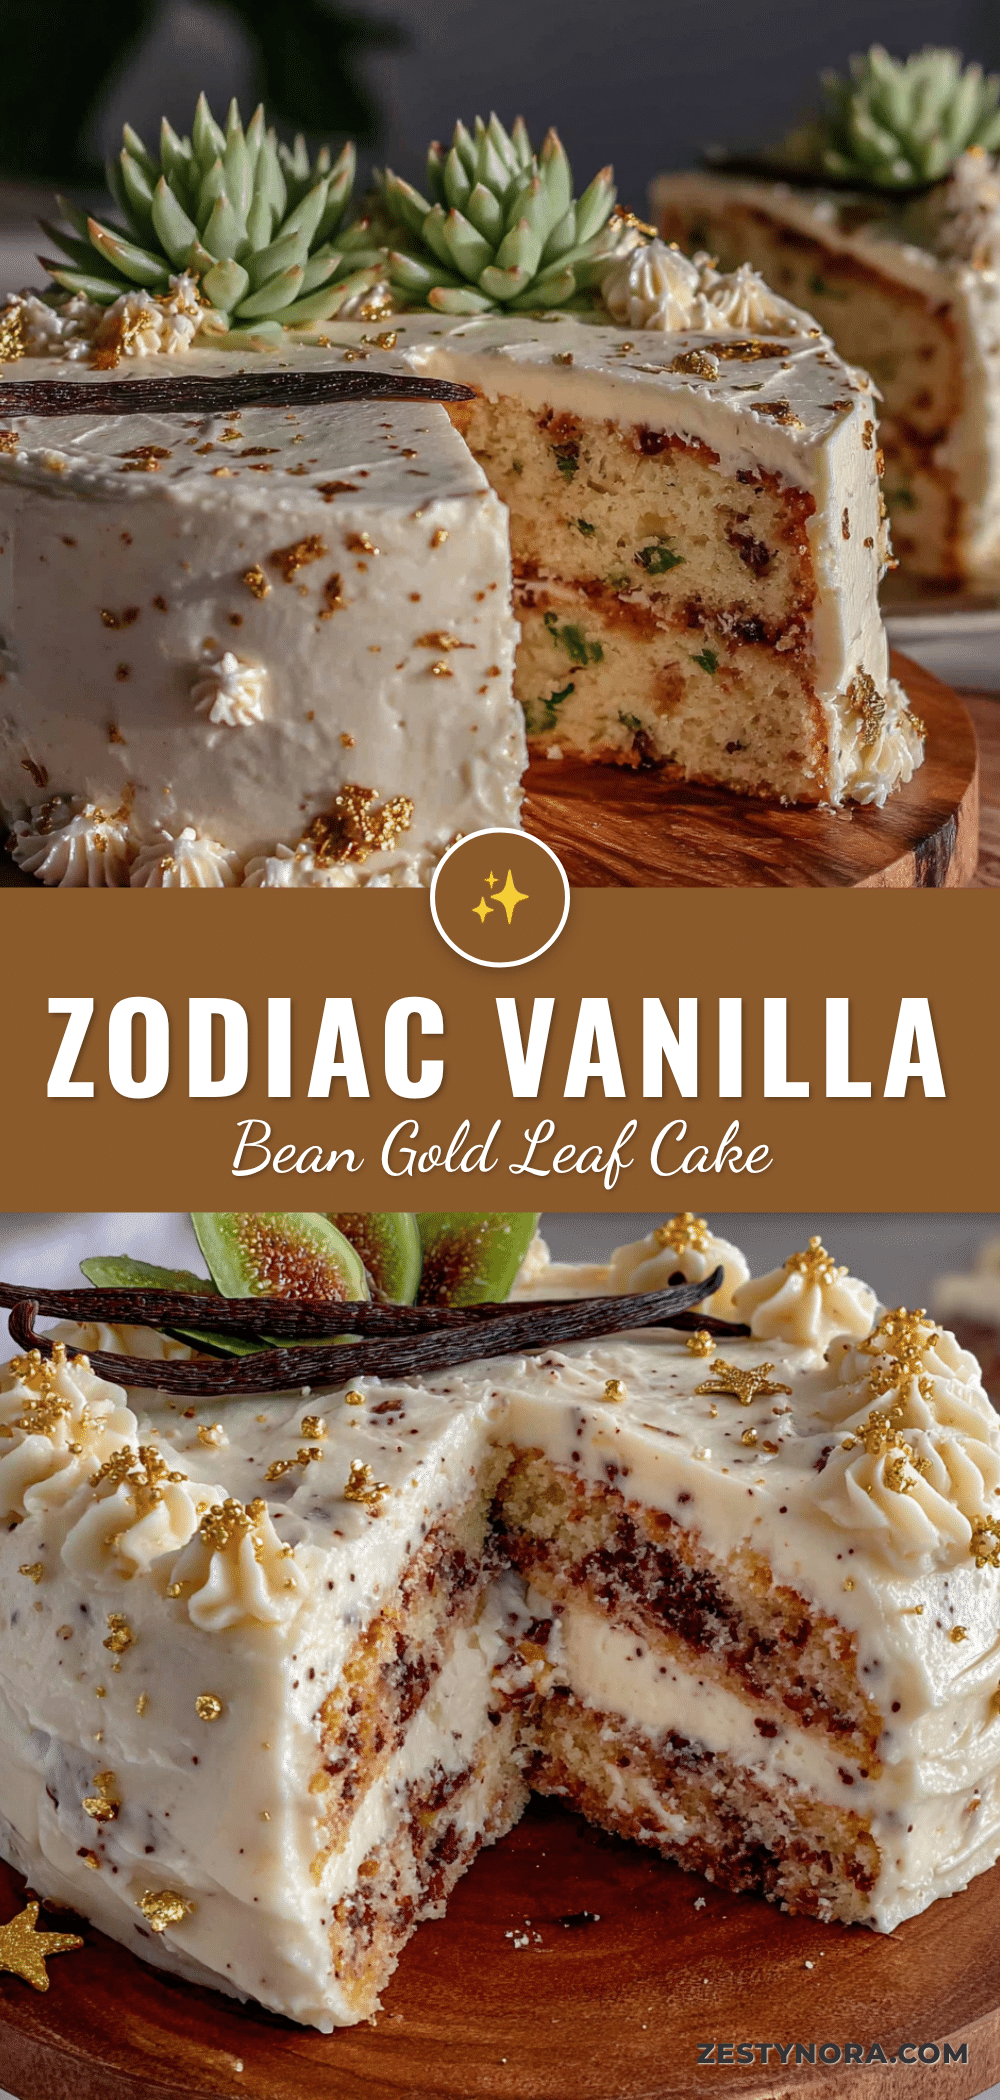
Perfect Vanilla Bean Zodiac Cake with Gold Leaf
A stunning vanilla bean cake decorated with zodiac symbols and edible gold leaf, perfect for birthdays and celebrations. This moist, tender cake features real vanilla bean paste and a buttery crumb that stays soft for days.
- Prep Time: 30 minutes
- Cook Time: 35 minutes
- Total Time: 1 hour 5 minutes
- Yield: 12 servings 1x
- Category: Dessert
- Cuisine: American
Ingredients
- 1 cup (226 grams) unsalted butter, softened
- 2 cups (400 grams) granulated sugar
- 4 large eggs, room temperature
- 2 tablespoons vanilla bean paste
- 3 cups (375 grams) all-purpose flour
- 2 teaspoons baking powder
- 1/2 teaspoon baking soda
- 1 teaspoon fine sea salt
- 1 cup (240 ml) buttermilk
- 1/2 cup (120 grams) full-fat sour cream
- 1/4 cup (60 ml) vegetable oil
- For the Vanilla Bean Buttercream:
- 1 1/2 cups (340 grams) unsalted butter, softened
- 4 cups (480 grams) powdered sugar, sifted
- 1 tablespoon vanilla bean paste
- 3–4 tablespoons heavy cream
- 1/4 teaspoon salt
- For the Decorating:
- 1–2 sheets edible gold leaf
- Edible gold paint or luster dust (optional)
- Small paintbrush (dedicated for food use)
Instructions
- Preheat oven to 350°F (175°C). Grease two 8-inch cake pans, line bottoms with parchment paper, and grease the parchment.
- In a medium bowl, whisk together flour, baking powder, baking soda, and salt. Set aside.
- In a stand mixer with paddle attachment, beat butter and sugar on medium speed until light and fluffy, about 5 minutes. Scrape down bowl.
- Add eggs one at a time, beating well after each. Add vanilla bean paste and beat until combined.
- In a separate bowl, whisk together buttermilk, sour cream, and vegetable oil.
- With mixer on low, add flour mixture in three additions, alternating with buttermilk mixture in two additions, starting and ending with flour. Mix just until combined.
- Divide batter evenly between prepared pans. Bake 30-35 minutes until a toothpick inserted in center comes out clean. Cool in pans 10 minutes, then turn out onto wire rack to cool completely.
- For buttercream: Beat softened butter on medium speed 3-4 minutes until pale and creamy. Gradually add sifted powdered sugar, beating on low. Add vanilla bean paste, salt, and heavy cream one tablespoon at a time until smooth and spreadable.
- Level cake tops with a serrated knife. Place one layer on cake board, spread 1 cup buttercream evenly. Top with second layer, cut-side down.
- Apply thin crumb coat of buttercream over entire cake. Refrigerate 30 minutes until firm.
- Apply remaining buttercream in thick, even layer. Smooth with offset spatula.
- Use toothpick to sketch zodiac symbols on cake. Trace with edible gold paint or luster dust. Apply gold leaf pieces with dry paintbrush, pressing lightly.
Notes
Room temperature ingredients are crucial for proper emulsification. Do not overmix batter once flour is added. Chill cake before decorating for easier frosting application. Gold leaf is forgiving; imperfections add to the handmade look. Cake can be made a day ahead; add gold leaf just before serving.
Nutrition
- Serving Size: 1 slice
- Calories: 520
- Sugar: 42
- Sodium: 320
- Fat: 28
- Saturated Fat: 17
- Carbohydrates: 65
- Fiber: 1
- Protein: 5
Keywords: vanilla bean cake, zodiac cake, gold leaf cake, birthday cake, celebration cake, vanilla buttercream, astrological cake


