This was supposed to be a classic, gooey, fully-loaded cheeseball for a Halloween party. I had the block of cream cheese softening on the counter, the shredded cheddar ready to go, and I was feeling pretty confident about my appetizer game. But then my toddler decided it was the perfect moment to “help” by dumping an entire bag of pretzel sticks onto the floor. Honestly, I was already running late, and the last thing I needed was a salty, crumbly mess to clean up. I grabbed the pretzels, tossed them in a bowl, and figured I’d just serve them on the side. The cheeseball itself? I was determined to make it work, but I also knew I wanted something that wouldn’t leave me feeling sluggish before a night of candy and chaos.
So, I swapped out half the cream cheese for Greek yogurt. I used reduced-fat cheddar. I added a ton of fresh herbs and a little garlic powder for a flavor punch that didn’t rely on a ton of fat. The result? A cheeseball that was lighter, tangier, and somehow even more addictive than the original. And when I stuck those pretzel sticks into the top to make it look like a mummy? Well, let me tell you, it was the hit of the party. I mean, people were actually fighting over the last pretzel stick. It was a happy accident, a total kitchen fail that turned into something way better than the plan. And now, I can’t imagine making a cheeseball any other way. Maybe you’ve been there, staring at a recipe that feels too heavy but not wanting to give up the fun. This one is for you.
Why You’ll Love This Recipe
This Lightened-Up Mummy Cheese Ball with Pretzel Sticks isn’t just a clever Halloween treat—it’s a genuinely delicious appetizer that you can feel good about eating. I’ve tested this recipe at three different gatherings now, and it’s the first thing to disappear every single time. Here’s why it works so well:
- Quick & Easy: Comes together in under 15 minutes of active prep time. Perfect for last-minute Halloween parties or when you need a fun snack without the fuss.
- Simple Ingredients: No fancy grocery trips needed. You likely already have Greek yogurt, cream cheese, and shredded cheese in your fridge. The pretzel sticks are the only “special” ingredient.
- Perfect for Halloween: Great for spooky parties, classroom treats, or a fun family movie night. The mummy design is so simple, even kids can help assemble it.
- Crowd-Pleaser: Always gets rave reviews from kids and adults alike. The creamy, tangy filling paired with salty, crunchy pretzels is an unbeatable combo.
- Unbelievably Delicious: The texture is so smooth and creamy, you won’t miss the extra fat. The Greek yogurt adds a subtle tang that perfectly balances the rich cheese.
What makes this recipe different from the rest? It’s the Greek yogurt trick. By replacing half the cream cheese with plain Greek yogurt, you cut the calories and fat significantly without sacrificing any of the creamy texture or rich flavor. I’ve tried it with full-fat yogurt, low-fat, and even non-dairy alternatives—the key is using a thick, strained yogurt (like Fage or Chobani) so the cheeseball doesn’t become runny. This isn’t just another version of a classic cheeseball; it’s the best version—lighter, tangier, and so much more fun to eat. It’s comfort food reimagined—healthier, faster, but with the same soul-soothing satisfaction. Perfect for impressing guests without stress, or turning a simple snack into something memorable.
What Ingredients You Will Need
This recipe uses simple, wholesome ingredients to deliver bold flavor and satisfying texture without the fuss. Most of these are pantry staples, which makes this perfect for those “I need a party snack NOW” moments.
- 8 oz reduced-fat cream cheese, softened (I recommend Philadelphia brand for the smoothest texture)
- 1/2 cup plain Greek yogurt, full-fat or 2% (Fage or Chobani work best—avoid watery yogurts)
- 1 cup reduced-fat shredded cheddar cheese (sharp cheddar gives the most flavor)
- 1/2 tsp garlic powder
- 1/4 tsp onion powder
- 1/4 tsp smoked paprika (adds a subtle smokiness)
- 1/4 tsp black pepper
- 1/8 tsp salt (optional, since cheese is already salty)
- 1/4 cup fresh chives, finely chopped (or green onions, for a milder flavor)
- 1/4 cup fresh parsley, finely chopped
- 20-25 pretzel sticks (I prefer Snyder’s or Bachman—they’re sturdy and don’t break easily)
- 2 black olives, sliced (for the mummy’s eyes)
- Optional: 1-2 tbsp milk (if the mixture is too thick to stir)
Ingredient Selection Tips: Look for a block-style cream cheese, not the spreadable kind in a tub—it holds its shape better. For the Greek yogurt, avoid flavored or sweetened varieties. Plain is best. If you’re using fresh herbs, make sure they’re completely dry before chopping; any excess moisture can make the cheeseball too soft. You can also use dried chives and parsley (about 1 tbsp each), but the fresh herbs really brighten up the flavor.
Substitution Guidance: For a dairy-free version, use dairy-free cream cheese and a thick coconut-based yogurt. For a gluten-free option, simply swap the pretzel sticks for gluten-free pretzels or carrot sticks. If you don’t have cheddar, try Monterey Jack or a Mexican blend. You can also add finely chopped jalapeños for a spicy kick, or sun-dried tomatoes for an Italian twist. The beauty of this recipe is its flexibility—don’t be afraid to experiment.
Equipment Needed
- Large mixing bowl (I use a glass bowl—it’s easier to see when everything is combined)
- Hand mixer or stand mixer (you can use a wooden spoon, but a mixer makes it much smoother)
- Spatula (for scraping the bowl clean)
- Plastic wrap (to shape and chill the cheeseball)
- Baking sheet or plate (for chilling)
- Serving platter (a flat plate works best for the mummy design)
- Sharp knife (for slicing olives)
- Small bowl (for the olive “eyes”)
If you don’t have a hand mixer, you can definitely mix this by hand—just make sure the cream cheese is fully softened, and be prepared to put in a little elbow grease. I’ve done it both ways, and honestly, the hand-mixed version has a slightly more rustic texture that I sometimes prefer. For the chilling step, a baking sheet works perfectly if you don’t have a large plate. And if you’re short on plastic wrap, you can use a reusable bowl cover or even a clean plastic bag. Budget-friendly tip: a simple wooden cutting board makes a great serving platter for this spooky snack.
Preparation Method
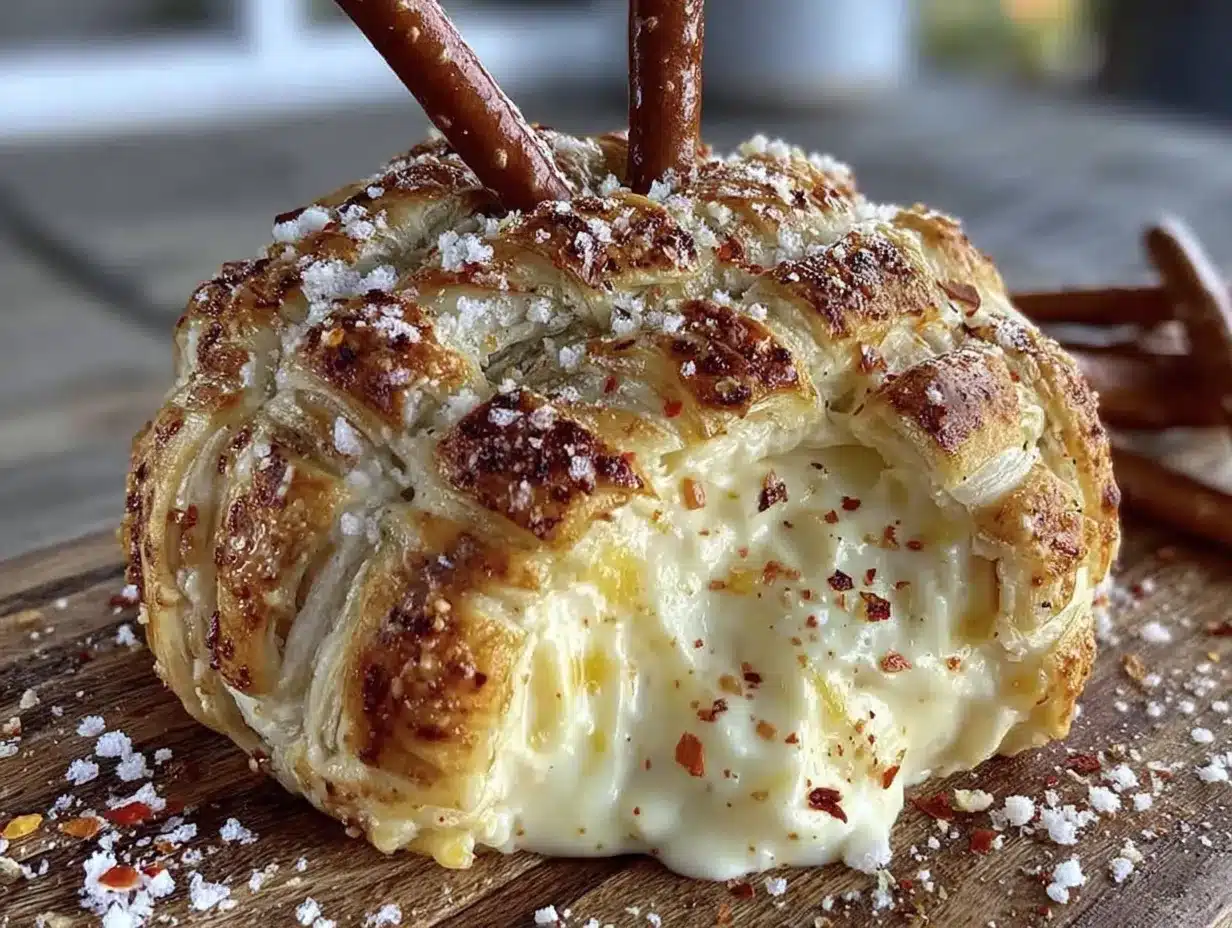
- Soften the cream cheese. Take the cream cheese out of the fridge about 30 minutes before you start. You want it to be room temperature so it mixes smoothly. If you’re in a hurry, microwave it for 10-15 seconds on low power—but watch it carefully so it doesn’t melt.
- Mix the base. In a large mixing bowl, combine the softened cream cheese and Greek yogurt. Beat with a hand mixer on medium speed until smooth and creamy, about 2 minutes. Scrape down the sides of the bowl with a spatula. The mixture should be fluffy and free of lumps.
- Add the cheese and seasonings. Add the shredded cheddar cheese, garlic powder, onion powder, smoked paprika, black pepper, and salt (if using). Mix on low speed until just combined. Be careful not to overmix—you want some small bits of shredded cheese to remain for texture. Stir in the fresh chives and parsley by hand with a spatula.
- Check the consistency. The mixture should be thick but spreadable. If it seems too stiff, add a tablespoon of milk and mix again. If it’s too soft (which can happen if the yogurt was watery), add a little more shredded cheese to firm it up.
- Shape the cheeseball. Lay a large piece of plastic wrap on your work surface. Spoon the cheese mixture into the center. Gather the edges of the plastic wrap and twist to form a tight ball. Use your hands to shape it into a smooth, round ball through the plastic. Don’t worry if it’s not perfect—the pretzel sticks will cover any imperfections.
- Chill the cheeseball. Place the wrapped cheeseball on a baking sheet or plate and refrigerate for at least 2 hours, or up to overnight. This step is crucial—a well-chilled cheeseball holds its shape better and is easier to decorate. I usually make it the night before a party, and it’s always perfect.
- Prepare the pretzel “bandages.” About 30 minutes before serving, remove the cheeseball from the fridge. Unwrap it and place it on your serving platter. Gently press the pretzel sticks into the cheeseball, spacing them about 1/4 inch apart, to create the mummy’s “bandages.” Start at the bottom and work your way up, leaving a small space at the top for the eyes. You want the pretzels to cover most of the cheeseball, but you should still see some of the creamy filling peeking through.
- Add the eyes. Slice two black olives into rounds. Place two olive slices in the exposed area at the top of the cheeseball to create the mummy’s eyes. For a spookier look, you can use small dots of cream cheese to make “pupils” on the olives.
- Serve immediately. The cheeseball is best served within 30 minutes of adding the pretzels, so the sticks stay crunchy. If you’re not serving right away, keep the cheeseball chilled and add the pretzels just before serving.
Sensory cues: At step 2, the mixture should smell tangy and fresh, like a good cream cheese. When you add the herbs, the kitchen should smell like a garden—fresh and bright. The finished cheeseball should be firm to the touch but still soft enough that the pretzel sticks slide in easily. If the pretzels crack when you push them in, the cheeseball is too cold—let it sit at room temperature for 5-10 minutes before decorating.
Cooking Tips & Techniques
I’ve made this recipe about a dozen times now, and I’ve learned a few things the hard way. Here are my best tips for getting it right every time.
Don’t skip the chilling step. I know it’s tempting to rush, but a warm cheeseball is a sticky, messy cheeseball. I once tried to decorate it after only 30 minutes in the fridge, and the pretzels just slid right out. Two hours is the minimum, but overnight is ideal. The flavors actually meld together and get better with time.
Use a light hand with the yogurt. Greek yogurt is thicker than regular yogurt, but it still adds moisture. If you add too much, your cheeseball will be soft and difficult to shape. Start with the recommended amount and add more only if the mixture seems too dry. I once used a full cup of yogurt (trying to be extra healthy), and I ended up with a soup that wouldn’t hold its shape. Learn from my mistake!
Toast the pretzels for extra crunch. This is a little trick I picked up from a food blogger friend. Spread the pretzel sticks on a baking sheet and toast them at 300°F for 5-7 minutes before using. They become extra crunchy and stay crisp longer, even when pressed into the cheeseball. Just make sure they cool completely before you use them.
Make ahead for stress-free entertaining. This is my favorite tip. You can prepare the cheeseball (without the pretzels) up to 3 days in advance. Keep it wrapped tightly in plastic wrap in the fridge. When you’re ready to serve, just unwrap, add the pretzels and eyes, and you’re done. It’s perfect for busy holiday schedules.
Don’t overmix the herbs. If you mix the herbs too vigorously, they can turn the cheeseball an unappetizing green color. Fold them in gently with a spatula until they’re just distributed. You want little green flecks throughout, not a completely green ball.
Variations & Adaptations
One of the best things about this recipe is how easily it adapts to different tastes and dietary needs. Here are some variations I’ve tried and loved.
- Spicy Mummy: Add 1/4 cup finely chopped pickled jalapeños and 1/2 tsp cayenne pepper to the cheese mixture. The heat pairs beautifully with the cool, creamy base. I made this for a Halloween party with a “spicy” theme, and it was gone in 20 minutes.
- Herb Garden Mummy: Skip the cheddar and use a combination of fresh dill, basil, and tarragon instead of the chives and parsley. Add 1/4 cup crumbled feta cheese for a Mediterranean twist. This version is especially good with pita chips instead of pretzels.
- Dairy-Free Mummy: Use dairy-free cream cheese (I like Kite Hill or Violife) and a thick coconut-based yogurt. Add 1 tbsp nutritional yeast for a cheesy flavor. The texture will be slightly different, but it’s still delicious. I tested this for a friend with lactose intolerance, and she couldn’t tell the difference.
- Smoky Bacon Mummy: Add 1/4 cup cooked, crumbled turkey bacon and 1/2 tsp liquid smoke to the cheese mixture. The smoky flavor adds depth and makes it feel more indulgent. This is my husband’s favorite version.
- Sweet Mummy: For a dessert twist, swap the cheddar and herbs for 1/4 cup honey, 1 tsp cinnamon, and 1/4 cup chopped dried cranberries. Use cinnamon-sugar pretzel sticks for the bandages. It’s surprisingly good and perfect for a Halloween dessert table.
Serving & Storage Suggestions
This mummy cheeseball is best served chilled, right after you add the pretzel sticks. The contrast between the cold, creamy filling and the crunchy, salty pretzels is what makes it so addictive. I like to serve it on a flat platter surrounded by extra pretzel sticks, carrot sticks, celery, and bell pepper strips for dipping. It also pairs beautifully with crackers—I recommend something sturdy like Triscuits or whole wheat Ritz.
If you’re serving this at a party, keep it chilled until the last minute. I’ve found that it holds up well for about an hour at room temperature, but after that, the pretzels start to get soft. If you’re worried about timing, you can prep everything and add the pretzels just before guests arrive.
Storage: Leftover cheeseball (without the pretzels) can be stored in an airtight container in the refrigerator for up to 5 days. The flavors actually deepen and get better after a day or two. If you have leftover decorated cheeseball, remove the pretzel sticks (they’ll be soggy) and store the cheese mixture separately. You can always add fresh pretzels later.
Freezing: You can freeze the undecorated cheeseball for up to 3 months. Wrap it tightly in plastic wrap and then in foil. Thaw it in the refrigerator overnight before decorating and serving. The texture might be slightly softer after freezing, but it’s still delicious.
One thing I’ve noticed: this cheeseball actually tastes better the next day. The garlic and herb flavors meld together, and the yogurt tang becomes more subtle. So don’t be afraid to make it ahead—it’s one of those rare recipes that improves with time.
Nutritional Information & Benefits
Here’s the approximate nutritional breakdown for one serving (based on 8 servings):
| Nutrient | Amount per Serving |
|---|---|
| Calories | 185 |
| Total Fat | 12g |
| Saturated Fat | 7g |
| Cholesterol | 35mg |
| Sodium | 380mg |
| Total Carbohydrates | 12g |
| Dietary Fiber | 1g |
| Sugars | 3g |
| Protein | 10g |
Compared to a traditional cheeseball made with full-fat cream cheese and no yogurt, this version saves about 80 calories and 8g of fat per serving. The Greek yogurt also adds a boost of protein and probiotics, which are great for gut health. The reduced-fat cheddar still provides plenty of calcium, and the fresh herbs add antioxidants and vitamins. This is a snack you can feel good about serving at any party—it’s indulgent enough to satisfy cravings but light enough that you won’t regret that second helping.
Dietary Considerations: This recipe is vegetarian and can be made gluten-free (with gluten-free pretzels) or dairy-free (with substitutions). It contains dairy and gluten in its standard form.
Conclusion
This Lightened-Up Mummy Cheese Ball with Pretzel Sticks has become my go-to Halloween appetizer, and I honestly make it year-round now. It’s proof that you don’t have to sacrifice flavor or fun to eat a little lighter. Whether you’re hosting a spooky party, looking for a healthy-ish snack for a movie night, or just want to surprise your kids with something fun, this recipe delivers every time.
I love how customizable it is—you can make it spicy, herby, or even sweet, and it always turns out delicious. And let’s be honest, there’s something deeply satisfying about pulling a mummy cheeseball out of the fridge and watching people’s faces light up. It’s a little bit silly, a little bit spooky, and completely delicious.
So go ahead, give it a try. Don’t worry if the first one isn’t picture-perfect—mine certainly wasn’t. The beauty of this recipe is in its playful, imperfect nature. And when you take that first bite of creamy, tangy cheese with a salty pretzel crunch, you’ll know exactly why I keep making it. If you try it, I’d love to hear how it turned out. Leave a comment below or tag me in your photos—I’m always looking for new mummy designs!
Frequently Asked Questions
Can I make this cheeseball completely dairy-free?
Yes! Use dairy-free cream cheese (like Kite Hill or Violife) and a thick coconut-based yogurt. Add 1 tablespoon of nutritional yeast for a cheesy flavor. The texture will be slightly softer, so you may need to chill it longer before shaping.
How far in advance can I make this?
You can prepare the cheeseball (without the pretzels) up to 3 days in advance. Keep it wrapped tightly in plastic wrap in the refrigerator. Add the pretzel sticks and olive eyes just before serving for the best texture.
Can I use low-fat cream cheese instead of reduced-fat?
You can, but the texture will be softer and harder to shape. I recommend sticking with reduced-fat (Neufchâtel) cream cheese, which has a better balance of creaminess and structure. If you use low-fat, add an extra 1/4 cup of shredded cheese to help firm it up.
My cheeseball is too soft—what did I do wrong?
This usually happens if the yogurt was too watery or if the cream cheese wasn’t fully softened before mixing. To fix it, add more shredded cheese (about 1/4 cup at a time) until the mixture firms up. You can also chill it for an extra hour before shaping.
Can I use this recipe for other shaped cheeseballs?
Absolutely! This mixture works great for any shape. Try forming it into a pumpkin for fall, a ghost for Halloween, or a snowman for winter holidays. Just adjust the decorations accordingly. The pretzel sticks can be used as arms, legs, or even a broomstick.
Pin This Recipe!
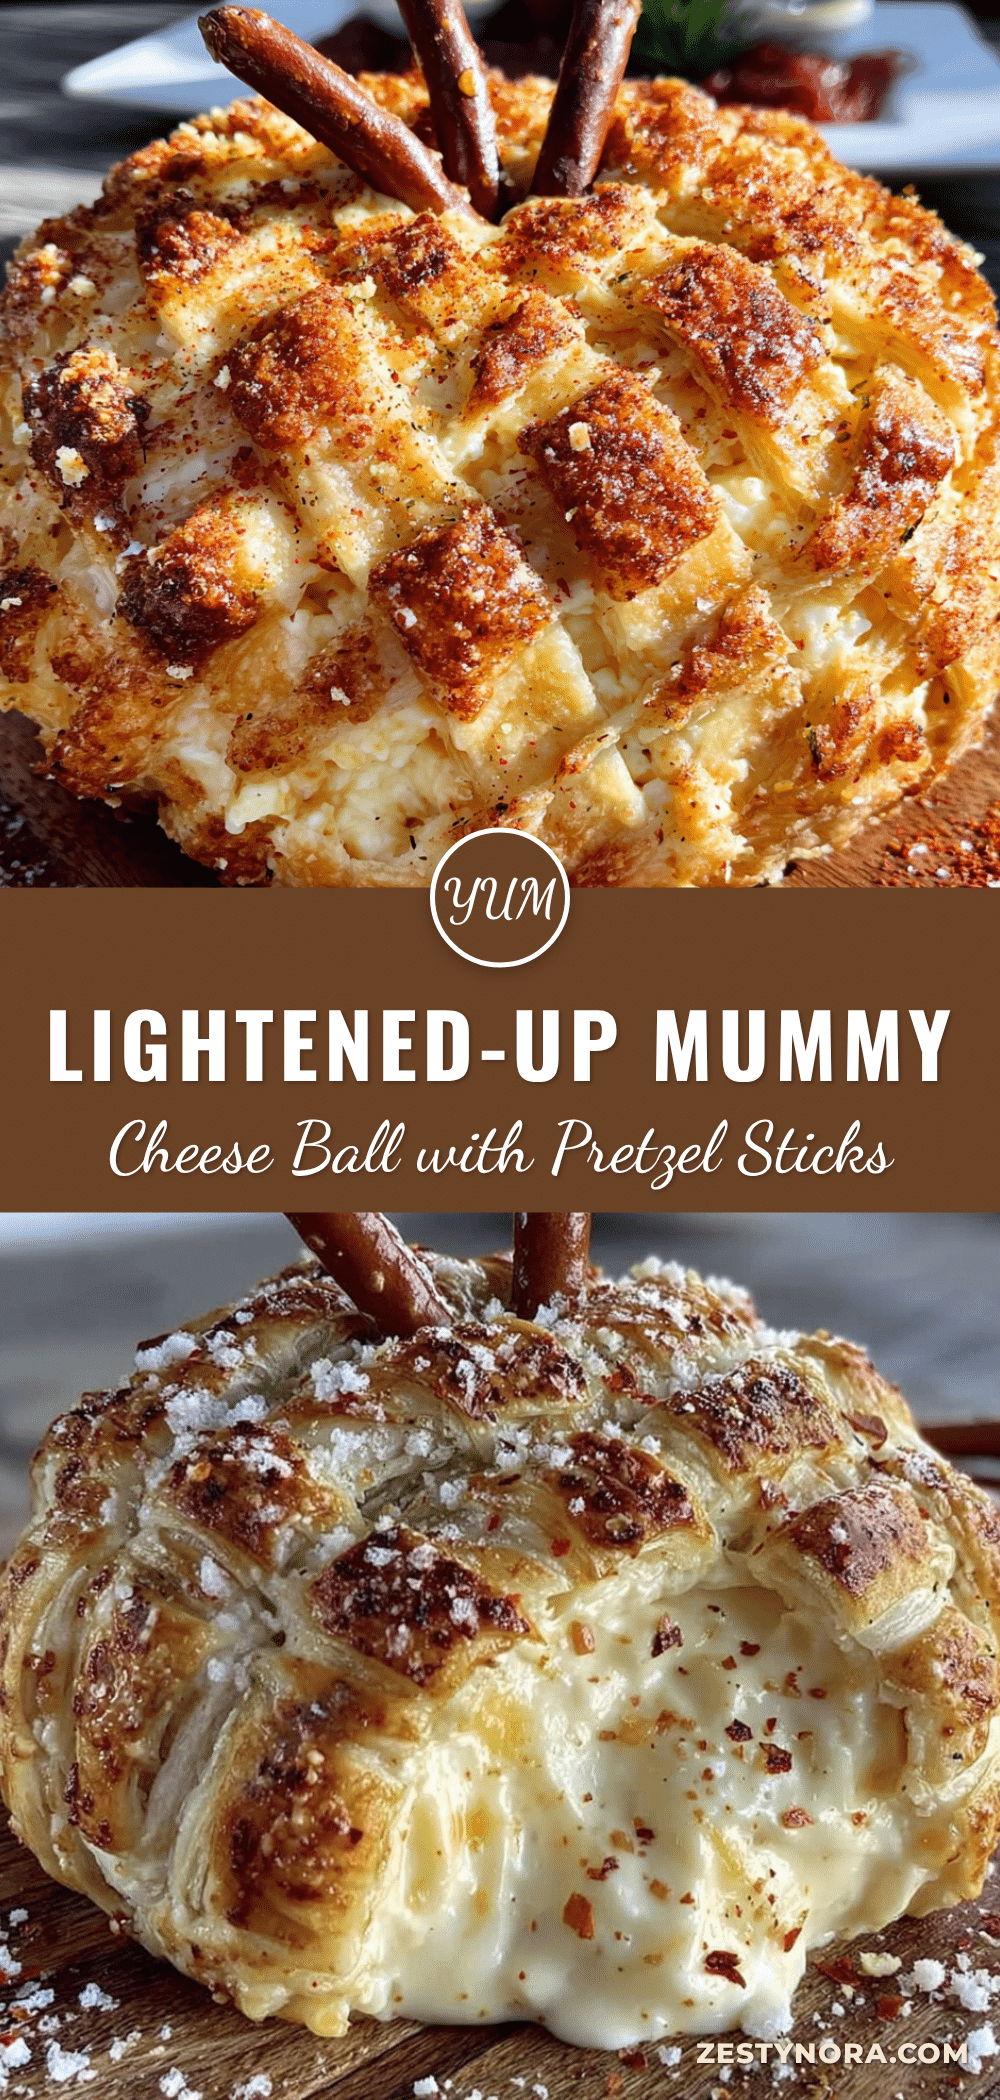
Lightened-Up Mummy Cheese Ball with Pretzel Sticks
A lighter, tangier version of a classic cheeseball, shaped like a mummy with pretzel sticks for bandages and olive eyes. Perfect for Halloween parties or any fun gathering.
- Prep Time: 15 minutes
- Cook Time: 0 minutes
- Total Time: 2 hours 15 minutes (includes chilling)
- Yield: 8 servings 1x
- Category: Appetizer
- Cuisine: American
Ingredients
- 8 oz reduced-fat cream cheese, softened
- 1/2 cup plain Greek yogurt (full-fat or 2%)
- 1 cup reduced-fat shredded cheddar cheese (sharp cheddar recommended)
- 1/2 tsp garlic powder
- 1/4 tsp onion powder
- 1/4 tsp smoked paprika
- 1/4 tsp black pepper
- 1/8 tsp salt (optional)
- 1/4 cup fresh chives, finely chopped
- 1/4 cup fresh parsley, finely chopped
- 20–25 pretzel sticks
- 2 black olives, sliced
- 1–2 tbsp milk (optional, if mixture is too thick)
Instructions
- Soften the cream cheese: Take the cream cheese out of the fridge about 30 minutes before starting. If in a hurry, microwave for 10-15 seconds on low power.
- Mix the base: In a large mixing bowl, combine softened cream cheese and Greek yogurt. Beat with a hand mixer on medium speed until smooth and creamy, about 2 minutes. Scrape down sides of bowl.
- Add cheese and seasonings: Add shredded cheddar, garlic powder, onion powder, smoked paprika, black pepper, and salt (if using). Mix on low speed until just combined. Stir in fresh chives and parsley by hand with a spatula.
- Check consistency: Mixture should be thick but spreadable. If too stiff, add 1 tablespoon of milk and mix again. If too soft, add more shredded cheese.
- Shape the cheeseball: Lay a large piece of plastic wrap on work surface. Spoon cheese mixture into center. Gather edges of plastic wrap and twist to form a tight ball. Shape into a smooth round ball through the plastic.
- Chill the cheeseball: Place wrapped cheeseball on a baking sheet or plate and refrigerate for at least 2 hours, or up to overnight.
- Prepare pretzel ‘bandages’: About 30 minutes before serving, remove cheeseball from fridge. Unwrap and place on serving platter. Gently press pretzel sticks into cheeseball, spacing about 1/4 inch apart, starting at bottom and working up, leaving space at top for eyes.
- Add the eyes: Slice two black olives into rounds. Place two olive slices in the exposed area at the top for mummy’s eyes. Optionally, use small dots of cream cheese for ‘pupils’.
- Serve immediately: Best served within 30 minutes of adding pretzels so sticks stay crunchy. If not serving right away, keep chilled and add pretzels just before serving.
Notes
Don’t skip the chilling step—a warm cheeseball is sticky and messy. Use a light hand with yogurt to avoid a soft mixture. Toast pretzels at 300°F for 5-7 minutes for extra crunch. Make ahead up to 3 days without pretzels. Leftover cheeseball (without pretzels) can be stored in an airtight container in the refrigerator for up to 5 days. Freeze undecorated cheeseball for up to 3 months.
Nutrition
- Serving Size: 1/8 of cheeseball
- Calories: 185
- Sugar: 3
- Sodium: 380
- Fat: 12
- Saturated Fat: 7
- Carbohydrates: 12
- Fiber: 1
- Protein: 10
Keywords: mummy cheeseball, Halloween appetizer, lightened-up cheeseball, pretzel sticks, Greek yogurt cheeseball, spooky snack, party appetizer