I was sorting through a box of old greeting cards at a flea market last fall when the woman running the booth—a retired baker with flour permanently dusted into the creases of her hands—started talking about Halloween treats. I wasn’t looking for cooking advice, honestly. I was hunting for vintage postcards. But there I was, holding a 1980s card with a cartoon cat on it, listening to her describe exactly how to make ghost meringue cookies. She told me the secret was patience, not perfection, and that the best ghosts came from a batch where you’d forgotten to stress. I bought the card for a quarter, and she scribbled the meringue ratio on the back. That scribbled recipe has become my go-to every October, and let me tell you, it works like magic. Maybe you’ve been there—staring at a Pinterest board full of complicated Halloween desserts and thinking, “I just want something simple that looks impressive.” These ghost meringue cookies are exactly that. Light, airy, and adorable with their little chocolate eyes, they’re the kind of treat that makes people smile before they even take a bite.
Why You’ll Love This Recipe
I’ve tested this recipe more times than I care to admit. The first batch collapsed into sad little puddles. The second batch had chocolate eyes that melted into weird frowns. But by batch three, I had it dialed in. Here’s why I keep coming back to these ghost meringue cookies year after year:
- Quick & Easy: These come together in about 15 minutes of active prep time. The oven does the rest of the work while you get on with your day.
- Simple Ingredients: Egg whites, sugar, cream of tartar, vanilla, and chocolate chips. That’s it. No weird specialty items needed.
- Perfect for Halloween: Whether you’re hosting a party, sending treats to school, or just want something festive for your family, these ghosts deliver the spooky factor without the sugar overload.
- Crowd-Pleaser: Kids love them. Adults love them. Even people who claim they don’t like meringue end up reaching for seconds.
- Unbelievably Delicious: The texture is what gets me every time—crisp on the outside, light as air on the inside, with a tiny melt-in-your-mouth quality that feels almost magical.
What makes these ghost meringue cookies different from other recipes? It’s the technique. I whip the egg whites slowly at first to build a stable foam, then gradually add the sugar so it dissolves completely. No gritty meringue here. The result is a ghost that holds its shape, stays crisp for days, and looks like it floated straight out of a cartoon. This isn’t just another Halloween cookie recipe—it’s the one you’ll pull out year after year.
What Ingredients You Will Need
This recipe uses simple, everyday ingredients to create something that feels special. Most of these are probably in your kitchen right now.
- Large egg whites (3, room temperature) — Room temperature egg whites whip up higher and more stable than cold ones. I separate my eggs when they’re cold, then let the whites sit on the counter for about 30 minutes before I start.
- Granulated sugar (¾ cup, 150g) — Regular white sugar works perfectly. Don’t substitute powdered sugar here, as it contains cornstarch that can affect the texture.
- Cream of tartar (½ teaspoon) — This stabilizes the egg whites and helps them hold their shape. If you don’t have it, you can substitute 1 teaspoon of lemon juice or white vinegar.
- Vanilla extract (1 teaspoon) — Pure vanilla adds warmth and depth. I use Nielsen-Massey because it’s rich without being overpowering, but any good vanilla works.
- Mini chocolate chips (¼ cup, for the eyes) — Look for mini chips that are small enough to look like ghost eyes. Regular chips can work in a pinch, but they look a little oversized.
- Pinch of salt — Just a tiny amount balances the sweetness and helps the egg whites whip up properly.
For the best results, make sure your mixing bowl and whisk attachment are completely clean and free of any grease. Even a tiny bit of fat can prevent your egg whites from whipping up properly. I wipe my bowl with a little lemon juice on a paper towel before I start, just to be safe.
Equipment Needed
You don’t need much fancy equipment for these ghost meringue cookies, which is part of their charm.
- Electric mixer (stand mixer or hand mixer) — You can whip egg whites by hand with a whisk, but it takes about 15 minutes of steady work and your arm will definitely feel it. A stand mixer makes this recipe almost effortless.
- Large mixing bowl — Glass, metal, or ceramic all work. Avoid plastic bowls, which can retain grease even after washing.
- Baking sheet — A standard half-sheet pan works perfectly. Line it with parchment paper for easy cleanup and to prevent sticking.
- Piping bag with round tip (or a zip-top bag) — A piping bag gives you more control over the shape, but a zip-top bag with the corner snipped off works just fine. I’ve used both, and honestly, the zip-top bag method is easier for beginners.
- Rubber spatula — For folding in the chocolate chips and scraping down the bowl.
If you don’t have a piping bag, you can also just spoon the meringue onto the baking sheet and shape it into ghost-like blobs with the back of a spoon. They won’t look as uniform, but they’ll taste just as good. I actually kind of love the imperfect ones—they have more personality.
Preparation Method
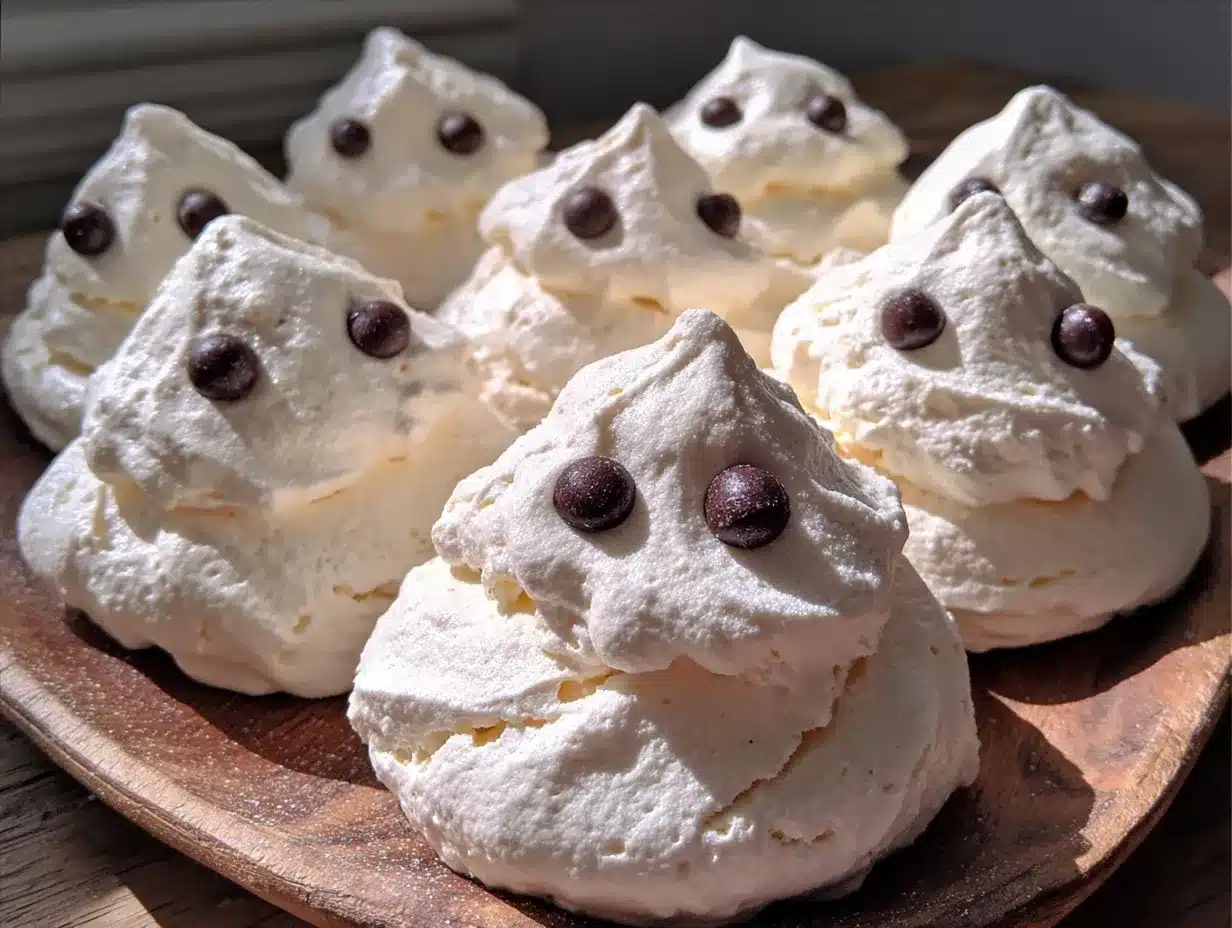
Let me walk you through this step by step. I’ve learned a few tricks along the way that make these ghost meringue cookies turn out perfectly every time.
- Preheat your oven to 200°F (95°C). Yes, that low temperature is intentional. Meringues bake low and slow to dry out without browning. Line a baking sheet with parchment paper and set it aside.
- Separate your eggs carefully. Crack each egg into a small bowl first, then transfer the white to your mixing bowl. This way, if a yolk breaks, it doesn’t ruin the whole batch. Even a tiny speck of yolk can prevent your egg whites from whipping up properly.
- Start whipping on low speed. Beat the egg whites and cream of tartar together on low for about 2 minutes until they’re frothy and bubbly. This slow start builds a stable foam structure.
- Gradually add the sugar. With the mixer running on medium speed, add the sugar one tablespoon at a time. I know it feels tedious, but this step is crucial. Adding the sugar slowly gives it time to dissolve completely, which prevents that gritty texture nobody wants.
- Whip until stiff peaks form. Once all the sugar is added, increase the speed to high and whip for 5-7 minutes. You’re looking for stiff, glossy peaks that hold their shape when you lift the whisk. The mixture should look thick and marshmallow-like. To test, rub a tiny bit between your fingers—if it feels smooth, the sugar has dissolved. If it feels gritty, keep whipping.
- Add vanilla and salt. With the mixer on low, add the vanilla extract and a pinch of salt. Mix just until combined, about 10 seconds. Don’t overmix at this stage or you’ll deflate all that beautiful volume.
- Fold in the chocolate chips. Use a rubber spatula to gently fold in the mini chocolate chips. Use a light hand here—you want to distribute the chips without knocking the air out of the meringue. Stop folding as soon as the chips are evenly distributed.
- Pipe the ghosts. Transfer the meringue to your piping bag fitted with a round tip. Pipe small mounds onto the prepared baking sheet, about 2 inches apart. To make them look like ghosts, pipe a slightly taller mound and then pull the tip straight up to create a little peak at the top. If you’re using a zip-top bag, snip about ½ inch off one corner and pipe from there.
- Add the eyes. Before the meringue starts to set, gently press two mini chocolate chips into each ghost for eyes. Place them close together near the top of each mound. Don’t press too hard or you’ll flatten the ghost.
- Bake for 90 minutes. Place the baking sheet in the preheated oven and bake for 1 hour and 30 minutes. The meringues should be dry to the touch and easily lift off the parchment paper. They shouldn’t be brown at all—just pale and slightly matte on the surface.
- Turn off the oven and let them cool inside. This is my favorite trick. After the baking time is up, turn off the oven but leave the meringues inside with the door closed for another 30-60 minutes. This gradual cooling prevents cracking and ensures they’re completely dry all the way through.
- Cool completely on the baking sheet. Remove the ghosts from the oven and let them cool completely on the baking sheet before moving them. They’re fragile when warm, so be patient.
Your kitchen will smell faintly sweet and vanilla-y while these bake. It’s a cozy, comforting scent that makes the whole house feel like Halloween.
Cooking Tips & Techniques
I’ve made plenty of mistakes with these ghost meringue cookies, and I’m sharing them so you don’t have to repeat them.
Don’t rush the sugar addition. The first time I made these, I dumped all the sugar in at once. The meringue never got stiff, and the ghosts spread out into flat, sad little blobs. Adding sugar gradually gives it time to dissolve, which creates that stable, glossy structure you need.
Watch for humidity. Meringues are picky about weather. If it’s a rainy or humid day, your meringues might end up sticky or chewy instead of crisp. I try to make these on dry days, but if you’re stuck with humidity, you can add an extra 15-20 minutes of baking time to compensate.
Use parchment paper, not wax paper. I made that mistake once. Wax paper sticks to meringue like glue, and I ended up with ghost fragments instead of whole cookies. Parchment paper is non-stick and makes cleanup a breeze.
Don’t open the oven door. I know it’s tempting to peek, but opening the door lets cold air in and can cause your meringues to crack or collapse. Trust the process and keep that door closed.
Make sure your bowl is spotless. I once used a bowl that had a tiny bit of butter residue, and my egg whites refused to whip up. I ended up starting over with a clean bowl. Wipe your bowl with lemon juice or vinegar on a paper towel before you start to remove any trace of grease.
Store them properly. Meringues absorb moisture from the air, which makes them soft. Store these ghosts in an airtight container at room temperature, and they’ll stay crisp for up to a week. If they do get soft, you can crisp them up in a 200°F oven for 10 minutes.
Variations & Adaptations
One of the best things about this recipe is how easy it is to customize. Here are a few variations I’ve tried and loved.
Pumpkin Spice Ghosts: Add 1 teaspoon of pumpkin pie spice to the sugar before you start whipping. The warm spices complement the vanilla beautifully and make these feel extra fall-ish. I made these for a Halloween party last year, and they disappeared faster than the candy bowl.
Chocolate Ghosts: Swap 2 tablespoons of the granulated sugar for unsweetened cocoa powder. The meringue will be a pale brown color, which looks kind of spooky. Use white chocolate chips for the eyes instead of dark chocolate for contrast.
Vegan Version: You can use aquafaba (the liquid from a can of chickpeas) instead of egg whites. Use 3 tablespoons of aquafaba per egg white. It whips up just like egg whites, though it takes a little longer. I was skeptical the first time I tried it, but honestly, the texture is almost identical.
Peppermint Ghosts: Add ½ teaspoon of peppermint extract along with the vanilla. These are perfect for a Christmas-themed treat if you want to keep the ghost shape going past Halloween. Crushed candy canes on top would be a fun addition.
Colorful Ghosts: Add a few drops of gel food coloring after the stiff peaks form. Swirl it in gently with a spatula for a marbled effect. Purple, green, and orange are all fun Halloween options.
Serving & Storage Suggestions
These ghost meringue cookies are best served at room temperature. They’re perfect on their own as a light, airy treat, but they also work beautifully as decorations on a Halloween dessert table. I like to arrange them on a platter with some fake spiderwebs and plastic spiders for a fun, spooky display.
They pair wonderfully with hot chocolate, coffee, or a warm apple cider. The sweetness of the meringue balances the bitterness of coffee or the tartness of cider. For a fun party idea, you can serve them alongside a bowl of chocolate mousse or pudding and let guests “dip” the ghosts in for an extra indulgent treat.
Storage: Store these ghosts in an airtight container at room temperature for up to one week. Do not refrigerate them—the moisture in the fridge will make them sticky. If you need to stack them in a container, place a layer of parchment paper between each layer to prevent them from sticking together.
Freezing: You can freeze baked meringues for up to three months. Place them in a single layer in a freezer-safe container with parchment paper between layers. Thaw at room temperature for about 30 minutes before serving. Don’t thaw them in the fridge—again, moisture is the enemy of crisp meringue.
The flavors actually develop a bit over time. The vanilla becomes more pronounced after a day or two, and the chocolate chips soften slightly, which creates a nice contrast with the crisp meringue.
Nutritional Information & Benefits
Each ghost meringue cookie (based on a batch of 24) contains approximately:
- Calories: 35
- Fat: 0.5g
- Carbohydrates: 8g
- Sugar: 7g
- Protein: 0.5g
These are a lighter option compared to traditional Halloween cookies, which often pack in butter and flour. Meringues are naturally gluten-free and fat-free (aside from the tiny bit in the chocolate chips), making them a good choice for anyone watching their intake.
Egg whites are a great source of protein without the fat and cholesterol of the yolk. They also contain riboflavin and selenium. The mini chocolate chips add a small amount of antioxidants from the cocoa, though let’s be honest—we’re eating these for fun, not for health benefits.
If you’re following a dairy-free diet, make sure to use dairy-free chocolate chips. Most dark chocolate chips are naturally dairy-free, but it’s worth checking the label. These cookies are also nut-free as written, which makes them a safe option for school parties and gatherings.
Conclusion
These ghost meringue cookies have become a Halloween tradition in my house, and I have a feeling they’ll become one in yours too. They’re simple enough to make on a busy weeknight but special enough to bring to a party. The best part? Watching people’s faces light up when they see these little ghosts staring up at them from the plate.
I love that this recipe came from an unexpected source—a flea market conversation with a retired baker who just wanted to share her knowledge. It reminds me that the best recipes often come from the most unlikely places. So go ahead, give these a try. Make them your own. Add your own twist. And if you come up with a variation I haven’t tried, I’d love to hear about it in the comments.
Happy Halloween, and happy baking!
Frequently Asked Questions
Can I make these ghost meringue cookies without a piping bag?
Absolutely. You can use a zip-top bag with the corner snipped off, or you can simply spoon the meringue onto the baking sheet and shape it with the back of a spoon. The ghosts won’t be as uniform, but they’ll taste exactly the same.
Why did my meringue turn out sticky or chewy?
This usually happens when there’s too much humidity in the air or the meringues weren’t baked long enough. Try baking them for an additional 15-20 minutes on a dry day. If they’re still sticky, they need more time in the oven.
Can I use liquid egg whites from a carton?
I don’t recommend it. Carton egg whites are pasteurized differently and often contain stabilizers that prevent them from whipping up properly. Fresh egg whites from whole eggs give you the best volume and texture.
How do I know when the meringues are done baking?
They should be dry to the touch and easily lift off the parchment paper. The surface should be matte, not shiny. If they still feel soft or sticky, they need more time. Remember, they’ll continue to dry out as they cool in the turned-off oven.
Can I double this recipe?
Yes, but you’ll need to bake them in batches or use multiple baking sheets. Make sure you have enough oven space so the heat can circulate properly around each ghost. Crowding the oven can lead to uneven baking.
Pin This Recipe!
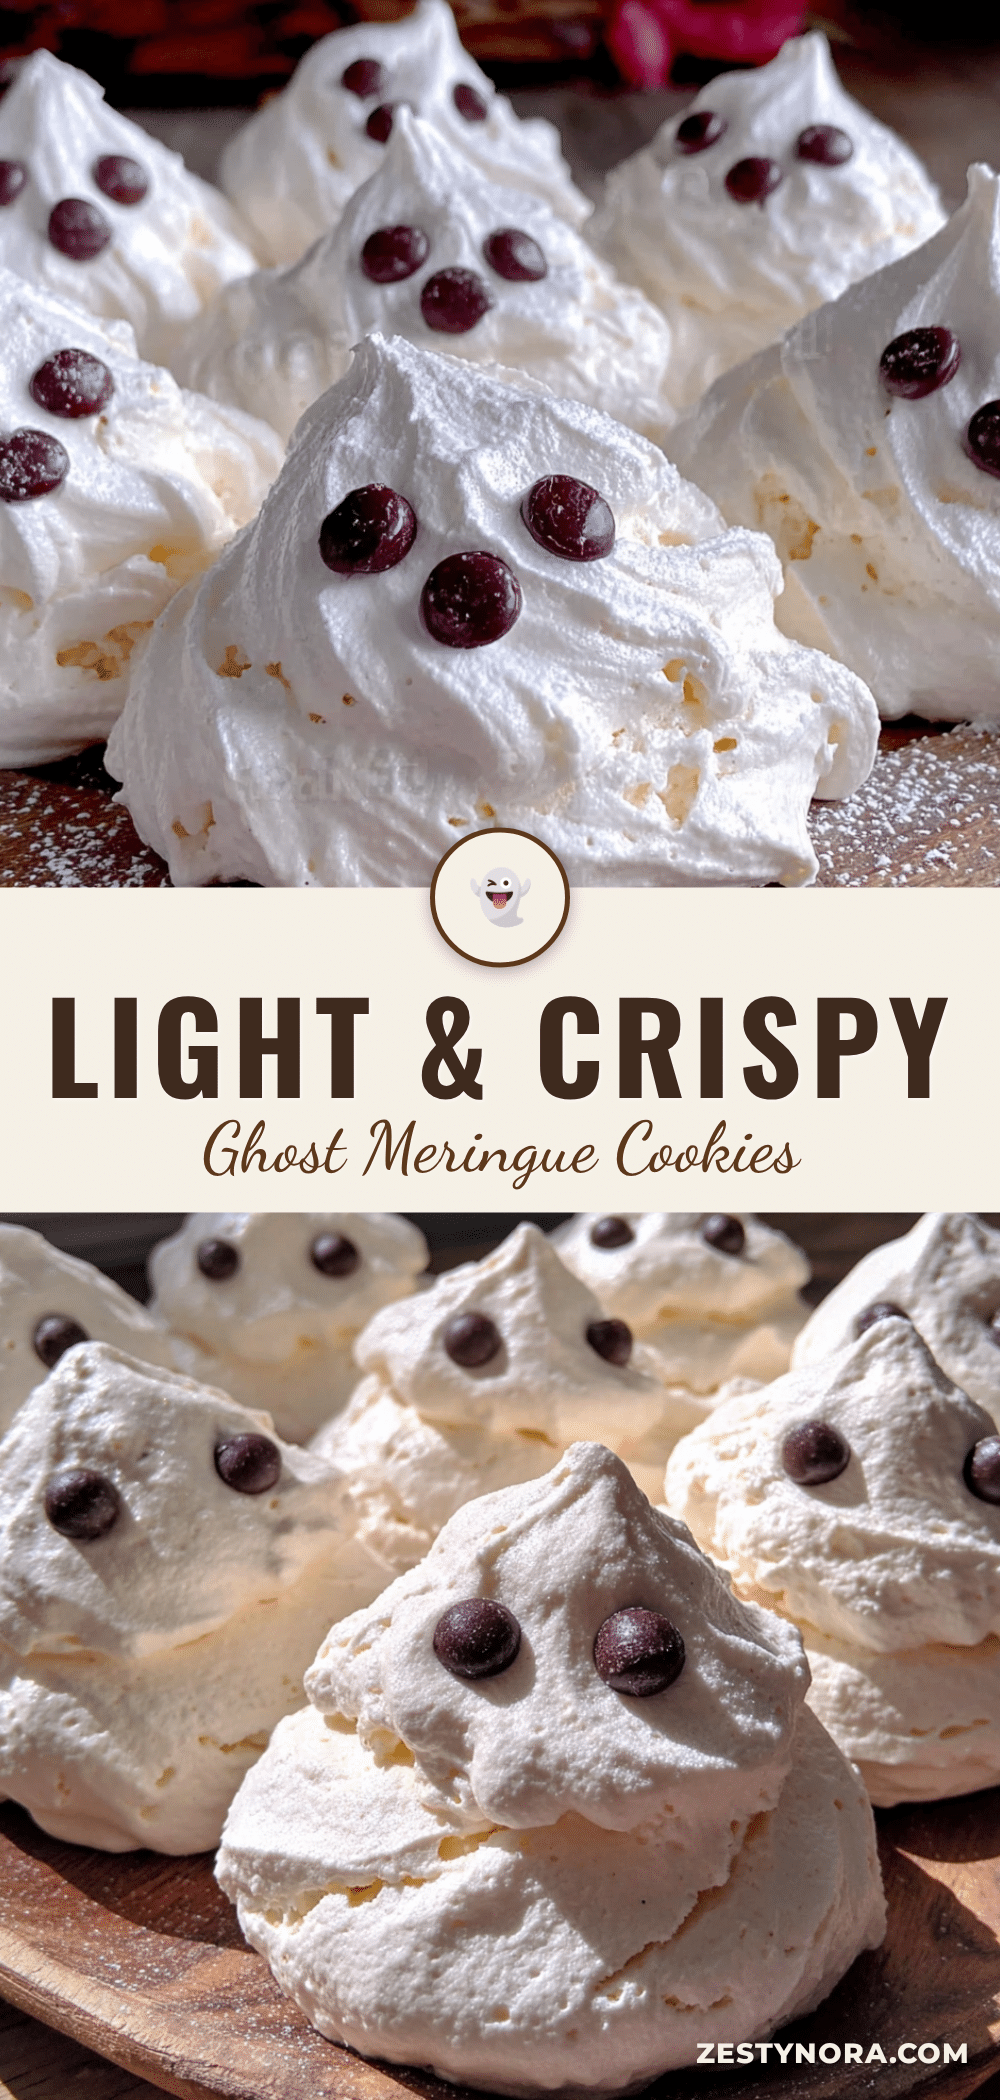
Light & Crispy Ghost Meringue Cookies: Easy Halloween Treat
Light, airy, and adorable ghost-shaped meringue cookies with chocolate eyes. A simple yet impressive Halloween treat that comes together with just a few basic ingredients.
- Prep Time: 15 minutes
- Cook Time: 90 minutes
- Total Time: 2 hours 15 minutes
- Yield: 24 servings 1x
- Category: Dessert
- Cuisine: American
Ingredients
- 3 large egg whites, room temperature
- ¾ cup (150g) granulated sugar
- ½ teaspoon cream of tartar
- 1 teaspoon vanilla extract
- ¼ cup mini chocolate chips
- Pinch of salt
Instructions
- Preheat your oven to 200°F (95°C). Line a baking sheet with parchment paper and set aside.
- Separate your eggs carefully, transferring each white to your mixing bowl. Ensure no yolk gets in.
- Start whipping the egg whites and cream of tartar on low speed for about 2 minutes until frothy and bubbly.
- With the mixer running on medium speed, add the sugar one tablespoon at a time, allowing it to dissolve completely.
- Increase speed to high and whip for 5-7 minutes until stiff, glossy peaks form. The mixture should be thick and marshmallow-like.
- Add vanilla extract and a pinch of salt. Mix on low just until combined, about 10 seconds.
- Gently fold in the mini chocolate chips with a rubber spatula, being careful not to deflate the meringue.
- Transfer the meringue to a piping bag fitted with a round tip (or a zip-top bag with the corner snipped). Pipe small mounds onto the prepared baking sheet, about 2 inches apart, pulling the tip straight up to create a peak.
- Before the meringue sets, gently press two mini chocolate chips into each ghost for eyes, placing them close together near the top.
- Bake for 90 minutes. The meringues should be dry to the touch and easily lift off the parchment paper.
- Turn off the oven and let the meringues cool inside with the door closed for 30-60 minutes.
- Remove from the oven and cool completely on the baking sheet before moving.
Notes
For best results, ensure your mixing bowl and whisk are completely clean and grease-free. Wipe with lemon juice or vinegar on a paper towel before starting. Avoid making meringues on humid or rainy days; if necessary, add 15-20 minutes of baking time. Store in an airtight container at room temperature for up to a week. Do not refrigerate. To crisp up soft meringues, bake at 200°F for 10 minutes.
Nutrition
- Serving Size: 1 ghost meringue coo
- Calories: 35
- Sugar: 7
- Sodium: 10
- Fat: 0.5
- Carbohydrates: 8
- Protein: 0.5
Keywords: ghost meringue cookies, Halloween cookies, meringue cookies, easy Halloween treats, ghost cookies, light cookies, crispy cookies


