My niece Clara asked why I couldn’t just arrange the orange slices in a circle and put a celery stick on top. I started to explain why that wouldn’t work—something about the stem needing to be attached, the shape needing to be more oval, the whole thing looking like a sad, flattened sun instead of a pumpkin. Then I stopped. I was holding a bag of clementines, a bunch of celery, and a knife, and I was about to make this way harder than it needed to be. Honestly, I was about to turn a simple snack into a whole production.
I set down the knife and slid the clementines across the counter toward her. “Show me,” I said. She peeled them, arranged them in a rough circle on a big wooden board, and stuck a celery stick right in the middle. It looked… exactly like a pumpkin. Not a perfect, food-stylist pumpkin, but a real, honest-to-goodness pumpkin that a kid would actually want to eat. I mean, I had been planning to carve out a watermelon and fill it with fruit salad. I had bought special cookie cutters in the shape of leaves. I had a whole Pinterest board dedicated to “spooky snacks.” And she just… did it.
That moment stuck with me. Not because I learned a new technique, but because I remembered what Halloween snacks are actually for. They’re not for impressing other parents on Instagram. They’re for making kids smile, for getting them to eat something that isn’t a fistful of candy corn, for that little moment of pride when they help create something in the kitchen. So I took her idea and ran with it—turned it into a proper tray that’s big enough for a party, sturdy enough to travel, and simple enough that you can throw it together in ten minutes flat. Maybe you’ve been there, overcomplicating something that was supposed to be fun. This pumpkin-shaped fruit tray is my apology to my past self, and my gift to you.
Why You’ll Love This Recipe
Let me tell you why this particular fruit tray has become my go-to for every Halloween gathering, from school parties to family get-togethers. I’ve tested it at three different events now, and it never fails.
- Quick & Easy: This comes together in under 15 minutes, start to finish. No baking, no blending, no special equipment. If you can peel an orange and wash some grapes, you can make this.
- Simple Ingredients: You likely already have everything in your kitchen. Oranges, celery, grapes, maybe some blueberries or apple slices. No fancy grocery trips needed—I promise.
- Perfect for Halloween Parties: Great for classroom celebrations, potlucks, or just a fun afternoon snack before trick-or-treating. It’s festive without being fussy.
- Crowd-Pleaser: Kids actually eat this. I’ve watched children bypass bowls of chips to grab orange slices from this tray. It’s the Halloween magic at work.
- Unbelievably Delicious: There’s something about the combination of sweet, juicy oranges with crunchy celery that just works. Plus, the grapes add that pop of sweetness kids crave.
What makes this recipe different from the rest? It’s the shape. The pumpkin shape isn’t just cute—it’s functional. The orange slices naturally curve to form the pumpkin body, and the celery stem gives it that instant Halloween identity. No carving, no cutting special shapes, no waste. It’s the kind of recipe that makes you feel clever without actually having to be clever.
This recipe isn’t just good—it’s the kind that makes you close your eyes after the first bite. It’s comfort food reimagined for a holiday that usually revolves around sugar. Healthier, faster, but with the same soul-soothing satisfaction. Perfect for impressing other parents without stress, or turning a simple snack into something memorable.
What Ingredients You Will Need
This recipe uses simple, wholesome ingredients to deliver a fun Halloween snack that actually tastes good. The beauty is in the simplicity—no obscure items, no complicated prep.
- Oranges (6-8 medium): These form the pumpkin body. I prefer navel oranges for their sweetness and firm texture. Look for oranges that are round and even—they’ll arrange better. (Adds natural sweetness and vitamin C)
- Celery (2-3 stalks): This becomes the pumpkin stem. Choose stalks that are straight and thick, about 4-5 inches long. (Adds crunch and that classic pumpkin look)
- Green grapes (1 cup): These fill in the gaps and add color contrast. Seedless grapes work best. (Adds sweetness and a pop of green)
- Blueberries (1/2 cup): Optional, but they add a nice dark contrast around the edges. Fresh is best. (Adds antioxidants and color depth)
- Apple slices (optional, 1 apple): I sometimes add these for extra crunch. Granny Smith apples work well for tart contrast. (Adds texture and variety)
- Pumpkin-shaped cookie cutter (optional): If you want to cut apple slices into pumpkin shapes for extra decoration. Not necessary, but fun.
- Large serving platter or cutting board: A round or oval board works best. I use a wooden board about 16 inches in diameter.
Ingredient Tips: For best results, use oranges that are firm and heavy for their size—they’ll be juicier and hold their shape better. I recommend Sunkist or Cuties clementines if you want smaller, kid-friendly segments. For the celery, look for stalks that are bright green and crisp. If the celery is limp, soak it in ice water for 10 minutes before using—it’ll crisp right up.
Substitution Guidance: No oranges? Use tangerines or mandarins—they’re smaller but work great for mini pumpkins. No celery? Try a pretzel stick or a slice of green bell pepper for the stem. For a dairy-free option, obviously everything here is dairy-free already. For a low-sugar version, use fewer grapes and more apple slices. The beauty of this recipe is its flexibility—you can swap in whatever fruit you have on hand.
Equipment Needed
You don’t need much for this recipe, which is part of the appeal. Here’s what I use:
- Large serving platter or cutting board: A round or oval board about 14-16 inches in diameter works best. I use a bamboo board I picked up at a discount store for $8.
- Sharp knife: For slicing oranges and apples. A chef’s knife or a serrated knife both work fine.
- Cutting board: For prepping the fruit. Keep it separate from the serving board to avoid cross-contamination.
- Small cookie cutter (optional): If you want to cut apple slices into pumpkin shapes. I have a set of Halloween cutters I use every year.
- Paper towels: For drying the fruit after washing. Wet fruit can make the board slippery.
Budget-Friendly Options: Don’t have a large platter? Use a baking sheet lined with parchment paper. No cookie cutter? Just slice the apples into thin wedges—they’ll still look great. I once made this on a large dinner plate for a small gathering, and it worked perfectly.
Personal Experience: I’ve tried this on several different boards, and I prefer a wooden one because the fruit doesn’t slide around as much. A marble board looks beautiful but can be slippery. If you’re using a glass platter, put a damp paper towel underneath the fruit to keep it in place.
Preparation Method
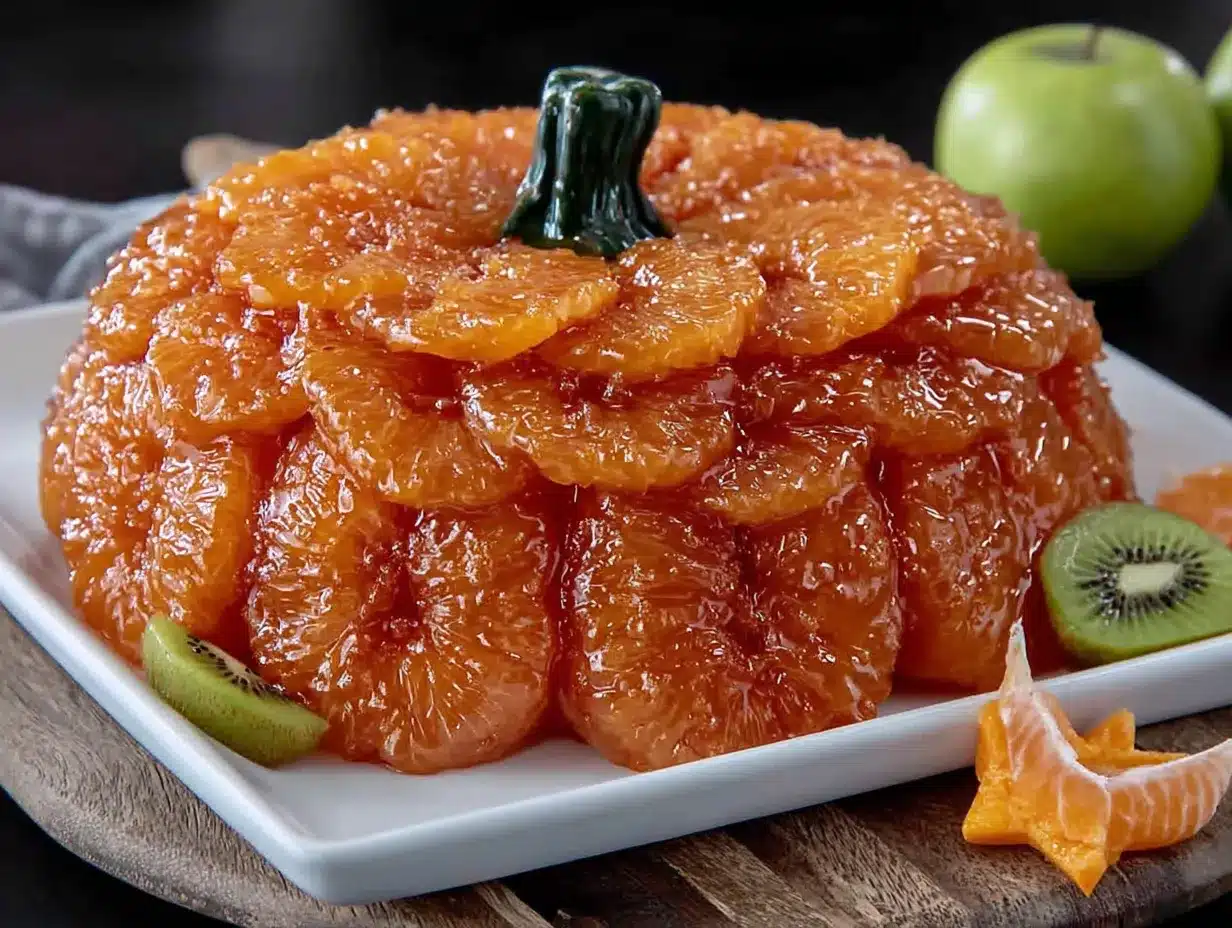
Let me walk you through this step by step. Trust me, it’s easier than it looks.
- Wash all fruit thoroughly. Rinse the oranges, grapes, blueberries, and celery under cool water. Pat everything dry with paper towels. This is important—wet fruit makes the board slippery and can cause the oranges to slide out of place.
- Slice the oranges. Cut each orange into rounds about 1/4 inch thick. You want them thin enough to lay flat but thick enough to hold their shape. I aim for about 6-8 slices per orange, depending on size. Discard the ends (the slices with mostly peel). You should end up with about 30-40 orange slices total.
- Arrange the pumpkin body. Start by placing your first orange slice in the center of the board. Then work outward in a circle, overlapping the slices slightly. The goal is to create a round, pumpkin-like shape about 10-12 inches in diameter. Think of it like building a flower—each slice is a petal. Overlap them by about 1/2 inch so they hold each other in place.
- Build the pumpkin shape. As you add more slices, gently press them down so they form a slight dome. This gives the pumpkin dimension. Don’t worry if it’s not perfect—the overlapping slices create a natural pumpkin texture. I usually use about 20-25 slices for the main body.
- Add the stem. Take a celery stalk and trim it to about 3-4 inches long. Cut a small slit in the bottom of the stalk (about 1/2 inch deep) and wedge it into the center of the orange slices. This helps it stand upright. If the celery is too tall, trim it down. The stem should look proportional to the pumpkin.
- Fill in the gaps. Use green grapes to fill any spaces between the orange slices. This adds color contrast and helps the pumpkin shape look more cohesive. Press the grapes gently into the gaps—they’ll stay in place naturally.
- Add the finishing touches. Scatter blueberries around the edges of the pumpkin for a “dirt” effect. If you’re using apple slices, arrange them in a ring around the pumpkin. For extra fun, use a pumpkin-shaped cookie cutter to cut apple slices into tiny pumpkins and place them around the board.
- Check your work. Step back and look at the tray. Does it look like a pumpkin? If not, adjust the orange slices slightly. The beauty of this recipe is that you can rearrange it until it looks right. I once spent 10 minutes just moving slices around until it looked perfect.
- Serve immediately or refrigerate. If you’re making this ahead, cover the tray with plastic wrap and refrigerate for up to 2 hours. Any longer and the oranges might start to dry out. Take it out 15 minutes before serving to let the fruit come to room temperature.
Time Estimate: Prep time is about 10 minutes, assembly takes another 5-10 minutes. Total time: 15-20 minutes. That’s faster than driving to the store for a pre-made fruit tray.
Troubleshooting Tip: If the orange slices keep sliding around, try this trick: put a thin layer of cream cheese or Greek yogurt on the board first. It acts like edible glue and keeps everything in place. I learned this after a particularly disastrous attempt at a party where the whole pumpkin slid off the board.
Cooking Tips & Techniques
I’ve made this pumpkin fruit tray about a dozen times now, and I’ve learned a few things the hard way. Here are my best tips:
Choose the right oranges. Not all oranges are created equal for this recipe. Navel oranges are my go-to because they’re round, sweet, and slice evenly. Avoid oranges that are too soft or have thick peels—they won’t hold their shape. Blood oranges look amazing but are smaller and harder to arrange.
Slice with the grain. When slicing oranges, cut perpendicular to the segments, not parallel. This creates those beautiful star patterns in the center of each slice. It also makes the slices more stable because the segments are held together by the membrane.
Don’t overthink the shape. Here’s where I went wrong the first few times. I tried to make the pumpkin perfectly round, and it looked stiff and unnatural. Pumpkins aren’t perfect circles—they have bumps and ridges. Let the orange slices overlap naturally. The imperfections are what make it look like a real pumpkin.
Keep it cold. Fruit tastes best when it’s cold and crisp. If you’re making this for a party, keep the tray refrigerated until just before serving. I’ve learned that fruit left out for more than 30 minutes starts to look sad and limp.
Use the right board. A round board is ideal, but a rectangular one works too. Just arrange the orange slices in a circle in the center. Avoid using a board that’s too small—you need room for the “dirt” (grapes and blueberries) around the edges.
My biggest failure: The first time I made this, I used a glass platter and didn’t dry the oranges properly. The whole thing slid apart when I tried to move it. Now I always use a wooden board and pat the fruit dry. Learn from my mistakes.
Variations & Adaptations
This recipe is endlessly adaptable. Here are some variations I’ve tried and loved:
Mini Pumpkin Version: Use clementines or mandarins instead of oranges. Arrange them in a smaller circle on a dessert plate. This is perfect for individual servings or lunchbox surprises. I made these for my niece’s class party, and they were a hit.
Fall Harvest Twist: Add pear slices, pomegranate seeds, and dried cranberries around the pumpkin. This turns it into a fall-themed fruit tray that works for Thanksgiving too. The pomegranate seeds look like little jewels scattered around the board.
Halloween Monster Version: Use the same pumpkin base, but add “eyes” made from two blueberry halves and a “mouth” made from a curved apple slice. Kids love this version—it’s like a jack-o-lantern that’s actually edible.
Dairy-Free Dip Option: Serve with a side of yogurt dip made from coconut yogurt and a drizzle of honey. Or make a simple cream cheese dip with a touch of vanilla extract. Both are delicious and kid-approved.
Allergen-Friendly: This recipe is naturally gluten-free, dairy-free, and nut-free. For a low-sugar version, skip the grapes and use more apple slices and blueberries. For a keto-friendly option, use only berries and skip the oranges entirely.
Serving & Storage Suggestions
This pumpkin fruit tray is best served cold, right out of the refrigerator. The contrast between the cold, juicy oranges and the crisp celery is what makes it special.
Presentation Tips: Arrange the tray on a large wooden board or a white platter for maximum visual impact. Add a few small Halloween-themed decorations around the board—plastic spiders, fake leaves, or mini pumpkins. Just make sure they’re not touching the fruit.
Complementary Dishes: This pairs beautifully with other Halloween snacks. Serve it alongside a bowl of popcorn, some veggie sticks with ranch dip, or a plate of cheese cubes. For a full party spread, add some spooky Halloween cupcakes and ghost-shaped pizza bites.
Storage Instructions: This tray is best eaten within a few hours of assembly. If you have leftovers, store the fruit in an airtight container in the refrigerator for up to 2 days. The oranges will soften slightly, but they’re still good for snacking. The celery can be stored separately in a bag with a damp paper towel to keep it crisp.
Reheating: You don’t need to reheat anything. Just let the fruit sit at room temperature for 10-15 minutes before serving. Cold fruit is actually better for this recipe.
Flavor Development: The oranges actually taste better after sitting for an hour or two. The flavors mellow and the sweetness becomes more pronounced. I’ve noticed that the grapes also absorb some of the orange juice, which makes them extra flavorful.
Nutritional Information & Benefits
This fruit tray is a healthy alternative to the usual Halloween candy. Here’s a rough breakdown per serving (assuming 8 servings):
- Calories: Approximately 80-100 per serving
- Carbohydrates: 20-25g (natural sugars from fruit)
- Fiber: 3-4g
- Vitamin C: 70-80% of daily value
- Potassium: 200-250mg
Health Benefits: Oranges are packed with vitamin C, which supports immune health—especially important during cold and flu season. Grapes contain antioxidants that support heart health. Celery is a good source of fiber and has anti-inflammatory properties. Blueberries are loaded with antioxidants that support brain health.
Dietary Considerations: This recipe is naturally gluten-free, dairy-free, nut-free, and vegan. It’s also low in sodium and contains no added sugar. For a low-FODMAP version, skip the apples and use only oranges, grapes, and blueberries.
Personal Wellness Perspective: I love that this recipe lets kids enjoy a Halloween treat without the sugar crash. It’s a way to celebrate the holiday while still nourishing their bodies. Plus, the act of arranging the fruit can be a fun activity for kids—it gets them excited about eating healthy food.
Conclusion
This pumpkin-shaped fruit tray has become a Halloween tradition in our house, all because my niece Clara asked a simple question. It’s proof that sometimes the best recipes come from letting go of our ideas of perfection and listening to the people we’re cooking for.
I love this recipe because it’s honest. It doesn’t pretend to be something it’s not. It’s just fruit, arranged in a way that makes kids smile. And honestly, that’s what Halloween should be about—joy, creativity, and a little bit of magic. This tray delivers all of that without the stress or the mess.
I encourage you to make this your own. Use whatever fruit you have on hand. Let your kids arrange the slices. Experiment with different shapes and decorations. The best version of this recipe is the one that makes your family happy.
If you try this recipe, I’d love to hear about it. Leave a comment below and let me know how it turned out. Did your kids help? Did you add any fun decorations? Share your photos and tag me on social media. Happy Halloween, and happy snacking!
Frequently Asked Questions
Can I make this fruit tray the night before?
I recommend making it no more than 2-3 hours before serving. The oranges can dry out if they sit too long, and the grapes might start to soften. If you need to prep ahead, slice the oranges and store them in an airtight container in the refrigerator. Assemble the tray just before serving.
What other fruits can I use for the pumpkin shape?
You can use tangerines, clementines, or mandarins for a smaller pumpkin. Grapefruit slices work too, but they’re larger and more tart. For a tropical twist, try using mango slices arranged in a circle. The key is to use fruit that slices into rounds and holds its shape.
How do I keep the celery stem from falling over?
Cut a small slit in the bottom of the celery stalk and wedge it between the orange slices. You can also use a small piece of cream cheese or peanut butter as “glue” to hold it in place. If the celery is too tall, trim it down so it’s proportional to the pumpkin.
Can I add a dip to this fruit tray?
Absolutely! A yogurt dip made from Greek yogurt and honey is a great option. You can also serve it with a cream cheese dip flavored with vanilla extract. Just place the dip in a small bowl in the center of the pumpkin (remove a few orange slices to make room) or serve it on the side.
Is this recipe safe for school parties?
Yes, this is a great option for school parties because it’s nut-free and contains no common allergens. Just check with the school about any specific dietary restrictions. The fruit is easy for kids to pick up and eat, and there are no choking hazards if you slice the grapes in half for younger children.
Pin This Recipe!
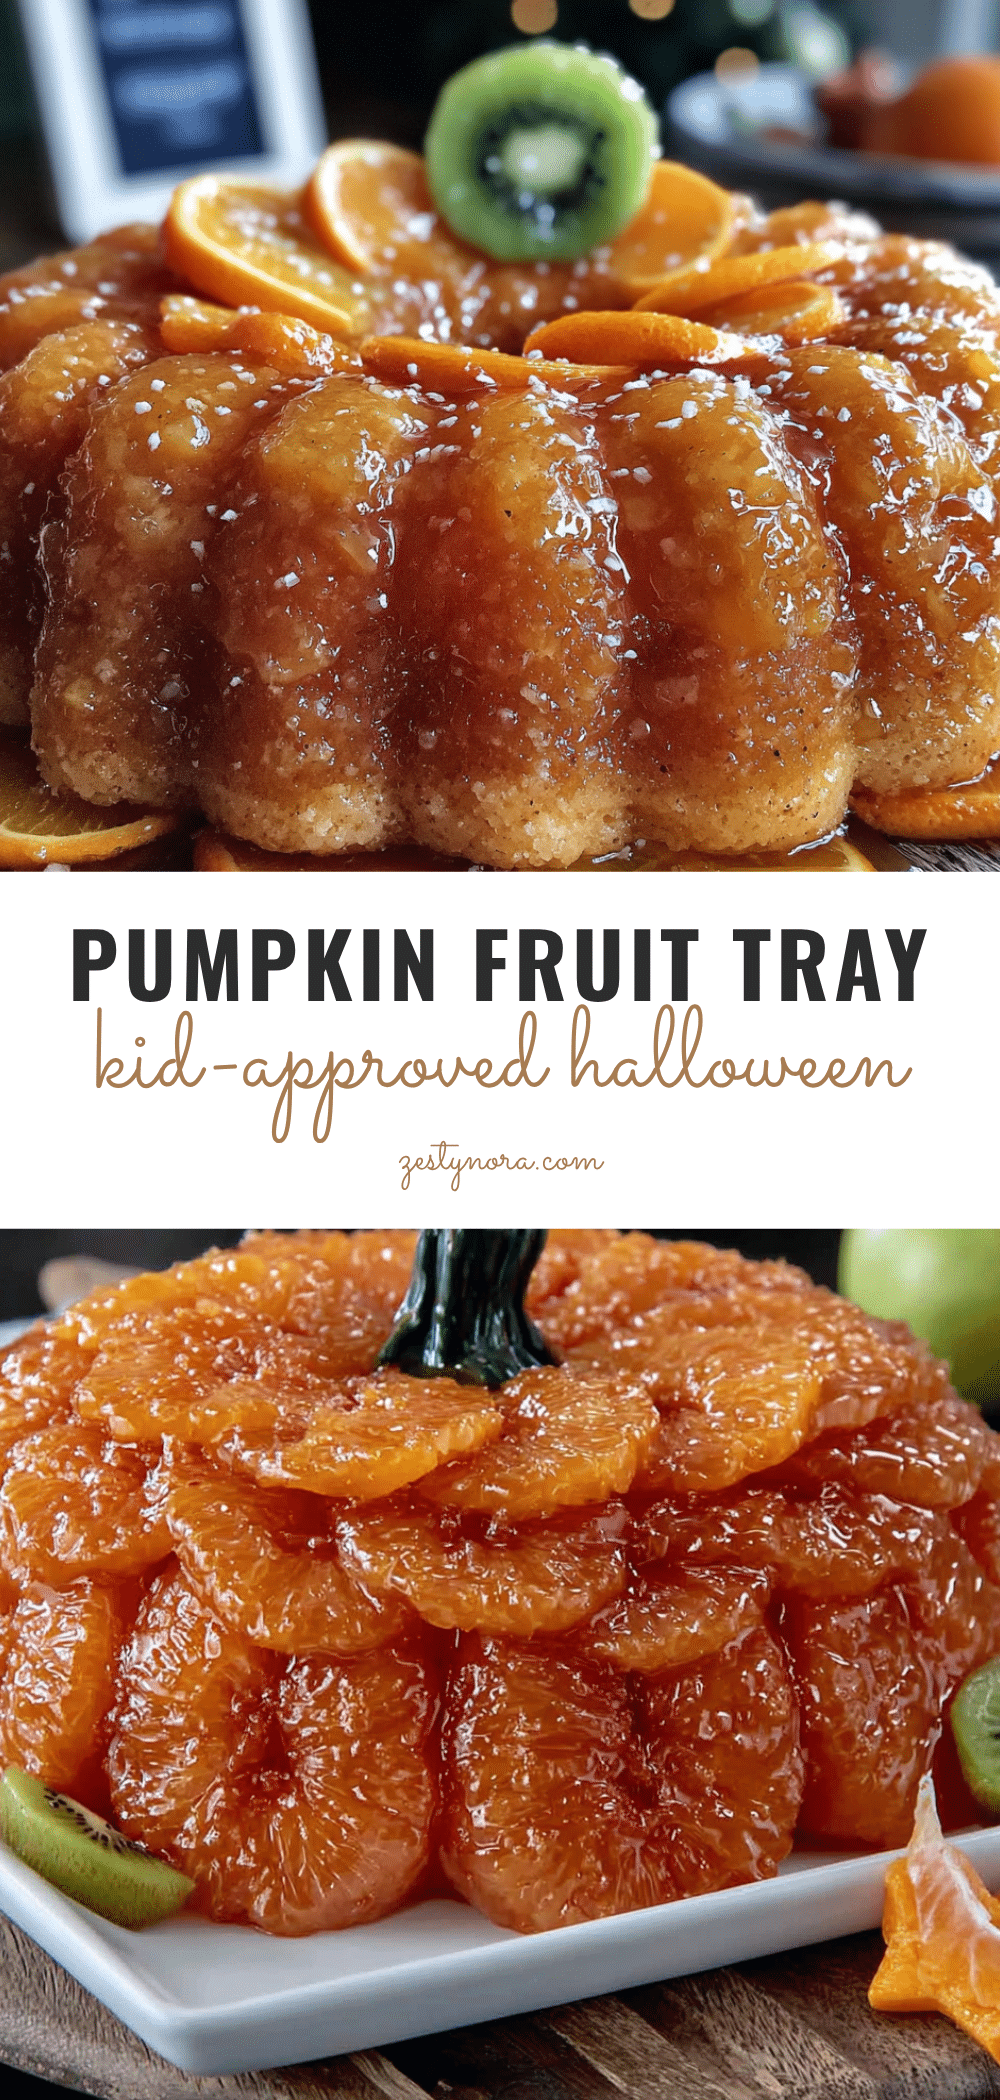
Kid-Approved Halloween Fruit Tray – Easy Pumpkin Orange Slices

A fun and easy Halloween fruit tray shaped like a pumpkin using orange slices, celery, and grapes. Perfect for parties, school events, or a healthy snack that kids will love.
- Prep Time: 10 minutes
- Cook Time: 0 minutes
- Total Time: 15-20 minutes
- Yield: 8 servings 1x
- Category: Snack
- Cuisine: American
Ingredients
- 6–8 medium oranges (navel oranges recommended)
- 2–3 stalks celery
- 1 cup green grapes (seedless)
- 1/2 cup blueberries (optional)
- 1 apple (optional, Granny Smith recommended)
- Pumpkin-shaped cookie cutter (optional)
Instructions
- Wash all fruit thoroughly. Rinse the oranges, grapes, blueberries, and celery under cool water. Pat everything dry with paper towels.
- Slice the oranges into rounds about 1/4 inch thick. Aim for 6-8 slices per orange, discarding the ends. You should have about 30-40 slices total.
- Arrange the pumpkin body by placing the first orange slice in the center of a large serving platter or cutting board. Work outward in a circle, overlapping slices slightly to create a round, pumpkin-like shape about 10-12 inches in diameter.
- Build the pumpkin shape by gently pressing down on the slices to form a slight dome. Use about 20-25 slices for the main body.
- Add the stem by trimming a celery stalk to 3-4 inches long. Cut a small slit in the bottom and wedge it into the center of the orange slices.
- Fill in the gaps between orange slices with green grapes, pressing them gently into place.
- Add finishing touches by scattering blueberries around the edges for a ‘dirt’ effect. If using apple slices, arrange them in a ring around the pumpkin or cut into pumpkin shapes with a cookie cutter.
- Check your work and adjust the orange slices as needed to achieve the pumpkin shape.
- Serve immediately or cover with plastic wrap and refrigerate for up to 2 hours. Remove from refrigerator 15 minutes before serving.
Notes
For best results, use firm, heavy oranges for juiciness and shape. If orange slices slide around, put a thin layer of cream cheese or Greek yogurt on the board first as edible glue. The tray is best eaten within a few hours of assembly. For a mini version, use clementines or mandarins.
Nutrition
- Serving Size: 1 serving (approxima
- Calories: 80100
- Sugar: 1518
- Sodium: 510
- Carbohydrates: 2025
- Fiber: 34
- Protein: 12
Keywords: Halloween fruit tray, pumpkin fruit platter, healthy Halloween snack, kid-friendly snack, orange pumpkin, fruit tray, Halloween party food