It was 10:47 PM on a Tuesday in mid-September, and I had a very specific craving for something creepy-cute. The kids were finally asleep after a week of begging me to plan our Halloween party menu, and I was scrolling through my phone, half-watching some true crime documentary I’d seen three times before. I didn’t have the fancy cookie cutters or the elaborate cake supplies that every “spooky snack” recipe online seemed to demand, but I had a dozen hard-boiled eggs from earlier that week and a jar of black olives that I’d bought on a whim. That’s when the idea hit me—spiders. Olive spiders. Sitting on little yellow clouds of deviled egg filling. I got up, grabbed my mixing bowl, and honestly? I didn’t stop grinning until I’d finished the first batch at midnight.
I mean, let me tell you, there’s something about the quiet of a late night that makes you braver in the kitchen. You stop second-guessing yourself. You just go with the weird little idea that pops into your head. And this one? It worked better than I ever imagined. My kids devoured them the next day at their after-school snack time, and my neighbor, Karen, actually asked me to send her the recipe before I’d even finished cleaning up. Maybe you’ve been there—staring into your fridge at 11 PM, wondering what kind of magic you can make with what’s already there. Well, this is that magic.
These Kid-Approved Halloween Deviled Eggs with Olive Spiders have become my go-to for every fall gathering, and I keep making them because they’re so ridiculously easy and fun. No fancy tools, no stress, just a classic deviled egg recipe with a playful, spooky twist that makes everyone smile. The best part? The kids actually help me make them now, which is a small miracle in itself.
Why You’ll Love This Recipe
I’ve tested this recipe at three different Halloween parties now, and I can tell you with total confidence—it’s a winner. Here’s why this one stands out from every other spooky snack you’ll find online:
- Quick & Easy : Comes together in under 20 minutes (plus egg boiling time), perfect for busy weeknights or last-minute Halloween cravings.
- Simple Ingredients : No fancy grocery trips needed; you likely already have eggs, mayo, mustard, and olives in your kitchen.
- Perfect for Halloween Parties : Great for classroom treats, spooky buffets, or just a fun after-school snack that gets the kids excited.
- Crowd-Pleaser : Always gets rave reviews from kids and adults alike—even the picky eaters who “don’t like eggs” end up grabbing two.
- Unbelievably Delicious : The creamy, tangy filling paired with the briny olive spiders is next-level comfort food.
What makes this recipe different from the rest? It’s not just another deviled egg recipe with a gimmick. I’ve perfected the filling ratio—just the right amount of mustard to give it a little kick without overwhelming the kids’ palates. And the olive spiders? I’ve figured out the trick to making them stay put and look genuinely creepy without falling apart. This isn’t just another version—it’s my best version, tested by a dozen kindergarteners and their skeptical parents.
This recipe isn’t just good—it is the kind that makes you close your eyes after the first bite. It’s comfort food reimagined for Halloween—creepy, fun, but with the same soul-soothing satisfaction of a classic deviled egg. Perfect for impressing guests without stress, or turning a simple snack into something memorable. Honestly, it’s the only Halloween appetizer I make anymore.
What Ingredients You Will Need
This recipe uses simple, wholesome ingredients to deliver bold flavor and satisfying texture without the fuss. Most of these are pantry staples, which makes it perfect for those last-minute Halloween cravings.
For the Deviled Eggs
- 6 large eggs (hard-boiled and peeled) — I prefer eggs that are at least a week old for easier peeling
- 3 tablespoons mayonnaise (adds creaminess) — I recommend Hellmann’s or Duke’s for best texture
- 1 teaspoon yellow mustard (adds tang and color)
- 1/2 teaspoon white vinegar (brightens the flavor)
- 1/4 teaspoon salt (enhances all the flavors)
- 1/8 teaspoon black pepper (a tiny kick)
- Pinch of paprika (for garnish and color)
For the Olive Spiders
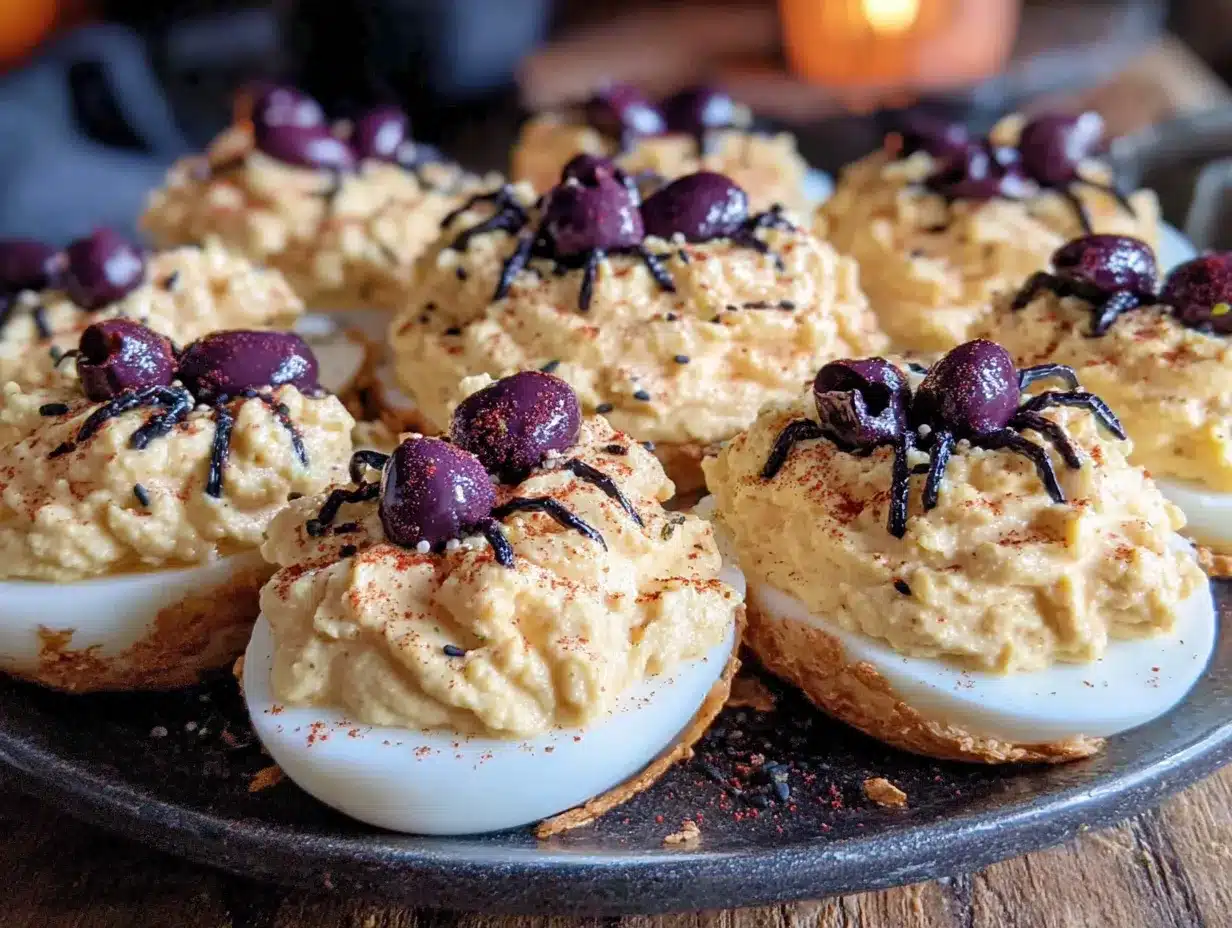
- 12 whole black olives (pitted, for the spider bodies)
- 12 black olive slices (from a separate can or sliced yourself, for the legs)
- 1 tablespoon cream cheese (optional, helps stick the legs to the body)
A quick note on the olives: I’ve tried both canned and jarred black olives, and I actually prefer the canned ones for this recipe. They’re softer and easier to slice into thin legs without breaking. Look for large, firm black olives for the spider bodies—the jumbo ones work best. If you can find pitted olives, you’ll save yourself a lot of frustration. Trust me on this one.
For the eggs, I’ve learned that farm-fresh eggs are actually harder to peel after boiling. If you can, use eggs that have been sitting in your fridge for a week or two. The air pocket inside them makes peeling a breeze. I learned this the hard way after ruining three batches of deviled eggs for a family reunion.
You can also swap the yellow mustard for Dijon if you want a more sophisticated flavor, but for the kids, stick with the classic yellow. It gives that familiar tangy taste they already love. If you’re dairy-free, skip the cream cheese for the spider legs—they’ll still stick fine if you press them gently into the filling.
Equipment Needed
Don’t worry, you won’t need any fancy kitchen gadgets for this one. Here’s what you’ll actually use:
- Medium saucepan — for boiling the eggs. Any pot works, but a wider one helps the eggs cook evenly.
- Mixing bowl — medium size, for mashing the yolks. I use my grandmother’s old ceramic one, but glass or metal works just fine.
- Fork or potato masher — for breaking up the yolks. A fork is honestly easier to clean.
- Small piping bag or zip-top bag — for filling the eggs neatly. A zip-top bag with a corner snipped off works perfectly if you don’t have a piping bag.
- Sharp knife — for slicing the olives and cutting the eggs in half. A paring knife is ideal.
- Cutting board — I recommend a small one just for this task to avoid cross-contamination.
- Small spoon — for scooping out the yolks.
- Plate or serving tray — for presenting your creepy creations.
If you don’t have a piping bag, don’t stress. I’ve used a sandwich bag for years before I finally bought a proper set. Just fill the bag, twist the top, and snip off a tiny corner. It’s not fancy, but it works like a charm. And honestly, the kids think it’s hilarious to watch me squeeze the filling out like toothpaste.
Preparation Method
Let me walk you through this step by step. I’ve made these so many times now that I could do it in my sleep—and I almost have, on more than one late-night cooking spree.
- Boil the eggs: Place your 6 eggs in a medium saucepan and cover them with cold water by about an inch. Bring the water to a rolling boil over high heat. Once it’s boiling, cover the pot, turn off the heat, and let the eggs sit for exactly 12 minutes. This gives you perfectly hard-boiled yolks without that weird gray ring. While they’re sitting, prepare an ice bath in a bowl. After 12 minutes, transfer the eggs to the ice bath and let them cool for at least 5 minutes. This stops the cooking and makes peeling so much easier.
- Peel the eggs: Gently tap each egg on the counter to crack the shell all over, then roll it between your palms to loosen the shell. Start peeling from the wider end—there’s usually an air pocket there that makes it easier. Run the egg under cold water as you peel to help remove any stubborn bits. I’ve ruined a few eggs by being too aggressive here, so take your time. You want them smooth and intact for the final presentation.
- Slice the eggs: Using a sharp knife, slice each egg in half lengthwise. Wipe the knife clean between cuts to keep the edges neat. Gently pop out the yolks into your mixing bowl. Arrange the white halves on your serving plate, cut side up. If any of the whites tear, don’t worry—just use them for the filling and save the prettier ones for the spiders.
- Make the filling: Add the mayonnaise, yellow mustard, white vinegar, salt, and pepper to the bowl with the yolks. Mash everything together with a fork until it’s completely smooth and creamy. Taste it and adjust the seasoning if needed. I sometimes add a tiny pinch more mustard if I want a stronger tang. The mixture should be thick but spreadable—like a very smooth paste.
- Fill the eggs: Transfer the yolk mixture to your piping bag or zip-top bag. Snip off a small corner (about 1/4 inch wide). Pipe the filling into each egg white half, mounding it slightly in the center. You want the filling to be tall enough that the spider body will sit on top without touching the egg white. If you’re using a spoon instead, just dollop it in and smooth the top with the back of the spoon.
- Prepare the olive spiders: This is the fun part. Take your 12 whole black olives—these are the spider bodies. For the legs, you have two options. Option one: slice 12 olive slices into thin strips (about 4-5 strips per slice). Option two: buy pre-sliced olives and use those. I prefer slicing my own because I can control the thickness. You want the legs to be thin enough to look spindly but thick enough not to break.
- Assemble the spiders: Place one whole olive (the body) on top of each filled egg. Gently press it into the filling so it stays put. Now, take 8 thin olive strips and arrange them around the body—4 on each side—to look like spider legs. If the legs won’t stick, dab a tiny bit of cream cheese on the end of each strip and press it into the filling. This is the trick I figured out after my first batch of spiders kept falling over.
- Garnish and serve: Sprinkle a light dusting of paprika over the entire tray for a pop of color. Some people like to add a tiny dollop of sour cream or a sprinkle of chives for extra flair, but I keep it simple. Serve immediately or refrigerate until ready to serve. These are best within 2 hours of assembly.
One thing I’ve learned: don’t assemble the spiders too far in advance. The olive legs can dry out or fall off if they sit too long. I usually prep the eggs and filling a day ahead, then assemble the spiders right before serving. It takes about 10 minutes and makes a huge difference in presentation.
Cooking Tips & Techniques
After making these for three Halloweens straight, I’ve collected a few tricks that make the process smoother and the results more impressive.
Perfect hard-boiled eggs every time: The biggest mistake people make is overcooking the eggs. That greenish-gray ring around the yolk? That’s from cooking them too long or at too high a heat. The cold-start method I described above—bringing them to a boil, then letting them sit off the heat—gives you perfectly yellow yolks every time. Trust me, I’ve tested it side by side with boiling-start methods, and this one wins every time.
Peeling without the pain: I used to dread peeling hard-boiled eggs. They’d come out all pockmarked and ugly. Then I learned the ice bath trick, and it changed everything. The rapid cooling shrinks the egg slightly inside the shell, creating a tiny gap that makes peeling effortless. Also, older eggs peel better than fresh ones. If you can, buy your eggs a week ahead of time.
Making the spiders look legit: The key to a convincing olive spider is the leg placement. They should curve slightly outward, like a real spider’s legs. I use a small knife to gently bend each olive strip into a gentle arc before placing it. And don’t skimp on the legs—8 legs per spider is the magic number. Four on each side, evenly spaced. It takes a little patience, but the result is genuinely creepy.
Keeping the filling stable: If your filling is too runny, it won’t hold the spider body in place. The fix? Add a little more mayonnaise or a pinch of salt to thicken it up. Or, if you’ve already made the filling too thin, add another hard-boiled yolk (just boil an extra egg and mash it in). I’ve done this more times than I care to admit.
Timing and multitasking: I like to boil the eggs while I’m prepping other Halloween snacks. They can sit in the fridge for up to a week after boiling, so I often make a big batch on Sunday and use them throughout the week. The filling can also be made a day ahead and stored in the fridge in a piping bag. Just pipe it into the eggs right before serving.
Variations & Adaptations
One of the best things about this recipe is how flexible it is. Here are some of my favorite variations:
Spicy Southwest Version: Add 1/4 teaspoon of cumin and a pinch of cayenne pepper to the filling. Top each spider with a tiny slice of pickled jalapeño for a kick. My husband loves this version, and it’s a hit at adult Halloween parties.
Avocado Deviled Eggs: Replace the mayonnaise with mashed avocado for a healthier, creamier filling. Add a squeeze of lime juice and a pinch of garlic powder. The green color actually makes the olive spiders pop even more. I tried this last year when I was out of mayo, and honestly, it might be my new favorite.
Bacon-Wrapped Spiders: For the ultimate indulgence, wrap each olive spider body in a half-slice of cooked bacon before placing it on the egg. Secure it with a toothpick. This turns them from a snack into a full-on appetizer. Fair warning: they’ll disappear in minutes.
Dairy-Free Version: Use vegan mayonnaise and skip the cream cheese for the legs. The spiders will still hold if you press them gently into the filling. I’ve served this version at a potluck with dairy-free friends, and nobody noticed the difference.
Mini Spider Bites: Use quail eggs instead of chicken eggs for adorable mini spiders. You’ll need about 12 quail eggs. The cooking time is shorter—about 4 minutes in boiling water, then an ice bath. These are perfect for fancy Halloween parties or for kids who want “baby spiders.”
I’ve also tried using green olives with pimentos for a slightly different look, but the black olives really are the most convincing spiders. The contrast against the yellow filling is what makes them pop.
Serving & Storage Suggestions
These deviled eggs are best served chilled or at room temperature, straight from the fridge. I like to arrange them on a black or dark-colored platter to make the spiders really stand out. A dark slate board or a black ceramic tray works beautifully. If you want to get extra festive, scatter some candy corn or mini pumpkins around the platter for a colorful contrast.
Storage: If you have leftovers (which is rare in my house), store the deviled eggs in an airtight container in the refrigerator for up to 2 days. I recommend removing the olive spiders before storing, as the legs can get soggy. Store the spiders separately in a small container. When you’re ready to serve again, just reassemble them.
Reheating: These are served cold, so no reheating is needed. If they’ve been in the fridge for a while, let them sit at room temperature for 10-15 minutes before serving to take the chill off.
Make-Ahead Tips: You can boil and peel the eggs up to 5 days in advance. The filling can be made 2 days ahead and stored in the fridge in a piping bag. Assemble the spiders no more than 2 hours before serving for the best presentation. The flavors actually meld and improve after a few hours in the fridge, so don’t be afraid to make the filled eggs a few hours ahead.
Pairing Suggestions: These deviled eggs pair beautifully with other Halloween finger foods like mini hot dogs, cheese cubes, and veggie sticks. For a full Halloween spread, serve them alongside a batch of ghost-shaped cookies or spiderweb cupcakes. A pitcher of apple cider or a bowl of punch completes the theme perfectly.
One thing I love about this recipe is that the flavors actually get better after a few hours in the fridge. The olive brine seeps into the filling just a tiny bit, adding a subtle brininess that’s absolutely delicious. So don’t stress if you make them a little early—they’ll taste even better.
Nutritional Information & Benefits
Here’s the breakdown for one serving (one deviled egg with spider):
- Calories: 85
- Protein: 6g
- Fat: 6g
- Carbohydrates: 1g
- Fiber: 0g
- Sugar: 0g
- Sodium: 180mg
These deviled eggs are a great source of high-quality protein, which makes them a satisfying snack that keeps kids full between meals. Eggs are also rich in choline, which is important for brain development—perfect for growing little ones. The olives add healthy monounsaturated fats and a dose of vitamin E, which is great for skin health.
This recipe is naturally gluten-free and low-carb, making it suitable for a variety of dietary needs. If you’re watching your sodium intake, you can use low-sodium olives or reduce the added salt in the filling. The mustard and vinegar provide plenty of flavor without relying heavily on salt.
From my own wellness perspective, I love that this snack feels indulgent but is actually pretty balanced. It’s one of those rare treats that satisfies a craving without the sugar crash. My kids get the fun of Halloween without the overload of candy, and I get to feel good about what they’re eating. Win-win.
Conclusion
Look, I know there are a million Halloween snack recipes out there. But these Kid-Approved Halloween Deviled Eggs with Olive Spiders are the real deal. They’re fun, they’re easy, and they actually taste amazing—not just “good for a Halloween snack.” The creamy, tangy filling paired with the briny olive spiders is a combination that works on every level.
What I love most about this recipe is how it brings people together. I’ve made these for my kids’ classroom parties, for family gatherings, and for Halloween potlucks, and every single time, someone asks for the recipe. There’s something about the combination of classic comfort food and playful presentation that just makes people smile. And honestly, that’s what cooking is all about for me.
So go ahead—give these a try. Customize them however you like. Add bacon, go spicy, make them mini. The beauty of this recipe is that it’s just a starting point. I’d love to hear how yours turn out! Drop a comment below and let me know if your kids loved them as much as mine do. And if you come up with a fun variation, please share it—I’m always looking for new ideas.
Happy Halloween, and happy cooking!
Frequently Asked Questions
Can I make these deviled eggs ahead of time?
Absolutely! You can boil and peel the eggs up to 5 days ahead. The filling can be made 2 days in advance and stored in a piping bag in the fridge. Just assemble the spiders no more than 2 hours before serving for the best presentation.
How do I keep the olive spiders from falling off?
The trick is to press the olive body gently but firmly into the filling. If the filling is too smooth, the spider might slide off. Adding a tiny dab of cream cheese to the bottom of the olive helps it stick. For the legs, press them into the filling at a slight angle so they stay put.
Can I use a different type of olive?
Black olives work best for the spider bodies because they’re dark and creepy-looking. But you can use green olives with pimentos for a different look—just know they won’t be as convincing as spiders. Kalamata olives are too soft and will fall apart.
How long do these deviled eggs last in the fridge?
Stored in an airtight container, they’ll keep for up to 2 days. But I recommend removing the olive spiders before storing, as the legs can get soggy. Store the spiders separately and reassemble when you’re ready to serve again.
Are these deviled eggs kid-friendly?
Yes! My kids absolutely love them. The filling is mild and creamy, and the olive spiders are more fun than scary. Even picky eaters tend to go for them because they look so playful. Just be sure to use pitted olives so there are no choking hazards for young children.
Pin This Recipe!
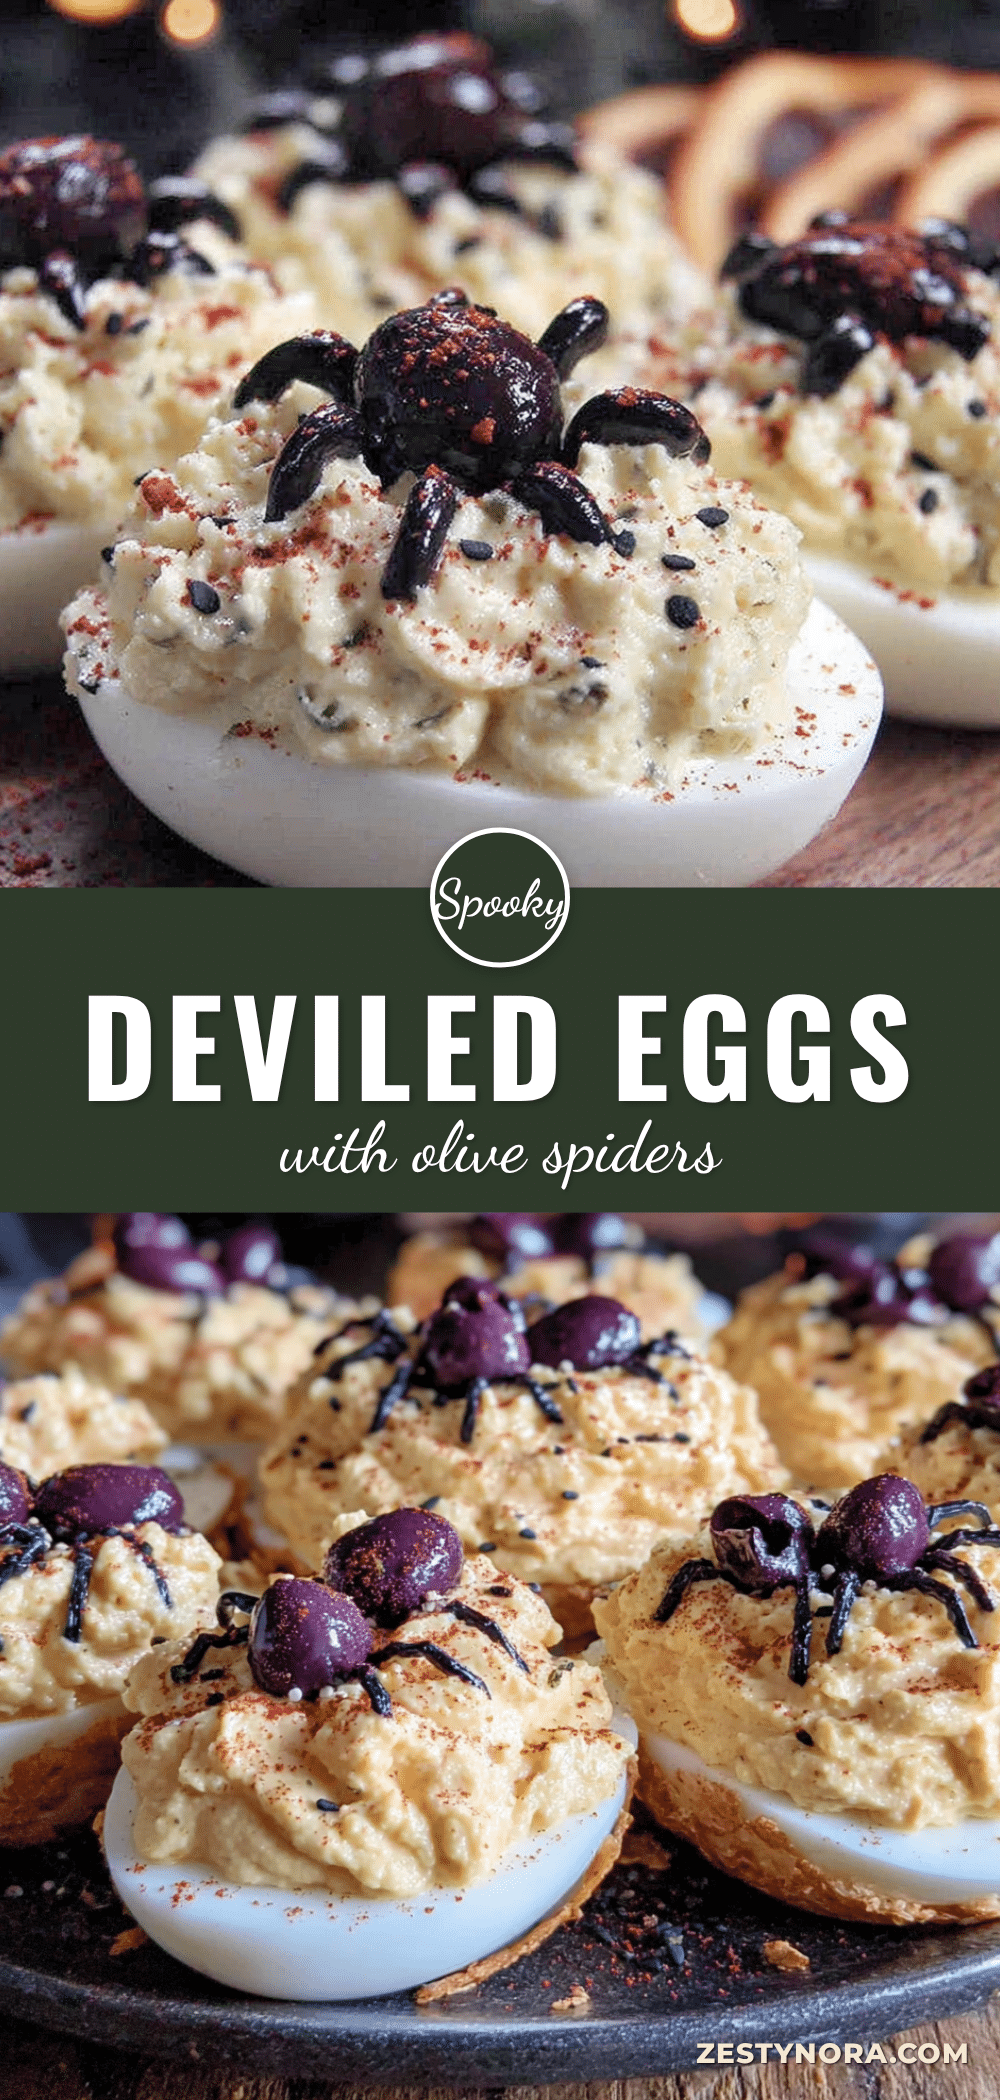
Kid-Approved Halloween Deviled Eggs with Olive Spiders: Easy Spooky Snack
These spooky deviled eggs feature creamy, tangy filling topped with creepy olive spiders. They’re quick, easy, and perfect for Halloween parties or a fun after-school snack that kids and adults love.
- Prep Time: 15 minutes
- Cook Time: 12 minutes
- Total Time: 27 minutes
- Yield: 12 deviled eggs (6 servings of 2 each) 1x
- Category: Appetizer
- Cuisine: American
Ingredients
- 6 large eggs (hard-boiled and peeled)
- 3 tablespoons mayonnaise
- 1 teaspoon yellow mustard
- 1/2 teaspoon white vinegar
- 1/4 teaspoon salt
- 1/8 teaspoon black pepper
- Pinch of paprika (for garnish)
- 12 whole black olives (pitted, for spider bodies)
- 12 black olive slices (for legs)
- 1 tablespoon cream cheese (optional, helps stick legs)
Instructions
- Boil the eggs: Place eggs in a saucepan, cover with cold water by 1 inch. Bring to a rolling boil, cover, turn off heat, and let sit for 12 minutes. Transfer to an ice bath for 5 minutes.
- Peel the eggs: Tap each egg to crack the shell, roll between palms, and peel starting from the wider end. Rinse under cold water.
- Slice the eggs: Cut each egg in half lengthwise. Remove yolks to a mixing bowl. Arrange whites on a serving plate.
- Make the filling: Add mayonnaise, mustard, vinegar, salt, and pepper to the yolks. Mash until smooth and creamy. Adjust seasoning to taste.
- Fill the eggs: Transfer filling to a piping bag or zip-top bag. Snip a small corner and pipe filling into each egg white, mounding slightly.
- Prepare the olive spiders: Slice olive slices into thin strips (4-5 per slice) for legs. Keep whole olives for bodies.
- Assemble the spiders: Place one whole olive on each filled egg. Arrange 8 thin olive strips around each body (4 per side) to look like legs. Use a dab of cream cheese if needed to stick.
- Garnish and serve: Dust with paprika. Serve immediately or refrigerate. Best within 2 hours of assembly.
Notes
For best results, use eggs that are at least a week old for easier peeling. Assemble spiders no more than 2 hours before serving to prevent legs from drying out. Store leftovers in an airtight container for up to 2 days, but remove spiders first to keep legs crisp.
Nutrition
- Serving Size: 1 deviled egg with s
- Calories: 85
- Sodium: 180
- Fat: 6
- Saturated Fat: 1.5
- Carbohydrates: 1
- Protein: 6
Keywords: Halloween deviled eggs, olive spiders, spooky snack, kid-friendly Halloween, easy appetizer


