My husband claimed to hate pumpkin pie for fifteen years. Fifteen years. He’d make a face at Thanksgiving, push the dessert plate away, and mutter something about “that weird mushy stuff.” I believed him. I mean, why wouldn’t I? He’s a grown man who knows what he likes. Then last November, I caught him standing at the kitchen counter at 10 PM, eating a slice of this homemade pumpkin pie from scratch with flaky crust straight from the pie dish with a fork. He didn’t even see me standing there. The man who “hated” pumpkin pie was halfway through his second slice before he realized he’d been caught.
The funny thing is, I hadn’t even made this pie for him. I was testing the recipe for a neighbor’s Thanksgiving potluck—Linda from two doors down, the one who always brings those amazing sweet potato biscuits. I wanted something that would actually impress her. So I spent a whole Tuesday afternoon wrestling with butter and flour, roasting a sugar pumpkin, and figuring out why my crust kept shrinking. The kitchen was a disaster. There was flour on the dog. I burned my wrist on the oven rack. And honestly? It was the best pumpkin pie I’d ever made.
That’s when I realized something. Most people who think they hate pumpkin pie have only ever had the sad, wobbly, overly-spiced version from a can. You know the one—it’s too sweet, too dense, and that crust tastes like cardboard. Maybe you’ve been there too, pushing that slice around your plate at a family dinner, wondering what all the fuss is about. This recipe is different. It’s lighter, creamier, and the crust shatters when you bite into it. It’s the kind of pie that makes skeptics sneak back for seconds in the dark. And that’s exactly why I keep making it.
Why You’ll Love This Recipe
Let me tell you why this homemade pumpkin pie from scratch with flaky crust is going to become your go-to dessert. I’ve tested it seven times—yes, seven—to get the texture just right. My family has been my official taste-testing committee, and they’ve been very thorough in their research.
- Simple Ingredients: You don’t need to hunt down fancy specialty items. Butter, flour, sugar, eggs, cream, and a pumpkin. That’s it. Everything is probably already in your kitchen or at your local grocery store.
- Perfect for Thanksgiving: This pie is made for the big day. It travels well, it looks gorgeous on a dessert table, and it actually tastes better the next day. You can make it a full 24 hours ahead.
- Crowd-Pleaser: I’ve served this to pumpkin pie lovers and pumpkin pie skeptics alike. The lovers rave. The skeptics? They ask for the recipe. It’s that good.
- Unbelievably Delicious: The filling is silky smooth with just the right amount of spice. Not too heavy, not too sweet. And that crust—oh, that crust. It’s buttery, flaky, and holds up perfectly without getting soggy.
What makes this recipe different from the rest? It’s the technique. Most recipes dump everything in a bowl and call it done. This one takes a few extra minutes to get the filling just right—tempering the eggs, straining for absolute smoothness, and blind-baking the crust so it stays crisp. These small steps make a huge difference. This isn’t just another pumpkin pie recipe. It’s the one you’ll pull out year after year.
What Ingredients You Will Need
This recipe uses simple, honest ingredients to create something truly special. Most of these are pantry staples, which makes this homemade pumpkin pie from scratch with flaky crust surprisingly easy to pull together on a whim. Here’s what you’ll need and why each ingredient matters.
For the Flaky Crust
- All-purpose flour, 2 ½ cups (315 grams) — I use King Arthur Flour for consistent results. The protein content is just right for a tender but sturdy crust.
- Unsalted butter, 1 cup (226 grams), very cold and cut into small cubes — This is non-negotiable. The butter must be ice-cold. I pop mine in the freezer for 15 minutes before cutting. (adds flakiness)
- Ice water, 6-8 tablespoons (90-120 ml) — Start with 6 and add more only if needed. The dough should just hold together when squeezed.
- Salt, 1 teaspoon (6 grams) — Fine sea salt works best.
- Sugar, 1 tablespoon (12 grams) — Just a touch to balance the savory notes.
For the Pumpkin Filling
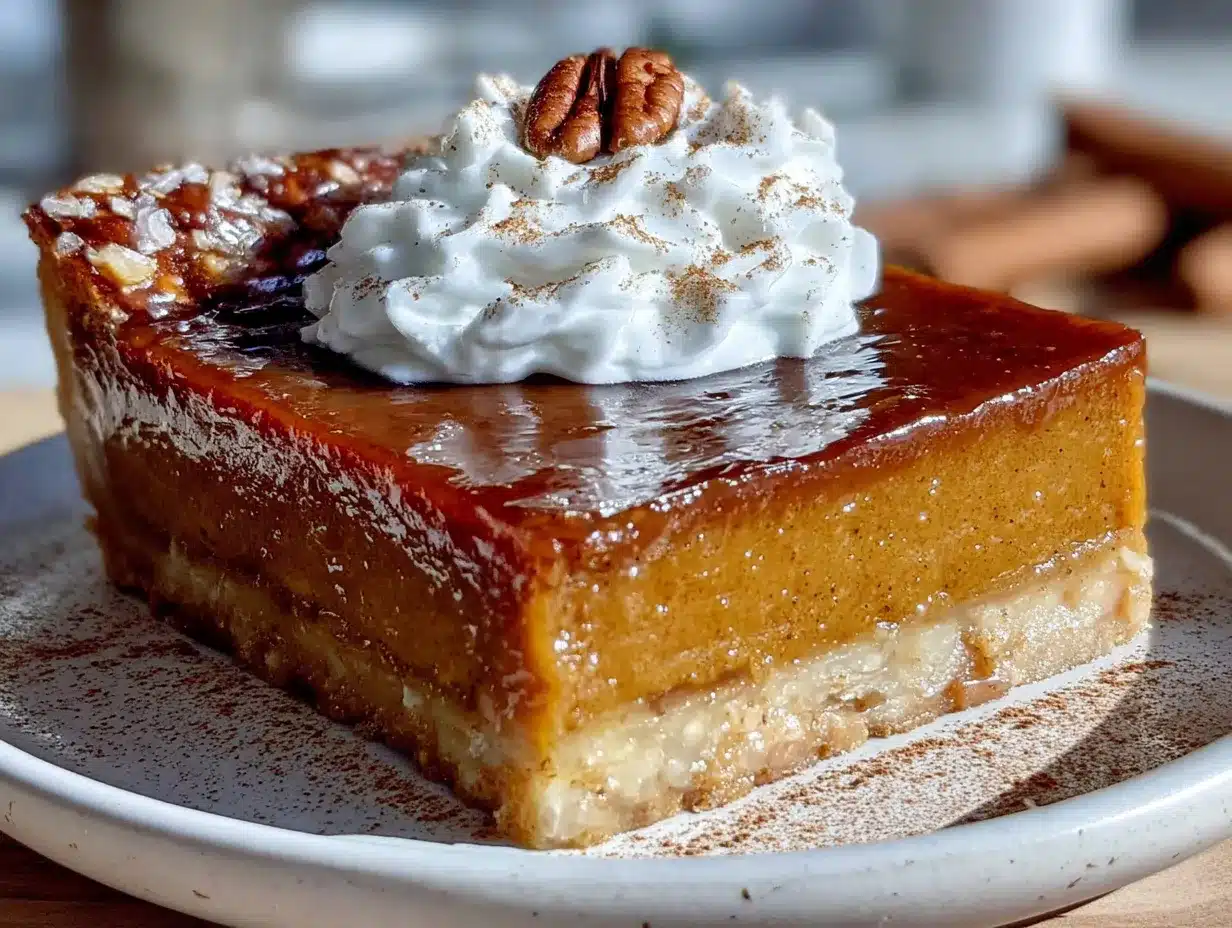
- Sugar pumpkin, 1 medium (about 3-4 pounds), or 1 ¾ cups (425 grams) pumpkin puree — If you’re using canned, look for pure pumpkin puree, not pumpkin pie filling. Libby’s is my go-to for consistency.
- Heavy cream, 1 ¼ cups (300 ml) — This gives the filling that luxurious, silky texture. Don’t substitute with milk if you can help it.
- Large eggs, 3 — Room temperature is important here. Cold eggs can make the filling seize up.
- Brown sugar, ¾ cup (165 grams), packed — Light or dark works. Dark gives a deeper, more molasses-like flavor.
- Granulated sugar, ¼ cup (50 grams)
- Ground cinnamon, 2 teaspoons
- Ground ginger, 1 teaspoon
- Ground nutmeg, ½ teaspoon — Freshly grated is amazing if you have it.
- Ground cloves, ¼ teaspoon
- Salt, ½ teaspoon
- Vanilla extract, 1 teaspoon — Pure, not imitation. It rounds out the spices beautifully.
Ingredient Selection Tip: For the best flavor, look for a sugar pumpkin that feels heavy for its size and has a deep orange color. If you’re using canned pumpkin, I recommend Libby’s—it has a consistent texture and moisture level that works perfectly in this recipe.
Substitution Guidance: If you’re dairy-free, you can substitute the butter in the crust with cold coconut oil or a high-quality vegan butter. For the filling, full-fat coconut milk works surprisingly well in place of heavy cream, though the texture will be slightly less lush.
Equipment Needed
You don’t need a fancy kitchen to make this homemade pumpkin pie from scratch with flaky crust. Here’s what you’ll actually use:
- 9-inch pie dish — Glass or ceramic works best. I prefer a deep-dish Pyrex because I can see how the bottom crust is browning.
- Rolling pin — A heavy marble one is lovely, but a basic wooden one works just fine. No rolling pin? A wine bottle works in a pinch.
- Large mixing bowls — You’ll need at least two: one for the crust, one for the filling.
- Pastry cutter or two forks — For cutting butter into the flour. I’ve used my hands in a hurry, but a pastry cutter keeps the butter cold.
- Plastic wrap — Essential for chilling the dough.
- Parchment paper and pie weights — For blind baking. Dried beans or uncooked rice work perfectly as cheap pie weights.
- Whisk — For smoothing out the filling.
- Fine-mesh strainer — This is my secret weapon. Straining the filling guarantees a silky-smooth texture with no lumps.
- Food processor or blender — Optional, but it makes pureeing roasted pumpkin a breeze.
- Baking sheet — Place your pie dish on one to catch any drips and help the bottom crust cook evenly.
Budget-Friendly Tip: Don’t rush out to buy pie weights. A roll of parchment paper and a bag of dried beans will cost you about three dollars and work just as well. I’ve been using the same bag of beans for three years now.
Preparation Method
Let’s get to the good part. Follow these steps carefully, and you’ll have a homemade pumpkin pie from scratch with flaky crust that will make everyone at the table ask for seconds.
Step 1: Make the Crust Dough (20 minutes active, 1 hour chilling)
In a large bowl, whisk together the flour, salt, and sugar. Add the cold butter cubes and toss to coat them in the flour. Using a pastry cutter or your fingertips, work the butter into the flour until the mixture looks like coarse meal with some pea-sized butter pieces remaining. This is crucial—those little butter chunks create the flaky layers. Drizzle 6 tablespoons of ice water over the mixture and stir with a fork until the dough just begins to come together. Squeeze a piece of dough in your hand. If it holds together, it’s ready. If it crumbles, add another tablespoon of water. Turn the dough out onto a lightly floured surface, shape it into a disc, wrap it in plastic wrap, and refrigerate for at least 1 hour.
Step 2: Roast the Pumpkin (45 minutes)
While the dough chills, preheat your oven to 400°F (200°C). Cut your sugar pumpkin in half and scoop out the seeds and stringy bits. Place the halves cut-side down on a parchment-lined baking sheet. Roast for 35-45 minutes, until the flesh is fork-tender. Let it cool, then scoop the flesh into a food processor and puree until completely smooth. You should have about 1 ¾ cups. If it seems watery, let it drain in a fine-mesh strainer for 15 minutes.
Step 3: Blind Bake the Crust (30 minutes)
On a lightly floured surface, roll the chilled dough into a 12-inch circle, about ⅛-inch thick. Gently transfer it to your pie dish, pressing it into the bottom and up the sides. Trim the excess dough, leaving a ½-inch overhang, then fold it under and crimp the edges. Prick the bottom of the crust all over with a fork. Line the crust with parchment paper and fill with pie weights or dried beans. Bake at 375°F (190°C) for 15 minutes. Remove the weights and parchment, then bake for another 5-7 minutes until the bottom looks dry and set. Let it cool slightly.
Step 4: Make the Filling (10 minutes)
Lower the oven temperature to 350°F (175°C). In a large bowl, whisk together the pumpkin puree, brown sugar, granulated sugar, cinnamon, ginger, nutmeg, cloves, and salt until smooth. In a separate small bowl, lightly beat the eggs. Slowly whisk the beaten eggs into the pumpkin mixture. Then gradually whisk in the heavy cream and vanilla extract. Here’s the trick that makes this filling special: pour the entire mixture through a fine-mesh strainer into a clean bowl. This removes any lumps and gives you that perfectly silky texture.
Step 5: Bake the Pie (50-60 minutes)
Place the blind-baked crust on a baking sheet. Pour the strained filling into the warm crust—it should come almost to the top. Carefully transfer to the oven and bake for 50-60 minutes. The pie is done when the edges are set but the center still jiggles slightly when you gently shake the pan. It will continue to set as it cools. If the edges of the crust start browning too quickly, tent them with foil or a pie shield.
Step 6: Cool and Serve (at least 2 hours)
Let the pie cool completely on a wire rack, about 2 hours. Then refrigerate for at least 4 hours or overnight. This step is not optional—the pie needs time to fully set and develop its flavor. Serve chilled or at room temperature, with a generous dollop of whipped cream.
Sensory Cue: When the pie is done, the kitchen will smell like autumn in a bottle—warm spices, toasted butter, and sweet pumpkin. The filling will have puffed up slightly around the edges and turned a deep, glossy orange.
Cooking Tips & Techniques
I’ve made this homemade pumpkin pie from scratch with flaky crust more times than I care to count, and I’ve learned a few things the hard way. Here are my best tips to save you from my mistakes.
Keep Everything Cold. The secret to a flaky crust is cold butter. If your butter softens while you’re working, pop the dough back in the fridge for 15 minutes. I once tried to rush the process and ended up with a tough, greasy crust. Never again.
Don’t Overwork the Dough. When you’re mixing the crust, stop as soon as the dough comes together. Overworking develops gluten, which makes the crust tough instead of tender. A few streaks of flour are totally fine.
Blind Bake is Non-Negotiable. I know it’s an extra step, but trust me on this. A soggy bottom crust ruins the whole pie. The blind baking creates a barrier that keeps the crust crisp even after the filling goes in. I learned this lesson after my first three attempts came out with sad, wet crusts.
Strain the Filling. This is my number one tip. Even if you think your pumpkin puree is smooth, there are always tiny lumps that will show up in the finished pie. A quick pass through a fine-mesh strainer takes 30 seconds and makes a world of difference.
Watch the Jiggle. The biggest mistake people make is overbaking the pie. The center should still have a gentle wobble when you take it out of the oven. It will continue to set as it cools. Overbaked pumpkin pie cracks and turns grainy.
Plan Ahead. This pie actually tastes better the next day. The spices meld together and the texture becomes even creamier. Make it a day ahead and thank me later.
Variations & Adaptations
One of the best things about this homemade pumpkin pie from scratch with flaky crust is how adaptable it is. Here are some ways to make it your own.
Spice It Up. Not a fan of cloves? Leave them out. Love cardamom? Add a ¼ teaspoon. I once made a version with a pinch of black pepper and a teaspoon of orange zest, and it was absolutely incredible. The pepper adds a subtle warmth that plays beautifully with the sweetness.
Go Gluten-Free. Swap the all-purpose flour for a good gluten-free flour blend that contains xanthan gum. Cup4Cup works wonderfully. The dough will be a bit more delicate, so handle it gently and press it into the pie dish instead of rolling it if needed.
Make It Dairy-Free. Use cold coconut oil or vegan butter in the crust. For the filling, full-fat coconut milk is a great substitute for heavy cream. The texture will be slightly different—a bit lighter—but still delicious.
Try a Different Crust. A graham cracker crust or a gingersnap crust is a fantastic shortcut if you’re short on time. Crush about 1 ½ cups of cookies, mix with 6 tablespoons of melted butter, and press into your pie dish. Bake at 350°F for 10 minutes before adding the filling.
Add a Boozy Twist. A tablespoon of bourbon or dark rum in the filling adds a lovely depth of flavor. I tried this last Thanksgiving on a whim, and it was a huge hit with the adults.
Serving & Storage Suggestions
This homemade pumpkin pie from scratch with flaky crust is a star on its own, but a few thoughtful touches can make it truly memorable.
Serving Temperature: I prefer this pie chilled, straight from the fridge. The filling is firmer and the flavors are more pronounced. But room temperature is lovely too, especially if you’ve just pulled it out of the oven the night before.
Presentation: A generous dollop of lightly sweetened whipped cream is the classic choice. For something a little extra, try a drizzle of caramel sauce and a sprinkle of flaky sea salt. The salt cuts through the sweetness beautifully.
What to Serve With It: A cup of strong black coffee or a hot mug of spiced chai is the perfect companion. If you’re serving it after a big meal, keep the portions modest—this pie is rich and satisfying.
Storage: Cover the pie loosely with plastic wrap or foil and store it in the refrigerator for up to 4 days. The flavors actually improve after the first day, so don’t be afraid to make it ahead.
Freezing: This pie freezes beautifully. Wrap it tightly in plastic wrap, then a layer of foil, and freeze for up to 3 months. Thaw overnight in the refrigerator before serving. I always make an extra pie for the freezer during pumpkin season.
Reheating: I don’t recommend reheating this pie. It’s best served cold or at room temperature. If you absolutely must have it warm, pop individual slices in a 300°F oven for about 5 minutes.
Nutritional Information & Benefits
Let’s be real—this is a dessert, and it’s meant to be enjoyed. But there are a few redeeming qualities worth mentioning.
Estimated Nutritional Values (per slice, 1/8 of pie):
| Nutrient | Amount |
|---|---|
| Calories | 380 |
| Total Fat | 22g |
| Saturated Fat | 13g |
| Carbohydrates | 42g |
| Fiber | 3g |
| Sugar | 24g |
| Protein | 6g |
| Vitamin A | 180% DV |
Health Highlights: Pumpkin is packed with vitamin A, which is great for eye health and immune function. It’s also a good source of fiber. The eggs and cream add protein and healthy fats, which help keep you full. Plus, the spices—cinnamon, ginger, nutmeg—are anti-inflammatory and full of antioxidants.
Dietary Considerations: This recipe is vegetarian. It contains gluten, dairy, and eggs. For gluten-free or dairy-free options, see the variations section above.
My Personal Take: I believe in balance. This pie is a special treat, not an everyday snack. Enjoy a slice, savor every bite, and don’t feel guilty about it. Food is meant to bring joy, and this pie does exactly that.
Conclusion
This homemade pumpkin pie from scratch with flaky crust is more than just a dessert. It’s the pie that changed my husband’s mind. It’s the pie that gets requested at every family gathering. It’s the pie that makes people close their eyes after the first bite and let out a little sigh of happiness.
I want you to make this pie and make it your own. Maybe you’ll add extra ginger. Maybe you’ll try the bourbon version. Maybe you’ll serve it with a mountain of whipped cream and a drizzle of caramel. Whatever you do, don’t be afraid to experiment. That’s how the best recipes are born.
I’d love to hear how yours turns out. Did you make any changes? Did you catch someone sneaking a slice in the dark? Drop a comment below and let me know. And if you’re looking for more fall desserts, you might enjoy my apple crisp with oat topping or my easy pear tart. Happy baking, friends.
Frequently Asked Questions
Can I use canned pumpkin instead of roasting a fresh one?
Absolutely. Canned pumpkin is a perfectly fine substitute. Just make sure you’re buying pure pumpkin puree, not pumpkin pie filling, which already has sugar and spices added. I recommend Libby’s for the best texture.
Why did my crust shrink during baking?
This usually happens when the dough is overworked or not chilled enough. The gluten tightens up in the oven and pulls the crust down. Next time, handle the dough as little as possible and make sure it’s thoroughly chilled before baking. Also, don’t stretch the dough when you’re fitting it into the pie dish—just gently press it in.
How do I know when the pie is done baking?
The edges should be set and slightly puffed, but the center should still jiggle when you gently shake the pan. Think of it like Jell-O—it should wobble, not ripple. The internal temperature should be around 175°F (80°C). It will continue to set as it cools.
Can I make this pie ahead of time?
Yes, and I actually recommend it. This pie tastes even better the next day after the flavors have had time to meld. You can make it up to 24 hours in advance and keep it covered in the refrigerator. It also freezes beautifully for up to 3 months.
My filling cracked on top. What went wrong?
This usually means the pie was overbaked or the oven temperature was too high. The filling expands as it bakes, and if it gets too hot, it can crack as it cools. Make sure your oven is properly calibrated, and take the pie out when the center is still slightly jiggly. A cracked pie is still delicious—just cover it with whipped cream and no one will ever know.
Pin This Recipe!
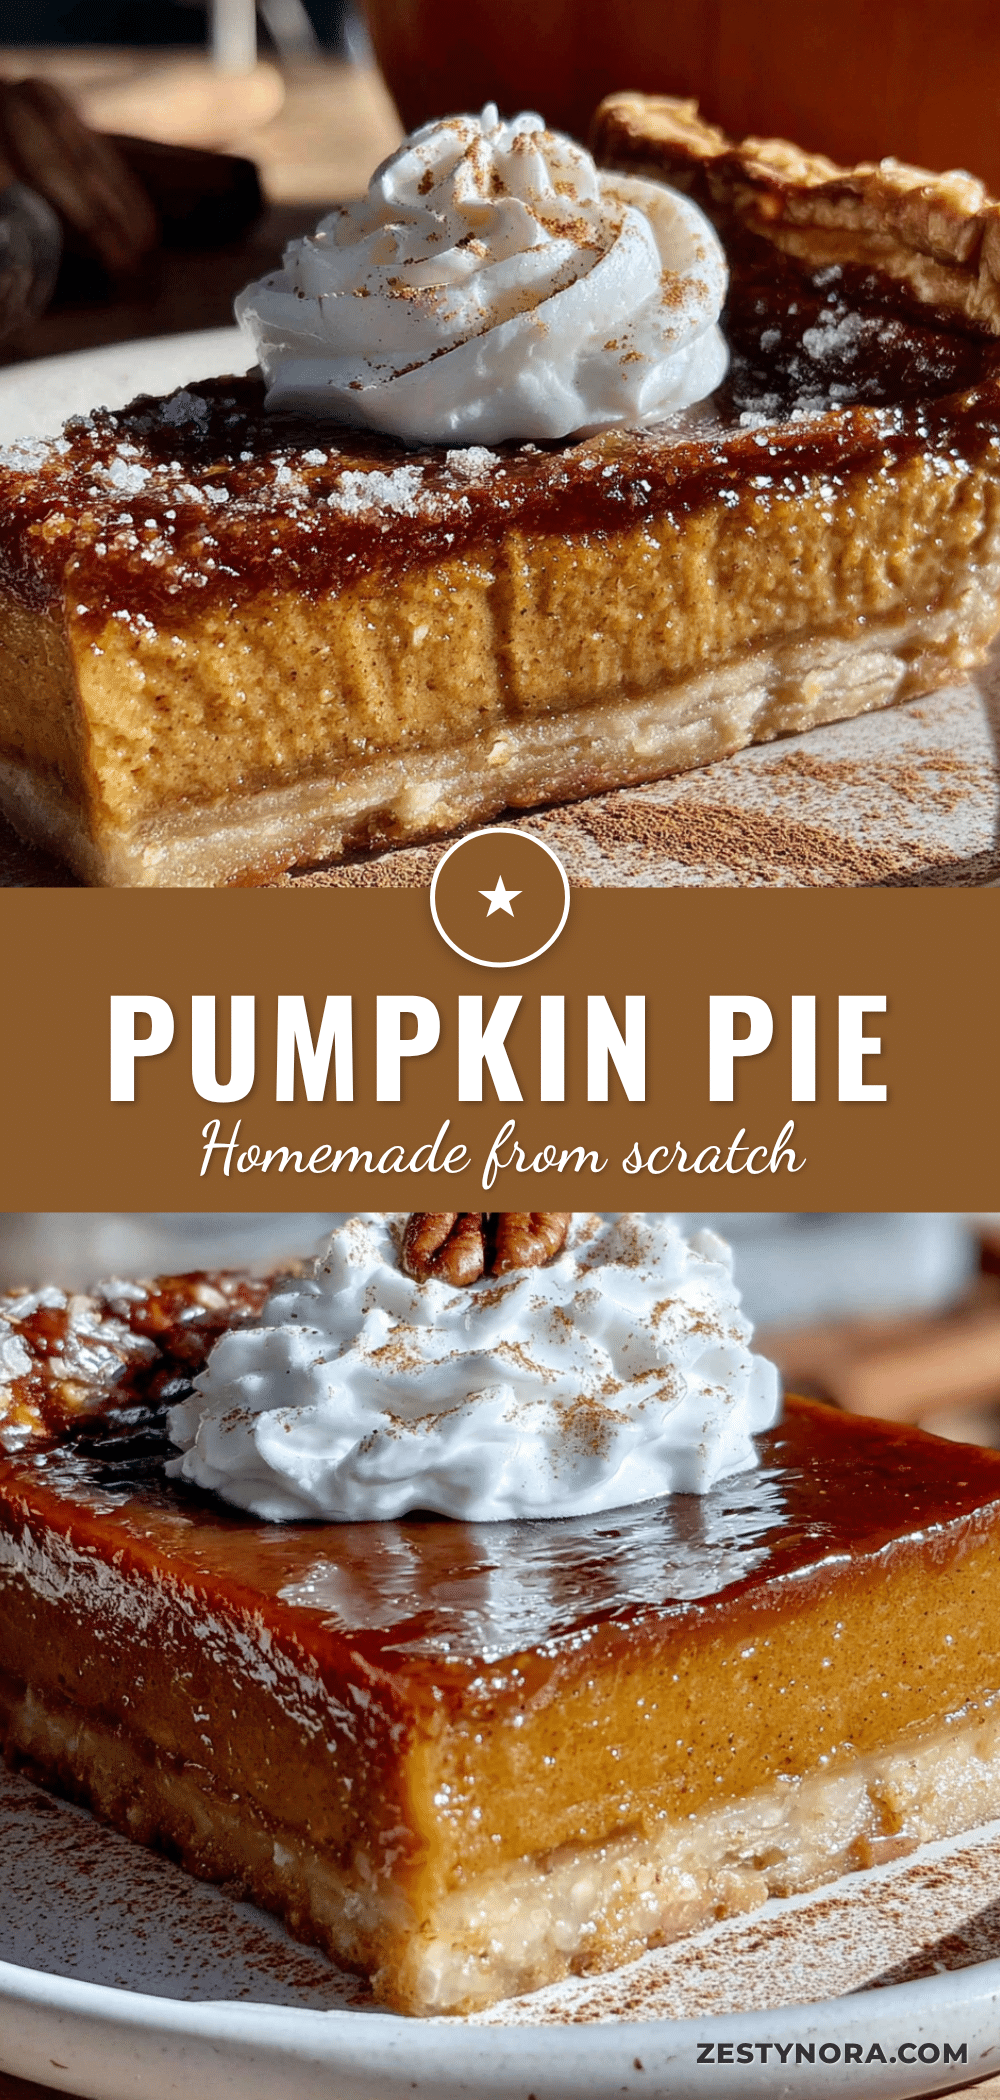
Homemade Pumpkin Pie with Flaky Crust
This homemade pumpkin pie from scratch features a silky smooth filling and a buttery, flaky crust that shatters when you bite into it. It’s the pie that will convert even the biggest pumpkin pie skeptics.
- Prep Time: 30 minutes
- Cook Time: 1 hour 30 minutes
- Total Time: 2 hours (plus chilling time)
- Yield: 8 servings 1x
- Category: Dessert
- Cuisine: American
Ingredients
- 2 ½ cups (315 grams) all-purpose flour
- 1 cup (226 grams) unsalted butter, very cold and cut into small cubes
- 6–8 tablespoons (90–120 ml) ice water
- 1 teaspoon (6 grams) salt
- 1 tablespoon (12 grams) sugar
- 1 medium sugar pumpkin (about 3–4 pounds) or 1 ¾ cups (425 grams) pumpkin puree
- 1 ¼ cups (300 ml) heavy cream
- 3 large eggs, room temperature
- ¾ cup (165 grams) packed brown sugar
- ¼ cup (50 grams) granulated sugar
- 2 teaspoons ground cinnamon
- 1 teaspoon ground ginger
- ½ teaspoon ground nutmeg
- ¼ teaspoon ground cloves
- ½ teaspoon salt
- 1 teaspoon vanilla extract
Instructions
- Make the crust dough: In a large bowl, whisk together flour, salt, and sugar. Add cold butter cubes and toss to coat. Using a pastry cutter or fingertips, work butter into flour until mixture resembles coarse meal with some pea-sized butter pieces. Drizzle 6 tablespoons ice water over mixture and stir with a fork until dough just begins to come together. Squeeze a piece; if it holds together, it’s ready. If crumbly, add another tablespoon water. Turn dough onto floured surface, shape into a disc…
- Roast the pumpkin: Preheat oven to 400°F (200°C). Cut sugar pumpkin in half, scoop out seeds and stringy bits. Place cut-side down on parchment-lined baking sheet. Roast 35-45 minutes until fork-tender. Cool, then scoop flesh into food processor and puree until smooth. You should have about 1 ¾ cups. If watery, drain in fine-mesh strainer for 15 minutes.
- Blind bake the crust: On floured surface, roll chilled dough into 12-inch circle, about ⅛-inch thick. Transfer to 9-inch pie dish, press into bottom and up sides. Trim excess dough, leaving ½-inch overhang, fold under and crimp edges. Prick bottom with fork. Line with parchment paper and fill with pie weights or dried beans. Bake at 375°F (190°C) for 15 minutes. Remove weights and parchment, bake 5-7 minutes more until bottom looks dry and set. Cool slightly.
- Make the filling: Lower oven to 350°F (175°C). In large bowl, whisk together pumpkin puree, brown sugar, granulated sugar, cinnamon, ginger, nutmeg, cloves, and salt until smooth. In separate small bowl, lightly beat eggs. Slowly whisk beaten eggs into pumpkin mixture. Gradually whisk in heavy cream and vanilla extract. Pour entire mixture through fine-mesh strainer into clean bowl to remove lumps.
- Bake the pie: Place blind-baked crust on baking sheet. Pour strained filling into warm crust, almost to top. Bake 50-60 minutes. Pie is done when edges are set but center still jiggles slightly when gently shaken. If crust edges brown too quickly, tent with foil or pie shield.
- Cool and serve: Let pie cool completely on wire rack, about 2 hours. Refrigerate for at least 4 hours or overnight. Serve chilled or at room temperature with whipped cream.
Notes
Keep all ingredients cold for flaky crust. Blind baking is essential to prevent soggy bottom. Strain filling for silky texture. Do not overbake; center should jiggle slightly. Pie tastes better the next day. Can be frozen for up to 3 months.
Nutrition
- Serving Size: 1 slice (1/8 of pie)
- Calories: 380
- Sugar: 24
- Fat: 22
- Saturated Fat: 13
- Carbohydrates: 42
- Fiber: 3
- Protein: 6
Keywords: pumpkin pie, homemade pumpkin pie, flaky crust, Thanksgiving dessert, pumpkin dessert, from scratch, fall dessert


