I wasn’t expecting lunchbox advice from my plumber, but there I was, standing in my kitchen with a dripping pipe, listening to Frank describe exactly how he packs pinwheels for his grandkids. The man had a wrench in one hand and was gesturing with the other, telling me about cream cheese and turkey and why “rolling them tight” was the secret to a happy kid at noon. Honestly, I almost forgot about the leak.
Frank is not the type you’d expect to have strong opinions about school lunches. He’s a quiet guy, mostly grunts when he works, and I’d never seen him so animated. But when he saw the sad-looking sandwich I was making for my son, he just shook his head. “You’re overthinking it,” he said. “Kids want something they can hold. Something that looks fun.” And then he told me about these Easy Turkey and Cream Cheese Pinwheels for Kids. He learned them from his wife, who learned them from a daycare teacher thirty years ago. It’s one of those recipes that just gets passed around, you know?
I made them that very night, despite the fact that my kitchen floor was still wet. My kid ate three before I could even pack the lunchbox. That’s when I knew Frank was onto something. These aren’t just another rolled-up snack. They’re the kind of thing that makes other parents ask, “How did you get them to eat that?” And the best part? They take about ten minutes to throw together. Maybe you’ve been there, staring into the fridge at 8 PM, wondering what on earth to pack for tomorrow. Let me tell you, these pinwheels are the answer you didn’t know you needed.
Why You’ll Love This Recipe
I’ve tested a lot of kids’ lunch ideas over the years, and most of them end up in the trash or traded away at the cafeteria table. These Easy Turkey and Cream Cheese Pinwheels for Kids are different. They’re the ones that come home in an empty container, and honestly, that’s the highest compliment a parent can get.
- Quick & Easy: You can make these in under 15 minutes. Seriously, they come together faster than a grilled cheese, and there’s no pan to wash.
- Simple Ingredients: You only need four things—tortillas, cream cheese, turkey, and a little seasoning. No fancy grocery trips required. You probably have everything right now.
- Perfect for Lunchboxes: These hold up beautifully in a lunch bag. No sogginess, no falling apart. They’re sturdy little spirals that stay intact until lunchtime.
- Crowd-Pleaser: I’ve served these at playdates, birthday parties, and even as a quick after-school snack. Kids devour them. Adults sneak them too. I’m not judging.
- Unbelievably Delicious: The cream cheese gets all soft and creamy against the savory turkey, and the tortilla adds just the right chew. It’s simple, but it works.
What makes this recipe different from the hundreds of other pinwheel recipes out there? It’s the ratio. Most recipes use way too much cream cheese or dry turkey. I’ve dialed it in so every bite is balanced. Plus, I roll the tortillas a specific way to prevent them from unraveling. It’s a small trick, but it makes a huge difference. This isn’t just another version—it’s the best version. The one you’ll come back to week after week.
There’s something special about watching a kid open their lunchbox and actually get excited. These pinwheels do that. They’re colorful, they’re fun to eat, and they taste like a treat. But they’re also packed with protein and easy to customize. It’s the kind of recipe that makes you feel like a good parent without spending all afternoon in the kitchen.
What Ingredients You Will Need
This recipe uses simple, wholesome ingredients to deliver big flavor without the fuss. You probably have most of these in your kitchen right now, which is exactly how I like it.
- Flour tortillas (8-inch, soft taco size): You want the large ones, not the tiny fajita size. Look for “burrito” or “soft taco” on the package. I prefer Mission or Guerrero brand for their flexibility—they roll without cracking. If you’re using homemade tortillas, make sure they’re cool before you start.
- Cream cheese (8 ounces, softened): Full-fat cream cheese works best here. It spreads smoothly and holds the roll together. Low-fat works in a pinch, but the texture is a little thinner. Let it sit on the counter for 20 minutes to soften. (A quick tip: if you’re in a rush, microwave it for 10 seconds. Not 20. Trust me.)
- Deli turkey (about 8-10 slices, thin-cut): Go for oven-roasted or smoked turkey for the best flavor. I like Boar’s Head or Applegate for clean ingredients. Thin-cut is important—thick slices make the pinwheels bulky and hard to roll. Ask the deli counter to shave it if you can.
- Salt and pepper (a pinch each): Just a tiny bit to wake up the cream cheese. Don’t skip this. It makes a surprising difference.
- Optional add-ins: A handful of fresh spinach leaves, a thin layer of shredded cheddar, or a smear of ranch dressing. These are totally optional but fun to mix up. My kid loves when I sneak in a few baby spinach leaves—they don’t even notice.
That’s it. Four main ingredients, plus a few optional extras if you’re feeling fancy. The beauty of this recipe is its simplicity. You don’t need expensive specialty items or hard-to-find spices. It’s just good, basic food that comes together in minutes.
When you’re shopping, look for cream cheese that’s fresh—check the expiration date. Stale cream cheese can be grainy and won’t spread as nicely. For the turkey, I recommend getting it sliced fresh at the deli counter rather than buying pre-packaged. It’s usually less salty and has a better texture. But if pre-packaged is what you’ve got, it’ll work just fine. No judgment here.
One more thing—if you’re making these for a party or a crowd, double the recipe. They disappear fast. I learned that the hard way at a playdate last month. I made one batch thinking it would be plenty. I was wrong.
Equipment Needed
You don’t need much for this recipe, which is part of the appeal. Here’s what you’ll want to have on hand:
- A medium mixing bowl: For softening and mixing the cream cheese. Any bowl will do, but a wide, shallow one makes mixing easier.
- A rubber spatula or butter knife: For spreading the cream cheese mixture onto the tortillas. A spatula gives you a smoother, more even layer, but a butter knife works in a pinch.
- A sharp knife: For cutting the rolls into pinwheels. A serrated bread knife works best—it cuts through the tortilla without squishing it. I’ve used a chef’s knife before, and it tends to mash the roll a bit. A serrated knife is the way to go.
- A cutting board: For rolling and cutting. Make sure it’s clean and dry.
- Plastic wrap or parchment paper: For wrapping the rolls before you refrigerate them. This helps them hold their shape.
- A plate or baking sheet: To hold the wrapped rolls in the fridge.
If you don’t have a serrated knife, don’t stress. Just use the sharpest knife you own and saw gently. I’ve made these with a dull knife before, and it was a mess. Learn from my mistakes. Also, a silicone baking mat can be helpful for rolling, but it’s not necessary. I’ve rolled these on a clean countertop for years with no issues.
Budget-friendly tip: You don’t need fancy equipment for this recipe. A butter knife from your drawer and a regular cutting board are perfectly fine. Save your money for good quality turkey and cream cheese instead.
Preparation Method

- Soften the cream cheese (5 minutes): Take the cream cheese out of the fridge and let it sit at room temperature for about 20 minutes. If you’re in a hurry, unwrap it and microwave it on low power for 10-15 seconds. You want it soft but not melted. (I’ve nuked it for 20 seconds before and ended up with a puddle. Not ideal.)
- Mix the cream cheese (2 minutes): In a medium bowl, combine the softened cream cheese with a pinch of salt and a pinch of pepper. Stir until smooth and creamy. If you’re adding any extras like dried herbs or garlic powder, mix them in now. Taste it. It should be creamy and slightly savory.
- Prepare the tortillas (1 minute): Lay one tortilla flat on your cutting board. If your tortillas are stiff, warm them in the microwave for 10 seconds to make them more pliable. This helps prevent cracking when you roll.
- Spread the cream cheese (2 minutes): Using your spatula or butter knife, spread a thin, even layer of the cream cheese mixture over the entire surface of the tortilla. Go all the way to the edges—this acts like glue to hold everything together. Don’t go too thick, or the pinwheels will be messy. Think of it like buttering toast.
- Layer the turkey (2 minutes): Place 2-3 slices of turkey on top of the cream cheese, covering the tortilla evenly. Overlap the slices slightly so there are no bare spots. If you’re adding spinach or cheese, lay those on top of the turkey now.
- Roll it up (2 minutes): Starting at one edge, tightly roll the tortilla into a log. Keep it as snug as you can without squeezing the filling out the ends. Think of it like rolling a sleeping bag—firm but gentle. Once it’s rolled, place it seam-side down on the cutting board.
- Wrap and chill (30 minutes minimum): Wrap the rolled tortilla tightly in plastic wrap or parchment paper. Twist the ends to seal. Place it on a plate and refrigerate for at least 30 minutes. This is the most important step. Chilling sets the cream cheese and helps the roll hold its shape when you cut it. I know it’s tempting to skip this, but don’t. Your pinwheels will fall apart.
- Slice into pinwheels (3 minutes): Unwrap the chilled roll and place it on a clean cutting board. Using a sharp serrated knife, slice the roll into 1-inch rounds. Use a gentle sawing motion—don’t press down hard or you’ll squish the roll. You should get about 6-8 pinwheels per tortilla.
- Arrange and serve (1 minute): Place the pinwheels on a plate or in a lunchbox. They’re ready to eat right away, or you can keep them refrigerated for later.
Sensory cues: The cream cheese should feel smooth and spreadable, not lumpy. When you roll the tortilla, it should feel firm but flexible. When you slice, you should see a clean spiral of cream cheese and turkey. If the filling oozes out, your roll was too loose or your cream cheese was too thick.
Personal tip: I like to make these the night before. They actually taste better after sitting in the fridge overnight—the flavors meld together. Plus, it’s one less thing to do in the morning. Just slice them right before you pack the lunchbox.
Cooking Tips & Techniques
I’ve made these pinwheels more times than I can count, and I’ve learned a few things along the way. Here’s what I wish someone had told me:
The biggest mistake people make is using cold cream cheese. It won’t spread evenly, and it’ll tear your tortilla. Let it soften properly. I once tried to rush it and ended up with lumpy, torn pinwheels that looked like a disaster. They still tasted fine, but they weren’t pretty.
Rolling technique matters. Start with the edge closest to you and roll away from your body. Use your fingers to tuck the filling in as you go. Keep even pressure. If you roll too loosely, the pinwheels will unravel. Too tight, and the filling squishes out the ends. It takes a few tries to get the feel, but once you do, it’s second nature.
Timing is everything. Don’t skip the chilling step. I know it adds 30 minutes, but it’s non-negotiable. The cold cream cheese firms up and acts like glue. I’ve cut pinwheels without chilling before, and they were a floppy, messy disaster. Lesson learned.
Multitasking strategy: Make a double batch while you’re at it. The process is the same whether you’re making one roll or six. Wrap them all, chill them together, and slice what you need. The extras keep beautifully in the fridge for up to three days. It’s a game-changer for busy mornings.
Consistency tip: If your tortillas are cracking, they’re either too dry or too cold. Warm them in the microwave for 10 seconds. If they’re still cracking, try a different brand. Some tortillas are just more brittle than others. I’ve had the best luck with Mission brand flour tortillas.
One more thing—don’t overfill. It’s tempting to pile on the turkey, but less is more here. A thin, even layer gives you clean, beautiful spirals. Too much filling makes them fall apart. Trust the process.
Variations & Adaptations
Once you’ve mastered the basic recipe, the possibilities are endless. Here are some of my favorite variations:
Vegetarian version: Swap the turkey for hummus or roasted red peppers. Spread a thin layer of hummus instead of cream cheese, then add sliced cucumbers and shredded carrots. It’s fresh, crunchy, and totally satisfying. My vegetarian friend requests these for every potluck.
Cheesy twist: Sprinkle a thin layer of shredded cheddar or mozzarella on top of the cream cheese before adding the turkey. It adds an extra layer of flavor and makes the pinwheels even more kid-friendly. I’ve also used pepper jack for a little kick—adults love it.
Gluten-free option: Use gluten-free tortillas or large lettuce leaves. Lettuce wraps are surprisingly sturdy and add a nice crunch. Just be careful not to overfill, since lettuce is more delicate than tortillas.
Dairy-free adaptation: Use dairy-free cream cheese. I’ve tried Kite Hill and Violife, and both work well. Just make sure it’s softened before spreading. The texture is a little different, but the flavor is still great.
Seasonal variation: In the summer, add fresh basil leaves and sliced tomato. In the fall, try adding a thin layer of cranberry sauce. It sounds weird, but it’s amazing. I made these for Thanksgiving leftovers one year, and they were a hit.
Flavor boost: Mix a teaspoon of ranch seasoning or everything bagel seasoning into the cream cheese. It adds a ton of flavor with zero extra effort. My kids love the ranch version—they call them “funny bagel rolls.”
I once tried a version with sun-dried tomato cream cheese and roasted red peppers. It was incredible, but my kids wouldn’t touch it. So I ate them all myself. No regrets.
Serving & Storage Suggestions
These pinwheels are incredibly versatile. Here’s how to serve and store them:
Serving temperature: They’re best served cold or at room temperature. Straight from the fridge is fine, but letting them sit for 5-10 minutes takes the chill off and softens the cream cheese slightly. Don’t microwave them—the tortilla gets rubbery.
Presentation tips for parties: Arrange the pinwheels on a platter in concentric circles, cut-side up. Garnish with fresh herbs or cherry tomatoes for color. For kids’ parties, stick a toothpick in each one to make them easy to grab. I like to use colorful toothpicks for a fun touch.
What to serve alongside: These pair beautifully with fresh fruit, veggie sticks, or a small cup of soup. For lunchboxes, add apple slices, baby carrots, and a yogurt tube. It’s a balanced meal that kids actually eat.
Storage instructions: Keep leftover pinwheels in an airtight container in the refrigerator for up to 3 days. Place a paper towel at the bottom of the container to absorb any moisture. Change the paper towel if it gets soggy. Don’t freeze them—the cream cheese gets grainy when thawed.
Reheating tips: Honestly, don’t reheat them. They’re meant to be eaten cold. If you absolutely must warm them, microwave for 10 seconds max. But I promise, they’re better cold.
How flavors develop over time: These actually taste better after a few hours in the fridge. The flavors meld together, and the cream cheese firms up perfectly. I often make them the night before and slice them in the morning. They’re at their peak about 4-6 hours after assembly.
Packing for lunch: Place the pinwheels in a small container with a tight-fitting lid. If you’re stacking them, put a piece of parchment paper between layers to prevent sticking. They hold up well, even in a backpack.
Nutritional Information & Benefits
Here’s a rough estimate for one serving (about 4 pinwheels, using the basic recipe):
| Nutrient | Amount |
|---|---|
| Calories | 280-320 |
| Protein | 18-22g |
| Carbohydrates | 24-28g |
| Fat | 14-18g |
| Fiber | 1-2g |
| Sodium | 600-800mg |
These pinwheels are a solid source of protein from the turkey and cream cheese, which helps keep kids full and focused through the afternoon. The carbohydrates from the tortilla provide quick energy, while the fat from the cream cheese adds staying power. It’s a balanced snack that won’t cause a sugar crash.
Health benefits of key ingredients: Turkey is lean protein that supports muscle growth and repair. Cream cheese provides calcium for strong bones. Tortillas offer B vitamins for energy. If you add spinach, you’re getting iron and vitamin K. Not bad for a 10-minute recipe.
Dietary considerations: This recipe is naturally low in sugar and can be made gluten-free or dairy-free with simple swaps. It’s not suitable for vegans as written, but the hummus variation works great. Always check your ingredient labels if you’re cooking for someone with allergies.
Potential allergens: Contains dairy (cream cheese) and gluten (tortillas). The turkey is usually safe, but some deli meats contain fillers. Read labels carefully.
I’m not a nutritionist, but I try to feed my family balanced meals. These pinwheels make me feel good because they’re real food, not processed junk. And the fact that my kids actually eat them? That’s a win in my book.
Conclusion
These Easy Turkey and Cream Cheese Pinwheels for Kids are the kind of recipe that becomes a staple. They’re quick, simple, and endlessly adaptable. Whether you’re packing school lunches, feeding a crowd at a playdate, or just looking for a stress-free snack, these pinwheels deliver every time.
I still think about Frank every time I make them. That plumber with his wrench and his grandkid-approved recipe. It’s funny where good ideas come from, isn’t it? The best recipes aren’t always from cookbooks or food blogs. Sometimes they come from the most unexpected places—like a guy fixing your sink.
I hope you make these and love them as much as we do. Don’t be afraid to tweak them to your family’s taste. Add cheese, swap the turkey, throw in some veggies. Make them your own. And when you do, I’d love to hear about it. Drop a comment below and tell me how yours turned out. What did your kids think? Did you try a fun variation? Let’s share the pinwheel love.
Happy rolling, friends. Your lunchboxes are about to get a whole lot more exciting.
Frequently Asked Questions
Can I make these pinwheels ahead of time?
Absolutely. In fact, I recommend it. Assemble and roll the tortillas, wrap them tightly, and refrigerate for up to 24 hours before slicing. The flavors get even better overnight. Just slice them right before serving for the best texture.
How do I keep the pinwheels from getting soggy in a lunchbox?
The key is to pat the turkey dry with a paper towel before layering it. Excess moisture from the deli meat can make the tortilla soggy. Also, make sure the cream cheese is at room temperature so it spreads evenly and creates a barrier. A dry tortilla is a happy tortilla.
Can I use a different type of meat?
Yes! Ham, roast beef, or even rotisserie chicken work beautifully. Just make sure whatever you use is sliced thin and not too wet. I’ve also used salami for a more savory version—adults love it. Kids might prefer the milder flavor of turkey or ham.
How long do these pinwheels last in the fridge?
Stored in an airtight container, they’ll stay fresh for up to 3 days. After that, the tortilla starts to get soft and the cream cheese can separate. I usually make them on Sunday and use them for lunches through Wednesday. They never last longer than that in my house anyway.
Can I freeze turkey and cream cheese pinwheels?
I don’t recommend it. Cream cheese doesn’t freeze well—it becomes grainy and watery when thawed. The tortilla also gets mushy. These are best made fresh or kept in the fridge. If you need a freezer-friendly option, try using cheddar cheese instead of cream cheese and freeze before slicing.
Pin This Recipe!
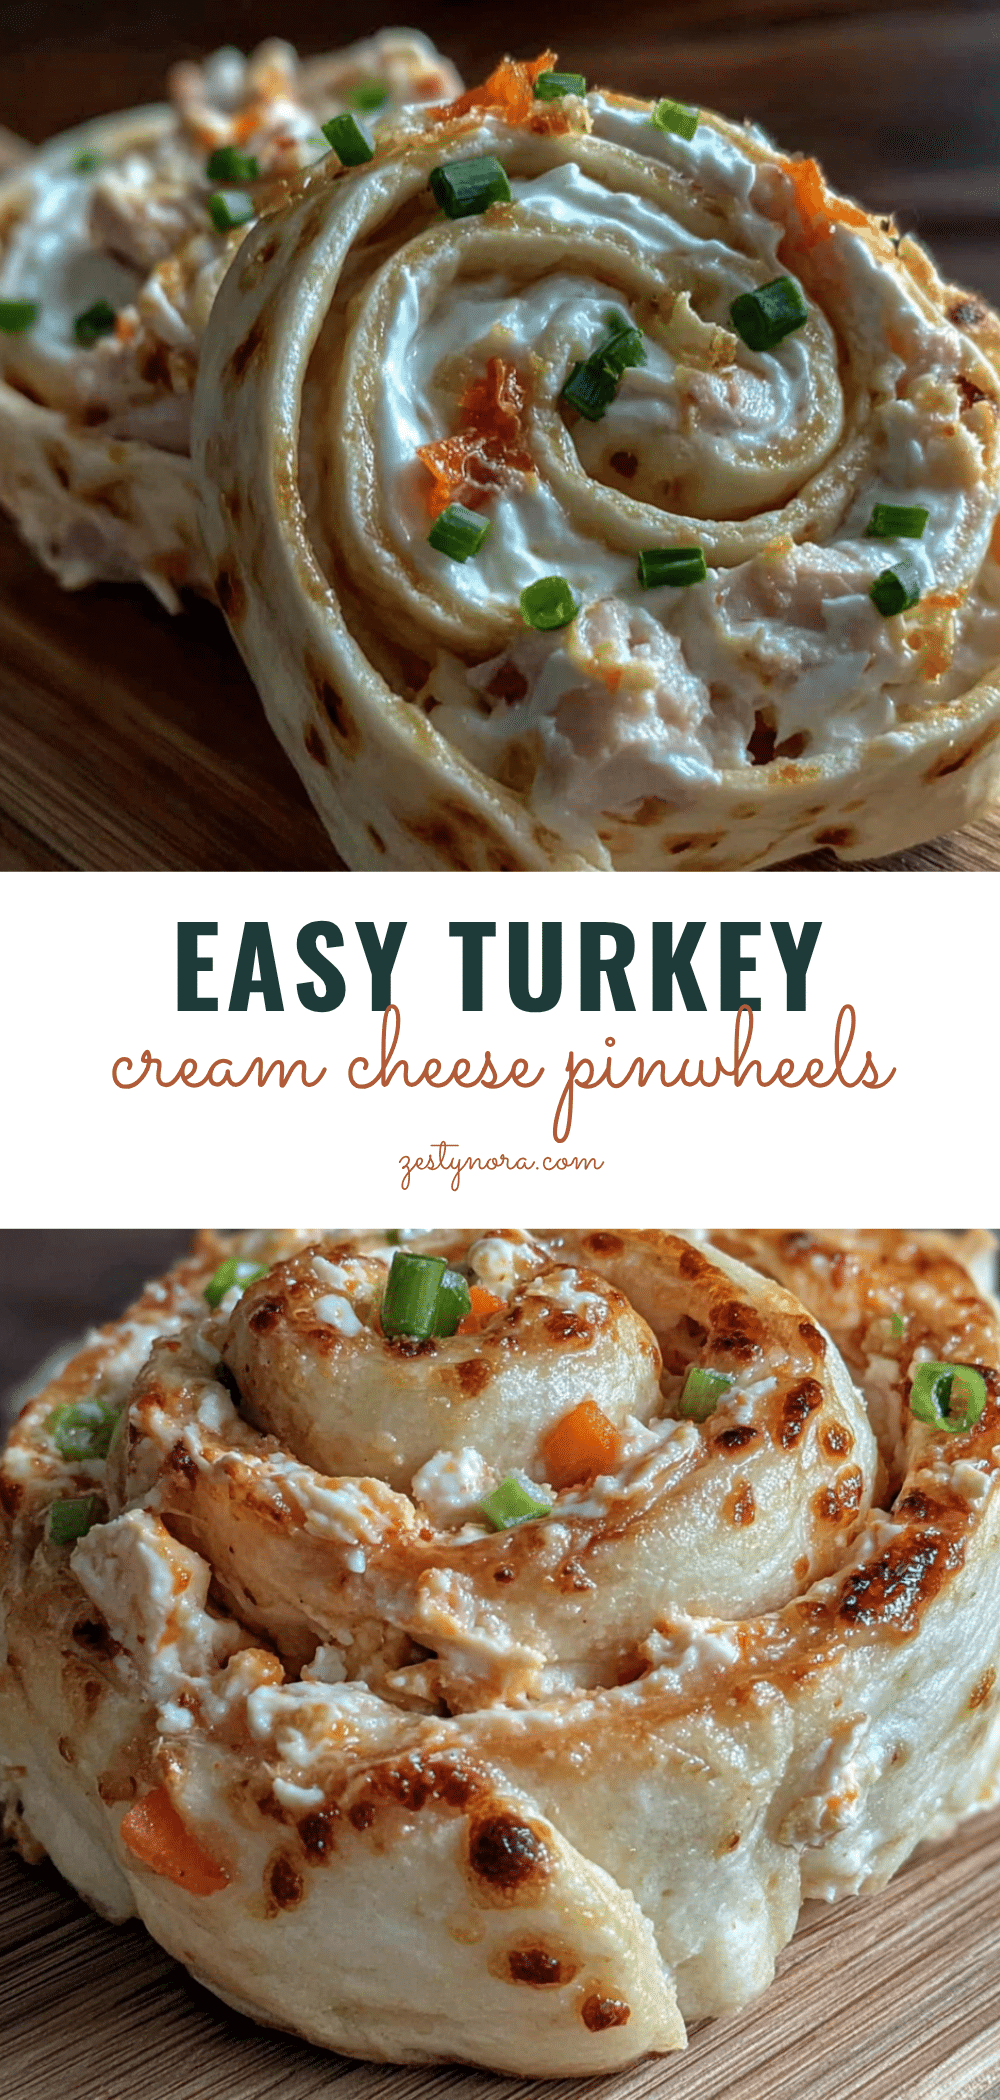
Easy Turkey Cream Cheese Pinwheels: Fun Kids Lunch

These Easy Turkey and Cream Cheese Pinwheels are a quick, kid-friendly lunchbox staple made with just four simple ingredients. They’re sturdy, delicious, and come together in under 15 minutes for a stress-free meal that kids actually eat.
- Prep Time: 15 minutes
- Cook Time: 0 minutes
- Total Time: 45 minutes (includes 30 minutes chilling)
- Yield: 4 servings 1x
- Category: Lunch
- Cuisine: American
Ingredients
- 4 large flour tortillas (8-inch, soft taco size)
- 8 ounces cream cheese, softened
- 8–10 slices deli turkey, thin-cut
- 1 pinch salt
- 1 pinch black pepper
- Optional: fresh spinach leaves, shredded cheddar cheese, or ranch dressing
Instructions
- Soften the cream cheese: Let it sit at room temperature for 20 minutes, or microwave on low for 10-15 seconds until soft but not melted.
- Mix the cream cheese: In a medium bowl, combine softened cream cheese with a pinch of salt and pepper. Stir until smooth and creamy. Add any optional seasonings or herbs if desired.
- Prepare the tortillas: Lay one tortilla flat on a cutting board. If stiff, microwave for 10 seconds to make pliable.
- Spread the cream cheese: Using a rubber spatula or butter knife, spread a thin, even layer of cream cheese mixture over the entire surface of the tortilla, all the way to the edges.
- Layer the turkey: Place 2-3 slices of turkey on top of the cream cheese, overlapping slightly to cover evenly. Add any optional ingredients like spinach or cheese now.
- Roll it up: Starting at one edge, tightly roll the tortilla into a log, keeping it snug without squeezing filling out the ends. Place seam-side down.
- Wrap and chill: Wrap the rolled tortilla tightly in plastic wrap or parchment paper. Refrigerate for at least 30 minutes to set.
- Slice into pinwheels: Unwrap the chilled roll. Using a sharp serrated knife, slice into 1-inch rounds using a gentle sawing motion.
- Arrange and serve: Place pinwheels on a plate or in a lunchbox. Serve cold or at room temperature.
Notes
For best results, make these the night before—flavors meld and texture improves. Pat turkey dry to prevent sogginess. Don’t skip the chilling step; it helps pinwheels hold their shape when sliced. Use full-fat cream cheese for best texture. Tortillas can be warmed for 10 seconds if cracking.
Nutrition
- Serving Size: 4 pinwheels
- Calories: 300
- Sugar: 2
- Sodium: 700
- Fat: 16
- Saturated Fat: 8
- Carbohydrates: 26
- Fiber: 1
- Protein: 20
Keywords: turkey pinwheels, cream cheese pinwheels, kids lunch, easy lunchbox ideas, no-cook lunch, school lunch, turkey cream cheese roll-ups


