Third time in six days and I finally stopped overmixing the cream cheese. That was the thing, you know—the one tiny detail that kept my no-bake pumpkin cheesecake cups from setting up right. The first batch was delicious but a little too loose, more like a pudding you’d eat with a spoon. The second batch I overcorrected and ended up with a texture that was almost too firm, missing that velvety melt-in-your-mouth thing you want from a chilled dessert. But the third batch? That was the one where I finally just let the mixer do its job and stopped fussing. The filling came together smooth and silky, the graham cracker crust held its shape perfectly, and when I pulled one out of the fridge the next morning, it sliced clean through with zero drama.
I wasn’t even trying to develop a recipe at first. I just wanted a small fall dessert that didn’t require turning on the oven—something I could make after the kids went to bed without waking the whole house with mixer noise (well, minimal noise). And honestly? I didn’t need a whole cheesecake sitting in my fridge, tempting me for days. I needed exactly two servings, maybe three if I was feeling generous. These easy no-bake pumpkin cheesecake cups ended up being exactly that—a small batch dessert that feels special but doesn’t leave you with a week’s worth of leftovers you’ll eat standing over the sink at midnight. Not that I’ve done that. More than once.
The best part about this recipe is how forgiving it is once you get the technique down. You don’t need a water bath, you don’t need to worry about cracks, and you definitely don’t need any special equipment. Just a few bowls, some patience while it chills, and you’ve got a creamy, spiced pumpkin cheesecake situation that tastes like you spent way more effort than you actually did. That’s my favorite kind of dessert, honestly.
Why You’ll Love This Recipe
Let me tell you why these easy no-bake pumpkin cheesecake cups have earned a permanent spot in my fall dessert rotation. I’ve tested this recipe more times than I care to admit, and each batch taught me something new about getting that perfect no-bake texture.
- No Oven Required: This is a true no-bake dessert. No turning on the oven, no hovering over a water bath, no worrying about overbaking. Perfect for those warm fall days when you want pumpkin flavor but don’t want to heat up the kitchen.
- Small Batch Perfection: This recipe makes exactly two generous servings or three smaller ones. No more, no less. It’s perfect when you’re craving something sweet but don’t need a full cheesecake staring at you from the fridge.
- Simple Ingredients: You probably have most of these in your pantry already. Canned pumpkin puree, cream cheese, graham crackers, butter, sugar, and pumpkin pie spice. No fancy grocery store runs required.
- Make-Ahead Friendly: These cups actually get better after a few hours in the fridge. The flavors meld together, the crust firms up perfectly, and the texture becomes incredibly creamy. Make them the night before and you’re set for the next day.
- Crowd-Pleasing Flavor: The combination of tangy cream cheese, sweet pumpkin, and warm fall spices is basically irresistible. Even people who say they’re “not really pumpkin people” have gone back for seconds when I’ve served these.
What makes this recipe different from other no-bake pumpkin desserts is the texture. I’ve had versions that were too dense or too airy, but this one hits that sweet spot—creamy but firm enough to hold its shape, with a crust that stays crunchy even after chilling. It’s the kind of dessert that makes you close your eyes after the first bite. And honestly? It’s perfect for those evenings when you want something special but don’t want to spend hours in the kitchen.
What Ingredients You Will Need
This recipe uses simple, wholesome ingredients that come together to create something truly special. The beauty of these easy no-bake pumpkin cheesecake cups is that you don’t need anything complicated—just good quality ingredients that work together harmoniously.
For the Graham Cracker Crust
- Graham crackers, crushed (about 4 full sheets) – You can use a food processor or just put them in a zip-top bag and crush them with a rolling pin. I prefer the texture when they’re crushed by hand—it gives the crust a more rustic feel.
- Unsalted butter, melted (2 tablespoons) – This binds the crust together. If you only have salted butter, just reduce the added salt in the filling by a pinch.
- Granulated sugar (1 tablespoon) – Just a touch of sweetness to balance the buttery graham cracker flavor.
- Pinch of salt – Don’t skip this. Salt makes the crust taste more buttery and enhances the overall flavor.
For the Pumpkin Cheesecake Filling
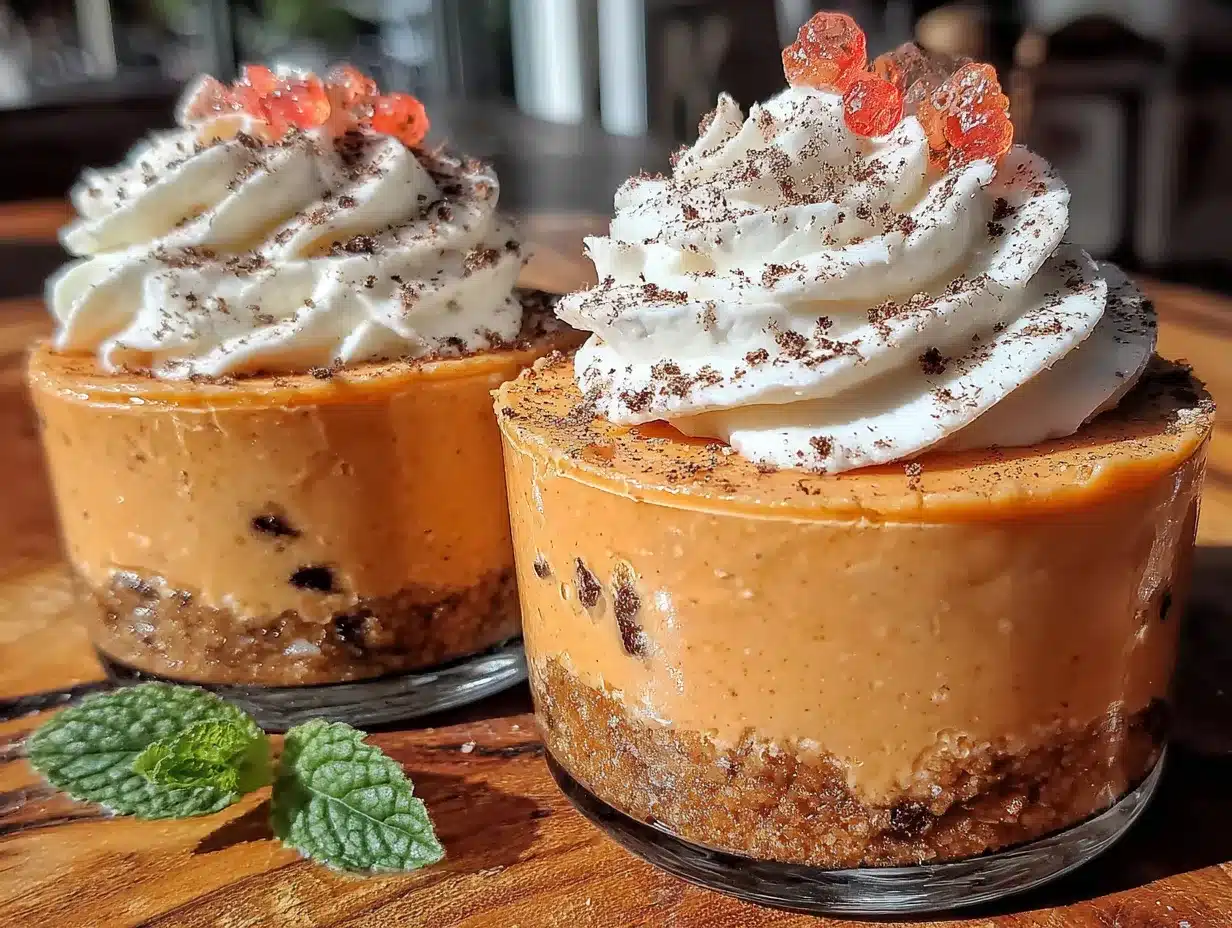
- Full-fat cream cheese, softened to room temperature (4 ounces, or half a block) – This is crucial. Cold cream cheese will give you lumpy filling. Let it sit on the counter for at least 30 minutes before you start.
- Pumpkin puree (¼ cup) – Make sure you’re using 100% pumpkin puree, not pumpkin pie filling. The pie filling has added sugar and spices that will throw off the balance. I personally like Libby’s brand for consistent results.
- Powdered sugar (3 tablespoons) – This dissolves more easily than granulated sugar and gives the filling a silky smooth texture without any grittiness.
- Heavy cream (2 tablespoons) – Adds richness and helps the filling set up properly. You can substitute with full-fat coconut cream for a dairy-free option.
- Pumpkin pie spice (½ teaspoon) – You can use store-bought or make your own blend with cinnamon, nutmeg, ginger, and allspice. I actually prefer making my own because I like a little extra cinnamon.
- Vanilla extract (½ teaspoon) – Pure vanilla extract makes a difference here. The artificial stuff has a weird aftertaste that you’ll notice in a simple recipe like this.
For the Topping (Optional but Recommended)
- Whipped cream – Homemade is best, but store-bought works in a pinch. I like to add a tiny pinch of cinnamon to my whipped cream for extra flavor.
- Ground cinnamon – For dusting the top. It makes the cups look prettier and adds that final touch of fall flavor.
- Graham cracker crumbs – A little sprinkle on top adds texture and makes them look like they came from a fancy bakery.
If you’re looking for more pumpkin-inspired treats, you might enjoy my moist chocolate chip pumpkin bread or these soft pumpkin chocolate chip cookies—both are perfect for fall baking sessions.
Equipment Needed
You don’t need much for these easy no-bake pumpkin cheesecake cups, which is part of what makes them so great. Here’s what you’ll need:
- Two small glasses or ramekins (6-8 ounce size works perfectly) – I use small mason jars or short tumblers. The key is having something that shows off the layers.
- Mixing bowls – One medium bowl for the crust and one small bowl for the filling. Nothing fancy needed.
- Hand mixer or stand mixer – You can whisk by hand if you’re patient, but a mixer makes the filling much smoother and faster. I’ve done it both ways, and the mixer wins every time.
- Measuring cups and spoons – Accurate measurements matter in no-bake recipes since you can’t adjust texture during baking.
- Spatula – For scraping every last bit of filling into the cups. Trust me, you won’t want to waste any.
- Zip-top bag or food processor – For crushing the graham crackers. A rolling pin and some elbow grease works too.
If you don’t have ramekins, you can use small bowls, teacups, or even a small loaf pan and scoop out portions. The presentation won’t be as pretty, but the taste will be the same.
Preparation Method
Let me walk you through making these easy no-bake pumpkin cheesecake cups step by step. I’ve included all the little details I learned from my multiple test batches so you can nail it on the first try.
Step 1: Make the Crust
Start by crushing your graham crackers. If you’re using a food processor, pulse until you get fine crumbs. If you’re doing it by hand (my preferred method because it’s oddly satisfying), put the crackers in a zip-top bag and crush them with a rolling pin until you have a mix of fine crumbs and a few slightly larger pieces for texture.
Transfer the crumbs to a small bowl. Add the melted butter, granulated sugar, and a pinch of salt. Stir with a fork until everything is well combined and the mixture looks like wet sand. It should clump together when you press it between your fingers.
Divide the crust mixture evenly between your two cups or ramekins. Press it down firmly with the back of a spoon or the bottom of a small glass. You want it compact so it holds together when you eat it. Pop the cups in the fridge while you make the filling—this helps the crust set up.
Step 2: Make the Pumpkin Cheesecake Filling
In a medium mixing bowl, beat the softened cream cheese with a hand mixer on medium speed until it’s completely smooth and fluffy. This takes about 1-2 minutes. Scrape down the sides of the bowl with a spatula at least once to make sure there are no lumps.
Add the pumpkin puree, powdered sugar, heavy cream, pumpkin pie spice, and vanilla extract. Beat on low speed at first so the powdered sugar doesn’t fly everywhere, then increase to medium and beat for another 2-3 minutes until everything is well combined and the mixture is smooth and creamy.
Here’s the trick I learned the hard way: don’t overmix at this stage. Once everything is combined, stop. Overmixing can make the filling too thin and it won’t set up properly. You want it thick and luscious, not runny.
Step 3: Assemble the Cups
Take your crust-lined cups out of the fridge. Divide the pumpkin cheesecake filling evenly between the two cups, spooning it over the crust. Use a small spatula or the back of a spoon to smooth the top.
Tap each cup gently on the counter a few times to release any air bubbles. This also helps the filling settle evenly over the crust.
Step 4: Chill and Set
Cover each cup with plastic wrap or a small lid and refrigerate for at least 4 hours, but overnight is better. I know it’s hard to wait, but the texture really does improve with time. The filling needs that time to firm up and develop that classic cheesecake texture.
If you’re in a hurry, you can pop them in the freezer for about 2 hours, but watch them carefully—they can freeze solid if you leave them too long. The fridge method is more reliable.
Step 5: Garnish and Serve
When you’re ready to serve, take the cups out of the fridge. Top each one with a generous dollop of whipped cream, a sprinkle of cinnamon, and a few extra graham cracker crumbs if you have them. The contrast of the creamy filling, crunchy topping, and buttery crust is absolutely perfect.
For a special touch, you can also add a drizzle of caramel sauce or a few toasted pecans on top. But honestly, they’re delicious just as they are.
Cooking Tips & Techniques
After making these easy no-bake pumpkin cheesecake cups more times than I’d like to admit, I’ve picked up a few tricks that make a real difference. Here are the things I wish someone had told me before my first attempt.
Room temperature ingredients are non-negotiable. I know it’s tempting to use cold cream cheese straight from the fridge, but you’ll end up with a lumpy filling that no amount of beating will fix. Let your cream cheese sit out for at least 30 minutes before you start. Same goes for the heavy cream—cold cream won’t incorporate as smoothly.
Press the crust firmly enough. The first time I made these, I was too gentle with the crust and it fell apart when I tried to eat it. You want to press it down firmly and evenly, especially around the edges. Use the bottom of a small glass or a shot glass to really compact it.
Don’t skip the chill time. I know 4 hours feels like forever when you’re craving pumpkin cheesecake, but this is a no-bake dessert and the structure comes from chilling, not baking. If you rush it, you’ll end up with a soupy mess. Trust the process.
Use full-fat cream cheese. Low-fat or Neufchâtel cream cheese has a higher water content, which can make your filling too loose. For the best texture, go with full-fat. Your waistline can forgive you for one small dessert.
Toast your spices. This is optional but amazing. If you have an extra minute, toast your pumpkin pie spice in a dry pan over medium heat for about 30 seconds until it smells fragrant. It deepens the flavor and makes the cups taste even more autumnal.
If you’re looking for another no-bake dessert that’s perfect for warmer months, try my easy no-bake peach icebox cake—it uses a similar technique but with fresh summer peaches.
Variations & Adaptations
One of the best things about these easy no-bake pumpkin cheesecake cups is how adaptable they are. Here are some variations I’ve tried and loved.
Gluten-Free Version: Swap the graham crackers for gluten-free graham crackers or use crushed gluten-free shortbread cookies. I’ve also used crushed gluten-free vanilla wafers with great results.
Dairy-Free Version: Use dairy-free cream cheese (I like the brand Violife for this) and replace the heavy cream with full-fat coconut cream. The coconut flavor is subtle and actually pairs nicely with the pumpkin and spices.
Extra Spicy Pumpkin: If you love warm fall spices, add an extra ¼ teaspoon of cinnamon and a pinch of cloves to the filling. You can also add a tiny pinch of black pepper—it sounds weird but it really brings out the pumpkin flavor.
Chocolate Pumpkin: Add 1 tablespoon of melted dark chocolate to the filling before mixing. The chocolate and pumpkin combo is surprisingly delicious and feels extra decadent.
Individual Serving Alternative: Instead of cups, you can make this in a small loaf pan (like a 3×5 inch) and slice it into bars. Just double the crust and filling amounts and press everything into the pan. Chill for at least 6 hours before slicing.
Pumpkin Spice Latte Version: Add 1 teaspoon of instant espresso powder dissolved in 1 teaspoon of hot water to the filling. It gives the cups a coffee-shop vibe that’s perfect for fall mornings.
Serving & Storage Suggestions
These easy no-bake pumpkin cheesecake cups are best served cold, straight from the fridge. The texture is at its peak when they’ve had at least 4 hours to set, but overnight is ideal.
For presentation, I like to serve them in clear glass cups or small mason jars so you can see the beautiful layers. Top with a generous swirl of whipped cream, a dusting of cinnamon, and maybe a few toasted pecans or a drizzle of caramel sauce if you’re feeling fancy.
These cups pair beautifully with a hot cup of coffee or a chai latte. They also work great as part of a fall dessert spread alongside something savory like fresh cowboy caviar with smoky grilled corn for a sweet-and-savory contrast.
Storage: Cover the cups tightly with plastic wrap or a lid and store them in the refrigerator for up to 5 days. The crust will soften slightly over time, but the flavor actually improves as the spices meld with the cream cheese.
Freezing: You can freeze these cups for up to 2 months. Wrap each cup individually in plastic wrap and then foil. Thaw in the refrigerator overnight before serving. The texture will be slightly different (a bit more dense) but still delicious.
Reheating: Don’t. These are meant to be served cold. If you want a warm pumpkin dessert, try my perfect sourdough discard pumpkin muffins instead.
Nutritional Information & Benefits
While these easy no-bake pumpkin cheesecake cups are definitely a treat, they do have some redeeming qualities. Here’s a rough estimate of the nutritional information per serving (based on two servings):
- Calories: Approximately 350-400 per cup
- Fat: 28g (mostly from cream cheese and butter)
- Carbohydrates: 28g
- Protein: 6g
- Sugar: 18g
- Fiber: 2g
Pumpkin is actually a nutritional powerhouse. It’s packed with vitamin A (great for eye health), fiber (good for digestion), and antioxidants. The cream cheese provides calcium and protein, though it’s also high in saturated fat, so moderation is key.
If you’re watching your sugar intake, you can reduce the powdered sugar to 2 tablespoons. The filling won’t be as sweet, but the pumpkin and spices still provide plenty of flavor. You can also use a sugar substitute like monk fruit sweetener, though I haven’t tested that personally.
These cups are vegetarian and can be made gluten-free and dairy-free with the substitutions mentioned above. They’re not suitable for vegans unless you use dairy-free alternatives throughout.
Conclusion
These easy no-bake pumpkin cheesecake cups have become my go-to fall dessert for good reason. They’re simple enough to make on a weekday evening but impressive enough to serve to guests. The creamy pumpkin filling, buttery graham cracker crust, and warm spices come together in a way that feels both nostalgic and fresh.
What I love most about this recipe is how forgiving it is. You don’t need to be a pastry chef to nail it. You don’t need special equipment. You just need a little patience while it chills and a willingness to enjoy something you made with your own hands. And honestly? That’s the best kind of dessert.
I’d love to hear how these turn out for you. Did you add any fun toppings? Try a variation? Leave a comment below and let me know—I read every single one and I’m always looking for new ideas to try. And if you share a photo on Pinterest, tag me so I can see your beautiful creations!
Until next time, happy fall baking (or rather, no-baking)!
Frequently Asked Questions
Can I use pumpkin pie filling instead of pumpkin puree?
I wouldn’t recommend it. Pumpkin pie filling already has sugar and spices added, which will throw off the balance of this recipe. Stick with 100% pumpkin puree for the best results. If you only have pumpkin pie filling, reduce the sugar and spices in the recipe, but honestly, it’s easier to just buy the right thing.
How long do these need to chill?
At least 4 hours, but overnight is ideal. The filling needs time to firm up and develop that creamy cheesecake texture. If you try to rush it, you’ll end up with a loose, pudding-like consistency. Trust me, I’ve made that mistake.
Can I make these in a different size container?
Absolutely. You can use small bowls, teacups, or even a small loaf pan. Just adjust the chilling time if you’re using a larger container—it may need an extra hour or two to set properly. The key is having a container that shows off the beautiful layers.
Can I add a different crust?
Definitely. Crushed vanilla wafers, shortbread cookies, or even ginger snaps would work beautifully. Ginger snaps would add an extra layer of fall flavor that pairs perfectly with the pumpkin. Just adjust the butter amount slightly if needed—denser cookies might need a little more butter to bind.
What if my filling is too runny?
This usually happens if the cream cheese wasn’t fully softened or if you overmixed the filling. To fix it, you can add an extra tablespoon of powdered sugar and beat briefly. If it’s still too loose, chill the filling in the fridge for 30 minutes before assembling the cups. For next time, make sure your cream cheese is truly at room temperature and stop mixing once everything is combined.
Pin This Recipe!
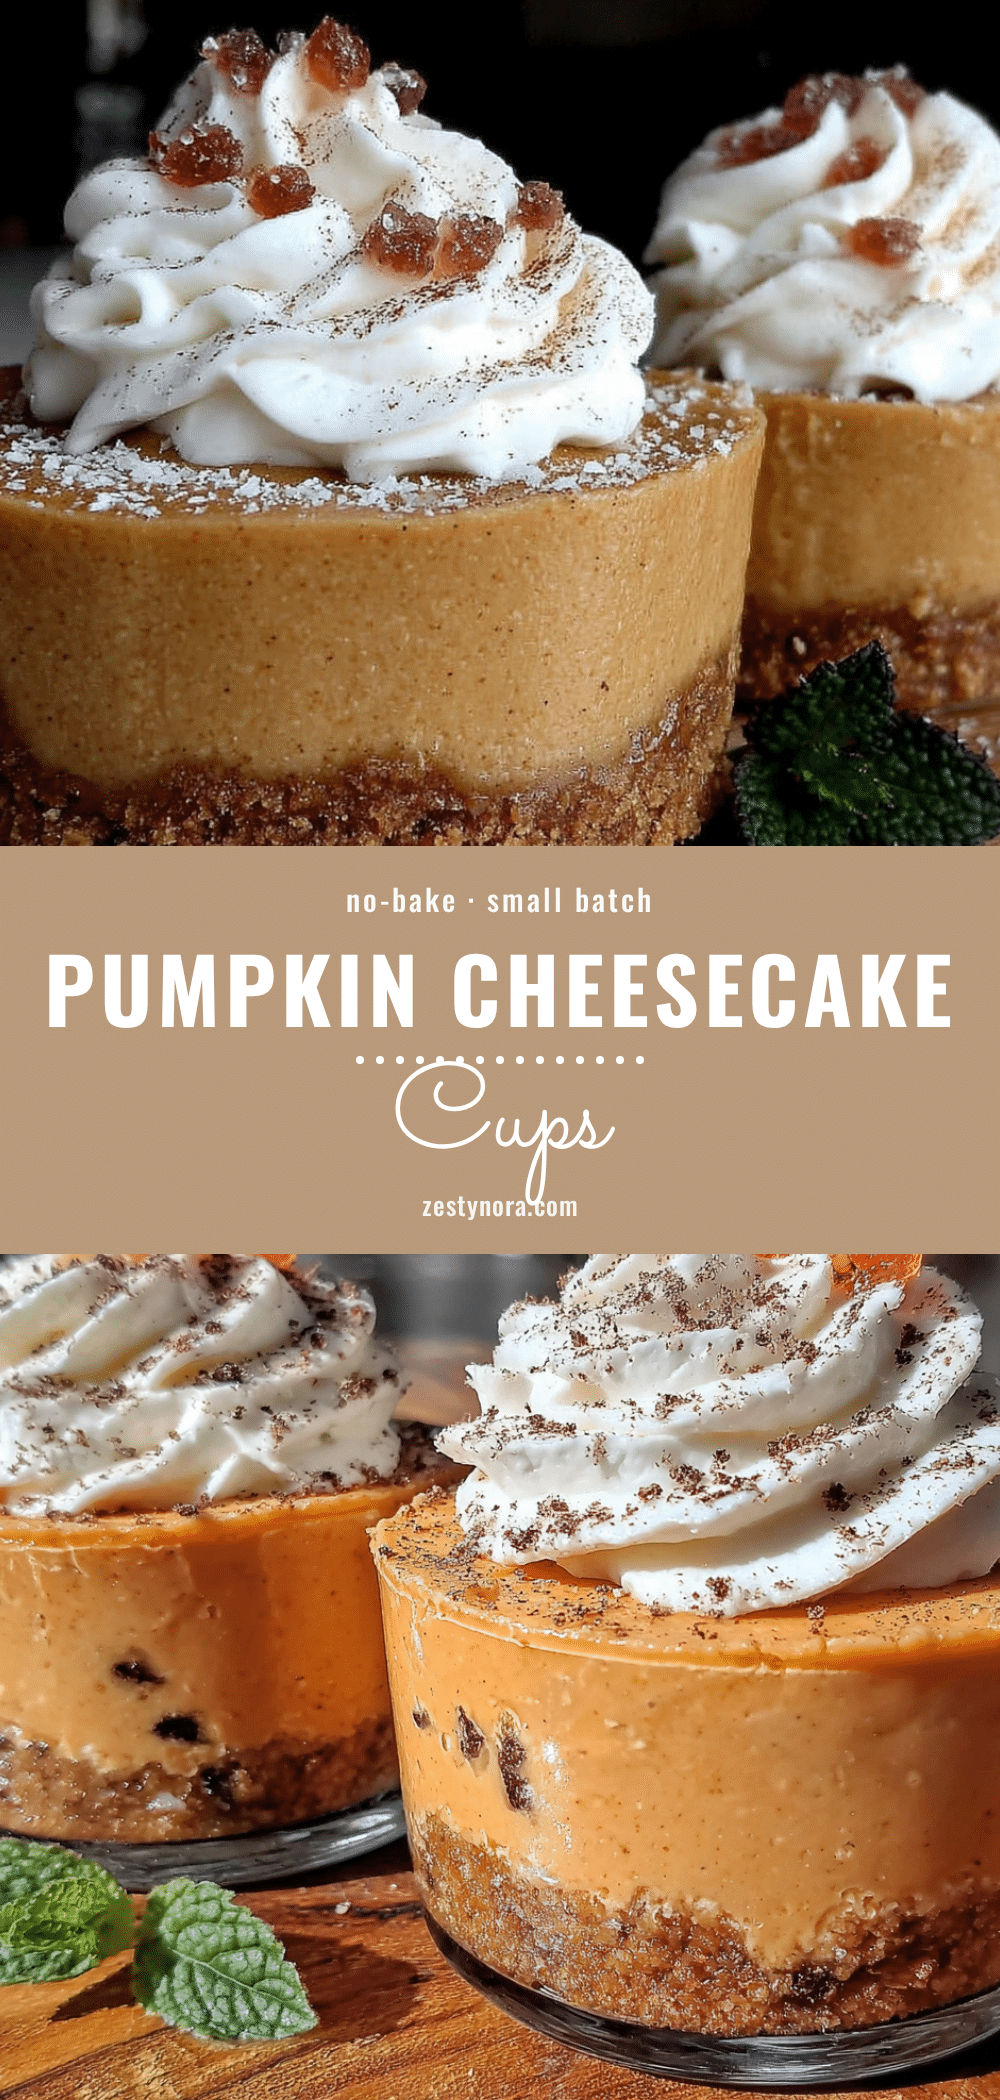
Easy No-Bake Pumpkin Cheesecake Cups (Best Small Batch Recipe)
These easy no-bake pumpkin cheesecake cups are a small batch fall dessert that requires no oven. Creamy pumpkin filling, buttery graham cracker crust, and warm spices come together in a simple, make-ahead treat perfect for two.
- Prep Time: 15 minutes
- Cook Time: 0 minutes
- Total Time: 4 hours 15 minutes (includes chilling)
- Yield: 2 servings 1x
- Category: Dessert
- Cuisine: American
Ingredients
- 4 full sheets graham crackers, crushed
- 2 tablespoons unsalted butter, melted
- 1 tablespoon granulated sugar
- Pinch of salt
- 4 ounces full-fat cream cheese, softened to room temperature
- 1/4 cup pumpkin puree (100% pure, not pie filling)
- 3 tablespoons powdered sugar
- 2 tablespoons heavy cream
- 1/2 teaspoon pumpkin pie spice
- 1/2 teaspoon vanilla extract
- Whipped cream (for topping, optional)
- Ground cinnamon (for dusting, optional)
- Graham cracker crumbs (for topping, optional)
Instructions
- Crush graham crackers into fine crumbs (using a food processor or a zip-top bag and rolling pin). Transfer to a small bowl.
- Add melted butter, granulated sugar, and a pinch of salt to the crumbs. Stir with a fork until mixture resembles wet sand and clumps when pressed.
- Divide crust mixture evenly between two 6-8 ounce cups or ramekins. Press firmly with the back of a spoon or bottom of a small glass. Place cups in the fridge while making the filling.
- In a medium bowl, beat softened cream cheese with a hand mixer on medium speed until smooth and fluffy, about 1-2 minutes. Scrape down sides.
- Add pumpkin puree, powdered sugar, heavy cream, pumpkin pie spice, and vanilla extract. Beat on low speed to combine, then increase to medium and beat for 2-3 minutes until smooth and creamy. Do not overmix.
- Remove crust-lined cups from fridge. Divide filling evenly between the two cups, smoothing the tops with a spatula. Tap cups gently on counter to release air bubbles.
- Cover cups with plastic wrap or lids and refrigerate for at least 4 hours, preferably overnight, until set.
- Before serving, top with whipped cream, a dusting of cinnamon, and extra graham cracker crumbs if desired.
Notes
Room temperature cream cheese is essential for a smooth filling. Do not overmix the filling once combined. Chill for at least 4 hours, but overnight is best for texture. For a dairy-free version, use dairy-free cream cheese and full-fat coconut cream. For a gluten-free version, use gluten-free graham crackers.
Nutrition
- Serving Size: 1 cup
- Calories: 375
- Sugar: 18
- Sodium: 280
- Fat: 28
- Saturated Fat: 16
- Carbohydrates: 28
- Fiber: 2
- Protein: 6
Keywords: no-bake pumpkin cheesecake cups, small batch pumpkin dessert, easy fall dessert, no-bake cheesecake, pumpkin cheesecake cups


