My neighbor Sarah wasn’t trying to impress anyone. I’d stopped by to borrow a ladder on a random Tuesday afternoon in October, and the smell hit me before I even knocked on the screen door. It was buttery, warm, and oddly comforting — like the inside of a state fair funnel cake stand mixed with the coziest diner on earth. She opened the door holding a baking sheet, completely nonchalant, wearing sweatpants and a flour-dusted t-shirt. “Oh, those? Just something stupid for the kids’ Halloween party tomorrow,” she said, shrugging like she’d made a bowl of cereal.
I stared at the tray. Little mummy-shaped hot dogs wrapped in golden, flaky dough, with tiny dots of mustard for eyes staring back at me. Honestly, I was speechless. She had two kids under five, a barking dog, and a sink full of dishes — and she’d whipped up the most adorable thing I’d ever seen in about fifteen minutes. “Can I have one?” I asked, already reaching. She laughed and handed me the whole tray. “Take them. I’ll make more.”
That first bite was ridiculous. The crescent dough was perfectly crisp on the outside, soft and pillowy inside, wrapped around a juicy hot dog that tasted like childhood. I stood in her messy kitchen, eating three of them, while she told me how her mom used to make these for every Halloween sleepover. She didn’t think it was anything special. But I knew right then I’d be making these for the rest of my life. And honestly? You will too.
Why You’ll Love This Recipe
Let’s be real for a second. Weeknights in October are chaotic. You’ve got costumes to figure out, pumpkins to carve, and kids bouncing off the walls from too much candy anticipation. The last thing you need is a complicated recipe that takes an hour and leaves your kitchen looking like a flour bomb went off. These mummy hot dogs solve all of that.
- Ready in 20 Minutes Flat: From fridge to table in under half an hour. That’s faster than ordering pizza, and way cuter.
- Just 3 Ingredients: Hot dogs, crescent dough, and mustard. That’s it. No fancy grocery run required — you probably have everything right now.
- Perfect for Halloween Weeknights: Whether it’s a school party, a family movie night, or just Tuesday, these make any evening feel festive without the stress.
- Kid-Approved (and Adult-Approved Too): I’ve watched grown adults eat six of these in one sitting. They’re that good. The flaky dough, the salty hot dog, the tiny mustard eyes — it’s impossible to eat just one.
- Zero Fuss, Maximum Cuteness: You don’t need special cookie cutters or decorating skills. If you can wrap a strip of dough around a hot dog, you can make these. I promise.
What makes these different from every other Halloween snack out there? They actually taste amazing. Some holiday recipes are all looks and no flavor — dry, bland, disappointing. These are buttery, flaky, salty, and satisfying. The crescent dough gets perfectly golden in the oven, and the hot dog stays juicy inside. It’s comfort food disguised as a craft project, and that’s the best kind of recipe.
I’ve made these for three Halloweens in a row now, and every single time, someone asks for the recipe. The first time I made them for my own family, my husband literally said, “Why have we never made these before?” Now they’re a non-negotiable October tradition. You’ll see why after one bite.
What Ingredients You Will Need
This recipe uses the simplest ingredients to deliver maximum flavor and cuteness without any fuss. Everything is probably already in your kitchen, which is the whole point. Here’s what you need and why each ingredient matters.
- Hot dogs (8 standard-sized): Go with your favorite brand. I personally use beef hot dogs for richer flavor, but turkey or chicken work great too. Avoid jumbo or thick hot dogs — they’re too big for the dough to wrap properly. Standard size is perfect. If you want to get fancy, look for uncured or all-beef options with no artificial nitrates. (I like Hebrew National or Applegate Farms for the best texture.)
- Crescent roll dough (1 can, 8-count): This is the magic ingredient. Pillsbury is the classic choice and works perfectly every time. The dough is pre-scored into triangles, which you’ll cut into thin strips for wrapping. Make sure it’s thoroughly chilled — cold dough is much easier to work with and won’t get sticky. If you’re dairy-free, check the label; some brands use butter, others use palm oil.
- Yellow mustard (for eyes): This is for the mummy faces, so you want a squeeze bottle for precision. Yellow mustard gives the best color contrast against the golden dough. You can also use Dijon, honey mustard, or even ketchup if mustard isn’t your thing. Just make sure it’s in a squeeze bottle with a thin tip, or use a toothpick to dot it on.
- Cooking spray or parchment paper (optional but helpful): The crescent dough has enough butter to prevent major sticking, but a light spray on your baking sheet never hurts. Parchment paper makes cleanup even easier — and trust me, you’ll appreciate that on a busy weeknight.
That’s it. Three ingredients (plus a spray if you want). No eggs for washing, no cheese for melting, no fancy seasonings. The beauty of this recipe is its simplicity. The crescent dough bakes up golden and flaky all on its own, and the hot dog provides all the savory flavor you need. If you want to get creative, you can add a sprinkle of everything bagel seasoning or poppy seeds before baking, but honestly? They’re perfect as is.
One quick tip from experience: don’t use refrigerated pizza dough or biscuit dough instead of crescent rolls. They’re not the same texture and won’t get that signature flaky, buttery layer. Crescent dough is specifically designed to puff up and separate into those beautiful golden layers, which is exactly what makes these mummies look so good. Stick with the real deal.
Equipment Needed
The equipment list for this recipe is short, which is exactly what you want on a busy weeknight. Here’s what you’ll need and a few alternatives if you don’t have the exact tools.
- Baking sheet (standard half-sheet size, 13×18 inches): This fits all 8 mummy hot dogs comfortably without crowding. If you only have a smaller pan, use two or bake in batches. Crowding the pan traps steam and makes the dough soggy instead of crispy.
- Parchment paper or silicone baking mat: Highly recommended for easy cleanup. The crescent dough can leave a buttery residue on bare pans, and scrubbing that off after dinner is nobody’s idea of fun. Parchment paper is cheap and makes cleanup take 10 seconds.
- Sharp knife or pizza cutter: You’ll be cutting the crescent dough triangles into thin strips. A pizza cutter works beautifully for this — it glides through the dough without pulling or tearing it. A sharp chef’s knife works too. Avoid using a dull knife or scissors; they’ll squish the dough and make uneven strips.
- Small bowl (optional): If you’re using mustard from a jar instead of a squeeze bottle, put a small amount in a bowl and use a toothpick to dot the eyes. It’s mess-free and gives you more control.
- Cooling rack (optional): If you want the bottoms to stay crispy, transfer the baked mummies to a cooling rack after a minute or two on the pan. This prevents steam from softening the dough underneath. Not essential, but nice if you have one.
I’ve made these in a tiny apartment kitchen with a warped baking sheet and a butter knife, and they still turned out great. Don’t overthink the equipment. If you have a pan and a knife, you’re good to go.
Preparation Method
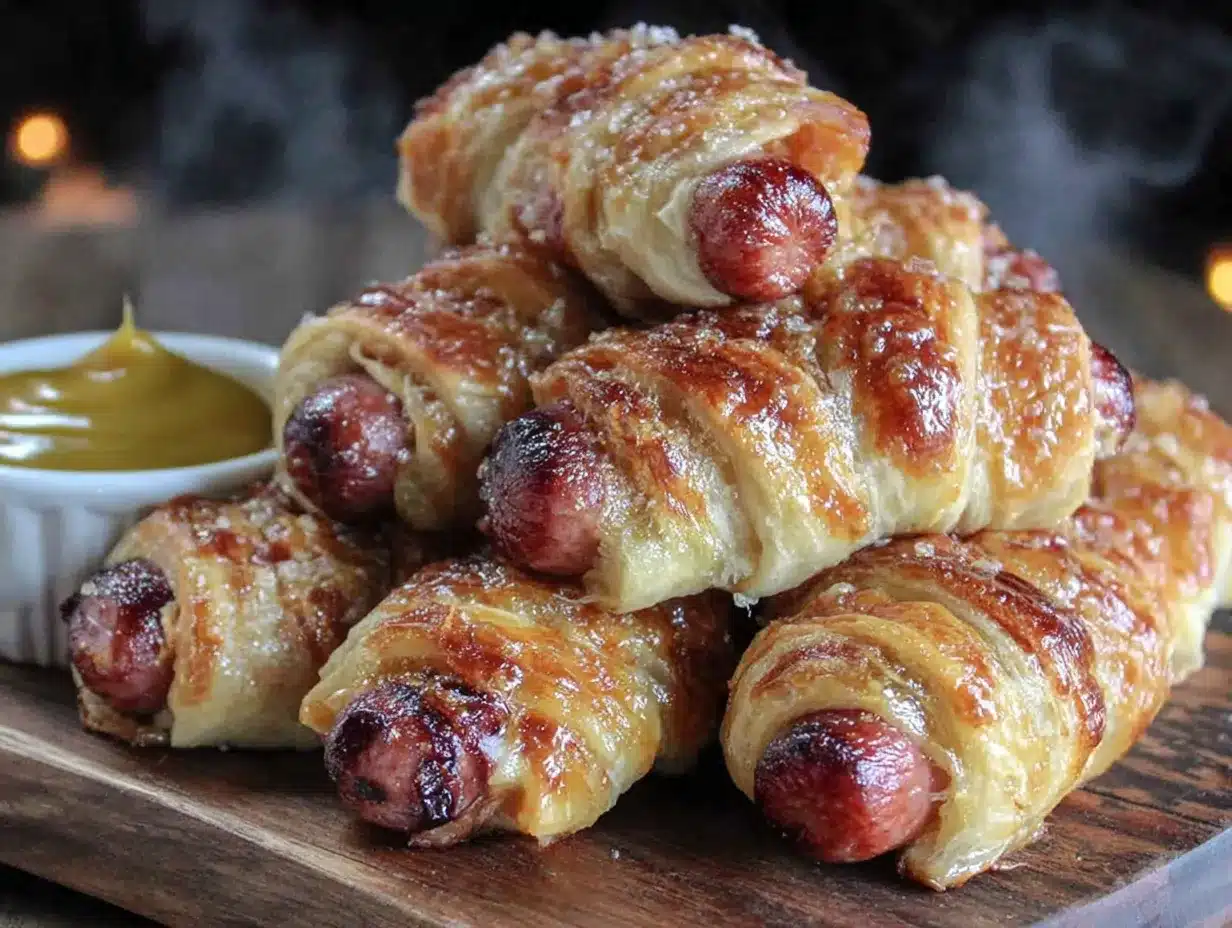
Alright, let’s make these little guys. The whole process takes about 20 minutes start to finish, and most of that is baking time. Here’s exactly how to do it.
- Preheat your oven to 375°F (190°C). Line a baking sheet with parchment paper or lightly spray it with cooking spray. Getting the oven hot before you start wrapping ensures even baking and golden results.
- Unroll the crescent dough and separate it along the perforated lines into 8 triangles. Lay them flat on a cutting board or clean counter. You’ll see the dough is pre-cut into triangles — perfect for what we’re doing.
- Cut each triangle into thin strips. Using a pizza cutter or sharp knife, slice each triangle lengthwise into 4-5 thin strips, about ¼ to ½ inch wide. Don’t stress about perfection — some strips will be thicker than others, and that’s fine. The unevenness actually makes the mummies look more authentic, like real gauze wrapping.
- Wrap each hot dog. Take one hot dog and start wrapping the dough strips around it, slightly overlapping each strip as you go. Leave a small gap at the top (about ½ inch) for the mummy’s face. Don’t wrap too tightly — the dough needs room to expand as it bakes. Think of it like loosely bandaging a wound, not shrink-wrapping a package.
- Place the wrapped hot dogs on the prepared baking sheet with the seam side down. This keeps the dough from unraveling during baking. Space them about 2 inches apart so they have room to puff up and brown evenly.
- Bake for 12-15 minutes, or until the crescent dough is golden brown and cooked through. The exact time depends on your oven and how thick your strips are. Start checking at 12 minutes — you’re looking for a deep golden color, not pale or doughy. The kitchen will smell incredible at this point.
- Let them cool for 2 minutes on the baking sheet. This is important — the dough is super hot and fragile right out of the oven. Moving them too soon can cause the strips to tear or separate. Two minutes is all you need.
- Add the mustard eyes. Using a squeeze bottle or a toothpick dipped in mustard, dot two small eyes on the exposed part of each hot dog. Don’t make them too big — tiny dots look more like cute mummy eyes and less like mustard blobs. If you want to get creative, you can add a tiny smile or make some with one eye closed.
- Serve immediately. These are best warm, when the dough is still flaky and the hot dog is juicy. They’ll still be good at room temperature for a while, but that first warm bite is something special.
A few things I’ve learned the hard way: Don’t overwork the dough. If your hands are warm, the dough gets sticky and hard to manage. If that happens, pop the strips in the fridge for 5 minutes to firm up. Also, if you’re making these with kids (which you absolutely should), expect some mangled-looking mummies. That’s part of the fun. My nephew made one that looked like a hot dog that got into a fight with a roll of toilet paper, and it was everyone’s favorite.
Cooking Tips & Techniques
After making these mummy hot dogs more times than I can count, I’ve picked up a few tricks that make the process smoother and the results better. Here’s what I wish someone had told me the first time.
Keep the dough cold. Crescent dough is much easier to handle when it’s straight from the fridge. If your kitchen is warm or your hands run hot, the dough can get sticky and stretchy, making it hard to cut clean strips. If that happens, pop the cut strips on a plate and refrigerate them for 5-10 minutes before wrapping. It makes a huge difference.
Don’t wrap too tight. I made this mistake my first time. I wrapped the strips snugly around the hot dogs, thinking it would look neater. Instead, the dough tore as it expanded in the oven, and I ended up with naked hot dogs peeking through gaps. Leave a little breathing room — the dough needs space to puff up and create those beautiful flaky layers.
Use the right hot dog size. Standard-sized hot dogs are perfect. Jumbo hot dogs are too thick and take longer to heat through, which can lead to over-browned dough. Mini hot dogs or cocktail sausages work great if you want bite-sized mummies for a party — just reduce the baking time by a few minutes.
Watch the oven like a hawk at the end. Crescent dough goes from golden to burnt surprisingly fast, especially if your oven runs hot. Start checking at 10 minutes, and rotate the pan halfway through if your oven has hot spots. You’re looking for an even, deep golden brown — not pale patches or dark edges.
Make the eyes after baking, not before. I tried adding mustard dots before baking once, thinking it would save time. The mustard darkened and spread into weird blobs in the oven. The mummies looked like they had jaundice. Always add the eyes after baking for clean, cute results.
Double the batch. Seriously. These disappear faster than you’d expect. I’ve never had leftovers, even when I thought I made plenty. If you’re serving a crowd, plan on 3-4 per person for a snack, or 2 per person if you’re serving them with a meal.
Variations & Adaptations
One of the best things about this recipe is how easy it is to customize. Here are some variations I’ve tried and loved, plus a few ideas for different dietary needs.
Cheesy Mummy Hot Dogs: Before wrapping the hot dogs, cut a thin slit lengthwise down the center and stuff it with a strip of cheddar or mozzarella cheese. Wrap and bake as directed. The cheese melts into the hot dog and creates a gooey, amazing center. Just be careful — the cheese gets volcano-hot, so let them cool a minute longer before serving.
Spicy Mummy Dogs: Use spicy jalapeño or chipotle hot dogs, or brush the dough strips with a little hot sauce before wrapping. You can also add a sprinkle of red pepper flakes or cayenne to the dough for extra heat. My husband loves these, and they’re great for adults who want a little kick.
Vegetarian Version: Swap the hot dogs for plant-based sausages or veggie dogs. Most brands work well, though some are softer than beef hot dogs, so wrap them gently. I like Field Roast or Beyond Meat sausages for the best texture and flavor. The rest of the recipe stays exactly the same.
Pizza Mummies: Brush the dough strips with a little pizza sauce before wrapping (go light — too much will make the dough soggy). After baking, sprinkle with a pinch of dried oregano and serve with warm marinara for dipping. These taste like pizza rolls in mummy form, and they’re incredible.
Breakfast Mummies: Use breakfast sausage links instead of hot dogs and serve them with maple syrup for dipping. The sweet and salty combo is surprisingly amazing. These are perfect for Halloween morning before school or a fun weekend brunch.
I’ve tried all of these variations at various Halloween parties and family gatherings, and every single one was a hit. The cheesy version is probably my favorite, but the spicy ones win for game day snacking. Don’t be afraid to experiment — the basic method is so simple that you can really run with it.
Serving & Storage Suggestions
These mummy hot dogs are best served warm, right after the mustard eyes go on. The contrast between the hot, flaky dough and the cool mustard is part of the magic. But they’re flexible enough to work for different serving situations.
For a Halloween party: Arrange them on a platter with a small bowl of ketchup, mustard, or ranch dressing for dipping. You can also add some “scary” sides like pretzel sticks (bones), orange bell pepper strips, or a bowl of popcorn. The visual effect is adorable, and kids will grab them by the handful.
For a weeknight dinner: Serve 3-4 mummy hot dogs per person alongside a simple salad, some carrot sticks, or a cup of tomato soup. It’s not a fancy meal, but it’s fun, fast, and filling — exactly what you need on a busy October evening.
For school lunches: Let them cool completely, then pack them in a lunchbox with some fruit and a treat. They’re still tasty at room temperature, and the mummy face will make your kid the coolest one at the lunch table. Just don’t be surprised if they come home asking for more.
Storage: Leftover mummy hot dogs (if you somehow have any) can be stored in an airtight container in the refrigerator for up to 3 days. The dough will soften over time, but they’re still good. To reheat, pop them in a 350°F oven for 5-7 minutes, or in an air fryer at 350°F for 3-4 minutes. The microwave works in a pinch, but the dough will be soft instead of crispy.
Freezing: You can freeze these before or after baking. To freeze unbaked, wrap the hot dogs and place them on a parchment-lined baking sheet in the freezer until solid (about 1 hour). Transfer to a freezer bag and store for up to 2 months. Bake from frozen, adding 3-5 minutes to the baking time. To freeze baked mummies, let them cool completely, then freeze in a single layer on a baking sheet before transferring to a freezer bag. Reheat directly from frozen in a 350°F oven for 8-10 minutes.
One thing I’ve noticed: the mustard eyes can bleed a little into the dough after storage, so if you’re making these ahead for a party, it’s best to add the eyes right before serving. The mummies themselves can be baked a day in advance and reheated — just save the mustard for the last minute.
Nutritional Information & Benefits
Let’s be honest — these are a treat, not a health food. But they’re made with real ingredients, and there are a few ways to make them work within your family’s dietary needs.
Estimated nutritional values per serving (2 mummy hot dogs):
- Calories: 320-380 (depends on hot dog brand)
- Protein: 12-15g
- Fat: 22-26g
- Carbohydrates: 22-26g
- Fiber: 0-1g
- Sugar: 4-6g
- Sodium: 800-1000mg
Health highlights: Hot dogs provide protein and iron, and crescent dough offers carbohydrates for quick energy. If you use uncured or nitrate-free hot dogs, you reduce processed additives. For a slightly lighter option, use turkey or chicken hot dogs and reduced-fat crescent dough (though the texture won’t be quite as flaky).
Dietary considerations: This recipe is not gluten-free (crescent dough contains wheat flour) unless you use a specialty gluten-free crescent dough. It contains dairy (butter in the crescent dough) and soy (often in hot dogs and dough). For a dairy-free version, check crescent dough labels — some brands use palm oil instead of butter. For a lower-sodium option, use low-sodium hot dogs and skip any extra salt.
Allergen note: Crescent dough typically contains wheat, milk, and soy. Hot dogs often contain soy and may contain other allergens. Always check labels if you’re cooking for someone with food allergies.
Look, I’m not going to pretend these are a superfood. But they’re a fun, occasional treat that brings people together, and there’s real value in that. On a busy weeknight when you need dinner on the table fast and you want to put a smile on everyone’s face? These are exactly the right call.
Conclusion
These mummy hot dogs are the kind of recipe that becomes a tradition without you even planning it. They’re quick enough for a Tuesday night, cute enough for a Halloween party, and delicious enough that everyone — kids, adults, picky eaters, food snobs — will reach for seconds. I’ve made them for three Octobers in a row now, and every time, someone asks for the recipe. Every single time.
What I love most about them is how little they ask of you. Three ingredients. Twenty minutes. No fancy skills or special tools. You don’t have to be a crafty parent or a Pinterest-perfect host to pull these off. You just need a can of dough, some hot dogs, and a little mustard. That’s it. And somehow, from that bare minimum, you get something that feels special.
So go ahead and make these for your family this week. Let the kids help wrap the dough (it’ll be messy and wonderful). Serve them with ketchup and a side of laughter. Take a picture before they disappear. And when someone asks where you got the recipe, tell them your neighbor made them on a random Tuesday in sweatpants, and they were the best thing you ate all year.
I’d love to hear how yours turn out! Drop a comment below with your favorite variation, or tag me in your mummy hot dog photos. Happy Halloween, and happy cooking!
Frequently Asked Questions
Can I make these ahead of time for a party?
Absolutely! You can assemble the mummy hot dogs up to 24 hours in advance and keep them covered in the refrigerator. Bake them just before serving for the best texture. If you need to bake them ahead, reheat in a 350°F oven for 5-7 minutes and add the mustard eyes right before serving.
What if I don’t have crescent dough?
You can use puff pastry sheets cut into thin strips instead. The texture will be different — puff pastry is flakier and more buttery — but it works great. Just cut the pastry into strips and wrap the same way. Bake at 400°F for 12-15 minutes instead of 375°F.
Can I use a different type of mustard for the eyes?
Yes! Yellow mustard gives the best color contrast, but Dijon, honey mustard, or even ketchup work fine. Just make sure whatever you use is in a squeeze bottle with a thin tip, or use a toothpick to dot it on. Avoid whole-grain mustard — the seeds make the eyes look weird.
My dough strips keep tearing. What am I doing wrong?
This usually happens when the dough is too warm or you’re pulling it too tight. Try refrigerating the cut strips for 5-10 minutes before wrapping. Also, make sure you’re using a sharp knife or pizza cutter — dull tools squish and tear the dough. And remember, wrap loosely! Tight wrapping causes the dough to tear as it expands in the oven.
How do I keep the mummy eyes from smudging?
Let the baked mummies cool for 2-3 minutes before adding the eyes. If the surface is too hot, the mustard will melt and spread. Also, use a light hand — tiny dots are less likely to smudge than big blobs. If you’re transporting them, add the eyes at your destination rather than at home.
Pin This Recipe!
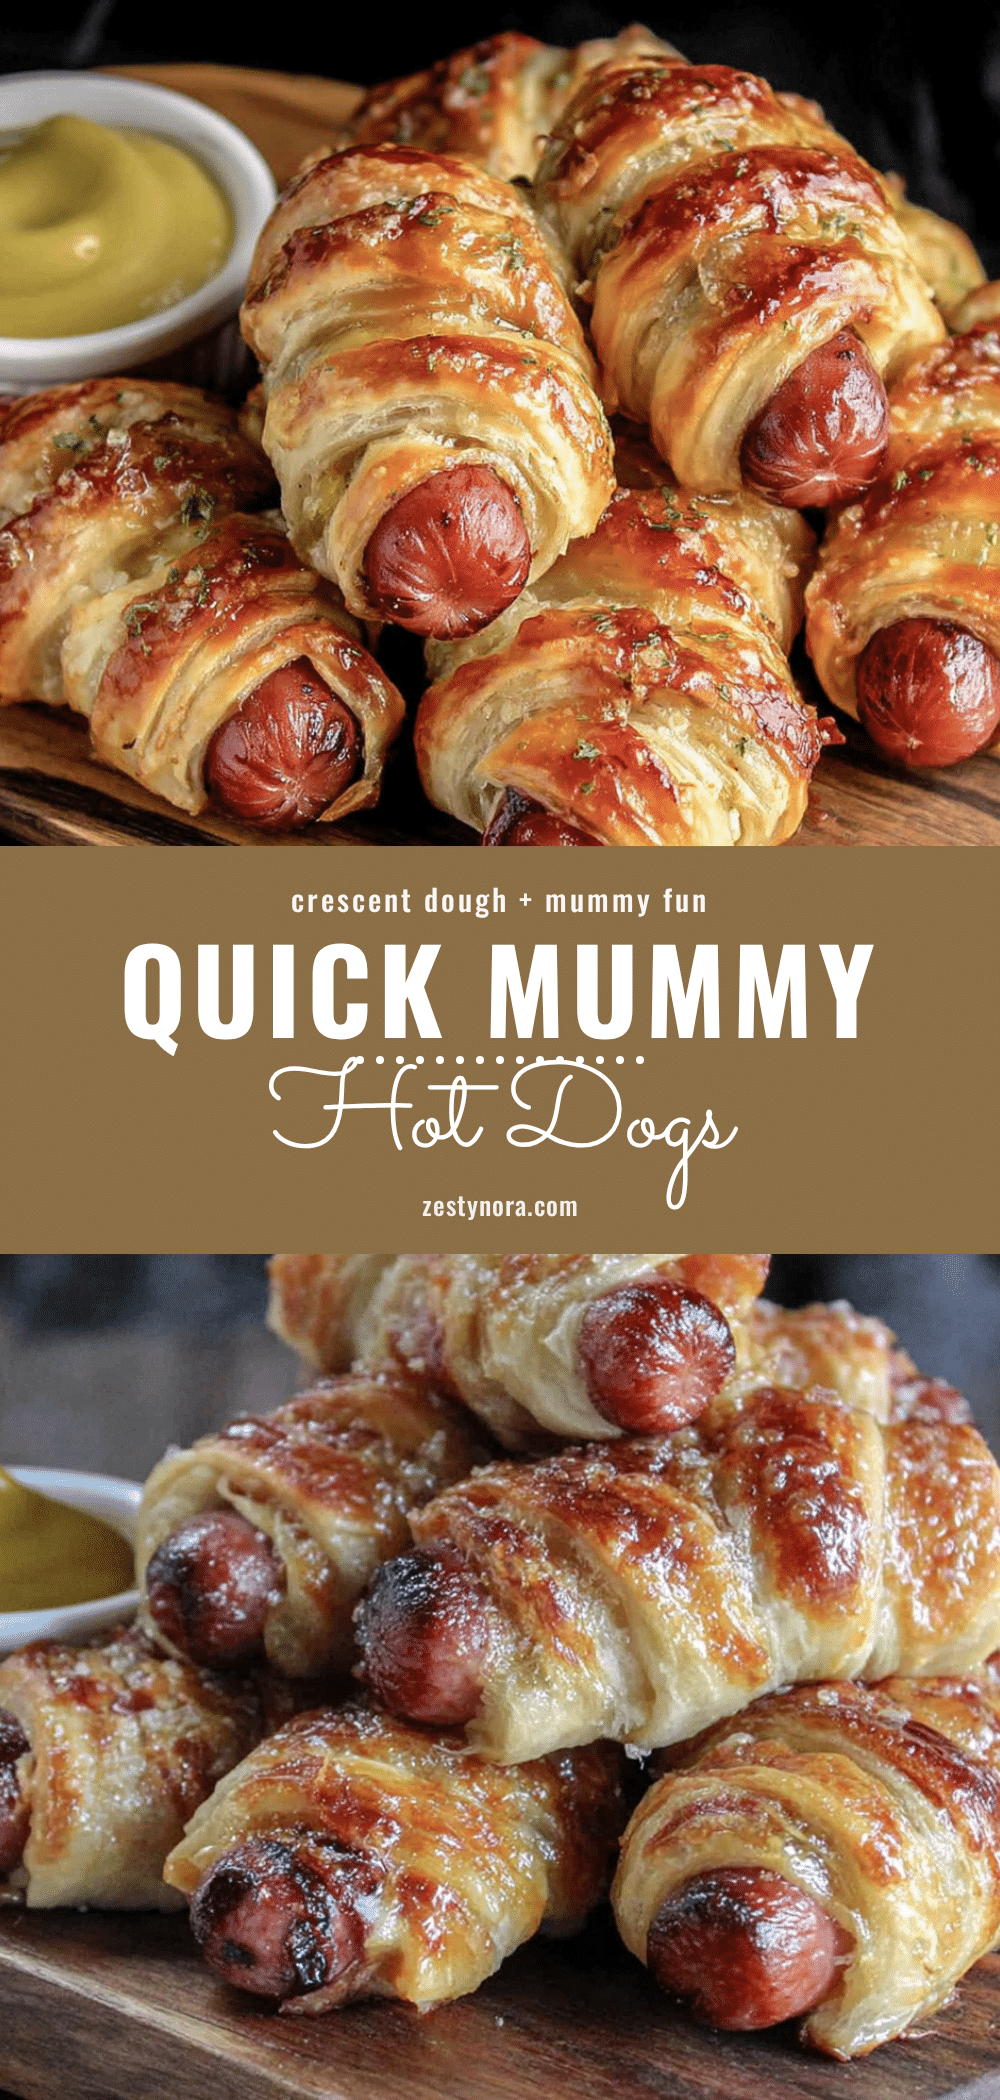
Easy Mummy Hot Dogs with Crescent Dough

These adorable mummy hot dogs are wrapped in flaky crescent dough and baked until golden. Ready in just 20 minutes with only 3 ingredients, they’re the perfect Halloween weeknight dinner or party snack that kids and adults love.
- Prep Time: 10 minutes
- Cook Time: 15 minutes
- Total Time: 25 minutes
- Yield: 8 servings 1x
- Category: Appetizer
- Cuisine: American
Ingredients
- 8 standard-sized hot dogs
- 1 can (8-count) crescent roll dough
- Yellow mustard (for eyes)
- Cooking spray or parchment paper (optional)
Instructions
- Preheat your oven to 375°F (190°C). Line a baking sheet with parchment paper or lightly spray it with cooking spray.
- Unroll the crescent dough and separate it along the perforated lines into 8 triangles. Lay them flat on a cutting board or clean counter.
- Cut each triangle into thin strips. Using a pizza cutter or sharp knife, slice each triangle lengthwise into 4-5 thin strips, about ¼ to ½ inch wide.
- Wrap each hot dog. Take one hot dog and start wrapping the dough strips around it, slightly overlapping each strip as you go. Leave a small gap at the top (about ½ inch) for the mummy’s face. Don’t wrap too tightly.
- Place the wrapped hot dogs on the prepared baking sheet with the seam side down. Space them about 2 inches apart.
- Bake for 12-15 minutes, or until the crescent dough is golden brown and cooked through.
- Let them cool for 2 minutes on the baking sheet.
- Add the mustard eyes. Using a squeeze bottle or a toothpick dipped in mustard, dot two small eyes on the exposed part of each hot dog.
- Serve immediately.
Notes
Keep the dough cold for easier handling. Don’t wrap too tight or the dough may tear. Add mustard eyes after baking to prevent spreading. Double the batch for a crowd.
Nutrition
- Serving Size: 2 mummy hot dogs
- Calories: 350
- Sugar: 5
- Sodium: 900
- Fat: 24
- Saturated Fat: 8
- Carbohydrates: 24
- Protein: 13
Keywords: mummy hot dogs, Halloween appetizer, crescent dough hot dogs, easy Halloween recipe, kid-friendly Halloween snack