My neighbor, a retired special effects artist named Leo, watched me struggling to untangle a string of Halloween lights last October. He didn’t say anything at first. Then he walked over, took the tangled mess from my hands, and said, “You know, the real magic isn’t the lights—it’s what you put in the bowl.” I had no idea what he meant until he showed up at my door the next afternoon with a grocery bag and a mischievous grin. That was the day I learned how to make a Kid-Friendly Witches Brew Green Punch with Dry Ice Effect that would change our Halloween parties forever.
Honestly, I was a little nervous about the dry ice part. I mean, you hear stories, right? But Leo walked me through it like a patient science teacher, and my kids stood on tiptoes at the kitchen counter, eyes wide as saucers. The punch itself is simple—just a few ingredients you probably already have—but the fog effect? That’s the showstopper. It turns a regular drink into something that looks like it bubbled up from a cauldron in a haunted swamp. Maybe you’ve been there, trying to find that one thing that makes a kids’ Halloween party feel special without breaking the bank or your sanity.
The first time I made this punch, I accidentally used lime sherbet that was too soft, and it turned the whole batch into a slushy mess. But you know what? The kids didn’t care. They thought the fog was magic, and honestly, they were right. This recipe stayed with me because it’s not just about the drink—it’s about the moment when everyone gathers around the bowl, waiting for the fog to roll over the edge. It’s simple, affordable, and absolutely unforgettable for the little ones.
Why You’ll Love This Recipe
This Kid-Friendly Witches Brew Green Punch with Dry Ice Effect has become my go-to for every Halloween gathering, and I’ve tested it enough times to know it works every single time. Here’s why you’ll fall in love with it too:
- Quick & Easy: This punch comes together in under 10 minutes, which is perfect when you’re juggling costumes, decorations, and a house full of excited kids.
- Simple Ingredients: No fancy grocery trips needed—you likely already have lemonade, lime sherbet, and lemon-lime soda in your kitchen or can grab them for a few dollars.
- Perfect for Halloween Parties: Whether it’s a classroom celebration, a neighborhood gathering, or a family movie night, this punch steals the show every time.
- Crowd-Pleaser: Both kids and adults go crazy for the fizzy, sweet flavor and the spooky fog effect. I’ve never had leftovers!
- Unbelievably Delicious: The combination of tart lemonade, creamy sherbet, and bubbly soda creates a flavor that’s refreshing and fun—like a carbonated limeade float.
What makes this recipe different from the rest is the dry ice technique. Most punch recipes just look green, but this one actually smokes and bubbles like a real witch’s brew. It’s not just another Halloween drink—it’s an experience. And let me tell you, watching my nephew’s face light up when the fog rolled over the bowl was worth every penny of the dry ice cost. This recipe isn’t just good—it’s the kind that makes you feel like a kitchen magician without any of the stress.
What Ingredients You Will Need
This recipe uses simple, affordable ingredients to create a punch that looks complicated but couldn’t be easier. Most of these are pantry staples or easy to find at any grocery store, especially around Halloween.
- 1 gallon (3.78 liters) lemonade (I prefer Minute Maid or Simply Lemonade for consistent flavor; avoid pulp-free versions for a smoother punch)
- 1 liter lemon-lime soda (Sprite or 7Up work best; the bubbles help create the fog effect)
- 1.5 quarts (1.42 liters) lime sherbet (Look for a bright green brand like Blue Bell or Breyers for the best color; you can also use lemon sherbet for a lighter shade)
- 2-3 pounds (0.9-1.4 kg) food-grade dry ice (Available at most grocery stores or ice companies; call ahead to check availability)
- Green food coloring (optional, for a more intense color; I use a few drops of neon green gel coloring)
- Plastic spiders or gummy worms (optional, for garnish and extra spookiness)
For the dry ice, I always recommend buying from a reputable source like a local grocery store or a specialty ice company. You want food-grade dry ice, not the stuff used for industrial purposes. It’s usually pretty cheap—around $1-2 per pound—and a little goes a long way. If you can’t find dry ice, you can still make the punch without the fog effect, but honestly, it’s worth the effort to track some down.
If you’re making this for a crowd, you can double the recipe easily. Just use a larger punch bowl or even a clean plastic cauldron from a party store. For a non-dairy version, swap the sherbet for a lime-flavored sorbet, though the texture will be a bit icier. And if you’re worried about the sugar content, use diet lemonade and sugar-free soda—the flavor will still be great, just a little less sweet.
Equipment Needed
You don’t need much fancy equipment for this recipe, which is part of its charm. Here’s what you’ll need:
- Large punch bowl (a plastic cauldron from a party store works perfectly and adds to the spooky vibe; I found mine for $8)
- Large spoon or ladle (for stirring and serving)
- Tongs or heavy-duty gloves (for handling dry ice—never touch it with bare hands)
- Small hammer or mallet (to break large dry ice blocks into smaller pieces; wrap the ice in a towel first)
- Measuring cups (for the lemonade and soda)
- Ice cream scoop (for the sherbet)
If you don’t have a punch bowl, a large glass bowl or even a clean plastic storage container will work. Just make sure it’s wide enough for the fog to spill over the edges. I’ve used a ceramic mixing bowl in a pinch, and it looked fine. For the dry ice, you can ask the store to break it into smaller chunks for you—most places are happy to help. And if you don’t have tongs, use a thick oven mitt or a folded kitchen towel to handle the dry ice safely.
Preparation Method
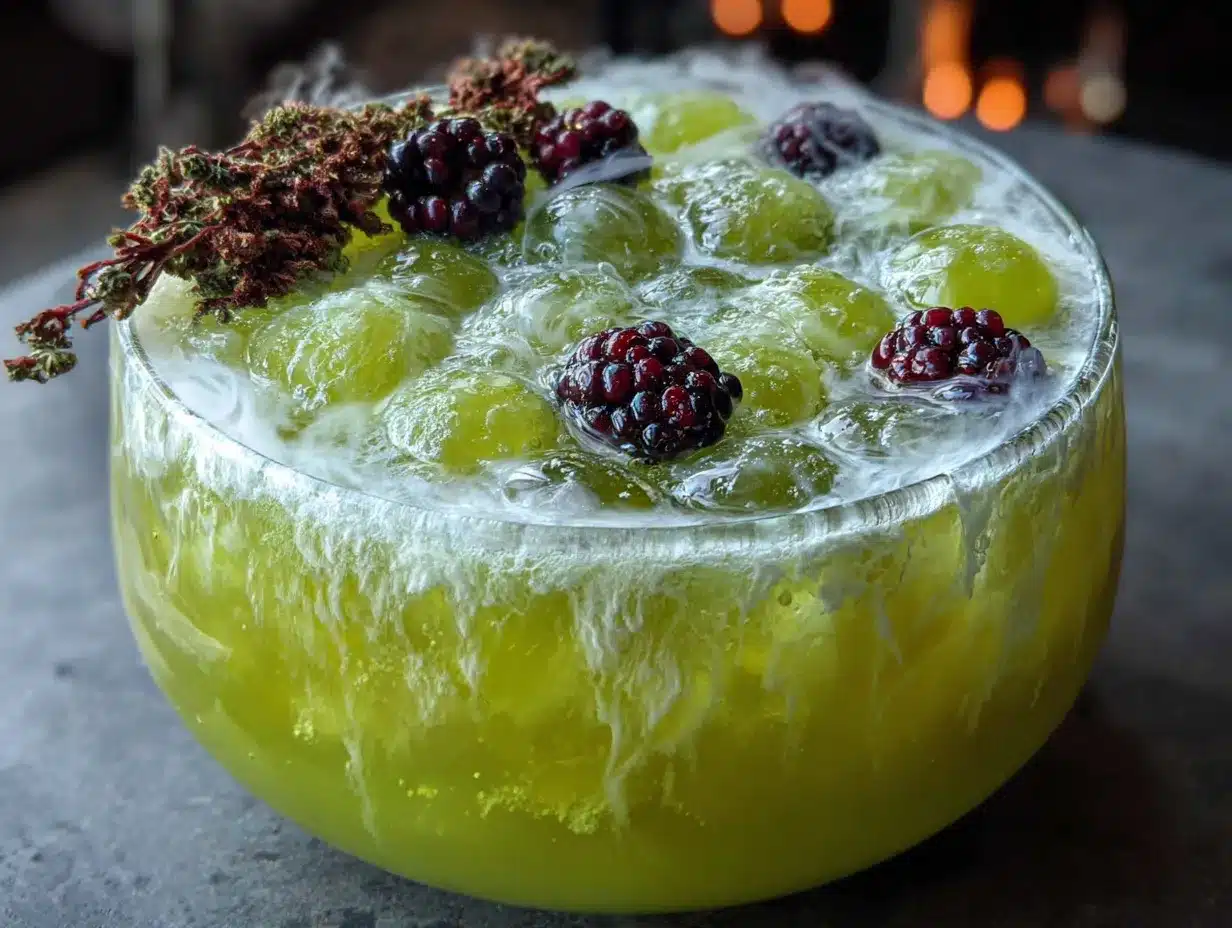
Follow these steps carefully, especially when handling the dry ice. Safety first, but the fun factor is totally worth it!
- Prepare the dry ice: Put on your gloves or use tongs to handle the dry ice. Place the block in a thick towel and use the hammer to break it into small chunks, about the size of golf balls. You want pieces that will fit easily into the punch bowl without sticking out of the liquid. Set the chunks aside in a bowl or on a plate. Safety note: Never seal dry ice in an airtight container—it can explode from pressure buildup.
- Chill the lemonade: Pour the full gallon of lemonade into your punch bowl. If you have time, refrigerate the lemonade for at least an hour before serving so it’s nice and cold. Cold liquid makes the dry ice fog last longer and look more dramatic.
- Add the soda: Slowly pour the liter of lemon-lime soda into the lemonade. Stir gently with your large spoon to combine. You’ll see lots of bubbles forming—that’s a good sign! The carbonation helps the dry ice fog rise and spill over the edges of the bowl.
- Add food coloring (optional): If you want a brighter green color, add a few drops of neon green food coloring now. Stir well to distribute the color evenly. I usually add about 5-6 drops for a vibrant swampy green, but you can adjust based on your preference.
- Add the sherbet: Use your ice cream scoop to add large scoops of lime sherbet to the punch. I usually add about 6-8 scoops, depending on the size of my bowl. The sherbet will float on top and slowly melt, creating a creamy, frothy layer. Don’t stir it in completely—let it sit on top for visual effect.
- Add the dry ice: This is the fun part! Using your tongs or gloved hands, carefully drop a few chunks of dry ice into the punch bowl. Start with 2-3 pieces and watch the fog roll out. Add more as needed—you’ll see the fog intensify. Important: Never let anyone drink or eat the dry ice. It should only be in the liquid for visual effect.
- Garnish and serve: If you’re using plastic spiders or gummy worms, place them around the edge of the bowl or float them in the punch. Ladle the punch into cups, making sure to avoid scooping up any dry ice pieces. The fog effect will last for about 15-20 minutes before you need to add more dry ice.
I remember the first time I made this, I added too much dry ice at once, and the fog was so thick I couldn’t see the punch! It was hilarious, but the kids loved it. Now I add it gradually to control the effect. The punch should look like a bubbling cauldron, not a smoke machine.
Cooking Tips & Techniques
Over the years, I’ve learned a few tricks that make this punch even better. Here are my top tips:
Handle dry ice safely: This is non-negotiable. Always wear gloves or use tongs when handling dry ice. It can cause frostbite on bare skin within seconds. Also, never store dry ice in a closed container or freezer—it sublimates into carbon dioxide gas, which can build up pressure and cause an explosion. Keep it in a well-ventilated area in a paper bag or open container.
Get the fog just right: The fog effect works best when the liquid is cold and the dry ice is broken into small pieces. Warm liquid will make the fog dissipate too quickly, and large chunks won’t sublimate as evenly. I like to add dry ice gradually—start with a few small chunks, then add more as the fog starts to thin. You’ll get a continuous rolling effect that looks amazing.
Keep the punch cold: The dry ice will keep the punch chilled, but if you’re serving it over a long period, you might need to add more ice. I don’t recommend using regular ice cubes because they’ll water down the punch. Instead, use frozen sherbet scoops or freeze some lemonade into ice cubes beforehand. That way, the punch stays cold and flavorful.
Test the flavor: Before adding the dry ice, taste the punch and adjust the sweetness. If it’s too tart, add more sherbet. If it’s too sweet, add a splash of lemon juice. The dry ice doesn’t affect the flavor, so you can tweak it to your liking beforehand.
One mistake I made early on was adding the dry ice too early. I wanted the fog to be dramatic when guests arrived, but by the time they got there, the fog had mostly dissipated. Now I wait until everyone is gathered around, then drop in the dry ice for maximum wow factor. Timing is everything!
Variations & Adaptations
This recipe is super flexible, so feel free to make it your own. Here are some variations I’ve tried and loved:
- Purple Potion Punch: Swap the lime sherbet for grape or berry sherbet, and use purple food coloring instead of green. The flavor will be sweeter and more berry-forward, perfect for a wizard-themed party.
- Orange Ooze Punch: Use orange sherbet and orange soda instead of lime and lemon-lime. Add a few drops of orange food coloring for a brighter hue. This version tastes like a creamsicle and is great for fall harvest parties.
- Dairy-Free Version: Replace the sherbet with a lime-flavored sorbet or a dairy-free coconut milk ice cream. The texture will be icier and less creamy, but the flavor is still delicious. I’ve used So Delicious brand coconut milk ice cream with great results.
- Sparkling Cauldron: For extra bubbles, use club soda instead of lemon-lime soda and add a splash of lime juice. This version is less sweet and more refreshing, perfect for adults who want a lighter option.
- Frozen Punch: Blend the lemonade, sherbet, and soda with ice for a slushy version. Serve in cups with a small piece of dry ice on the side for a mini fog effect. This is great for outdoor parties where a punch bowl might not work.
I once made a batch using leftover cranberry juice and lemon-lime soda because that’s all I had in the fridge. It turned a weird pinkish color, but the kids called it “Witch’s Blood Punch” and loved it even more. Sometimes the best variations come from happy accidents!
Serving & Storage Suggestions
This punch is best served immediately after adding the dry ice, while the fog effect is at its peak. The flavor is brightest when the punch is cold and fizzy, so don’t let it sit out too long. Here are some serving tips:
Serving temperature: Serve the punch ice-cold. The cold temperature keeps the dry ice fog thick and dramatic. If you’re serving outdoors on a warm day, consider placing the punch bowl in a larger bowl filled with ice to keep it chilled.
Presentation: Use a cauldron-shaped punch bowl if you can find one—it really sells the witch’s brew vibe. I also like to add fake cobwebs around the base of the bowl and scatter plastic spiders on the table. For individual servings, use clear plastic cups so kids can see the fog rising from their drink.
Complementary dishes: This punch pairs perfectly with Halloween snacks like mummy hot dogs, pumpkin-shaped cheese crackers, or ghost-shaped sugar cookies. I also like to serve it alongside a platter of veggie sticks with ranch dip for a healthier option.
Storage: You can’t really store leftover punch with the dry ice since it will have sublimated. But you can store the base mixture (lemonade, soda, and sherbet) in the refrigerator for up to 24 hours. Just stir well before serving and add fresh dry ice when you’re ready to serve again. The sherbet will melt and change the texture, but the flavor will still be good.
Reheating: There’s no need to reheat this punch—it’s meant to be served cold. If the punch has warmed up, add a few frozen sherbet scoops to chill it down again. The flavors actually develop a bit over time, so it might taste even better after an hour or two in the fridge.
Nutritional Information & Benefits
Let’s be real—this is a treat, not a health drink. But here’s a rough idea of what you’re getting per 8-ounce serving (based on one serving of the punch without dry ice):
- Calories: Approximately 180-220 calories per serving
- Sugar: 35-45 grams (mostly from the lemonade and sherbet)
- Fat: 2-4 grams (from the sherbet)
- Carbohydrates: 40-50 grams
- Protein: 1-2 grams
The main ingredients—lemonade and lime sherbet—provide a small amount of vitamin C from the citrus, and the sherbet adds a bit of calcium from the dairy. But honestly, this punch is about fun and celebration, not nutrition. If you’re concerned about sugar, you can use diet versions of the lemonade and soda to cut the calories in half.
For dietary considerations, this recipe contains dairy from the sherbet, so it’s not suitable for vegans or those with lactose intolerance without modifications. It’s also not gluten-free if you’re using certain brands of sherbet that may contain gluten-based stabilizers (though most are fine). Always check labels if you’re serving guests with allergies.
Conclusion
This Kid-Friendly Witches Brew Green Punch with Dry Ice Effect is more than just a drink—it’s a memory in the making. I’ve made it for four Halloween parties now, and every single time, it’s the first thing the kids talk about when they leave. The way the fog rolls over the edge of the bowl, the giggles when someone takes a sip and gets a fizzy surprise—it’s pure joy in a cup.
I love this recipe because it’s so easy to adapt. You can make it spooky, silly, or even fancy depending on your crowd. And the best part? It costs less than $15 to make, which means you can focus your budget on other party essentials like candy and decorations. Honestly, if you’re looking for that one thing that will make your Halloween party unforgettable, this is it.
So go ahead—grab some dry ice, raid your pantry, and get ready to become the coolest host on the block. And when your kids are still talking about the “magic punch” weeks later, you’ll know it was worth every bubbling second. Have you tried this recipe? I’d love to hear how it turned out! Drop a comment below and share your own spooky variations—I’m always looking for new ideas.
Frequently Asked Questions
Can I make this punch without dry ice?
Yes, absolutely! The punch will still taste delicious and look green and festive. You just won’t have the fog effect. For a similar spooky vibe, you can add dry ice chips to individual cups instead of the whole bowl, or use a fog machine near the punch table for a similar effect.
Is dry ice safe for kids to be around?
Yes, as long as you follow safety precautions. Never let children handle dry ice directly, and always supervise the punch bowl. Make sure no one puts dry ice in their mouth or drinks it. The fog itself is safe to breathe in small amounts, but the punch bowl should be in a well-ventilated area.
How long does the dry ice fog effect last?
The fog effect typically lasts 15-20 minutes per batch of dry ice chunks. You can add more dry ice as needed to keep the fog going. A 2-3 pound block of dry ice should last for about 2-3 hours if you add it gradually.
Can I make this punch ahead of time?
You can prepare the base mixture (lemonade, soda, and sherbet) up to 24 hours in advance and store it in the refrigerator. However, wait to add the dry ice until just before serving for the best fog effect. The sherbet will melt and change the texture, but the flavor will still be great.
What can I use instead of lime sherbet?
You can use lemon sherbet, lime sorbet, or even vanilla ice cream with green food coloring. For a dairy-free option, use coconut milk-based ice cream or sorbet. Each option will change the flavor slightly, but they all work well in this recipe.
Pin This Recipe!
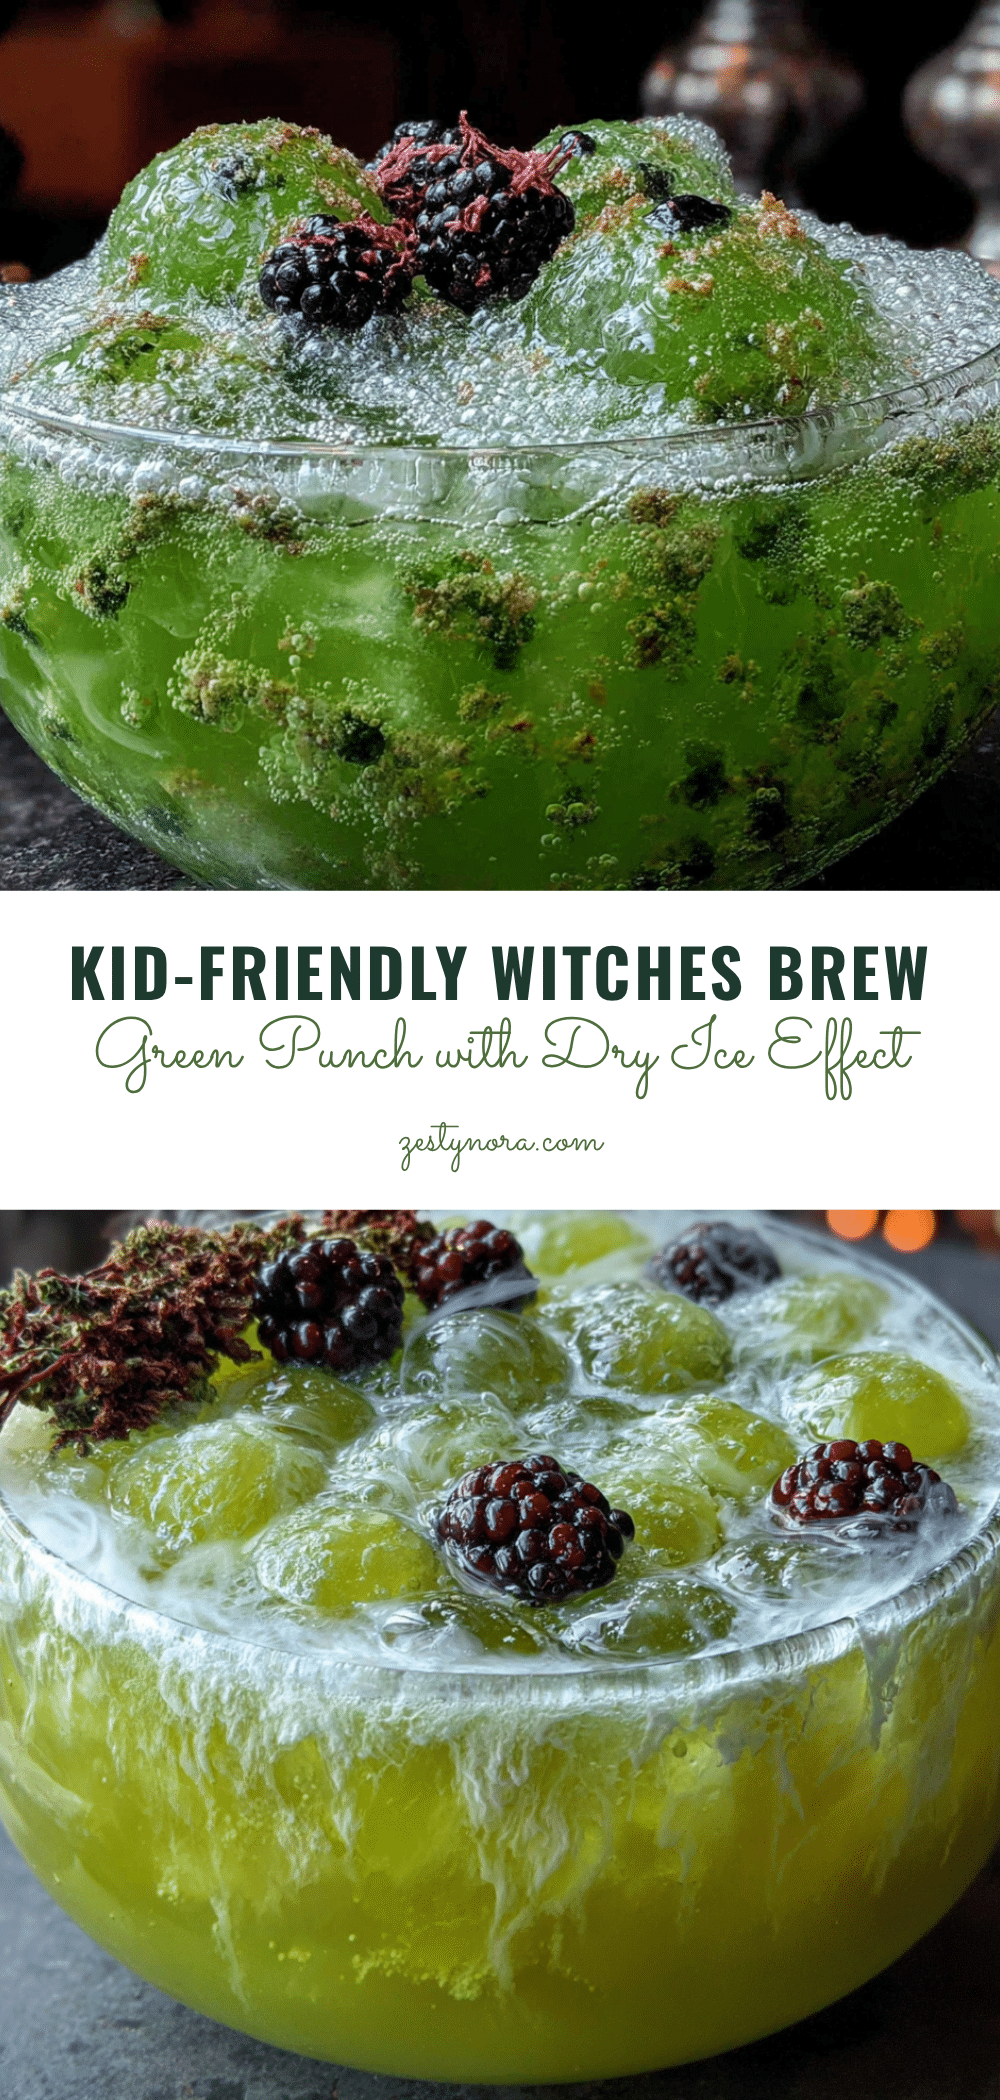
Easy Kid-Friendly Witches Brew Green Punch with Dry Ice Effect
This spooky green punch with a dramatic dry ice fog effect is the perfect Halloween party drink. Quick to make with simple ingredients, it creates a memorable experience for kids and adults alike.
- Prep Time: 10 minutes
- Cook Time: 0 minutes
- Total Time: 10 minutes
- Yield: 16 servings 1x
- Category: Beverage
- Cuisine: American
Ingredients
- 1 gallon (3.78 liters) lemonade
- 1 liter lemon-lime soda (Sprite or 7Up)
- 1.5 quarts (1.42 liters) lime sherbet
- 2–3 pounds (0.9–1.4 kg) food-grade dry ice
- Green food coloring (optional)
- Plastic spiders or gummy worms (optional, for garnish)
Instructions
- Prepare the dry ice: Put on gloves or use tongs to handle the dry ice. Place the block in a thick towel and use a hammer to break it into small chunks, about the size of golf balls. Set aside in a bowl or on a plate. Never seal dry ice in an airtight container.
- Chill the lemonade: Pour the full gallon of lemonade into your punch bowl. Refrigerate for at least an hour before serving if possible.
- Add the soda: Slowly pour the liter of lemon-lime soda into the lemonade. Stir gently to combine.
- Add food coloring (optional): If desired, add a few drops of neon green food coloring and stir well.
- Add the sherbet: Use an ice cream scoop to add 6-8 large scoops of lime sherbet to the punch. Let it float on top without stirring completely.
- Add the dry ice: Using tongs or gloved hands, carefully drop 2-3 chunks of dry ice into the punch bowl. Watch the fog roll out and add more as needed. Never let anyone drink or eat the dry ice.
- Garnish and serve: If using, place plastic spiders or gummy worms around the edge of the bowl or float them in the punch. Ladle the punch into cups, avoiding any dry ice pieces. The fog effect lasts 15-20 minutes before needing more dry ice.
Notes
Handle dry ice with gloves or tongs to avoid frostbite. Never store dry ice in an airtight container. Add dry ice gradually for best fog effect. For a dairy-free version, use lime sorbet instead of sherbet. The punch base can be prepared up to 24 hours in advance, but add dry ice just before serving.
Nutrition
- Serving Size: 8 ounces
- Calories: 200
- Sugar: 40
- Sodium: 50
- Fat: 3
- Saturated Fat: 2
- Carbohydrates: 45
- Protein: 1
Keywords: Halloween punch, witches brew, green punch, dry ice punch, kid-friendly Halloween drink, spooky punch


