It was 10:47 PM on a random Tuesday in late September, and I had a very specific craving for something that tasted like childhood but looked like Halloween. I didn’t have any fancy pumpkin-shaped cookie cutters or those expensive silicone molds everyone uses on Instagram, but I had a half-empty bag of mini marshmallows, a box of Rice Krispies that was about to expire, and this ridiculous idea that I could just shape the treats into pumpkins with my hands. Honestly, I was tired. It had been one of those days where nothing went right—I’d burned my toast that morning, spilled coffee on my favorite sweater, and somehow ended up with orange food coloring on my ceiling (don’t ask). But there I was, standing in my kitchen at almost 11 PM, buttering my fingers like a mad scientist about to perform an edible experiment.
The thing about late-night cooking is that the usual rules sort of disappear. You stop overthinking. You stop second-guessing. You just go with whatever feels right in the moment. So I melted the butter, dumped in the marshmallows, and stirred until everything got all gooey and dangerous. I added a few drops of orange gel food coloring—which, let me tell you, looked terrifying at first, like something you’d see in a Halloween movie—and then I tossed in the cereal. The mixture turned this brilliant, vibrant orange that made me laugh out loud. I mean, it was ridiculous. It was perfect.
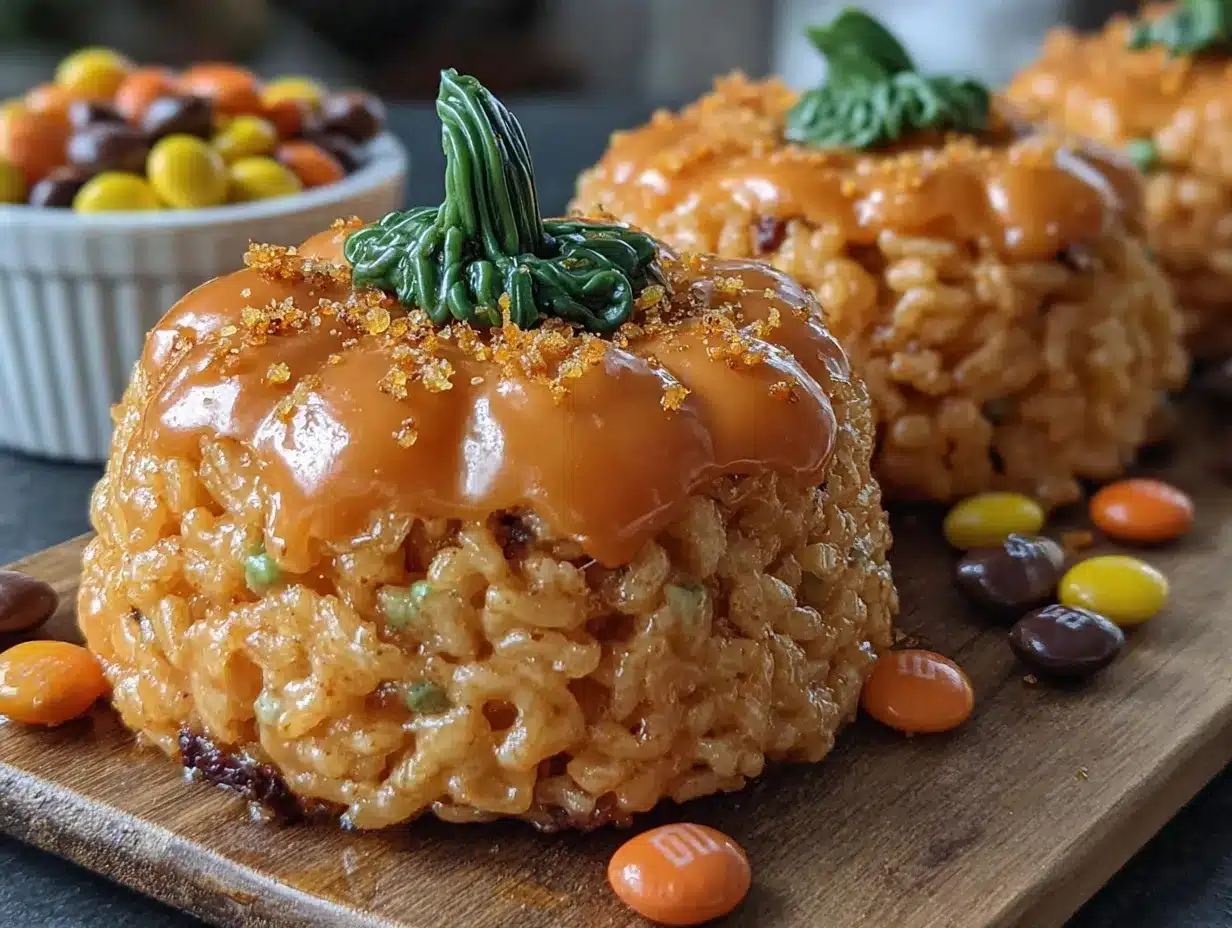
I shaped them into little pumpkin rounds, pressed a green candy corn into the top of each one for a stem, and stood back to admire my work. Maybe you’ve been there—that moment when something you threw together on a whim actually turns out better than the Pinterest-perfect version you spent hours planning? That was this moment. These Halloween Rice Krispie Treat Pumpkins weren’t just cute. They were the kind of cute that makes you text a photo to your group chat at midnight with the caption “look what I made” and actually get replies. And honestly, that’s why I keep making them. They’re the easiest, most forgiving Halloween dessert I’ve ever made, and they remind me that sometimes the best things happen when you stop trying so hard.
Why You’ll Love This Recipe
Let me tell you why these Halloween Rice Krispie Treat Pumpkins have become my go-to fall dessert, and why I think they’ll become yours too. I’ve tested this recipe about seven times now—yes, seven—because I wanted to get the texture just right. Not too hard, not too sticky, but that perfect chewy-crunchy balance that makes you reach for another one before you’ve finished the first.
- Quick & Easy: We’re talking 15 minutes from start to finish. No baking, no complicated steps, no waiting around. Perfect for those nights when you need a Halloween treat but don’t have the energy for a full baking project.
- Simple Ingredients: You probably already have everything in your pantry. Butter, marshmallows, Rice Krispies cereal, and orange food coloring. That’s it. No fancy grocery store runs required.
- Perfect for Halloween Parties: These little pumpkins are the life of the party. Kids love them, adults sneak them, and they look way more impressive than the effort suggests. Great for classroom treats, office potlucks, or just making your kitchen look festive.
- Crowd-Pleaser: I’ve brought these to three different gatherings now, and every single time, someone asks for the recipe. They’re nostalgic but with a seasonal twist that feels fresh and fun.
- Unbelievably Delicious: The combination of buttery marshmallow with that satisfying cereal crunch is already unbeatable. Add a hint of vanilla and that festive orange color, and you’ve got a treat that tastes like fall in every bite.
What makes this recipe different from all the other pumpkin-shaped treats out there? It’s the texture, honestly. Most versions end up too dense or too crumbly. But I’ve figured out the exact ratio of butter to marshmallows to cereal that gives you a treat that holds its shape beautifully without being rock hard. Plus, I use a little trick with the food coloring—adding it to the marshmallow mixture before the cereal—so the color distributes evenly without overmixing. This isn’t just another version of Rice Krispie treats. This is the version you’ll come back to year after year.
And here’s the emotional part: these treats make me happy. Like, genuinely, childlike happy. There’s something about shaping food into little pumpkins that brings out a playful side of cooking that we sometimes lose as adults. It’s comfort food reimagined for the Halloween season—simple, joyful, and absolutely delicious.
What Ingredients You Will Need
This recipe uses simple, everyday ingredients to create something that feels special and seasonal. Most of these are pantry staples, which makes this the perfect last-minute Halloween treat. Let me walk you through each one and share a few tips I’ve picked up along the way.
- 3 tablespoons unsalted butter (plus extra for greasing your hands and the pan) — I prefer using unsalted butter because it lets you control the salt level. If you only have salted butter, just skip adding any extra salt later. The butter is crucial here—it adds richness and helps the marshmallows melt smoothly. I’ve tried using margarine before, and honestly, the texture just isn’t the same. Stick with real butter for the best results.
- 1 package (10 ounces) mini marshmallows (about 4 cups) — Mini marshmallows melt more evenly than the large ones, which is why I always recommend them. If all you have are large marshmallows, just cut them into smaller pieces before melting. I’ve made that mistake before, and they take forever to melt evenly. The brand doesn’t matter much here, but I’ve had good luck with Jet-Puffed for consistent results.
- 1/2 teaspoon vanilla extract — This is optional, but I think it adds a lovely warmth that complements the buttery marshmallow flavor. Pure vanilla extract is best, but imitation vanilla works fine too. Just don’t skip it—you’ll notice the difference.
- 6 cups Rice Krispies cereal (or any crispy rice cereal) — The classic choice, obviously. But here’s a tip I learned the hard way: make sure your cereal is fresh. Stale cereal will give you soggy treats that don’t hold their shape. If your box has been open for more than a few weeks, buy a new one. The brand-name Rice Krispies do hold up slightly better than store brands, but generic works fine in a pinch.
- Orange gel food coloring — Gel food coloring is key here. Liquid food coloring will make your mixture too wet and can mess with the texture. I use Wilton orange gel, which gives a vibrant, true pumpkin color without needing too much. Start with a small amount and add more until you’re happy with the shade. You can also mix yellow and red gels to create your own orange.
- Green candy melts or candy corn (for the stems) — Candy corn is the easiest option because it’s already the right shape and color. Just press one into the top of each pumpkin. If you want a more polished look, use green candy melts. Melt them, pipe a small stem onto each treat, and let them set. I’ve done both, and honestly, the candy corn version has more charm.
- Optional: Cinnamon or pumpkin pie spice — For a fall twist, add 1/2 teaspoon of cinnamon or pumpkin pie spice to the marshmallow mixture. This gives the treats a subtle warmth that screams autumn. I tried this last year, and it was a huge hit.
For the full printable list with measurements, check out the recipe card at the end of this post. I’ve also included notes on substitutions if you need them.
Equipment Needed
You don’t need any fancy equipment for these Halloween Rice Krispie Treat Pumpkins, which is part of why I love this recipe so much. Here’s what you’ll need:
- Large saucepan or pot: You need something big enough to hold all the marshmallows and cereal. I use a 4-quart pot, which gives me plenty of room to stir without making a mess. A non-stick pot is ideal, but any heavy-bottomed saucepan will work.
- Wooden spoon or silicone spatula: A wooden spoon is great for stirring the marshmallow mixture because it doesn’t conduct heat. A silicone spatula works too, just make sure it’s heat-resistant. I’ve melted a few cheap spatulas in my day, so trust me on this.
- 9×13-inch baking dish or large sheet pan: You’ll use this to let the mixture cool slightly before shaping. You don’t actually bake anything, so any large, flat surface works. I line mine with parchment paper for easy cleanup.
- Parchment paper or wax paper: Essential for preventing sticking. You’ll also use it to cover the treats while you shape them.
- Butter or cooking spray: For greasing your hands and the pan. Butter gives the best flavor, but cooking spray is quicker. I use butter because I like the extra richness it adds to the outside of the treats.
- Cooling rack (optional): If you want the treats to set faster, place them on a cooling rack. Not necessary, but it helps.
I’ve made these with just a pot and my hands before, so don’t stress if you don’t have everything on this list. The most important tool is your hands—they’re the best pumpkin-shaping tool you’ve got.
Preparation Method
Alright, let’s get to the fun part. Follow these steps carefully, and you’ll have a batch of adorable Halloween Rice Krispie Treat Pumpkins in no time.
- Prepare your workspace. Before you start, line a 9×13-inch baking dish or large sheet pan with parchment paper. Lightly grease the paper with butter or cooking spray. Also, grease a separate piece of parchment paper that you’ll use to press down the mixture. Trust me, having everything ready makes the process so much smoother.
- Melt the butter. In a large saucepan over medium-low heat, melt the 3 tablespoons of unsalted butter. Stir occasionally so it melts evenly. Don’t rush this step—if the butter burns, the whole batch will taste off. I learned that the hard way during my second test batch. Burnt butter smell is not what you want for Halloween treats.
- Add the marshmallows. Once the butter is fully melted, add the entire package of mini marshmallows. Stir constantly with your wooden spoon or silicone spatula until the marshmallows are completely melted and the mixture is smooth. This usually takes about 4-5 minutes. Keep the heat on low to medium-low—too high and the marshmallows will scorch.
- Add vanilla and food coloring. Remove the pot from the heat. Stir in the 1/2 teaspoon of vanilla extract. Then add your orange gel food coloring. Start with a small amount—about 1/4 teaspoon—and stir well. Add more until you reach your desired shade of pumpkin orange. Remember, the color will lighten slightly when you add the cereal, so go a shade darker than you think you want. The mixture should look vibrant and uniform.
- Mix in the cereal. Add the 6 cups of Rice Krispies cereal all at once. Fold gently until the cereal is evenly coated with the marshmallow mixture. Be careful not to crush the cereal—you want those crispy pieces intact. This is where a gentle hand matters. I use a folding motion rather than stirring vigorously.
- Let it cool slightly. Transfer the mixture to your prepared baking dish or sheet pan. Spread it out evenly using your greased spatula or the greased parchment paper. Let it cool for about 5-10 minutes. You want it cool enough to handle but still warm and pliable. If it cools too much, it will be hard to shape.
- Shape into pumpkins. Here’s the hands-on part. Lightly butter your hands (or use cooking spray). Take about 1/4 cup of the mixture and roll it into a ball. Then gently flatten it slightly and shape it into a pumpkin-like round. You want it to look like a slightly squished sphere. Place each shaped pumpkin on a clean sheet of parchment paper. Repeat until you’ve used all the mixture. This recipe makes about 12-14 pumpkins, depending on size.
- Add the stems. While the pumpkins are still slightly warm, press a piece of candy corn or a small piped green candy melt into the top center of each one. The warmth will help it stick. If the treats have cooled too much, just press a little harder or add a tiny dab of melted candy melt as glue.
- Let them set. Allow the pumpkins to cool completely at room temperature. This takes about 20-30 minutes. They’ll firm up as they cool. Don’t rush this step by putting them in the fridge—it can make them too hard.
A few visual cues to watch for: The marshmallow mixture should be glossy and smooth, not grainy. When you add the cereal, every piece should be coated but not swimming in marshmallow. The finished pumpkins should hold their shape when you pick them up but still have a slight give when you bite into them. Perfect texture!
Cooking Tips & Techniques
After making these Halloween Rice Krispie Treat Pumpkins more times than I care to admit, I’ve picked up a few tricks that make a real difference. Let me share them with you so you can avoid my early mistakes.
Don’t overmix the cereal. This is the number one mistake people make. Once you add the cereal to the marshmallow mixture, fold it gently and stop as soon as everything is combined. Overmixing crushes the cereal and gives you dense, hard treats instead of light, crispy ones. I know it’s tempting to keep stirring to make sure everything is coated, but trust the process. A few folds are all you need.
Butter your hands generously. The marshmallow mixture is sticky. Like, really sticky. Don’t be shy with the butter on your hands. I use about a tablespoon total, rubbing it all over my palms and fingers. If the mixture starts sticking while you’re shaping, just re-butter your hands. I’ve also tried using cooking spray, but butter gives better results and adds a nice flavor to the outside of the treats.
Work quickly but calmly. The mixture starts to set as it cools, so you want to shape your pumpkins while it’s still warm and pliable. But don’t panic—you have about 15-20 minutes of workable time. I like to shape all the pumpkins first, then go back and add the stems. This keeps the process efficient without feeling rushed.
Use a cookie scoop for uniform sizes. If you want all your pumpkins to be the same size (which makes them look so much more professional), use a 1/4-cup cookie scoop or measuring cup to portion out the mixture. This also makes the shaping process faster because you’re not guessing at the amount each time.
My biggest failure: The first time I made these, I used liquid food coloring instead of gel. The mixture turned into a watery, orange mess that never set properly. The treats were sticky, misshapen, and honestly, a little sad. I almost gave up on the recipe entirely. But I tried again with gel coloring, and the difference was night and day. Sometimes the right ingredient makes all the difference.
Variations & Adaptations
One of the best things about this recipe is how easy it is to customize. Here are some variations I’ve tried and loved:
Chocolate-Dipped Pumpkins: After shaping and cooling the pumpkins, dip the bottoms in melted chocolate. Let the excess drip off, then place them on parchment paper to set. The chocolate adds a rich contrast to the sweet marshmallow flavor. I did this for a Halloween party last year, and they were gone in minutes.
Gluten-Free Version: Rice Krispies are naturally gluten-free, but check the label to make sure your brand is certified gluten-free if that’s a concern. Everything else in the recipe is already gluten-free, so this is an easy adaptation. I’ve served these to friends with celiac disease, and they were thrilled to have a safe Halloween treat.
Spiced Pumpkin Version: Add 1 teaspoon of pumpkin pie spice to the marshmallow mixture along with the vanilla. This gives the treats a warm, autumnal flavor that pairs beautifully with the orange color. I tried this last November, and it’s now my go-to version for Thanksgiving gatherings.
Vegan Option: Use vegan butter and vegan marshmallows (Dandies brand works well). The rest of the ingredients are already plant-based. The texture will be slightly different—vegan marshmallows don’t get quite as gooey—but the result is still delicious. I’ve made this for vegan friends, and they always appreciate having a festive option.
Mini Pumpkin Bites: Instead of making 12-14 regular-sized pumpkins, use a tablespoon to scoop out small portions and shape them into tiny pumpkins. These are perfect for lunchboxes or as a low-commitment treat. Kids especially love the mini version because they feel like they’re getting more.
Serving & Storage Suggestions
These Halloween Rice Krispie Treat Pumpkins are best served at room temperature. The texture is perfect—chewy but with that satisfying crunch. I like to arrange them on a platter lined with orange or black napkins for a festive look. You can also place each pumpkin in a small cupcake liner for individual servings, which makes them easy to grab at parties.
For a full Halloween spread, I pair these with:
- A bowl of caramel apples for contrast
- Warm apple cider or hot chocolate for drinks
- Other no-bake treats like chocolate-covered pretzels
Storage: Store the pumpkins in an airtight container at room temperature for up to 5 days. Layer them between sheets of parchment paper to prevent sticking. Do not refrigerate them—the cold air makes them hard and stale. If you need to store them longer, you can freeze them for up to 3 months. Just wrap each pumpkin individually in plastic wrap, then place them in a freezer-safe bag. Thaw at room temperature for about 30 minutes before serving.
The flavors actually develop a bit overnight—the marshmallow gets slightly more chewy, and the butter flavor becomes more pronounced. I actually prefer them on day two, but that’s just me. They rarely last that long in my house anyway.
Nutritional Information & Benefits
Let’s be honest—these are a treat, not a health food. But here’s the estimated nutritional breakdown for one pumpkin (based on 12 servings):
- Calories: 180
- Total Fat: 6g
- Saturated Fat: 3.5g
- Cholesterol: 15mg
- Sodium: 180mg
- Total Carbohydrates: 32g
- Dietary Fiber: 0g
- Sugars: 18g
- Protein: 2g
That said, there are a few redeeming qualities. Rice Krispies are fortified with iron and B vitamins, so you’re getting a tiny nutritional boost. The butter provides a small amount of vitamin A. And honestly? Sometimes you need a treat that’s purely about joy and celebration. I believe in balance—most of the time I eat nourishing meals, but holidays are for indulgence. These pumpkins are part of making memories, and that has its own kind of nutritional value.
If you’re watching your sugar intake, you can reduce the marshmallows slightly or use a sugar-free alternative, but the texture will change. This is one recipe where I say just enjoy the original version and savor every bite.
Conclusion
These Halloween Rice Krispie Treat Pumpkins have become a staple in my fall baking rotation, and I think they deserve a spot in yours too. They’re quick, easy, and so ridiculously cute that they’ll make you smile every time you look at them. Plus, they taste amazing—that classic buttery marshmallow flavor with a festive twist.
I love that this recipe lets you be creative. Want bigger pumpkins? Go for it. Prefer a different color? Make them into ghosts or monsters. The base recipe is so forgiving that you can really make it your own. That’s the beauty of simple recipes—they leave room for your personality to shine through.
If you make these, I’d love to hear about it. Drop a comment below and tell me how they turned out, or share a photo on social media and tag me. Did you add a special twist? Did your kids help shape them? Did you bring them to a party and watch them disappear? I want to know all about it. Happy Halloween, and happy snacking!
Frequently Asked Questions
Can I use regular food coloring instead of gel?
You can, but I don’t recommend it. Liquid food coloring adds extra moisture to the marshmallow mixture, which can make the treats sticky and prevent them from setting properly. Gel food coloring gives you a vibrant color without changing the texture. If liquid is all you have, use it sparingly and expect slightly stickier results.
How do I keep the treats from sticking to my hands?
Butter is your best friend here. Generously butter your hands before shaping each pumpkin. If the mixture starts sticking, wash and re-butter your hands. You can also use cooking spray, but butter gives better flavor. Another trick is to keep a small bowl of melted butter nearby to dip your fingers in as needed.
Can I make these ahead of time?
Absolutely. These pumpkins stay fresh for up to 5 days in an airtight container at room temperature. You can also freeze them for up to 3 months. Just wrap each one individually in plastic wrap before freezing. They’re actually perfect for making ahead because they hold their shape so well.
My treats turned out too hard. What went wrong?
This usually happens for one of two reasons: either you overcooked the marshmallow mixture (cooking it too long or on too high heat), or you pressed the mixture too firmly when shaping. The marshmallows should just be melted—don’t let them bubble. And when shaping, use a gentle touch. You want the treats to hold together, not be compressed into rocks.
Can I use a different cereal?
Yes, but the texture will change. Cocoa Pebbles would make chocolate-flavored pumpkins. Fruity Pebbles would add a fruity flavor and fun colors. You could even use a combination of cereals for a unique texture. Just keep the total cereal amount at 6 cups. I’ve tried a few variations, and they all work—just don’t expect the same classic Rice Krispie treat texture.
Pin This Recipe!
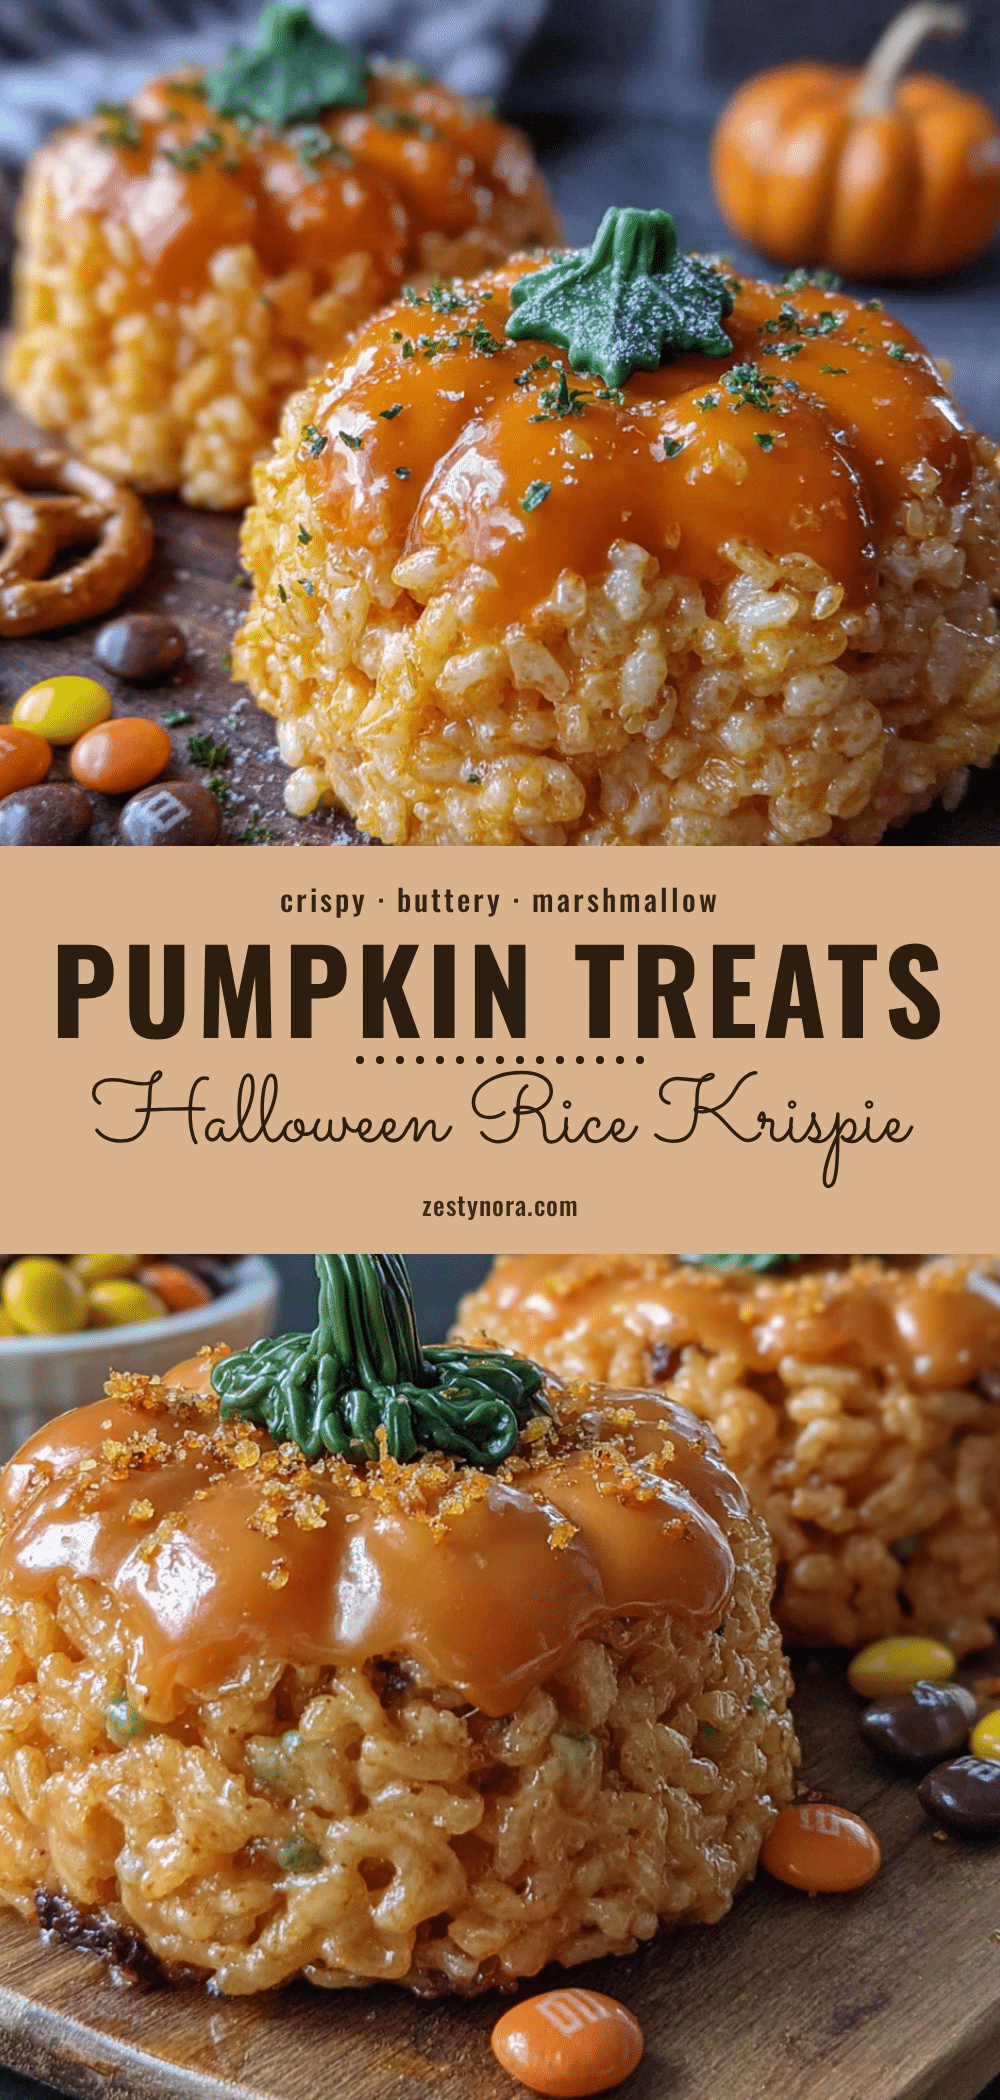
Easy Halloween Rice Krispie Treat Pumpkins: Best Fall Dessert
These no-bake Halloween Rice Krispie Treat Pumpkins are quick, easy, and incredibly cute. Made with simple pantry ingredients, they’re perfect for parties, classroom treats, or a fun family activity.
- Prep Time: 15 minutes
- Cook Time: 5 minutes
- Total Time: 20 minutes
- Yield: 12-14 servings 1x
- Category: Dessert
- Cuisine: American
Ingredients
- 3 tablespoons unsalted butter (plus extra for greasing)
- 1 package (10 ounces) mini marshmallows (about 4 cups)
- 1/2 teaspoon vanilla extract
- 6 cups Rice Krispies cereal
- Orange gel food coloring
- Green candy melts or candy corn (for stems)
- Optional: 1/2 teaspoon cinnamon or pumpkin pie spice
Instructions
- Prepare your workspace: Line a 9×13-inch baking dish or large sheet pan with parchment paper. Lightly grease the paper with butter or cooking spray. Also grease a separate piece of parchment paper for pressing.
- Melt the butter: In a large saucepan over medium-low heat, melt 3 tablespoons unsalted butter, stirring occasionally.
- Add the marshmallows: Add the entire package of mini marshmallows. Stir constantly over low to medium-low heat until completely melted and smooth (about 4-5 minutes).
- Add vanilla and food coloring: Remove pot from heat. Stir in 1/2 teaspoon vanilla extract. Add orange gel food coloring starting with 1/4 teaspoon, stirring well. Add more until desired shade is reached (color will lighten when cereal is added).
- Mix in the cereal: Add 6 cups Rice Krispies cereal all at once. Fold gently until evenly coated, being careful not to crush the cereal.
- Let it cool slightly: Transfer mixture to prepared pan. Spread evenly using greased spatula or parchment. Let cool 5-10 minutes until warm but pliable.
- Shape into pumpkins: Lightly butter hands. Take about 1/4 cup of mixture, roll into a ball, then gently flatten into a pumpkin-like round. Place on clean parchment. Repeat with remaining mixture (makes 12-14 pumpkins).
- Add the stems: While pumpkins are still warm, press a piece of candy corn or small piped green candy melt into the top center of each.
- Let them set: Allow pumpkins to cool completely at room temperature (20-30 minutes) until firm.
Notes
Butter your hands generously to prevent sticking. Work quickly as the mixture sets while cooling. For uniform sizes, use a 1/4-cup cookie scoop. Do not refrigerate; store at room temperature in an airtight container for up to 5 days. Can be frozen for up to 3 months.
Nutrition
- Serving Size: 1 pumpkin
- Calories: 180
- Sugar: 18
- Sodium: 180
- Fat: 6
- Saturated Fat: 3.5
- Carbohydrates: 32
- Protein: 2
Keywords: Halloween treats, Rice Krispie treats, pumpkin desserts, no-bake desserts, fall desserts, easy Halloween recipes


