The loaf was gone by noon. My neighbor, who had only stopped by to borrow a book, stood at my kitchen counter eating slice after slice, muttering something about “the best banana bread I’ve ever had” between bites. I didn’t even get a piece for myself that day. And honestly? I wasn’t even mad.
That loaf—this loaf—wasn’t supposed to be anything special. I had three overripe bananas on the counter, a sink full of dishes (including my stand mixer bowl), and absolutely zero energy to clean another attachment. So I just… didn’t. I grabbed a fork, melted some butter in a skillet, and started mixing everything by hand in one bowl. No mixer. No fuss. Just the smell of brown butter filling my tiny kitchen and the quiet satisfaction of making something good with almost nothing.
This easy browned butter banana bread (no mixer) became my go-to that day, and it hasn’t stopped being my go-to since. It’s the kind of recipe you make when you want something deeply comforting but don’t want to work for it. The brown butter adds this nutty, almost caramel-like depth that makes plain banana bread taste, well, plain in comparison. And the fact that you don’t need a mixer? That’s not a compromise—it’s a feature. Less cleanup, more flavor, and a loaf that disappears faster than you’d think possible.
Why You’ll Love This Recipe
I’ve tested this recipe more times than I can count, and I keep coming back to it because it just works. Every single time. The brown butter adds a richness that feels fancy, but the method is so simple you could make it with your eyes half-closed on a sleepy Sunday morning.
- No Mixer Needed : You don’t need a stand mixer, hand mixer, or any fancy gadget. Just a bowl, a fork, and a whisk. That’s it.
- One Bowl Wonder : Everything comes together in one bowl. Fewer dishes means more time enjoying that warm, buttery slice.
- Brown Butter Magic : That simple step of browning the butter transforms the entire loaf. It adds a deep, nutty flavor that regular banana bread just doesn’t have.
- Perfect for Busy Mornings : This comes together in about 10 minutes of active prep. The oven does the rest of the work.
- Uses Up Ripe Bananas : Got spotty bananas on the counter? This is the best way to use them up—no waste, all flavor.
- Foolproof Texture : The crumb is tender, moist, and perfectly dense without being gummy. Every slice holds together beautifully.
What makes this recipe different is the brown butter. I know, I know—everyone says that. But here’s the thing: most banana bread recipes just melt the butter and call it a day. Taking that extra 5 minutes to let it sizzle and turn golden brown unlocks a flavor that feels like you spent hours in the kitchen. You didn’t, but no one has to know that.
This is the recipe I make when I want to feel like I’ve got my life together, even when I don’t. It’s comfort food that’s easy enough for a Tuesday morning and impressive enough to bring to a brunch. And the way the brown butter pairs with the sweet bananas? Honestly, it’s the kind of combination that makes you close your eyes after the first bite. You’ll see what I mean.
What Ingredients You Will Need
This recipe uses simple, everyday ingredients to create something truly special. The star of the show is the butter—unsalted, because you want to control the salt level yourself. Everything else is probably already in your pantry or fruit bowl.
For the Banana Bread Batter
- Unsalted butter, ½ cup (1 stick or 113g) — You’ll brown this in a skillet until it turns golden and smells nutty. Don’t skip this step. It’s what makes the bread sing.
- Ripe bananas, 3 medium (about 1 cup or 240g mashed) — The riper, the better. Look for bananas with lots of brown spots. They’re sweeter and easier to mash.
- Granulated sugar, ¾ cup (150g) — Adds sweetness and helps create that tender crumb.
- Light brown sugar, ¼ cup (50g), packed — Adds moisture and a hint of molasses flavor that pairs beautifully with the brown butter.
- Large egg, 1, at room temperature — Binds everything together. Take it out of the fridge 15 minutes before starting.
- Vanilla extract, 1 teaspoon — Use pure vanilla if you can. It rounds out all the flavors.
- Plain yogurt or sour cream, ¼ cup (60g) — This is my secret for extra moisture. Greek yogurt works great too.
- All-purpose flour, 1½ cups (180g) — Spoon and level it into your measuring cup. Don’t scoop directly—you’ll end up with too much flour.
- Baking soda, 1 teaspoon — Helps the bread rise and gives it a light texture.
- Salt, ½ teaspoon — Balances the sweetness and brings out the banana flavor.
Optional Mix-Ins (Choose Your Adventure)
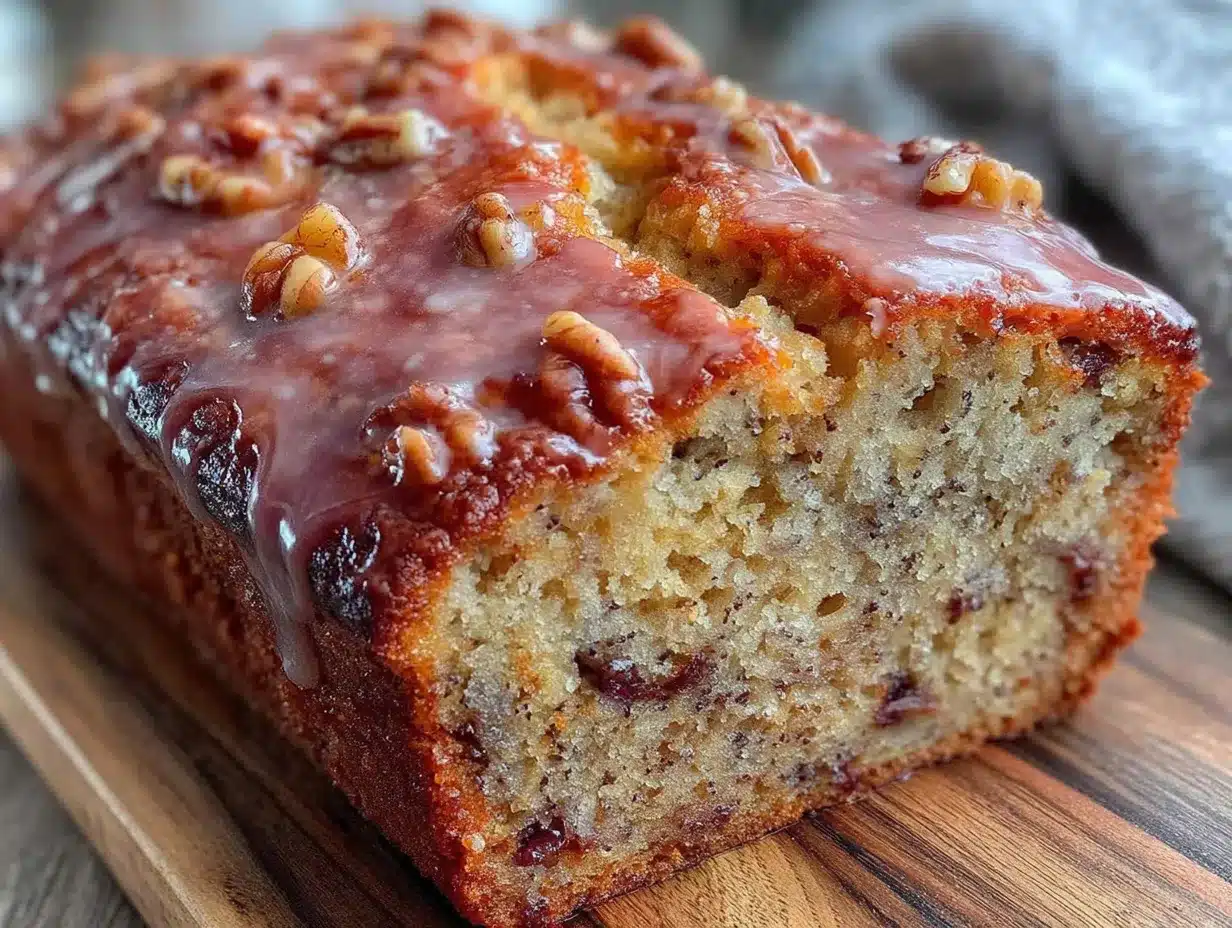
- Dark chocolate chips, ½ cup (85g) — Because chocolate and banana are a match made in heaven.
- Chopped walnuts or pecans, ½ cup (60g) — Adds a lovely crunch. Toast them lightly first for extra flavor.
- Flaky sea salt — A sprinkle on top before baking takes it over the edge. Trust me.
I usually use Cabot Greek yogurt because it’s thick and tangy, but any plain yogurt works. For the butter, I stick with Kerrygold when I can—it browns beautifully and adds an extra layer of richness. But honestly, any unsalted butter will do the job just fine.
If you’re out of yogurt, you can swap in the same amount of sour cream or even buttermilk. The acid in both helps activate the baking soda and keeps the bread tender. And if you want to make this dairy-free, use a plant-based butter and coconut yogurt. The flavor will be slightly different, but it’ll still be delicious.
Equipment Needed
One of the best things about this recipe is how little equipment it requires. You don’t need a mixer, a food processor, or any fancy kitchen gadget. Just the basics.
- Medium skillet or saucepan — For browning the butter. A light-colored pan helps you see when the butter turns golden.
- Large mixing bowl — One bowl for everything. I use a standard ceramic mixing bowl.
- Fork or potato masher — For mashing the bananas. A fork works perfectly.
- Whisk — For mixing the wet and dry ingredients together smoothly.
- Rubber spatula — For scraping every last bit of batter into the pan. Don’t waste that brown butter goodness.
- 9×5-inch loaf pan — Standard size. If you use a different size, the baking time will change.
- Parchment paper — Lining the pan makes lifting the loaf out effortless. No sticking, no fuss.
- Cooling rack — Lets the bread cool evenly so the bottom doesn’t get soggy.
If you don’t have a loaf pan, you can bake this in an 8×8-inch square pan—just reduce the baking time by about 10 minutes and check for doneness earlier. I’ve also made these as muffins before (bake at 350°F for about 18-20 minutes), and they turn out fantastic. No mixer needed for those either!
Preparation Method
This is where the magic happens. The whole process takes about 10 minutes of active work, then the oven does the rest. Let’s walk through it step by step.
- Preheat your oven to 350°F (175°C). Position the rack in the center. Line your 9×5-inch loaf pan with parchment paper, leaving some overhang on the long sides. This makes lifting the bread out so much easier later.
- Brown the butter. Place the ½ cup of unsalted butter in a medium skillet or saucepan over medium heat. Let it melt completely, then swirl the pan occasionally. After about 3-4 minutes, the butter will start to foam and sizzle. Keep watching—it can go from golden to burnt in seconds. When you see golden brown specks forming at the bottom and smell a nutty aroma, remove it from the heat immediately. Pour it into a heatproof bowl to stop the cooking process. Let it cool for about 5 minutes. Pro tip: Use a light-colored pan so you can actually see the color change.
- Mash the bananas. In your large mixing bowl, add the 3 ripe bananas. Mash them with a fork until mostly smooth with a few small lumps remaining. You want some texture, not baby food. You should have about 1 cup of mashed banana.
- Add the sugars and wet ingredients. To the mashed bananas, add the ¾ cup granulated sugar and ¼ cup packed light brown sugar. Stir with a whisk until combined. Then add the slightly cooled brown butter, 1 large egg (room temperature), 1 teaspoon vanilla extract, and ¼ cup plain yogurt. Whisk everything together until smooth and well combined. The mixture will look shiny and smell incredible.
- Add the dry ingredients. Sprinkle the 1½ cups all-purpose flour, 1 teaspoon baking soda, and ½ teaspoon salt over the wet mixture. Use a rubber spatula to fold everything together gently. Stir just until no streaks of flour remain—about 10 to 12 folds. Do not overmix. Overmixing develops gluten and makes the bread tough. A few small lumps are totally fine.
- Fold in any mix-ins (optional). If you’re using chocolate chips, nuts, or both, gently fold them in now. Reserve a small handful to sprinkle on top before baking if you want a pretty finish.
- Pour the batter into the prepared loaf pan. Use your spatula to scrape every bit of batter into the pan. Spread it evenly, then give the pan a gentle tap on the counter to release any air bubbles. If you’re adding flaky sea salt, sprinkle it on top now.
- Bake for 50-60 minutes. Place the pan in the preheated oven. Bake until the top is deep golden brown and a toothpick inserted into the center comes out clean or with just a few moist crumbs. Start checking at the 50-minute mark. Every oven runs a little differently, so keep an eye on it. Sensory cue: Your kitchen will smell like a cozy bakery—that nutty brown butter mixed with sweet banana is pure heaven.
- Cool in the pan for 10 minutes. Place the loaf pan on a cooling rack. Let it rest for 10 minutes. This helps the bread set so it doesn’t fall apart when you remove it.
- Lift the bread out and cool completely. Use the parchment paper overhang to lift the loaf out of the pan. Place it directly on the cooling rack. Let it cool completely before slicing—about 1 hour. I know, waiting is the hardest part. But if you slice it while it’s still warm, it will crumble. Trust me, I’ve learned this the hard way.
If you notice the top of your bread browning too quickly before the center is done, tent a piece of aluminum foil loosely over the top for the last 15 minutes of baking. This prevents the crust from burning while the inside finishes cooking.
Cooking Tips & Techniques
After making this recipe more times than I can count, I’ve picked up a few tricks that make a real difference. Here’s what I wish someone had told me the first time.
Don’t rush the brown butter. This is the most important step. Keep the heat at medium—not high—and swirl the pan often. The butter will go through stages: first it melts, then it foams, then it starts to crackle, and finally the milk solids turn golden brown. That nutty aroma is your signal to pull it off the heat. If you see black specks, you’ve gone too far. I’ve burned more than a few batches of butter while distracted by my phone. Set a timer if you need to.
Use room temperature ingredients. Cold egg and cold yogurt will seize up the brown butter and make the batter lumpy. Leave them on the counter for 15-20 minutes before you start. If you’re in a hurry, place the egg in a bowl of warm water for 5 minutes.
Measure your flour correctly. This is the most common mistake in baking. Scooping your measuring cup directly into the flour bag packs it down, and you end up with way too much. Instead, fluff the flour with a spoon, then spoon it into your measuring cup and level it off with a knife. It takes an extra 10 seconds and makes a huge difference.
Don’t overmix the batter. I know it’s tempting to keep stirring until it looks perfectly smooth, but resist the urge. Overmixing develops gluten, which makes banana bread tough and dense. Stir just until the flour disappears. A few streaks are okay—they’ll bake out.
Test for doneness properly. A toothpick inserted into the center should come out clean or with a few moist crumbs. If it’s wet with batter, it needs more time. If the toothpick is completely dry with no crumbs, you might have overbaked it. Look for that sweet spot.
One thing I learned the hard way: don’t open the oven door during the first 40 minutes of baking. The rush of cold air can cause the bread to sink in the middle. Be patient. Let it do its thing.
Variations & Adaptations
This recipe is wonderfully flexible. Here are some of my favorite ways to change it up depending on what I’m craving or what I have in the pantry.
Chocolate Swirl Banana Bread: After pouring the batter into the pan, drop spoonfuls of Nutella or melted dark chocolate on top. Use a knife to swirl it through the batter. The chocolate pairs beautifully with the brown butter. I make this version when I want something extra indulgent.
Gluten-Free Version: Substitute the all-purpose flour with a 1:1 gluten-free baking blend (I like King Arthur Measure for Measure). Add 1 teaspoon of xanthan gum if your blend doesn’t already include it. The texture will be slightly more delicate, but it’s still incredibly good.
Vegan Adaptation: Use a flax egg (1 tablespoon ground flaxseed mixed with 3 tablespoons water, let sit for 5 minutes) instead of the regular egg. Swap the butter with vegan butter and use coconut yogurt instead of dairy yogurt. The bread will be a bit denser but still delicious.
Seasonal Twist: In the fall, add 1 teaspoon of cinnamon and ½ teaspoon of nutmeg to the dry ingredients. Fold in ½ cup of chopped apples along with the bananas. The warm spices make this taste like autumn in a loaf.
Lower Sugar Option: Reduce the granulated sugar to ½ cup and omit the brown sugar entirely. The bananas provide plenty of natural sweetness. This version is less sweet but still satisfying—perfect for breakfast.
I once made a batch with leftover pumpkin puree instead of yogurt (about ¼ cup), and it turned out surprisingly good. The pumpkin added moisture and a subtle earthy flavor that worked well with the brown butter. Don’t be afraid to experiment—that’s how the best recipes are born.
Serving & Storage Suggestions
This banana bread is wonderful served warm, but it’s just as good at room temperature. Here’s how I like to enjoy it and how to keep it fresh for days.
Serving Suggestions: Slice the bread and serve it plain for a simple treat. For something extra, spread a slice with salted butter (the salt cuts through the sweetness beautifully) or a dollop of Greek yogurt and a drizzle of honey. If you’re feeling fancy, toast a slice lightly and top it with a scoop of vanilla ice cream—it’s basically dessert at that point.
This bread pairs wonderfully with a cup of coffee or a tall glass of cold milk. It’s also fantastic alongside a bowl of fresh fruit for a balanced breakfast. For a brunch spread, serve slices of this banana bread next to a cinnamon roll casserole with cream cheese frosting for the ultimate sweet breakfast table.
Storage Instructions: Store leftover banana bread in an airtight container at room temperature for up to 4 days. To keep it extra moist, place a paper towel in the container to absorb excess moisture and replace it every day or two. Do not refrigerate—the cold air dries out the bread and makes it stale faster.
Freezing Instructions: This bread freezes beautifully. Let it cool completely, then wrap it tightly in plastic wrap followed by a layer of aluminum foil. Freeze for up to 3 months. When you’re ready to enjoy it, thaw it in the refrigerator overnight or at room temperature for a few hours. You can also freeze individual slices for quick grab-and-go breakfasts.
Reheating Tips: To revive a slice, pop it in the microwave for 10-15 seconds for a warm, soft texture. For a slightly crisp edge, toast it in a toaster oven or under the broiler for a minute or two. The brown butter flavor actually deepens after a day or two, so leftovers are never a disappointment.
If you’ve got overripe bananas that need using up, this is the perfect recipe. But if you want another option for those spotty bananas, try these no-bake peanut butter banana energy bites for a quick and healthy snack that requires zero oven time.
Nutritional Information & Benefits
While this is definitely a treat, it does have some redeeming qualities thanks to the wholesome ingredients. Here’s a rough breakdown per slice (assuming 10 slices per loaf).
Estimated Nutrition Per Slice:
- Calories: 245
- Fat: 11g
- Saturated Fat: 6g
- Carbohydrates: 34g
- Fiber: 1.5g
- Sugar: 19g
- Protein: 3.5g
- Sodium: 210mg
Health Benefits: Bananas are rich in potassium, which supports heart health and muscle function. They also contain vitamin B6 and vitamin C. The yogurt adds a dose of calcium and probiotics, which are great for gut health. And the brown butter? Well, it makes you happy—and that counts for something.
Dietary Considerations: This recipe is vegetarian. To make it gluten-free, use a 1:1 gluten-free flour blend. To make it dairy-free, use vegan butter and coconut yogurt. It’s not low-carb or keto-friendly due to the bananas and sugar, but it’s a balanced treat when enjoyed in moderation.
Potential Allergens: This recipe contains dairy (butter, yogurt) and gluten (flour). It also contains eggs. If you have nut allergies, skip the optional walnut or pecan mix-ins.
I personally love that this bread feels like a small indulgence without being over-the-top. It’s sweet enough to satisfy a craving but not so sugary that you feel guilty having a second slice. And on days when I need a little extra comfort, I tell myself the bananas make it practically health food. That’s my story and I’m sticking to it.
Conclusion
This easy browned butter banana bread (no mixer) has become a staple in my kitchen for good reason. It’s simple, forgiving, and produces a loaf that tastes like you put in way more effort than you actually did. The brown butter adds a nutty depth that makes every bite feel special, and the fact that you don’t need a mixer means you can make it anytime—even when your kitchen is a mess and you’re running on three hours of sleep.
What I love most about this recipe is how adaptable it is. You can keep it classic, load it with chocolate chips, or add a swirl of Nutella. You can make it gluten-free or dairy-free. You can bake it as a loaf or as muffins. However you make it, it’s going to be good. And the people you share it with are going to ask for the recipe—trust me on that.
I’d love to hear how yours turns out. Did you add any mix-ins? Did you make any adaptations? Drop a comment below and let me know. And if you’re looking for another way to use up ripe bananas, check out this one-bowl banana bread with brown butter chocolate swirl—it’s basically this recipe’s chocolate-loving cousin.
Happy baking, friend. Go make that brown butter—you won’t regret it.
Frequently Asked Questions
Can I use frozen bananas for this recipe?
Absolutely. Thaw them completely first, then drain off any excess liquid before mashing. Frozen bananas are actually sweeter than fresh ones, so your bread will be even more flavorful.
Why did my banana bread sink in the middle?
This usually happens for one of three reasons: the oven wasn’t hot enough, you opened the door too early, or the batter was overmixed. Make sure your oven is fully preheated, resist the urge to peek for the first 40 minutes, and stop mixing as soon as the flour disappears.
Can I make this recipe without browning the butter?
You can, but it won’t be the same. The brown butter adds a nutty, caramel-like depth that makes this bread special. If you’re in a rush, just melt the butter and use it as is—it will still be good banana bread, just not as flavorful.
How do I know when the banana bread is done baking?
Insert a toothpick into the center of the loaf. If it comes out clean or with just a few moist crumbs, it’s done. If it’s wet with batter, bake for another 5-10 minutes and check again. The top should also be deep golden brown and spring back lightly when touched.
Can I double this recipe?
Yes, you can easily double it. Use two loaf pans instead of one. The baking time will stay about the same, but check for doneness at the 50-minute mark. If you’re baking both pans at the same time, rotate them halfway through for even baking.
Pin This Recipe!
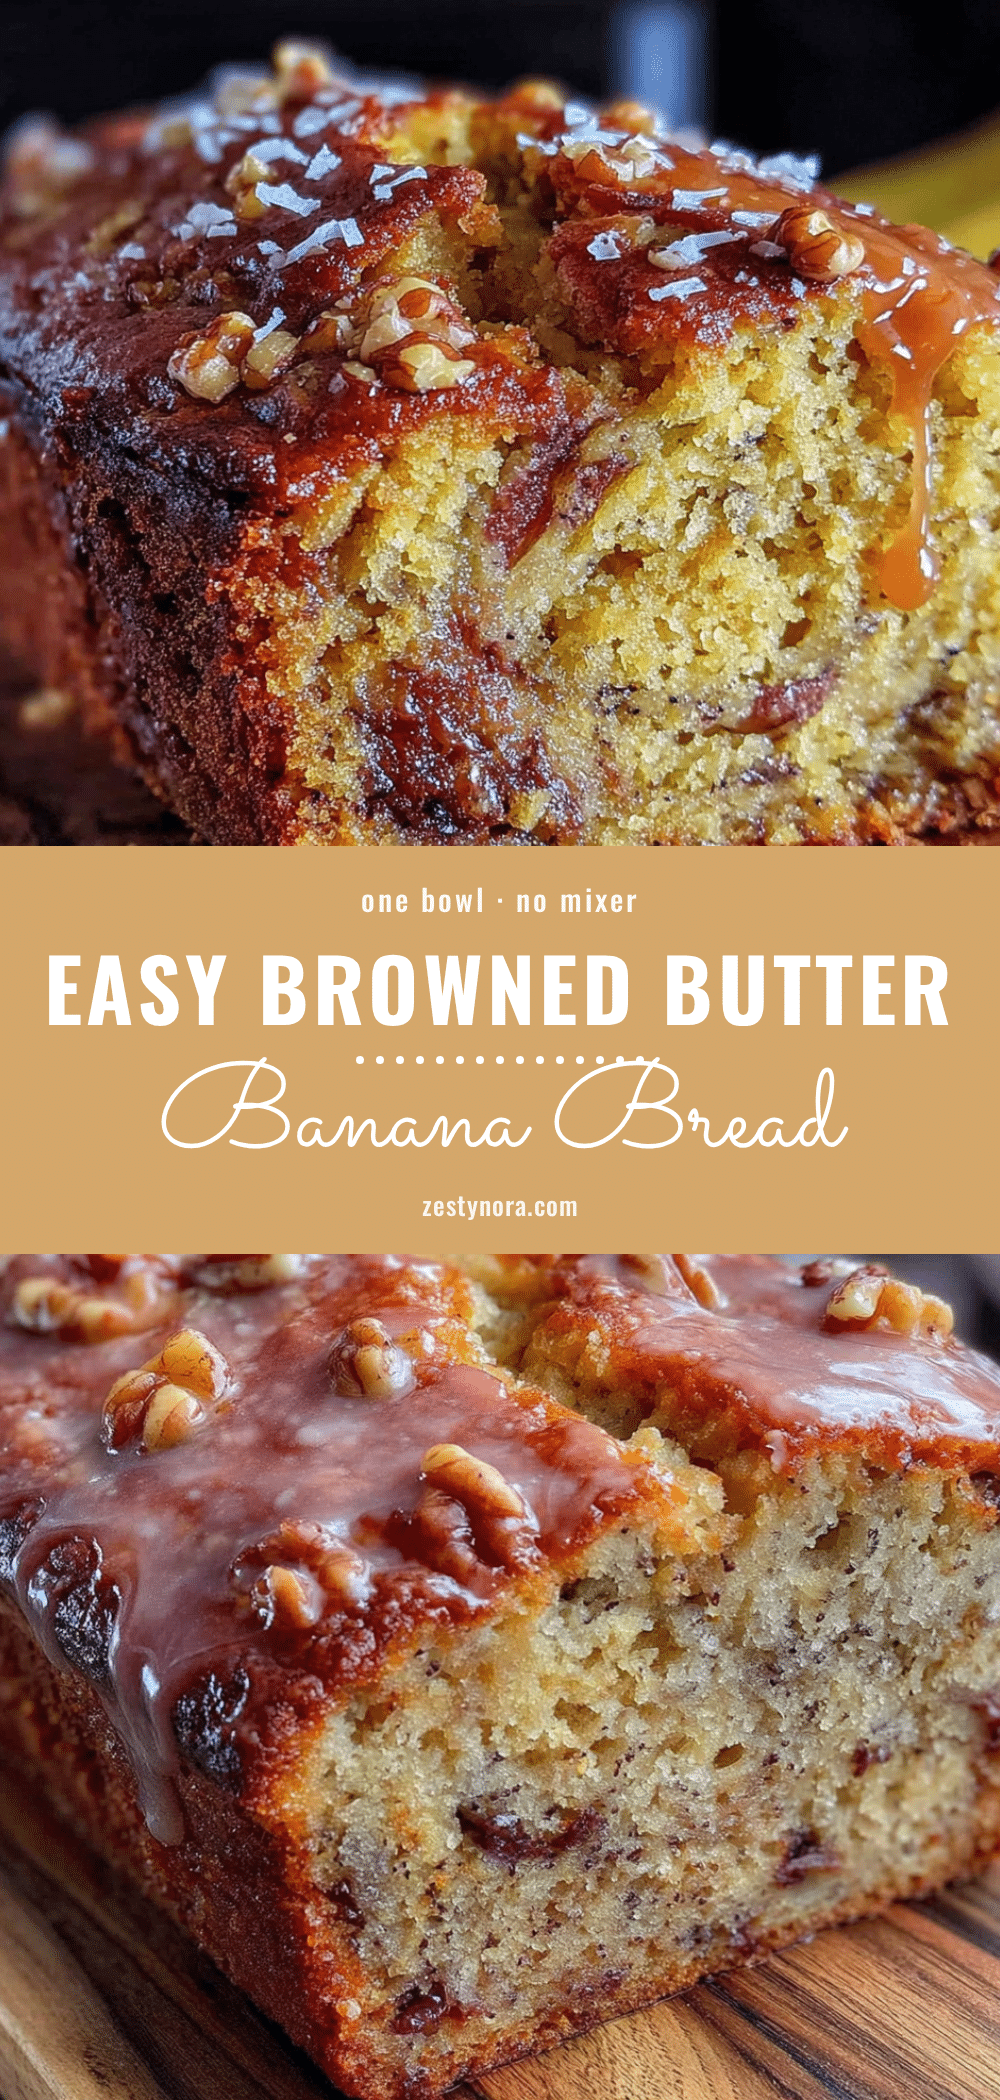
Easy Browned Butter Banana Bread Recipe (No Mixer)
This easy browned butter banana bread requires no mixer and comes together in one bowl. The brown butter adds a nutty, caramel-like depth that makes this the best banana bread you’ll ever have.
- Prep Time: 10 minutes
- Cook Time: 50-60 minutes
- Total Time: 1 hour 10 minutes
- Yield: 10 servings 1x
- Category: Dessert
- Cuisine: American
Ingredients
- ½ cup (1 stick or 113g) unsalted butter
- 3 medium ripe bananas (about 1 cup or 240g mashed)
- ¾ cup (150g) granulated sugar
- ¼ cup (50g) light brown sugar, packed
- 1 large egg, at room temperature
- 1 teaspoon vanilla extract
- ¼ cup (60g) plain yogurt or sour cream
- 1½ cups (180g) all-purpose flour
- 1 teaspoon baking soda
- ½ teaspoon salt
- ½ cup (85g) dark chocolate chips (optional)
- ½ cup (60g) chopped walnuts or pecans (optional)
- Flaky sea salt for topping (optional)
Instructions
- Preheat your oven to 350°F (175°C). Position the rack in the center. Line your 9×5-inch loaf pan with parchment paper, leaving some overhang on the long sides.
- Brown the butter: Place the ½ cup of unsalted butter in a medium skillet or saucepan over medium heat. Let it melt completely, then swirl the pan occasionally. After about 3-4 minutes, the butter will start to foam and sizzle. When you see golden brown specks forming at the bottom and smell a nutty aroma, remove it from the heat immediately. Pour it into a heatproof bowl to stop the cooking process. Let it cool for about 5 minutes.
- Mash the bananas: In your large mixing bowl, add the 3 ripe bananas. Mash them with a fork until mostly smooth with a few small lumps remaining. You should have about 1 cup of mashed banana.
- Add the sugars and wet ingredients: To the mashed bananas, add the ¾ cup granulated sugar and ¼ cup packed light brown sugar. Stir with a whisk until combined. Then add the slightly cooled brown butter, 1 large egg (room temperature), 1 teaspoon vanilla extract, and ¼ cup plain yogurt. Whisk everything together until smooth and well combined.
- Add the dry ingredients: Sprinkle the 1½ cups all-purpose flour, 1 teaspoon baking soda, and ½ teaspoon salt over the wet mixture. Use a rubber spatula to fold everything together gently. Stir just until no streaks of flour remain—about 10 to 12 folds. Do not overmix.
- Fold in any mix-ins (optional): If you’re using chocolate chips, nuts, or both, gently fold them in now. Reserve a small handful to sprinkle on top before baking if you want a pretty finish.
- Pour the batter into the prepared loaf pan. Use your spatula to scrape every bit of batter into the pan. Spread it evenly, then give the pan a gentle tap on the counter to release any air bubbles. If you’re adding flaky sea salt, sprinkle it on top now.
- Bake for 50-60 minutes. Place the pan in the preheated oven. Bake until the top is deep golden brown and a toothpick inserted into the center comes out clean or with just a few moist crumbs. Start checking at the 50-minute mark.
- Cool in the pan for 10 minutes. Place the loaf pan on a cooling rack. Let it rest for 10 minutes.
- Lift the bread out and cool completely: Use the parchment paper overhang to lift the loaf out of the pan. Place it directly on the cooling rack. Let it cool completely before slicing—about 1 hour.
Notes
Don’t rush the brown butter. Keep the heat at medium and swirl the pan often. Use room temperature ingredients. Measure flour correctly by spooning and leveling. Don’t overmix the batter. Test for doneness with a toothpick. If the top browns too quickly, tent with aluminum foil for the last 15 minutes.
Nutrition
- Serving Size: 1 slice
- Calories: 245
- Sugar: 19
- Sodium: 210
- Fat: 11
- Saturated Fat: 6
- Carbohydrates: 34
- Fiber: 1.5
- Protein: 3.5
Keywords: banana bread, browned butter banana bread, easy banana bread, no mixer banana bread, one bowl banana bread


