This was supposed to be a batch of salted caramel popcorn. I had the popcorn popped, the caramel sauce simmering on the stove, and I was feeling pretty good about myself. Then my phone rang—my mom, who never calls at the wrong time—and I got distracted. By the time I hung up, the caramel had gone from a perfect golden amber to a dark, smoky mess that smelled more like burnt sugar than anything edible. I stood there, staring at the ruined pot, and honestly, I just wanted to throw in the towel.
But I had a bag of white chocolate chips in the pantry and a bag of candy corn I’d bought on a whim because the orange and yellow colors looked so cheerful. I figured, why not just melt the chocolate, toss in the candy corn, and see what happened? I mean, it couldn’t be worse than the burnt caramel, right? I spread the mixture onto a baking sheet, threw it in the fridge, and forgot about it for an hour. When I pulled it out and broke it into pieces, I couldn’t believe it. The white chocolate had set into a creamy, crisp bark, and the candy corn added these little bursts of chewy sweetness. It was nothing like the caramel popcorn I’d planned—and honestly, it was way better.
That first bite had this unexpected crunch, followed by a soft, marshmallow-like chew from the candy corn. I stood at the counter, eating piece after piece, and I knew I’d stumbled onto something special. Maybe you’ve been there—when a kitchen disaster turns into a happy little accident that becomes your new favorite thing. This candy corn bark is that for me. It’s so simple that I almost feel silly calling it a recipe, but it’s the kind of treat that disappears fast. Every time I make it, I think back to that ruined caramel and smile. Sometimes the best recipes come from the messiest moments.
Why You’ll Love This Recipe
Let me tell you why this candy corn bark has become my go-to fall treat. It’s not fancy, and it doesn’t pretend to be. But it delivers on flavor, texture, and pure satisfaction every single time.
- Quick & Easy: This comes together in about 15 minutes of active time. The hardest part is waiting for it to set in the fridge. Perfect for those evenings when you need a sweet fix but don’t want to spend an hour in the kitchen.
- Simple Ingredients: You only need three things—white chocolate chips, candy corn, and a tiny bit of coconut oil or shortening. No fancy grocery trips, no obscure spices. You probably have everything already.
- Perfect for Fall Gatherings: This bark is a hit at Halloween parties, Thanksgiving dessert tables, or just a cozy night in with a movie. It’s festive without being over-the-top.
- Crowd-Pleaser: I’ve brought this to potlucks and watched it vanish within minutes. Kids love the candy corn, and adults love the creamy chocolate. It’s a win-win.
- Unbelievably Delicious: The combination of smooth white chocolate and chewy, slightly crunchy candy corn is addictive. It’s like a candy bar and a cookie had a baby.
What makes this different from other candy bark recipes? It’s the texture. Most bark recipes use dark or milk chocolate, which can be heavy. White chocolate lets the candy corn shine, and the tiny bit of coconut oil gives it a snappy, clean break. I tested this with different chocolates—trust me, white is the way to go. This isn’t just another version; it’s my best version after about six trials (and a few sticky failures).
This recipe is the kind that makes you close your eyes after the first bite. It’s comfort food reimagined—sweeter, crunchier, and way easier than you’d expect. Perfect for impressing guests without stress, or turning a simple Tuesday into something memorable.
What Ingredients You Will Need
This recipe uses simple, wholesome ingredients to deliver bold flavor and satisfying texture without the fuss. Here’s everything you need, along with a few notes from my kitchen trials.
- White Chocolate Chips (12 oz or 340 g): I recommend Ghirardelli or Guittard for the smoothest melt and creamiest texture. Avoid generic store brands that can seize or turn grainy. If you prefer a dairy-free option, use Enjoy Life white chocolate chips—they melt beautifully and taste just as good. Look for chips that list cocoa butter as the first ingredient for the best results.
- Candy Corn (1 cup or 200 g): Classic candy corn works perfectly here. I’ve tried the autumn mix with the little pumpkins and gourds, and it’s also delicious. For a less sweet version, look for “natural” candy corn made with honey or tapioca syrup. Just avoid the stale stuff—fresh candy corn is softer and chewier, which gives the bark a better texture.
- Coconut Oil or Shortening (1 tsp): This is the secret ingredient that keeps the chocolate from seizing and gives the bark a clean, snappy break. I use refined coconut oil because it has no coconut flavor. Vegetable shortening works too, but coconut oil gives a slightly glossier finish. Don’t skip this—I learned the hard way when my first batch came out crumbly and dull.
- Optional: Flaky Sea Salt (a pinch): This isn’t required, but it takes the bark to another level. The salt cuts through the sweetness and makes the flavors pop. I like Maldon sea salt for its delicate crunch. Sprinkle it on right after the chocolate sets, while it’s still soft.
That’s it. Three ingredients (four if you count the salt) and you’re ready to go. The beauty of this recipe is its simplicity—no complicated steps, no fancy equipment. Just melt, mix, and chill.
Equipment Needed
You don’t need much for this recipe, and that’s part of the charm. Here’s what I use, along with a few alternatives from my own kitchen experiments.
- Baking Sheet (13×18 inches or standard half-sheet): I use a rimmed baking sheet to keep the melted chocolate from spilling over the edges. If you don’t have one, a large cutting board or a flat plate lined with parchment will work.
- Parchment Paper or Silicone Mat: This is non-negotiable. Without it, the bark will stick to the pan and you’ll end up with a mess. I prefer parchment paper because it’s disposable, but a silicone mat works great and is more eco-friendly.
- Medium Microwave-Safe Bowl: For melting the chocolate. Glass or ceramic bowls work best—avoid plastic, which can hold onto odors. I use a Pyrex measuring cup because the spout makes pouring easier.
- Spatula or Offset Spatula: For spreading the melted chocolate into an even layer. A regular spoon works in a pinch, but an offset spatula gives you more control.
- Refrigerator Space: You’ll need a flat spot in your fridge to let the bark set. Clear a shelf beforehand—I’ve had to shuffle things around mid-recipe more times than I’d like to admit.
Budget-friendly tip: If you don’t have a silicone spatula, a butter knife works fine for spreading. And if you’re out of parchment paper, aluminum foil lightly greased with coconut oil will do the trick.
Preparation Method
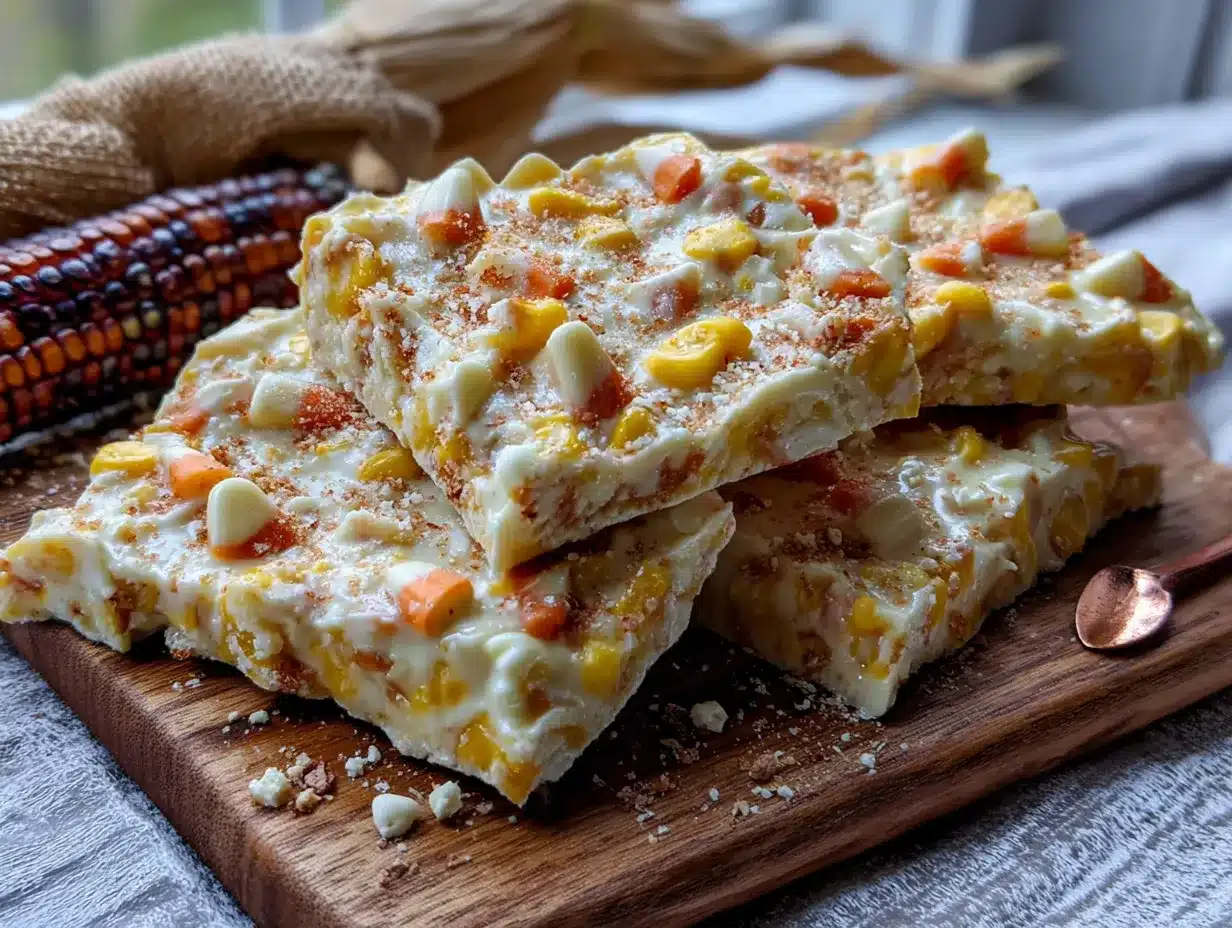
Follow these steps carefully, and you’ll have perfect candy corn bark every time. I’ve included all the little details I wish someone had told me when I first started making this.
- Line your baking sheet with parchment paper or a silicone mat. Make sure the paper extends slightly over the edges—this gives you handles to lift the bark out later. Set it aside.
- Measure out your candy corn (1 cup or 200 g) and set it near your workspace. If the candy corn is stale or hard, microwave it for 5 seconds to soften it slightly. Fresh candy corn is key—I once used an old bag, and the pieces were rock-hard and ruined the texture.
- Melt the white chocolate chips (12 oz or 340 g) in a medium microwave-safe bowl. Add the coconut oil (1 tsp) to the bowl. Microwave in 30-second intervals at 50% power, stirring after each interval. This is crucial—white chocolate burns easily. I ruined my first batch by microwaving on full power. It took about 2 minutes total. The chocolate should be smooth and glossy, with no lumps.
- Stir in the candy corn gently. Don’t overmix, or the candy corn will start to melt and streak the chocolate. You want it evenly distributed but still intact. Fold it in with a spatula using slow, deliberate strokes.
- Pour the mixture onto the prepared baking sheet. Use your spatula to spread it into an even layer, about ¼ inch thick. Don’t worry if it’s not perfect—rustic is part of the charm. If you want a thinner bark, spread it a bit more. For thicker, chunkier pieces, keep it concentrated in the center.
- Optional: Sprinkle flaky sea salt over the top if you’re using it. Do this while the chocolate is still wet so the salt sticks. I like about ¼ teaspoon, but adjust to your taste.
- Refrigerate for at least 1 hour until completely firm. The bark should be hard to the touch and lift easily off the parchment. If it feels soft or bends, give it more time. I usually leave mine for 2 hours to be safe.
- Break into pieces once set. Use your hands or a knife to break the bark into irregular shards. I like rustic, uneven pieces—they look more homemade and inviting. Store in an airtight container.
Sensory cues: When you spread the chocolate, it should look glossy and smooth, not grainy. The candy corn should be visible but slightly embedded in the chocolate. When you break the bark, it should snap cleanly—no bending or crumbling. If it bends, it needs more chilling time.
Pro tip from my kitchen: If the chocolate seizes (turns thick and lumpy), add another ½ tsp of coconut oil and stir vigorously. It should smooth out. This happened to me once when I added cold candy corn directly to hot chocolate—lesson learned.
Cooking Tips & Techniques
I’ve made this candy corn bark more times than I can count, and I’ve learned a few tricks along the way. Here’s what I wish I’d known from the start.
Don’t overheat the chocolate. White chocolate is the diva of the chocolate world—it burns at a lower temperature than milk or dark chocolate. Always use 50% power in the microwave and stir frequently. If you’re using a double boiler, keep the water at a gentle simmer, not a rolling boil. I once walked away for 30 seconds and came back to a bowl of scorched, lumpy mess. Not fun.
Room temperature ingredients matter. If your candy corn is straight from the fridge, let it sit out for 10 minutes before adding it to the melted chocolate. Cold candy corn can cause the chocolate to seize or become grainy. I learned this the hard way when my bark turned out speckled and weird.
Use a thin, even layer. Thick bark takes forever to set and can be chewy rather than snappy. Aim for about ¼ inch thickness. If you want thicker pieces, just break them into larger chunks later—the texture will still be right.
Timing is everything. This bark sets fast in the fridge, but don’t rush it. I’ve tried cutting it after 30 minutes, and it was a sticky, messy disaster. Give it a full hour minimum. For best results, make it the night before and let it chill overnight. The flavor actually gets better as it sits—the candy corn softens slightly and blends with the chocolate.
Double batch tip: This recipe doubles beautifully. Just use a larger baking sheet or two separate sheets. I’ve made triple batches for holiday parties, and they always disappear. Just make sure your fridge has enough flat space.
Variations & Adaptations
This recipe is incredibly flexible. Here are a few ways to switch it up based on your mood, diet, or what’s in your pantry.
Dark Chocolate Version: Swap the white chocolate for dark chocolate chips (60-70% cacao). The bitterness of the dark chocolate balances the sweetness of the candy corn beautifully. I tried this last fall, and it was a hit with my friends who find white chocolate too sweet. Use the same melting method—just be careful not to overheat it.
Nutty Crunch: Add ½ cup of chopped pecans or almonds along with the candy corn. Toast the nuts first in a dry pan for 3-4 minutes to bring out their flavor. This adds a lovely crunch and makes the bark feel more substantial. I love this version for Thanksgiving—it feels a little more grown-up.
Drizzle of Caramel: After spreading the chocolate, drizzle 2-3 tablespoons of store-bought caramel sauce over the top. Use a toothpick to swirl it into the chocolate. This adds a gooey, buttery note that pairs perfectly with the candy corn. Just make sure the caramel is room temperature so it doesn’t seize the chocolate.
Seasonal Twist: Swap candy corn for autumn-themed M&Ms or chopped Reese’s Pumpkins. I’ve done this for Halloween parties, and it’s always a crowd-pleaser. The chocolate chips add extra color and crunch.
Dairy-Free Option: Use dairy-free white chocolate chips (like Enjoy Life) and refined coconut oil. The texture is identical, and no one will know the difference. I’ve served this to dairy-free friends, and they couldn’t believe it wasn’t regular white chocolate.
My personal favorite variation? The dark chocolate version with a sprinkle of sea salt. It’s sophisticated enough for adult gatherings but still fun enough for kids. I stumbled onto it when I ran out of white chocolate and had to improvise—another happy accident!
Serving & Storage Suggestions
This candy corn bark is best served cold or at room temperature, depending on your preference. Here’s how to make the most of it.
Serving Temperature: I prefer it straight from the fridge—it’s snappy and refreshing, like a candy bar. But if you like a softer, chewier texture, let it sit at room temperature for 5-10 minutes before serving. For parties, I arrange the pieces on a platter with other fall treats like caramel apples or pumpkin cookies.
Presentation Ideas: Arrange the bark on a wooden board or a festive plate. Sprinkle extra candy corn around the edges for color. If you’re giving it as a gift, layer the pieces in a clear cellophane bag tied with a ribbon. I’ve done this for neighbors, and they always rave about it.
Storage Instructions: Store the bark in an airtight container in the refrigerator for up to 2 weeks. I use a glass container with a tight-fitting lid to keep it fresh. If you live in a humid climate, add a silica gel packet to the container to prevent the candy corn from getting sticky.
Freezer Tips: This bark freezes beautifully. Layer the pieces between sheets of parchment paper in a freezer-safe container or zip-top bag. It will keep for up to 3 months. To serve, let it thaw in the fridge for 30 minutes—don’t let it come to room temperature, or the texture can become soft.
Flavor Development: Honestly, this bark tastes even better after a day or two in the fridge. The candy corn softens slightly and melds with the chocolate, creating a more cohesive flavor. I’ve made it a week ahead for parties, and it was perfect.
Nutritional Information & Benefits
Let’s be real—this is a treat, not a health food. But that doesn’t mean it can’t fit into a balanced lifestyle. Here’s what you need to know.
Estimated Nutritional Values (per 1-ounce serving, about 2-3 pieces):
- Calories: 150
- Total Fat: 9g
- Saturated Fat: 5g
- Carbohydrates: 18g
- Sugar: 16g
- Protein: 2g
- Sodium: 25mg
Dietary Considerations: This recipe is vegetarian. For a vegan version, use dairy-free white chocolate chips. It contains dairy and soy (in the chocolate), so it’s not suitable for those with allergies unless you use specific alternatives. Candy corn typically contains gelatin, so it’s not vegan—look for vegan candy corn if needed.
Health Benefits of Key Ingredients: White chocolate contains cocoa butter, which is rich in antioxidants and healthy fats. In small amounts, it can be part of a balanced diet. Candy corn is mostly sugar, so enjoy it in moderation. The coconut oil provides a small amount of medium-chain triglycerides (MCTs), which are easily digested.
My personal perspective? I believe in enjoying treats without guilt. This bark is for special occasions—a Halloween party, a cozy fall evening, a gift for a friend. It’s not an everyday snack, and that’s okay. Savor it, share it, and don’t overthink it.
Conclusion
This easy 3-ingredient candy corn bark is proof that the best recipes don’t have to be complicated. It started as a mistake—a ruined batch of caramel and a moment of frustration—and turned into one of my most-requested treats. That’s the thing about cooking, isn’t it? Sometimes the accidents are better than the plans.
I love this recipe because it’s forgiving. You can swap the chocolate, add nuts, drizzle caramel, or keep it simple. It’s a blank canvas for your fall cravings. And honestly, it’s just fun to make. There’s something satisfying about watching the white chocolate melt and the candy corn disappear into it.
I’d love to hear how yours turns out. Did you add anything fun? Did you try a different chocolate? Drop a comment below and let me know. And if you share it on social media, tag me—I love seeing your creations. Now go make some bark, and don’t worry if it’s not perfect. Some of the best things in life come from happy accidents.
Frequently Asked Questions
Can I use milk chocolate instead of white chocolate?
Yes, but the texture will be different. Milk chocolate is softer and won’t set as firmly as white chocolate. If you try it, add an extra teaspoon of coconut oil to help it set. The flavor will be richer, but the candy corn might get lost. I prefer white chocolate for the contrast.
How do I prevent the chocolate from seizing?
Don’t let any water touch the chocolate—not even a drop. Make sure your bowl and spatula are completely dry. Microwave in short bursts at 50% power, and stir well between each interval. If it does seize, add ½ tsp of coconut oil and stir vigorously until smooth.
Can I make this without a microwave?
Absolutely. Use a double boiler: place a heatproof bowl over a pot of simmering water (don’t let the bowl touch the water). Stir the chocolate and coconut oil until melted. It takes a bit longer, but it’s just as easy. Just be careful not to overheat it.
How long does this bark last?
Stored in an airtight container in the fridge, it stays fresh for up to 2 weeks. In the freezer, it lasts up to 3 months. Just make sure it’s sealed well to prevent freezer burn. I’ve never had it last that long—it’s usually gone within days!
Can I use other candies besides candy corn?
Definitely. Try chopped candy bars, M&Ms, or even crushed pretzels for a salty-sweet twist. Just keep the total amount of mix-ins to about 1 cup so the chocolate can still set properly. My favorite alternative is chopped Reese’s Peanut Butter Cups—so good.
Pin This Recipe!
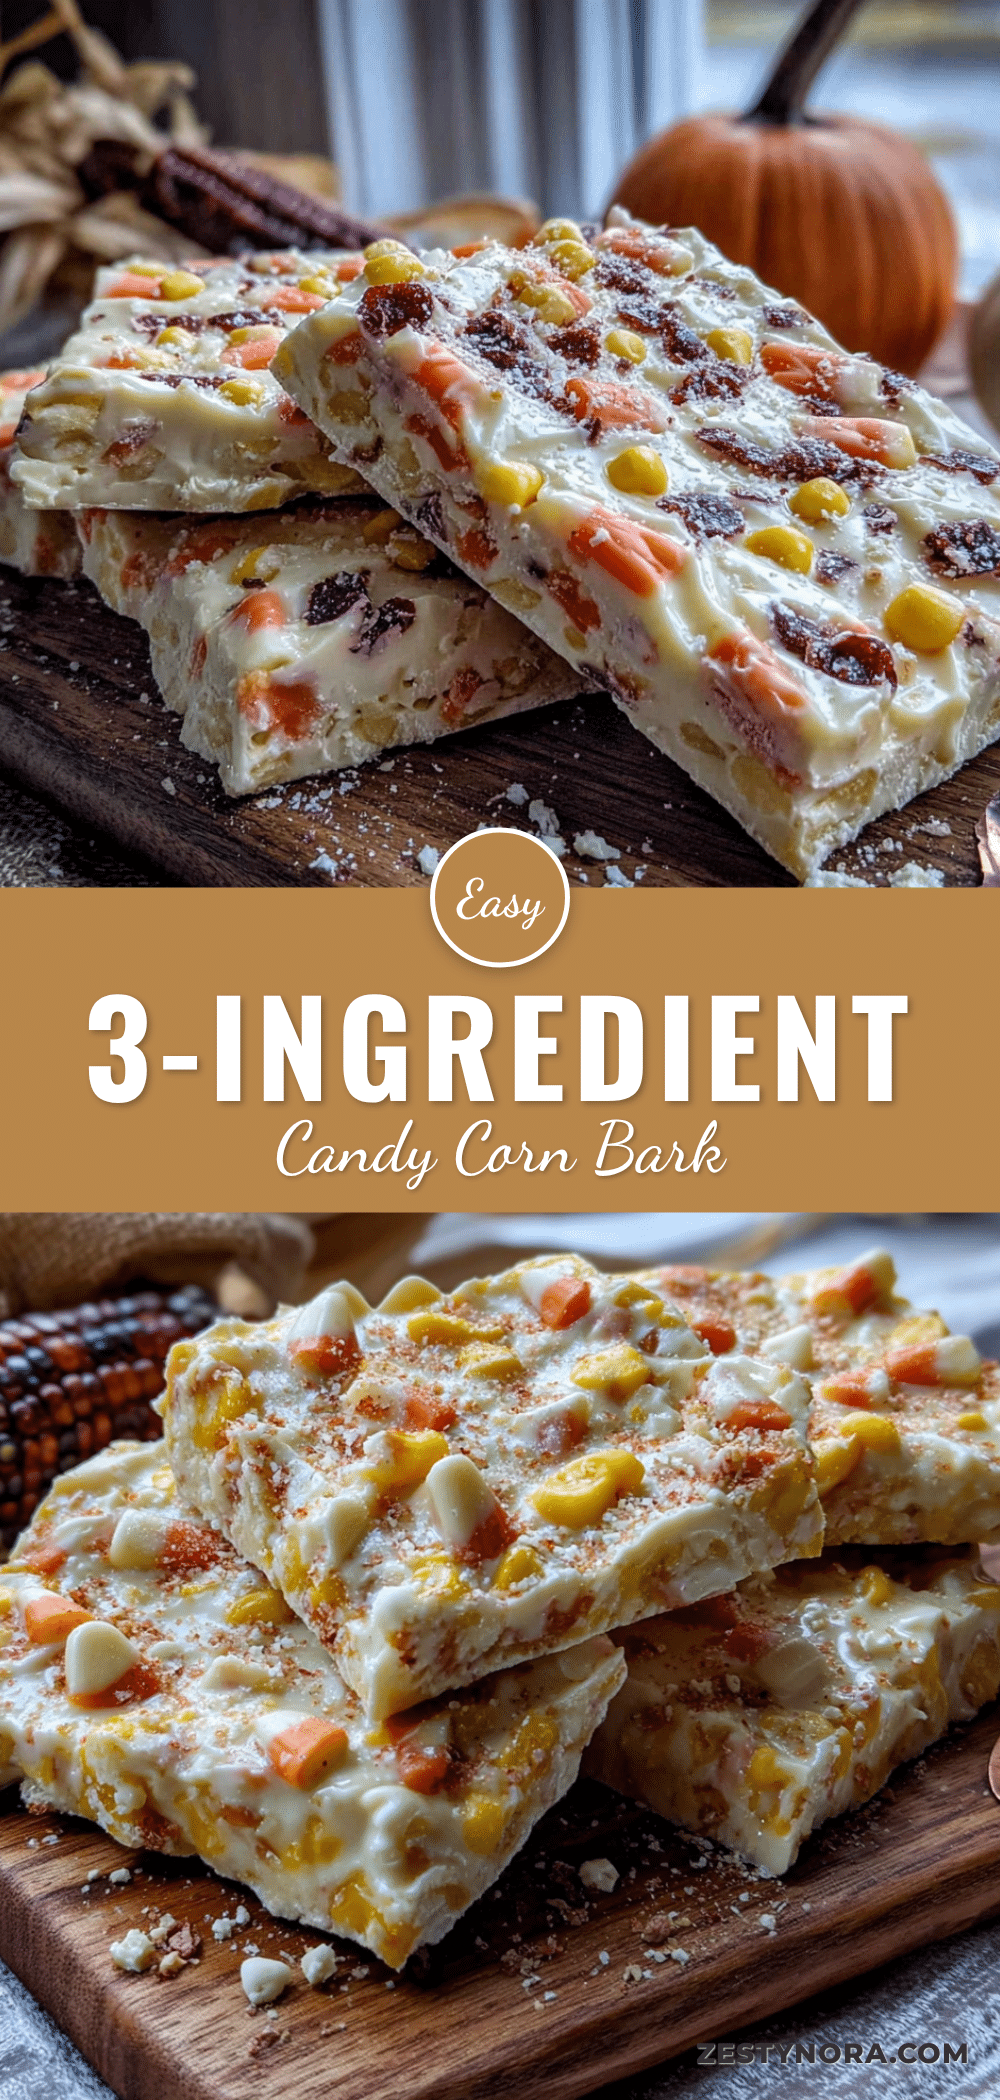
Easy 3-Ingredient Candy Corn Bark: The Best Fall Treat

This easy 3-ingredient candy corn bark is proof that the best recipes don’t have to be complicated. It started as a mistake—a ruined batch of caramel and a moment of frustration—and turned into one of my most-requested treats.
- Prep Time: 15 minutes
- Cook Time: 2 minutes
- Total Time: 1 hour 17 minutes
- Yield: 12 servings 1x
- Category: Dessert
- Cuisine: American
Ingredients
- 12 oz (340 g) white chocolate chips (recommended: Ghirardelli or Guittard)
- 1 cup (200 g) candy corn
- 1 tsp coconut oil or shortening
- Optional: pinch of flaky sea salt (e.g., Maldon)
Instructions
- Line your baking sheet with parchment paper or a silicone mat. Make sure the paper extends slightly over the edges—this gives you handles to lift the bark out later. Set it aside.
- Measure out your candy corn (1 cup or 200 g) and set it near your workspace. If the candy corn is stale or hard, microwave it for 5 seconds to soften it slightly.
- Melt the white chocolate chips (12 oz or 340 g) in a medium microwave-safe bowl. Add the coconut oil (1 tsp) to the bowl. Microwave in 30-second intervals at 50% power, stirring after each interval. This is crucial—white chocolate burns easily. It took about 2 minutes total. The chocolate should be smooth and glossy, with no lumps.
- Stir in the candy corn gently. Don’t overmix, or the candy corn will start to melt and streak the chocolate. You want it evenly distributed but still intact. Fold it in with a spatula using slow, deliberate strokes.
- Pour the mixture onto the prepared baking sheet. Use your spatula to spread it into an even layer, about ¼ inch thick. Don’t worry if it’s not perfect—rustic is part of the charm.
- Optional: Sprinkle flaky sea salt over the top if you’re using it. Do this while the chocolate is still wet so the salt sticks. I like about ¼ teaspoon, but adjust to your taste.
- Refrigerate for at least 1 hour until completely firm. The bark should be hard to the touch and lift easily off the parchment. If it feels soft or bends, give it more time. I usually leave mine for 2 hours to be safe.
- Break into pieces once set. Use your hands or a knife to break the bark into irregular shards. I like rustic, uneven pieces—they look more homemade and inviting. Store in an airtight container.
Notes
Don’t overheat the chocolate. White chocolate is the diva of the chocolate world—it burns at a lower temperature than milk or dark chocolate. Always use 50% power in the microwave and stir frequently. Room temperature ingredients matter. If your candy corn is straight from the fridge, let it sit out for 10 minutes before adding it to the melted chocolate. Cold candy corn can cause the chocolate to seize or become grainy. Use a thin, even layer. Thick bark takes forever to set and can be chewy rather than snappy. Aim for about ¼ inch thickness. Timing is everything. This bark sets fast in the fridge, but don’t rush it. Give it a full hour minimum. For best results, make it the night before and let it chill overnight. The flavor actually gets better as it sits—the candy corn softens slightly and blends with the chocolate. If the chocolate seizes (turns thick and lumpy), add another ½ tsp of coconut oil and stir vigorously. It should smooth out.
Nutrition
- Serving Size: 1 ounce (about 2-3 p
- Calories: 150
- Sugar: 16
- Sodium: 25
- Fat: 9
- Saturated Fat: 5
- Carbohydrates: 18
- Protein: 2
Keywords: candy corn bark, fall treat, Halloween dessert, easy dessert, 3-ingredient recipe, white chocolate bark


