For a while, I just accepted that jalapeño poppers weren’t going to stay crispy. You know that sad thing that happens—the breading gets soggy, the pepper goes limp, and what started as a good idea turns into a greasy, floppy mess on the plate. I’d order them at bars, make them from frozen bags, even tried the oven-baked versions that promised crunch but delivered something closer to a steamed pepper jacket. It was fine. I ate them anyway. But I kept thinking there had to be a way to get that snap—both in the pepper itself and in the coating—without a deep fryer or a complicated beer batter situation.
Then I started playing around with pickling my own jalapeños at home. Honestly, it started because I had too many from the garden and didn’t want them to go bad. I made a quick brine, threw in some garlic and peppercorns, and let them sit in the fridge. A few days later, I was eating them straight out of the jar (no judgment) and thought—wait. What if I stuffed these? The tang from the brine cuts right through the richness of the cream cheese, and because they’re pickled first, the peppers hold their shape way better during cooking. No more sad, soggy poppers.
So this recipe for Crispy Refrigerator Pickled Jalapeno Poppers was born out of a kitchen accident and a little stubbornness. It’s the appetizer I bring to every game day gathering, every potluck, every Tuesday night when I need something that feels like a treat. The crunch stays. The filling stays cool and creamy. And the pickled kick? That’s the part nobody sees coming.
Why You’ll Love This Recipe
Let me tell you why these poppers are different from every other version you’ve tried. First off—the crunch. It’s not a lie or a food blogger exaggeration. These things stay crispy for a surprisingly long time, even after they’ve sat out on the counter for a bit. The secret is in the double-coating method and the fact that the pickled peppers don’t release as much moisture during frying. Less moisture means a crunch that actually lasts.
- Quick & Easy : Comes together in about 30 minutes of active time, plus a quick pickle soak. Perfect for last-minute entertaining or when you just want a snack that feels special.
- Simple Ingredients : No weird specialty items. You probably have most of this in your pantry already—vinegar, sugar, flour, breadcrumbs, cream cheese. The only thing you might need to grab is a bunch of fresh jalapeños.
- Perfect for Game Day & Parties : These are the first thing to disappear at any gathering. I’ve seen people hover around the platter like they’re guarding treasure. They’re great for Super Bowl, backyard BBQs, or just a fun weekend snack.
- Crowd-Pleaser : Even people who say they don’t like spicy food go back for seconds. The pickling mellows out the heat just enough, and the creamy filling balances everything out.
- Unbelievably Delicious : The combo of tangy pickled pepper, cool cream cheese, and crunchy golden coating is honestly next-level. It’s the kind of appetizer that makes people close their eyes and go “mmm” without thinking.
What makes this recipe different from all the others? It’s the pickling step. Most recipes use raw jalapeños, which can be unpredictable in heat and texture. By giving them a quick refrigerator pickle, you get consistent flavor, a slight tang, and peppers that actually hold up to frying without turning into mush. Plus, you can make the pickled peppers days ahead, so assembly day is a breeze. This isn’t just another popper recipe—it’s the one I’ve tweaked and tested until it was exactly right. It’s comfort food reimagined—a little tangier, a lot crunchier, and totally worth the extra step.
What Ingredients You Will Need
This recipe uses simple, wholesome ingredients to deliver bold flavor and satisfying crunch without any fuss. Most of these are pantry staples, and the pickling brine comes together in minutes.
For the Pickled Jalapeños
- Fresh jalapeños – 10-12 medium-sized peppers. Look for firm, smooth-skinned peppers with no soft spots. I prefer using ones that are similar in size so they pickle evenly.
- White vinegar – 1 cup. Regular distilled white vinegar works best here. It has a clean, sharp acidity that doesn’t overpower the pepper flavor.
- Water – 1 cup. Filtered or tap water is fine. The ratio of vinegar to water is equal, which gives a balanced brine.
- Granulated sugar – 2 tablespoons. This balances the acidity and helps mellow the heat of the peppers.
- Kosher salt – 1 tablespoon. I use Diamond Crystal brand because it dissolves cleanly. If you use table salt, reduce to 2 teaspoons.
- Garlic cloves – 3 cloves, smashed. Adds a subtle savory note to the brine. You can leave them whole if you prefer a milder garlic flavor.
- Black peppercorns – 1 teaspoon. Whole peppercorns add a gentle warmth without being spicy. Don’t use pre-ground pepper here.
For the Filling
- Full-fat cream cheese – 8 ounces, softened to room temperature. I recommend Philadelphia brand for the smoothest texture. Low-fat versions will work, but the filling won’t be as rich or stable.
- Sharp cheddar cheese – ½ cup, finely shredded. Adds a savory depth that complements the tangy peppers. Pre-shredded cheese works in a pinch, but freshly shredded melts better.
- Green onions – 3 tablespoons, thinly sliced. For a mild oniony bite and a pop of color. You can substitute with chives if you prefer.
- Garlic powder – ½ teaspoon. Not the same as fresh garlic—this adds a gentle background note without being overpowering.
- Salt and black pepper – A pinch each, to taste.
For the Breading & Frying
- All-purpose flour – ½ cup. Creates the first layer of coating that helps the egg wash stick.
- Large eggs – 2, beaten with 1 tablespoon of water. This is the glue that holds the breadcrumbs in place.
- Panko breadcrumbs – 1 cup. These are non-negotiable for maximum crunch. Regular breadcrumbs will work, but they won’t give you the same crispy texture. I use Kikkoman brand.
- Grated Parmesan cheese – ¼ cup, finely grated. Mixed into the panko for extra flavor and browning. The kind in the green shaker can works perfectly here.
- Smoked paprika – ½ teaspoon. Adds color and a subtle smoky note. Regular paprika is fine too.
- Neutral oil for frying – About 2 cups, for shallow frying. I use canola or vegetable oil. Peanut oil works great if you have it on hand.
Equipment Needed
You don’t need a deep fryer or any fancy gadgets for this recipe. Here’s what you’ll actually use:
- A medium saucepan – For making the pickling brine. Any non-reactive pot works (stainless steel or enameled is best).
- A glass jar or heatproof bowl – For pickling the peppers. A wide-mouth quart-sized mason jar is perfect. Make sure it’s clean and dry before you start.
- A small paring knife – For slicing the peppers. A sharp knife makes clean cuts and reduces the chance of slipping.
- A small spoon or melon baller – For removing the seeds and membranes. A melon baller is actually perfect for this—it scoops out the insides quickly without tearing the pepper.
- Three shallow bowls – For the breading station (flour, egg wash, panko mixture). Pie plates or wide soup bowls work great.
- A large heavy-bottomed skillet or Dutch oven – For frying. Cast iron is ideal because it holds heat evenly, but any heavy pan will do. I use my trusty 12-inch cast iron skillet.
- A wire rack set over a baking sheet – For draining the fried poppers. This keeps them crispy on all sides. Paper towels work in a pinch, but the bottoms can get steamy.
- Tongs or a slotted spoon – For carefully lowering and removing the poppers from the hot oil.
- A kitchen thermometer – Optional but highly recommended. Keeping the oil at a steady 350°F is the secret to even browning and a non-greasy coating.
If you don’t have a thermometer, don’t stress. You can test the oil by dropping a pinch of panko in—if it sizzles immediately and floats, you’re good to go. Just keep an eye on the heat and adjust as you go.
Preparation Method
Step 1: Pickle the Jalapeños (Do This First!)
Start by making the brine. In a medium saucepan, combine 1 cup white vinegar, 1 cup water, 2 tablespoons granulated sugar, 1 tablespoon kosher salt, 3 smashed garlic cloves, and 1 teaspoon black peppercorns. Bring this to a boil over medium-high heat, stirring occasionally until the sugar and salt dissolve completely. Once it boils, remove it from the heat and let it cool for about 5 minutes—just enough so it’s not scalding hot.
While the brine cools, prepare your jalapeños. Wearing gloves is a good idea here (trust me on this one—I learned the hard way after touching my eye later that night). Slice each pepper in half lengthwise. Use a small spoon or melon baller to carefully scrape out the seeds and white membranes. Leave the stems intact if you want a little handle for dipping, or trim them off—your call.
Place the pepper halves into your clean glass jar or heatproof bowl. Pour the warm brine over them, making sure all the peppers are submerged. Let them sit at room temperature for about 30 minutes, then cover and transfer to the fridge. You want them to pickle for at least 2 hours, but overnight is even better. The peppers will keep in the fridge for up to 2 weeks, so you can absolutely make them ahead of time.
Step 2: Make the Cream Cheese Filling
In a medium bowl, combine 8 ounces of softened cream cheese, ½ cup shredded sharp cheddar, 3 tablespoons sliced green onions, ½ teaspoon garlic powder, and a pinch each of salt and black pepper. Stir everything together until it’s smooth and well combined. Taste it—you want the filling to be creamy and savory with a hint of sharpness from the cheddar. If it needs more salt, add a little. Set it aside while you set up your breading station.
Step 3: Set Up the Breading Station
Grab three shallow bowls. In the first bowl, put ½ cup all-purpose flour. In the second bowl, beat 2 large eggs with 1 tablespoon of water until smooth. In the third bowl, combine 1 cup panko breadcrumbs, ¼ cup grated Parmesan, and ½ teaspoon smoked paprika. Mix the panko mixture with your fingers to evenly distribute the cheese and paprika.
Step 4: Stuff and Coat the Peppers
Take your pickled jalapeño halves out of the brine and pat them dry gently with paper towels. You don’t want them dripping wet, but a little moisture is fine. Using a small spoon or your fingers, fill each pepper half with about a heaping teaspoon of the cream cheese mixture. Don’t overstuff—you want the filling to be flush with the cut edge, not overflowing. Smooth it out with your finger so it’s nice and even.
Now for the coating. Working one at a time, dredge each stuffed pepper in the flour, shaking off any excess. Then dip it into the egg wash, letting any extra drip off. Finally, press it into the panko mixture, making sure it’s completely coated on all sides. Place the coated poppers on a plate or baking sheet. Don’t stack them—they’ll stick together and mess up the coating.
Step 5: Fry to Golden Perfection
Pour about 2 inches of neutral oil into your heavy-bottomed skillet. Heat it over medium heat until it reaches 350°F. If you don’t have a thermometer, you can test the oil by dropping a pinch of panko in—it should sizzle immediately and float to the surface.
Carefully lower 4-5 poppers into the hot oil using tongs. Don’t overcrowd the pan—they need room to brown evenly. Fry for 2-3 minutes per side, until the coating is deep golden brown and crispy. Flip them gently with tongs. The total cooking time is about 4-6 minutes.
Transfer the fried poppers to the wire rack set over a baking sheet. Let them drain for a minute or two. Repeat with the remaining poppers, making sure the oil comes back up to temperature between batches.
Sensory cue: When they’re done, the coating should look like golden sand—crispy and textured. You’ll hear a satisfying crunch when you bite into one, and the filling should be warm and creamy, not runny.
Cooking Tips & Techniques
I’ve made these poppers more times than I can count, and I’ve definitely had my share of failures along the way. Here are the things I wish someone had told me when I started:
Don’t skip the drying step. After pickling, pat the peppers dry before stuffing them. If they’re too wet, the breading will slide right off during frying. I learned this the messy way—first batch ended up with bare spots and a pan full of floating breadcrumbs.
Keep the oil temperature steady. This is the biggest factor in getting a crispy, non-greasy coating. If the oil is too cool, the poppers absorb oil and turn soggy. Too hot, and the outside burns before the filling warms through. I keep my thermometer clipped to the pan and adjust the heat as needed between batches. If you don’t have a thermometer, fry a test popper first and adjust from there.
Use cold filling. After you stuff the peppers, pop them in the fridge for 10-15 minutes before breading. Cold filling stays put during frying and doesn’t leak out. This is especially helpful if you’re making a big batch.
Work in small batches. I know it’s tempting to load up the pan, but overcrowding drops the oil temperature and leads to uneven cooking. Four or five poppers per batch is the sweet spot. Give them room to swim.
Double-coat for extra crunch. If you’re feeling ambitious, you can do a double dip—flour, egg, panko, then egg and panko again. This creates an extra-thick, extra-crunchy shell. It’s not necessary, but it’s a fun upgrade for special occasions.
One mistake I still make: rushing the pickling step. I’ve tried to speed-pickle peppers in 20 minutes, and the flavor just isn’t the same. Give them at least 2 hours, ideally overnight. The brine really works its magic over time, mellowing the heat and infusing the peppers with tangy goodness.
Variations & Adaptations
One of the best things about this recipe is how easy it is to customize. Here are some variations I’ve tried and loved:
Air Fryer Version : If you want to skip the deep frying, these work beautifully in an air fryer. Preheat to 375°F, spray the poppers lightly with oil, and cook for 8-10 minutes, flipping halfway through. They won’t be quite as golden as the fried version, but they’re still crispy and way less greasy. I’ve made them this way for weeknight snacks when I don’t feel like dealing with a pot of oil.
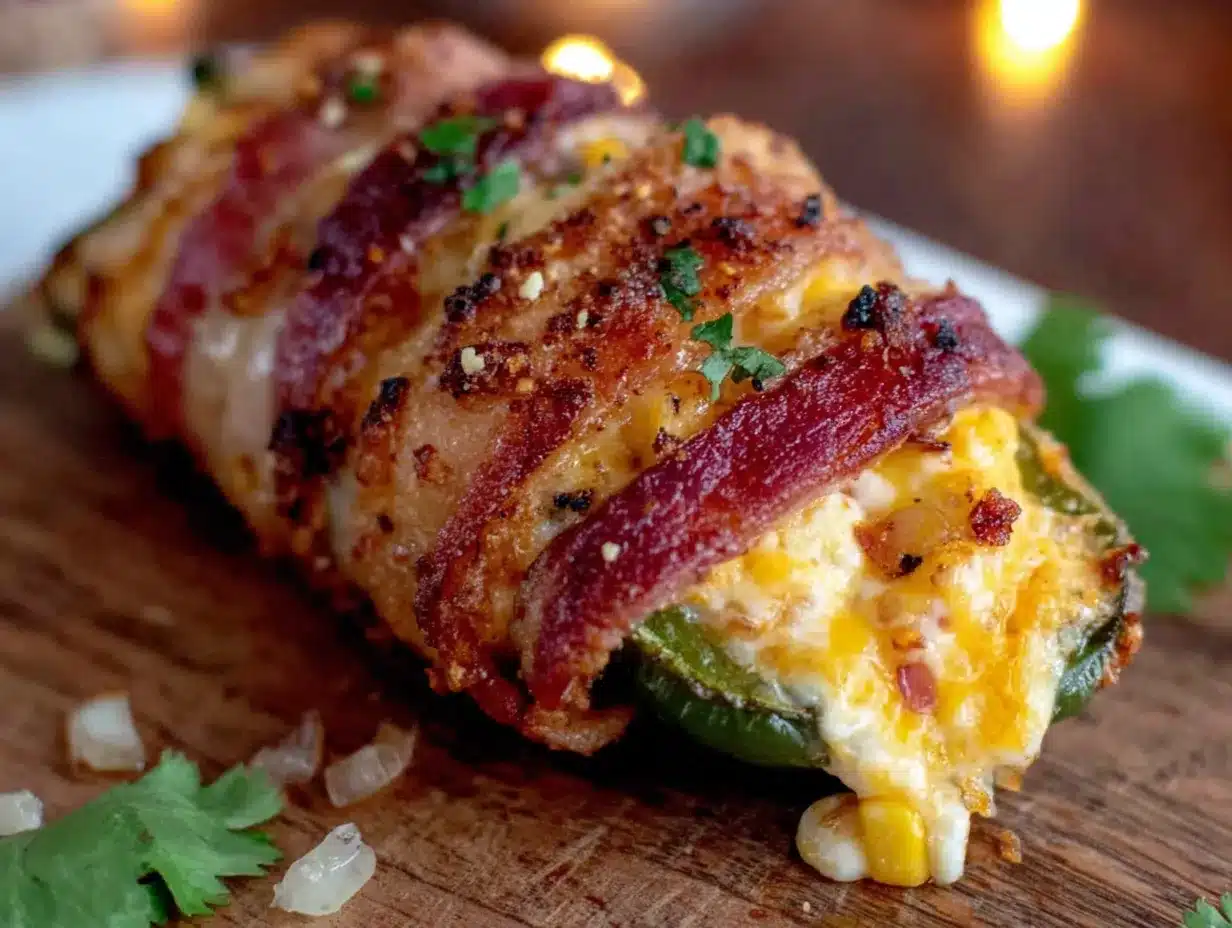
Bacon-Wrapped Poppers : Wrap each stuffed and breaded popper with a half-slice of bacon before frying. Secure with a toothpick. The bacon gets crispy in the hot oil and adds a smoky, savory layer. This is my go-to for game day parties—they disappear fast. Just be careful not to overcrowd the pan, since bacon can splatter a bit.
Spicy Filling : Add 1-2 finely chopped pickled jalapeños (from your brine) to the cream cheese mixture for an extra kick. You can also stir in a dash of hot sauce or a pinch of cayenne pepper. My husband loves this version—he says it’s the only way to make poppers “actually spicy.”
Dairy-Free Adaptation : Use dairy-free cream cheese and skip the cheddar. The filling won’t be as rich, but it still works. I’ve made these for friends with dairy sensitivities, and they were a hit. Just make sure your panko breadcrumbs are dairy-free (most are, but check the label).
Gluten-Free Option : Swap the all-purpose flour for a gluten-free all-purpose blend, and use gluten-free panko breadcrumbs. The texture will be slightly different—a bit more delicate—but still delicious. I’ve tested this with Cup4Cup flour and Ian’s gluten-free panko, and the results were solid.
Sweet & Spicy Twist : Add 1 tablespoon of honey or maple syrup to the cream cheese filling. The sweetness balances the heat from the pickled peppers beautifully. I tried this on a whim one night and now it’s my secret weapon for parties.
Serving & Storage Suggestions
These poppers are best served hot, right after frying. The contrast between the warm, crispy coating and the cool, creamy filling is at its peak within the first 10 minutes. I like to arrange them on a platter with a small bowl of ranch dressing or cool sour cream for dipping. A drizzle of hot honey on top is also incredible—it adds sweetness and a little extra heat.
For presentation, I sometimes sprinkle them with fresh chopped cilantro or a pinch of flaky sea salt right before serving. It makes them look extra fancy with zero extra effort.
If you’re serving these at a party, you can keep them warm in a 200°F oven for up to 30 minutes. Place them on a wire rack over a baking sheet so air can circulate around them—this prevents the bottoms from getting soggy. I’ve done this for Super Bowl parties and they stayed crispy the whole time.
Storage : Leftover poppers (if you have any) can be stored in an airtight container in the fridge for up to 3 days. The coating will soften a bit, but they’re still tasty. To reheat, pop them in an air fryer at 350°F for 3-4 minutes, or in a 375°F oven for about 8 minutes. Skip the microwave—it turns the coating into a sad, steamy mess.
Make-Ahead Tip : You can pickle the peppers up to 2 weeks in advance and keep them in the fridge. You can also stuff and bread the poppers a day ahead—just arrange them on a baking sheet, cover loosely with plastic wrap, and refrigerate. Fry them right before serving. This is my favorite way to handle party prep.
Nutritional Information & Benefits
Here’s the honest truth—these are not health food. They’re a treat, and that’s okay. But I do think it’s worth knowing what’s in them so you can enjoy them mindfully.
Per popper (based on a batch of 20): approximately 120 calories, 8g fat, 8g carbohydrates, 4g protein. These numbers will vary depending on the exact ingredients and frying method you use.
On the plus side, jalapeños are a good source of vitamin C and capsaicin, which has anti-inflammatory properties. The pickling process also adds probiotics (from the fermentation-like environment), though the heat from frying will reduce those benefits. Cream cheese provides calcium and a little protein, and the eggs in the breading add some B vitamins.
If you’re watching your sodium, you can reduce the salt in the brine and skip the added salt in the filling. The Parmesan in the breading adds enough savory flavor on its own.
For a lighter option, try the air fryer version—it cuts the oil significantly without sacrificing too much crunch. I’ve also made these with reduced-fat cream cheese, and while the filling isn’t as luscious, it still tastes great.
These poppers are gluten-free adaptable and can be made dairy-free with the right substitutions. They’re not suitable for a low-fat or low-calorie diet, but as an occasional indulgence, they’re totally worth it.
Conclusion
So here’s the deal—these Crispy Refrigerator Pickled Jalapeno Poppers are the appetizer I keep coming back to. They have that perfect balance of tangy, creamy, and crunchy that makes people stop mid-conversation to take another bite. The pickling step might seem like extra work, but honestly, it’s the thing that makes them special. It tames the heat, adds complexity, and gives the peppers a texture that holds up beautifully to frying.
I love that this recipe lets you customize everything—the heat level, the filling, the cooking method. You can make them as mild or as spicy as you want. You can fry them, air fry them, or even bake them in a pinch. They’re forgiving and adaptable, which is exactly what a good appetizer recipe should be.
If you make these, I’d love to hear how they turn out. Did you try the bacon-wrapped version? The sweet and spicy twist? Did you figure out a new variation I haven’t thought of? Drop a comment below and let me know. And if you’re looking for more easy appetizer ideas, you might also enjoy these crispy cheesy zucchini and corn fritters or this whipped ricotta crostini with fig and hot honey—both are perfect for parties and come together in a flash.
Thanks for stopping by, and happy cooking! Remember—the best recipes are the ones you make your own.
Frequently Asked Questions
Can I use jarred pickled jalapeños instead of pickling my own?
You can, but the texture and flavor will be different. Jarred pickled jalapeños are usually softer and more vinegary, which can make the poppers a bit mushy and overly tangy. Homemade pickled peppers have a firmer texture and a more balanced flavor. If you’re in a pinch, drain and pat them dry very well before using.
How long do the pickled jalapeños need to sit before I can use them?
At least 2 hours in the fridge, but overnight is best. The longer they sit, the more the brine penetrates the peppers, mellowing the heat and adding that tangy flavor. I usually make them the day before I plan to fry the poppers.
Can I bake these instead of frying?
Yes! Bake at 400°F on a parchment-lined baking sheet for 12-15 minutes, flipping halfway through. Spray them lightly with cooking oil first to help them brown. They won’t be as crispy as the fried version, but they’re still delicious and much lighter.
How do I keep the breading from falling off during frying?
Make sure the peppers are dry before you stuff them, and press the breadcrumbs firmly into the egg wash. Chilling the breaded poppers for 10-15 minutes before frying also helps the coating set. And don’t overcrowd the pan—if the oil temperature drops too much, the breading can slide off.
Can I freeze these poppers?
Yes! Freeze them on a baking sheet after breading (before frying) until solid, then transfer to a freezer bag. Fry straight from frozen, adding an extra minute or two to the cooking time. I’ve done this for last-minute parties, and they come out just as crispy as fresh.
Pin This Recipe!
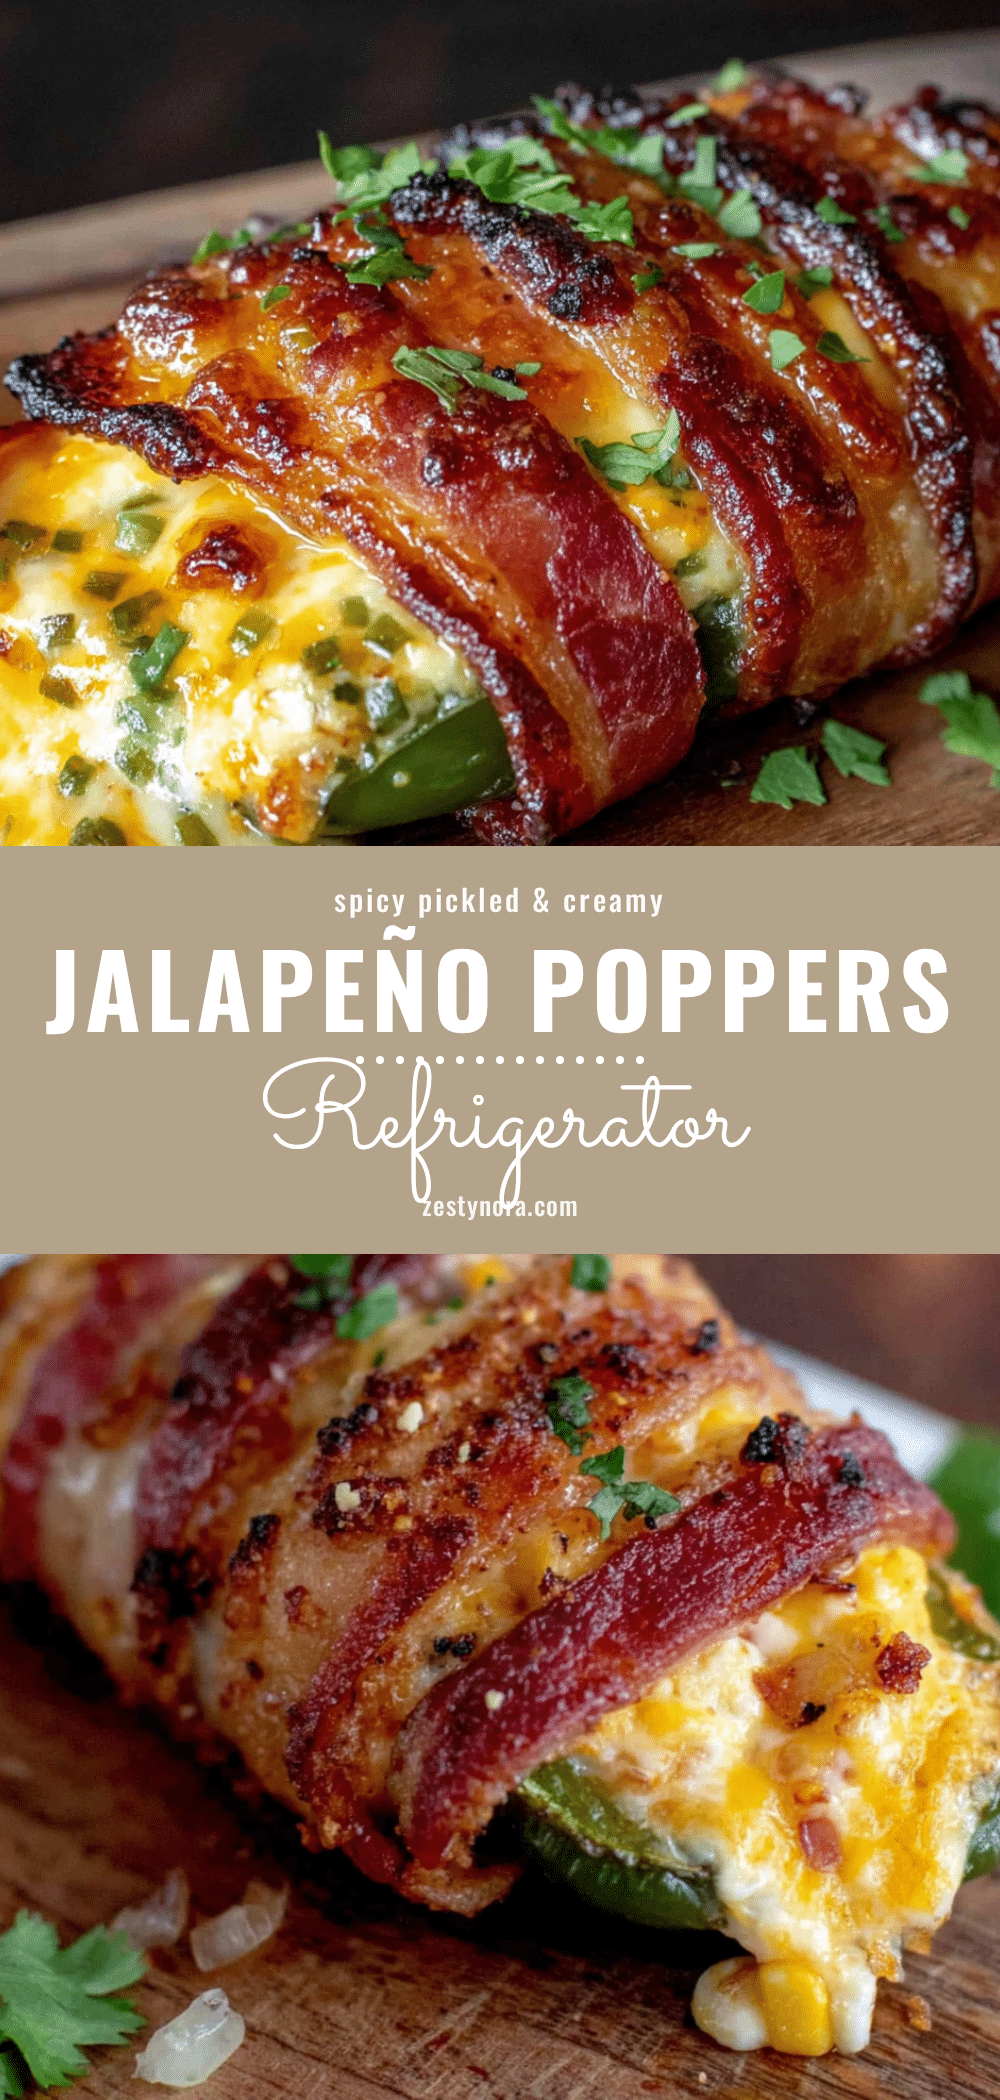
Crispy Refrigerator Pickled Jalapeno Poppers (Best Easy Appetizer)
These crispy jalapeno poppers are made with pickled peppers for a tangy kick and a crunchy coating that stays crispy. Perfect for game day, parties, or a fun snack, they’re easy to make with simple ingredients.
- Prep Time: 30 minutes
- Cook Time: 15 minutes
- Total Time: 45 minutes (plus 2 hours pickling time)
- Yield: 20 poppers 1x
- Category: Appetizer
- Cuisine: American
Ingredients
- 10–12 fresh jalapeños
- 1 cup white vinegar
- 1 cup water
- 2 tablespoons granulated sugar
- 1 tablespoon kosher salt (or 2 teaspoons table salt)
- 3 garlic cloves, smashed
- 1 teaspoon black peppercorns
- 8 ounces full-fat cream cheese, softened
- ½ cup sharp cheddar cheese, finely shredded
- 3 tablespoons green onions, thinly sliced
- ½ teaspoon garlic powder
- Pinch of salt and black pepper
- ½ cup all-purpose flour
- 2 large eggs, beaten with 1 tablespoon water
- 1 cup panko breadcrumbs
- ¼ cup grated Parmesan cheese
- ½ teaspoon smoked paprika
- About 2 cups neutral oil for frying (canola, vegetable, or peanut)
Instructions
- Make the pickling brine: In a medium saucepan, combine 1 cup white vinegar, 1 cup water, 2 tablespoons sugar, 1 tablespoon kosher salt, 3 smashed garlic cloves, and 1 teaspoon black peppercorns. Bring to a boil over medium-high heat, stirring until sugar and salt dissolve. Remove from heat and let cool for 5 minutes.
- Prepare the jalapeños: Wearing gloves, slice each pepper in half lengthwise. Use a small spoon or melon baller to scrape out seeds and membranes. Leave stems intact if desired.
- Place pepper halves in a clean glass jar or heatproof bowl. Pour warm brine over them, ensuring they are submerged. Let sit at room temperature for 30 minutes, then cover and refrigerate for at least 2 hours (overnight is best). Peppers can be stored in the fridge for up to 2 weeks.
- Make the filling: In a medium bowl, combine 8 ounces softened cream cheese, ½ cup shredded cheddar, 3 tablespoons sliced green onions, ½ teaspoon garlic powder, and a pinch each of salt and pepper. Stir until smooth. Set aside.
- Set up breading station: In three shallow bowls, place ½ cup flour in the first, beaten eggs with water in the second, and in the third, combine 1 cup panko, ¼ cup Parmesan, and ½ teaspoon smoked paprika. Mix well.
- Stuff and coat the peppers: Remove pickled jalapeños from brine and pat dry with paper towels. Fill each half with about a heaping teaspoon of cream cheese mixture, smoothing it flush with the cut edge. Working one at a time, dredge in flour (shake off excess), dip in egg wash, then press into panko mixture until fully coated. Place on a plate or baking sheet without stacking.
- Fry the poppers: Pour about 2 inches of oil into a heavy-bottomed skillet. Heat over medium heat to 350°F (test with a pinch of panko—it should sizzle immediately). Carefully lower 4-5 poppers into the oil using tongs. Fry for 2-3 minutes per side, until deep golden brown and crispy (total 4-6 minutes). Transfer to a wire rack set over a baking sheet to drain. Repeat with remaining poppers, letting oil return to temperature between batches.
- Serve hot, optionally with ranch dressing, sour cream, or hot honey for dipping.
Notes
For extra crunch, double-coat by repeating the egg and panko steps. Chill stuffed peppers for 10-15 minutes before breading to help filling stay put. Keep oil temperature steady at 350°F for best results. To make ahead, pickle peppers up to 2 weeks in advance or bread poppers a day ahead and refrigerate. Reheat leftovers in an air fryer at 350°F for 3-4 minutes or oven at 375°F for 8 minutes.
Nutrition
- Serving Size: 1 popper
- Calories: 120
- Sugar: 2
- Sodium: 200
- Fat: 8
- Saturated Fat: 3
- Carbohydrates: 8
- Fiber: 1
- Protein: 4
Keywords: jalapeno poppers, crispy poppers, pickled jalapeno, game day appetizer, easy appetizer, fried appetizer, cream cheese poppers


