My husband’s oldest friend, Dave, texted me at 4:30 PM on a Tuesday. He was dropping by. With his two teenagers. For “a snack.”
I stared at my empty pantry. The fridge contained three sad carrots, half a jar of pickles, and a stick of butter that had been melting since Sunday. I had no chocolate. No fresh fruit. No cereal.
Dave is a nice guy, but his kids are picky. They want crunch. They want sugar. They want something that looks like it came from a store, not my kitchen.
I grabbed the box of vanilla wafers I keep for emergencies. I found a bag of white chocolate chips in the back of the cupboard. Then I saw the black gel food coloring I’d bought for a party three years ago and never used.
It was a disaster waiting to happen. Or a miracle.
I melted the chocolate. I crushed the cookies. I mixed them into a dough that looked like gray mud. I used black icing to draw legs.
When Dave and the kids walked in, they didn’t ask what it was. They just started eating.
One of the teens said, “Are these store-bought? They’re weirdly good.”
I didn’t correct him.
That night, I realized I had accidentally invented the perfect Halloween treat. It’s messy. It’s fun. It’s crispy in all the right ways. And it uses stuff you probably already have.
I’ve made these dozens of times since. They never fail. They save me. And honestly? They’re better than anything I could buy at the store.
Why You’ll Love This Recipe
Let’s be honest. Halloween baking is usually a lot of stress for very little reward. You spend hours decorating, and the kids just want to eat the candy corn before dinner.
These crispy black spider sugar cookies are different. They are the kind of recipe that feels like a cheat code. You get the spooky factor without the hours of piping and fondant rolling. It’s approachable. It’s forgiving. And it tastes incredible.
Here is why this recipe has become a staple in my house:
* **Quick & Easy:** The whole process takes about 25 minutes. That’s it. You don’t need to chill the dough for days. You don’t need to make a complex frosting. Just mix, shape, and bake. Perfect for those chaotic weeknights when you need to look like a hero.
* **Simple Ingredients:** You likely have everything in your kitchen right now. Vanilla wafers, white chocolate, black food coloring. No fancy grocery trips needed. If you have a box of cookies and a bag of chips, you’re good to go.
* **Perfect for Kids (and Teens):** This isn’t a subtle dessert. It’s bold. It’s black. It has legs. Kids love making them because they get to use their hands. Teens love them because they look cool enough for Instagram.
* **Crowd-Pleaser:** I’ve served these at office parties, school events, and backyard bonfires. They always disappear first. Even people who claim they “don’t like Halloween candy” usually eat two of these.
* **Unbelievably Delicious:** The texture is the secret. The vanilla wafers provide a crisp, buttery snap that contrasts with the sweet, chewy white chocolate. It’s not just sugar; it’s actual flavor.
What makes this recipe stand out from other spider cookies? Most recipes use sugar cookies as the base. Those can be dry. These use vanilla wafers. The texture is lighter. The flavor is more interesting. Plus, the black coloring hides the imperfections. You don’t need to be a perfect artist. A wobbly leg is part of the charm.
It’s comfort food with a twist. It’s the kind of treat that makes you feel like you put in effort, even when you really didn’t. And that is a win in my book.
What Ingredients You Will Need
This recipe relies on a few key components to get that signature black color and crispy texture. You don’t need a pantry full of specialty items. In fact, the simplicity is the best part.
Here is what you need to gather:
* **Vanilla Wafers:** This is your base. I recommend using a sturdy brand like Nabisco or a store brand that holds its shape. You want about 2 cups of crushed wafers. If they are too soft, they will turn into mush. If they are too hard, they won’t bind. Aim for a cookie that snaps when you break it.
* **White Chocolate Chips:** Do not use white chocolate baking bars unless you have a tempering machine. Chips are easier. They melt evenly. I like Ghirardelli or Guittard because they have a nice cocoa butter content. You’ll need one 12-ounce bag.
* **Black Gel Food Coloring:** This is crucial. Liquid coloring will make your cookies runny and watery. Gel coloring is concentrated. It gives that deep, true black color without altering the texture. Black is hard to get right. You might need a generous amount. Don’t be shy.
* **Black Icing in a Pen or Bottle:** This is for the legs. You can buy pre-made black icing in a tube at any craft store or baking aisle. It needs to be thick enough to hold its shape. If it’s too thin, the legs will slide off.
* **Unsalted Butter:** Just a small amount. About 2 tablespoons. This helps bind the crumbs together and adds richness. Make sure it is softened, not melted.
* **Vanilla Extract:** A teaspoon adds depth. It balances the sweetness of the chocolate.
* **Pinch of Salt:** Always add a pinch. It makes the chocolate taste more like chocolate.
**Substitution Tips:**
* **Gluten-Free:** You can use gluten-free vanilla wafers. Just check the label to ensure they are sturdy. Some GF cookies crumble too easily.
* **Dairy-Free:** Use dairy-free white chocolate chips. There are several good brands now. The rest of the recipe is naturally dairy-free if you skip the butter or use a vegan alternative.
* **No Vanilla Wafers?** You can use shortbread cookies. They are buttery and crisp. Just crush them finely.
The key is texture. Your base needs to be crunchy. The chocolate needs to be smooth. The icing needs to be thick. Get these three things right, and you’re golden.
Equipment Needed
You don’t need much for this recipe. Keep it simple.
* **Large Mixing Bowl:** You need enough space to mix the crumbs and chocolate. A 4-quart bowl works well.
* **Food Processor or Ziploc Bag:** To crush the wafers. A food processor is faster. A rolling pin and a bag are more fun for kids.
* **Microwave-Safe Bowl:** For melting the chocolate. Glass or ceramic works best.
* **Spatula:** A silicone spatula is helpful for scraping the bowl.
* **Piping Bag or Icing Pen:** For drawing the legs. A small ziploc bag with the corner cut off works in a pinch.
**Pro Tip:** If you don’t have a food processor, put the cookies in a heavy-duty ziploc bag. Seal it tight. Use a rolling pin to crush them. Do this over a baking sheet to catch crumbs. It’s messy but effective.
Preparation Method

Let’s get into the actual making of these cookies. It’s straightforward, but there are a few tricks to keep them crispy.
**Step 1: Crush the Wafers (5 minutes)**
Take your vanilla wafers. If using a food processor, pulse until you have fine crumbs. You want the texture of sand, not powder. If using a bag, crush them until they are small pieces.
Transfer the crumbs to your large mixing bowl.
**Step 2: Melt the Chocolate (3 minutes)**
Place your white chocolate chips in a microwave-safe bowl. Microwave in 30-second intervals. Stir well between each interval. White chocolate burns easily. If you see steam, stop. You want it smooth and glossy.
Stir in the softened butter and vanilla extract. Mix until combined.
**Step 3: Add the Color (2 minutes)**
This is the messy part. Add the black gel food coloring to the chocolate mixture. Start with a small amount. Stir. It will look dark gray. Keep adding coloring until it is deep, rich black.
You want it to look like midnight. Don’t worry if it’s too dark. It will lighten slightly when baked, but it should be very dark in the bowl.
**Step 4: Combine the Dough (3 minutes)**
Pour the black chocolate mixture over the vanilla wafer crumbs. Mix with a spatula. The mixture will look like dark, sticky mud. That’s good.
If it’s too dry, add a teaspoon of milk. If it’s too wet, add more crumbs. You want a consistency that holds together when you squeeze it.
**Step 5: Shape the Cookies (5 minutes)**
Take a tablespoon of the mixture. Roll it into a ball. Place it on a parchment-lined baking sheet. Flatten it slightly. You want them to be about 2 inches wide.
Repeat until you have used all the dough. You should get about 12-15 cookies.
**Step 6: Chill (15 minutes)**
Put the baking sheet in the fridge. This step is non-negotiable. It firms up the chocolate so the legs stick. If you skip this, the cookies will spread and the legs will slide off.
**Step 7: Draw the Legs (5 minutes)**
Take your black icing pen. Draw eight legs on each cookie. Start from the center and draw outward. Don’t worry about symmetry. Spiders are messy creatures.
Let the icing set for 5 minutes.
**Step 8: Serve or Store**
Enjoy immediately. Or store in an airtight container.
Cooking Tips & Techniques
I’ve made these cookies a hundred times. Here is what I’ve learned.
**Don’t Overheat the Chocolate:** White chocolate has low cocoa solids. It burns faster than dark chocolate. If you use the microwave, go slow. Low power is better. If you use a double boiler, keep the water simmering, not boiling.
**Gel Coloring is Key:** Liquid food coloring contains water. Water and chocolate do not mix. It causes the chocolate to seize. Gel coloring has no water. It mixes smoothly. If you only have liquid, add it drop by drop. But gel is much better.
**Chill Thoroughly:** I know you want to eat them now. Wait. If the chocolate is warm, the icing will melt into it. You’ll get black blobs, not legs. Chill for at least 15 minutes.
**Use Sturdy Wafers:** Some vanilla wafers are very thin. They dissolve too fast. Look for cookies that are thick and crisp. If your wafers are stale, toast them lightly in the oven for 5 minutes. Let them cool, then crush.
**Don’t Overcrowd the Pan:** Leave space between the cookies. They don’t spread much, but you want them to cool evenly.
**Troubleshooting:**
* **Legs Sliding Off:** Your cookies weren’t cold enough. Chill them longer next time.
* **Cookies Too Crumbly:** Add more chocolate or a teaspoon of honey.
* **Color Too Dark:** It’s fine. It’s supposed to be black. If it’s too black, it just looks more like a spider.
Variations & Adaptations
Once you master the basic recipe, you can get creative.
**Pumpkin Spice Spider Cookies:** Add a tablespoon of pumpkin pie spice to the crumbs. Use orange food coloring instead of black. Use orange icing for legs. Great for autumn.
**Red Velvet Spiders:** Use red velvet wafers. Use red food coloring. Use white icing for legs. These look like tarantulas.
**Gluten-Free Version:** Use gluten-free vanilla wafers. Check that the chocolate chips are also GF. Most are, but some contain wheat starch.
**Nut-Free:** Ensure your wafers and chocolate chips are made in a nut-free facility. Most standard brands are safe, but always check labels.
**My Personal Twist:** I sometimes add a pinch of sea salt on top before chilling. The salt cuts the sweetness. It makes the chocolate taste richer. It’s a small change, but it makes a big difference.
Serving & Storage Suggestions
Serve these at room temperature. Cold chocolate can be hard to bite through.
They look great on a platter with other Halloween treats. Pair them with apple cider or milk. The crisp texture contrasts well with soft desserts.
**Storage:**
Store in an airtight container at room temperature. They last up to 5 days. Do not refrigerate. Refrigeration can make the wafers soft.
**Freezing:**
You can freeze the cookies before adding the legs. Wrap them tightly in plastic wrap. Freeze for up to 3 months. Thaw at room temperature. Then add the legs.
**Reheating:**
If you need to soften them, microwave for 5 seconds. Be careful not to melt the chocolate.
Nutritional Information & Benefits
These cookies are high in sugar and fat. They are a treat, not a health food.
One cookie contains approximately 150 calories. Most of the calories come from the white chocolate and butter. The vanilla wafers add carbohydrates.
They contain dairy from the chocolate and butter. They are not suitable for vegans unless you use dairy-free alternatives.
They are not gluten-free unless you use GF wafers.
From a wellness perspective, I view these as a fun, occasional treat. They are great for kids’ parties because they are portion-controlled. You can make them small. That helps with moderation.
Enjoy them in moderation. They are meant to be fun, not fuel.
Conclusion
These crispy black spider sugar cookies are more than just a Halloween snack. They are a solution. They are a way to handle unexpected guests, picky eaters, and low energy levels.
I love this recipe because it is forgiving. You don’t need to be a perfect baker. You just need to be willing to mix things together.
The kids love making them. I love eating them. And Dave’s kids still ask for them every year.
Try this recipe. It’s easy. It’s fun. And it tastes great.
If you make them, let me know how they turn out. Did the legs stick? Did the kids love them? Share your stories in the comments.
And if you need more easy treats, check out my pumpkin snickerdoodle cookies for a fall alternative.
Happy baking!
FAQs
Can I use dark chocolate instead of white chocolate?
Yes, but the color will be different. Dark chocolate with black coloring will look very dark brown, not black. White chocolate provides the best contrast for the black color.
Why do my spider legs keep falling off?
The cookies were probably not cold enough. Chill them for at least 15 minutes before adding the icing. The chocolate needs to be firm to hold the weight of the icing.
Can I make these ahead of time?
Yes. You can make the cookie balls and chill them. Add the legs the day you plan to serve them. This prevents the icing from smudging or melting.
What if I don’t have black gel food coloring?
You can use black liquid food coloring, but add it very slowly. It may change the texture. Or you can use cocoa powder, but the cookies will be dark brown, not black.
Are these cookies crunchy or chewy?
They are crispy on the outside and chewy in the middle. The vanilla wafers provide the crunch. The white chocolate provides the chew.
Pin This Recipe!
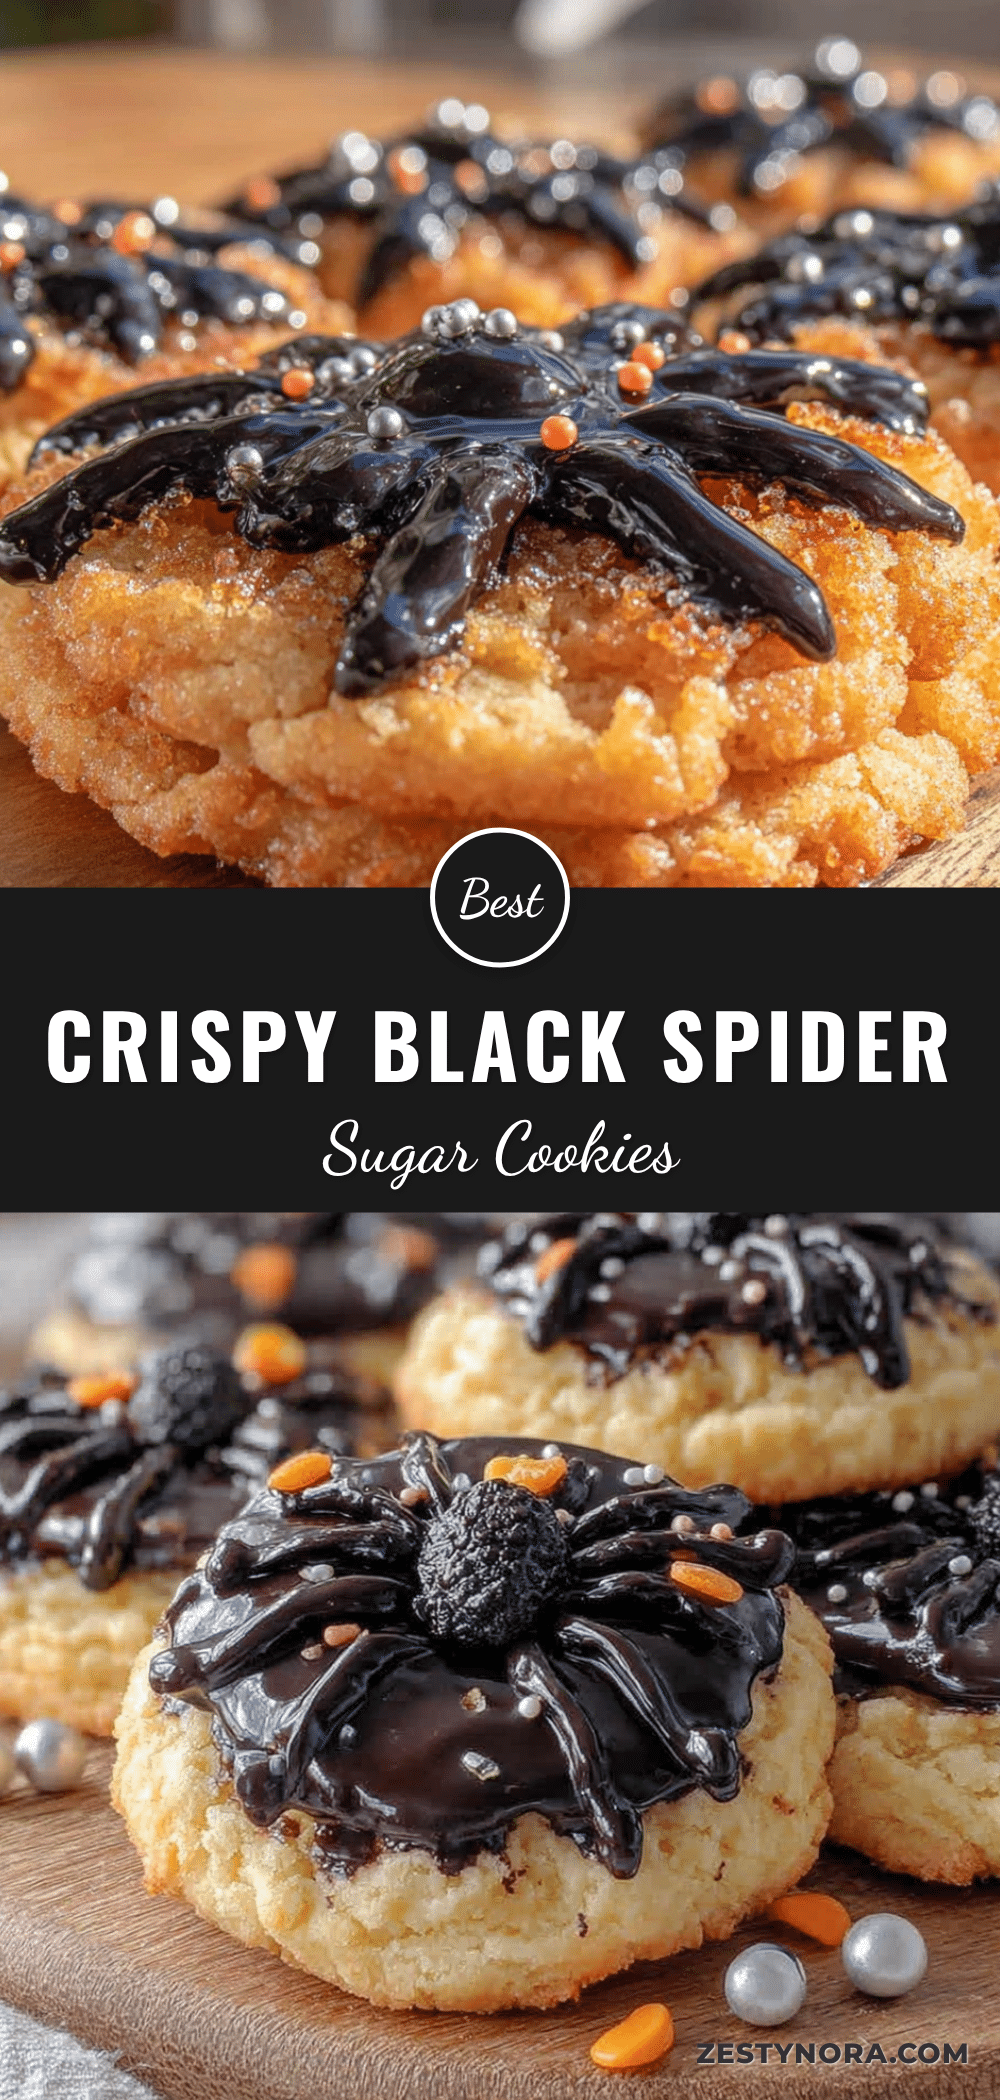
Crispy Black Spider Sugar Cookies: Easy Halloween Treat

A quick and easy Halloween treat made with vanilla wafers, white chocolate, and black food coloring. These cookies are crispy, fun to make, and perfect for kids and teens.
- Prep Time: 15 minutes
- Cook Time: 0 minutes
- Total Time: 25 minutes
- Yield: 12-15 cookies 1x
- Category: Dessert
- Cuisine: American
Ingredients
- 2 cups vanilla wafers, crushed
- 12 oz white chocolate chips
- 2 tbsp unsalted butter, softened
- 1 tsp vanilla extract
- Black gel food coloring
- Black icing in a pen or bottle
- Pinch of salt
Instructions
- Crush the vanilla wafers into fine crumbs using a food processor or a ziploc bag with a rolling pin. Transfer to a large mixing bowl.
- Melt the white chocolate chips in a microwave-safe bowl in 30-second intervals, stirring well between each interval until smooth and glossy. Stir in the softened butter and vanilla extract.
- Add black gel food coloring to the chocolate mixture gradually, stirring until the mixture is a deep, rich black color.
- Pour the black chocolate mixture over the vanilla wafer crumbs and mix with a spatula until combined. The mixture should hold together when squeezed.
- Roll tablespoon-sized portions of the mixture into balls and place them on a parchment-lined baking sheet. Flatten slightly to about 2 inches wide.
- Chill the baking sheet in the fridge for 15 minutes to firm up the chocolate.
- Draw eight legs on each cookie using the black icing pen. Let the icing set for 5 minutes.
- Serve at room temperature or store in an airtight container.
Notes
Use gel food coloring instead of liquid to prevent seizing. Ensure cookies are chilled thoroughly before adding icing legs to prevent sliding. For gluten-free, use GF vanilla wafers. For dairy-free, use dairy-free chocolate chips and skip or substitute butter.
Nutrition
- Serving Size: 1 cookie
- Calories: 150
- Sugar: 14
- Sodium: 50
- Fat: 8
- Saturated Fat: 5
- Carbohydrates: 20
- Fiber: 1
- Protein: 2
Keywords: Halloween cookies, spider cookies, easy dessert, kids baking, vanilla wafers, white chocolate, gluten-free option


