I assumed canned pumpkin was just a lazy shortcut for people who didn’t want to roast a whole squash. It took about five minutes for that assumption to fall apart completely, leaving me staring at a pan of dense, gummy disappointment. I had followed the instructions to the letter, or so I thought, but the result was less “creamy cheesecake” and more “pumpkin-shaped brick.” Honestly, it was embarrassing. I had invited friends over for a casual autumn gathering, expecting to serve something light and airy, but instead, I was serving a dessert that tested the structural integrity of my best china plates.
Let’s face it, we’ve all been there. You buy the nice pumpkin puree, you buy the cream cheese, and you pray the spices are fresh. But then the center sinks, or worse, it cracks open like a dried riverbed. I felt like giving up on pumpkin desserts entirely. I almost ordered takeout instead, which would have been a tragic waste of a perfectly good evening. But then I remembered seeing a tip somewhere about draining the liquid out of the puree. It seemed too simple, too basic to actually matter. I decided to give it one last shot, mixing a fresh batch with extra care.
The difference was night and day. The texture transformed from a wet sponge to something silky and rich, almost like mousse that had set firm. My friends dug in, and the silence that followed was the loudest compliment I’ve ever received. They asked for the recipe before I had even finished pouring myself a cup of coffee. That’s when I realized that the secret wasn’t in fancy techniques or expensive equipment. It was in the details. It was in understanding how moisture affects the structure of a cheesecake bar. Now, every time I make these creamy pumpkin spice cheesecake bars, I think back to that failed batch. It taught me patience, and it taught me that sometimes the simplest adjustments make the biggest difference in the kitchen.
Why You’ll Love This Recipe
There is a specific kind of magic that happens when you combine the tangy richness of cream cheese with the warm, spiced comfort of pumpkin. I’ve tested this recipe more times than I care to admit, tweaking the ratios until the balance felt just right. It’s not just another pumpkin dessert; it’s the kind of bar that feels like a hug in edible form. Here is why this version stands out from the rest:
- Quick & Easy: You can have these in the oven in under 30 minutes of prep time. It’s perfect for those weeknights when you want a homemade treat but don’t have hours to spare. No mixer required for the crust, which saves you cleanup time.
- Simple Ingredients: You likely already have most of these items in your pantry or fridge. Flour, butter, sugar, cream cheese, canned pumpkin, and spices. No trips to three different specialty stores needed.
- Perfect for Fall Gatherings: Whether it’s a Thanksgiving side table, a Halloween party, or just a cozy Tuesday night, these bars fit the season perfectly. They look elegant but are humble enough to be made in a home kitchen.
- Crowd-Pleaser: Even people who usually avoid “healthy” or “diet” desserts love these. The texture is rich enough to satisfy a sweet tooth but the spices make them feel lighter than a traditional slice of cheesecake.
- Unbelievably Delicious: The contrast between the buttery, crumbly crust and the smooth, spiced filling is next-level. It’s comfort food reimagined—satisfying without being overly heavy.
What makes this recipe different is the focus on texture. I use a technique where the pumpkin puree is drained to remove excess water. This prevents the sogginess that plagues so many other recipes. It’s a small step, but it ensures that every bite is firm and clean, not mushy. It’s the kind of detail that separates a good homemade bar from a bakery-quality one. Plus, the spice blend is balanced to highlight the pumpkin flavor without overwhelming it with cinnamon, which is a common mistake. It’s subtle, warm, and inviting.
What Ingredients You Will Need
This recipe relies on a few key components to create that signature creamy texture and rich flavor. The beauty of this dish is that it uses wholesome, accessible ingredients to deliver bold taste without the fuss. Here is what you need to gather before you start cooking.
- For the Crust:
- Graham cracker crumbs: About 1.5 cups. You can make your own by crushing whole sheets in a food processor, or buy pre-made crumbs. I prefer the pre-made ones for convenience, but homemade tastes fresher.
- Unsalted butter: Melted. This binds the crumbs together. Use high-quality butter for the best flavor.
- Granulated sugar: 2 tablespoons. Adds a slight sweetness to balance the savory crust.
- Ground cinnamon: 1/2 teaspoon. Adds warmth to the base layer.
- For the Filling:
- Cream cheese: 16 ounces (450g), full-fat and softened. This is the most important ingredient. Do not use low-fat cream cheese, or the texture will be grainy. I recommend brands like Philadelphia for consistency.
- Granulated sugar: 3/4 cup. Adjust to your sweetness preference, but don’t reduce too much or it won’t set properly.
- Large eggs: 2 large eggs, room temperature. Room temperature ingredients blend more smoothly, preventing lumps.
- Pure pumpkin puree: 1 cup. Crucial Note: Make sure this is 100% pure pumpkin, not pumpkin pie filling. You must drain it to remove excess liquid.
- Pumpkin pie spice: 1.5 teaspoons. This blend usually contains cinnamon, ginger, nutmeg, and cloves. It’s essential for that fall flavor.
- Vanilla extract: 1 teaspoon. Pure vanilla adds depth that artificial flavors can’t match.
- Salt: 1/4 teaspoon. Enhances the sweetness and balances the spices.
- For the Topping (Optional):
- Whipped cream: Store-bought or homemade.
- Caramel sauce: For an extra indulgent touch.
- Crushed pecans: For a little crunch.
If you want to get fancy, you can swap the graham cracker crumbs for crushed ginger snaps for a spicier crust. Or, if you need a gluten-free option, use a 1-to-1 gluten-free graham cracker flour. The filling itself is naturally gluten-free, which is a nice bonus for guests with dietary restrictions. Just remember, the quality of your pumpkin puree matters. Look for brands that are thick and concentrated, not watery.
Equipment Needed
You don’t need a lot of fancy gadgets to make these bars. A standard 9×13 inch baking pan is all you really need. I prefer using a metal pan because it conducts heat evenly, helping the crust get nice and crisp. If you only have glass, just keep an eye on it so the bottom doesn’t burn. You’ll also need a medium mixing bowl and a whisk. I’ve tried using an electric mixer, but it often incorporates too much air, which can cause the cheesecake to rise and then crack. A good old-fashioned whisk is actually better for keeping the texture dense and creamy.
A fine-mesh sieve or cheesecloth is essential for draining the pumpkin puree. I know it seems like an extra step, but it’s worth it. Without it, your bars might turn out soggy. A spatula is also handy for scraping the bowl and spreading the filling evenly. If you like a perfectly clean cut, a sharp knife dipped in hot water works wonders. Just wipe it between each slice. Avoid using a serrated knife, as it will tear the delicate crust. Keep your tools simple, and you’ll be fine.
Preparation Method
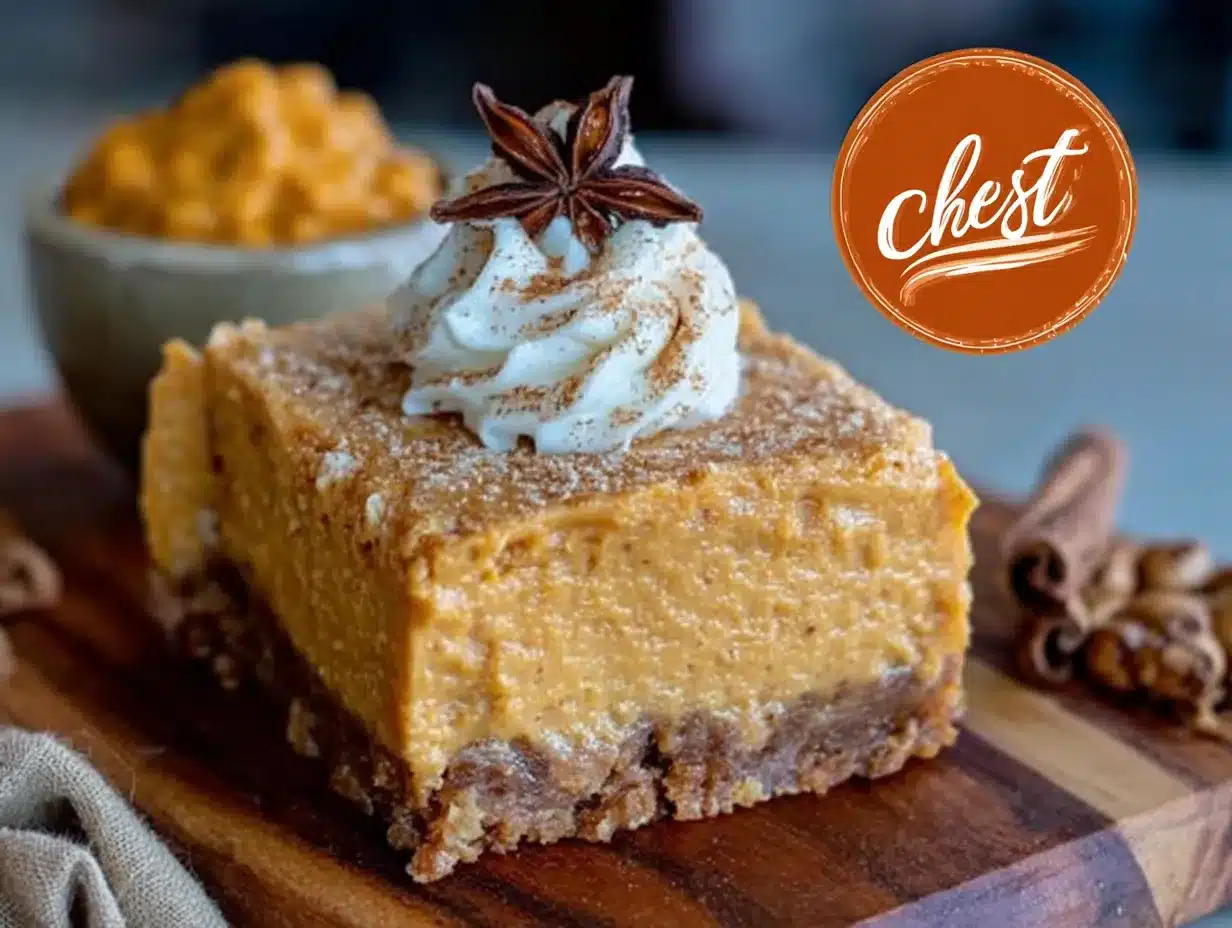
- Prepare the Pan and Oven: Preheat your oven to 350°F (175°C). Line a 9×13 inch baking pan with parchment paper, leaving an overhang on the sides. This makes it easy to lift the bars out later for cutting. Grease the parchment lightly with butter or cooking spray.
- Make the Crust: In a medium bowl, combine the graham cracker crumbs, melted butter, sugar, and cinnamon. Mix until it looks like wet sand. Press this mixture firmly into the bottom of your prepared pan. Use the bottom of a measuring cup to pack it down tight. A loose crust will crumble when you cut it. Bake for 8-10 minutes until it smells toasty. Remove and let it cool while you make the filling.
- Drain the Pumpkin: While the crust bakes, place your pure pumpkin puree in a fine-mesh sieve over a bowl. Let it sit for at least 15-20 minutes. You’ll see a lot of liquid drain out. If you’re in a hurry, you can pat it dry with paper towels, but draining is better. This step is critical for the creamy texture.
- Mix the Filling: In a large bowl, beat the softened cream cheese and sugar together until smooth. This should take about 2-3 minutes with a whisk. Make sure there are no lumps. Add the eggs one at a time, mixing gently after each addition. Do not overmix once the eggs are in, or you’ll add too much air. Stir in the drained pumpkin puree, pumpkin pie spice, vanilla, and salt. Mix until just combined. The batter should be thick and smooth.
- Bake the Bars: Pour the filling over the cooled crust. Smooth the top with a spatula. Bake for 30-35 minutes. The edges should be set, but the center should still have a slight jiggle. It will firm up as it cools. Do not overbake, or it will become dry.
- Cool Completely: Turn off the oven and crack the door open. Let the bars sit in the oven for another hour. This gradual cooling helps prevent cracking. Then, remove them and let them cool completely on a wire rack. Once cool, cover and refrigerate for at least 4 hours, or preferably overnight. This is when the flavors meld and the texture sets perfectly.
- Serve: Lift the bars out of the pan using the parchment paper. Slice into squares. Top with whipped cream or caramel if desired. Enjoy!
How do I prevent the cheesecake from cracking?
The main cause of cracking is overmixing the batter, which incorporates too much air. It expands in the oven and then collapses. Whisk gently. Also, avoid overbaking. The center should still jiggle slightly when you take it out. Let it cool slowly in the turned-off oven to prevent sudden temperature changes.
Can I use fresh pumpkin instead of canned?
You can, but you need to roast the pumpkin and puree it very thoroughly. Then, you must drain it just like the canned version. Canned puree is usually more consistent in moisture content, which is why it’s easier for beginners. If you use fresh, make sure it’s not watery.
How long do these bars last in the fridge?
They last up to 5 days in an airtight container in the refrigerator. The flavors actually get better after the first day as the spices have time to infuse into the cream cheese.
Can I freeze these bars?
Yes! Wrap individual bars tightly in plastic wrap and then foil. They can be frozen for up to 3 months. Thaw them in the fridge overnight before serving. The texture might change slightly, becoming a bit softer, but they still taste great.
Do I need to use room temperature cream cheese?
Yes. Cold cream cheese creates lumps that are hard to whisk out. If you forget to take it out, cut it into small cubes and let it sit for 30 minutes. You can also microwave it in short bursts, but be careful not to melt it.
Cooking Tips & Techniques
One thing I learned the hard way is that patience is key with cheesecake bars. I used to rush the cooling process, and the results were always messy. Letting them cool slowly in the oven is a game-changer. It prevents the surface from shrinking too quickly, which causes cracks. Another tip is to ensure your ingredients are at room temperature. Cold eggs can seize up the cream cheese mixture, leading to a lumpy batter. If you’re short on time, you can warm the eggs by placing them in a bowl of warm water for 10 minutes.
Also, don’t skip the draining step for the pumpkin. I know it’s annoying, but that extra moisture is what makes bars soggy and unappealing. If your pumpkin still seems wet after draining, press it gently with a paper towel. It’s better to have a slightly dry puree than a watery one. You can always add a splash of milk if the batter is too thick, but you can’t remove excess water. Finally, when you cut the bars, use a sharp knife and wipe it clean between cuts. This ensures clean edges and keeps the presentation looking professional.
Variations & Adaptations
While the classic pumpkin spice flavor is my favorite, there are plenty of ways to twist this recipe. For a gingerbread twist, swap the graham cracker crumbs for crushed ginger snaps and add a pinch of black pepper to the filling. It adds a nice kick. If you want a chocolate version, mix 1/4 cup of cocoa powder into the filling. It pairs surprisingly well with the pumpkin. For a nutty variation, fold in 1/2 cup of toasted pecans or walnuts into the batter before baking. It adds texture and richness.
You can also change the topping. Instead of whipped cream, try a salted caramel drizzle or a maple glaze. For a lighter option, skip the topping entirely and just enjoy the bars as they are. If you need a dairy-free version, use vegan cream cheese and dairy-free butter in the crust. The texture might be slightly different, but the flavor will still be great. Experimenting with these variations keeps the recipe fresh and exciting.
Serving & Storage Suggestions
These bars are best served chilled. The cold temperature enhances the creamy texture and balances the sweetness. I like to serve them with a dollop of whipped cream and a sprinkle of cinnamon on top. They also go well with a cup of hot coffee or tea. For storage, keep them in an airtight container in the refrigerator for up to 5 days. If you freeze them, make sure they are wrapped tightly to prevent freezer burn. To reheat, let them come to room temperature or warm them slightly in the microwave for 10 seconds. The flavors develop over time, so they taste even better on the second day.
Nutritional Information & Benefits
Each bar contains approximately 250 calories, with a good balance of carbohydrates and fats from the cream cheese and butter. The pumpkin puree adds a boost of Vitamin A and fiber, making this dessert slightly healthier than a traditional slice of cake. It’s a great option for those who want a sweet treat without feeling too heavy. However, it is still a dessert, so enjoy in moderation. For those with gluten sensitivities, the crust can be made gluten-free, but the cream cheese filling is naturally gluten-free. Always check labels for certified gluten-free products if you have celiac disease.
Conclusion
Making creamy pumpkin spice cheesecake bars is a rewarding experience that brings the warmth of fall into your kitchen. With simple ingredients and a few key techniques, you can create a dessert that looks professional and tastes homemade. I hope you try this recipe and enjoy it as much as I do. Feel free to customize it with your favorite toppings or variations. If you make these bars, I’d love to hear how they turned out. Leave a comment below with your thoughts or photos of your creation. Happy baking!
FAQs
Can I use pumpkin pie filling instead of pure pumpkin puree?
No, do not use pumpkin pie filling. It already contains sugar and spices, which will throw off the balance of your recipe. Always use 100% pure pumpkin puree.
Why did my cheesecake bars sink in the middle?
Sinking usually happens if the bars are overbaked or if the oven temperature fluctuates too much. Make sure to check them at the 30-minute mark and only bake until the edges are set.
Can I make this recipe in a springform pan?
Yes, you can. Use a 9-inch springform pan and adjust the baking time slightly. It might take a few minutes longer. Just be careful when removing the ring to avoid cracking the bars.
What is the best way to cut clean slices?
Use a sharp, thin-bladed knife. Dip it in hot water and wipe it dry before each cut. This ensures clean edges without dragging the crust.
Can I add chocolate chips to the filling?
Absolutely! 1/2 cup of semi-sweet chocolate chips adds a nice contrast to the pumpkin spice flavor. Fold them in gently before baking.
Pin This Recipe!
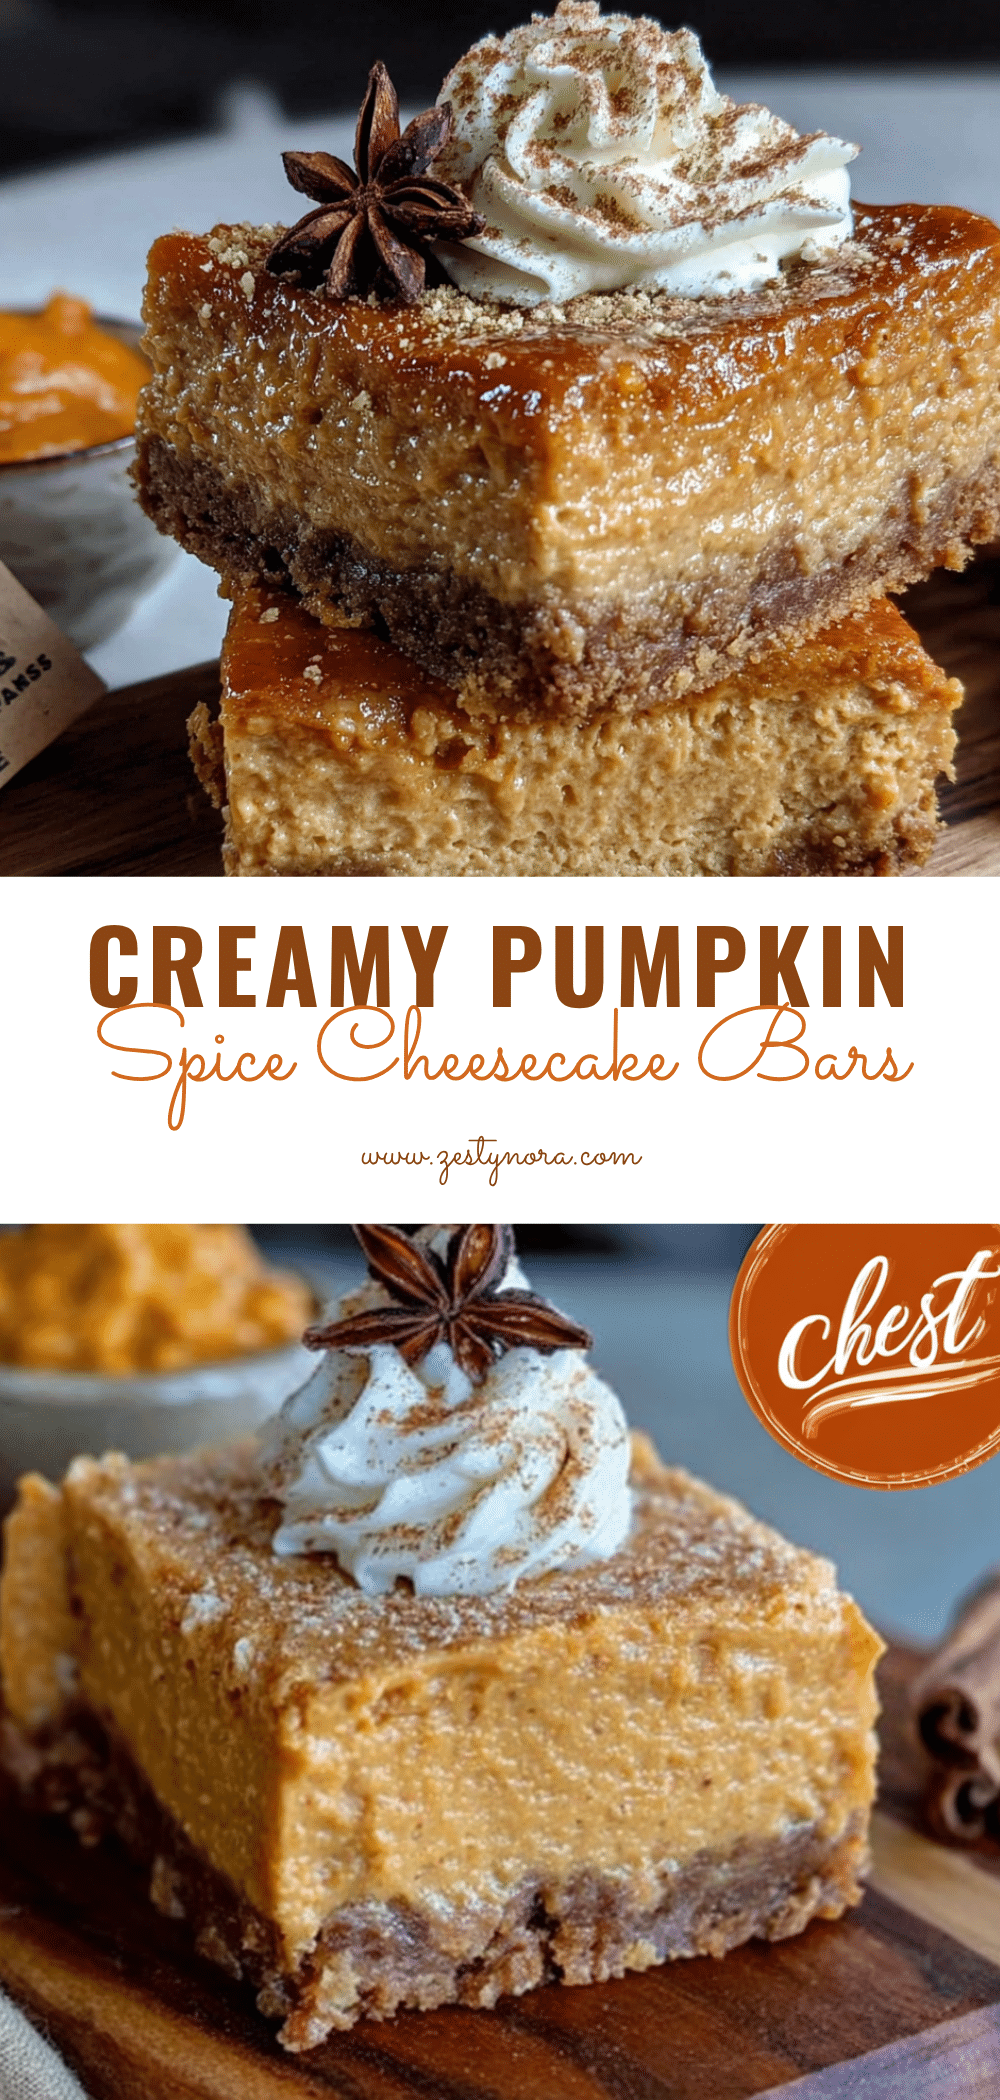
Creamy Pumpkin Spice Cheesecake Bars
Rich, dense, and silky pumpkin spice cheesecake bars with a buttery graham cracker crust. The secret to their perfect texture is draining the pumpkin puree to remove excess moisture.
- Prep Time: 30 minutes
- Cook Time: 45 minutes
- Total Time: 75 minutes
- Yield: 12 servings 1x
- Category: Dessert
- Cuisine: American
Ingredients
- 1.5 cups graham cracker crumbs
- 1/2 cup unsalted butter, melted
- 2 tablespoons granulated sugar
- 1/2 teaspoon ground cinnamon
- 16 ounces (450g) full-fat cream cheese, softened
- 3/4 cup granulated sugar
- 2 large eggs, room temperature
- 1 cup pure pumpkin puree, drained
- 1.5 teaspoons pumpkin pie spice
- 1 teaspoon vanilla extract
- 1/4 teaspoon salt
Instructions
- Preheat oven to 350°F (175°C). Line a 9×13 inch baking pan with parchment paper and grease lightly.
- In a medium bowl, combine graham cracker crumbs, melted butter, 2 tablespoons sugar, and cinnamon. Mix until it resembles wet sand.
- Press the crust mixture firmly into the bottom of the prepared pan. Bake for 8-10 minutes until toasted. Remove and let cool.
- While the crust bakes, place the pumpkin puree in a fine-mesh sieve over a bowl and let drain for 15-20 minutes to remove excess liquid.
- In a large bowl, whisk softened cream cheese and 3/4 cup sugar until smooth (2-3 minutes).
- Add eggs one at a time, mixing gently after each addition to avoid incorporating too much air.
- Stir in the drained pumpkin puree, pumpkin pie spice, vanilla extract, and salt. Mix until just combined.
- Pour the filling over the cooled crust and smooth the top with a spatula.
- Bake for 30-35 minutes until edges are set but the center still has a slight jiggle.
- Turn off the oven and crack the door open. Let the bars sit in the oven for 1 hour to cool gradually.
- Remove from oven and cool completely on a wire rack.
- Cover and refrigerate for at least 4 hours, or preferably overnight, before slicing and serving.
Notes
Draining the pumpkin puree is crucial to prevent a soggy texture. Ensure ingredients are at room temperature to avoid lumps. Cool the bars slowly in the turned-off oven to prevent cracking. For clean cuts, dip a sharp knife in hot water and wipe between slices.
Nutrition
- Serving Size: 1 bar
- Calories: 250
- Sugar: 16
- Sodium: 180
- Fat: 18
- Saturated Fat: 10
- Carbohydrates: 22
- Fiber: 1
- Protein: 4
Keywords: pumpkin cheesecake, fall dessert, pumpkin spice bars, easy cheesecake recipe, autumn baking, graham cracker crust


