This was supposed to be a batch of perfectly piped, professionally-stamped, bakery-worthy sugar cookies. I had the fancy embossed rolling pin, the gel food coloring matched to a Pantone chart, and a vision of cookies so uniform they’d make a pastry chef weep. Then the power flickered. My stand mixer groaned to a halt mid-cream, leaving butter and sugar in a sad, half-fluffy state. The oven, an old gas model that’s frankly seen better decades, decided to run about 40 degrees cooler than its dial claimed. I was already running late for a pumpkin-carving party, and I had a kitchen full of ingredients that were supposed to become something spectacular. What came out of that temperamental oven was nothing like the plan — and honestly, so much better. They were imperfect, a little rustic, with edges that caught the heat differently and centers that stayed impossibly soft. They looked like something from a cozy, slightly spooky storybook, not a test kitchen. And that first bite? It had this unexpected, tender crumb that the perfect, fussy recipe never delivered.
I mean, maybe you’ve been there. You plan this elaborate baking project, you’ve got the vision board saved on your phone, and then real life — with its finicky appliances and vanishing ingredients — just laughs at your plans. That Tuesday, I had a bowl of half-mixed dough, a bag of confectioners’ sugar I’d dropped on the floor (thank goodness for sealed bags), and a stubborn refusal to let the evening be a total loss. I grabbed a different recipe from a stained, handwritten card my neighbor had slid under my door weeks ago. It used more butter, less sugar, and a splash of sour cream — a trick I’d never tried. I figured, what did I have to lose?
The cookies that came out of that oven were a revelation. They weren’t just good; they were the kind of cookie that makes you close your eyes after the first bite. They had this soft, almost cloud-like texture with a perfectly set edge, and they held the royal icing like a dream. I ended up taking them to the party anyway, apologizing for their “rustic” look. They were gone in ten minutes. Someone asked for the recipe before I’d even taken off my coat. That’s why this recipe stayed with me — it taught me that the best things in the kitchen don’t come from perfect plans. They come from a little chaos, a happy accident, and the willingness to just keep going.
Why You’ll Love This Recipe
These aren’t your average Halloween cookies. They’re the result of a happy accident that turned into my most-requested recipe. I’ve tested this version dozens of times since that power-outage night, tweaking the ratios until the texture was just right. The secret is in the sour cream — it gives the cookies a tenderness that’s hard to achieve with a standard sugar cookie base.
- Soft & Tender Texture: Unlike crisp, snap-apart sugar cookies, these have a pillowy softness that makes them feel more like a cozy treat than a crunchy decoration. The sour cream is the game-changer here.
- Simple Ingredients: You likely have everything in your pantry right now. No fancy extracts, no specialty flours — just butter, sugar, eggs, flour, and that magical splash of sour cream.
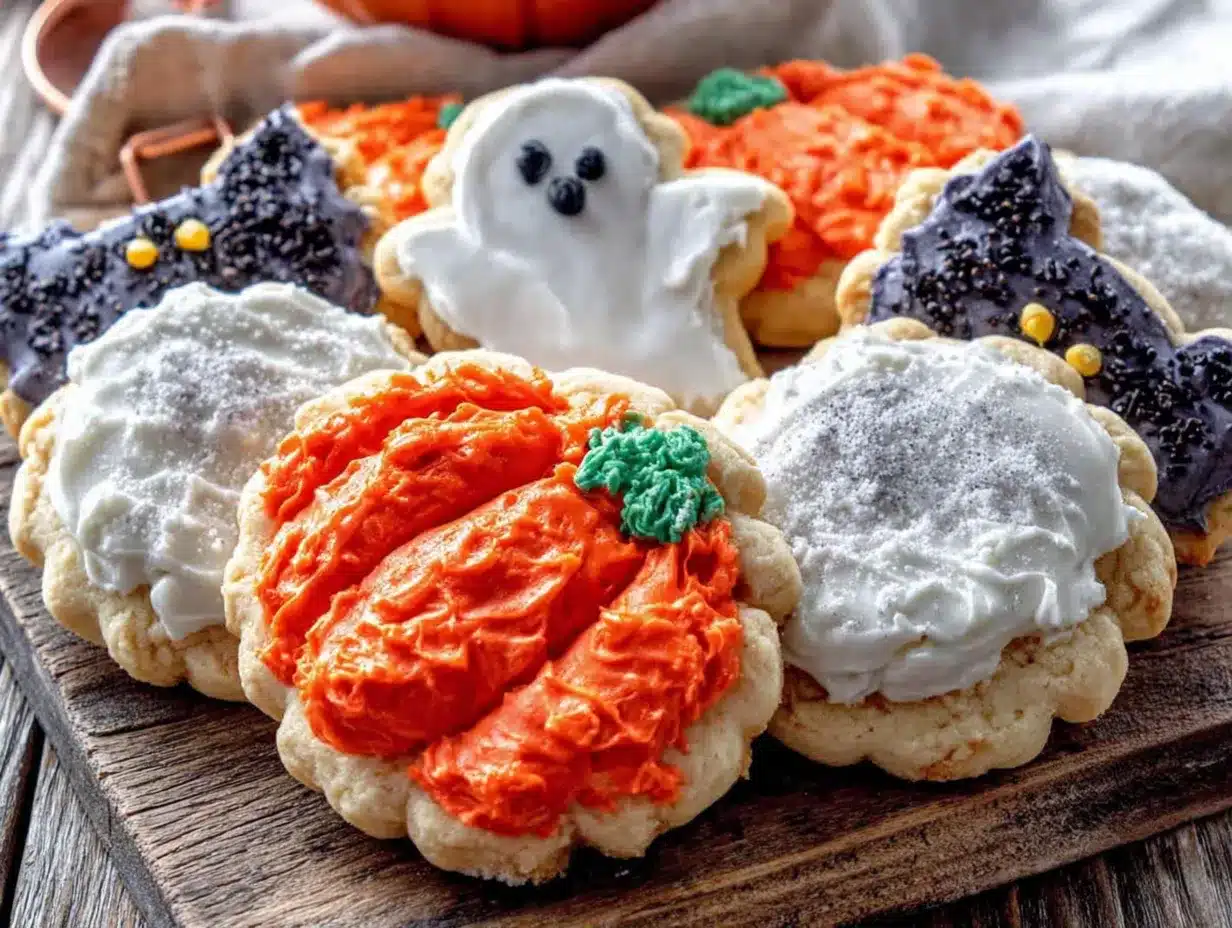
- Perfect for Halloween: These are the ideal canvas for royal icing. They hold their shape beautifully, and the soft base contrasts perfectly with the firm, glossy icing. Great for parties, school treats, or a cozy night in.
- Crowd-Pleaser: Kids love the fun shapes and bright colors, and adults rave about the flavor. I’ve brought these to potlucks, office parties, and family gatherings — they never last long.
- Unbelievably Delicious: The combination of the buttery, soft cookie with the sweet, slightly crunchy royal icing is next-level comfort food. It’s the kind of treat that makes you reach for a second (or third) cookie before you’ve finished the first.
What makes this recipe different from the rest? It’s the texture, plain and simple. Most Halloween sugar cookies are either too hard to enjoy or too soft to decorate. These strike that perfect balance — sturdy enough for intricate icing work, but tender enough to melt in your mouth. I’ve spent years tweaking the ratios, and this is the version I keep coming back to. It’s comfort food reimagined — familiar, but with a little something extra that makes it special.
What Ingredients You Will Need
This recipe uses simple, wholesome ingredients to deliver that perfect soft texture and rich flavor. Most of these are pantry staples, so you can whip up a batch whenever the Halloween spirit strikes. I’ve included some notes on substitutions and my personal preferences based on years of testing.
For the Cookies
- Unsalted butter, softened — 1 cup (226g). I prefer using European-style butter like Kerrygold for a richer flavor, but any unsalted butter works. Make sure it’s truly softened to room temperature — about an hour on the counter.
- Granulated sugar — 1 cup (200g). Regular white sugar is fine. Don’t substitute with brown sugar here, as it will change the texture and spread.
- Large egg — 1, room temperature. Cold eggs can cause the butter to seize up, so let it sit out for 30 minutes.
- Sour cream — 1/3 cup (80g), full-fat preferred. This is the secret ingredient! It adds moisture and tenderness without making the dough sticky. I’ve tried low-fat versions, and the cookies come out less tender.
- Vanilla extract — 1 teaspoon. Pure vanilla is best, but imitation works in a pinch. For a fun twist, try using vanilla bean paste for those tiny speckles.
- All-purpose flour — 2 1/2 cups (312g), spooned and leveled. Don’t scoop directly from the bag — you’ll end up with too much flour and dry cookies.
- Baking powder — 1 teaspoon. This gives the cookies a little lift without spreading them too thin.
- Salt — 1/2 teaspoon. Fine sea salt is my go-to. It balances the sweetness and enhances the butter flavor.
For the Royal Icing
- Confectioners’ sugar — 3 cups (340g), sifted. Sifting is non-negotiable here — lumps will clog your piping tip and ruin the smooth finish.
- Meringue powder — 3 tablespoons. This gives the icing structure and dries to a hard, glossy finish. I recommend Wilton brand for consistency.
- Water — 4-6 tablespoons, room temperature. Add slowly — you might not need all of it.
- Vanilla extract — 1/2 teaspoon (optional). Adds a subtle flavor, but you can leave it out for pure white icing.
- Gel food coloring — in Halloween colors (orange, black, purple, green). I prefer Americolor gels — they’re concentrated and don’t thin the icing like liquid colors do.
Substitution Notes
For a dairy-free version, you can substitute the butter with a high-quality vegan butter stick (like Miyoko’s) and use a dairy-free sour cream alternative. The texture will be slightly different but still delicious. For a gluten-free option, use a 1:1 gluten-free flour blend that contains xanthan gum — I’ve had good results with King Arthur’s Measure for Measure. The cookies will be a bit more delicate, so handle them gently.
Equipment Needed
You don’t need a professional bakery setup for these cookies, but having the right tools makes the process much smoother. Here’s what I use and recommend:
- Stand mixer or hand mixer — A stand mixer with the paddle attachment is ideal for creaming the butter and sugar, but a hand mixer works just fine. I’ve made these with both, and the results are identical.
- Rolling pin — A standard rolling pin works, but I love my adjustable rolling pin with thickness rings. It ensures even cookies every time. Target has a great affordable option.
- Parchment paper — Essential for lining baking sheets and rolling out dough without sticking. I buy the pre-cut sheets for convenience.
- Cookie cutters — Halloween shapes like pumpkins, ghosts, bats, and cats. I’ve collected mine over the years from various stores — Wilton sets are reliable and affordable.
- Baking sheets — Light-colored, rimmed baking sheets work best. Dark sheets can cause the bottoms to brown too quickly.
- Cooling rack — A wire rack is crucial for cooling cookies evenly before decorating.
- Piping bags and tips — Disposable piping bags are easiest for royal icing. I use Wilton round tips #2 and #3 for outlining and flooding.
- Squeeze bottles — Optional but helpful for flooding large areas of icing. I got a set of 4 from Amazon for under $10.
- Toothpicks — For popping air bubbles in the icing and dragging colors for fun effects.
If you don’t have piping bags, you can use a zip-top bag with a tiny corner snipped off. It’s not as precise, but it works in a pinch. I’ve done it more times than I’d like to admit!
Preparation Method
Let’s make some cookies! Take your time with each step — rushing is the enemy of good sugar cookies. I’ve included sensory cues and troubleshooting tips based on my own mishaps.
Step 1: Make the Dough
In a large bowl (or the bowl of your stand mixer), beat the softened butter and granulated sugar together on medium speed until light and fluffy — about 3-4 minutes. You’re looking for a pale yellow color and a texture that looks like fluffy sand. Scrape down the sides of the bowl with a spatula halfway through. Add the egg, sour cream, and vanilla extract, then beat on low until just combined. The mixture might look a little curdled at this point — that’s okay, the flour will bring it together.
In a separate bowl, whisk together the flour, baking powder, and salt. Gradually add the dry ingredients to the wet mixture, mixing on low speed until the dough just comes together. Don’t overmix! Stop as soon as you don’t see any more streaks of flour. The dough should be soft but not sticky. If it feels too sticky, add a tablespoon more flour. If it’s crumbly, add a teaspoon of water.
Step 2: Chill the Dough
Divide the dough into two discs, wrap each tightly in plastic wrap, and refrigerate for at least 2 hours. This is non-negotiable — chilled dough is much easier to roll out and holds its shape better during baking. I’ve skipped this step before, and my bat cookies turned into sad, blobby blobs. Trust me on this one. You can chill the dough for up to 3 days, or freeze it for up to 3 months.
Step 3: Roll and Cut
Preheat your oven to 350°F (175°C) and line two baking sheets with parchment paper. Lightly flour your work surface and rolling pin. Roll out one disc of dough to about 1/4-inch thickness. I use my adjustable rolling pin set to 1/4 inch for consistency. If the dough starts to stick, dust with a little more flour. Cut out your Halloween shapes and transfer them to the prepared baking sheets, spacing them about 1 inch apart. Gather the scraps, re-roll, and cut again — you can do this 2-3 times before the dough gets tough.
Step 4: Bake
Bake for 8-10 minutes, rotating the pans halfway through. The cookies are done when the edges are just barely set and the centers look slightly underdone — they should not be brown at all. A good test is to gently touch the center of a cookie; it should feel soft but not wet. Let them cool on the baking sheet for 5 minutes, then transfer to a wire rack to cool completely. This is critical — moving them too soon can break them, and they need to be completely cool before decorating.
Step 5: Make the Royal Icing
In a large bowl, combine the sifted confectioners’ sugar and meringue powder. Add 4 tablespoons of water and the vanilla extract (if using). Beat on low speed until combined, then increase to medium-high and beat for 5-7 minutes, until the icing is thick, glossy, and forms stiff peaks. The consistency should be like toothpaste for outlining, and slightly thinner for flooding (when you lift the spoon, the ribbon of icing should sink back into the bowl within 10 seconds). Add water a teaspoon at a time to adjust consistency.
Step 6: Decorate
Divide the icing into bowls and color with gel food coloring. Transfer to piping bags fitted with small round tips. Outline each cookie with the thicker icing, then fill in the center with the thinner “flood” icing. Use a toothpick to spread the icing into corners and pop any air bubbles. Let the base layer dry for at least 4 hours (or overnight) before adding details like faces or stripes. I learned the hard way that rushing this step leads to colors bleeding into each other.
Cooking Tips & Techniques
After dozens of batches (and plenty of failures), I’ve picked up a few tricks that make these cookies consistently perfect. Here are my hard-earned lessons:
- Don’t overwork the dough. The more you handle it, the tougher the cookies become. Mix just until the flour disappears, and re-roll scraps gently. I once tried to get every last bit of dough from a batch, and the final cookies were tough as hockey pucks.
- Chill the cut-out shapes. If you have time, pop the cut cookies in the freezer for 10 minutes before baking. This helps them hold their shape even better. I do this when I’m making intricate shapes like cats or bats with delicate ears.
- Use a light touch with flour. Too much flour on your work surface can dry out the dough. I use a light dusting and a bench scraper to lift the cookies if they stick.
- Watch the oven like a hawk. These cookies go from perfectly done to overbaked in about 60 seconds. I set a timer for 7 minutes and check every minute after that. The cookies should look pale — any browning means they’ll be crisp, not soft.
- Royal icing consistency is everything. I keep a small bowl of water nearby to thin the icing as needed. The outlining consistency should hold a stiff peak, while the flooding consistency should flow like warm honey. Test it on a plate before you start decorating.
- Pop those bubbles. After flooding a cookie, immediately drag a toothpick through any air bubbles. I missed a few on my first batch, and they looked like they had pockmarks.
One mistake I made early on was trying to decorate cookies that weren’t completely cool. The icing melted right off and created a sticky mess. Now I always let them cool for at least an hour on the rack before even thinking about icing. Patience pays off!
Variations & Adaptations
These cookies are endlessly customizable. Here are some of my favorite variations, tested and approved by my family and friends:
- Chocolate Base: Replace 1/3 cup of the flour with unsweetened cocoa powder. The chocolate version pairs beautifully with a vanilla or orange-flavored royal icing. I made these for a Halloween party last year, and they were a huge hit.
- Spiced Pumpkin: Add 1 teaspoon of pumpkin pie spice and 2 tablespoons of pumpkin puree to the dough (reduce the sour cream by 1 tablespoon). These taste like fall in cookie form and are perfect for Thanksgiving, too.
- Gluten-Free: Use a 1:1 gluten-free flour blend with xanthan gum. The dough will be a bit more fragile, so chill it for an extra hour before rolling. I’ve had great results with King Arthur’s Measure for Measure.
- Vegan: Substitute the butter with vegan butter, the egg with a flax egg (1 tablespoon ground flaxseed + 3 tablespoons water), and the sour cream with a dairy-free version. The texture is slightly different but still delicious.
- Citrus Twist: Add the zest of one lemon or orange to the dough and replace the vanilla in the icing with lemon or orange extract. The bright flavor cuts through the sweetness beautifully.
I tried a lavender-honey variation once for a spring event, and while it wasn’t my favorite, my neighbor absolutely loved it. Don’t be afraid to experiment — that’s how I discovered the sour cream trick in the first place!
Serving & Storage Suggestions
These cookies are best served at room temperature, with the royal icing fully set and glossy. I love arranging them on a large platter or cake stand for Halloween parties — they make such a festive centerpiece. For a cozy night in, I pair them with a warm mug of spiced apple cider or a hot chocolate with marshmallows. The contrast between the warm drink and the cool, sweet cookie is pure comfort.
For storage, place the decorated cookies in a single layer in an airtight container, separating layers with parchment paper. They’ll stay fresh at room temperature for up to 5 days. The flavor actually improves after a day or two — the cookies soften slightly, and the icing sets perfectly. I’ve also frozen undecorated cookies (baked and cooled, wrapped tightly) for up to 3 months. Just thaw at room temperature and decorate as usual.
If you’re making these ahead for a party, I recommend baking the cookies 2-3 days in advance and decorating them the day before. The icing needs at least 4 hours to dry completely, so plan accordingly. I once decorated cookies an hour before a party, and the icing smeared all over the container — lesson learned!
Flavor-wise, these cookies develop beautifully over time. The butter flavor deepens, and the texture becomes even more tender. Honestly, I think they’re even better on day two or three — if they last that long!
Nutritional Information & Benefits
While these are definitely a treat, there are a few redeeming qualities worth noting. Each cookie (based on a 2-inch cutter and using the full batch of icing) contains approximately:
- Calories: 120-150
- Fat: 5-7g
- Carbohydrates: 18-22g
- Protein: 1-2g
- Sugar: 12-15g
The sour cream adds a small amount of calcium and probiotics, while the butter provides vitamin A. The egg contributes high-quality protein. Of course, these are still a sweet treat, but using real ingredients means you’re avoiding the preservatives and artificial additives found in store-bought versions.
For those with dietary restrictions, the gluten-free and vegan variations make these accessible to more people. The royal icing can be made without meringue powder (using aquafaba instead) for an egg-free option. Always check labels if you’re serving someone with allergies — some confectioners’ sugars contain cornstarch, which can be an issue for corn allergies.
I believe in balance — these cookies are meant to be enjoyed as part of a festive celebration, not as an everyday snack. One or two with a cup of tea is the perfect way to indulge without overdoing it.
Conclusion
These cozy homemade Halloween sugar cookies with royal icing are more than just a recipe — they’re a tradition in the making. They started as a happy accident on a chaotic evening, and now they’re the cookies I turn to for every Halloween gathering, every cozy night in, every time I need a little sweetness in my life. The soft, tender texture and the glossy, vibrant icing are a combination that never fails to bring a smile to people’s faces.
I encourage you to make these your own. Use your favorite Halloween cookie cutters, experiment with different color combinations, and don’t stress about perfection. Some of my favorite cookies have been the ones with slightly wonky faces or uneven icing — they have character. That’s the beauty of homemade baking: it’s not about being flawless, it’s about the love and effort you put into it.
I’d love to hear how your cookies turn out! Leave a comment below with your favorite Halloween shape, tag me in your photos on social media, or share your own twist on this recipe. Happy baking, and may your kitchen be filled with the cozy, sweet smell of sugar cookies and the warmth of a happy accident turned tradition.
Frequently Asked Questions
Can I freeze the cookie dough?
Absolutely! Wrap the dough discs tightly in plastic wrap and place them in a freezer bag. They’ll keep for up to 3 months. When you’re ready to bake, thaw the dough in the refrigerator overnight, then roll and cut as usual. I always keep a batch in the freezer for spontaneous baking sessions.
Why did my cookies spread too much?
Spreading usually happens when the dough isn’t chilled enough or the butter was too soft. Make sure your dough chills for at least 2 hours, and if your kitchen is warm, pop the cut cookies in the freezer for 10 minutes before baking. Also, check that your baking powder isn’t expired — old leavening agents can cause uneven spreading.
Can I use liquid food coloring instead of gel?
You can, but I don’t recommend it. Liquid food coloring adds extra moisture to the royal icing, which can thin it out and affect the consistency. You’d need to add more confectioners’ sugar to compensate, which throws off the recipe. Gel colors are concentrated and don’t change the icing texture — they’re worth the investment.
How do I get the royal icing perfectly smooth?
The key is the right consistency — the flooding icing should flow like honey and sink back into itself within 10 seconds when you lift the spoon. After flooding each cookie, use a toothpick to spread the icing into corners and pop any air bubbles. Let the cookies sit undisturbed for at least 4 hours, and the icing will self-level into a smooth, glossy finish.
Can I make these cookies without royal icing?
Of course! These cookies are delicious on their own, dusted with a little confectioners’ sugar, or brushed with a simple glaze made from confectioners’ sugar and milk. You can also press sprinkles or sanding sugar into the dough before baking for a simpler decoration. The soft texture makes them wonderful no matter how you finish them.
Pin This Recipe!

Cozy Homemade Halloween Sugar Cookies with Royal Icing

These soft, tender sugar cookies with a pillowy texture are the perfect canvas for royal icing. A happy accident turned into a beloved Halloween tradition, these cookies are easy to make and endlessly customizable.
- Prep Time: 30 minutes
- Cook Time: 10 minutes
- Total Time: 2 hours 40 minutes (includes 2 hours chilling)
- Yield: 24 cookies 1x
- Category: Dessert
- Cuisine: American
Ingredients
- 1 cup (226g) unsalted butter, softened
- 1 cup (200g) granulated sugar
- 1 large egg, room temperature
- 1/3 cup (80g) full-fat sour cream
- 1 teaspoon vanilla extract
- 2 1/2 cups (312g) all-purpose flour, spooned and leveled
- 1 teaspoon baking powder
- 1/2 teaspoon fine sea salt
- 3 cups (340g) confectioners’ sugar, sifted
- 3 tablespoons meringue powder
- 4–6 tablespoons water, room temperature
- 1/2 teaspoon vanilla extract (optional)
- Gel food coloring (orange, black, purple, green)
Instructions
- In a large bowl, beat softened butter and granulated sugar on medium speed until light and fluffy, about 3-4 minutes. Scrape down the bowl halfway through.
- Add egg, sour cream, and vanilla extract; beat on low until just combined. The mixture may look curdled.
- In a separate bowl, whisk together flour, baking powder, and salt. Gradually add to wet mixture, mixing on low until dough just comes together. Do not overmix.
- Divide dough into two discs, wrap tightly in plastic wrap, and refrigerate for at least 2 hours (up to 3 days).
- Preheat oven to 350°F (175°C). Line two baking sheets with parchment paper.
- Lightly flour work surface and rolling pin. Roll out one disc of dough to 1/4-inch thickness. Cut into Halloween shapes and transfer to prepared baking sheets, spacing 1 inch apart.
- Bake for 8-10 minutes, rotating pans halfway through. Cookies are done when edges are set and centers look slightly underdone. Cool on baking sheet for 5 minutes, then transfer to wire rack to cool completely.
- For royal icing: In a large bowl, combine sifted confectioners’ sugar and meringue powder. Add 4 tablespoons water and vanilla extract (if using). Beat on low until combined, then on medium-high for 5-7 minutes until thick, glossy, and forms stiff peaks. Adjust consistency with additional water as needed.
- Divide icing into bowls and color with gel food coloring. Transfer to piping bags fitted with small round tips.
- Outline each cookie with thicker icing, then fill with thinner ‘flood’ icing. Use a toothpick to spread icing and pop air bubbles. Let base layer dry for at least 4 hours or overnight before adding details.
Notes
Chill the cut-out shapes in the freezer for 10 minutes before baking to help them hold their shape. Don’t overwork the dough to keep cookies tender. Royal icing consistency is key: outlining should hold a stiff peak, flooding should flow like honey. Let cookies cool completely before decorating to prevent icing from melting.
Nutrition
- Serving Size: 1 cookie
- Calories: 135
- Sugar: 13
- Sodium: 75
- Fat: 6
- Saturated Fat: 3.5
- Carbohydrates: 20
- Protein: 1.5
Keywords: Halloween sugar cookies, soft sugar cookies, royal icing cookies, Halloween treats, sour cream sugar cookies


