There used to be a tiny bakery called “Sprinkle & Whimsy” tucked between a laundromat and a used bookstore on the corner of Elm Street. When they closed their doors three years ago—just a handwritten sign in the window saying “Thank you for the sweet years”—I honestly felt a little lost. Their confetti birthday cake was the stuff of legend. Not too sweet, impossibly tender, with those little specks of color running through every single bite. The buttercream was this cloud-like thing that melted the second it hit your tongue. I tried recreating it maybe seven or eight times before I got close. The first attempt was a dense, dry disaster. The second one looked like a sad, lumpy science project. But this version? This is the one. After a lot of trial and error—and one particularly messy afternoon where I forgot the vanilla entirely—I finally nailed it.
You know that feeling when you take a bite of something and it just transports you? That’s what this cake does for me. It’s not just a birthday cake; it’s a cozy, homemade hug in dessert form. The kind of cake that makes you close your eyes on the first bite and forget about whatever went wrong that day. I started making it for my own quiet celebrations, but now it’s the one everyone asks for. Maybe you’ve been there—chasing a flavor from a place that no longer exists, trying to bottle up a little bit of that happiness. This is that recipe. And honestly, it’s better than the original ever was.
Why You’ll Love This Recipe
This isn’t just another confetti cake recipe you’ll find floating around the internet. I’ve tested this one until my kitchen looked like a rainbow exploded, and I can tell you with confidence—this is the one you’ll come back to again and again. Here’s why it’s earned a permanent spot in my recipe box:
- Quick & Easy: From mixing bowl to cooling rack in under an hour. Perfect for those last-minute birthday cravings or a Tuesday night that just needs a little sparkle.
- Simple Ingredients: You probably have most of this in your pantry right now. No weird extracts or hard-to-find specialty flours. Just good, honest baking staples.
- Perfect for Any Occasion: Birthdays, obviously. But also rainy Sundays, celebrating a promotion, or just because it’s Wednesday and you deserve a slice of joy.
- Crowd-Pleaser: I’ve served this to kids, grandparents, and that one friend who claims they “don’t really like cake.” Every single person went back for seconds.
- Unbelievably Delicious: The secret is in the technique—creaming the butter and sugar until it’s light and fluffy, then adding the eggs one at a time. It creates a crumb so tender it practically falls apart on your fork.
What makes this recipe different from the rest? It’s the balance. The cake is moist without being greasy, sweet without being cloying, and that buttercream is silky smooth without being a sugary mess. I spent a long time tweaking the ratios to get that perfect texture. It’s comfort food reimagined—familiar, yes, but with a little extra love that makes it feel special. This is the kind of cake that makes you slow down, take a deep breath, and just enjoy the moment.
What Ingredients You Will Need
This recipe uses simple, wholesome ingredients to deliver that nostalgic bakery flavor without the fuss. Most of these are pantry staples, and the ones that aren’t are easy to find at any grocery store. Let’s break it down.
For the Cake
- All-purpose flour, 2 ½ cups (315g) – I prefer Gold Medal for its consistent protein content. Spoon and level it; don’t scoop directly from the bag or you’ll end up with a dry cake.
- Granulated sugar, 1 ¾ cups (350g) – Regular white sugar works best here. It dissolves beautifully and helps create that tender crumb.
- Unsalted butter, 1 cup (226g), softened – Make sure it’s at room temperature. Cold butter won’t cream properly, and melted butter changes the texture entirely. I leave mine out for about an hour before I start.
- Large eggs, 3, room temperature – If you forgot to take them out of the fridge, place them in a bowl of warm water for 5 minutes. Cold eggs can seize the batter.
- Whole milk, 1 cup (240ml) – Whole milk adds richness, but 2% works in a pinch. Avoid skim milk; the cake won’t be as moist.
- Vanilla extract, 2 teaspoons – Pure vanilla extract is non-negotiable here. Imitation vanilla has that artificial aftertaste that just ruins the cozy factor.
- Baking powder, 2 ½ teaspoons – Make sure it’s fresh. If your baking powder is older than 6 months, it might not give you the lift you need.
- Salt, ½ teaspoon – Just enough to balance the sweetness and enhance the flavors.
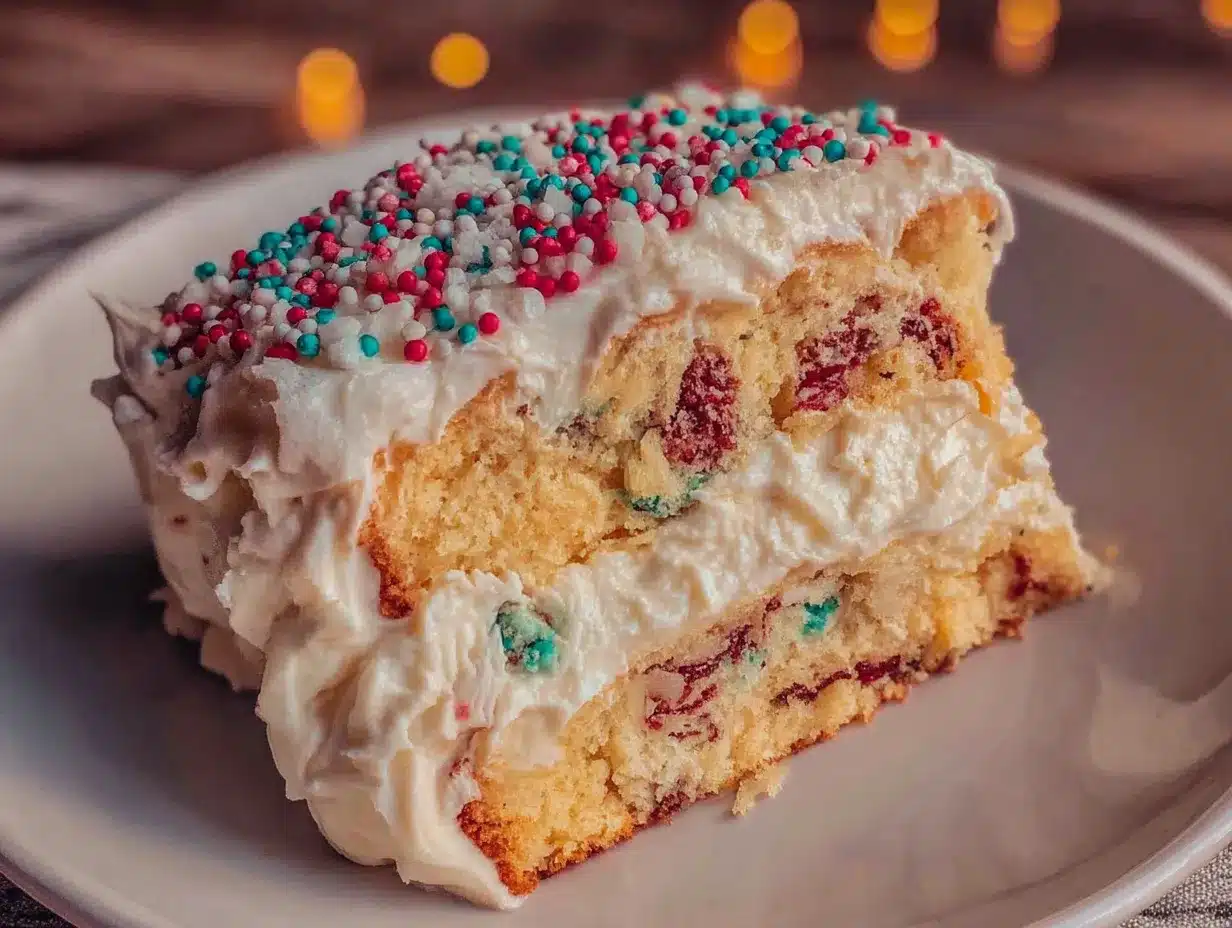
- Rainbow sprinkles, ½ cup (80g) – Use the jimmies-style sprinkles (the long, skinny ones), not the round nonpareils. The round ones tend to bleed their color into the batter and turn the cake an odd grayish hue. Trust me on this one.
For the Vanilla Buttercream
- Unsalted butter, 1 ½ cups (339g), softened – Again, room temperature is key. Cold butter will give you lumpy frosting.
- Powdered sugar, 4 cups (480g), sifted – Sifting removes clumps and gives you that silky smooth texture. I know it’s an extra step, but it makes a real difference.
- Heavy cream, 3-4 tablespoons (45-60ml) – Heavy cream makes the frosting light and fluffy. You can use milk in a pinch, but the texture won’t be quite as dreamy.
- Vanilla extract, 2 teaspoons – Pure vanilla again. It’s the star of the show here.
- Salt, a pinch – Just a tiny pinch to cut through the sweetness and make the vanilla flavor pop.
One quick note on the sprinkles: I’ve tried a few brands, and I keep coming back to Betty Crocker’s rainbow jimmies. They hold their color well and don’t bleed into the batter. If you’re using a different brand, do a quick test—drop a few sprinkles into a small bowl of water and see if the color leaches out. If it does, find another brand.
Equipment Needed
You don’t need a fancy bakery setup to make this cake. Here’s what I use in my own kitchen:
- Two 9-inch round cake pans – I love my Fat Daddio’s anodized aluminum pans. They heat evenly and release cakes beautifully. If you’re using dark non-stick pans, reduce the oven temperature by 25°F to prevent over-browning.
- Electric hand mixer or stand mixer – A stand mixer makes creaming the butter and sugar a breeze, but a hand mixer works just fine. You can do it by hand with a wooden spoon, but your arm will definitely get a workout.
- Large mixing bowls – At least two: one for dry ingredients and one for the batter.
- Whisk and rubber spatula – The whisk for combining dry ingredients, the spatula for scraping down the bowl and folding in the sprinkles.
- Cooling rack – Essential for letting the cakes cool completely before frosting. If you frost a warm cake, the buttercream will slide right off.
- Offset spatula – For spreading that buttercream like a pro. A butter knife works in a pinch, but the offset spatula gives you that smooth, bakery-style finish.
- Parchment paper – Line the bottom of your cake pans for easy release. I trace the bottom of the pan on the paper and cut it out. Saves so much frustration.
- Sifter or fine-mesh strainer – For sifting the powdered sugar. Yes, it’s worth it.
If you don’t have a stand mixer, don’t worry. I made this cake for years with just a hand mixer and a lot of patience. The key is to cream the butter and sugar for the full 3-4 minutes, even if your arm gets tired. That’s where the magic happens.
Preparation Method
Alright, let’s get baking! This method is broken down into clear steps so you can follow along without any hiccups. I’ve included some sensory cues along the way—things to look for, smell, and feel—so you know you’re on the right track.
- Preheat and Prep: Preheat your oven to 350°F (175°C). Grease two 9-inch round cake pans with butter or non-stick spray, then line the bottoms with parchment paper circles. Lightly flour the sides of the pans, tapping out any excess. This double-layer prep ensures your cakes will release without a fight.
- Mix the Dry Ingredients: In a medium bowl, whisk together the 2 ½ cups of all-purpose flour, 2 ½ teaspoons of baking powder, and ½ teaspoon of salt. Whisk for about 20 seconds to aerate the flour and distribute the leavening evenly. Set this aside.
- Cream the Butter and Sugar: In a large mixing bowl (or the bowl of your stand mixer), beat the 1 cup of softened unsalted butter and 1 ¾ cups of granulated sugar together on medium speed for 3-4 minutes. You’re looking for a light, fluffy, almost pale yellow mixture. It should look like it’s doubled in volume. This is the most important step—don’t rush it. If you stop too early, your cake will be dense.
- Add the Eggs and Vanilla: Add the 3 room-temperature eggs, one at a time, beating well after each addition. Scrape down the sides and bottom of the bowl with your rubber spatula after each egg. Then, beat in the 2 teaspoons of vanilla extract. The mixture might look a little curdled at this point—that’s totally normal. Don’t panic.
- Alternate Adding Dry Ingredients and Milk: With the mixer on low speed, add about one-third of the dry ingredients to the butter mixture. Mix until just combined—a few streaks of flour are okay. Then, add half of the 1 cup of whole milk, mixing until incorporated. Repeat with another third of the dry ingredients, the remaining milk, and finally the last third of the dry ingredients. Stop mixing as soon as the flour disappears. Over-mixing at this stage will develop the gluten and make your cake tough.
- Fold in the Sprinkles: Remove the bowl from the mixer and grab your rubber spatula. Gently fold in the ½ cup of rainbow sprinkles with just a few strokes. You want them distributed evenly without over-mixing. The batter should be thick, smooth, and studded with little pops of color.
- Divide and Bake: Divide the batter evenly between the two prepared pans. Use a kitchen scale for accuracy if you have one—each pan should have about 650g of batter. Smooth the tops with your spatula. Bake for 25-30 minutes, or until a toothpick inserted into the center comes out clean or with a few moist crumbs. The edges should be lightly golden and pulling away from the sides of the pan. Your kitchen will smell like pure joy at this point.
- Cool the Cakes: Let the cakes cool in the pans on a wire rack for 10 minutes. Then, run a thin knife around the edges to loosen them, invert onto the cooling rack, and remove the parchment paper. Let them cool completely—at least 1 hour. Do not attempt to frost a warm cake. I learned this the hard way when my buttercream turned into a melty puddle.
- Make the Buttercream: While the cakes are cooling, make the frosting. In a large bowl, beat the 1 ½ cups of softened unsalted butter on medium speed for 2-3 minutes until it’s smooth and pale. Gradually add the 4 cups of sifted powdered sugar, about 1 cup at a time, beating on low speed to prevent a sugar cloud. Add the 2 teaspoons of vanilla extract and a pinch of salt. Add the heavy cream, 1 tablespoon at a time, and beat on medium-high speed for 3-4 minutes until the frosting is light, fluffy, and spreadable. If it’s too thick, add another tablespoon of cream. If it’s too thin, add a little more powdered sugar.
- Assemble and Frost: Place one cooled cake layer on your serving plate or cake stand. Spread about ¾ cup of buttercream evenly over the top. Place the second layer on top, flat side down. Apply a thin crumb coat—a thin layer of frosting all over the cake to seal in any loose crumbs. Refrigerate for 15 minutes to set the crumb coat. Then, apply the remaining frosting in a thick, generous layer. Use your offset spatula to create swirls or a smooth finish, whatever your heart desires. Top with extra sprinkles for that celebratory look.
Cooking Tips & Techniques
I’ve made this cake more times than I can count, and I’ve picked up a few tricks along the way that make the process smoother and the results more consistent. Here are my best tips:
- Room temperature ingredients are non-negotiable. I know it’s tempting to use cold eggs and butter straight from the fridge, but room temperature ingredients emulsify better, creating a lighter, more tender crumb. If you’re in a hurry, cut your butter into small cubes and let it sit for 15 minutes. For eggs, place them in a bowl of warm water for 5 minutes.
- Don’t over-mix the batter. Once you add the flour, mix only until it’s just combined. Over-mixing develops gluten, which can make your cake dense and rubbery. A few small lumps in the batter are perfectly fine—they’ll bake out.
- Use a kitchen scale for accuracy. Measuring flour by volume can be inconsistent. If you have a scale, use it. 315 grams of all-purpose flour is much more reliable than a scooped measuring cup.
- Let the cakes cool completely. This is the hardest part, I know. But if you frost a warm cake, the buttercream will melt and slide off, and you’ll end up with a mess. Patience pays off here.
- Chill the cake before the final coat. The crumb coat is your best friend. It traps all those loose crumbs so your final layer of frosting is clean and beautiful. Pop the cake in the fridge for 15-20 minutes between coats.
- One mistake I made early on: I used too many sprinkles in the batter, thinking more color meant more fun. But too many sprinkles can weigh down the batter and make the cake sink in the middle. Stick to ½ cup. It’s the perfect amount.
Variations & Adaptations
This recipe is a wonderful base for all kinds of creative twists. Here are a few variations I’ve tried and loved:
- Gluten-Free Version: Substitute the all-purpose flour with a 1:1 gluten-free baking flour blend that contains xanthan gum. I’ve had great results with King Arthur’s Measure for Measure flour. The texture is slightly more delicate, but it’s still incredibly delicious.
- Dairy-Free Option: Use vegan butter sticks (like Miyoko’s or Country Crock Plant Butter) and substitute the whole milk with unsweetened oat milk or almond milk. For the buttercream, use vegan butter and a dairy-free heavy cream alternative. The flavor is a little different, but the cozy factor is still there.
- Lemon Confetti Cake: Add the zest of one lemon to the sugar and rub it in with your fingers before creaming with the butter. Replace 1 teaspoon of the vanilla extract with lemon extract. It adds a bright, sunny note that’s perfect for spring birthdays.
- Chocolate Confetti Cake: Replace ¼ cup of the all-purpose flour with ¼ cup of unsweetened cocoa powder. Use chocolate sprinkles instead of rainbow ones. Frost with the same vanilla buttercream for a classic chocolate-vanilla combo, or use a chocolate buttercream for double the chocolate.
- Cupcake Version: This batter makes about 24 cupcakes. Bake at 350°F (175°C) for 18-20 minutes. The baking time is shorter, so keep an eye on them. They’re perfect for parties or just portion control.
I’ve personally tried the lemon version for a friend’s bridal shower, and it was a huge hit. The bright citrus flavor paired with the creamy vanilla buttercream is just perfection.
Serving & Storage Suggestions
This cake is best served at room temperature, so take it out of the fridge about 30 minutes before you plan to slice into it. The buttercream softens slightly, and the cake becomes incredibly tender. I love serving it with a tall glass of cold milk or a hot cup of coffee. The contrast of temperatures is just lovely.
For storage, place any leftover cake in an airtight container at room temperature for up to 2 days. If your kitchen is warm, store it in the refrigerator for up to 5 days. Just let it come to room temperature before serving again. The flavors actually meld together beautifully overnight, so day-old cake is often even better than fresh-baked.
You can also freeze this cake! Wrap the unfrosted cake layers tightly in plastic wrap, then in aluminum foil, and freeze for up to 3 months. When you’re ready to use them, thaw overnight in the refrigerator. Frost as usual. The buttercream can also be frozen in an airtight container for up to 3 months. Thaw in the fridge overnight, then re-whip it for a minute or two to bring back that fluffy texture.
One thing I’ve noticed: the sprinkles in the cake can soften slightly after a day or two, which actually makes the cake even more moist. So don’t be afraid of leftovers—they’re a gift.
Nutritional Information & Benefits
Let’s be real—this is a celebration cake, not a health food. But that doesn’t mean it can’t have a place in a balanced life. Here’s a rough estimate of the nutritional values per slice (based on 12 servings):
- Calories: Approximately 480-520 per slice
- Fat: 26g
- Carbohydrates: 62g
- Protein: 5g
- Sugar: 45g
That said, this cake does have some redeeming qualities. The butter provides a good source of fat-soluble vitamins like A, D, and E. The milk adds calcium and protein. And honestly, the biggest benefit is the joy it brings. Sharing a homemade cake with people you love is a form of self-care and connection. It’s about the experience, not just the numbers.
If you’re watching your sugar intake, you can reduce the sugar in the cake to 1 ½ cups without significantly affecting the texture. For the frosting, you can use a sugar-free powdered sugar substitute, but the texture will be slightly different. I’ve tried it, and while it works in a pinch, the real deal is worth the splurge for special occasions.
Conclusion
This cozy homemade confetti birthday cake with vanilla buttercream is more than just a recipe—it’s a little piece of happiness you can create in your own kitchen. It’s the cake I make when I need a pick-me-up, when I want to celebrate a small victory, or when I just want to fill my home with the smell of vanilla and nostalgia. It’s forgiving, it’s delicious, and it’s guaranteed to make someone’s day a little brighter.
I’d love for you to try it and make it your own. Maybe you’ll add a different extract, or top it with fresh berries, or turn it into a layer cake with three tiers. Whatever you do, I hope it brings you the same warmth and joy it brings me. If you make it, please come back and leave a comment or tag me in your photos—I genuinely love seeing your creations. Until then, happy baking, and remember: every day is worth celebrating with cake.
Frequently Asked Questions
Can I use margarine instead of butter?
You can, but I don’t recommend it. Butter gives the cake its rich flavor and tender texture. Margarine has a higher water content, which can make the cake dense and greasy. If you’re dairy-free, use a high-quality vegan butter stick instead of margarine.
Why did my cake sink in the middle?
This usually happens for one of three reasons: your oven wasn’t hot enough, you opened the oven door too early, or you over-mixed the batter. Make sure your oven is fully preheated to 350°F (175°C), and resist the urge to peek until the 25-minute mark. Over-mixing incorporates too much air, which can cause the cake to rise quickly and then collapse.
Can I use a different type of sprinkles?
Yes, but stick with jimmies (the long, skinny sprinkles) for the best results. Round nonpareils tend to bleed their color into the batter, turning it an unappetizing gray. If you only have nonpareils, toss them in a tablespoon of flour before folding them into the batter—this helps minimize color bleeding.
How do I get my buttercream smooth?
The key is sifting your powdered sugar and beating the buttercream for a full 3-4 minutes after adding the cream. If your frosting still looks lumpy, it might be because your butter wasn’t soft enough. Let it sit at room temperature for another 15 minutes and beat again. A warm bowl can also help—run it under hot water, dry it, and then re-whip the frosting.
Can I make this cake in advance?
Absolutely. You can bake the cake layers up to 2 days in advance. Wrap them tightly in plastic wrap and store at room temperature. You can also make the buttercream up to a week ahead and keep it in the refrigerator. When you’re ready to assemble, let the buttercream come to room temperature and re-whip it for a minute to restore its fluffy texture.
Pin This Recipe!
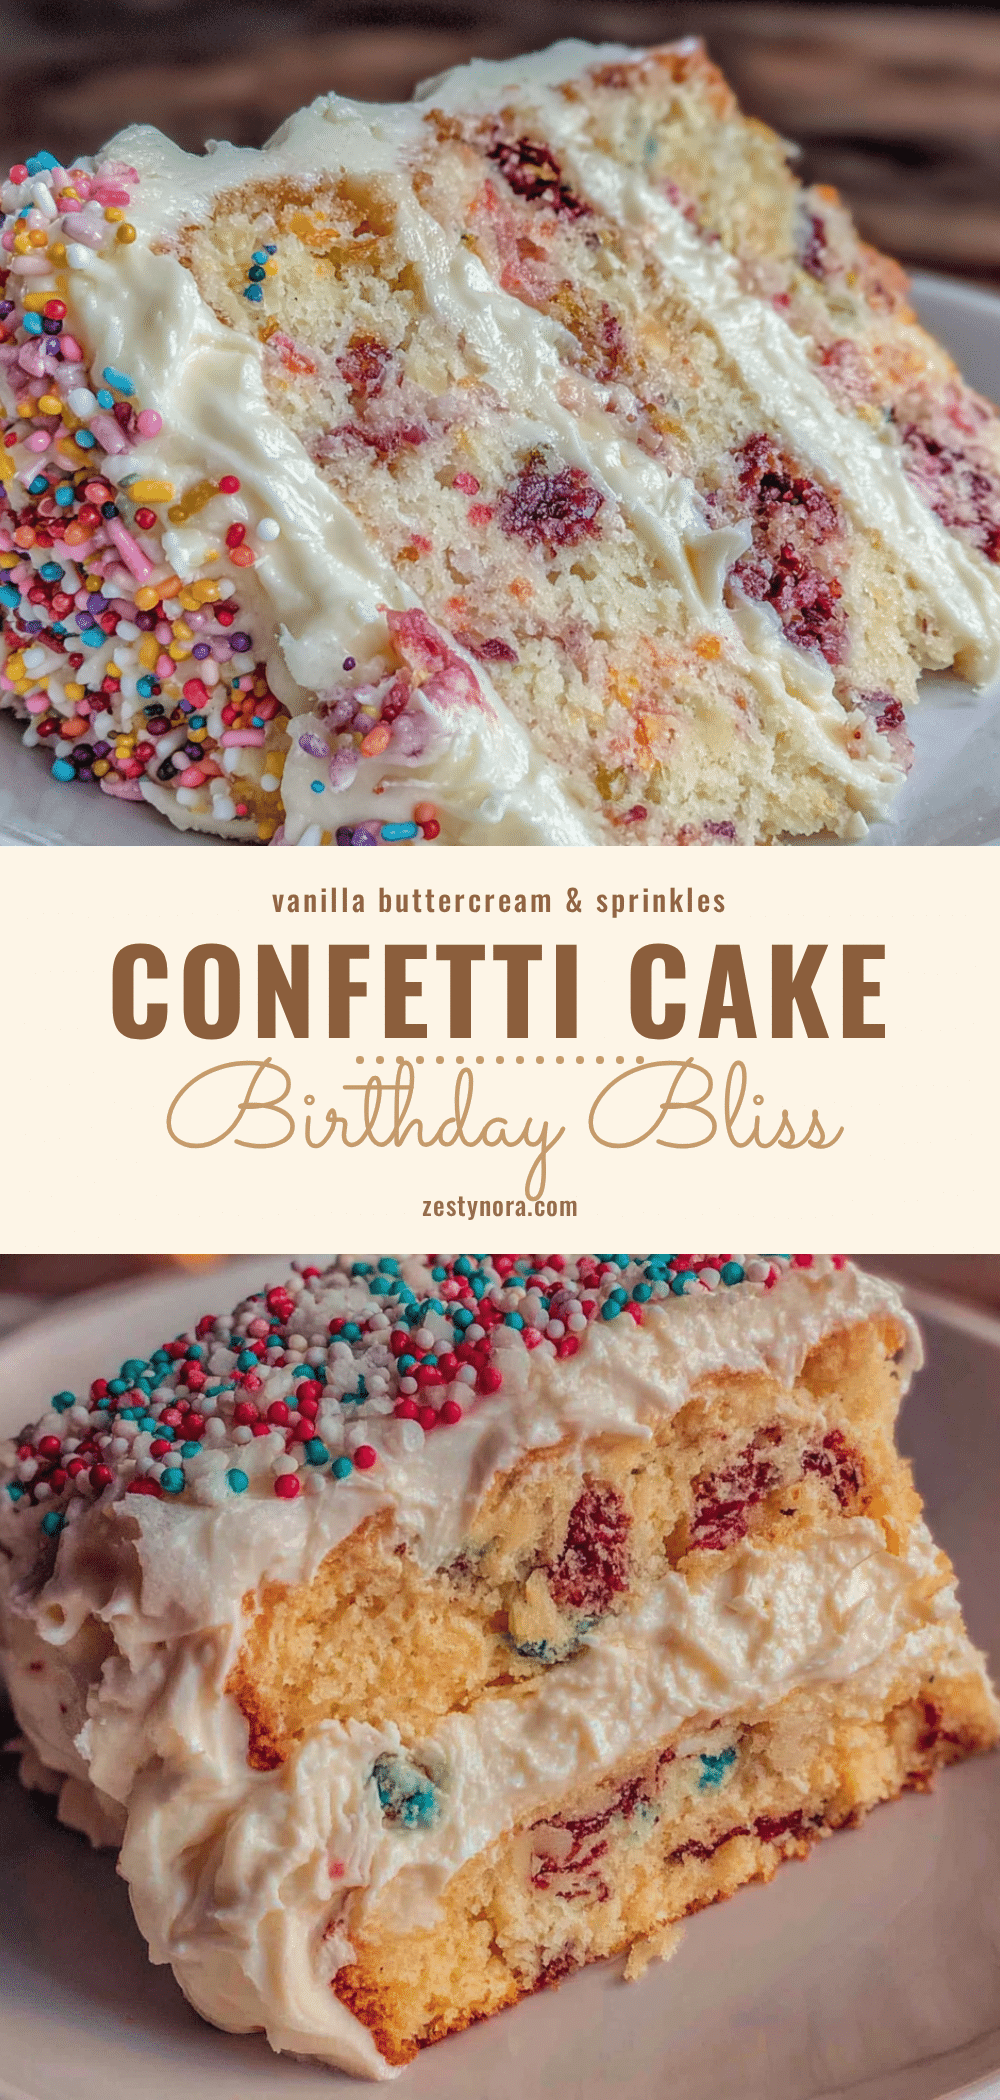
Cozy Homemade Confetti Birthday Cake with Vanilla Buttercream
This confetti birthday cake is a cozy, homemade hug in dessert form—impossibly tender, not too sweet, and topped with a cloud-like vanilla buttercream. It’s the perfect celebration cake for any occasion.
- Prep Time: 20 minutes
- Cook Time: 30 minutes
- Total Time: 1 hour 50 minutes (includes cooling)
- Yield: 12 servings
- Category: Dessert
- Cuisine: American
Ingredients
- All-purpose flour, 2 ½ cups (315g)
- Granulated sugar, 1 ¾ cups (350g)
- Unsalted butter, 1 cup (226g), softened
- Large eggs, 3, room temperature
- Whole milk, 1 cup (240ml)
- Vanilla extract, 2 teaspoons
- Baking powder, 2 ½ teaspoons
- Salt, ½ teaspoon
- Rainbow sprinkles (jimmies), ½ cup (80g)
- Unsalted butter, 1 ½ cups (339g), softened (for buttercream)
- Powdered sugar, 4 cups (480g), sifted (for buttercream)
- Heavy cream, 3-4 tablespoons (45-60ml) (for buttercream)
- Vanilla extract, 2 teaspoons (for buttercream)
- Salt, a pinch (for buttercream)
Instructions
- Preheat your oven to 350°F (175°C). Grease two 9-inch round cake pans with butter or non-stick spray, then line the bottoms with parchment paper circles. Lightly flour the sides of the pans, tapping out any excess.
- In a medium bowl, whisk together the 2 ½ cups of all-purpose flour, 2 ½ teaspoons of baking powder, and ½ teaspoon of salt. Whisk for about 20 seconds to aerate the flour and distribute the leavening evenly. Set this aside.
- In a large mixing bowl (or the bowl of your stand mixer), beat the 1 cup of softened unsalted butter and 1 ¾ cups of granulated sugar together on medium speed for 3-4 minutes. You’re looking for a light, fluffy, almost pale yellow mixture. It should look like it’s doubled in volume.
- Add the 3 room-temperature eggs, one at a time, beating well after each addition. Scrape down the sides and bottom of the bowl with your rubber spatula after each egg. Then, beat in the 2 teaspoons of vanilla extract. The mixture might look a little curdled at this point—that’s totally normal.
- With the mixer on low speed, add about one-third of the dry ingredients to the butter mixture. Mix until just combined—a few streaks of flour are okay. Then, add half of the 1 cup of whole milk, mixing until incorporated. Repeat with another third of the dry ingredients, the remaining milk, and finally the last third of the dry ingredients. Stop mixing as soon as the flour disappears.
- Remove the bowl from the mixer and grab your rubber spatula. Gently fold in the ½ cup of rainbow sprinkles with just a few strokes. You want them distributed evenly without over-mixing.
- Divide the batter evenly between the two prepared pans. Use a kitchen scale for accuracy if you have one—each pan should have about 650g of batter. Smooth the tops with your spatula. Bake for 25-30 minutes, or until a toothpick inserted into the center comes out clean or with a few moist crumbs. The edges should be lightly golden and pulling away from the sides of the pan.
- Let the cakes cool in the pans on a wire rack for 10 minutes. Then, run a thin knife around the edges to loosen them, invert onto the cooling rack, and remove the parchment paper. Let them cool completely—at least 1 hour.
- While the cakes are cooling, make the frosting. In a large bowl, beat the 1 ½ cups of softened unsalted butter on medium speed for 2-3 minutes until it’s smooth and pale. Gradually add the 4 cups of sifted powdered sugar, about 1 cup at a time, beating on low speed to prevent a sugar cloud. Add the 2 teaspoons of vanilla extract and a pinch of salt. Add the heavy cream, 1 tablespoon at a time, and beat on medium-high speed for 3-4 minutes until the frosting is light, fluffy, and spreadable. If i…
- Place one cooled cake layer on your serving plate or cake stand. Spread about ¾ cup of buttercream evenly over the top. Place the second layer on top, flat side down. Apply a thin crumb coat—a thin layer of frosting all over the cake to seal in any loose crumbs. Refrigerate for 15 minutes to set the crumb coat. Then, apply the remaining frosting in a thick, generous layer. Use your offset spatula to create swirls or a smooth finish. Top with extra sprinkles for that celebratory look.
Notes
Use jimmies-style sprinkles (long, skinny ones) to prevent color bleeding. Room temperature ingredients are crucial for best texture. Do not over-mix the batter. Let cakes cool completely before frosting. For a crumb coat, chill the cake for 15 minutes before final frosting layer.
Nutrition
- Serving Size: 1 slice
- Calories: 500
- Sugar: 45
- Sodium: 220
- Fat: 26
- Saturated Fat: 16
- Carbohydrates: 62
- Fiber: 1
- Protein: 5
Keywords: confetti cake, birthday cake, vanilla buttercream, homemade cake, sprinkle cake, celebration cake


