Introduction
My husband claimed to hate casseroles for a solid ten years. Ten years. He’d make this face—you know the one, a slight wince like he’d just bitten into something unexpected—every time the word came up. “Casseroles are just… wet food,” he’d say, and I’d roll my eyes so hard I’m surprised they didn’t stick.
Then came last October. I was staring down a fridge with half a pack of chicken thighs, some sad-looking celery, and a bag of rice that was collecting dust. Payday was still three days away, and I needed dinner that wouldn’t make me cry. I threw it all in a baking dish, crossed my fingers, and shoved it in the oven. Honestly, I wasn’t expecting much.
An hour later, I found him standing at the kitchen counter, fork in hand, eating straight from the dish. “This is not a casserole,” he said, mouth half-full. “This is… cozy.” I mean, okay, sure. Call it whatever you want, buddy. I just called it dinner, and it cost me maybe eight bucks for the whole thing.
This recipe became our fall survival meal. It’s the kind of thing you make when the leaves are turning and you need something warm in your belly without emptying your wallet. Maybe you’ve been there—staring at pantry staples, wondering how to make something that actually feels like comfort food. This is that dish.
Why You’ll Love This Recipe
Let me tell you why this one sticks around in my rotation. I’ve tested this recipe maybe a dozen times, tweaking the liquid ratio, playing with the oven temperature, trying different cuts of chicken. What I landed on is the version that works every single time, no stress, no fuss.
- Budget-Friendly: This whole dish comes together for under ten dollars using pantry staples and affordable chicken thighs. Perfect for those weeks when groceries are stretching thin.
- One-Dish Wonder: Everything bakes in a single dish, which means less cleanup and more time curled up on the couch. I’m not kidding when I say this is my laziest fall dinner.
- Fall Comfort in Every Bite: The rice soaks up all the chicken juices and broth, getting tender and flavorful. It’s the kind of meal that makes you want to light a candle and put on a sweater.
- Forgiving and Flexible: You can swap vegetables, use different rice varieties, or change up the seasoning. I’ve made this with what I had on hand more times than I can count, and it always works.
- Crowd-Pleasing Magic: Even my casserole-hating husband asks for this. The rice stays fluffy, the chicken gets fall-apart tender, and the whole thing just feels like a hug in a bowl.
This isn’t just another chicken and rice recipe. The trick is browning the chicken first—that step adds so much depth without any fancy ingredients. Plus, using bone-in thighs keeps the meat juicy and adds flavor to the rice as it bakes. It’s comfort food that respects your budget and your time.
What Ingredients You Will Need
This recipe uses simple, budget-friendly ingredients that you probably already have in your kitchen. The beauty is in how they come together—nothing fancy, just good, honest food that tastes like you spent way more effort than you actually did.
- Chicken thighs, bone-in, skin-on (about 4-6 thighs, roughly 1.5 pounds): Bone-in thighs stay juicy during the long bake and add richness to the rice. I always grab these when they’re on sale—they’re usually the cheapest cut. (Skin adds flavor and crispiness)
- Long-grain white rice (1 cup, 200g): I use standard white rice here because it cooks evenly and stays fluffy. Basmati works great too. Avoid instant rice or short-grain—they get too mushy. (I recommend Mahatma or store brand for consistent results)
- Chicken broth (2 cups, 480ml): Low-sodium is best so you can control the salt. If you don’t have broth, use water with a bullion cube dissolved in it. (Better than Bouillon is my go-to for flavor)
- Yellow onion (1 medium, diced): Adds sweetness and depth as it bakes. You can use shallots or leeks if you’re feeling fancy, but a regular onion does the job.
- Carrots (2 medium, diced): For color and a little sweetness. In fall, I love using farmers market carrots that are sweeter and more flavorful.
- Celery (2 stalks, diced): The classic aromatics trio. Adds that savory backbone.
- Garlic (3 cloves, minced): Fresh garlic makes a difference here. Don’t use the jarred stuff—it burns too easily.
- Dried thyme (1 teaspoon): Earthy and warm, perfect for fall. You can use fresh thyme if you have it—just double the amount.
- Dried rosemary (½ teaspoon): Piney and aromatic. Crush it between your fingers before adding to release the oils.
- Paprika (1 teaspoon): For color and a subtle sweetness. Smoked paprika adds another layer if you have it.
- Salt and black pepper (to taste): Don’t be shy with the seasoning. The rice needs it.
- Olive oil (2 tablespoons, 30ml): For browning the chicken. Butter works too, but olive oil handles the heat better.
- Fresh parsley (for garnish, optional): Adds a pop of color and freshness at the end.
Substitution Notes: Use boneless, skinless thighs if that’s what you have—just reduce the bake time by about 10 minutes. For a gluten-free version, this recipe is naturally gluten-free as long as your broth is certified gluten-free. Swap the vegetables based on what’s in your fridge—zucchini, bell peppers, or even frozen mixed vegetables work fine.
Equipment Needed
You don’t need a fancy kitchen for this one. Here’s what you’ll need:
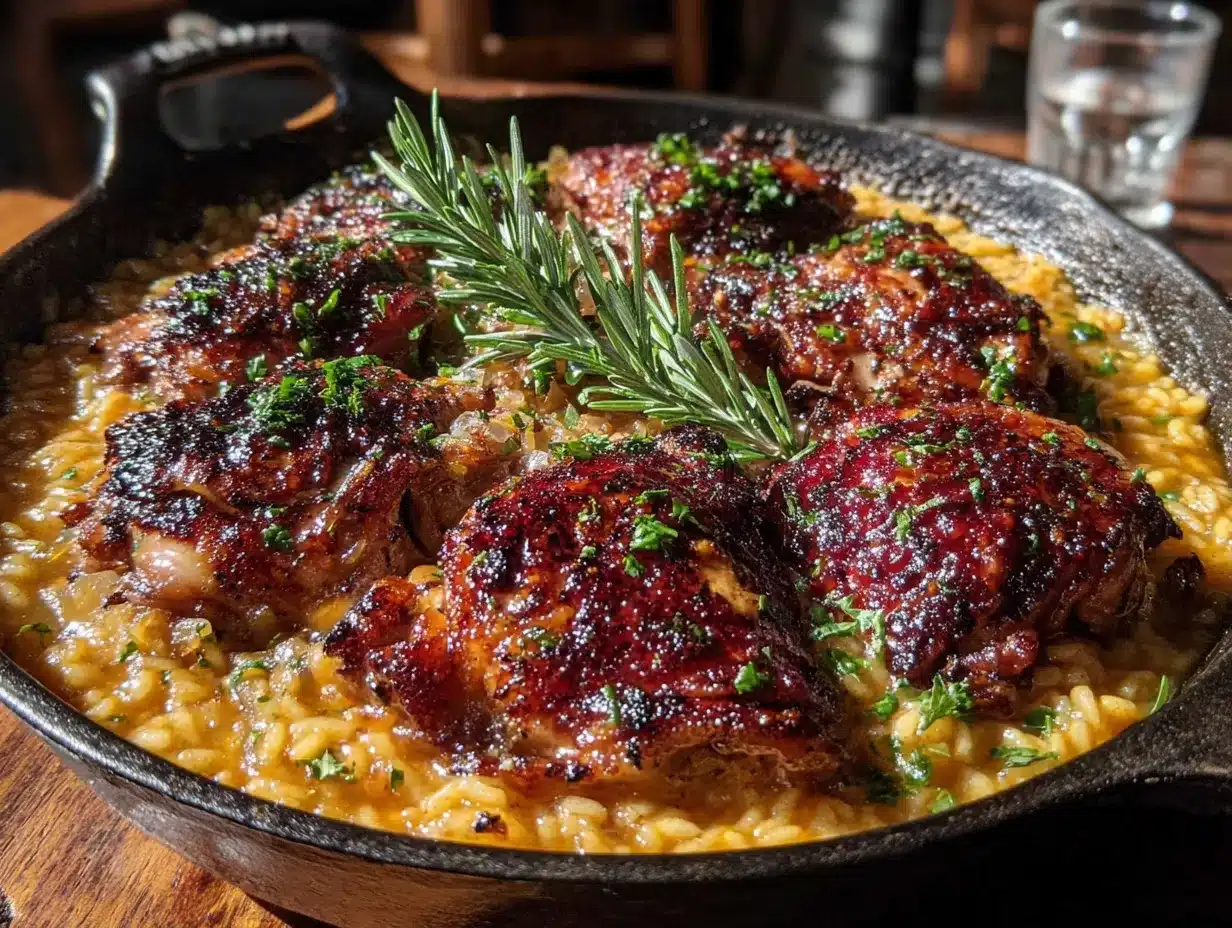
- Large oven-safe skillet or Dutch oven (10-12 inches): A cast iron skillet works perfectly. If you don’t have one, use a regular skillet for browning and transfer everything to a 9×13 baking dish. (I use my trusty Lodge cast iron—it was twenty bucks and has lasted years)
- Cutting board and sharp knife: For dicing the vegetables. A dull knife makes this step miserable, so take two minutes to sharpen yours.
- Measuring cups and spoons: Rice-to-liquid ratio matters here, so measure accurately. I’ve eyeballed it before and ended up with crunchy rice. Learn from my mistakes.
- Wooden spoon or spatula: For stirring and scraping up the browned bits from the pan—that’s where the flavor lives.
- Foil: For covering the dish during the first part of baking. This traps steam and helps the rice cook evenly.
Budget Tip: A good cast iron skillet costs less than thirty dollars and will outlive you. If you’re just starting out, a 9×13 baking dish and a regular skillet will work just fine. Don’t overthink the equipment.
Preparation Method
Let me walk you through this step by step. I’ve made this so many times I could do it in my sleep, but I’ll share all the little tricks I’ve picked up along the way.
- Preheat your oven to 375°F (190°C). Get this going first so the oven is hot when you’re ready. Position the rack in the middle of the oven.
- Pat the chicken thighs dry with paper towels. This is important—wet chicken won’t brown properly. Season both sides generously with salt, pepper, and paprika. Don’t skimp on the salt here; it’s the only chance to season the skin directly.
- Heat the olive oil in your oven-safe skillet over medium-high heat. Wait until the oil shimmers—about 2 minutes. Place the chicken thighs skin-side down in the pan. Don’t crowd them; work in batches if needed. Let them cook undisturbed for 5-6 minutes until the skin is golden brown and crispy. Flip and cook for another 3 minutes on the other side. Transfer to a plate. (The skin should be deep golden—if it’s pale, keep going)
- Reduce the heat to medium. Add the diced onion, carrots, and celery to the pan. Scrape up all those browned bits from the bottom—that’s pure flavor. Cook for 5 minutes, stirring occasionally, until the vegetables start to soften. The onions should look translucent, not brown.
- Add the minced garlic, dried thyme, and dried rosemary. Stir for about 30 seconds until fragrant. Garlic burns fast, so keep it moving. You’ll smell it immediately—that’s your cue to move on.
- Add the rice to the pan. Stir it around for about a minute, coating it in the oil and vegetable mixture. This toasting step makes the rice nuttier and helps it stay separate during baking. (I forgot this step once, and the rice was sad and sticky. Don’t skip it)
- Pour in the chicken broth. Stir everything together, scraping up any remaining bits from the bottom. Bring it to a gentle simmer—you should see small bubbles around the edges, not a rolling boil.
- Nestle the chicken thighs back into the rice mixture, skin-side up. The rice should come about halfway up the chicken. If it looks dry, add a splash more broth or water.
- Cover the skillet tightly with foil. This traps steam and ensures the rice cooks evenly. If you’re using a Dutch oven, put the lid on. Bake for 35 minutes.
- After 35 minutes, remove the foil carefully (steam is hot!). The rice should be tender and most of the liquid absorbed. If the rice is still a bit firm, re-cover and bake for another 5-10 minutes. Bake uncovered for the final 10 minutes to crisp up the chicken skin again.
- Let it rest for 5 minutes before serving. This lets the rice absorb any remaining liquid and makes it easier to serve. Garnish with fresh parsley if you’re feeling fancy.
Sensory Check: The kitchen should smell like a cozy fall evening—earthy thyme, savory chicken, and that comforting rice aroma. The chicken skin should be crackling crisp, and the rice should be fluffy and tender, not mushy or crunchy.
Cooking Tips & Techniques
I’ve messed this up enough times to know what works and what doesn’t. Here’s what I’ve learned the hard way:
Don’t skip browning the chicken. I know it’s an extra step, and some days you just want to throw everything in a pan and call it done. But that golden-brown skin adds so much flavor to the rice. Trust me, I tried skipping it once, and the whole dish tasted flat. Those browned bits stuck to the pan are liquid gold.
Watch your rice-to-liquid ratio. This is the most common mistake. Too much liquid and you get mushy rice. Too little and it’s crunchy. I’ve found that 1 cup of rice to 2 cups of broth is the sweet spot, but keep in mind that the chicken releases some liquid as it bakes. If your dish looks dry at the 25-minute mark, add a quarter cup of broth or water.
Let the rice rest. I’m guilty of diving in right away, but letting it sit for those 5 minutes makes a real difference. The rice firms up, the flavors meld, and everything becomes more cohesive. It’s worth the wait.
Use a meat thermometer if you’re unsure. Chicken thighs are forgiving, but you want them to reach 165°F (74°C) in the thickest part. I’ve pulled them at 160°F and let carry-over cooking do the rest—works perfectly.
Multitask wisely. While the chicken browns, dice your vegetables. While the rice bakes, clean up your cutting board. This recipe has natural breaks—use them to stay ahead of the mess.
Variations & Adaptations
This recipe is a chameleon. Here are some ways I’ve changed it up depending on what I have or who I’m feeding:
- Vegetarian Version: Skip the chicken and use vegetable broth. Add a can of drained chickpeas or white beans for protein. Mushrooms add that savory, meaty flavor—cremini or shiitake work great. Bake for 30 minutes covered, then 10 minutes uncovered.
- Creamy Mushroom Version: Add a can of cream of mushroom soup (or make your own) along with the broth. Stir in sautéed mushrooms for extra umami. This version is pure comfort food and my go-to on rainy days.
- Spicy Cajun Twist: Swap the thyme and rosemary for Cajun seasoning. Add diced andouille sausage along with the vegetables. This is my husband’s favorite—he likes things with a kick.
- Herb and Lemon Version: Add the zest of one lemon and a tablespoon of fresh lemon juice with the broth. Stir in fresh dill or parsley at the end. Bright and fresh, perfect for those transitional fall days that still feel like summer.
- Budget Stretch Version: Use drumsticks instead of thighs—they’re usually cheaper. Add a cup of frozen peas or green beans in the last 10 minutes of baking. You can even use water with bullion instead of broth to save a dollar.
Serving & Storage Suggestions
This dish is a complete meal on its own, but here’s how I like to serve it:
Serving: Scoop the rice onto plates and top with a chicken thigh. The rice should be fluffy and studded with tender vegetables. A sprinkle of fresh parsley or chives adds color. I love serving it with a simple green salad dressed with lemon vinaigrette—the acidity cuts through the richness. A side of crusty bread is never a bad idea either.
Storage: Let the dish cool completely before storing. Transfer to an airtight container and refrigerate for up to 4 days. The flavors actually get better overnight as the rice absorbs more of the chicken juices. I’ve been known to make a double batch just for leftovers.
Reheating: The microwave works in a pinch, but the oven is better. Place individual portions in an oven-safe dish, add a splash of broth or water, cover with foil, and reheat at 350°F (175°C) for 15-20 minutes. This keeps the rice from drying out. For a quick fix, microwave on medium power for 2 minutes, stir, then another minute.
Freezing: This freezes beautifully. Portion into individual containers and freeze for up to 3 months. Thaw overnight in the refrigerator and reheat as directed. I’ve pulled these out on busy weeknights and felt like a hero.
Flavor Development: Honest truth—this dish is even better the next day. The rice absorbs all those chicken juices, and the flavors mellow and deepen. I sometimes make it a day ahead on purpose.
Nutritional Information & Benefits
Here’s the breakdown per serving (based on 4 servings, using bone-in chicken thighs):
- Calories: Approximately 480 per serving
- Protein: 32g
- Carbohydrates: 42g
- Fat: 18g
- Fiber: 3g
- Sodium: 680mg (varies based on broth and added salt)
Health Benefits: Chicken thighs provide high-quality protein and important B vitamins like niacin and B6, which support energy metabolism. The carrots and celery add fiber, vitamin A, and antioxidants. Garlic and onions contain compounds that support immune health—perfect for fall when everyone’s sniffling. Using bone-in chicken also adds collagen and minerals to the broth, which is good for joints and skin.
Dietary Considerations: This recipe is naturally gluten-free (check your broth label). It’s dairy-free as written. For lower sodium, use no-salt-added broth and reduce the added salt. For a lower-carb version, use cauliflower rice—just reduce the liquid and bake time significantly.
I’m not a nutritionist, but I feel good about feeding this to my family. It’s real food, balanced, and satisfying without being heavy. That’s the kind of meal I want on a chilly fall evening.
Conclusion
This cozy fall chicken and rice bake is proof that you don’t need fancy ingredients or complicated techniques to make something truly comforting. It’s the recipe I turn to when I need a win in the kitchen without breaking the bank. The rice gets fluffy, the chicken gets tender, and the whole house smells like autumn in the best way.
I love that this recipe has become our fall tradition—the one we make when the first leaves start turning and the air gets that crisp edge. It’s not fancy, but it’s ours. And honestly, that’s what makes it special.
Customize it however you like. Add more vegetables, change up the spices, make it your own. That’s the beauty of a simple recipe—it leaves room for your personality to shine through.
If you make this cozy fall chicken and rice bake, I’d love to hear about it. Drop a comment below and tell me how it turned out, or share your own twist. Don’t forget to pin this for later and share it with someone who needs a budget-friendly dinner idea. Happy cooking, friends!
Frequently Asked Questions
Can I use boneless, skinless chicken breasts instead of thighs?
Yes, but they’ll cook faster and can dry out more easily. Reduce the covered bake time to 25 minutes, then check for doneness. Breast meat should reach 165°F (74°C). You might want to add a tablespoon of butter to keep them moist.
Why is my rice still crunchy after baking?
This usually happens when there isn’t enough liquid or the oven temperature is too low. Make sure your broth is hot when you add it to the rice, and check that your oven is actually at 375°F. If the rice is still firm after 35 minutes, add a quarter cup of hot broth, re-cover, and bake for another 10 minutes.
Can I make this in a slow cooker?
Absolutely! Brown the chicken and sauté the vegetables on the stovetop first, then transfer everything to the slow cooker. Cook on low for 4-5 hours or high for 2-3 hours. The rice might be a bit softer than the oven version, but it’s still delicious. Add the rice during the last hour of cooking to prevent it from getting mushy.
How do I prevent the chicken skin from getting soggy?
The key is baking uncovered for the last 10 minutes. Also, make sure the chicken skin is completely dry before browning, and don’t overcrowd the pan when searing. If the skin is still not crispy enough, pop it under the broiler for 2-3 minutes at the end—watch it carefully so it doesn’t burn.
Can I use brown rice instead of white rice?
Yes, but brown rice needs more liquid and a longer cooking time. Use 1 cup brown rice to 2.5 cups broth, and bake covered for 50-55 minutes before removing the foil. Check for doneness and add more liquid if needed. The texture will be chewier and nuttier, which I actually love for fall recipes.
Pin This Recipe!
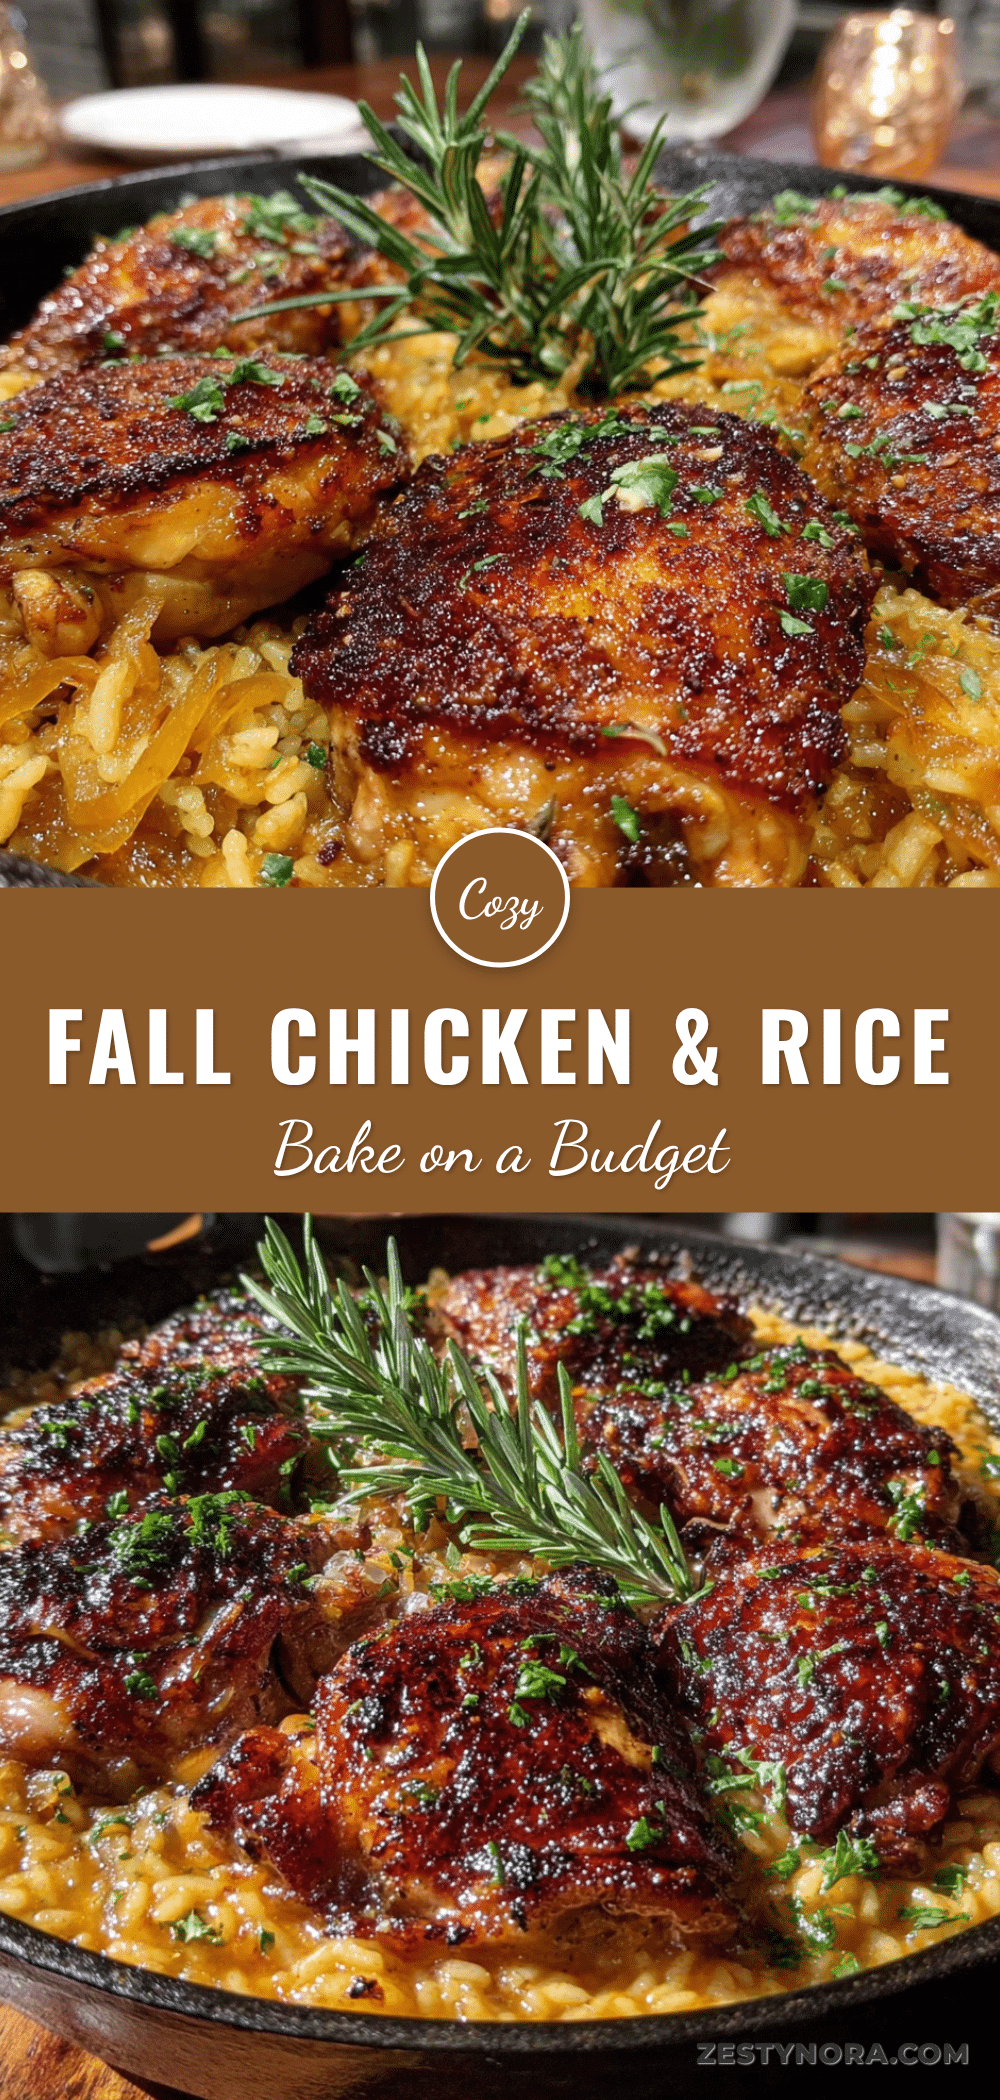
Cozy Fall Chicken and Rice Bake on a Budget

A budget-friendly, one-dish chicken and rice bake that’s perfect for cozy fall evenings. Bone-in chicken thighs and simple pantry staples come together for a comforting meal that costs under ten dollars.
- Prep Time: 15 minutes
- Cook Time: 50 minutes
- Total Time: 1 hour 5 minutes
- Yield: 4 servings 1x
- Category: Main Course
- Cuisine: American
Ingredients
- 4–6 bone-in, skin-on chicken thighs (about 1.5 pounds)
- 1 cup (200g) long-grain white rice
- 2 cups (480ml) low-sodium chicken broth
- 1 medium yellow onion, diced
- 2 medium carrots, diced
- 2 stalks celery, diced
- 3 cloves garlic, minced
- 1 teaspoon dried thyme
- ½ teaspoon dried rosemary
- 1 teaspoon paprika
- Salt and black pepper to taste
- 2 tablespoons (30ml) olive oil
- Fresh parsley for garnish (optional)
Instructions
- Preheat your oven to 375°F (190°C). Position the rack in the middle.
- Pat the chicken thighs dry with paper towels. Season both sides generously with salt, pepper, and paprika.
- Heat the olive oil in a large oven-safe skillet or Dutch oven over medium-high heat until shimmering. Place the chicken thighs skin-side down in the pan, working in batches if needed. Cook undisturbed for 5-6 minutes until the skin is golden brown and crispy. Flip and cook for another 3 minutes. Transfer to a plate.
- Reduce the heat to medium. Add the diced onion, carrots, and celery to the pan. Scrape up the browned bits from the bottom. Cook for 5 minutes, stirring occasionally, until the vegetables start to soften and the onions are translucent.
- Add the minced garlic, dried thyme, and dried rosemary. Stir for about 30 seconds until fragrant.
- Add the rice to the pan and stir for about a minute to coat it in the oil and vegetable mixture.
- Pour in the chicken broth. Stir everything together, scraping up any remaining bits from the bottom. Bring to a gentle simmer.
- Nestle the chicken thighs back into the rice mixture, skin-side up. The rice should come about halfway up the chicken. Add a splash more broth or water if it looks dry.
- Cover the skillet tightly with foil (or use the lid if using a Dutch oven). Bake for 35 minutes.
- After 35 minutes, carefully remove the foil. The rice should be tender and most of the liquid absorbed. If the rice is still firm, re-cover and bake for another 5-10 minutes. Bake uncovered for the final 10 minutes to crisp up the chicken skin.
- Let it rest for 5 minutes before serving. Garnish with fresh parsley if desired.
Notes
Don’t skip browning the chicken—it adds depth of flavor. For best results, let the rice rest for 5 minutes after baking. If the rice is still crunchy after 35 minutes, add ¼ cup hot broth and bake covered for another 10 minutes. To prevent soggy skin, bake uncovered for the last 10 minutes or broil for 2-3 minutes at the end.
Nutrition
- Serving Size: 1 serving (1 chicken
- Calories: 480
- Sugar: 4
- Sodium: 680
- Fat: 18
- Saturated Fat: 4
- Carbohydrates: 42
- Fiber: 3
- Protein: 32
Keywords: chicken and rice bake, fall casserole, budget-friendly dinner, one-dish meal, cozy chicken recipe, easy chicken thighs, comfort food