My neighbor Sarah asked why I couldn’t just use evaporated milk instead of sweetened condensed milk for the creamy layer. I started to explain why that wouldn’t work—then stopped. Honestly? I’d never tried it. I’d just assumed the sugar content was necessary for the texture to set right. But Sarah was staring at me with this look, waiting, and I realized I was about to defend a recipe choice I’d never actually tested. So I shrugged and said, “You know what? Let’s find out.”
We were standing in her kitchen on a chilly Tuesday afternoon, the kind of gray day that makes you want to bake something—or in this case, make something a little more fun. She’d asked me to teach her how to make layered jello shots for a Halloween get-together, and I’d walked in all confident with my tried-and-true method. But the moment she questioned that milk choice, I felt my whole “expert” facade wobble. I grabbed a can of evaporated milk from her pantry, crossed my fingers, and we went for it.
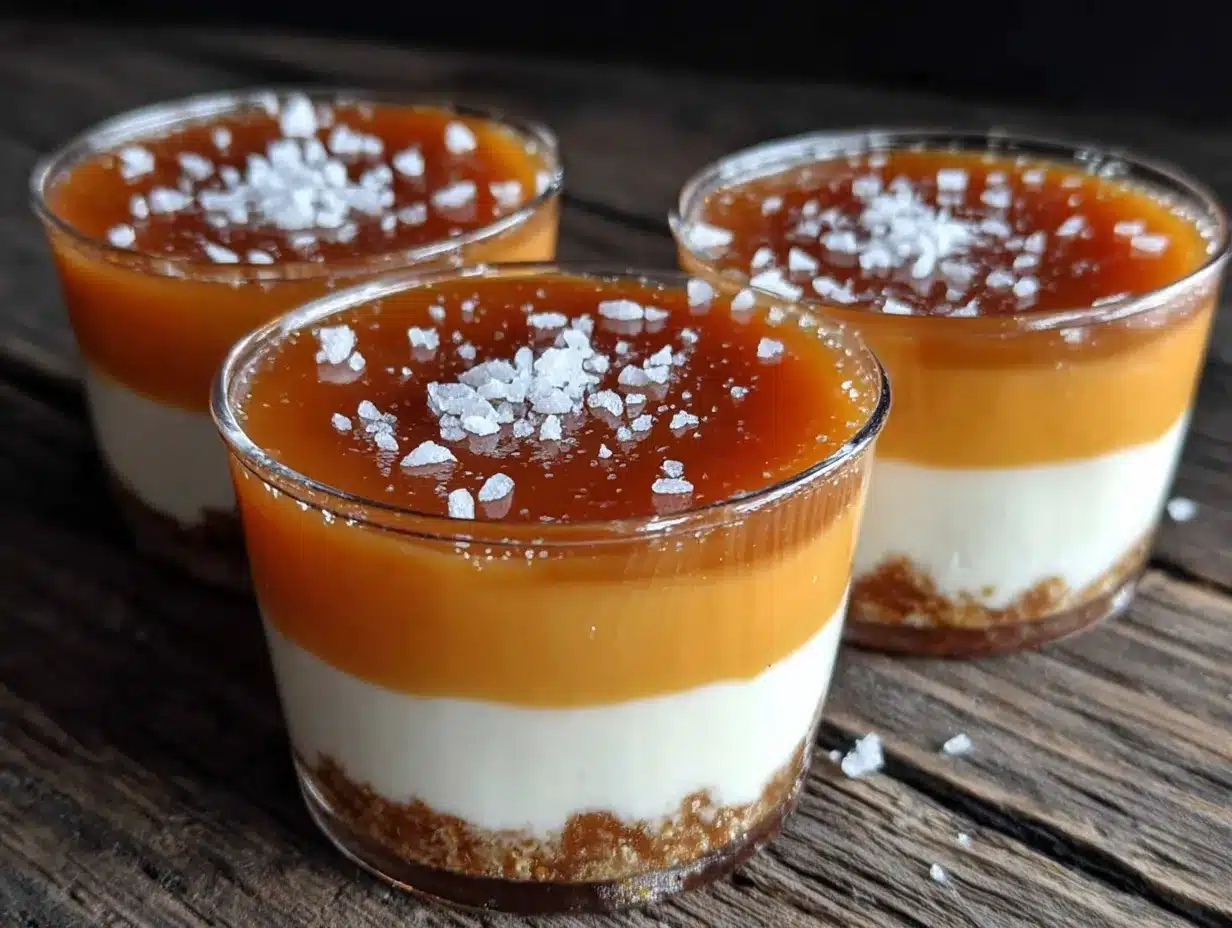
The layers set perfectly. I mean, perfectly. The orange and yellow stripes were crisp, the creamy white layer was smooth, and the whole thing looked like a tiny, edible candy corn. I stood there holding one up to the light, and Sarah just laughed. “Told you,” she said. And she was right. That moment taught me something important about cooking—and about this particular recipe. Sometimes the best version of a dish comes from letting go of what you think you know. These cozy candy corn layered jello shots are proof of that. They’re simple, they’re nostalgic, and they’ve got a little story behind them now. I keep making them because every time I do, I remember that afternoon in Sarah’s kitchen, and I smile.
Why You’ll Love This Recipe
Let me tell you why these cozy candy corn layered jello shots have become my go-to for fall gatherings. First off, they’re ridiculously easy. I’m talking three simple steps, and you’ve got a dessert shot that looks like you spent hours on it. The hardest part is waiting for the layers to set, and honestly, that’s just an excuse to binge-watch a scary movie while you wait.
- Quick & Easy: Active prep time is about 15 minutes. The rest is just fridge time. Perfect for when you’re hosting and need something impressive without the stress.
- Simple Ingredients: You probably have most of this stuff already—jello boxes, unflavored gelatin, milk, and vodka. No weird specialty items required.
- Perfect for Fall Parties: Halloween, Thanksgiving, or just a cozy night in—these fit right in. They’re conversation starters, I swear.
- Crowd-Pleaser: I’ve served these to friends who “don’t do jello shots,” and they always come back for seconds. The creamy layer changes everything.
- Unbelievably Delicious: The texture is what gets you. It’s not just jiggly jello—it’s got this rich, creamy middle that makes it feel more like a dessert than a shot.
What makes this recipe different from the dozens of candy corn jello shot recipes out there? It’s the evaporated milk trick. Most recipes use sweetened condensed milk, which makes the creamy layer too sweet and sometimes grainy. Using evaporated milk gives you a silky, neutral base that lets the jello flavors shine. I tested this about four times before I got it right, and let me tell you—this version is the one. It’s comfort food in shot form, honestly. The kind of thing that makes you close your eyes after the first sip and think, “Yeah, this is exactly what I needed today.”
What Ingredients You Will Need
This recipe uses simple, everyday ingredients to create something that looks way more complicated than it actually is. Most of these are pantry staples, so you might not even need a grocery run.
For the Orange Layer (Bottom)
- 1 box (3 oz) orange gelatin (Jell-O brand works great, but store brands are fine too)
- 1 cup boiling water
- 1/2 cup cold water
- 1/2 cup vodka (or substitute with cold water for a non-alcoholic version)
For the Yellow Layer (Top)
- 1 box (3 oz) lemon or yellow gelatin (I prefer lemon for that tart kick, but peach works too)
- 1 cup boiling water
- 1/2 cup cold water
- 1/2 cup vodka (or cold water for non-alcoholic)
For the Creamy White Layer (Middle)
- 1 can (12 oz) evaporated milk (NOT sweetened condensed milk—trust me on this)
- 1 packet (1/4 oz) unflavored gelatin (like Knox brand)
- 1/4 cup cold water (for blooming the gelatin)
- 1 teaspoon vanilla extract (adds warmth and depth)
A quick note on the evaporated milk—I know it’s tempting to grab the sweetened condensed milk because it’s right next to it on the shelf. Don’t do it. I learned this the hard way when I made my first batch and the middle layer came out overly sweet and kind of gritty. The evaporated milk gives you that silky, neutral creaminess that balances the tart jello layers perfectly. If you’re dairy-free, full-fat coconut milk works as a substitute, though the texture will be slightly different.
For the vodka, I recommend a mid-range brand like Smirnoff or Tito’s. You don’t need top-shelf stuff here, but avoid the really cheap plastic-bottle vodkas—they have a harsh aftertaste that can mess with the jello flavors. And if you’re making these for a crowd that includes kids or non-drinkers, just swap the vodka for equal parts cold water. They’ll still taste amazing.
Equipment Needed
You don’t need fancy gear for these cozy candy corn layered jello shots. Here’s what I use:
- 2-cup liquid measuring cup with a spout—makes pouring the layers so much easier without spilling
- Small saucepans for boiling water (or a kettle works too)
- Mixing bowls for each layer (I use three small glass bowls)
- Whisk for stirring the gelatin until it’s fully dissolved
- 2-ounce plastic shot cups with lids—you can find these at party supply stores or on Amazon for cheap
- Baking sheet or tray to hold the cups while they set in the fridge
- Measuring spoons and cups for accuracy
If you don’t have a liquid measuring cup with a spout, a clean pitcher works fine. Just pour slowly. I’ve also used a turkey baster in a pinch to layer the jello, and honestly, it worked better than I expected. For the shot cups, I prefer the ones with clear lids so you can see the layers, but any small cups will do. Pro tip: place the cups on a baking sheet before filling—it makes moving them in and out of the fridge way easier, especially when the fridge is crowded.
Preparation Method
Okay, here’s where the magic happens. Follow these steps, and you’ll have perfect layers every time. I’ve included all the little tricks I learned from my many, many test batches.
Step 1: Make the Orange Layer (Bottom)
In a small bowl, combine 1 box of orange gelatin with 1 cup of boiling water. Stir for about 2 minutes until the powder is completely dissolved—no granules left, I promise. Then add 1/2 cup cold water and 1/2 cup vodka. Stir gently. Pour the mixture into your shot cups, filling each about one-third full. Place the cups on a baking sheet and refrigerate for at least 1 hour, or until the layer is fully set and firm to the touch. Don’t rush this—if the bottom layer isn’t solid, the next layer will sink into it and ruin your stripes.
Step 2: Make the Creamy White Layer (Middle)
This is the trickiest part, but you’ve got this. In a small saucepan, pour 1/4 cup cold water and sprinkle 1 packet of unflavored gelatin over the top. Let it sit for about 5 minutes—this is called “blooming” and it’s important for the texture. Then warm the mixture over low heat, stirring constantly, until the gelatin dissolves completely. Remove from heat. Stir in 1 can of evaporated milk and 1 teaspoon of vanilla extract. Mix well. Let this cool to room temperature—about 10 minutes—before pouring. If it’s too warm, it will melt the orange layer. Pour the creamy mixture over the set orange layer, filling each cup about two-thirds full. Refrigerate for another 1 to 1.5 hours, until this layer is set.
Step 3: Make the Yellow Layer (Top)
In a clean bowl, combine 1 box of lemon or yellow gelatin with 1 cup of boiling water. Stir until dissolved. Add 1/2 cup cold water and 1/2 cup vodka. Stir gently. Let this cool to room temperature—again, about 10 minutes—before pouring over the set creamy layer. Fill the cups to the top. Refrigerate for at least 2 hours, or overnight for best results. The longer they set, the cleaner the layers will be when you bite into them.
A few sensory cues to watch for: the orange layer should feel firm when you gently tap the cup, not jiggly. The creamy layer should look opaque and set, like a firm pudding. And the final yellow layer should be clear and bright, with no bubbles on top. If you see bubbles, just pop them with a toothpick before the jello sets.
Cooking Tips & Techniques
I’ve made these cozy candy corn layered jello shots about a dozen times now, and I’ve definitely learned what works and what doesn’t. Here are my best tips:
Patience is everything. I know it’s tempting to rush the layers, but if you pour the next layer before the previous one is fully set, you’ll end up with a muddy mess instead of clean stripes. Give each layer at least an hour in the fridge, and don’t skip the cooling step before pouring. Trust me, I learned this the hard way when I poured warm creamy mixture over a slightly-soft orange layer and ended up with a weird orange-swirl situation.
Room temperature is your friend. Before pouring any layer over a set one, let the new mixture cool to room temperature. If it’s even slightly warm, it can melt the layer below and create a blurry line. I usually let mine sit for 10-15 minutes on the counter, stirring occasionally to help it cool evenly.
Use a steady hand. When pouring, go slow. I like to pour the mixture down the side of the cup rather than straight into the center—it reduces splashing and helps keep the layers clean. A small funnel or a turkey baster works wonders if you’re feeling fancy.
The vodka matters. I mentioned this before, but it bears repeating. Cheap vodka can leave a harsh aftertaste that competes with the jello flavors. Mid-range vodka dissolves cleanly and lets the fruit flavors shine. And if you’re using flavored vodka, make sure it complements the jello—citrus vodka works great with the lemon layer, for example.
Make ahead for best results. These actually taste better after sitting overnight. The flavors meld together, and the texture becomes perfectly firm but still soft. I usually make mine the day before a party and just pop the lids on before serving.
Variations & Adaptations
One of the best things about this recipe is how easy it is to customize. Here are some variations I’ve tried and loved:
Non-Alcoholic Version
Simply replace the vodka with equal parts cold water. The jello will set slightly firmer, but the flavor is still delicious. This is perfect for kids’ Halloween parties or if you’re serving a crowd that includes non-drinkers. I made a batch for my sister’s baby shower, and honestly, nobody missed the alcohol.
Dairy-Free Creamy Layer
Full-fat coconut milk works beautifully as a substitute for evaporated milk. The texture is a little softer, but the coconut flavor actually complements the orange and lemon notes really well. Just make sure you use the canned coconut milk, not the stuff in cartons—the carton version is too thin and won’t set properly.
Different Flavor Combos
Who says you have to stick with candy corn colors? Try a red-white-and-blue version for the Fourth of July using strawberry, coconut, and blue raspberry jello. Or go green, white, and red for Christmas with lime, coconut, and cherry. The possibilities are endless, and I’ve definitely gone through phases where I made a different color combo every week.
Extra Boozy Version
If you want a stronger kick, you can increase the vodka to 3/4 cup per layer and reduce the cold water to 1/4 cup. Just be aware that more alcohol means a softer set, so you’ll need to refrigerate for longer—at least 4 hours per layer. I tried this once for a New Year’s party, and let’s just say they were popular.
Serving & Storage Suggestions
These cozy candy corn layered jello shots are best served cold, straight from the fridge. I like to arrange them on a platter with the lids off so people can see the beautiful layers. For Halloween parties, I sometimes add a little candy corn on top of each shot as a garnish—it’s cute and gives people a hint of what’s inside.
For storage, keep the lids on and refrigerate. They’ll stay good for up to 5 days, though the texture is best within the first 3 days. After that, the layers might start to soften slightly. I don’t recommend freezing them—the texture gets weird and icy when thawed.
If you’re serving these at a party, you can make them up to 2 days in advance. Just keep them covered in the fridge and add any garnishes right before serving. And if you’re transporting them, place the baking sheet with the cups in a cooler with ice packs to keep them cold.
These pair wonderfully with other fall treats. I love serving them alongside a plate of pumpkin spice cookies or a warm slice of apple crisp. The contrast between the cold, jiggly shots and the warm, crumbly dessert is just perfect for a cozy fall evening.
Nutritional Information & Benefits
Let’s be real—these are a treat, not a health food. But here’s the breakdown if you’re curious. Per 2-ounce shot (using vodka), you’re looking at approximately:
- Calories: 85-100
- Carbohydrates: 12g
- Sugar: 11g
- Protein: 1g
- Fat: 1g
- Alcohol content: roughly 0.5 oz per shot
The evaporated milk adds a small amount of calcium and protein, while the gelatin provides collagen, which is good for joint health and skin elasticity. Of course, the sugar content is on the higher side, so these are best enjoyed in moderation as part of a balanced diet.
For those with dietary restrictions, note that this recipe contains dairy (from the evaporated milk) and gelatin (which is not vegetarian or vegan). For a vegan version, you could try agar-agar instead of gelatin, but I haven’t tested that personally, so I can’t vouch for the results. The non-alcoholic version is obviously suitable for those avoiding alcohol.
Conclusion
These cozy candy corn layered jello shots have become my signature fall treat, and I think they’ll become yours too. They’re simple enough for a beginner but impressive enough to wow your guests. The three layers come together beautifully, and that creamy middle layer—thanks to Sarah’s suggestion—really sets this recipe apart from all the others out there.
I love making these because they remind me that sometimes the best recipes come from being open to new ideas, even when they challenge what you thought you knew. Every time I pour that creamy layer over the orange, I think of that Tuesday afternoon in Sarah’s kitchen, and I smile.
Now I want to hear from you! Have you tried making these? Did you experiment with different flavors or add your own twist? Drop a comment below and let me know how they turned out. And if you’re looking for more cozy fall recipes, don’t forget to check out my creamy pumpkin pasta or these caramel apple bites. Happy layering, friends!
Frequently Asked Questions
Can I use sugar-free jello for this recipe?
Yes, you can! Sugar-free jello works just fine, though the texture might be slightly softer. Just follow the same measurements on the box for the liquid. I’ve tested this with sugar-free orange and lemon jello, and the layers set beautifully. The flavor is a little less sweet, so you might want to add a teaspoon of sugar substitute to the creamy layer to balance it out.
Why did my layers blur together?
This usually happens when you pour the next layer before the previous one is fully set, or when the new layer is too warm. Make sure each layer is completely firm—at least 1 to 1.5 hours in the fridge—and let the new mixture cool to room temperature before pouring. If you’re in a hurry, you can speed up the setting process by placing the cups in the freezer for 15-20 minutes, but watch them closely so they don’t freeze solid.
Can I make these without alcohol?
Absolutely! Just replace the vodka with an equal amount of cold water. The jello will set a bit firmer, but the flavor is still delicious. This is perfect for kids’ parties or if you’re serving a crowd that includes non-drinkers. I’ve made non-alcoholic versions for baby showers and office parties, and they’re always a hit.
How far in advance can I make these?
You can make these up to 3 days in advance. Keep them covered with lids or plastic wrap in the refrigerator. The texture is best within the first 2 days, but they’ll still be good on day 3. I don’t recommend making them more than 3 days ahead because the layers can start to soften and separate slightly.
Can I use different flavors for the layers?
Definitely! The candy corn colors are orange, yellow, and white, but you can use any flavor combination you like. For a tropical twist, try pineapple, coconut, and lime. For a berry version, use strawberry, vanilla, and blueberry. Just keep in mind that the creamy layer should be a neutral flavor (like vanilla or plain) so it doesn’t clash with the fruit flavors. I’ve made a rainbow version for Pride month with six different colors, and it was stunning—just time-consuming!
Pin This Recipe!
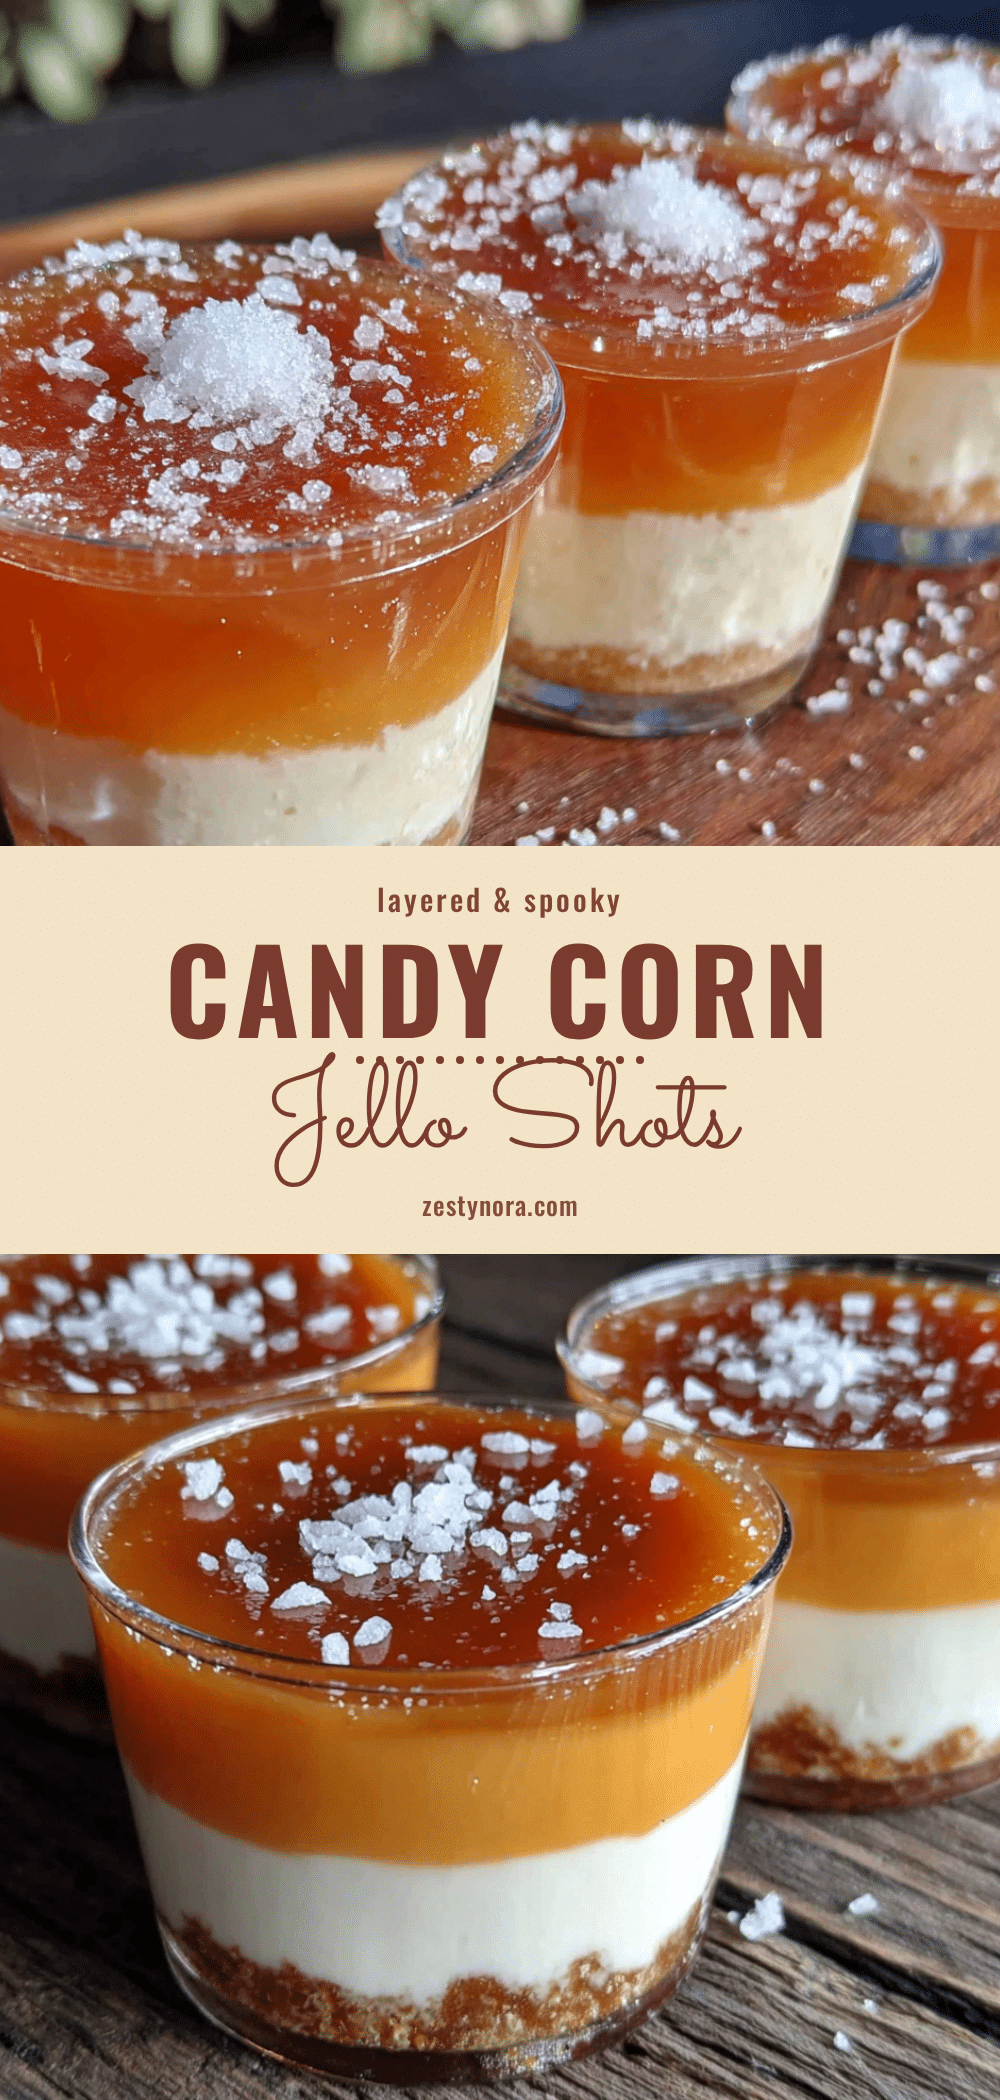
Cozy Candy Corn Layered Jello Shots: Easy 3-Step Recipe
These easy 3-step candy corn layered jello shots are the perfect fall treat. With a creamy evaporated milk middle layer and vibrant orange and yellow jello, they’re a nostalgic and impressive dessert shot for any Halloween or Thanksgiving gathering.
- Prep Time: 15 minutes
- Cook Time: 0 minutes
- Total Time: 4 hours 15 minutes (including chilling time)
- Yield: 12 servings (2-ounce shots) 1x
- Category: Dessert
- Cuisine: American
Ingredients
- 1 box (3 oz) orange gelatin
- 1 cup boiling water
- 1/2 cup cold water
- 1/2 cup vodka (or cold water for non-alcoholic)
- 1 box (3 oz) lemon or yellow gelatin
- 1 cup boiling water
- 1/2 cup cold water
- 1/2 cup vodka (or cold water for non-alcoholic)
- 1 can (12 oz) evaporated milk (NOT sweetened condensed milk)
- 1 packet (1/4 oz) unflavored gelatin
- 1/4 cup cold water
- 1 teaspoon vanilla extract
Instructions
- Make the orange layer (bottom): In a small bowl, combine 1 box of orange gelatin with 1 cup of boiling water. Stir for about 2 minutes until completely dissolved. Add 1/2 cup cold water and 1/2 cup vodka. Stir gently. Pour into shot cups, filling each about one-third full. Refrigerate for at least 1 hour until fully set.
- Make the creamy white layer (middle): In a small saucepan, pour 1/4 cup cold water and sprinkle 1 packet of unflavored gelatin over the top. Let sit for 5 minutes to bloom. Warm over low heat, stirring constantly, until gelatin dissolves. Remove from heat. Stir in 1 can of evaporated milk and 1 teaspoon vanilla extract. Mix well. Let cool to room temperature (about 10 minutes). Pour over set orange layer, filling each cup about two-thirds full. Refrigerate for 1 to 1.5 hours until set.
- Make the yellow layer (top): In a clean bowl, combine 1 box of lemon or yellow gelatin with 1 cup of boiling water. Stir until dissolved. Add 1/2 cup cold water and 1/2 cup vodka. Stir gently. Let cool to room temperature (about 10 minutes). Pour over set creamy layer, filling cups to the top. Refrigerate for at least 2 hours, or overnight for best results.
Notes
Patience is key—let each layer fully set before adding the next. Let new mixtures cool to room temperature before pouring to prevent melting. Use mid-range vodka for best flavor. Make ahead up to 2 days in advance for best results. For non-alcoholic version, replace vodka with equal parts cold water.
Nutrition
- Serving Size: 1 shot (2 ounces)
- Calories: 85100
- Sugar: 11
- Sodium: 30
- Fat: 1
- Saturated Fat: 0.5
- Carbohydrates: 12
- Protein: 1
Keywords: candy corn, jello shots, Halloween, fall, layered jello, party dessert, easy recipe


