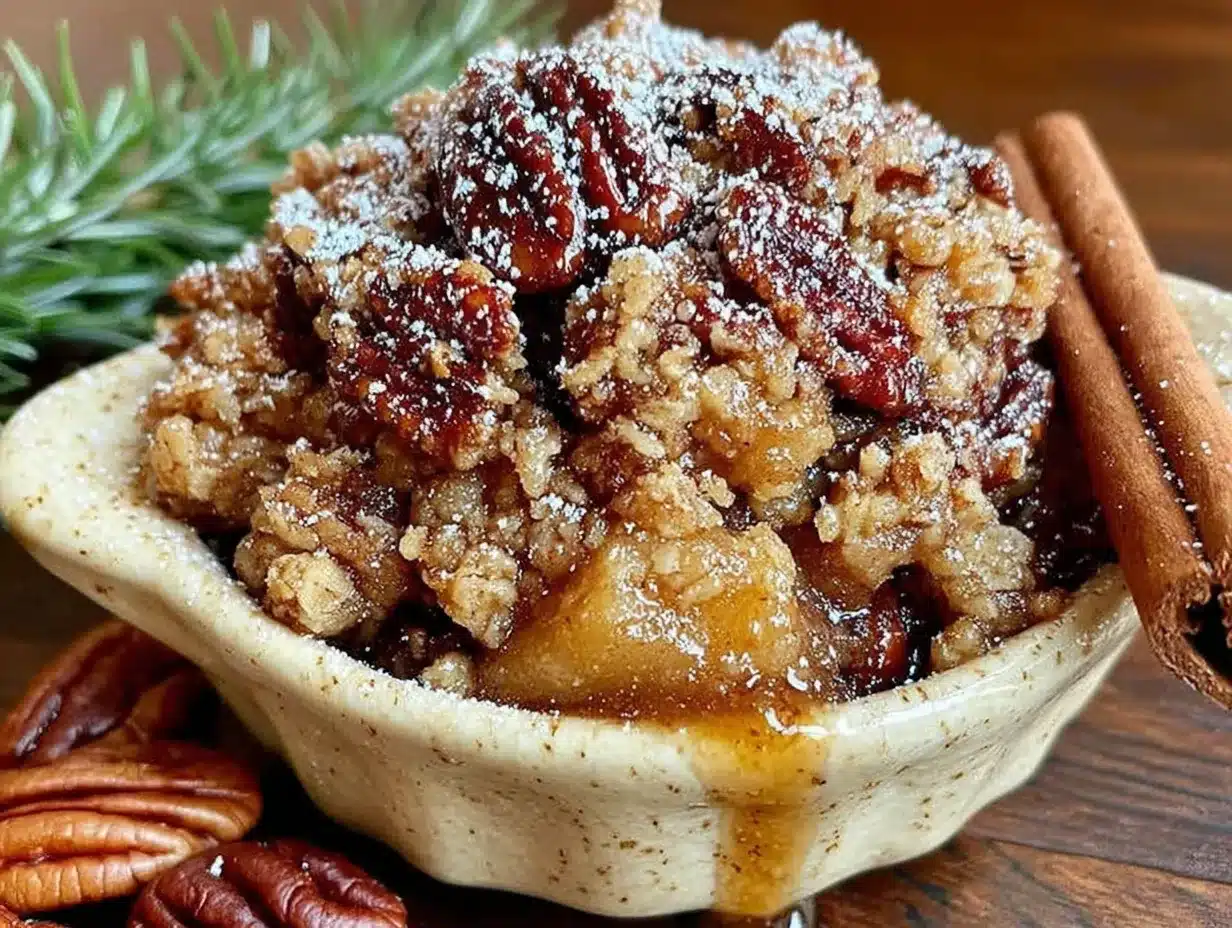
The way the pecan topping cracks under the spoon — that first break, then the give of soft apples underneath — that’s what this whole thing is about. It’s not just a crisp. It’s a texture event. I spent three autumns trying to get it right, and honestly, I burned a lot of butter (and a little bit of my pride) along the way. The brown butter is non-negotiable here. It adds this nutty, almost toffee-like depth that regular melted butter just can’t touch. And the maple? It doesn’t shout — it hums in the background, sweet but not cloying.
I first made this on a Tuesday that felt like a Thursday, you know? One of those gray afternoons where the light goes flat by 3 PM. I had a bag of apples from a farm stand, some pecans left over from a salad I’d made, and a vague memory of my grandmother’s apple crisp — which was good, but always a little too sweet and a little too wet. I wanted something with more structure. More personality.
So I browned the butter. I toasted the pecans. I let the maple syrup reduce just slightly before mixing it in. And when I pulled it out of the oven, the kitchen smelled like a hug. The topping was golden and craggy, the filling was bubbling at the edges, and I stood there eating it straight from the dish — because some things don’t need a plate. This is one of those desserts that feels like a reward, even on a random Tuesday. And I think that’s the whole point.
Why You’ll Love This Recipe
This isn’t just another apple crisp. After testing this recipe about seven times (my neighbors were very happy), I can tell you exactly why it works and why you’ll keep coming back to it.
- Rich, Nutty Flavor : The brown butter and toasted pecans add a depth that plain butter and oats just can’t deliver. It’s like your taste buds got a promotion.
- Perfect Texture Balance : You get a crunchy, buttery topping that actually stays crisp (no soggy oat blanket here), with soft, jammy apples underneath.
- Simple Ingredients : Nothing weird. No obscure extracts or hard-to-find flours. You probably have most of this in your kitchen right now.
- Make-Ahead Friendly : You can prep the topping and filling separately, then assemble and bake when you’re ready. Perfect for holiday stress management.
- Naturally Sweetened : The maple syrup does the heavy lifting, so you don’t need a ton of refined sugar. It feels indulgent but not excessive.
- Crowd-Pleaser : I’ve served this at potlucks, Thanksgiving dinners, and casual weeknight hangs. It disappears every single time. Kids and adults both go for seconds.
What makes this version different is the technique. Browning the butter might seem like an extra step, but it’s the secret weapon. It transforms the whole dessert from “good” to “what did you put in this?” And the maple pecan combination? It’s not trying to be fancy — it just works. This is the kind of dessert that makes you close your eyes after the first bite. It’s comfort food reimagined — familiar, but somehow better than you remembered.
What Ingredients You Will Need
This recipe uses simple, wholesome ingredients to deliver that cozy fall flavor without any fuss. Most of these are pantry staples, especially if you’ve been baking through autumn like I have.
For the Apple Filling
- 6 medium apples, peeled, cored, and sliced (about ¼-inch thick) — I recommend a mix of tart and sweet, like Granny Smith and Honeycrisp. The tart ones hold their shape, and the sweet ones break down into jammy goodness.
- 3 tablespoons pure maple syrup (not pancake syrup, please) — this adds sweetness without being overpowering.
- 2 tablespoons brown sugar, packed — just a little for extra depth.
- 1 tablespoon lemon juice — brightens the apples and prevents browning.
- 1 teaspoon vanilla extract — use the real stuff if you can.
- 1 teaspoon ground cinnamon
- ¼ teaspoon ground nutmeg — freshly grated if you’re feeling fancy.
- ¼ teaspoon salt — trust me on this. It balances the sweetness.
- 1 tablespoon all-purpose flour — helps thicken the juices as it bakes.
For the Brown Butter Maple Pecan Topping
- ½ cup unsalted butter (1 stick) — you’ll brown this, so keep an eye on it.
- ¾ cup old-fashioned rolled oats — not quick oats. They get mushy.
- ¾ cup all-purpose flour
- ½ cup chopped pecans — toast them lightly before using for maximum flavor.
- ½ cup brown sugar, packed
- 3 tablespoons pure maple syrup
- ½ teaspoon ground cinnamon
- ¼ teaspoon salt
A quick note on apples: I’ve tested this with Fuji, Gala, and Pink Lady, and they all work, but the texture changes. Fuji gets softer, Pink Lady holds up better. If you want a crisp with distinct apple slices, go firmer. If you want more of a compote-like filling, go softer. I personally like a mix — it gives you the best of both worlds. And for the pecans, I usually buy raw ones and toast them in a dry skillet for about 3 minutes until they smell fragrant. It makes a difference.
Equipment Needed
You don’t need a ton of fancy gear for this, which is part of why I love it. Here’s what you’ll want:
- 8×8-inch baking dish (or a similar 2-quart dish) — glass or ceramic works best. Metal can work too, but keep an eye on baking time.
- Medium saucepan — for browning the butter. Light-colored pans help you see the color change.
- Large mixing bowl — for the apple filling.
- Medium mixing bowl — for the topping.
- Sharp knife and cutting board — for prepping the apples.
- Wooden spoon or silicone spatula — for stirring the brown butter.
- Measuring cups and spoons
- Wire rack — for cooling. Not essential, but helps the crisp set properly.
If you don’t have an 8×8 dish, you can use a 9-inch pie plate or even a cast-iron skillet (which looks gorgeous for serving). Just adjust the baking time slightly — a wider dish means the filling cooks faster. And if you’re browning butter for the first time, use a light-colored pan so you can actually see the milk solids turn golden. I learned that one the hard way after a few batches of burnt butter that smelled more like regret than toffee.
Preparation Method
Okay, let’s get to it. This recipe comes together in about an hour, and most of that is hands-off baking time. Here’s how to do it.
- Preheat your oven to 350°F (175°C). Position the rack in the center. While it heats up, start on the brown butter — it’ll take about 5 minutes.
- Brown the butter. In a medium saucepan over medium heat, melt the butter. Stir frequently with a wooden spoon. It’ll foam up, then settle down, and you’ll see little brown specks forming at the bottom. That’s the milk solids toasting. When it smells nutty and turns a golden-amber color (about 4-5 minutes), remove it from the heat immediately. Pour it into a heatproof bowl to stop the cooking. Don’t walk away — it goes from perfect to burnt in about 15 seconds.
- Prepare the apples. While the butter cools slightly, peel, core, and slice your apples into ¼-inch thick pieces. Toss them in a large bowl with the maple syrup, brown sugar, lemon juice, vanilla, cinnamon, nutmeg, salt, and flour. Stir until every slice is coated. Let it sit for a minute while you make the topping.
- Make the topping. In a medium bowl, combine the oats, flour, chopped pecans, brown sugar, maple syrup, cinnamon, and salt. Pour the slightly cooled brown butter over the top and stir until everything is evenly moistened. It should look clumpy and a little shaggy — that’s perfect.
- Assemble the crisp. Spread the apple mixture evenly in your greased 8×8 baking dish. Sprinkle the topping over the apples in an even layer. Don’t press it down — you want those clumps to stay clumpy so they get crispy.
- Bake for 35-40 minutes. The topping should be deep golden brown and the filling should be bubbling up around the edges. If your topping is browning too fast but the apples aren’t done yet, tent loosely with foil for the last 10 minutes.
- Cool for at least 15 minutes. I know it’s hard, but let it rest. The filling needs time to set, and you don’t want to burn your mouth. Plus, it gets even better as it sits.
A few sensory cues to watch for: when the brown butter is ready, it’ll smell like toasted nuts and caramel. The apples should look glossy and slightly translucent after mixing. And when the crisp comes out of the oven, the topping should feel firm to the touch, not soft. If it jiggles, give it another 5 minutes.
Cooking Tips & Techniques
I’ve made this recipe enough times to know where things can go wrong — and how to fix them. Here are the tips I wish someone had told me.
Don’t skip browning the butter. I know it’s an extra step, but it’s the difference between a good crisp and a memorable one. The nutty flavor from the browned butter is what makes the topping taste like it came from a bakery. Just watch it closely — I once got distracted by a phone call and ended up with butter that looked like dark coffee. Start over if that happens. It’s not worth it.
Toast your pecans. This takes 3 minutes in a dry pan over medium heat, and it wakes up their flavor completely. Raw pecans are fine, but toasted pecans are aromatic and crunchy. I usually do this while the butter is browning, so it’s efficient.
Use a mix of apple varieties. Tart apples like Granny Smith hold their shape, while sweeter ones like Honeycrisp or Fuji break down into a soft, jammy texture. Using both gives you a more interesting filling. If you use all tart apples, the filling might be too firm. All sweet apples, and you’ll end up with applesauce. Balance is key.
Let the crisp rest before serving. This is the hardest tip to follow, I know. But if you dig in right away, the filling will be runny and the topping might slide off. Give it 15-20 minutes. The juices thicken, the topping sets, and everything holds together better. I usually make it before dinner and let it rest while we eat — perfect timing.
If the topping browns too fast, tent with foil. Ovens vary, and sometimes the topping gets dark before the apples are tender. Just lay a piece of foil loosely over the top and continue baking. No harm done.
Variations & Adaptations
One of the best things about this recipe is how flexible it is. Here are some ways to make it your own.
Gluten-Free Version: Swap the all-purpose flour with a 1:1 gluten-free baking flour blend. The topping will be a little more crumbly, but it still works beautifully. I’ve tested this with Bob’s Red Mill and King Arthur, and both turned out great.
Dairy-Free Option: Use vegan butter or coconut oil in place of the regular butter. Coconut oil won’t brown the same way, but it adds a subtle tropical note that pairs surprisingly well with the maple and pecans. Just reduce the amount slightly — coconut oil is more concentrated.
Spice It Up: Add ¼ teaspoon of cardamom or ginger to the filling for a warmer, more complex flavor. I tried this once on a whim and now I do it every time. It’s subtle but noticeable.
Berry Apple Crisp: Toss in a cup of fresh or frozen cranberries, blueberries, or raspberries with the apples. The tartness cuts through the sweetness and adds a beautiful color. If using frozen berries, add an extra tablespoon of flour to absorb the extra liquid.
Individual Servings: Divide the filling and topping among 4-6 ramekins and bake for 20-25 minutes. These are perfect for dinner parties — everyone gets their own little dish with extra crispy edges.
I once made a version with pears instead of apples (because I had too many from a tree in my yard), and it was fantastic. Just use firmer pears like Bosc or Anjou so they don’t turn to mush.
Serving & Storage Suggestions
This crisp is best served warm, but honestly, it’s pretty great at room temperature too. Here’s how to make the most of it.
Serving Temperature: Warm is ideal. Let it rest for 15-20 minutes after baking, then scoop into bowls. The contrast between the warm filling and cold ice cream is pure magic.
Toppings: A scoop of vanilla ice cream is the classic choice, but a drizzle of heavy cream, a dollop of whipped cream, or a spoonful of Greek yogurt works too. For extra fall vibes, try a scoop of cinnamon or caramel ice cream.
Complementary Dishes: This crisp pairs beautifully with a cup of hot coffee, spiced cider, or a glass of bourbon (if you’re feeling adult). For a full fall spread, serve it alongside a slice of soft pumpkin chocolate chip cookies or a slice of chocolate zucchini bundt cake for a dessert table that’ll steal the show.
Storage: Cover the dish tightly with foil or plastic wrap and store in the refrigerator for up to 4 days. The topping will soften over time, but it’ll still taste delicious. To reheat, pop individual portions in the microwave for 30 seconds or warm in a 350°F oven for 10 minutes to crisp the topping back up.
Freezing: You can freeze the assembled (unbaked) crisp for up to 3 months. Wrap the dish tightly in plastic wrap and foil, then bake straight from frozen — just add 15-20 minutes to the baking time. Or freeze the baked and cooled crisp for a quick dessert later. Thaw in the fridge overnight and reheat in the oven.
The flavors actually deepen after a day in the fridge. The maple and brown butter meld together even more, and the apples get softer and sweeter. I’ve been known to eat leftovers cold, straight from the dish, at 10 PM. No regrets.
Nutritional Information & Benefits
This is dessert, so I’m not going to pretend it’s health food. But it’s made with real ingredients, and that counts for something.
Estimated per serving (1/6 of recipe):
- Calories: 420
- Fat: 18g
- Carbohydrates: 64g
- Fiber: 6g
- Sugar: 42g
- Protein: 4g
Health Highlights:
- Apples are packed with fiber and vitamin C. They also contain antioxidants that support heart health.
- Pecans are a good source of healthy fats, magnesium, and zinc. They’re great for brain health — fitting for a cozy dessert, right?
- Maple syrup contains antioxidants and minerals like zinc and manganese. It’s still sugar, but it’s less processed than refined white sugar.
- Oats provide soluble fiber, which helps with digestion and keeps you full longer.
Dietary Considerations: This recipe is vegetarian and can be made gluten-free and dairy-free with simple swaps (see variations above). It contains nuts (pecans) and gluten (flour, oats). If you’re avoiding nuts, substitute the pecans with sunflower seeds or omit them entirely — the topping will still be delicious.
I’m not a nutritionist, but I believe in eating food that makes you feel good. This crisp feels like a hug in a bowl, and sometimes that’s exactly what you need.
Conclusion
This cozy brown butter maple pecan apple crisp is the kind of dessert that makes you slow down. It’s not complicated, but it feels special. The brown butter adds a richness you can’t fake, the maple syrup brings a gentle sweetness, and the pecans give it that satisfying crunch. It’s the dessert I make when I want to feel like I’ve done something nice for myself — and for the people I’m feeding.
I hope you try it and make it your own. Swap the apples for pears, add extra cinnamon, or skip the nuts if that’s your thing. The best recipes are the ones you adapt to your own kitchen. And if you do make it, I’d love to hear how it turned out. Leave a comment below, share a photo, or tag me — it honestly makes my day.
Here’s to cozy nights, warm desserts, and the simple joy of a spoon hitting a perfectly crunchy topping. Go make some memories.
Frequently Asked Questions
Can I use quick oats instead of rolled oats?
I wouldn’t recommend it. Quick oats are more finely processed and they tend to turn mushy during baking. Rolled oats give you that nice, hearty texture that holds up well. If you only have quick oats, use them, but expect a softer topping.
Do I have to peel the apples?
Not necessarily, but I prefer to. The peel can get tough during baking, especially if you’re using a firmer apple variety. If you leave the peel on, slice the apples thinner so the peel softens more. Some people like the extra texture — it’s a personal choice.
Can I make this ahead of time?
Absolutely. You can assemble the crisp (without baking) up to 24 hours in advance. Cover and refrigerate, then bake as directed — you might need to add 5-10 minutes since you’re starting from cold. Or bake it fully, cool, and reheat in a 350°F oven for 10-15 minutes before serving.
What if my topping gets too dark before the apples are done?
No worries. Just tent the dish loosely with aluminum foil and continue baking. The foil will protect the topping from over-browning while the apples finish cooking. Check the apples by poking them with a fork — they should be tender but not mushy.
Can I use frozen apples?
I don’t recommend it. Frozen apples release a lot of extra water as they thaw, which can make your filling soupy and watery. Stick with fresh apples for the best texture. If you’re in a pinch, thaw and drain the frozen apples thoroughly, and add an extra tablespoon of flour to the filling to absorb the extra liquid.
Pin This Recipe!
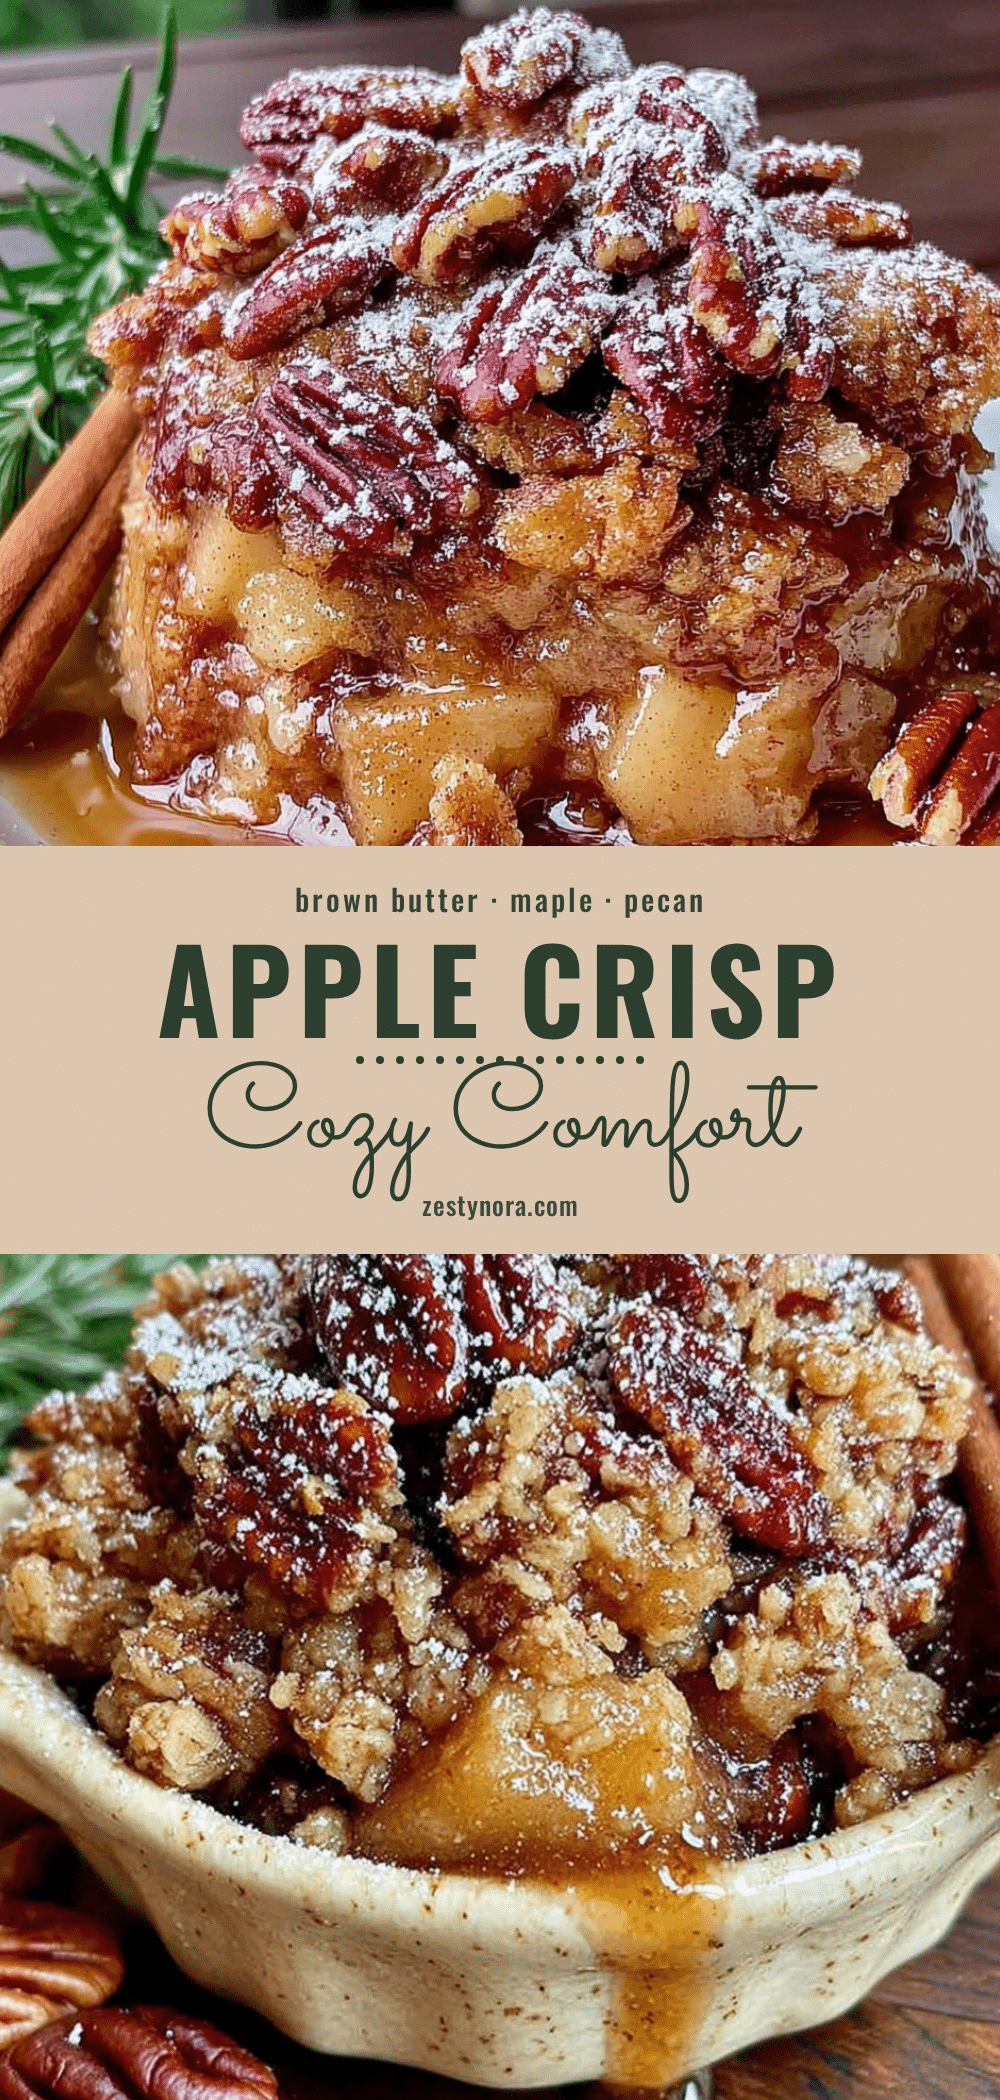
Cozy Brown Butter Maple Pecan Apple Crisp: Easy Fall Dessert
A cozy fall dessert featuring a crunchy, buttery pecan topping over soft, jammy apples, sweetened with maple syrup and enriched with nutty brown butter. This apple crisp is a texture event with perfect balance and simple ingredients.
- Prep Time: 15 minutes
- Cook Time: 35-40 minutes
- Total Time: 50-55 minutes
- Yield: 6 servings 1x
- Category: Dessert
- Cuisine: American
Ingredients
- 6 medium apples, peeled, cored, and sliced (about ¼-inch thick) — a mix of tart and sweet, like Granny Smith and Honeycrisp
- 3 tablespoons pure maple syrup
- 2 tablespoons brown sugar, packed
- 1 tablespoon lemon juice
- 1 teaspoon vanilla extract
- 1 teaspoon ground cinnamon
- ¼ teaspoon ground nutmeg
- ¼ teaspoon salt
- 1 tablespoon all-purpose flour
- ½ cup unsalted butter (1 stick)
- ¾ cup old-fashioned rolled oats
- ¾ cup all-purpose flour
- ½ cup chopped pecans, lightly toasted
- ½ cup brown sugar, packed
- 3 tablespoons pure maple syrup
- ½ teaspoon ground cinnamon
- ¼ teaspoon salt
Instructions
- Preheat your oven to 350°F (175°C). Position the rack in the center.
- Brown the butter: In a medium saucepan over medium heat, melt the butter. Stir frequently with a wooden spoon. It’ll foam up, then settle down, and you’ll see little brown specks forming at the bottom. When it smells nutty and turns a golden-amber color (about 4-5 minutes), remove it from the heat immediately. Pour it into a heatproof bowl to stop the cooking.
- Prepare the apples: While the butter cools slightly, peel, core, and slice your apples into ¼-inch thick pieces. Toss them in a large bowl with the maple syrup, brown sugar, lemon juice, vanilla, cinnamon, nutmeg, salt, and flour. Stir until every slice is coated. Let it sit for a minute.
- Make the topping: In a medium bowl, combine the oats, flour, chopped pecans, brown sugar, maple syrup, cinnamon, and salt. Pour the slightly cooled brown butter over the top and stir until everything is evenly moistened. It should look clumpy and a little shaggy.
- Assemble the crisp: Spread the apple mixture evenly in your greased 8×8 baking dish. Sprinkle the topping over the apples in an even layer. Don’t press it down.
- Bake for 35-40 minutes. The topping should be deep golden brown and the filling should be bubbling up around the edges. If your topping is browning too fast but the apples aren’t done yet, tent loosely with foil for the last 10 minutes.
- Cool for at least 15 minutes before serving. The filling needs time to set.
Notes
Don’t skip browning the butter — it’s the key to the nutty, toffee-like depth. Toast the pecans for maximum flavor. Use a mix of apple varieties for best texture. Let the crisp rest for 15-20 minutes before serving to allow the filling to set. If the topping browns too fast, tent with foil. Can be made gluten-free with a 1:1 gluten-free flour blend and dairy-free with vegan butter or coconut oil.
Nutrition
- Serving Size: 1/6 of recipe
- Calories: 420
- Sugar: 42
- Sodium: 250
- Fat: 18
- Saturated Fat: 8
- Carbohydrates: 64
- Fiber: 6
- Protein: 4
Keywords: apple crisp, brown butter, maple pecan, fall dessert, easy dessert, apple dessert, pecan topping, cozy dessert


