My sister did not trust cream cheese in a pumpkin dessert. That’s the cold, hard truth I was working with last Thanksgiving when I told her about these triple layer pumpkin cheesecake bars I’d been testing. She looked at me like I’d suggested putting sauerkraut on the turkey. “Pumpkin and cream cheese together?” she said, wrinkling her nose. “That sounds like a stomachache waiting to happen.” I didn’t argue with her. I just waited.
See, I’d been on a mission. Every fall, I make a moist chocolate chip pumpkin bread that disappears in about twelve minutes flat, but I wanted something different this year. Something that felt fancy but didn’t require me to bust out a springform pan and a water bath. Something that said “I tried” without actually taking all day. So I started layering. A buttery shortbread crust on the bottom. A silky cheesecake layer in the middle. A spiced pumpkin cake layer on top. And then I baked it, chilled it, and cut it into bars.
The first batch was good. The second batch was better. By the third batch, I had the ratios right—that perfect balance where each bite gives you a little bit of everything without any one flavor screaming for attention. The pumpkin keeps it fall-appropriate, the cheesecake keeps it rich, and the crust keeps it from being too much. (You know what I mean—desserts that are all filling and no structure just feel sad.)
Anyway. I brought a pan to that Thanksgiving dinner. Set it on the counter next to the pies. Didn’t say a word about the cream cheese. My sister tried one bar. Then another. Then she looked at me and said, “Okay, fine. You win.” And honestly? That was better than any recipe award.
Why You’ll Love This Recipe
Let me tell you why these bars have earned a permanent spot in my fall baking rotation. I’ve tested this recipe at least six times—once with low-fat cream cheese (don’t do it, the texture gets weird), once with a graham cracker crust (good but not as sturdy), and once where I accidentally doubled the sugar (we don’t talk about that). What I landed on is the version that works every single time, no fuss, no drama.
- Three Layers, One Pan — You get a buttery shortbread crust, a creamy cheesecake middle, and a tender pumpkin cake top. All in a standard 9×13 pan. No special equipment required.
- Make-Ahead Friendly — These bars actually taste better the next day. The flavors meld together overnight, and the texture firms up perfectly. You can make them two days ahead and still impress everyone.
- No Water Bath Needed — Cheesecake without the stress. No wrapping pans in foil, no worrying about water seeping in, no cracked tops (unless you want that rustic look, which I fully support).
- Crowd-Pleasing Size — A 9×13 pan gives you 24 generous bars. Perfect for Thanksgiving, Friendsgiving, potlucks, or just stocking your freezer for those “I need pie but I don’t want to bake” moments.
- That Texture Contrast — The crust stays crisp, the cheesecake stays velvety, and the pumpkin layer stays tender. Every bite has a little crunch, a little cream, and a little cake. It’s the kind of texture play that makes you close your eyes on the second bite.
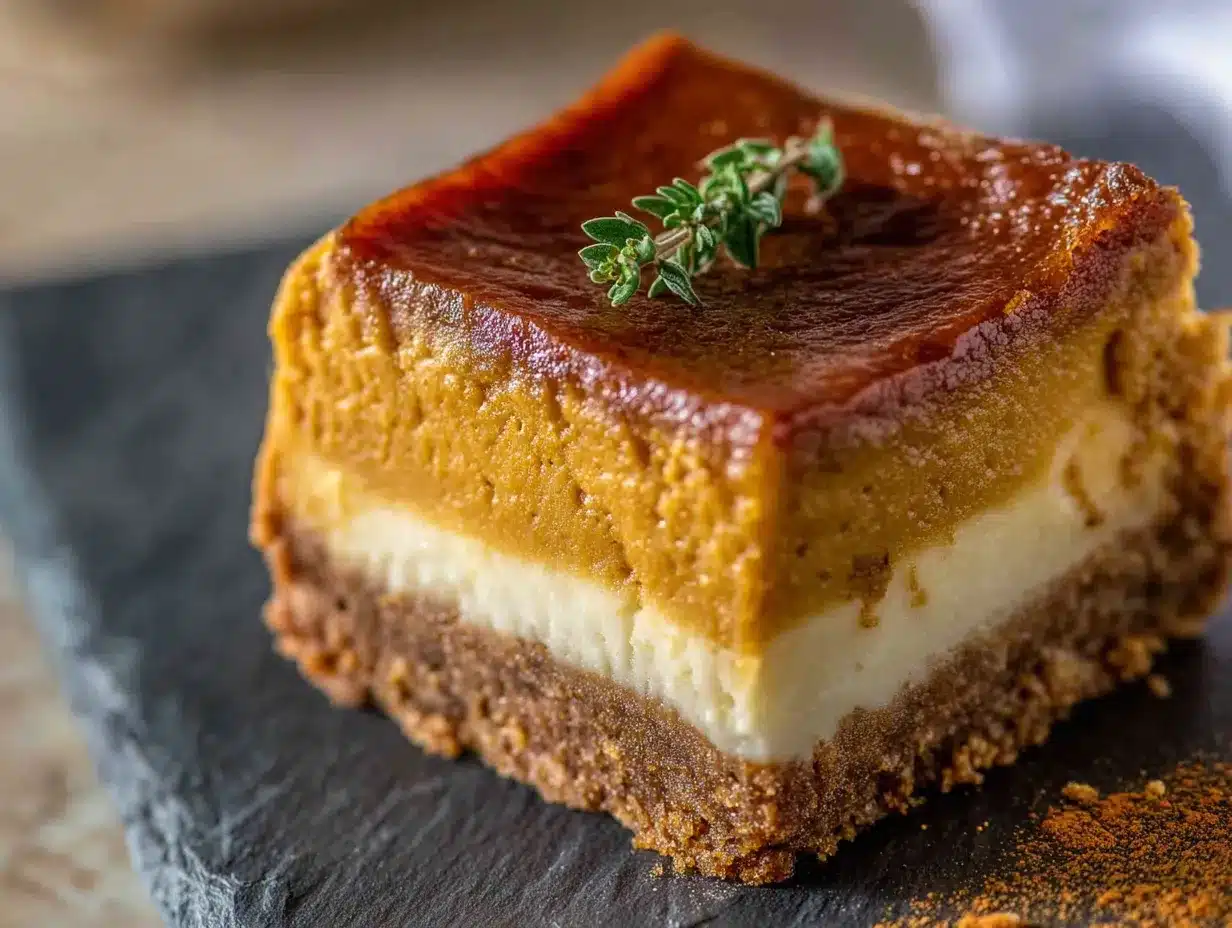
What makes these bars different from the dozens of pumpkin cheesecake recipes out there? Two things. First, the shortbread crust—it’s pre-baked, which means it stays crunchy instead of getting soggy from the wet layers above. Second, the pumpkin layer is more cake than custard, so it holds its shape when you cut into it. No sliding layers, no messy bars, just clean, beautiful slices that make you look like you know what you’re doing.
What Ingredients You Will Need
This recipe uses pretty standard baking ingredients, but a few specifics make a real difference. I’ve tested enough variations to know which shortcuts work and which ones will leave you disappointed. Here’s what you need and why each ingredient matters.
For the Shortbread Crust
- 1 ½ cups all-purpose flour — Spoon and level it. Scooping directly from the bag packs in too much flour and makes the crust dry.
- ½ cup granulated sugar — Just enough sweetness to balance the buttery richness.
- ¾ cup unsalted butter, cold and cut into small cubes — Cold butter is key here. It creates that short, crumbly texture. If the butter softens too much, the crust turns tough. I use Land O’Lakes because the butterfat content is consistent.
- ¼ teaspoon salt — Enhances the butter flavor. Don’t skip it.
For the Cheesecake Layer
- 16 ounces cream cheese, softened to room temperature — Full-fat, block-style cream cheese only. Not the spreadable tub kind. It has too much air and water, which leads to a runny cheesecake layer. Let it sit on the counter for at least an hour before mixing.
- ½ cup granulated sugar — Sweetens without overpowering the tang.
- 2 large eggs, room temperature — Cold eggs can seize the cream cheese mixture and leave lumps. If you forgot to set them out, place them in a bowl of warm water for 5 minutes.
- 1 teaspoon vanilla extract — Pure vanilla, not imitation. The flavor difference is noticeable in a simple cheesecake layer.
For the Pumpkin Layer
- 1 cup canned pumpkin puree — Not pumpkin pie filling. Pumpkin pie filling has sugar and spices already added, which will throw off the whole recipe. I prefer Libby’s for its consistent texture and deep color.
- ½ cup granulated sugar — Balances the earthy pumpkin flavor.
- ¼ cup brown sugar, packed — Adds a subtle molasses note that pairs beautifully with the spices.
- 2 large eggs, room temperature — Same rule as the cheesecake layer.
- ½ cup vegetable oil — Keeps the pumpkin layer moist and tender. You can substitute melted coconut oil if you prefer, but the flavor will be slightly different.
- 1 cup all-purpose flour — Gives the pumpkin layer structure so it holds up when sliced.
- 1 teaspoon baking powder — Helps the pumpkin layer rise just slightly.
- ½ teaspoon baking soda — Works with the acidity of the pumpkin for a tender crumb.
- 1 teaspoon ground cinnamon — The backbone of the spice blend.
- ½ teaspoon ground ginger — Adds warmth without heat.
- ¼ teaspoon ground nutmeg — Freshly grated if you have it, but pre-ground works fine.
- ¼ teaspoon ground cloves — A little goes a long way. Too much and it tastes like holiday candle.
- ¼ teaspoon salt — Balances sweetness and enhances spices.
Equipment Needed
Nothing too crazy here. You probably have most of this already.
- 9×13-inch baking pan — Metal or glass both work, but metal gives a crisper crust. If using glass, reduce the oven temperature by 25°F and check for doneness a few minutes earlier.
- Parchment paper — Line the pan with two overlapping sheets, leaving overhang on all sides. This makes lifting the bars out a breeze. I’ve tried greasing the pan directly, and the bars always stick somewhere. Parchment is worth the extra thirty seconds.
- Electric hand mixer or stand mixer — You can mix the crust by hand with a pastry cutter, but the cheesecake and pumpkin layers need some power to get smooth. A hand mixer works perfectly fine.
- Large mixing bowls — At least two. One for the crust, one for the cheesecake, one for the pumpkin layer. (Okay, three.)
- Rubber spatula — For scraping every last bit of cheesecake out of the bowl. Waste not, want not.
- Offset spatula — Helpful for spreading the cheesecake layer evenly, but a regular spatula works too.
- Measuring cups and spoons — The usual suspects.
- Cooling rack — Essential for even cooling. Setting a hot pan directly on the counter can trap heat and overcook the bottom.
- Sharp knife — A chef’s knife or a long serrated knife works best for clean cuts. Wipe the blade between cuts for the prettiest bars.
Budget-friendly tip: If you don’t have parchment paper, you can grease the pan thoroughly with butter and dust it with flour. Just be extra gentle when lifting the bars out.
Preparation Method
Take your time with this one. The actual hands-on work is maybe 30 minutes, but the chilling is where the magic happens. Here’s how to get it right.
Step 1: Make the Crust
Preheat your oven to 350°F (175°C). Line your 9×13 pan with parchment paper, leaving about 2 inches of overhang on the long sides. In a medium bowl, combine 1 ½ cups flour, ½ cup sugar, and ¼ teaspoon salt. Add the cold butter cubes and cut them in using a pastry cutter or your fingertips until the mixture looks like coarse meal with some pea-sized butter pieces still visible. Don’t overwork it—you want those little butter pockets. Press the mixture evenly into the bottom of the prepared pan. Bake for 18-20 minutes, until the edges are just starting to turn golden. Set aside to cool while you make the filling.
Step 2: Make the Cheesecake Layer
In a large bowl, beat the softened cream cheese with an electric mixer on medium speed until smooth and creamy, about 2 minutes. Scrape down the sides and bottom of the bowl. Add ½ cup sugar and beat until combined, another minute. Add the eggs one at a time, beating on low after each addition just until incorporated. Overmixing at this stage adds too much air, which can cause the cheesecake to puff up and crack. Stir in the vanilla. Set aside.
Step 3: Make the Pumpkin Layer
In another large bowl, whisk together the pumpkin puree, ½ cup granulated sugar, and ¼ cup brown sugar until smooth. Add the eggs and vegetable oil, whisking until fully combined. In a separate small bowl, whisk together 1 cup flour, 1 teaspoon baking powder, ½ teaspoon baking soda, 1 teaspoon cinnamon, ½ teaspoon ginger, ¼ teaspoon nutmeg, ¼ teaspoon cloves, and ¼ teaspoon salt. Add the dry ingredients to the pumpkin mixture and stir with a spatula until just combined. A few streaks of flour are fine—overmixing makes the cake layer tough.
Step 4: Assemble the Layers
Pour the cheesecake mixture over the cooled crust and spread it evenly with a spatula. It should cover the entire surface. Now, carefully spoon the pumpkin mixture over the cheesecake layer in dollops. Use the back of a spoon or an offset spatula to gently spread it into an even layer. Don’t press too hard—you want the layers to stay separate, not swirl together. (Though if they do swirl a little, it still tastes amazing, so don’t stress.)
Step 5: Bake
Bake at 350°F (175°C) for 35-40 minutes. The edges should be set and the center should still jiggle slightly when you gently shake the pan. A toothpick inserted into the pumpkin layer should come out clean or with a few moist crumbs. If the top is browning too quickly around the 25-minute mark, tent loosely with foil. Let the bars cool completely on a wire rack—this takes about 2 hours. Then refrigerate for at least 4 hours, preferably overnight. This step is non-negotiable. Warm cheesecake bars are a mess. Chilled ones slice beautifully.
Step 6: Slice and Serve
Once fully chilled, lift the bars out of the pan using the parchment overhang. Place on a cutting board. Use a sharp knife to trim the edges if you want clean sides (I usually do—it’s worth the extra bite for the cook). Cut into 24 bars, wiping the knife clean between cuts. Serve cold or let them sit at room temperature for 15 minutes for a softer texture.
Cooking Tips & Techniques
I’ve made this recipe enough times to know where things can go sideways. Here’s what I’ve learned the hard way so you don’t have to.
Room temperature ingredients matter more than you think. I know it’s annoying to wait, but cold cream cheese creates lumps that no amount of beating will fully smooth out. And cold eggs can cause the cream cheese mixture to seize up, leaving you with a grainy texture. Set everything out an hour before you start baking. Set a timer if you’re forgetful like me.
Don’t overmix the cheesecake layer. I did this once while distracted by a phone call, and the cheesecake puffed up like a soufflé during baking, then collapsed and cracked. Mix on low speed and stop as soon as the ingredients come together. A few small lumps are fine—they’ll melt during baking.
The crust needs to be fully cooled before adding the cheesecake layer. I know it’s tempting to speed this up, but a hot crust will start melting the cream cheese mixture, and you’ll end up with a sad, muddy layer situation. Let it cool on the counter for at least 20 minutes. You can even pop it in the fridge for 10 if you’re in a hurry.
Use the right pan size. A 9×13 pan gives you the perfect thickness for all three layers. A smaller pan will make the layers too thick and they won’t bake evenly. A larger pan will give you thin, sad bars. Stick with the recommended size.
Chill overnight for the best texture. I know, I know—you want to eat them now. But the flavors really do meld and deepen overnight. The cheesecake firms up, the pumpkin layer settles, and the crust stays crisp. If you absolutely must eat one right after cooling, go ahead. But save most of them for the next day. You’ll thank me.
For clean slices, use a hot knife. Run your knife under hot water, dry it off, and make one clean cut. Wipe the blade clean between cuts. This gives you those gorgeous, Instagram-worthy bars with no smearing.
Variations & Adaptations
This recipe is pretty forgiving, so feel free to play around. Here are some variations I’ve tried and loved.
Gluten-Free Version: Substitute the all-purpose flour in both the crust and the pumpkin layer with a 1:1 gluten-free baking flour blend. I’ve used Bob’s Red Mill and King Arthur Measure for Measure with good results. The crust will be a bit more delicate, so handle it gently when pressing into the pan.
Dairy-Free Version: Use a dairy-free cream cheese alternative like Kite Hill or Miyoko’s. The texture will be slightly softer, so chill the bars for a full 8 hours before slicing. Substitute the butter in the crust with a plant-based butter stick (not the spreadable kind in a tub).
Spice it Up: Add ¼ teaspoon of cardamom or allspice to the pumpkin layer for a more complex spice profile. I tried this with cardamom last year and it was a hit—it adds a floral, slightly citrusy note that pairs beautifully with the pumpkin.
Add a Swirl: If you want a marbled look, spoon the pumpkin layer over the cheesecake in dollops, then use a knife to gently swirl them together. Don’t over-swirl or you’ll lose the distinct layers. Three or four figure-eight motions is plenty.
Nutty Crust: Replace ¼ cup of the flour in the crust with finely chopped pecans or walnuts. Toast them first for extra flavor. This adds a lovely crunch and a nutty depth that complements the pumpkin.
Bourbon Maple Drizzle: Whisk together ½ cup powdered sugar, 1 tablespoon bourbon, and 1 tablespoon maple syrup. Drizzle over the cooled bars before serving. I made this for a Friendsgiving and people literally fought over the last piece.
If you’re looking for more pumpkin inspiration, don’t miss my soft pumpkin chocolate chip cookies—they’re the perfect companion to these bars for a full fall dessert spread.
Serving & Storage Suggestions
These bars are versatile enough for any occasion. Here’s how to serve and store them like a pro.
Serving Temperature: I prefer them chilled straight from the fridge—the layers hold together beautifully and the texture is almost like a cheesecake bar. But if you want a softer, more cake-like texture, let them sit at room temperature for 15-20 minutes before serving. Both ways are delicious, so it really comes down to personal preference.
Presentation: Arrange the bars on a platter and dust lightly with powdered sugar or cinnamon. A dollop of whipped cream on top takes them over the top for special occasions. For Thanksgiving, I like to add a small candied pecan on each bar—it adds a festive touch and a little crunch.
Pairings: These bars are fantastic with a cup of hot coffee or spiced chai. For a boozy pairing, try them with a bourbon old fashioned or a dark rum cider. The warmth of the spirits complements the pumpkin spice beautifully.
Refrigerator Storage: Store the bars in an airtight container in the refrigerator for up to 5 days. Place a sheet of parchment paper between layers to prevent sticking. They actually get better after a day or two as the flavors meld.
Freezer Storage: These freeze beautifully. Wrap individual bars tightly in plastic wrap, then place them in a freezer-safe bag or container. Freeze for up to 3 months. To thaw, transfer to the refrigerator overnight or let sit at room temperature for about an hour. I always keep a stash in my freezer for unexpected guests or late-night cravings.
Flavor Development: The spices in the pumpkin layer continue to develop over time, so these bars actually taste more complex on day two or three. The crust stays surprisingly crisp if stored properly. Just make sure the container is airtight—any exposure to air will soften the crust.
If you’re planning a fall dessert table, these bars pair beautifully with a slice of moist chocolate chip pumpkin bread for a true pumpkin lover’s dream.
Nutritional Information & Benefits
Let’s be real—these are a treat, not a health food. But knowing what’s in them helps you enjoy them mindfully.
Per bar (based on 24 servings):
- Calories: approximately 280
- Total Fat: 18g
- Saturated Fat: 9g
- Cholesterol: 75mg
- Sodium: 180mg
- Total Carbohydrates: 27g
- Dietary Fiber: 1g
- Sugars: 17g
- Protein: 5g
Health Highlights: Pumpkin is packed with vitamin A (in the form of beta-carotene), which supports eye health and immune function. It’s also a good source of fiber and potassium. The cream cheese provides calcium and protein, though it’s definitely on the indulgent side. The eggs add high-quality protein and essential amino acids.
Dietary Considerations: This recipe contains gluten, dairy, and eggs. For gluten-free and dairy-free options, see the variations section above. It is not suitable for vegans as written, but you could experiment with vegan cream cheese and egg replacers—just know the texture will be different.
My Take: I’m not one to pretend dessert is health food. But I do believe in using real, whole ingredients and enjoying treats in moderation. These bars use butter and cream cheese and sugar, yes, but they also use real pumpkin and warm spices that actually have some nutritional value. It’s about balance. One bar with your afternoon coffee is a lovely thing. A whole pan is a different story.
Conclusion
These triple layer pumpkin cheesecake bars are the kind of dessert that makes people ask for the recipe before they’ve even finished their first bite. They look impressive—three distinct layers, that gorgeous golden pumpkin top, the creamy white cheesecake middle—but they’re actually pretty straightforward to make. No water bath, no complicated techniques, just good ingredients and a little patience for the chilling time.
What I love most about this recipe is how adaptable it is. It works for Thanksgiving dinner, for a casual fall potluck, for a Sunday afternoon baking project with the kids. It travels well, freezes beautifully, and somehow tastes even better the next day. That’s the kind of recipe that earns a permanent spot in your rotation.
I’d love to hear how these turn out for you. Did you try any variations? Did your family fight over the last piece? Drop a comment below and let me know—I read every single one. And if you share a photo on social media, tag me so I can see your beautiful bars. Happy baking, friends. Fall is too short not to enjoy every single bite.
Frequently Asked Questions
Can I use fresh pumpkin instead of canned?
You can, but you’ll need to cook and puree it first, then drain off as much liquid as possible. Fresh pumpkin has more water than canned, which can make the pumpkin layer too wet. If using fresh, reduce the oil by 2 tablespoons and expect a slightly softer texture. Canned pumpkin is actually more consistent for baking, so I recommend sticking with it.
Why did my cheesecake layer crack?
Cracking usually happens from overmixing the cheesecake batter (which adds too much air) or overbaking. Make sure you mix on low speed and stop as soon as the ingredients come together. Also, don’t overbake—the center should still jiggle slightly when you shake the pan. If your oven runs hot, check the bars at 30 minutes instead of 35. And remember, even cracked cheesecake bars taste amazing, so don’t stress too much.
Can I make these bars in a different pan size?
I don’t recommend it. A 9×13 pan gives you the perfect ratio of crust to filling to topping. If you use a smaller pan, the layers will be too thick and may not bake through properly. If you use a larger pan, the layers will be too thin and the bars will be dry. Stick with 9×13 for the best results.
How do I know when the bars are done baking?
The edges should be set and lightly golden, and the center should still jiggle slightly when you gently shake the pan. A toothpick inserted into the pumpkin layer should come out clean or with a few moist crumbs. If the toothpick comes out wet with batter, bake for another 3-5 minutes and check again. The cheesecake layer will continue to set as it cools, so it’s better to underbake slightly than overbake.
Can I freeze these bars with the parchment paper?
Yes! I actually recommend freezing them on the parchment paper. Once the bars are fully chilled and cut, leave them on the parchment, wrap the whole thing tightly in plastic wrap, then place it in a freezer bag. When you’re ready to eat, just lift the parchment out of the bag, let the bars thaw in the fridge, and slice as needed. The parchment prevents sticking and makes the whole process mess-free.
Pin This Recipe!
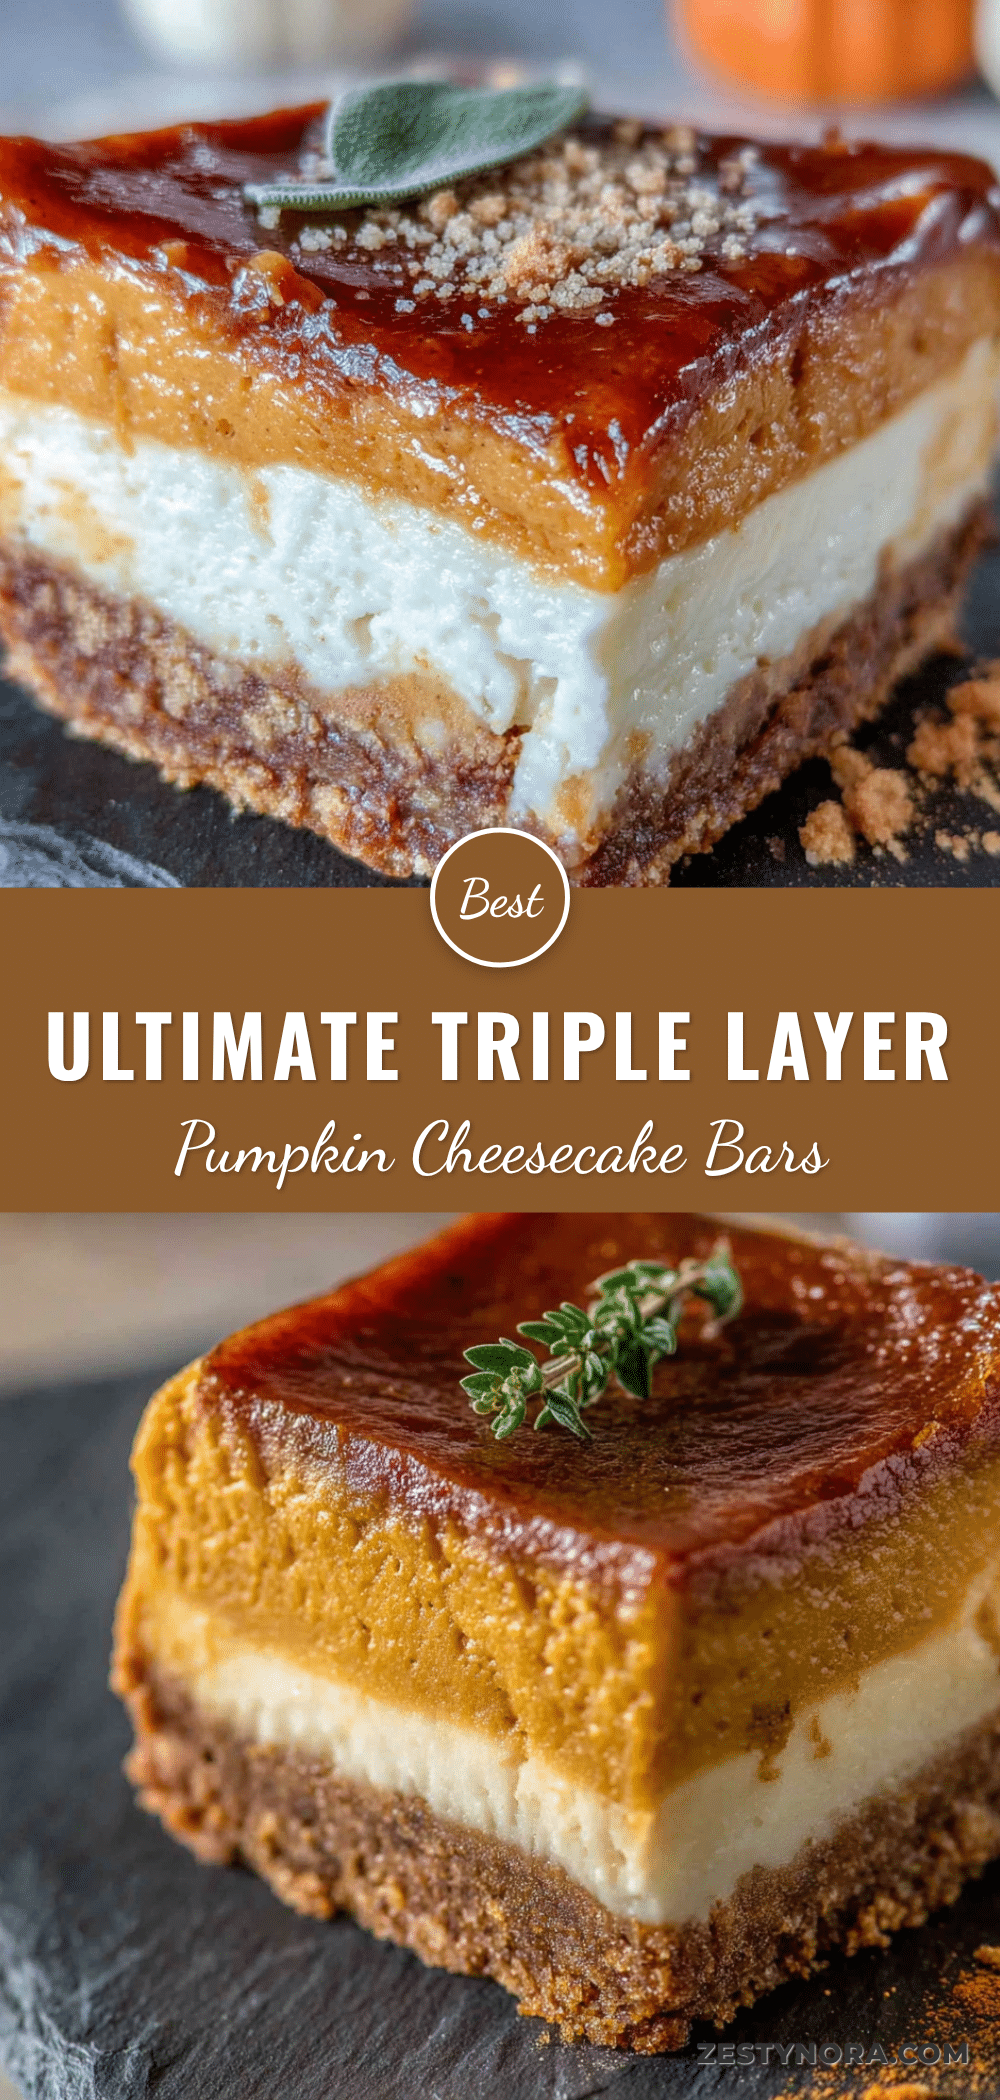
Best Triple Layer Pumpkin Cheesecake Bars (Easy Recipe)
These triple layer pumpkin cheesecake bars feature a buttery shortbread crust, a creamy cheesecake middle, and a spiced pumpkin cake top. They’re make-ahead friendly, require no water bath, and are perfect for fall gatherings.
- Prep Time: 30 minutes
- Cook Time: 35-40 minutes
- Total Time: 4 hours 35 minutes (includes chilling)
- Yield: 24 bars 1x
- Category: Dessert
- Cuisine: American
Ingredients
- 1 ½ cups all-purpose flour
- ½ cup granulated sugar
- ¾ cup unsalted butter, cold and cut into small cubes
- ¼ teaspoon salt
- 16 ounces cream cheese, softened to room temperature
- ½ cup granulated sugar
- 2 large eggs, room temperature
- 1 teaspoon vanilla extract
- 1 cup canned pumpkin puree
- ½ cup granulated sugar
- ¼ cup brown sugar, packed
- 2 large eggs, room temperature
- ½ cup vegetable oil
- 1 cup all-purpose flour
- 1 teaspoon baking powder
- ½ teaspoon baking soda
- 1 teaspoon ground cinnamon
- ½ teaspoon ground ginger
- ¼ teaspoon ground nutmeg
- ¼ teaspoon ground cloves
- ¼ teaspoon salt
Instructions
- Preheat oven to 350°F (175°C). Line a 9×13-inch baking pan with parchment paper, leaving overhang on the long sides.
- Make the crust: In a medium bowl, combine 1 ½ cups flour, ½ cup sugar, and ¼ teaspoon salt. Cut in cold butter cubes using a pastry cutter or fingertips until mixture resembles coarse meal with pea-sized butter pieces. Press evenly into the bottom of the prepared pan. Bake for 18-20 minutes until edges are lightly golden. Set aside to cool.
- Make the cheesecake layer: In a large bowl, beat softened cream cheese with an electric mixer on medium speed until smooth, about 2 minutes. Add ½ cup sugar and beat until combined. Add eggs one at a time, beating on low after each addition. Stir in vanilla. Set aside.
- Make the pumpkin layer: In a large bowl, whisk together pumpkin puree, ½ cup granulated sugar, and ¼ cup brown sugar until smooth. Add eggs and vegetable oil, whisking until combined. In a separate bowl, whisk together 1 cup flour, baking powder, baking soda, cinnamon, ginger, nutmeg, cloves, and salt. Add dry ingredients to pumpkin mixture and stir until just combined.
- Assemble: Pour cheesecake mixture over cooled crust and spread evenly. Spoon pumpkin mixture over cheesecake in dollops, then gently spread into an even layer without swirling.
- Bake at 350°F (175°C) for 35-40 minutes until edges are set and center jiggles slightly. Cool completely on a wire rack (about 2 hours), then refrigerate for at least 4 hours or overnight.
- Slice and serve: Lift bars out using parchment overhang. Trim edges if desired, then cut into 24 bars, wiping knife clean between cuts. Serve cold or at room temperature.
Notes
Room temperature ingredients are crucial for a smooth cheesecake layer. Chill overnight for best texture and clean slices. Use a hot knife for clean cuts.
Nutrition
- Serving Size: 1 bar
- Calories: 280
- Sugar: 17
- Sodium: 180
- Fat: 18
- Saturated Fat: 9
- Carbohydrates: 27
- Fiber: 1
- Protein: 5
Keywords: pumpkin cheesecake bars, triple layer, fall dessert, Thanksgiving, shortbread crust, easy recipe


