My sister-in-law, Jen, wasn’t trying to be the star of Thanksgiving. Honestly, she was just trying to keep her toddler from melting down before the turkey was carved. I’d stopped by her place the weekend before the big day to help her map out the grocery list, and the smell of chocolate and vanilla hit me before I even got my coat off. There she was, at her cluttered kitchen island, with a baking sheet full of these goofy little turkey faces staring up at her. She was completely nonchalant about it. “Oh, it’s just something for the kids’ table,” she said, wiping a smear of melted candy off her wrist. She acted like she was boiling pasta. Let me tell you, I was floored. They were the most adorable, clever things I’d ever seen, and she made them look easy. I mean, they were perfect. That casual, low-stakes energy is exactly how this recipe should feel. It’s not about making a showstopper centerpiece; it’s about making something fun that makes everyone smile. You know that feeling when you see a dessert that’s just too cute to eat? That’s these cake pops. I’ve been making them every year since, and they are always the first thing to disappear, even before the pie. Honestly, they’re the reason I look forward to the kids’ table now.
Why You’ll Love This Recipe
Let’s be real for a second. Thanksgiving desserts can feel like a lot of pressure. Pies need to be perfect, and the presentation has to be spotless. These turkey cake pops? They are the opposite of stressful. They are the fun, quirky, stress-free treat your holiday table needs. Here is why you are going to be so glad you made them:
- Super Fun for Everyone: Honestly, who can resist a cake pop shaped like a turkey? They are a guaranteed conversation starter and a total hit with kids and adults alike. They bring a playful energy to the table without taking themselves too seriously.
- Surprisingly Simple Ingredients: You don’t need a specialty baking store for this. The base is just your favorite cake mix and frosting. The decorations are all standard candy you can find at any grocery store. No fancy trips needed, which is a huge win during the holiday chaos.
- Perfect Make-Ahead Treat: This is the biggest lifesaver. You can make these cake pops days ahead of time. Just store them in the fridge, and you have one less thing to worry about on the big day. It’s a total stress-buster for a busy host.
- Completely Customizable: You can use any flavor of cake and frosting you love. Chocolate, vanilla, red velvet—they all work. The “turkey” decoration is just a template; you can get as creative as you want with the candy faces.
- Unbelievably Cute: Let’s face it, the visual payoff is huge. They look like you spent hours on them, but the assembly is actually quick and easy. The combination of the cake pop and the candy decorations is just next-level adorable.
This isn’t just another cake pop recipe. It is the one that saves your sanity. It’s a dessert that feels festive and special without the anxiety of a complicated bake. It’s the kind of treat that makes you feel like a holiday hero with minimal effort. Honestly, that’s the best kind of recipe to have in your back pocket.
What Ingredients You Will Need
This recipe uses simple, wholesome ingredients to deliver a delicious and adorable treat without any fuss. Most of these are pantry staples or easy to find at your local grocery store, making this a low-stress project for a busy holiday week.
For the Cake Pops
- 1 box (15.25 oz) chocolate or vanilla cake mix (I recommend Duncan Hines or Betty Crocker for consistent results). Plus the ingredients called for on the box (usually eggs, oil, and water).
- 1/2 cup prepared frosting (Use a flavor that matches your cake. I love using cream cheese frosting with vanilla cake or chocolate frosting with chocolate cake. It adds richness and binds the crumbs perfectly.)
For the Coating & Decoration
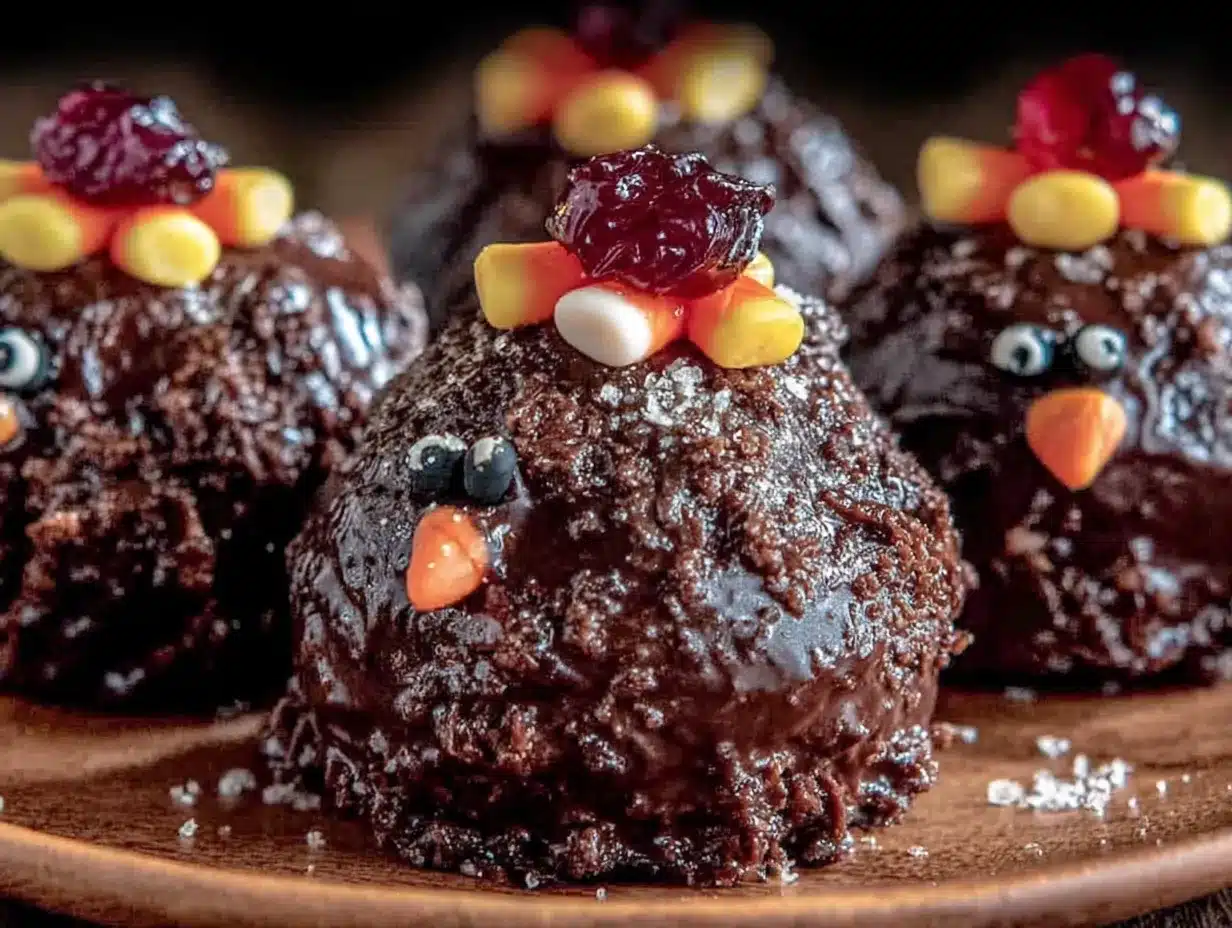
- 1 package (12 oz) candy melts (I prefer Wilton or Ghirardelli for a smooth, thin coating. You’ll need a light brown or tan color for the turkey head and body. You can use white melts and color them with oil-based candy coloring.)
- 1 tablespoon coconut oil or vegetable shortening (This helps thin the candy melts for a perfectly smooth dip. It makes a huge difference!)
- Lollipop sticks (You can find these at craft stores or online. I get the 6-inch size.)
- Small candy eyes (These are the classic googly eyes you see on all cute desserts.)
- Orange candy corn (This becomes the turkey’s beak. Look for the classic candy corn shape.)
- Red candy melts or red fruit leather (For the wattle, that little red thing on the turkey’s neck. I find that cutting a tiny strip of fruit leather is way easier than trying to pipe melted candy.)
- Chocolate wafer cookies or large pretzel sticks (For the turkey’s “feathers.” I like using chocolate wafers because they look like round tail feathers. Pretzel sticks are a great salty-sweet alternative.)
- Optional: Orange or yellow frosting (For piping little turkey feet on the base, if you want to get extra fancy.)
Ingredient Selection Tips & Substitutions
When you are picking your candy melts, look for a brand that melts smoothly. Wilton is my go-to because it’s reliable. If you are using white melts and coloring them, make sure you use an oil-based candy coloring. Regular food coloring will seize the chocolate and make it lumpy—trust me, I learned that the hard way. For a gluten-free option, use a gluten-free cake mix. It works perfectly. You can also swap the candy melts for almond bark or even melted chocolate chips mixed with a little coconut oil for a different flavor profile. If you don’t have candy corn, you can pipe a little orange frosting for the beak. The beauty of this recipe is that it is very forgiving.
Equipment Needed
- Baking sheet (lined with parchment paper or a silicone mat)
- Large mixing bowl
- Hand mixer or stand mixer (for making the cake)
- 9×13 inch baking pan (or two 8-inch round pans)
- Fork or pastry cutter (for crumbling the cake)
- Small cookie scoop (for portioning the cake balls evenly. This is a game-changer for consistency!)
- Microwave-safe bowl (for melting the candy)
- Styrofoam block or empty egg carton (to hold the cake pops upright while they dry)
- Piping bags or small zip-top bags (for any detail work)
You don’t need a ton of fancy gadgets for this. A good cookie scoop is my best tip—it makes the cake balls uniform, which means they all dip and dry at the same rate. If you don’t have a Styrofoam block, an egg carton turned upside down with holes poked in it works like a charm. I’ve used that trick more times than I can count.
Preparation Method
Okay, let’s get to the fun part. Follow these steps, and you will have a flock of adorable turkeys in no time. Take your time, and don’t rush the chilling steps—they are the secret to success.
- Bake the Cake. Prepare your cake mix according to the package directions. Bake it in a 9×13 inch pan. Let it cool completely. This is super important. A warm cake will turn your frosting into a soupy mess. I usually bake it the day before and let it sit out overnight.
- Crumble the Cake. Once the cake is completely cool, crumble it into a large bowl. Use your hands or a fork to break it down into fine crumbs. There should be no large chunks left. It should look like damp sand.
- Mix in the Frosting. Add your 1/2 cup of frosting to the cake crumbs. Use your hands or a spatula to mix it all together. You are looking for a texture that holds together when you squeeze it in your fist, like Play-Doh. Don’t add too much frosting! Start with 1/2 cup and add a tablespoon more if it’s too dry. A sticky mixture is harder to work with.
- Form the Balls. Use your small cookie scoop to portion out the mixture. Roll each portion into a smooth ball between your palms. Place them on your parchment-lined baking sheet. You should get about 30-35 cake balls. Pop the tray in the fridge for at least 2 hours, or the freezer for 30 minutes. They need to be firm so they don’t fall off the sticks.
- Attach the Lollipop Sticks. Melt a small amount of your candy melts in the microwave (about 1/4 cup for this step). Dip the tip of a lollipop stick into the melted candy, then insert it about halfway into a chilled cake ball. This acts like glue. Repeat for all the balls. Place them back in the fridge for 15 minutes to set the “glue.”
- Melt the Coating. In a microwave-safe bowl, combine your remaining candy melts and the coconut oil or shortening. Microwave in 30-second intervals, stirring well after each, until completely smooth. Don’t overheat it or it will seize. It should be thin and runny.
- Dip the Cake Pops. Hold a cake pop by the stick and dip it completely into the melted candy. Gently tap the stick on the edge of the bowl to let the excess drip off. Don’t swirl it too much or the ball might fall off! Once coated, stick the pop into your Styrofoam block or egg carton to dry.
- Add the Feathers (Optional but Recommended). While the coating is still wet, carefully press 3-4 chocolate wafer cookies or pretzel sticks into the back of the cake pop to create the turkey’s tail feathers. Work quickly before the coating sets. If you wait, you can use a dab of melted candy to “glue” them on later.
- Decorate the Faces. Once the coating is completely dry (about 15-20 minutes), it’s time to make the faces. Use a tiny dab of melted candy to attach two candy eyes. Add a piece of candy corn for the beak (pointy side out). Use a tiny piece of red fruit leather for the wattle, attaching it just below the beak.
- Let Everything Set. Allow all the decorations to set completely. This takes about 30 minutes. Then, your turkey cake pops are ready to serve or store!
Cooking Tips & Techniques
Let me save you from the mistakes I’ve made. I’ve had cake pops fall off sticks, crack, and look like sad little blobs. Here are the lessons I learned the hard way.
- The “Sweat” Factor: If your cake balls are too cold when you dip them, the coating can crack. If they are too warm, they fall off the stick. The sweet spot is taking them out of the fridge and letting them sit on the counter for 5 minutes before dipping. It’s a delicate balance, but you’ll get a feel for it.
- Thin is In: Your candy coating needs to be thin. If it’s too thick, it will be heavy and the cake pop will slide right off the stick. This is where the coconut oil or shortening is your best friend. Add it a teaspoon at a time until the mixture is the consistency of heavy cream.
- The Tap, Don’t Swirl: When you are tapping off the excess coating, do it gently. Hold the pop vertically and tap the stick against the bowl. Don’t swirl it in a circle, or you risk the cake ball detaching from the stick. I learned this one after a very messy batch.
- Work in Batches: Don’t try to dip all 30 cake pops at once. Work with 5-6 at a time. Keep the rest in the fridge so they stay firm. This prevents the coating from getting too thick or the cake balls from getting too warm.
- Use a Toothpick for Details: For tiny details like the wattle or a little smile, use a toothpick to dab on a tiny amount of melted candy. It gives you way more control than a piping bag for these small elements.
Variations & Adaptations
One of the best things about this recipe is how flexible it is. Here are a few ways I have tweaked it over the years to keep things interesting.
- Chocolate Turkey Pops: Use a chocolate cake mix and chocolate frosting for the base. Then, use dark chocolate candy melts for the coating. The rich chocolate flavor is a huge hit with the adults. You can use white candy eyes and an orange candy corn beak for a striking contrast.
- Pumpkin Spice Turkey Pops: This is my absolute favorite fall variation. Use a spice cake mix and add a teaspoon of pumpkin pie spice to the frosting. It tastes like autumn in a bite. For the coating, use a warm orange or gold candy melt. The smell is incredible.
- Salty-Sweet Pretzel Turkeys: For the feathers, swap the chocolate wafers for large, salted pretzel sticks. The salty crunch is a fantastic contrast to the sweet, creamy cake pop. I love this one for a more adult-friendly treat. It’s a crowd-pleaser at any gathering.
- Red Velvet Turkeys: Use a red velvet cake mix with cream cheese frosting. The red color peeking through the coating is so festive. It’s a beautiful and delicious twist that feels extra special for the holidays.
- Mini “Turkey Leg” Pops: Instead of making the whole turkey, shape the cake mixture into small, log-shaped “drumsticks.” Dip them in brown candy melts and add a white “bone” (a small piece of a pretzel stick) at the end. It’s a hilarious and adorable alternative.
Serving & Storage Suggestions
These little guys are best served at room temperature. The coating will be firm, and the cake pop inside will be soft and fudgy. If you serve them straight from the fridge, they will be a bit hard. Let them sit out for about 15-20 minutes before you present them.
For storage, place the finished cake pops in an airtight container. Layer them between sheets of parchment paper so the decorations don’t stick together. They will keep in the refrigerator for up to a week. Honestly, they are even better on day two or three because the flavors have had time to meld.
You can also freeze them for up to 3 months. Just make sure they are in a freezer-safe container. When you are ready to serve, let them thaw in the refrigerator overnight, then bring them to room temperature. The flavor and texture hold up beautifully. I usually make a double batch in November and freeze one for a random December treat. It’s a lifesaver for holiday parties.
These cake pops look amazing arranged on a platter or standing up in a small glass jar. They are perfect for a dessert table, a kids’ craft station, or even as a fun edible centerpiece. I like to put them on a bed of green-tinted coconut flakes to look like grass. It’s a simple touch that makes the whole presentation pop.
Nutritional Information & Benefits
Let’s be honest, these are a treat. They are not health food, and that is perfectly okay! The joy they bring is a major part of the holiday experience. That said, here is a rough idea of what you are working with. Per cake pop (based on a standard recipe and average decoration): approximately 180-220 calories, 8-10g of fat, 28-32g of carbohydrates, and 2-3g of protein.
The main ingredients provide a little something. The eggs in the cake mix offer some protein, and the cocoa powder in chocolate versions contains some antioxidants. Using a cream cheese frosting adds a bit of calcium. But honestly, the biggest benefit here is the happiness and the memories. It’s a treat that brings people together, and that is a pretty great thing. If you are looking for a lower-sugar option, you can use a sugar-free cake mix and sugar-free frosting. The texture will be slightly different, but it works in a pinch.
Always check your specific ingredients for potential allergens. This recipe contains gluten, dairy, and eggs. It can be made gluten-free with a gluten-free cake mix and dairy-free with dairy-free frosting and chocolate.
Conclusion
So, there you have it. The perfect Thanksgiving turkey cake pops that are as fun to make as they are to eat. They are the kind of recipe that turns a simple dessert into a memory. I love making them because they remind me of that day in Jen’s kitchen—a moment of pure, uncomplicated joy in the middle of holiday chaos. They are proof that you don’t need a complicated, fancy dessert to make the table feel special.
I really hope you give these a try. Don’t be afraid to make them your own. Use your favorite cake flavor, get creative with the candy decorations, and let the kids help. Those little imperfections are what make them perfect. When you make them, I’d love to hear about it! Drop a comment below and tell me how they turned out, or share a picture on social media. Your stories are what make this community so wonderful. Happy Thanksgiving, and happy baking!
Frequently Asked Questions
Can I use a different type of cake mix?
Absolutely! This recipe is very forgiving. You can use any flavor of cake mix you like—chocolate, vanilla, lemon, red velvet, or even a gluten-free blend. Just make sure it is fully cooled before you crumble it. The flavor of the cake will be the star of your pop.
My cake pops keep falling off the stick. What am I doing wrong?
This is the most common issue. The fix is usually one of two things. First, make sure your cake balls are very cold. They need to be firm. Second, don’t skip the step of dipping the stick in melted candy before inserting it. That acts like glue. Finally, when you dip the pop, don’t swirl it; just tap it gently to remove excess coating.
How do I prevent the candy coating from cracking?
Cracking happens when the cake pop is too cold when you dip it into the warm coating. The sudden temperature change makes the coating crack. The solution is simple: let your chilled cake balls sit on the counter for 5 minutes to take the chill off before you start dipping. It’s a small step that makes a huge difference.
Can I make these cake pops ahead of time?
Yes, and I highly recommend it! You can make the entire batch of cake pops and store them in an airtight container in the refrigerator for up to a week. They actually taste better after a day or two because the flavors have time to meld. You can also freeze them for up to 3 months.
My candy melts are too thick. How do I thin them out?
Thick candy melts are a common problem. The best solution is to add a little bit of coconut oil or vegetable shortening. Add it one teaspoon at a time, stirring well after each addition, until the mixture is smooth and thin, like heavy cream. Do not add water or milk, as this will cause the candy to seize and become lumpy.
Pin This Recipe!
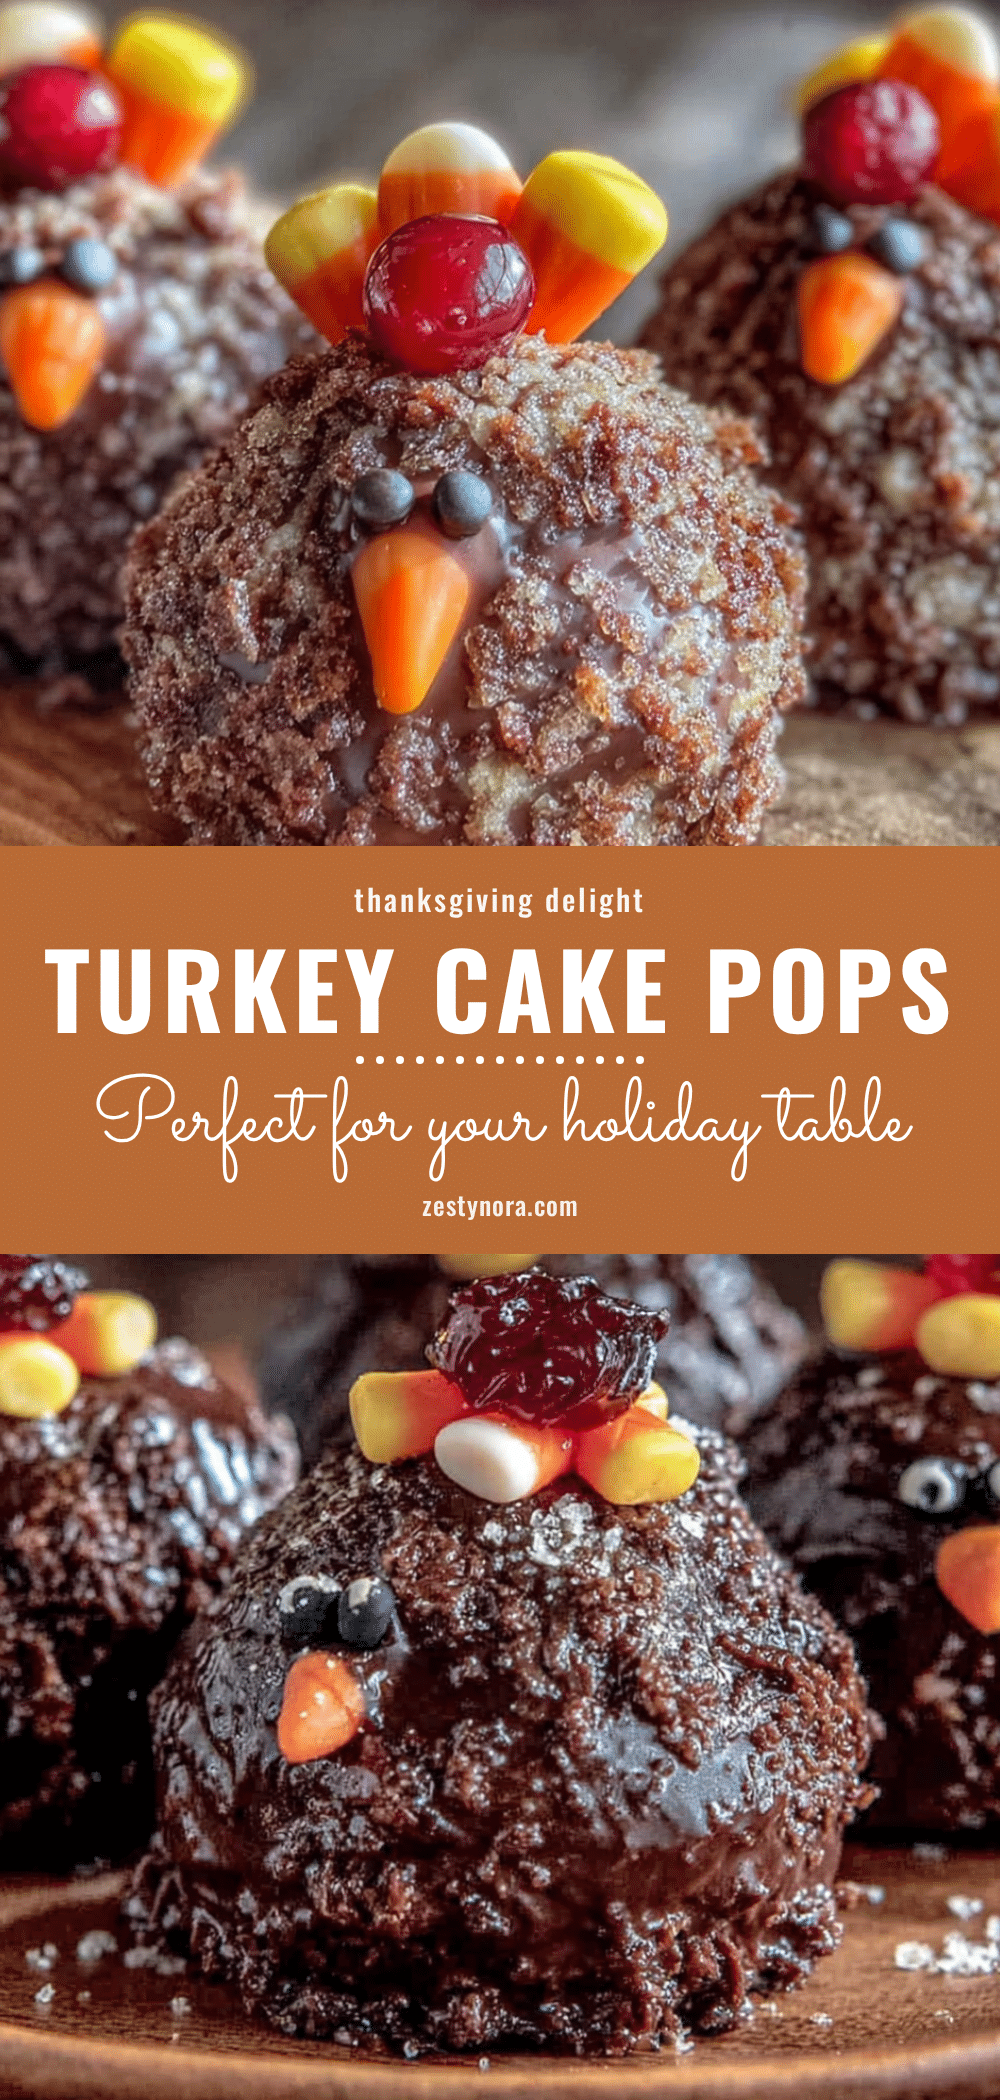
Best Thanksgiving Turkey Cake Pops – Easy Holiday Treat
These adorable turkey cake pops are a fun, stress-free Thanksgiving dessert that kids and adults love. Made with simple ingredients and easy to customize, they’re the perfect make-ahead treat for your holiday table.
- Prep Time: 30 minutes
- Cook Time: 30 minutes
- Total Time: 3 hours (includes chilling and setting time)
- Yield: 30-35 cake pops 1x
- Category: Dessert
- Cuisine: American
Ingredients
- 1 box (15.25 oz) chocolate or vanilla cake mix, plus ingredients called for on box (eggs, oil, water)
- 1/2 cup prepared frosting (cream cheese or chocolate, matching cake flavor)
- 1 package (12 oz) candy melts (light brown or tan, or white with oil-based coloring)
- 1 tablespoon coconut oil or vegetable shortening
- Lollipop sticks (6-inch)
- Small candy eyes
- Orange candy corn
- Red candy melts or red fruit leather (for wattle)
- Chocolate wafer cookies or large pretzel sticks (for feathers)
- Optional: Orange or yellow frosting (for piping feet)
Instructions
- Bake the cake: Prepare cake mix according to package directions in a 9×13 inch pan. Cool completely.
- Crumble the cake: Once cool, crumble into fine crumbs in a large bowl using hands or a fork.
- Mix in frosting: Add 1/2 cup frosting to crumbs and mix until mixture holds together like Play-Doh when squeezed. Add more frosting if needed, 1 tablespoon at a time.
- Form the balls: Use a small cookie scoop to portion mixture, roll into smooth balls, and place on parchment-lined baking sheet. Refrigerate for at least 2 hours or freeze for 30 minutes until firm.
- Attach lollipop sticks: Melt about 1/4 cup candy melts. Dip tip of each stick into melted candy, then insert halfway into a chilled cake ball. Return to fridge for 15 minutes to set.
- Melt the coating: Combine remaining candy melts and coconut oil/shortening in a microwave-safe bowl. Microwave in 30-second intervals, stirring after each, until smooth and thin.
- Dip the cake pops: Hold a pop by the stick and dip completely into melted candy. Gently tap stick on bowl edge to remove excess. Place upright in Styrofoam block or egg carton to dry.
- Add feathers (optional): While coating is still wet, press 3-4 chocolate wafer cookies or pretzel sticks into the back of the pop for tail feathers. Work quickly before coating sets.
- Decorate faces: Once coating is dry (15-20 minutes), use a dab of melted candy to attach two candy eyes, a candy corn beak (pointy side out), and a small piece of red fruit leather for the wattle below the beak.
- Let everything set: Allow decorations to set completely, about 30 minutes. Serve or store.
Notes
Chill cake balls thoroughly before dipping to prevent falling off sticks. Let chilled balls sit at room temperature for 5 minutes before dipping to prevent coating from cracking. Thin candy melts with coconut oil or shortening for a smooth coating. Work in batches of 5-6 pops at a time, keeping remaining balls refrigerated. Use a toothpick for tiny details like the wattle.
Nutrition
- Serving Size: 1 cake pop
- Calories: 200
- Sugar: 20
- Sodium: 180
- Fat: 9
- Saturated Fat: 4
- Carbohydrates: 30
- Fiber: 1
- Protein: 2.5
Keywords: Thanksgiving, turkey cake pops, holiday treats, easy dessert, cake pops, kids dessert, fall baking


