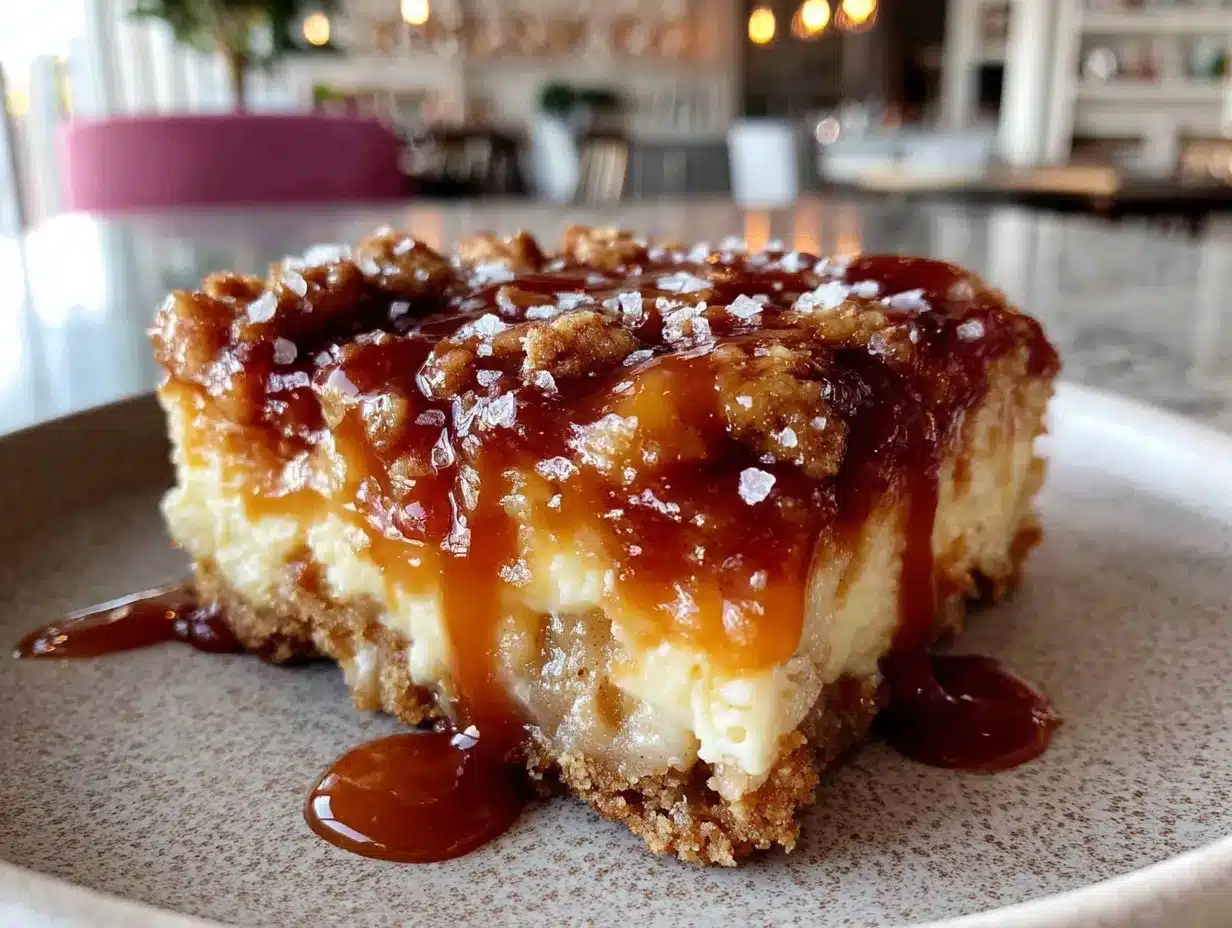
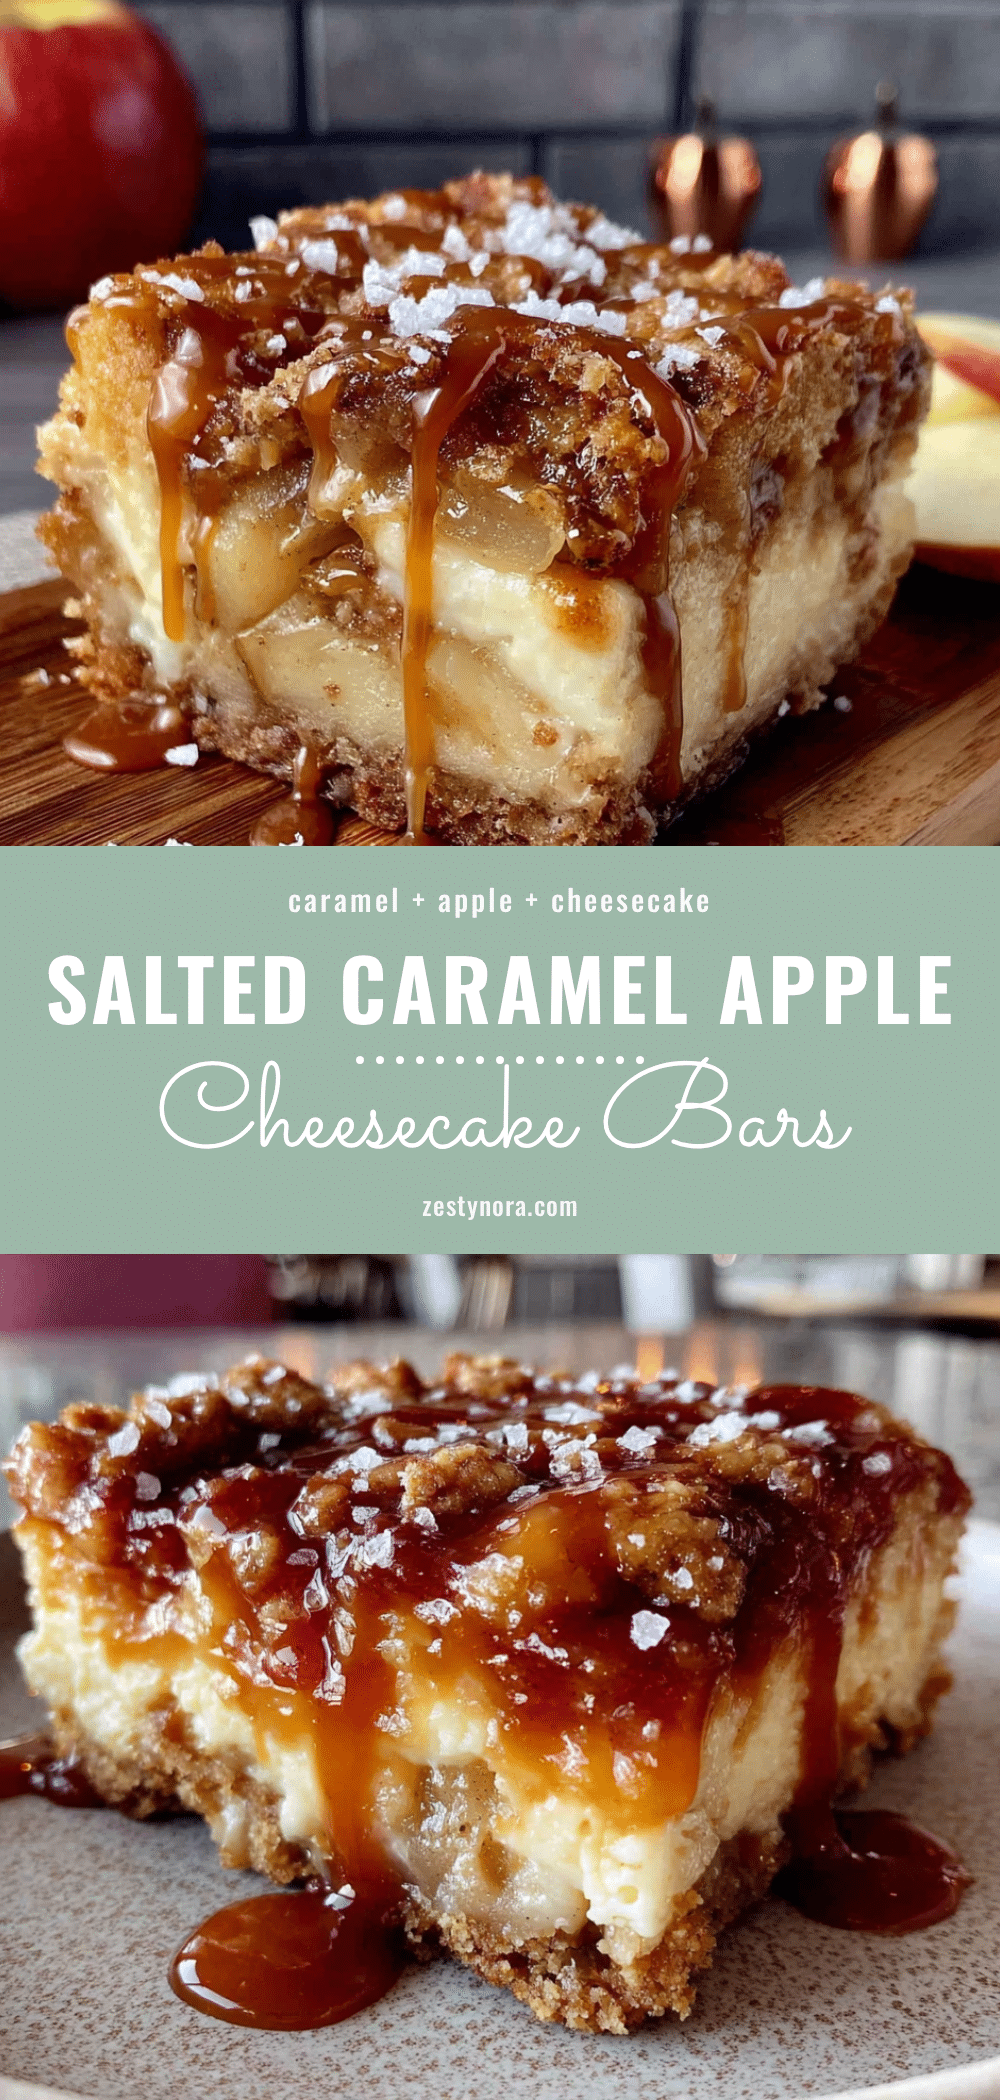
I swore I didn’t like cheesecake. For years, that was my story, and I was sticking to it. The dense, heavy texture, the way it sat in your stomach like a brick—no thank you. I’d politely pass the plate at every holiday gathering, content with a slice of apple pie instead. Then, last October, my sister-in-law, Karen, brought a pan of these to a family dinner. I watched her set them down, these little golden squares with a swirl of caramel on top, and I prepared my usual polite decline. But then I saw my notoriously picky nephew, Liam, grab a second one before his first was even finished. That got my attention. Later that night, after everyone had gone home, I found myself standing in front of the fridge, the container calling my name. I cut a tiny sliver, just to be polite. You know that feeling when you take a bite of something and your brain just stops? That was it. The buttery shortbread crust, the creamy, tangy cheesecake, the tender spiced apples, and that ribbon of salted caramel running through it all—it was a perfect bite. I ate two more slivers standing there in the dark kitchen. I’ve been making them ever since, and honestly, I’m still a little smug about being proven so completely wrong.
Why You’ll Love These Salted Caramel Apple Cheesecake Bars
These aren’t just another dessert bar. They are the result of many, many test batches in my kitchen—some that were too runny, some where the crust was a soggy mess, and one memorable disaster where the caramel boiled over and set off the smoke alarm. Through it all, I perfected the ratios and the technique so you don’t have to. This is the version that disappears fastest at every potluck, bake sale, and family dinner I bring them to.
- Quick & Easy: No water bath, no springform pan, no fussing with cracks. This recipe comes together in about 30 minutes of active prep time.
- Simple Ingredients: You’ll find almost everything in your pantry and fridge. No special trips to gourmet grocery stores required.
- Perfect for Fall Gatherings: They scream “autumn” with every bite. Perfect for Thanksgiving, Halloween parties, or a cozy Sunday night dessert.
- Crowd-Pleaser: The combo of apple, caramel, and cheesecake is a universal language. Kids love the sweetness, adults appreciate the touch of salt.
- Unbelievably Delicious: The texture is what gets everyone. A crunchy crust, a smooth and creamy cheesecake layer, and soft, jammy apples on top.
What makes these different from every other recipe? It’s the technique of pre-cooking the apples. Most recipes just throw raw apple slices on top, which release too much water and make the cheesecake layer watery. By sautéing them first, you concentrate their flavor and keep the bars perfectly structured. It’s a small step that makes a huge difference.
This is the kind of dessert that makes you close your eyes after the first bite. It’s comfort food, perfected. Perfect for impressing guests without a speck of stress, or turning a simple Tuesday into something memorable.
What Ingredients You Will Need
This recipe uses simple, wholesome ingredients to create a dessert that tastes far more complicated than it is. Most are pantry staples, making this an easy last-minute treat.
- For the Shortbread Crust:
- 1 ½ cups (188g) all-purpose flour (spooned and leveled)
- ½ cup (100g) granulated sugar
- ½ teaspoon salt
- ¾ cup (170g) unsalted butter, cold and cut into small cubes (I use Kerrygold for its rich flavor)
- For the Cheesecake Filling:
- 16 ounces (452g) full-fat cream cheese, softened to room temperature (Philadelphia is my go-to for the creamiest texture)
- ½ cup (100g) granulated sugar
- 2 large eggs, room temperature
- 1 teaspoon vanilla extract
- 1 tablespoon all-purpose flour (helps prevent cracking)
- For the Apple Layer:
- 3 medium apples, peeled, cored, and diced into ½-inch cubes (about 3 cups). I prefer Granny Smith for tartness, but Honeycrisp or Fuji work great too.
- 2 tablespoons unsalted butter
- ¼ cup (50g) packed light brown sugar
- 1 teaspoon ground cinnamon
- ¼ teaspoon ground nutmeg
- Pinch of salt
- For the Salted Caramel:
- ½ cup (100g) granulated sugar
- 3 tablespoons unsalted butter, cut into pieces
- ¼ cup (60ml) heavy cream, room temperature
- ½ teaspoon flaky sea salt (like Maldon), plus more for finishing
Ingredient Tips: For the best texture, make sure your cream cheese and eggs are truly at room temperature. Cold ingredients can create a lumpy cheesecake filling. If you’re in a pinch, you can use a good quality store-bought caramel sauce, but the homemade version is so quick and tastes infinitely better. I also recommend using a firm, tart apple so it holds its shape during baking.
Equipment Needed
You don’t need a lot of fancy gear for this one, which is part of the beauty.
- 9×13-inch baking pan – This is the perfect size for a generous batch of bars.
- Parchment paper – A must for easy removal. I like to leave an overhang on two sides to create “handles.”
- Electric hand mixer or stand mixer – For getting the cheesecake filling smooth and fluffy. You can do it by hand with a whisk, but your arm will get a workout.
- Large skillet – For sautéing the apples.
- Small saucepan – For making the caramel. A light-colored pan is best so you can see the color change.
- Mixing bowls – A few different sizes.
- Pastry cutter or fork – For cutting the butter into the flour for the crust.
- Rubber spatula – For folding and scraping.
If you don’t have a pastry cutter, just use two forks or your fingertips. The key is to work quickly so the butter stays cold. A good, sturdy baking pan is a worthy investment—I’ve had my Nordic Ware pan for years, and it’s never let me down.
Preparation Method
- Preheat and Prep: Preheat your oven to 350°F (175°C). Line your 9×13-inch baking pan with parchment paper, leaving a 2-inch overhang on the long sides. This will be your lifting handles later.
- Make the Crust: In a medium bowl, whisk together the flour, sugar, and salt. Add the cold, cubed butter. Use a pastry cutter or your fingertips to cut the butter into the flour until the mixture looks like coarse meal with some pea-sized butter pieces remaining. Don’t overwork it. Dump the mixture into the prepared pan and press it down firmly and evenly into the bottom. I use the bottom of a flat measuring cup to get it really compact. Bake for 18-20 minutes, or until the edges are just barely golden. Set aside to cool slightly while you make the filling.
- Make the Cheesecake Filling: In a large bowl, beat the softened cream cheese and sugar together with an electric mixer on medium speed until smooth and creamy, about 2 minutes. Scrape down the sides and bottom of the bowl. Add the eggs one at a time, beating on low after each just until combined. Over-mixing at this stage adds too much air and can cause cracks. Beat in the vanilla extract and the tablespoon of flour until just combined. Pour the filling over the warm crust and spread it into an even layer.
- Cook the Apples: In a large skillet over medium heat, melt the 2 tablespoons of butter. Add the diced apples, brown sugar, cinnamon, nutmeg, and a pinch of salt. Cook, stirring occasionally, for 5-7 minutes, until the apples are softened and the liquid has thickened into a syrupy glaze. They should be tender but not mushy. Let them cool for a few minutes, then spoon them evenly over the cheesecake layer.
- Bake the Bars: Place the pan in the oven and bake for 35-40 minutes. The edges should be set, and the center should have a slight jiggle—like Jell-O, not liquid. A toothpick inserted into the center (avoiding the apples) should come out mostly clean. Let the bars cool completely at room temperature on a wire rack. This is crucial. Then, refrigerate for at least 4 hours, or preferably overnight. This step is non-negotiable for clean slices.
- Make the Caramel (While the Bars Chill): In a small, heavy-bottomed saucepan, spread the ½ cup of sugar in an even layer. Cook over medium heat, without stirring, until the sugar begins to melt around the edges. Swirl the pan occasionally (don’t stir!) until the sugar is fully melted and a deep amber color. It will go from golden to burned quickly, so watch it carefully. Remove from heat and immediately whisk in the butter until melted. The mixture will bubble up. Slowly drizzle in the heavy cream while whisking constantly until smooth. Stir in the flaky sea salt. Let the caramel cool in the pan for 15 minutes, then pour it into a jar or bowl to cool completely. It will thicken as it cools.
- Assemble and Serve: Once the bars are fully chilled and set, use the parchment overhang to lift them out of the pan onto a cutting board. Drizzle the cooled salted caramel generously over the top. Sprinkle with a little extra flaky sea salt. Use a sharp knife to cut into squares, wiping the blade clean between cuts for the neatest slices.
My Personal Tip: I once forgot to let the bars chill overnight and tried to cut them after just 2 hours. It was a delicious, ugly mess. Trust the process. Patience is the secret ingredient here.
Cooking Tips & Techniques
Over the years, I’ve made every mistake in the book so you don’t have to. Here’s what I’ve learned:
- The Cold Butter Rule: For a flaky, tender crust, the butter must be cold. If it warms up and gets greasy, your crust will be tough. If your kitchen is warm, pop the flour-butter mixture in the fridge for 10 minutes before pressing it into the pan.
- Don’t Over-Bake the Cheesecake: This is the number one mistake. A slightly jiggly center is perfect. Over-baking leads to a dry, cracked cheesecake. It will continue to set as it cools.
- Preventing a Soggy Crust: Pre-baking the crust for a full 20 minutes until it’s lightly golden is key. It creates a barrier that stops the wet cheesecake filling from soaking in. Also, make sure your apples are cooked down enough that they aren’t releasing a ton of water into the cheesecake layer.
- Caramel Color is Flavor: Don’t be scared of the caramel. You want it to be a deep, rich amber color—like a new penny. If it’s too light, it will just taste sweet. If it’s too dark, it will be bitter. The window is about 30 seconds, so keep your eyes on it.
- Multitasking Strategy: While the crust is baking, you can make the cheesecake filling. While the filling is being poured, you can start the apples. While the bars are baking, you can make the caramel. This way, everything is done in about an hour of active time.
I once tried to speed things up by using a pre-made graham cracker crust. Don’t do it. The buttery, shortbread crust is the backbone of this dessert. It’s worth the extra 5 minutes.
Variations & Adaptations
This recipe is a fantastic base for experimentation. Here are a few ways I’ve changed it up over the years:
- Gluten-Free Version: Simply substitute the all-purpose flour in the crust with a 1:1 gluten-free baking flour blend (like Bob’s Red Mill). The texture will be slightly more crumbly but still delicious. The tablespoon of flour in the cheesecake can be replaced with cornstarch or more gluten-free flour.
- Spiced Pear & Ginger: Swap the apples for firm, ripe pears (like Bosc or Anjou). In the skillet, replace the cinnamon and nutmeg with ½ teaspoon of ground ginger and a pinch of cardamom. It’s a wonderful, sophisticated twist for a winter gathering.
- Nutty Crust: Add ½ cup of finely chopped pecans or walnuts to the shortbread crust. Press the mixture into the pan as usual. It adds a wonderful crunch and toasty flavor that pairs beautifully with the apples and caramel.
- Dairy-Free Attempt: I’ve tried this with dairy-free cream cheese and butter. It works, but the texture is not as rich and creamy. If you must go dairy-free, I recommend using a high-quality brand like Kite Hill. The crust works well with vegan butter.
My personal favorite variation is adding a handful of fresh or frozen cranberries to the apple mixture in the last minute of cooking. The tart pop of the cranberries against the sweet apples and caramel is absolutely divine, especially around the holidays.
Serving & Storage Suggestions
These bars are fantastic at room temperature or slightly chilled. I prefer them straight from the fridge on a warm day, but letting them sit out for 15 minutes before serving softens the cheesecake layer to a perfect, creamy texture.
For serving, I like to cut them into 24 smaller squares for a crowd. A dollop of lightly sweetened whipped cream or a scoop of vanilla bean ice cream takes them over the top. For a cozy fall drink pairing, a hot cup of spiced chai or a strong black coffee is a perfect match.
Storage: Store any leftover bars in an airtight container in the refrigerator. They will keep well for up to 5 days, though they rarely last that long in my house. The flavors actually meld together beautifully overnight, making the second day even better.
Freezing: These bars freeze like a dream. Once they are fully chilled and set, cut them into individual squares. Place them on a baking sheet lined with parchment paper and freeze for 1 hour, or until solid. Transfer the frozen bars to a freezer-safe bag or container, placing parchment paper between layers to prevent sticking. They will keep for up to 3 months. To thaw, place them in the refrigerator overnight or let them sit at room temperature for about 20 minutes. I recommend drizzling the caramel on top after thawing for the freshest taste and texture.
Nutritional Information & Benefits
Let’s be honest—this is a special occasion dessert, not a health food. But knowing what’s in it helps you enjoy it mindfully. The following is an estimate per bar (based on 24 servings).
| Nutrient | Amount Per Bar (approx.) |
|---|---|
| Calories | 280 |
| Fat | 18g |
| Saturated Fat | 11g |
| Carbohydrates | 28g |
| Sugar | 20g |
| Protein | 4g |
On the plus side, apples provide fiber and vitamin C, and cinnamon has anti-inflammatory properties. The cream cheese offers a bit of calcium and protein. The real benefit? The joy of sharing a truly homemade dessert with the people you love. That’s a kind of nutrition you can’t measure on a label.
This recipe contains dairy (milk, butter, cream cheese, heavy cream), gluten (wheat flour), and eggs. It is not suitable for a vegan diet as written.
Frequently Asked Questions
Can I use a different type of apple?
Absolutely! Granny Smith are my top choice for their tartness, which balances the sweet caramel. Honeycrisp, Fuji, or Braeburn also work well. Avoid Red Delicious or Gala as they can become mushy.
Can I make this in a 9×9 inch pan?
You can, but the layers will be much thicker and you will need to increase the baking time by 10-15 minutes. Keep an eye on the center jiggle. A 9×13 pan is really the ideal size for the proportions in this recipe.
My caramel seized up and turned into a hard lump. What went wrong?
This usually happens when your cream or butter is too cold. Make sure your heavy cream is at room temperature before adding it to the hot sugar. If it does seize, don’t panic. Return the pan to low heat and gently stir until it melts back into a smooth sauce.
Can I use store-bought caramel sauce?
Yes, in a pinch. Use a high-quality brand like Trader Joe’s or Stonewall Kitchen. You’ll need about ½ cup. However, the homemade salted caramel is incredibly simple and tastes so much fresher and richer. I really encourage you to try it!
How do I get clean, neat slices?
Patience is key. The bars must be fully chilled—ideally overnight. Use a large, sharp chef’s knife and wipe the blade clean with a damp paper towel between each cut. Run the knife under hot water, dry it, and then cut for even cleaner slices.
Conclusion
These Salted Caramel Apple Cheesecake Bars are more than just a dessert; they’re a little piece of autumn magic you can hold in your hand. They are the recipe that changed my mind about an entire category of food, and I have a feeling they’ll become a fast favorite in your home, too. The buttery crust, the creamy filling, the spiced apples, and that ribbon of salted caramel—it’s a combination that just works.
Don’t be afraid to make them your own. Swap the apples for pears, add some nuts to the crust, or double the caramel. The best recipes are the ones that get passed around and tweaked to fit your family’s taste. I truly hope you give these a try and fall in love with them the way I did.
When you make them, I’d love to hear about it! Leave a comment below and tell me how they turned out, or share a photo on Pinterest and tag me. Your kitchen stories are what make this community so special. Happy baking, friend!
Pin This Recipe!
Best Salted Caramel Apple Cheesecake Bars: Easy Family Recipe
These Salted Caramel Apple Cheesecake Bars feature a buttery shortbread crust, creamy cheesecake filling, tender spiced apples, and a ribbon of salted caramel. They are quick and easy to make, perfect for fall gatherings, and a guaranteed crowd-pleaser.
- Prep Time: 30 minutes
- Cook Time: 35-40 minutes
- Total Time: 4 hours 30 minutes (includes chilling)
- Yield: 24 servings 1x
- Category: Dessert
- Cuisine: American
Ingredients
- 1 ½ cups (188g) all-purpose flour (spooned and leveled)
- ½ cup (100g) granulated sugar
- ½ teaspoon salt
- ¾ cup (170g) unsalted butter, cold and cut into small cubes
- 16 ounces (452g) full-fat cream cheese, softened to room temperature
- ½ cup (100g) granulated sugar
- 2 large eggs, room temperature
- 1 teaspoon vanilla extract
- 1 tablespoon all-purpose flour
- 3 medium apples, peeled, cored, and diced into ½-inch cubes (about 3 cups)
- 2 tablespoons unsalted butter
- ¼ cup (50g) packed light brown sugar
- 1 teaspoon ground cinnamon
- ¼ teaspoon ground nutmeg
- Pinch of salt
- ½ cup (100g) granulated sugar
- 3 tablespoons unsalted butter, cut into pieces
- ¼ cup (60ml) heavy cream, room temperature
- ½ teaspoon flaky sea salt, plus more for finishing
Instructions
- Preheat your oven to 350°F (175°C). Line your 9×13-inch baking pan with parchment paper, leaving a 2-inch overhang on the long sides.
- In a medium bowl, whisk together the flour, sugar, and salt. Add the cold, cubed butter. Use a pastry cutter or your fingertips to cut the butter into the flour until the mixture looks like coarse meal with some pea-sized butter pieces remaining. Dump the mixture into the prepared pan and press it down firmly and evenly into the bottom. Bake for 18-20 minutes, or until the edges are just barely golden. Set aside to cool slightly.
- In a large bowl, beat the softened cream cheese and sugar together with an electric mixer on medium speed until smooth and creamy, about 2 minutes. Scrape down the sides and bottom of the bowl. Add the eggs one at a time, beating on low after each just until combined. Beat in the vanilla extract and the tablespoon of flour until just combined. Pour the filling over the warm crust and spread it into an even layer.
- In a large skillet over medium heat, melt the 2 tablespoons of butter. Add the diced apples, brown sugar, cinnamon, nutmeg, and a pinch of salt. Cook, stirring occasionally, for 5-7 minutes, until the apples are softened and the liquid has thickened into a syrupy glaze. Let them cool for a few minutes, then spoon them evenly over the cheesecake layer.
- Place the pan in the oven and bake for 35-40 minutes. The edges should be set, and the center should have a slight jiggle. Let the bars cool completely at room temperature on a wire rack. Then, refrigerate for at least 4 hours, or preferably overnight.
- In a small, heavy-bottomed saucepan, spread the ½ cup of sugar in an even layer. Cook over medium heat, without stirring, until the sugar begins to melt around the edges. Swirl the pan occasionally until the sugar is fully melted and a deep amber color. Remove from heat and immediately whisk in the butter until melted. Slowly drizzle in the heavy cream while whisking constantly until smooth. Stir in the flaky sea salt. Let the caramel cool in the pan for 15 minutes, then pour it into a jar or bo…
- Once the bars are fully chilled and set, use the parchment overhang to lift them out of the pan onto a cutting board. Drizzle the cooled salted caramel generously over the top. Sprinkle with a little extra flaky sea salt. Use a sharp knife to cut into squares, wiping the blade clean between cuts.
Notes
For the best texture, make sure your cream cheese and eggs are truly at room temperature. Pre-baking the crust for a full 20 minutes until lightly golden is key to preventing a soggy crust. The bars must be fully chilled—ideally overnight—for clean slices. If the caramel seizes, return the pan to low heat and gently stir until it melts back into a smooth sauce.
Nutrition
- Serving Size: 1 bar
- Calories: 280
- Sugar: 20
- Sodium: 180
- Fat: 18
- Saturated Fat: 11
- Carbohydrates: 28
- Fiber: 1
- Protein: 4
Keywords: salted caramel apple cheesecake bars, apple cheesecake bars, caramel apple bars, cheesecake bars, fall dessert, easy cheesecake recipe


