I was digging through my freezer last Tuesday, hunting for a bag of frozen peas, when my hand brushed against a dusty Ziploc bag buried under a bag of broccoli. Inside was a single, sad-looking, rock-hard red velvet cupcake, the frosting smeared and the heart shape barely visible. And just like that, I was twenty-three years old again, standing in my first tiny apartment kitchen with a hand mixer that smoked if you ran it too long.
My neighbor, an older woman named Carol who always smelled like mothballs and sugar, had knocked on my door holding a plate of these heart-shaped cupcakes. “You look like you need some practice,” she said, nodding at the smoke billowing from my mixer. She was right—I’d burned through three batches of buttercream that week trying to impress a guy who, honestly, didn’t deserve a single crumb. But Carol didn’t know that. She just saw a girl with flour on her nose and hope in her eyes.
That first bite—even frozen, even months later—tasted like the moment I realized I could actually do this. The cake was tender, the cocoa was subtle, and that cream cheese frosting was so tangy and sweet it made my jaw ache. I’d made a mess of my kitchen that night, spilled red food coloring on my favorite jeans, and almost cried when the first batch came out lopsided. But Carol’s recipe worked. It always worked.
She moved away the next summer, and I never got her phone number. But I kept making these cupcakes every Valentine’s Day, chasing that exact feeling—the warmth of a stranger’s kindness, the pride of a perfectly risen cake, the joy of handing someone something beautiful and saying, “I made this for you.” Maybe you’ve had a moment like that, where a recipe becomes more than just flour and sugar. It becomes a way of saying what words can’t.
Why You’ll Love This Recipe
Let me tell you—these are not your average box-mix red velvet cupcakes. After twelve years of tweaking Carol’s original recipe, I’ve landed on a version that’s tender, moist, and just the right amount of rich. I’ve tested this with everything from buttermilk to sour cream, and this combination wins every single time.
- Quick & Easy: From start to finish, you’re looking at about 45 minutes. That includes cooling time. Perfect for a last-minute Valentine’s treat or a classroom party.
- Simple Ingredients: You probably have most of these in your pantry right now. No weird extracts, no specialty flours—just real, honest baking staples.
- Perfect for Valentine’s Day: The heart shape and the deep red color make these absolutely irresistible for February 14th. They’re also great for anniversaries, Galentine’s parties, or any day you want to say “I love you” with sugar.
- Crowd-Pleaser: I’ve brought these to potlucks, work parties, and family dinners. They disappear within minutes. Kids love the color, adults love the flavor.
- Unbelievably Delicious: The secret is a touch of cocoa powder and a splash of vinegar—don’t skip it. It reacts with the baking soda to create the most tender crumb you’ve ever had.
What makes these different from every other red velvet recipe out there? It’s the balance. The cake is not too sweet, the frosting is not too tangy, and the heart shape makes them feel special without being fussy. You don’t need a fancy piping bag or a dozen specialty tips. Just a good spatula and a heart-shaped pan. Honestly, this is the kind of recipe that makes you look like you spent hours in the kitchen—when really, you spent less than an hour and still had time to clean up before anyone showed up.
What Ingredients You Will Need
This recipe uses simple, everyday ingredients to create something that feels bakery-worthy. I’ve tested these measurements down to the gram, so trust me on the specifics.
For the Cupcakes
- 1 ½ cups (190g) all-purpose flour (spoon and level—don’t scoop directly from the bag)
- 1 cup (200g) granulated sugar
- 1 tablespoon unsweetened cocoa powder (I prefer Hershey’s for its smooth flavor)
- 1 teaspoon baking soda
- ½ teaspoon salt
- 1 cup (240ml) buttermilk, room temperature (adds tenderness)
- ½ cup (120ml) vegetable oil (keeps the cake moist for days)
- 1 large egg, room temperature
- 1 teaspoon vanilla extract
- 1 tablespoon red food coloring (gel works best for that vibrant red without thinning the batter)
- 1 teaspoon white vinegar (trust me on this—it reacts with the baking soda)
For the Cream Cheese Frosting
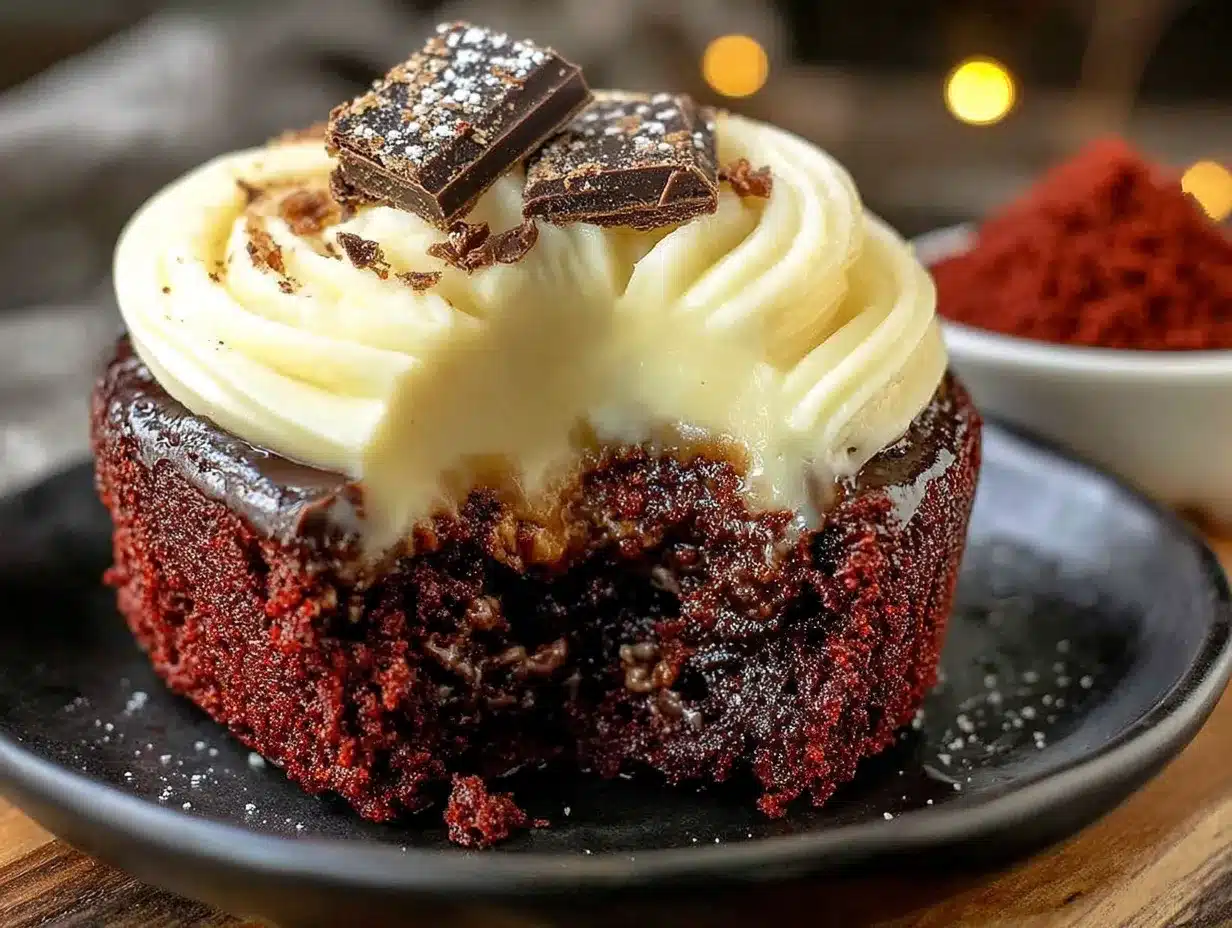
- 8 oz (226g) cream cheese, softened (use full-fat for the best texture)
- ½ cup (113g) unsalted butter, softened
- 3 cups (360g) powdered sugar, sifted
- 1 teaspoon vanilla extract
- Pinch of salt
If you’re dairy-free, you can substitute the buttermilk with 1 cup of almond milk mixed with 1 tablespoon of lemon juice. Let it sit for 5 minutes before using. For the cream cheese, I’ve had good luck with Kite Hill’s dairy-free version. Just know the frosting won’t be quite as firm. And if you want a deeper red color without using artificial food coloring, try beet powder—about 2 tablespoons mixed into the buttermilk before adding it to the batter. It gives a more muted, natural red, but it’s gorgeous in its own way.
Equipment Needed
You don’t need a professional bakery setup for these. Here’s what I use every time:
- Heart-shaped cupcake pan (or a standard muffin pan with heart-shaped liners)
- Mixing bowls (one large, one medium)
- Hand mixer or stand mixer (I’ve made these with a whisk and a lot of elbow grease—it works, but your arm will thank you for the mixer)
- Measuring cups and spoons
- Rubber spatula
- Cooling rack
- Piping bag or zip-top bag (for the frosting)
- Offset spatula (optional, but makes frosting look professional)
If you don’t have a heart-shaped pan, don’t worry. You can use a standard muffin pan and cut the cooled cupcakes into heart shapes with a cookie cutter. It’s a little extra work, but the result is just as cute. I’ve also baked these in mini muffin tins for bite-sized treats—just reduce the baking time to 10-12 minutes.
Preparation Method
Alright, let’s get to it. I’ve broken this down so even if you’ve never baked a cupcake in your life, you’ll end up with something beautiful.
- Preheat your oven to 350°F (175°C). Line your heart-shaped cupcake pan with liners or grease it well. I’ve forgotten to do this before, and let me tell you—nothing ruins a mood like scraping a broken cupcake out of a pan. Don’t be me.
- In a large bowl, whisk together the flour, sugar, cocoa powder, baking soda, and salt. Make sure there are no lumps. I use a whisk for this, not a spoon—it aerates the flour and makes the cake lighter. Set this aside.
- In a medium bowl, whisk together the buttermilk, oil, egg, vanilla, and red food coloring. Whisk until everything is combined and the color is uniform. It should look like a very vivid, almost alarming shade of red. That’s normal.
- Pour the wet ingredients into the dry ingredients. Stir gently with a spatula until just combined. A few streaks of flour are okay—overmixing will make the cupcakes tough. I’ve done it, and they came out dense and sad. Don’t overdo it.
- Add the vinegar and stir gently. You’ll see the batter lighten slightly and become a little bubbly. That’s the reaction between the vinegar and baking soda—it creates lift. Work quickly here and get the batter into the pan.
- Fill each heart-shaped cavity about ⅔ full. I use a cookie scoop for this—it’s faster and more consistent. If you overfill, the cupcakes will overflow and lose their heart shape. Trust me, I’ve made heart-shaped blobs before.
- Bake for 15-18 minutes. A toothpick inserted into the center should come out clean or with a few moist crumbs. The tops should spring back when lightly touched. Let them cool in the pan for 5 minutes, then transfer to a wire rack to cool completely. Do not frost them while they’re warm—your frosting will slide right off and you’ll be left with a sad, melted mess. I learned this the hard way on my third batch ever.
- While the cupcakes cool, make the frosting. In a large bowl, beat the cream cheese and butter together until smooth and creamy—about 2 minutes. Add the vanilla and salt, then gradually add the powdered sugar, one cup at a time, beating on low speed. Once all the sugar is in, beat on medium-high for 2 minutes until light and fluffy. If it’s too thick, add a teaspoon of milk. Too thin? Add a little more powdered sugar.
- Frost the completely cooled cupcakes. I use a piping bag with a star tip, but you can also just spread it on with a knife. Sprinkle with red sugar crystals, heart-shaped sprinkles, or a dusting of cocoa powder. Or leave them plain—they’re beautiful either way.
Cooking Tips & Techniques
I’ve made these cupcakes more times than I can count, and I’ve made every mistake in the book. Here’s what I’ve learned:
Room temperature ingredients matter. I know it’s annoying to wait for eggs and buttermilk to come to room temperature, but it makes a huge difference. Cold ingredients don’t emulsify properly, and you end up with a dense, greasy cake. Set everything out 30 minutes before you start baking.
Don’t skip the vinegar. I know it sounds weird in a sweet cupcake, but the vinegar reacts with the baking soda to create carbon dioxide bubbles. That’s what makes the cake light and tender. Without it, you’d have a flat, dense puck. I tried it once when I was out of vinegar, and never again.
Use gel food coloring, not liquid. Liquid food coloring will thin your batter and you’ll need a ton of it to get that deep red color. Gel coloring is concentrated—one tablespoon is all you need. I bought a bottle of Wilton’s red gel three years ago and I’m still using it.
Let the cupcakes cool completely. I cannot stress this enough. If you frost them while they’re even slightly warm, the cream cheese frosting will melt and slide off. I once frosted a batch that felt cool on the outside but was still warm inside—an hour later, I had a plate of pink puddles. Patience, my friend.
Make the frosting ahead of time. You can make the cream cheese frosting up to three days in advance. Just keep it in the fridge, and let it come to room temperature before you use it. Give it a quick whip with the mixer to bring back the fluffiness.
Variations & Adaptations
One of the best things about this recipe is how adaptable it is. Here are a few ways I’ve changed it up over the years:
Gluten-Free Version: Swap the all-purpose flour for a 1:1 gluten-free baking blend. I’ve used Bob’s Red Mill with great results. Add ¼ teaspoon of xanthan gum if your blend doesn’t already include it. The texture will be slightly more delicate, so handle them gently.
Chocolate Lover’s Twist: Increase the cocoa powder to 2 tablespoons and add ½ cup of mini chocolate chips to the batter. It makes the cupcakes richer and more decadent—perfect for the chocolate-obsessed Valentine in your life.
Vegan Adaptation: Replace the egg with a flax egg (1 tablespoon ground flaxseed + 3 tablespoons water, let sit for 5 minutes). Use a plant-based buttermilk (almond milk + lemon juice) and vegan cream cheese for the frosting. I’ve made these for a vegan friend’s birthday and they were a hit—just know the texture is a little denser.
Strawberry Red Velvet: Add ½ cup of finely chopped fresh strawberries to the batter. Fold them in gently after you add the vinegar. The strawberries add little bursts of flavor and make the cupcakes even more festive for Valentine’s Day.
Serving & Storage Suggestions
These cupcakes are best served at room temperature. The cream cheese frosting softens up, the cake is tender, and everything just comes together. If you’ve stored them in the fridge, let them sit out for 20-30 minutes before serving.
For a Valentine’s Day spread, I love pairing these with a glass of cold milk or a hot cup of coffee. The tangy frosting and the rich cake balance perfectly with something simple. If you’re feeling fancy, arrange them on a cake stand with fresh strawberries and a few roses. It makes for a stunning presentation.
Storage: Keep unfrosted cupcakes in an airtight container at room temperature for up to 3 days. Frosted cupcakes should be stored in the refrigerator—they’ll last up to 5 days. Just bring them to room temperature before serving.
Freezing: You can freeze unfrosted cupcakes for up to 3 months. Wrap each one tightly in plastic wrap, then place them in a freezer bag. When you’re ready to serve, thaw them at room temperature, then frost. I’ve also frozen the frosting separately in a piping bag—just thaw it in the fridge overnight and give it a good stir before using.
The flavors actually get better after a day in the fridge. The cake absorbs a bit of moisture, and the cocoa flavor becomes more pronounced. So don’t stress about making these a day ahead—it might actually be better that way.
Nutritional Information & Benefits
Okay, let’s be real—these are cupcakes, not health food. But here’s the breakdown so you know what you’re working with:
Per cupcake (makes 12): Approximately 320 calories, 18g fat, 38g carbohydrates, 4g protein. The cream cheese frosting adds most of the fat and sugar, so if you want to lighten it up, you can use a lighter hand with the frosting or try a Greek yogurt-based alternative.
On the bright side, red velvet cupcakes contain a small amount of cocoa powder, which is rich in antioxidants. The cream cheese provides a bit of calcium and protein. And honestly? Sometimes the best thing you can do for your health is to enjoy something beautiful and delicious with people you love. I firmly believe that joy is its own kind of nutrition.
If you’re watching your sugar intake, you can reduce the sugar in the cake to ¾ cup without affecting the texture too much. For the frosting, try a sugar-free powdered sugar substitute—just know the texture will be slightly grainier.
Conclusion
These red velvet heart-shaped cupcakes are more than just a pretty treat for Valentine’s Day. They’re a reminder that the best things in life are often the simplest—a tender cake, a tangy frosting, a shape that says “I love you” without needing a single word. Every time I make them, I think of Carol and her smoky hand mixer and the kindness she showed a clueless twenty-three-year-old. And I think about how a recipe can carry a memory forward, bite after bite, year after year.
I hope you make these for someone you love—even if that someone is just you. Customize them, make them your own, and don’t stress about perfection. A lopsided heart is still a heart. A smear of frosting is still delicious. And a homemade cupcake, no matter how imperfect, is always, always worth the effort.
So go ahead—preheat that oven, get a little flour on your counter, and make something beautiful. I’d love to hear how they turn out. Drop a comment below, share a photo, or tell me about your own baking memory. Happy Valentine’s Day, friend.
Frequently Asked Questions
Can I use a regular cupcake pan instead of a heart-shaped one?
Absolutely. You can use standard round cupcake liners and top them with heart-shaped sprinkles or cut the baked cupcakes into hearts with a cookie cutter. The flavor will be exactly the same.
Why did my red velvet cupcakes turn out brown instead of red?
This usually happens when you’re using liquid food coloring instead of gel. Liquid coloring is more diluted, so you need more of it—which can thin your batter. Gel coloring gives you that vibrant red with just a tablespoon. Also, make sure your cocoa powder is unsweetened and not Dutch-processed, which can darken the color.
Can I make these cupcakes dairy-free?
Yes. Use a plant-based buttermilk (almond milk + lemon juice), a dairy-free cream cheese like Kite Hill, and vegan butter. The texture will be slightly different, but they’re still delicious. I’ve made them for dairy-free friends and they disappeared just as fast.
How far in advance can I make these for Valentine’s Day?
You can bake the cupcakes up to 3 days ahead and store them unfrosted in an airtight container. Make the frosting up to 3 days ahead and keep it in the fridge. Frost them the day you plan to serve them for the best presentation.
My cream cheese frosting turned out runny. What went wrong?
Most likely, your cream cheese or butter was too soft—or your cupcakes were still warm. Cream cheese frosting needs both ingredients to be softened but still cool to the touch. If it’s too runny, pop it in the fridge for 15 minutes, then beat it again. You can also add a little more powdered sugar to thicken it up.
Pin This Recipe!
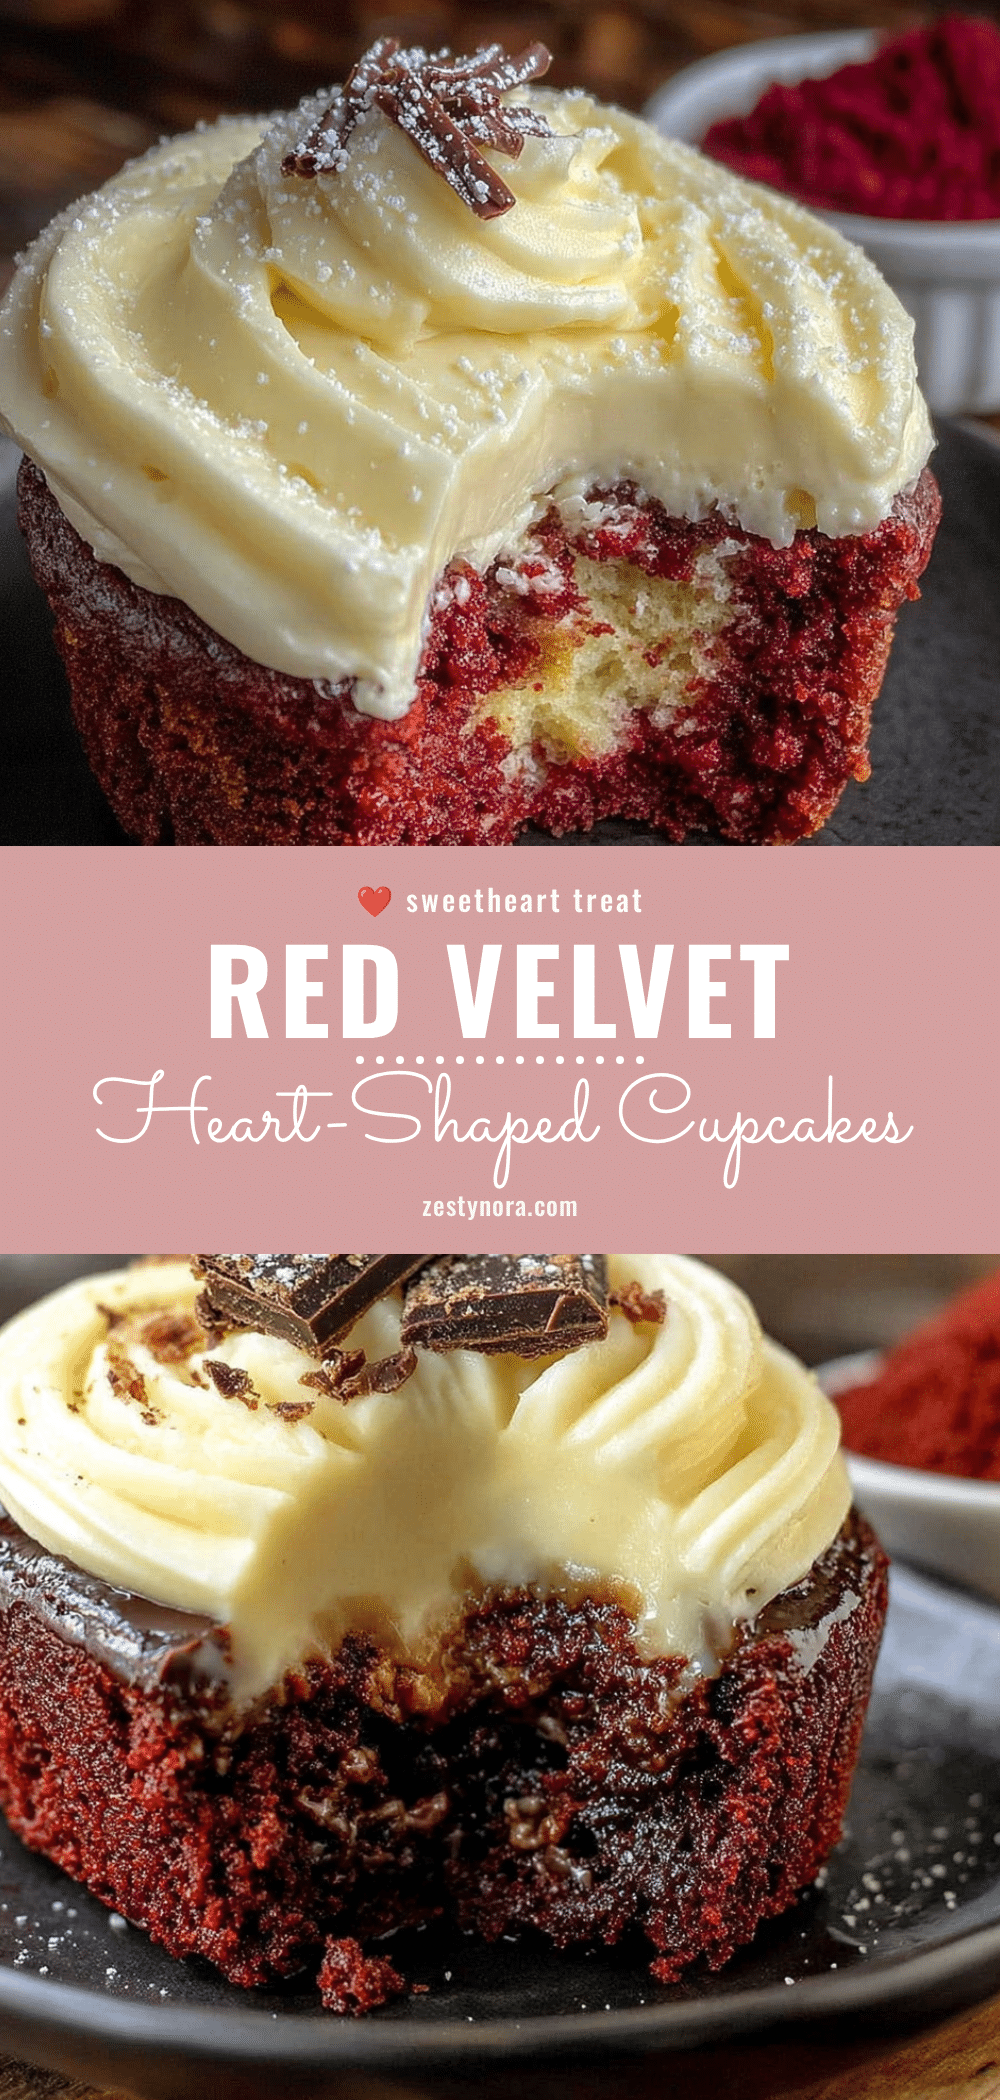
Best Red Velvet Heart Cupcakes for Valentine’s Day
Tender, moist red velvet cupcakes with tangy cream cheese frosting, shaped like hearts. Perfect for Valentine’s Day or any occasion where you want to say ‘I love you’ with sugar.
- Prep Time: 15 minutes
- Cook Time: 18 minutes
- Total Time: 45 minutes
- Yield: 12 servings 1x
- Category: Dessert
- Cuisine: American
Ingredients
- 1 ½ cups (190g) all-purpose flour
- 1 cup (200g) granulated sugar
- 1 tablespoon unsweetened cocoa powder
- 1 teaspoon baking soda
- ½ teaspoon salt
- 1 cup (240ml) buttermilk, room temperature
- ½ cup (120ml) vegetable oil
- 1 large egg, room temperature
- 1 teaspoon vanilla extract
- 1 tablespoon red food coloring (gel preferred)
- 1 teaspoon white vinegar
- 8 oz (226g) cream cheese, softened
- ½ cup (113g) unsalted butter, softened
- 3 cups (360g) powdered sugar, sifted
- 1 teaspoon vanilla extract
- Pinch of salt
Instructions
- Preheat your oven to 350°F (175°C). Line your heart-shaped cupcake pan with liners or grease it well.
- In a large bowl, whisk together the flour, sugar, cocoa powder, baking soda, and salt. Set aside.
- In a medium bowl, whisk together the buttermilk, oil, egg, vanilla, and red food coloring until combined and uniform in color.
- Pour the wet ingredients into the dry ingredients. Stir gently with a spatula until just combined. A few streaks of flour are okay.
- Add the vinegar and stir gently. The batter will lighten slightly and become bubbly. Work quickly.
- Fill each heart-shaped cavity about ⅔ full using a cookie scoop or spoon.
- Bake for 15-18 minutes, until a toothpick inserted into the center comes out clean or with a few moist crumbs. Let cool in the pan for 5 minutes, then transfer to a wire rack to cool completely.
- While the cupcakes cool, make the frosting: In a large bowl, beat the cream cheese and butter together until smooth and creamy, about 2 minutes. Add the vanilla and salt, then gradually add the powdered sugar, one cup at a time, beating on low speed. Once all sugar is in, beat on medium-high for 2 minutes until light and fluffy.
- Frost the completely cooled cupcakes using a piping bag or knife. Decorate as desired.
Notes
Room temperature ingredients matter. Don’t skip the vinegar—it reacts with baking soda for a tender crumb. Use gel food coloring for vibrant red. Let cupcakes cool completely before frosting. Frosting can be made up to 3 days ahead.
Nutrition
- Serving Size: 1 cupcake
- Calories: 320
- Sugar: 28
- Sodium: 220
- Fat: 18
- Saturated Fat: 8
- Carbohydrates: 38
- Fiber: 1
- Protein: 4
Keywords: red velvet cupcakes, heart-shaped cupcakes, Valentine's Day cupcakes, cream cheese frosting, easy cupcake recipe


